In the first step of crawler project development, we need to locate and analyze the functions of the crawler project we want to achieve, that is, carry out demand analysis.
Project analysis:
In today's project, the crawler we built needs to realize the following functions: 1. Crawl all blog information of any user in the blog. 2. Extract the article name, article URL, article clicks, article comments and other information of the blog. 3. Write the extracted data to the Mysql database.
It can be found that the main purpose of the crawler project is to extract and store the relevant information of all blog posts of users in the blog into the database.
The difficulties of the project include: 1. How to extract the number of article clicks, article comments and other information. 2. How to crawl all blog information of a user through circulation. 3,pipelines.py Further processing of information in. 4. Xpath expressions are used in conjunction with regular expressions. 5. Simulate browser crawling in scratch.
Implementation idea:
In this project, the main implementations are:
- 1. Manually write the response crawler implementation using the Urllib module.
- 2. Write a response crawler project implementation using the Scrapy framework.
However, considering that the Scrapy framework is relatively more convenient to implement, we use the Scrapy method to write it here. There are two ways to use the framework:
- 1. Implementation of Crawler Based on basic crawler template
- 2. Automatic crawler implementation based on crawler template is used.
In this project, we will use the crawler implementation based on basic crawler template. If you want to try the automatic crawler implementation based on crawl crawler template, you can pay attention to the column, which will be written later.
Actual preparation:
Next, we will gradually analyze and implement the preparation of this crawler project. First, we need to design the Mysql database used in this project to store the article name, article Url, article clicks, comments and other information. The table structure of Mysql database in this project is shown in the figure below, in which the database name is hexun. The table name is myhexum.
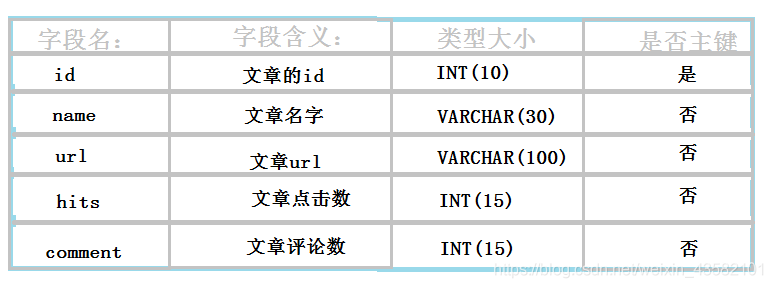
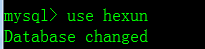
After designing the database, we can establish the designed database through SQL statements. First, we should create the database hexun,
create database hexun
After creating a database, you need to select the database and create the corresponding table under the database. The SQL statement is as follows:
use hexum
create table myhexun(id int(10) auto_increment primary key not null,name varchar(30), url varchar(100),hits int(15),comment int(15));

After creating a table, we can check whether the table we just created is successful through show tables.
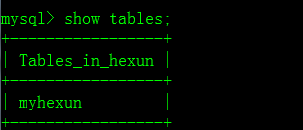
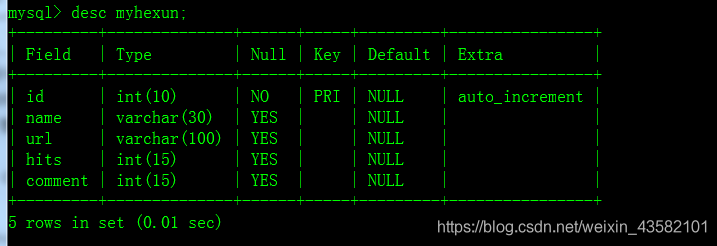
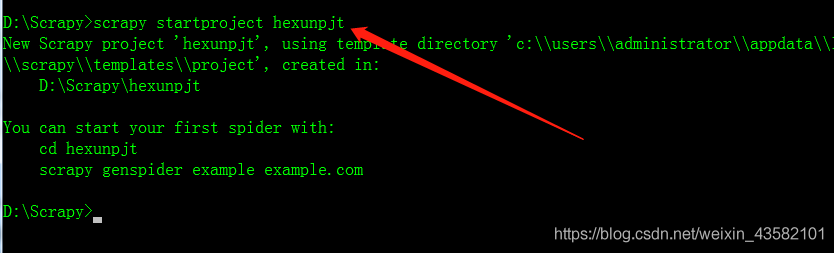
You can see that the table under the database hexun already has its own fields. We need to write our crawler project based on the Scrapy framework. First, you can create the corresponding crawler item hexunpjt on the cmd command line. As shown in the figure below:
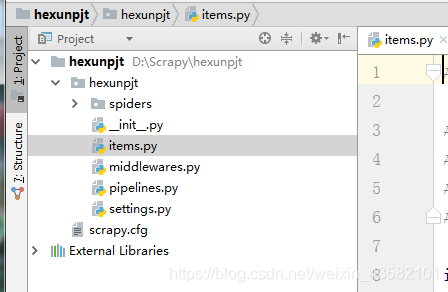
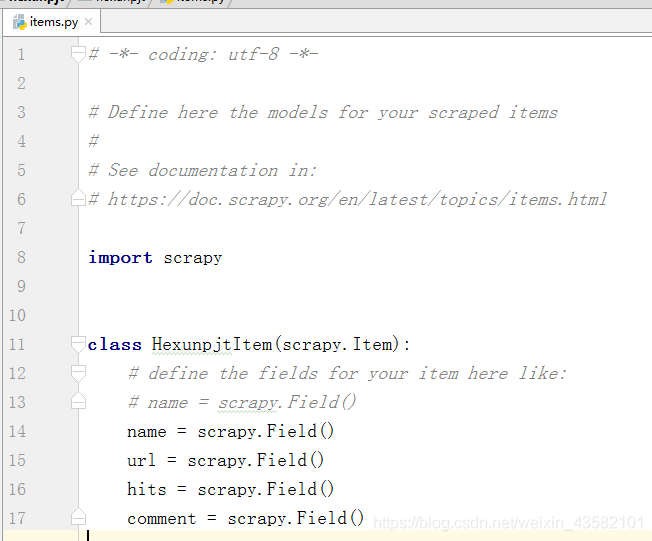
After creating the crawler project, we can first write the items.py file in the crawler project through the editor. Modify the file as follows:
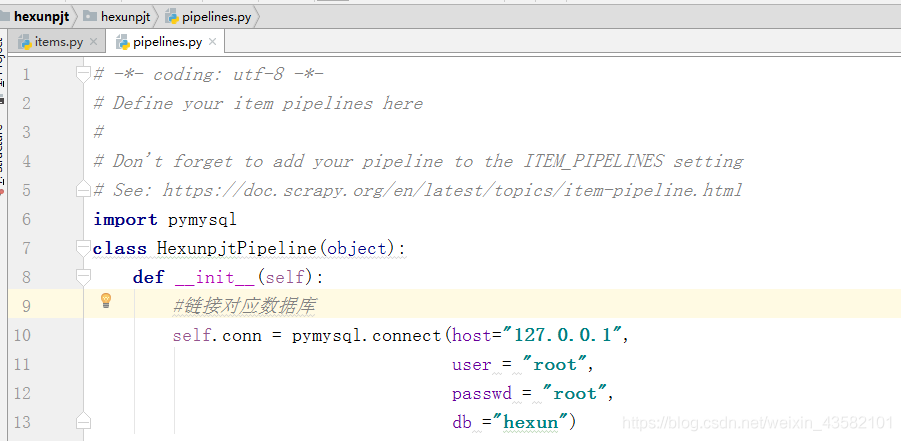
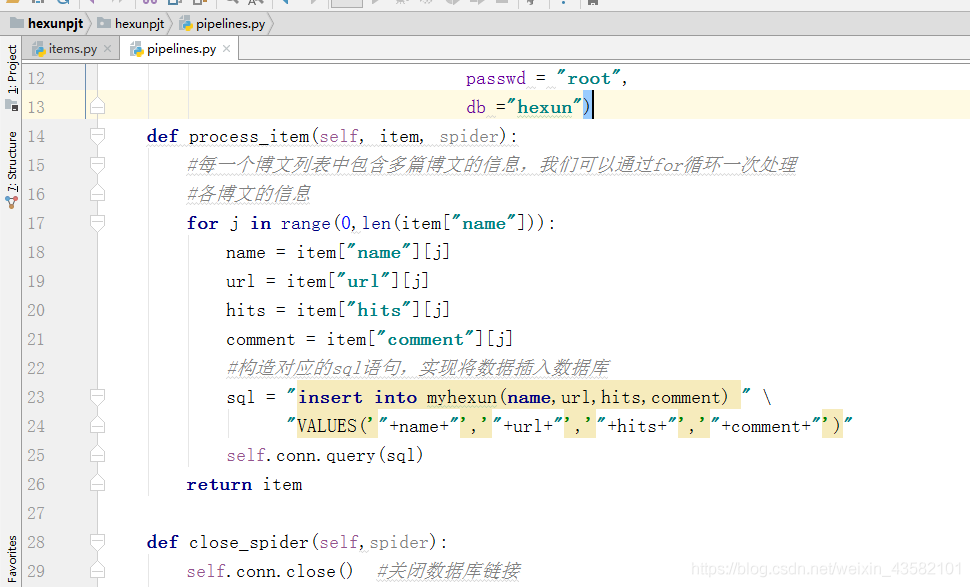
After writing the items.py file, You also need to write pipelines.py The crawled information is further processed in the file. We modify the pipelines.py file as follows, and the key parts have been annotated.
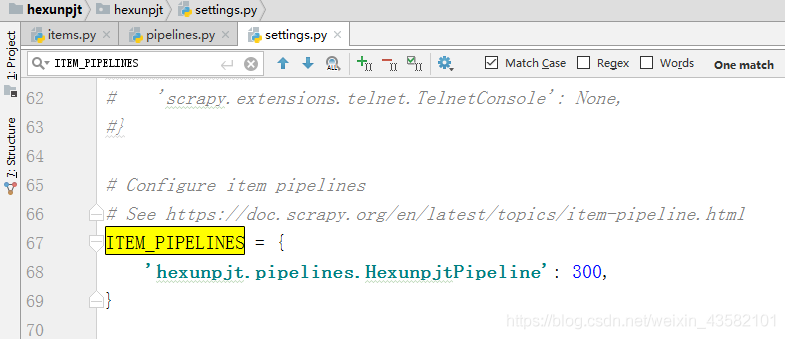
Next, we need to write the settings.py file to configure the response. First, we need to open ITEM_PIPELINES, sets the item in the file_ Pipeline is modified as follows:
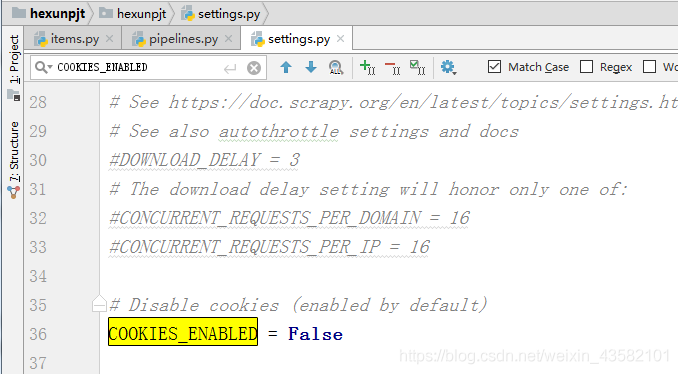
Started item_ After pipelines, in order to prevent the crawler from being recognized by the other server through our Cookie information, we can turn off the use of cookies and set cookies in the file_ The enabled message is modified as follows:
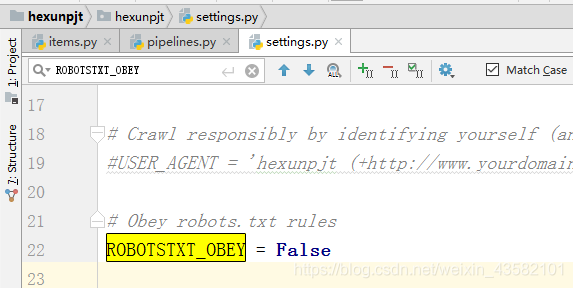
Then, in order to prevent the robots.txt file of the other server from restricting our crawlers, we can set crawling in the file that does not follow the robots protocol. We will set the robotsxxt in the file_ The obey section is set as follows:
After setting up the configuration file, we can create a crawler in this project. In the cmd command line, use the following command to create: (cd into the project)

Here we break into a crawler named myhexunspd based on the basic template. Next, we need to write the crawler to crawl the web page: First, let's analyze how to write the crawler: We open the blog list page of any user in a blog. For example, we open the website: http://fjrs168.blog.hexun.com/ After opening:
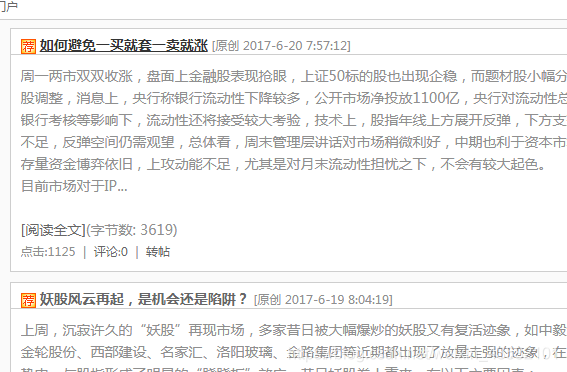
The interface above appears. We need to analyze the information to be extracted from this page.
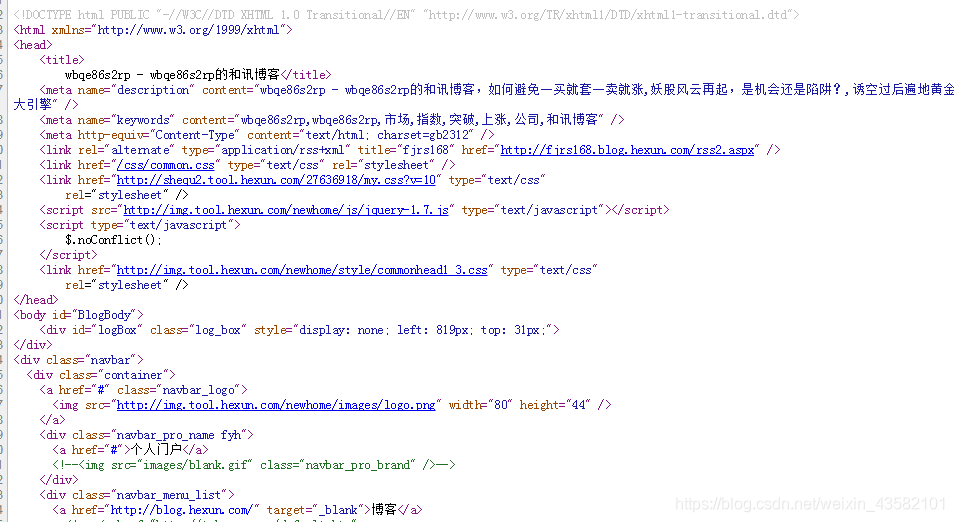

Therefore, our Xpath expression can be:
"//span[@class='ArticleTitleText']/a/text()"
The Xpath expression of the article URL is:
"//span[@class='ArticleTitleText']/a/@href"
You can see that the source code does not contain information such as the number of clicks and readings of the article. Because this information is obtained dynamically through the Java scratch script. At this point, we can use Fiddler tool for analysis.
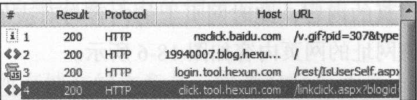
Through analysis, we will find that the value corresponding to click108659235 is the current reading number of the blog list we view. click108641909 corresponds to the second article. comment108641909 corresponds to the number of comments.

We can extract the corresponding blog reading number and comment number through regular expression in the web page. Number of readings: "click\d *? ',' (\ d *?) '" Number of comments: "comment\d *? ',' (\ d *?) '"
The corresponding website is analyzed by fiddler: Extract the web address information that stores the number of comments and readings through regular expressions:
''
</code></pre>
<p>Next we want to:<br> 1,Get the URL of the corresponding number of hits and comments<br> 2,adopt urllib.request Crawl the data in the website corresponding to the number of clicks and comments of the blog<br> 3,Regular expressions are used to extract the number of hits and comments of blog posts</p>
<p>We first get the blog posts of any user:<br> Add crawler file myhexunspd.py Amend to read as follows:<br> <img src="https://img-blog.csdnimg.cn/20190127210427491.png?x-oss-process=image/watermark,type_ ZmFuZ3poZW5naGVpdGk,shadow_ 10,text_ aHR0cHM6Ly9ibG9nLmNzZG4ubmV0L3dlaXhpbl80MzU4MjEwMQ==,size_ 16,color_ FFFFFF,t_ 70 "ALT =" insert picture description "> < br > < img SRC =" here " https://img-blog.csdnimg.cn/20190127210445844.png?x -oss-process=image/watermark,type_ ZmFuZ3poZW5naGVpdGk,shadow_ 10,text_ aHR0cHM6Ly9ibG9nLmNzZG4ubmV0L3dlaXhpbl80MzU4MjEwMQ==,size_ 16,color_ FFFFFF,t_ 70 "ALT =" insert picture description "> < br > < img SRC =" here " https://img-blog.csdnimg.cn/20190127210505315.png?x -oss-process=image/watermark,type_ ZmFuZ3poZW5naGVpdGk,shadow_ 10,text_ aHR0cHM6Ly9ibG9nLmNzZG4ubmV0L3dlaXhpbl80MzU4MjEwMQ==,size_ 16,color_ FFFFFF,t_ 70 "ALT =" insert picture description "> < br > < img SRC =" here " https://img-blog.csdnimg.cn/2019012721051680.png?x -oss-process=image/watermark,type_ ZmFuZ3poZW5naGVpdGk,shadow_ 10,text_ aHR0cHM6Ly9ibG9nLmNzZG4ubmV0L3dlaXhpbl80MzU4MjEwMQ==,size_ 16,color_ FFFFFF,t_ 70 "ALT =" insert picture description "> < br > < img SRC =" here " https://img-blog.csdnimg.cn/20190127210527497.png?x -oss-process=image/watermark,type_ ZmFuZ3poZW5naGVpdGk,shadow_ 10,text_ aHR0cHM6Ly9ibG9nLmNzZG4ubmV0L3dlaXhpbl80MzU4MjEwMQ==,size_ 16,color_ FFFFFF,t_ 70 "ALT =" insert picture description here "> < br > for example, if we want to modify the information of other users, we just need to change the uid in the crawler file. < br > for example, we first find a blog website as follows: < br > < a href =" http://shihanbingblog.blog.hexun.com/ "> http://shihanbingblog.blog.hexun.com/ </a></p>
<p>take uid = "19940007"<br> Change to uid = "shihanbingblog"<br> That is, you can crawl another user's blog information.</p>
<h2><a id="_128"></a>Commissioning and operation:</h2>
<p>After writing the corresponding crawler project,<a href="http://Xn -- myhexunspd-5i2px5fucwgm90f5k7cqkmyo9cba353tt5bj28mea156i4twbjxno7c. Py "> we can run the crawler file myhexunspd. Py under this crawler project < / a >. As follows:</p>
<pre><code>scrapy crawl myhexunspd --nolog
</code></pre>
<p>It's almost over. A little hasty.<br> Make changes in a few days.</p>