A slider simulation operation of Air China was sent before, and the position of the slider to the notch was not calculated. This article uses opencv+selenium to simulate and test the slider of QQ mailbox.

QQ email link: https://mail.qq.com/
The login mechanism of QQ email requires us to enter a wrong account or password, and we will have the opportunity to pop up the slider verification code, so I'll always test with the wrong account below. In fact, some accounts, or QQ accounts that log in remotely, also need to slide the unlock verification code to continue logging in. So this test may be used in the future.
First, log in with selenium:
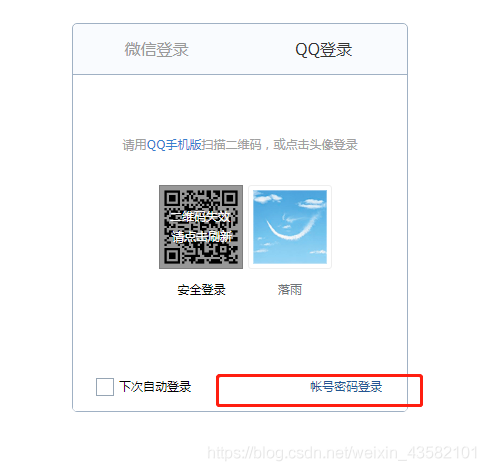
After visiting, you will see a page as shown in the figure below. We need to click the account and password to log in before we can conduct our simulation operation.
At first, I directly used selenium to get the ID and click the account to log in. I found that it didn't work. Later, take a closer look. This is an iframe box. We can't click it directly. To switch frame s. selenium has such operations:
driver.switch_to.frame("login_frame") # login_frame is the id of the iframe of the login window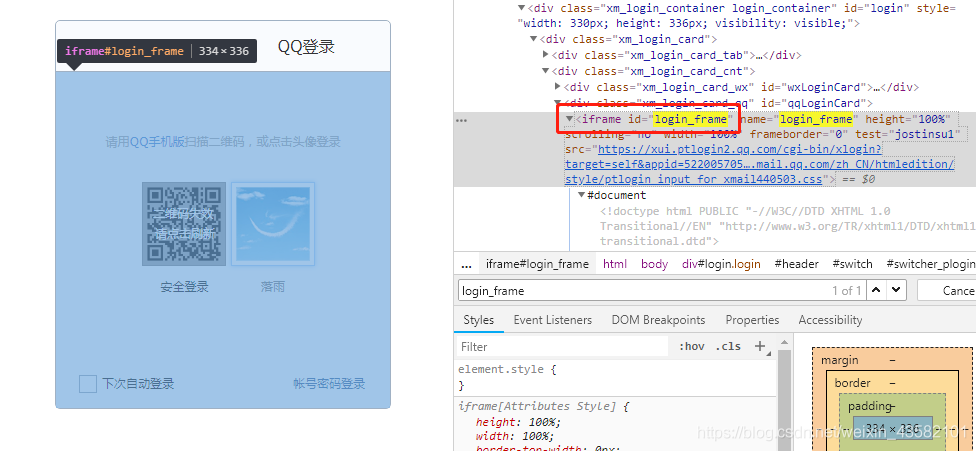
So you can click. For our next operation.
    driver.get('https://mail.qq.com')
    time.sleep(2)
    driver.switch_to.frame("login_frame")        # Switch frame. login_frame is the login window id
    time.sleep(1)
    driver.find_element_by_id('switcher_plogin').click()           #Click account password to log in
    time.sleep(1)
    username = '1234567{}@qq.com'.format(random.randint(0,99))     #Get an account at random
    driver.find_element_by_id("u").send_keys(username)             #Enter account number
    time.sleep(1)
    driver.find_element_by_id("p").send_keys('wwwwwwwwwwwww')      #Enter a password
    time.sleep(1)
    driver.find_element_by_id("login_button").click()              #Click login
    time.sleep(1)
If there's such a thing, there's no slider. Then try again ==
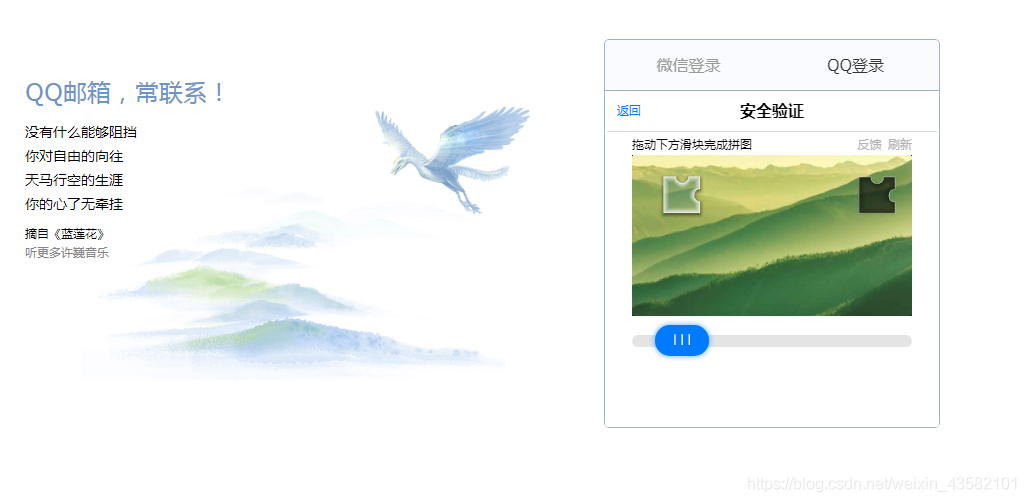
After the slider appears under normal conditions:
Start notch location identification:
The method I use here is to obtain the src of the image through xpath in selenium, then download it and save it locally. Then opencv is used to detect the image gap.
Let's first get the src of two pictures (slider and verification diagram):
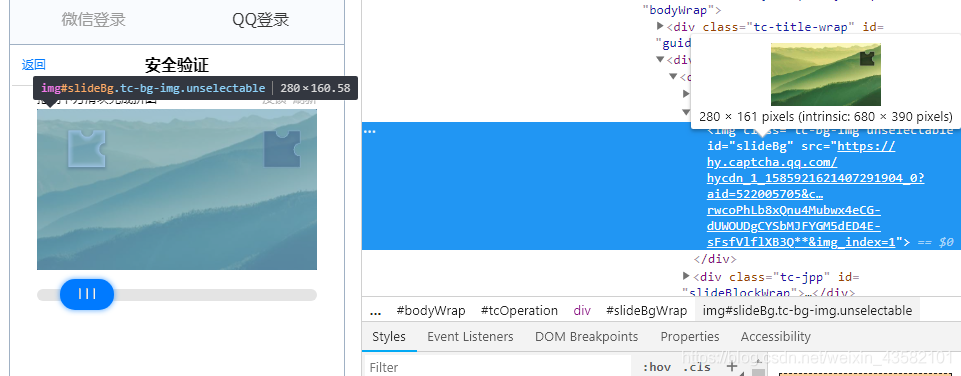
src_big = driver.find_element_by_xpath('//div[@id="slideBgWrap"]/img').get_attribute('src')
src_small = driver.find_element_by_xpath('//div[@id="slideBlockWrap"]/img').get_attribute('src')Then save to local:
    img_big = requests.get(src_big).content
    img_small = requests.get(src_small).content
    with open('yanzhengtu.jpg','wb') as f:
        f.write(img_big)
    with open('huakuai.png','wb') as f:
        f.write(img_small)
Start to identify the image notch position: Write a shibie function:
def shibie():
otemp = 'huakuai.png' #slider
oblk = 'yanzhengtu.jpg' # Verification diagram
target = cv2.imread(otemp, 0) #Read in picture
template = cv2.imread(oblk, 0)
w, h = target.shape[::-1] #Gets the transposed structure of the array
temp = 'temp.jpg'
targ = 'targ.jpg'
cv2.imwrite(temp, template)
cv2.imwrite(targ, target)
target = cv2.imread(targ)
target = cv2.cvtColor(target, cv2.COLOR_BGR2GRAY) #Image color space conversion
target = abs(255 - target)
cv2.imwrite(targ, target)
target = cv2.imread(targ)
template = cv2.imread(temp)
result = cv2.matchTemplate(target, template, cv2.TM_CCOEFF_NORMED) #Image template matching
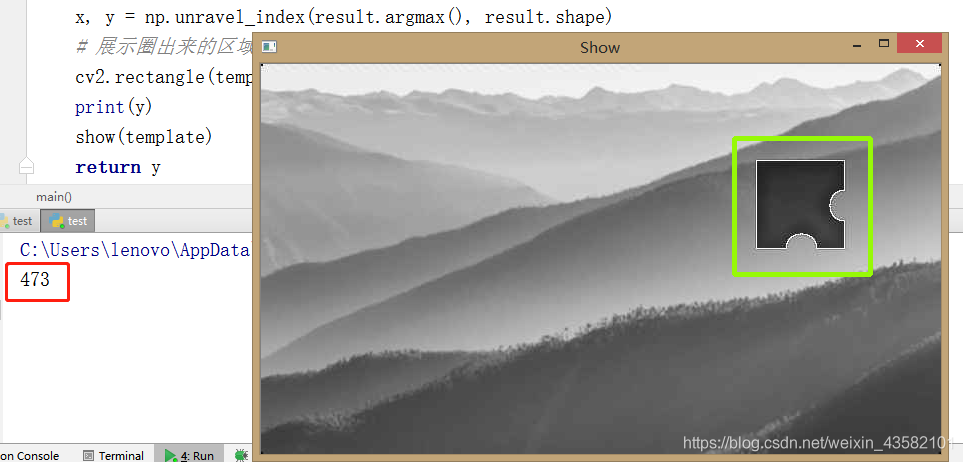
x, y = np.unravel_index(result.argmax(), result.shape) #Gets the position of a / group of index values of type int in a multidimensional array
# Show the circled area
cv2.rectangle(template, (y, x), (y + w, x + h), (7, 249, 151), 3) #Draw a rectangle diagonally
# print(y)
# show(template)
return yThen we call the identification function we wrote: Returns the distance from the 0 left mark to the notch position in the local picture: y
The width of our local picture is 680 pixels The width of the verification map given by QQ mailbox is 280 pixels
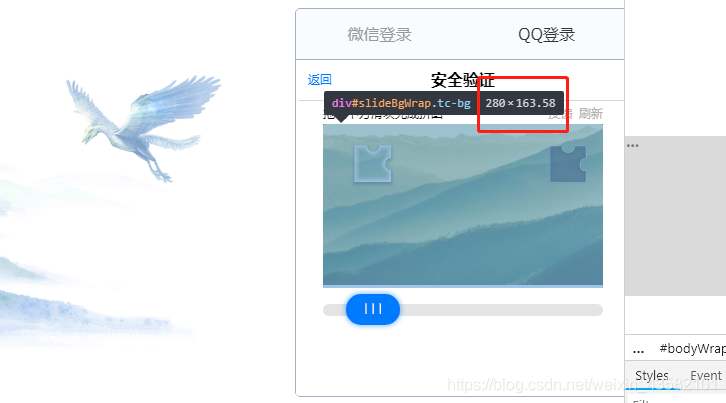
Then the distance we move is: y = y/(680/280) However, the starting position of the slider displayed on the browser is not 0.
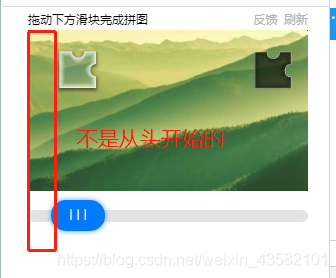
So the distance we move should be: y = (y+22.5) / (680 / 280) + k Of course, there may be some errors k, which need to be observed and supplemented.
We can use ActionChains in selenium to move the mouse.
huakuai = driver.find_element_by_id('tcaptcha_drag_thumb')
            action = ActionChains(driver)
            action.click_and_hold(huakuai).perform()
            y = (y+20)/(680/280)-27
		    try:
		        action.move_by_offset(y,0).perform()
		        time.sleep(0.5)
		        action.release(on_element=huakuai).perform()    #Release the left mouse button to complete the operation
		        time.sleep(1)
		    except:
		        pass
Test results:
Because there's no video here. Let me use gif diagram to demonstrate the following:
The quality of the picture is too bad, but it doesn't affect the results. Now you can recognize and drag to the correct position.
Full code:
from selenium import webdriver
import cv2,numpy as np,random,requests,time
from selenium.webdriver import ActionChains

'''Identify notch position and calculate offset value'''
def shibie():
    otemp = 'huakuai.png'               #slider
    oblk =  'yanzhengtu.jpg'                   # Verification diagram
    target = cv2.imread(otemp, 0)
    template = cv2.imread(oblk, 0)
    w, h = target.shape[::-1]
    temp = 'temp.jpg'
    targ = 'targ.jpg'
    cv2.imwrite(temp, template)
    cv2.imwrite(targ, target)
    target = cv2.imread(targ)
    target = cv2.cvtColor(target, cv2.COLOR_BGR2GRAY)   #Image color space conversion
    target = abs(255 - target)
    cv2.imwrite(targ, target)
    target = cv2.imread(targ)
    template = cv2.imread(temp)
    result = cv2.matchTemplate(target, template, cv2.TM_CCOEFF_NORMED)#Image template matching
    x, y = np.unravel_index(result.argmax(), result.shape)  #Gets the position of a / group of index values of type int in a multidimensional array
    # Show the circled area
    cv2.rectangle(template, (y, x), (y + w, x + h), (7, 249, 151), 3) #Draw a rectangle diagonally
    # print(y)
    # show(template)
    return y


'''Selenium Simulated Login acquisition slider'''
def main():
    driver = webdriver.Chrome(executable_path=r'C:\Users\lenovo\Desktop\chromedriver_win32\chromedriver.exe')
    driver.get('https://mail.qq.com')
    # driver.find_element_by_xpath('//div[@calss="bottom hide"]/a[@class="link"]').click()
    time.sleep(2)
    driver.switch_to.frame("login_frame")        # Switch frame. login_frame is the id of the iframe of the login window
    time.sleep(1)
    driver.find_element_by_id('switcher_plogin').click()
    time.sleep(1)
    username = '1234567{}@qq.com'.format(random.randint(0,99))
    driver.find_element_by_id("u").send_keys(username)
    time.sleep(1)
    driver.find_element_by_id("p").send_keys('wwwwwwwwwwwww')
    time.sleep(1)
    driver.find_element_by_id("login_button").click()
    time.sleep(1)
    try:
        driver.switch_to.frame("tcaptcha_iframe")
        time.sleep(1)
        if driver.find_element_by_id('slideBgWrap'):
            time.sleep(0.5)
            src_big = driver.find_element_by_xpath('//div[@id="slideBgWrap"]/img').get_attribute('src')
            src_small = driver.find_element_by_xpath('//div[@id="slideBlockWrap"]/img').get_attribute('src')
            img_big = requests.get(src_big).content
            img_small = requests.get(src_small).content
            with open('yanzhengtu.jpg','wb') as f:
                f.write(img_big)
            with open('huakuai.png','wb') as f:
                f.write(img_small)
            time.sleep(3)
            y = shibie()
            time.sleep(1)
            # print(y)
            huakuai = driver.find_element_by_id('tcaptcha_drag_thumb')
            action = ActionChains(driver)
            action.click_and_hold(huakuai).perform()
            y = (y+20)/(680/280)-27
            try:
                action.move_by_offset(y,0).perform()
                time.sleep(0.5)
                action.release(on_element=huakuai).perform()       #Release the left mouse button to complete the operation
                time.sleep(1)
            except:
                pass
    except:
        time.sleep(1)
        driver.close()
        main()
main()