1, System source replacement
1. Backup system source
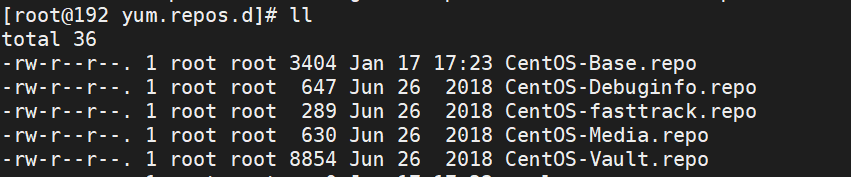
- (1) Default path to source
cd /etc/yum.repos.d
- (2) Check it out
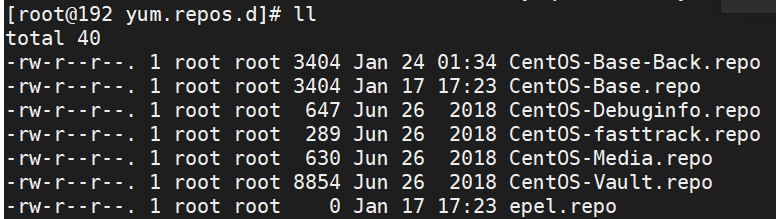
- (3) Backup
cp CentOS-Base.repo CentOS-Base-Back.repo
2. Modify the configuration file of the system source
vi CentOS-Base.repo
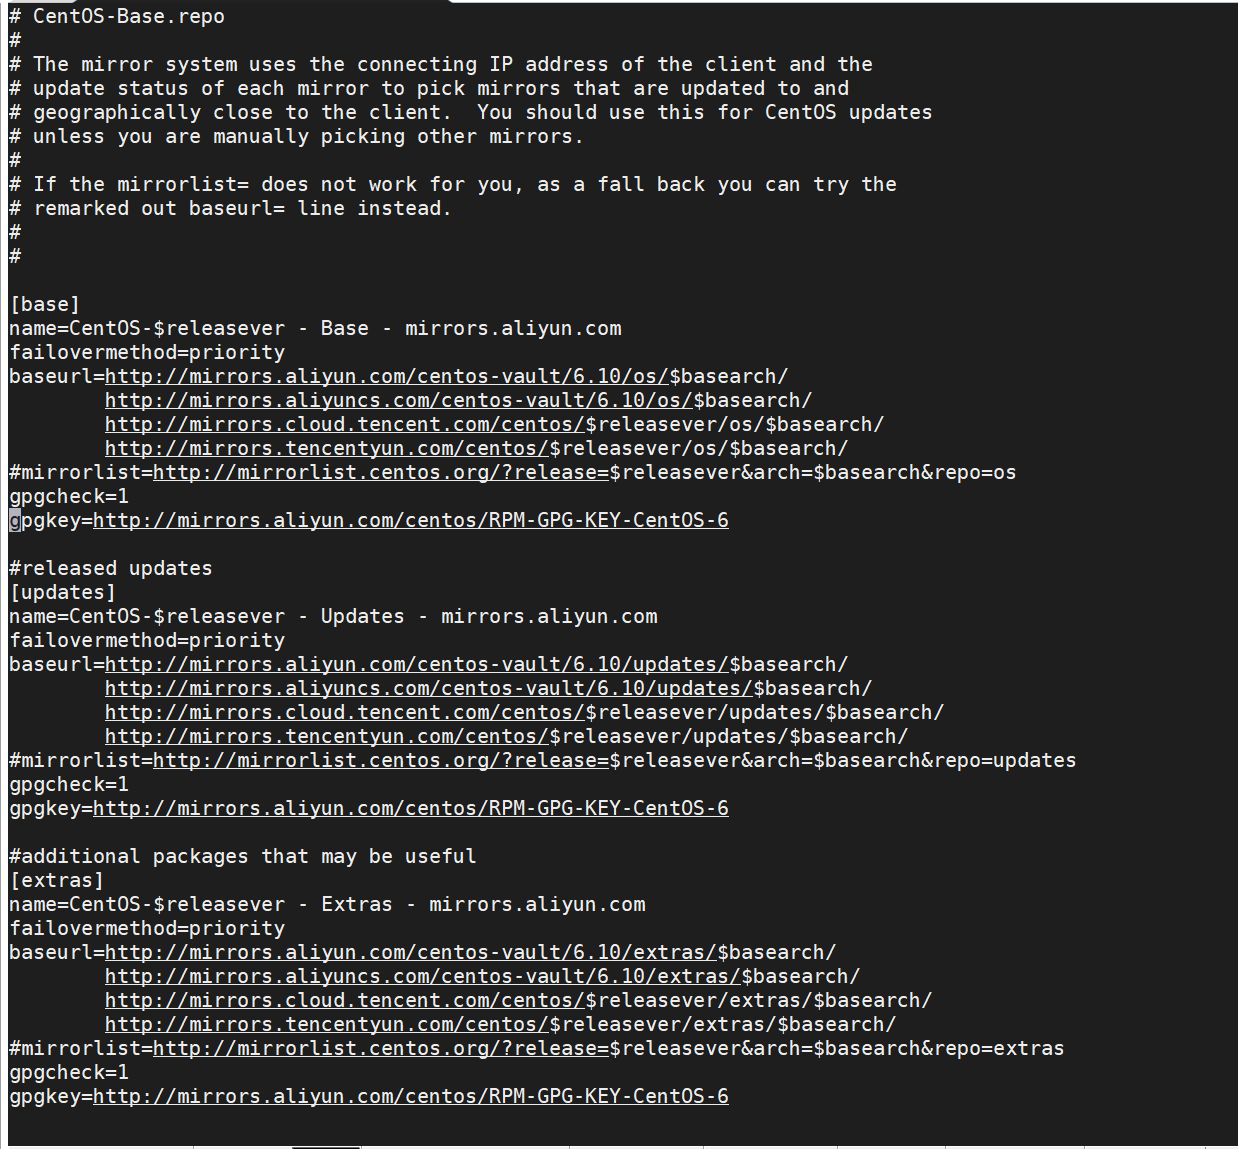
-
It mainly modifies baseurl and gpgkey. Modify its three modes [base] (basic), [updates] (update), [extras] (other)
-
Here is a relatively new Alibaba cloud search found on January 24, 2022
###The three states are different
baseurl=http://mirrors.aliyun.com/centos/$releasever/os/$basearch/


gpgkey=http://mirrors.aliyun.com/centos/RPM-GPG-KEY-CentOS-6
- Load using command
curl -o /etc/yum.repos.d/CentOS-Base.repo https://mirrors.aliyun.com/repo/Centos-6.repo
3. Test whether the modification is successful
- Enter the following command and the installation will be successful if no error is reported
yum clean all


yum makecache
be careful
- CentOS base was not backed up Repo, please do not modify
2, Download rpm package using yum command
1. Download
- (1) Creating a new download folder is similar to not putting everything in the default location for easy searching
## Enter the root directory
cd ~

## Create download folder
mkdir download

## Enter the download folder
cd download/
- (2) Execute download command
wget https://repo.mysql.com//mysql80-community-release-el6-1.noarch.rpm


2. Installation
- (1) Using the install command
rpm -ivh mysql80-community-release-el6-5.noarch.rpm
- (2) Install mysql
yum install mysql-community-server
3. Start
/etc/init.d/mysqld start
- If no error is reported, the startup is successful
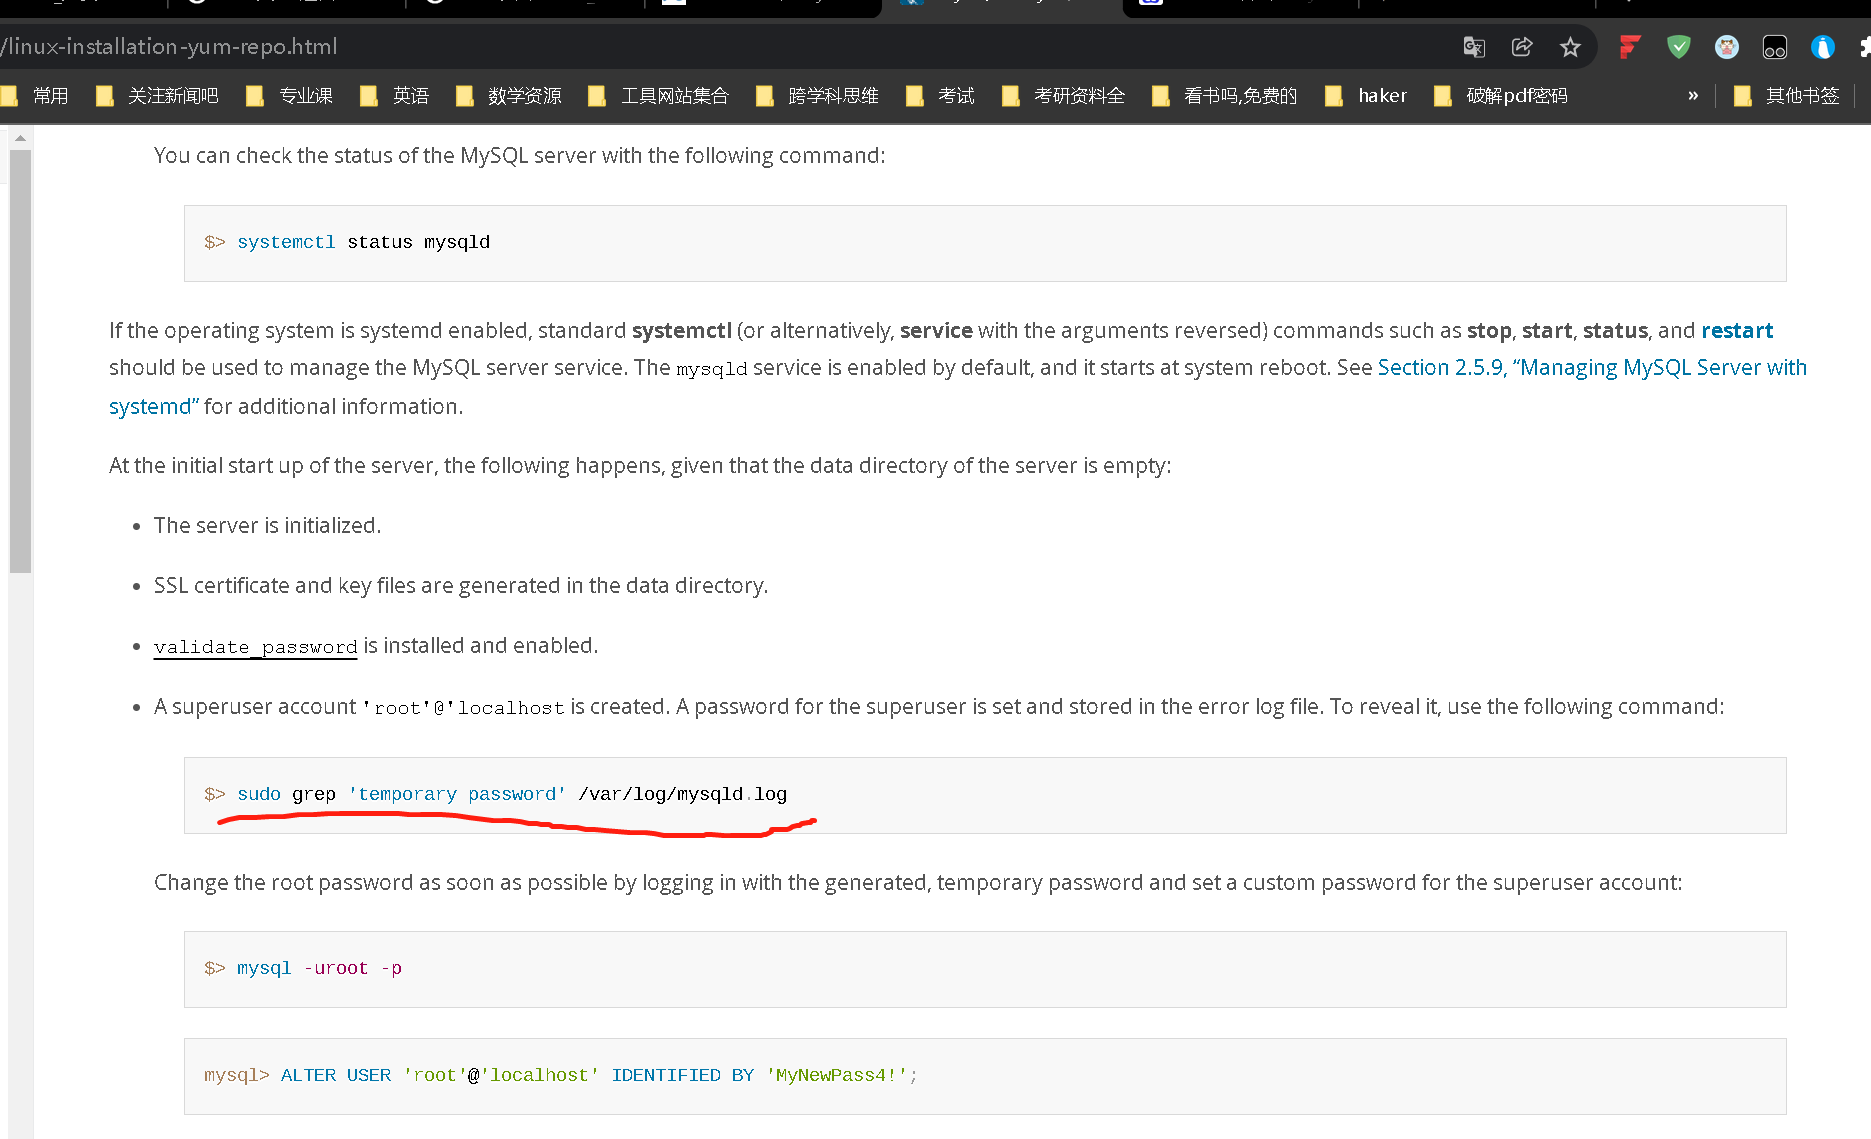
4. The default password is stored in this log
- Execute the following file and you will see the default password. Don't make any changes, just knock down the side command, otherwise you won't get the password
sudo grep 'temporary password' /var/log/mysqld.log
- Refer to official documents: https://dev.mysql.com/doc/refman/8.0/en/linux-installation-yum-repo.html 2.5.1 Installing MySQL on Linux Using the MySQL Yum Repository (January 24, 2022)
5. Login, change password
- -p press enter, enter the default password just obtained, and enter mysql
mysql -uroot -p
- Modify default password
mysql> ALTER USER 'root'@'localhost' IDENTIFIED BY 'MyNewPass4!';
- Add remote access user
GRANT ALL PRIVILEGES ON *.* TO 'Newly created user name' IDENTIFIED BY 'Set password' WITH GRANT OPTION;
-
Execute exit to exit.
-
Configure default encoding
-
(1) Backup profile
## Enter the directory where the configuration file is located
cd /etc
## Perform backup
cp  my.cnf my-Back.cnf
- (2) Modify profile
vi /etc/my.cnf
- (3) Add two items to the profile
character_set_server=utf8
init_connect='SET NAMES utf8'
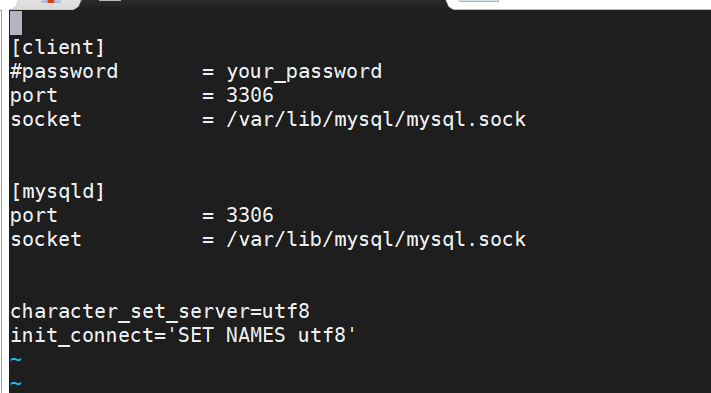
- Restart service
/etc/init.d/mysqld restart
3, Mysql8 0 configuration
1. Open remote access port
- (1) Modify profile
## View open port status
 /etc/init.d/iptables status

## Open port

 /sbin/iptables -I INPUT -p tcp --dport 3306 -j ACCEPT
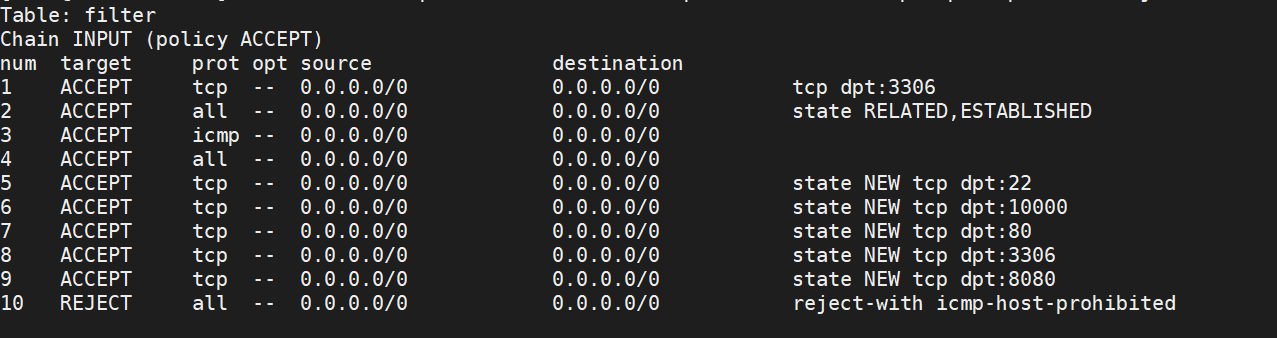
- (2) Save to file, restart
## Save changes
/etc/init.d/iptables save

## Server restart
service iptables restart
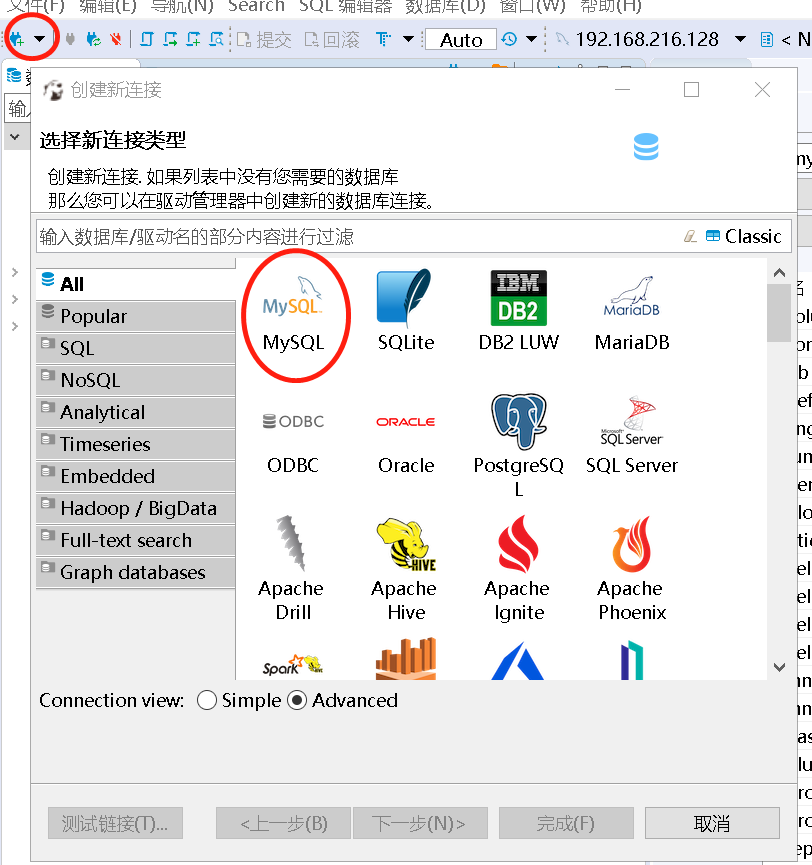
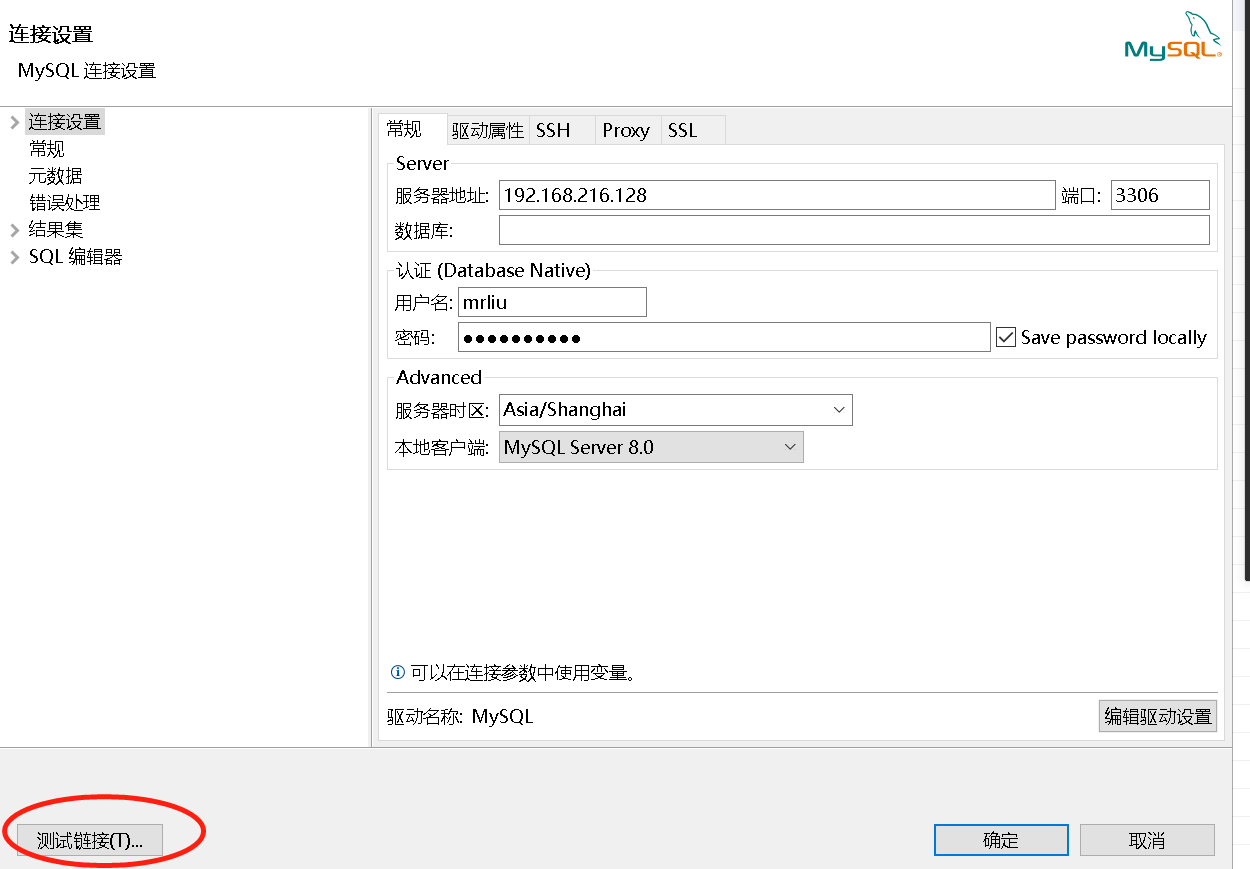
5, Remote connection
- DBever connection is adopted this time
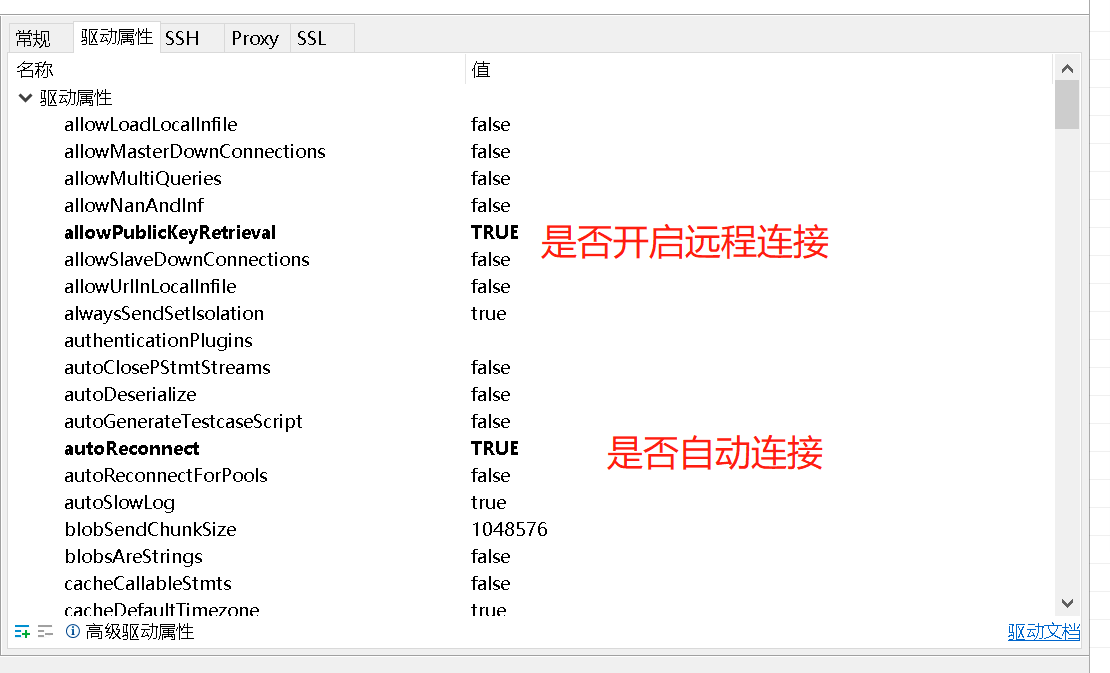
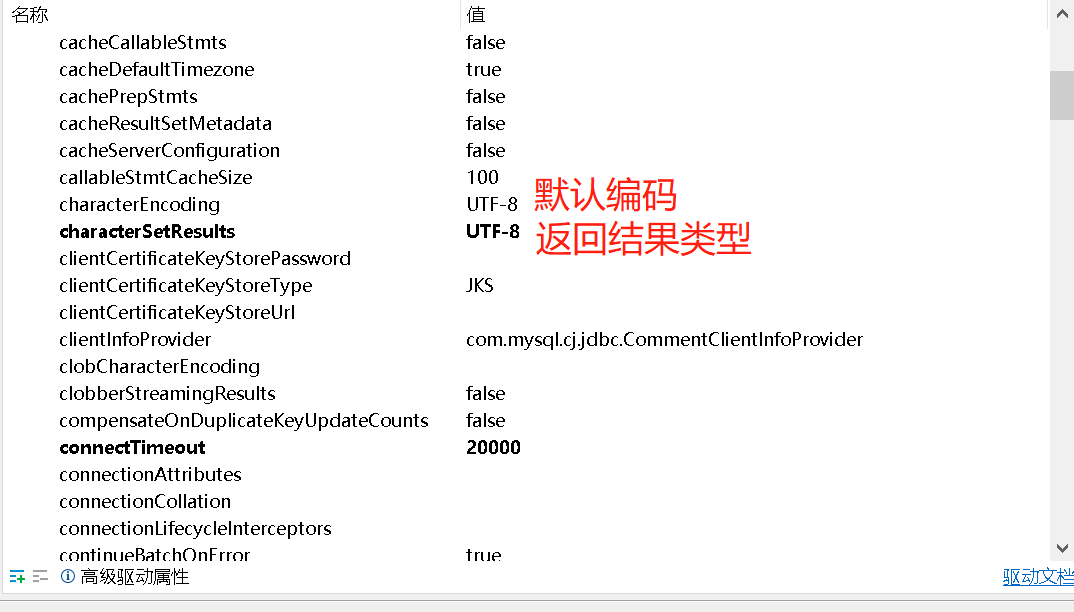
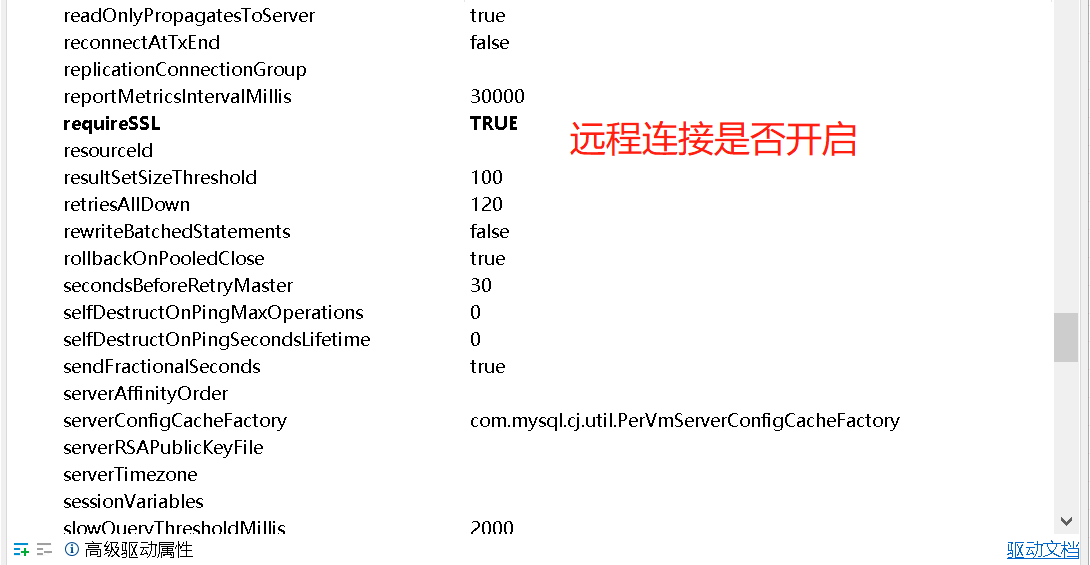
1. To modify the configuration, click the two icons as shown in the figure
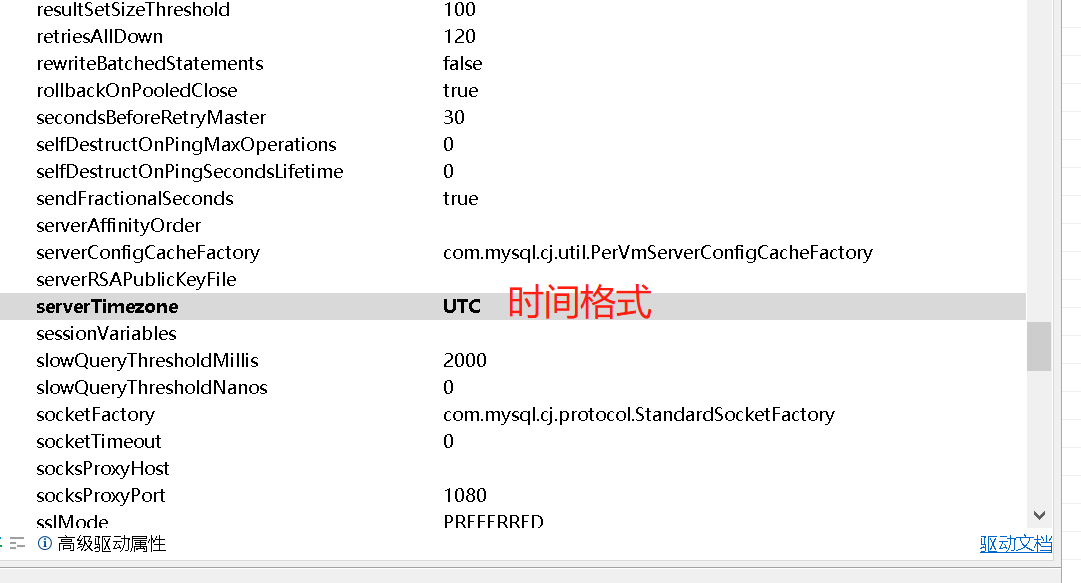
2. Parameter configuration in the figure
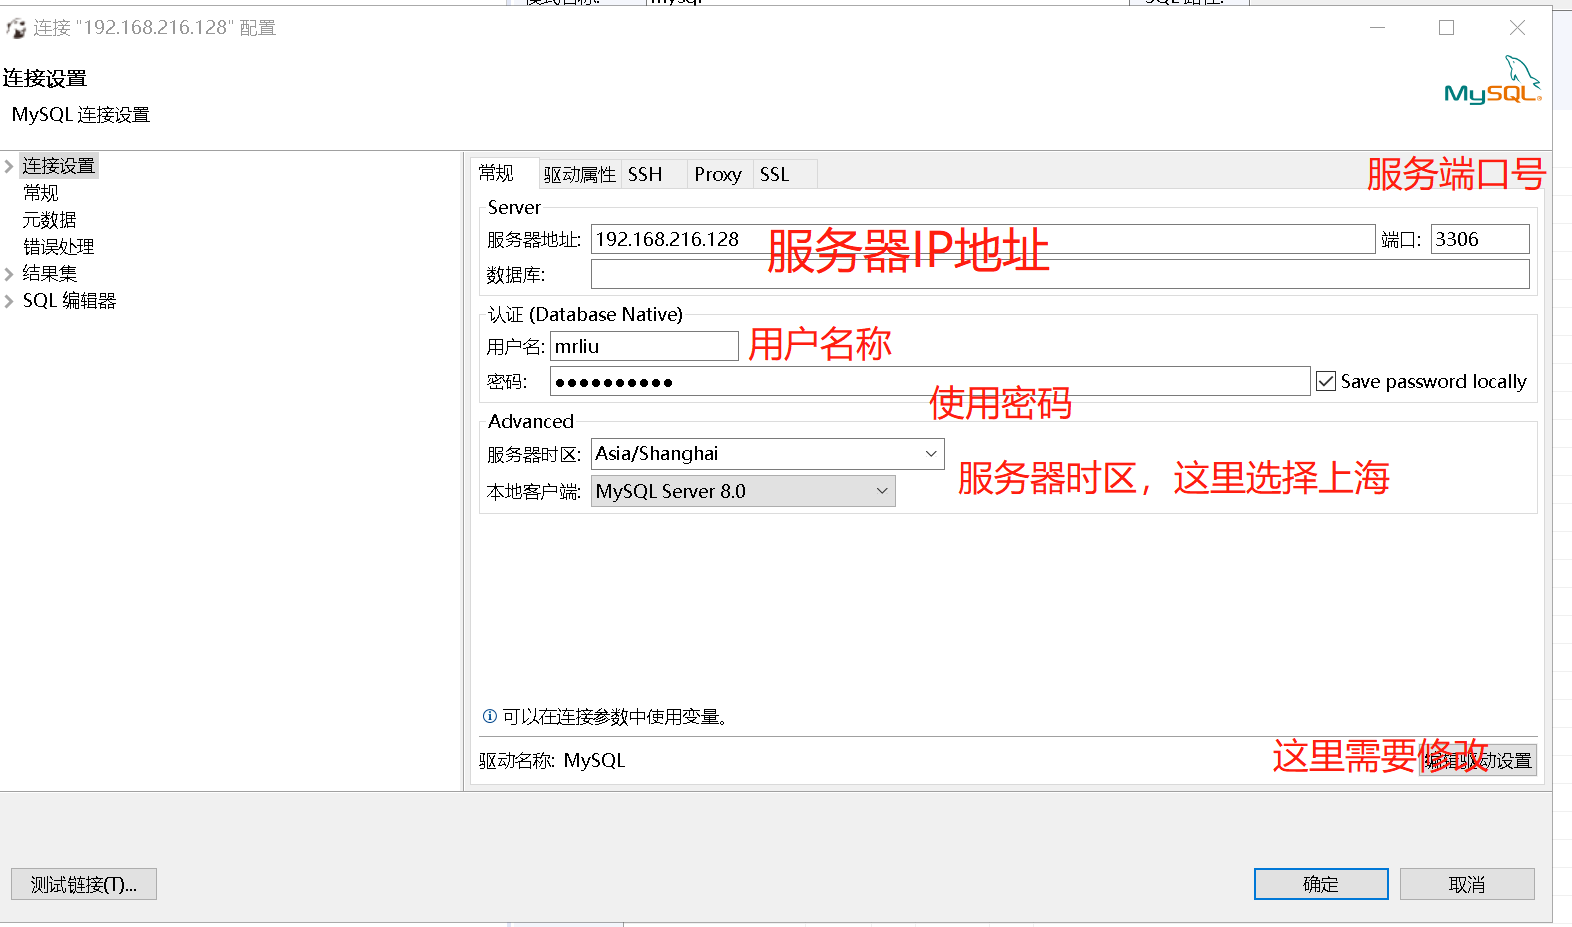
3. If there is no JDK, you need to click to edit the driver configuration
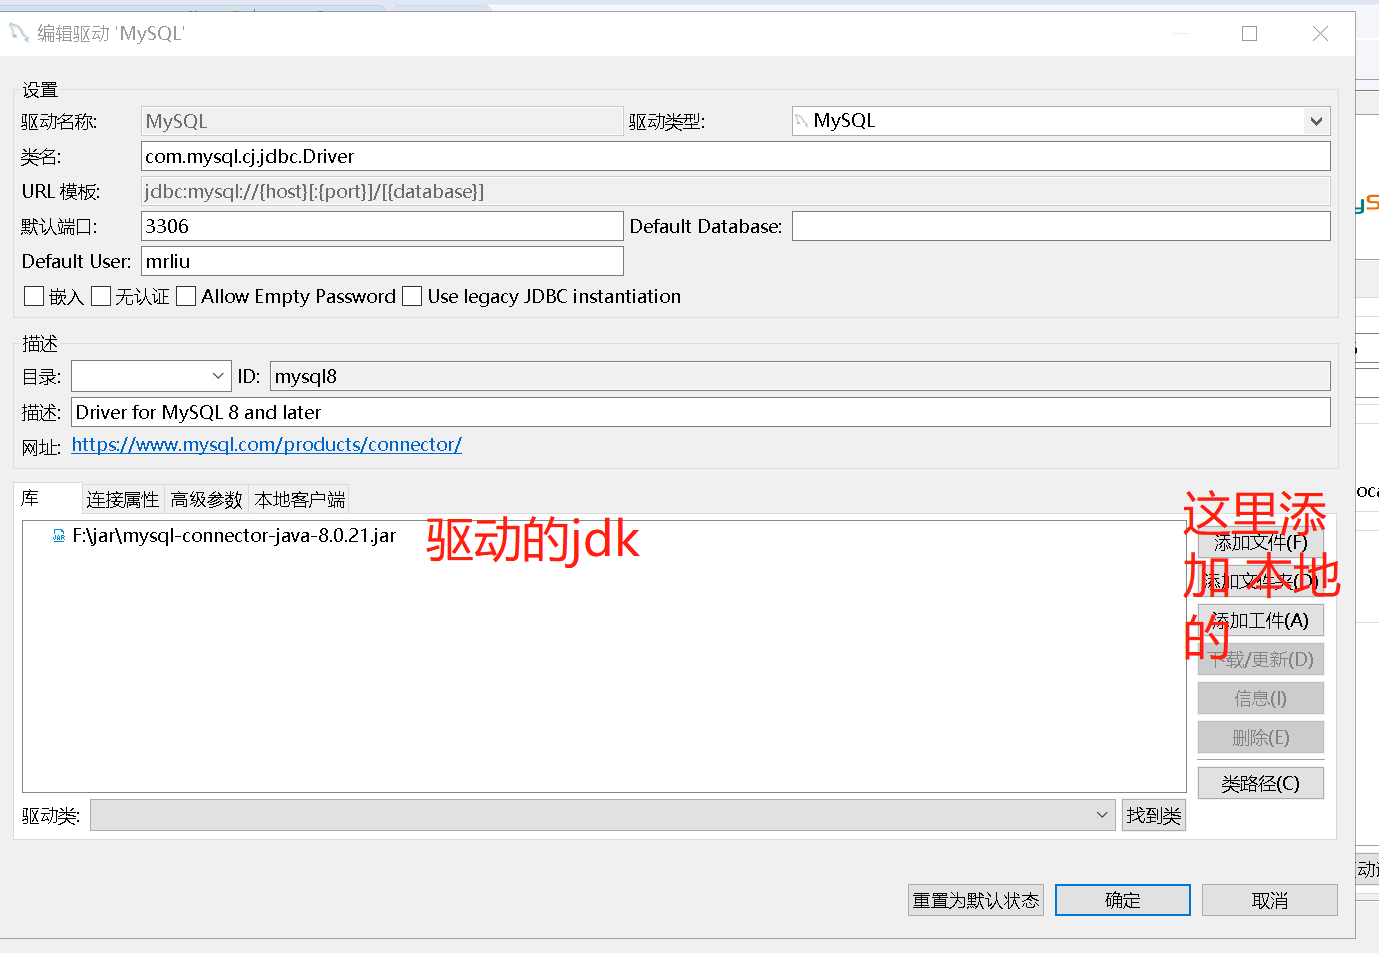
- The driver will download by itself by default. Sometimes it will be difficult to download. Therefore, you can also select the one that has been downloaded and connect by local connection
4. If the driver configuration is modified, sometimes there will be problems if it is not modified
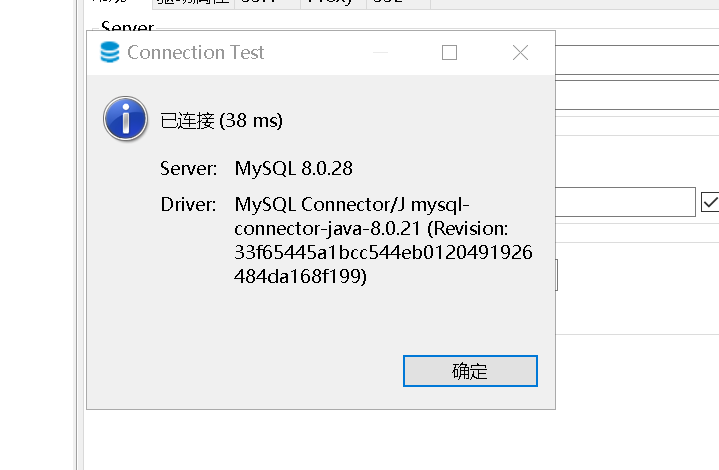
5. Test connection
- (1) Click test connection
- (2) As shown in the figure, the test is successful
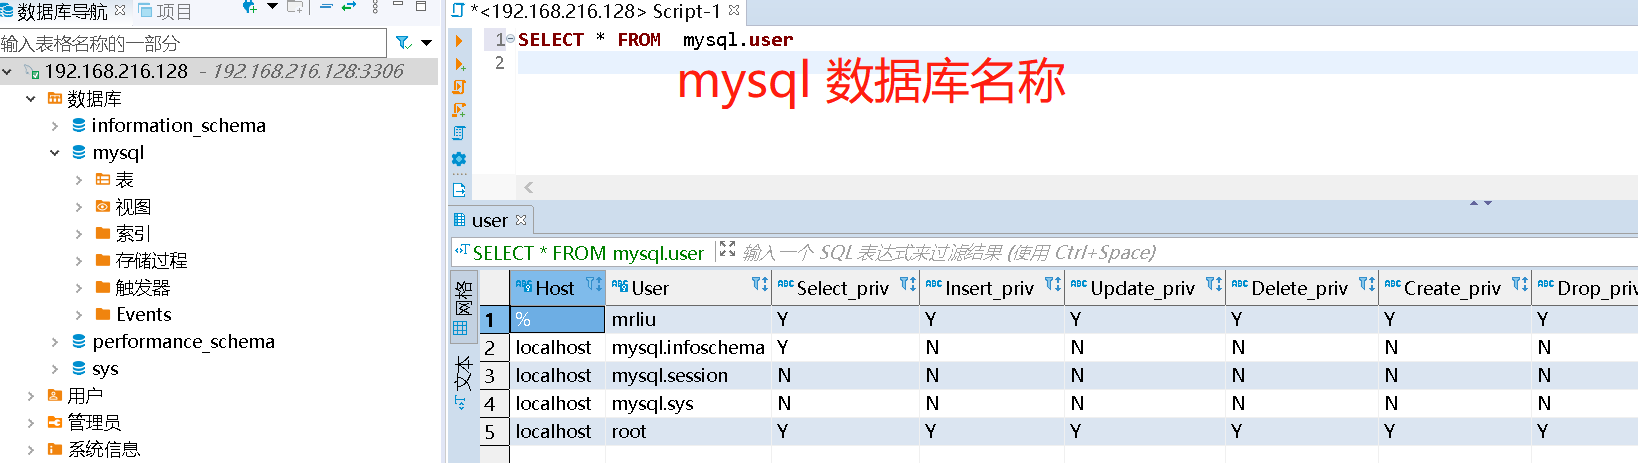
- (3) Operation interface after success
epilogue
- There are many problems in mysql 8.0 series, compared with MySQL 5.0 6 such a stable version has many inexplicable questions, and many answers on the Internet are not very normal. Therefore, after writing this server installation version, other versions will be added in the future. I hope it will be helpful to you