
Electron's star tup on github is now almost as much as React-native
It feels bad that webpack updates stealthily every week. It's bad that Angular updates to 8. Vue will soon come out with a new version. 5G will be ready for commercial use this year. Huawei's system will come out too. RN hasn't been updated to the first version yet. There is also a mad update of technology flutter that claims to be unemploying front-end developers. Front-end is really endless to learn.

Back to the point, there is no denying that the big front-end is really fantastic, PC can be developed across three platforms, mobile can write all kinds of applets and React-native applications at once, and then run in ios and Android as well as web pages, here we have to say------- Taro framework in Jingdong These people have used Node.js and webpack for days
Not familiar with webpacks, look at my previous articles and don't focus on webpacks today
Welcome to my column, Advanced Front End, which is highly praised by Stars
- Handwritten React Optimized Scaffold
- Front End Performance Optimization Incomplete Manual
- Handwritten vue scaffolding
- This text source git repository address
Let's start with an introduction to Electron's official website:
Build cross-platform desktop applications using JavaScript, HTML, and CSS. If you can build a website, you can build a desktop application.Electron is a framework for creating native programs using Web technologies such as JavaScript, HTML, and CSS. It is responsible for the more difficult parts. You just need to focus on the core of your application.
- What does that mean?
- Electron = Node.js +Google Browser +Ordinary JS Code Generated Application, which is packaged into an installation package, is a complete application
- Electron is divided into two processes, the main process is responsible for the harder part, the rendering process (common JS code) part, and the UI interface display
- Communication between two processes can be done through the remote module, as well as between IPCRender and IPCMain, which is similar to the one mounted on global attributes (much like the earliest namespace modularization scheme), and the other is based on publishing and subscription mechanisms, customizing event monitoring and triggering to achieve communication between the two processes.
- Electron is equivalent to putting a shell on a single-page application generated by React. If you are concerned with complex functions such as file manipulation, you need to rely on Electron's main process, which can either call Node.js'API directly or use C++ plug-ins, where Node.js can be used to write back-end CRUD s, middleware or now.Write the front end.
Talking about Technology Selection
- Use React to do the underlying UI drawing, React+TS is preferred for large projects
- Best practices for state management are definitely not Redux, dva is currently preferred, or redux-saga.
- Choosing a webpack as a build tool can severely limit your front-end development if you don't really suffer from it, so it's recommended that you take a good look at Node.js and webpack
- Instead of GraphQL, I probably didn't understand GraphQL very well and didn't understand the essence of it.
- In the communication protocol section, websoket and normal http communication are selected
- Because it is demo, many places have not been refined. Later, an open source project for NetEase cloud music will be created for electron, which must be done.
Start formal environment building first
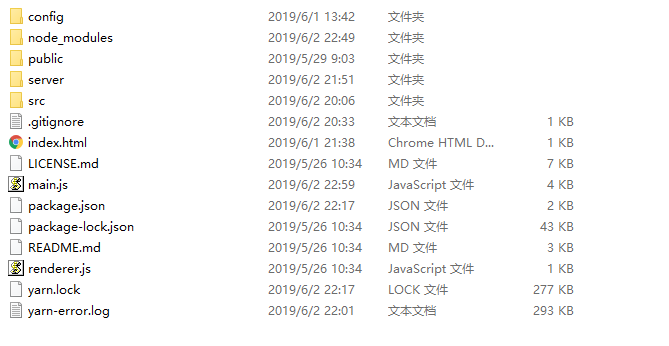
- config file Place webpack configuration file
- Server folder places back-end server code for Node.js
- Place source under src
- main.js is the entry file for Electron
- json file is script entry file and package management file~
Development mode project startup ideas:
- Start webpack first to package code into memory for hot updates
- Start Electron again to read the file contents of the corresponding url address for hot updates
Set webpack entry
        app: ['babel-polyfill', './src/index.js', './index.html'],
        vendor: ['react']
        }
Ignore the code in Electron and don't package it in webpack (because there is background module code in Electron, packaging will fail)
externals: [
        (function () {
            var IGNORES = [
                'electron'
            ];
            return function (context, request, callback) {
                if (IGNORES.indexOf(request) >= 0) {
                    return callback(null, "require('" + request + "')");
                }
                return callback();
            };
        })()
    ]
Add Code Split
optimization: {
        runtimeChunk: true,
        splitChunks: {
            chunks: 'all'
        }
    },
Set up hot updates, etc.
    plugins: [
        new HtmlWebpackPlugin({
            template: './index.html'
        }),
        new webpack.HotModuleReplacementPlugin(),
        new webpack.NamedModulesPlugin(),
    ],
    mode: 'development',
    devServer: {
        contentBase: '../build',
        open: true,
        port: 5000,
        hot: true
    },
Join babel
{
    loader: 'babel-loader',
    options: {   //jsx syntax
        presets: ["@babel/preset-react",
            //tree shaking loads babel-polifill presets on demand from back to front
            ["@babel/preset-env", {
                "modules": false,
                "useBuiltIns": "false", "corejs": 2,
            }],
        ],

    plugins: [
        //Support import lazy loading plugin s from front to back
        "@babel/plugin-syntax-dynamic-import",
        //Andt-mobileOn-demand load true is less, write'css'without less style value
        ["import", { libraryName: "antd-mobile", style: true }],
        //Identify class components
        ["@babel/plugin-proposal-class-properties", { "loose": true }],
        //
    ],
    cacheDirectory: true
},
}
Look at the configuration file main.js for the main process
// Modules to control application life and create native browser window
const { app, BrowserWindow, ipcMain, Tray, Menu } = require('electron')
const path = require('path')
// Keep a global reference of the window object, if you don't, the window will
// be closed automatically when the JavaScript object is garbage collected.
let mainWindow
app.disableHardwareAcceleration()
// ipcMain.on('sync-message', (event, arg) => {
//   console.log("sync - message")
//   // event.returnValue('message', 'tanjinjie hello')
// })
function createWindow() {
  // Create the browser window.
  tray = new Tray(path.join(__dirname, './src/assets/bg.jpg'));
  tray.setToolTip('wechart');
  tray.on('click', () => {
    mainWindow.isVisible() ? mainWindow.hide() : mainWindow.show()
  });
  const contextMenu = Menu.buildFromTemplate([
    { label: 'Sign out', click: () => mainWindow.quit() },
  ]);
  tray.setContextMenu(contextMenu);
  mainWindow = new BrowserWindow({
    width: 805,
    height: 500,
    webPreferences: {
      nodeIntegration: true
    },
    // titleBarStyle: 'hidden'
    frame: false
  })

  //Custom zoom-in and zoom-out tray function
  ipcMain.on('changeWindow', (event, arg) => {
    if (arg === 'min') {
      console.log('min')
      mainWindow.minimize()
    } else if (arg === 'max') {
      console.log('max')
      if (mainWindow.isMaximized()) {
        mainWindow.unmaximize()
      } else {
        mainWindow.maximize()
      }
    } else if (arg === "hide") {
      console.log('hide')
      mainWindow.hide()
    }
  })
  // and load the index.html of the app.
  // mainWindow.loadFile('index.html')
  mainWindow.loadURL('http://localhost:5000');
  BrowserWindow.addDevToolsExtension(
    path.join(__dirname, './src/extensions/react-dev-tool'),
  );


  // Open the DevTools.
  // mainWindow.webContents.openDevTools()

  // Emitted when the window is closed.
  mainWindow.on('closed', function () {
    // Dereference the window object, usually you would store windows
    // in an array if your app supports multi windows, this is the time
    // when you should delete the corresponding element.
    mainWindow = null
    BrowserWindow.removeDevToolsExtension(
      path.join(__dirname, './src/extensions/react-dev-tool'),
    );
  })
}

// This method will be called when Electron has finished
// initialization and is ready to create browser windows.
// Some APIs can only be used after this event occurs.
app.on('ready', createWindow)

// Quit when all windows are closed.
app.on('window-all-closed', function () {
  // On macOS it is common for applications and their menu bar
  // to stay active until the user quits explicitly with Cmd + Q
  if (process.platform !== 'darwin') app.quit()
})

app.on('activate', function () {
  // On macOS it's common to re-create a window in the app when the
  // dock icon is clicked and there are no other windows open.
  if (mainWindow === null) createWindow()
})


// In this file you can include the rest of your app's specific main process
// code. You can also put them in separate files and require them here.
Today I will only talk about configuration in development mode, because there are so many articles scored, ~The remaining configuration goes to git repository to see
Start the project in development mode:
- Use "dev": "webpack-dev-server --config. /config/webpack.dev.js" to package code into memory
- Use "start": "electron." to open an electron, read the resources in the corresponding memory address, and achieve hot updates
Once the project is up, inject dva into the index.js file at the entrance
import React from 'react'
import App from './App'
import dva from 'dva'
import Homes from './model/Homes'
import main from './model/main'
const app = dva()
app.router(({ history, app: store }) => (
  <App
    history={history}
    getState={store._store.getState}
    dispatch={store._store.dispatch}
  />
));
app.model(Homes)
app.model(main)
app.start('#root')
I have to say here that the difference between redux,redux-sage,dva is directly illustrated
First is Redux
- React is only responsible for page rendering, not page logic, from which page logic can be extracted separately into a store, and state and page logic can be extracted from <App/> into a separate store.
- Page logic is reducer, <TodoList/> and <AddTodoBtn/> are Pure Component s, and the connection method makes it easy to add a wrapper layer to them to establish a connection with the store: dispatch can inject action into the store to change the state of the store, and at the same time subscribe to changes in the state of the store, once the state changes, the components connectedThe process of sending actions to stores using dispatch can be intercepted as well. Naturally, a variety of Middleware can be added here to implement various custom functions. eg: logging makes each part perform its own duties, with lower coupling, higher reuse and better scalability.

Then inject Redux-sage
- As mentioned above, you can use Middleware to intercept action s so that asynchronous network operations are convenient. Just make a Middleware. Here, use redux-saga as a class library and raise a chestnut:
- Click the Create Todo button to launch an action with type == addTodo
- saga intercepts this action, initiates an http request, and if the request succeeds, continues to send an action to reducer with type == addTodoSucc, indicating successful creation, or vice versa, sends an action with type == addTodoFail
Finally: Dva
- With the first three padding steps, the emergence of Dva has come to fruition. As Dva said on its website, Dva is based on the best practices of React + Redux + Saga, doing three important things that greatly enhance the coding experience:
- Unify store and saga as a model concept, written in a js file
- Added a Subscriptions for collecting actions from other sources, eg:Keyboard operations
- model is very simple, like DSL or RoR, coding flies fast
- Conventions are better than configurations, always good.


In the entry APP component, inject props to manage the state tree
import React from 'react'
import { HashRouter, Route, Redirect, Switch } from 'dva/router';
import Home from './pages/home'
const Router = (props) => {
    return (
        <HashRouter>
            <Switch>
                <Route path="/home" component={Home}></Route>
                <Redirect to="/home"></Redirect>
            </Switch>
        </HashRouter>
    )
}
export default Router
connect the connection state tree in the component
import React from 'react'
import { ipcRenderer } from 'electron'
import { NavLink, Switch, Route, Redirect } from 'dva/router'
import Title from '../../components/title'
import Main from '../main'
import Friend from '../firend'
import More from '../more'
import { connect } from 'dva'
import './index.less'
class App extends React.Component {
    componentDidMount() {
        ipcRenderer.send('message', 'hello electron')
        ipcRenderer.on('message', (event, arg) => {
            console.log(arg, new Date(Date.now()))
        })
        const ws = new WebSocket('ws://localhost:8080');
        ws.onopen = function () {
            ws.send('123')
            console.log('open')
        }
        ws.onmessage = function () {
            console.log('onmessage')
        }
        ws.onerror = function () {
            console.log('onerror')
        }
        ws.onclose = function () {
            console.log('onclose')
        }
    }
    componentWillUnmount() {
        ipcRenderer.removeAllListeners()
    }
    render() {
        console.log(this.props)
        return (
            <div className="wrap">
                <div className="nav">
                    <NavLink to="/home/main">Home</NavLink>
                    <NavLink to="/home/firend">Friend</NavLink>
                    <NavLink to="/home/more">More</NavLink>
                </div>
                <div className="content">
                    <Title></Title>
                    <Switch>
                        <Route path="/home/main" component={Main}></Route>
                        <Route path="/home/firend" component={Friend}></Route>
                        <Route path="/home/more" component={More}></Route>
                        <Redirect to="/home/main"></Redirect>
                    </Switch>
                </div>
            </div>
        )
    }
}
export default connect(
    ({ main }) => ({
        test: main.main
    })
)(App)
// ipcRenderer.sendSync('sync-message','sync-message')
What did the above component do?
- Up in the component mounted lifecycle function, a websocket connection is started, event listening for the response is mounted, messages are sent to the main thread, and the message event for the main thread is triggered.
- Remove event monitoring for all cross-process communications when components are about to be uninstalled
- Route jump using dva
- The state tree is connected and the mains state data of the state tree mainmodule is read
Subcomponents that go to the previous component
import React from 'react'
import { connect } from 'dva'
class App extends React.Component {
    handleAdd = () => {
        this.props.dispatch({
            type: 'home/add',
            val: 5,
            res: 1
        })
    }
    handleDel = () => {
    }
    render() {
        const { homes } = this.props
        console.log(this.props)
        return (
            <div>
                <button onClick={this.handleAdd}>add</button>
                <button onClick={this.handleDel}>{homes}</button>
            </div>
        )
    }
}
export default connect(
    ({ home, main }) => ({
        homes: home.num,
        mains: main.main
    })
)(App)
See also what this component does
- Connect the state tree, read the state data of the home,main modules, and convert to props
- Bind the event, if you click the button, dispatch gives the corresponding effects, updates the data of the status tree, and updates the page
Finally, let's see how the rendering process controls the window display of the main process
import React from 'react'
import { ipcRenderer } from 'electron'
import './index.less'
export default class App extends React.Component {
    handle = (type) => {
        return () => {
            if (type === 'min') {
                console.log('min')
                ipcRenderer.send('changeWindow', 'min')
            } else if (type === 'max') {
                console.log('max')
                ipcRenderer.send('changeWindow', 'max')
            } else {
                console.log('hide')
                ipcRenderer.send('changeWindow', 'hide')
            }
        }
    }
    render() {
        return (
            <div className="title-container">
                <div className="title" style={{ "WebkitAppRegion": "drag" }}>Zones that can be dragged</div>
                <button onClick={this.handle('min')}>minimize</button>
                <button onClick={this.handle('max')}>Maximize</button>
                <button onClick={this.handle('hide')}>Tray</button>
            </div>
        )
    }
}
- Control window display and hiding by IPCRender communicating with main process
Let's go to the model managed in dva to see
- home module
export default {
    namespace: 'home',
    state: {
        homes: [1, 2, 3],
        num: 0
    },
    reducers: {
        adds(state, { newNum }) {
            return {
                ...state,
                num: newNum
            }
        }
    },
    effects: {
        * add({ res, val }, { put, select, call }) {
            const { home } = yield select()
            console.log(home.num)
            yield console.log(res, val)
            const newNum = home.num + 1
            yield put({ type: 'adds', newNum })
        }
    },
}
dva really saves us a lot of code and is better maintained and easier to read
- Its general flow

- If not, go to the official website to see examples, generally not as steep as the RXJS learning route
Code in Node.js
const express = require('express')
const { Server } = require("ws");
const app = express()
const wsServer = new Server({ port: 8080 })
wsServer.on('connection', (ws) => {
    ws.onopen = function () {
        console.log('open')
    }
    ws.onmessage = function (data) {
        console.log(data)
        ws.send('234')
        console.log('onmessage' + data)
    }
    ws.onerror = function () {
        console.log('onerror')
    }
    ws.onclose = function () {
        console.log('onclose')
    }
});

app.listen(8000, (err) => {
    if (!err) { console.log('Monitor OK') } else {
        console.log('Failed to listen')
    }
})
First listen on a websocket port 8080, bind events, and use express to listen on native port 8000
- In this way, an application does not necessarily need all of the real-time communication, depending on the needs, to decide when to do real-time communication
- Restful architecture still exists, Node.js can be used as middleware or CRUD for underlying servers with high IO output