Previous articles
Spring boot project deployed to Alibaba cloud tutorial (1) successfully connected to remote ECs and configured Alibaba cloud security group
We have been able to visit our Cloud server Now, install the application in it.
Tutorial jdk, tomcat, mysql download address
Link: https://pan.baidu.com/s/1FS1yYNqvnRJODklRnm9wog Extraction code: g6nb
1, Go to the official website to download JDK

The common way is to download it and then use the tool to transfer it Linux server Yes, I'd like to recommend a Cloud server How to download it for you:
1. Download this file with IE browser, then go to download center to pause and copy download link
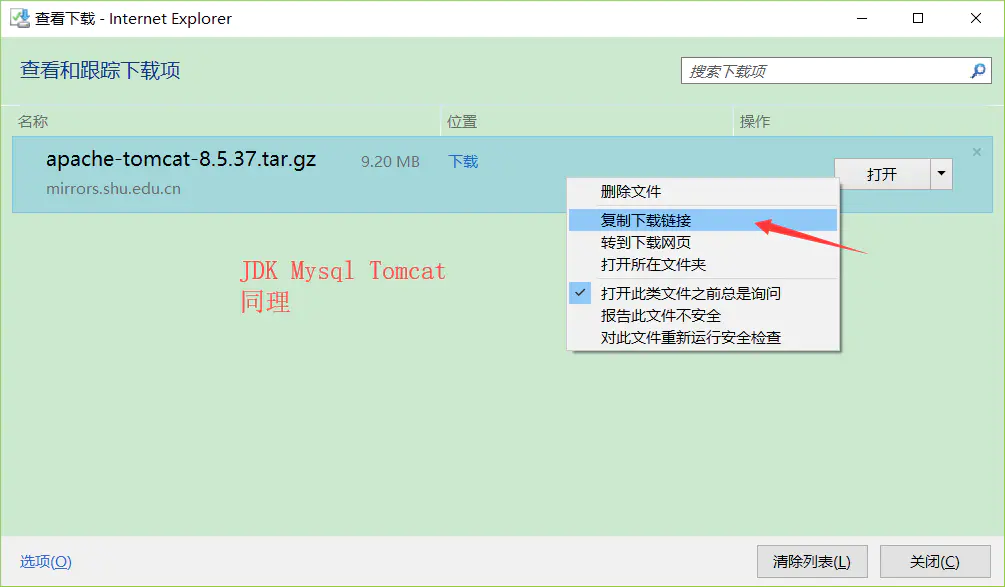
Select IE browser
2. Download
# Switch directories
cd /
# Create a folder Java
mkdir usr/local/java
# Enter this folder
cd /usr/local/java
# Put the copied download link 'ctrl+insert' here
wget Download link
3. Unzip
chmod +x jdk-8u191-linux-x64.tar.gz
tar xzf jdk-8u191-linux-x64.tar.gz -C /usr/java
4. Set environment variables:
a. open / etc/profile: vi /etc/profile and press i to enter editing mode
b. enter the following information ctrl+insert, and pay attention to your version number
export JAVA_HOME=/usr/local/java/jdk1.8.0_191
export CLASSPATH=$JAVA_HOME/lib/tools.jar:$JAVA_HOME/lib/dt.jar:$JAVA_HOME/lib
export PATH=$JAVA_HOME/bin:$PATH
c. press Esc key to exit editing mode, input: wq to save and close the file
d. load environment variable: source /etc/profile
e. when running the Java version command and displaying the JDK version information, it indicates that the JDK has been installed successfully
2, Download and install Tomcat on the official website
- Create a generic user www to run Tomcat:
useradd www - Create site root:
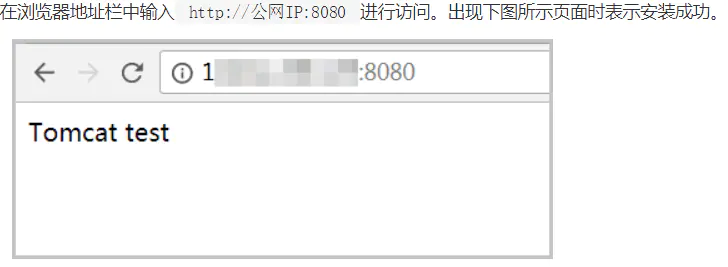
mkdir -p /data/wwwroot/default - This example will create a new Tomcat test page directly in the root directory of the website
echo Tomcat test > /data/wwwroot/default/index.jsp
chown -R www.www /data/wwwroot
- The same way to go to the official download link
cd /usr/local
wget download link
- Unzip the installation and pay attention to your version
Unzip tar xzf apache-tomcat-8.5.34.tar.gz
mv apache-tomcat-8.5.34 /usr/local/tomcat/
Authorization chown -R www.www /usr/local/tomcat/
- Configure server.xml
Switch to / usr/local/tomcat/conf / Directory: cd /usr/local/tomcat/conf/
Rename the server.xml file: MV server.xml server.xml_k
Create a new server.xml file and run the command vi server.xml
Press the i key to enter the edit mode and add the following
<?xml version="1.0" encoding="UTF-8"?> <Server port="8006" shutdown="SHUTDOWN"> <Listener className="org.apache.catalina.core.JreMemoryLeakPreventionListener"/> <Listener className="org.apache.catalina.mbeans.GlobalResourcesLifecycleListener"/> <Listener className="org.apache.catalina.core.ThreadLocalLeakPreventionListener"/> <Listener className="org.apache.catalina.core.AprLifecycleListener"/> <GlobalNamingResources> <Resource name="UserDatabase" auth="Container" type="org.apache.catalina.UserDatabase" description="User database that can be updated and saved" factory="org.apache.catalina.users.MemoryUserDatabaseFactory" pathname="conf/tomcat-users.xml"/> </GlobalNamingResources> <Service name="Catalina"> <Connector port="8080" protocol="HTTP/1.1" connectionTimeout="20000" redirectPort="8443" maxThreads="1000" minSpareThreads="20" acceptCount="1000" maxHttpHeaderSize="65536" debug="0" disableUploadTimeout="true" useBodyEncodingForURI="true" enableLookups="false" URIEncoding="UTF-8"/> <Engine name="Catalina" defaultHost="localhost"> <Realm className="org.apache.catalina.realm.LockOutRealm"> <Realm className="org.apache.catalina.realm.UserDatabaseRealm" resourceName="UserDatabase"/> </Realm> <Host name="localhost" appBase="/data/wwwroot/default" unpackWARs="true" autoDeploy="true"> <Context path="" docBase="/data/wwwroot/default" debug="0" reloadable="false" crossContext="true"/> <Valve className="org.apache.catalina.valves.AccessLogValve" directory="logs" prefix="localhost_access_log." suffix=".txt" pattern="%h %l %u %t "%r" %s %b" /> </Host> </Engine> </Service> </Server>
Press Esc to exit editing mode, enter: wq to save and exit editing
- Set JVM parameters
Run the command vi /usr/local/tomcat/bin/setenv.sh to create / usr/local/tomcat/bin/setenv.sh.
Press the i key to enter the edit mode and add the following
JAVA_OPTS='-Djava.security.egd=file:/dev/./urandom -server -Xms256m -Xmx496m -Dfile.encoding=UTF-8'
- Set the Tomcat self starting script.
Download script:
wget https://github.com/lj2007331/oneinstack/raw/master/init.d/Tomcat-init
Rename Tomcat init: MV Tomcat init / etc / init.d/tomcat
Add execution permission: chmod +x /etc/init.d/tomcat
Run the following command to set the startup script Java home, and note the version number
sed -i 's@^export JAVA_HOME=.*@export JAVA_HOME=/usr/java/jdk1.8.0_191@' /etc/init.d/tomcat
- Set self start
chkconfig --add tomcat
chkconfig tomcat on
- Start Tomcat
service tomcat start
Next install MySQL. I think it's useful. I like to pay attention to it