Please read this article before reading it Specialize in fancy (1) to the simplest custom View, increase self-confidence, you can do it.
As the second part of the fancy series, there is no nonsense in this part. It's all the basic knowledge needed to learn the custom View well. For example, to learn English, you need to know the words first, and the same is true for the custom View. If you want to learn these basic knowledge well, it's like a bit of a fool talking about dreams, so you need to have some psychological preparation. If there are any mistakes, please correct them in the comments below.
1. Coordinate system
Since I draw a custom View myself, I need to know where I draw it, right? So I need to know how to define the coordinate system in Android. The blogs of each custom View are poorly written, so I will steal a map shamelessly, hehe.
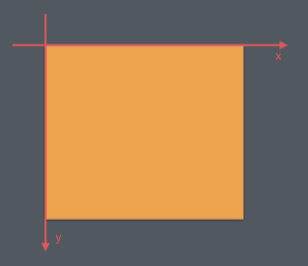
Make an explanation for the above figure:
- The upper left corner of the screen is the coordinate origin.
- To the right increases the x-axis.
- Downward increases the y-axis direction.
2. Angle and radian
Although the above coordinate system is different from the mathematical coordinate system, it can be understood. Now we have to say that the mathematical coordinate system is good and can be skipped directly.
Why talk about the angle and radian of androcchio? To put it simply, some complex and cool effects are actually the effects formed by combining some simple things with mathematical precision. Among them, angle calculation will certainly be involved, so it needs to be understood in advance.
First of all, angle is 60 base, radian is 10 base. Angles and radians are the same units of measurement that describe angles. Let's first look at their definitions:
| name | definition |
|---|---|
| angle | Two rays are emitted from the center of the circle to the circumference, forming an arc with the included angle opposite to the included angle. When the arc length is exactly equal to 360 times of the circumference of the circle, the angle between the two rays is 1 degree. |
| radian | Two rays are emitted from the center of the circle to the circumference, forming an arc with the included angle opposite to the included angle. When the arc length is exactly equal to the radius of the circle, the angle between the two rays is 1 radian. |
The text may not be very clear. Here are two pictures to illustrate the image:
Angle illustration: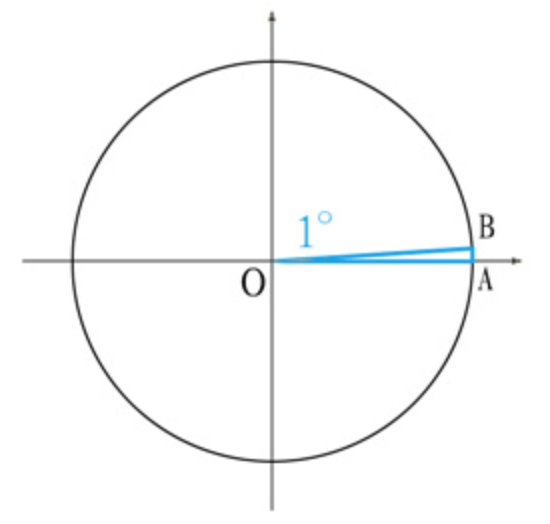
When arc AB = 1 / 360 of the circumference of the circle, angle AOB = 1 degree.
Radian illustration: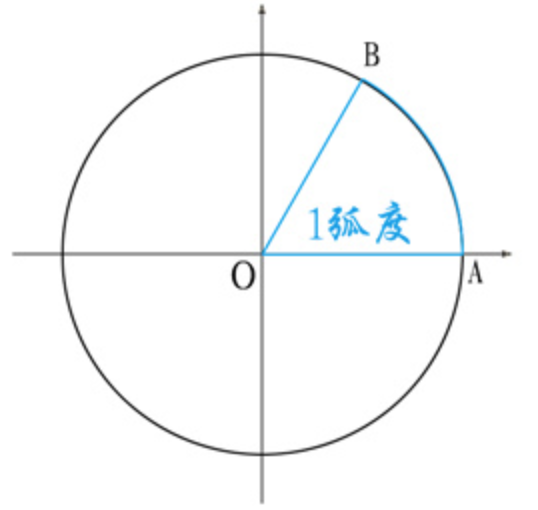
When arc AB = radius, angle AOB = 1 radian.
In this way, we can see clearly. Let's talk about the conversion relationship between angle and radian.
The corresponding angle of a circle is 360 degrees (angle), and the corresponding radian is 2 π radian.
So the equivalence relation is 360 (angle) = 2 π (radian) = > 180 (angle) = π (radian).
From the equivalence relation, the following conversion formula can be obtained:
| formula | example |
|---|---|
| rad = deg x π / 180 | 2π = 360 x π / 180 |
| deg = rad x 180 / π | 360 = 2π x 180 / π |
Where rad is the radian and deg is the angle. At the same time, note that in the default coordinate system of the screen, the direction of angle increase is clockwise, as shown in the following figure: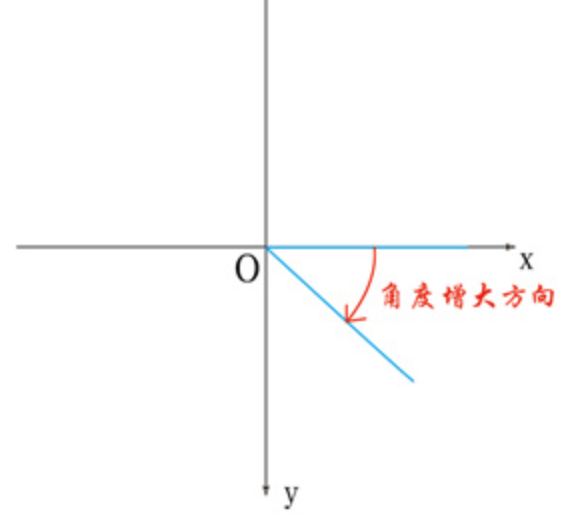
3. draw()XXX
The above briefly introduces several basic knowledge, and then comes to the theme of this article: draw() painting method.
Paste the circle code from the previous article:
 @Override
    protected void onDraw(Canvas canvas) {
        super.onDraw(canvas);

        //Draw a circle
        canvas.drawCircle(300,300,200,mPaint);
}
All of the things we want to draw are written in the onDraw() method, through the canvas.drwaXXX() method. Canvas, commonly known as canvas, can draw all kinds of things on it. It is the basis of Android platform 2D graphics drawing, and it is very powerful. So we have to master all kinds of drawXXX() methods. There is no shortcut for mastering these methods. We only need to master them by hand.
1. Draw color
@Override
    protected void onDraw(Canvas canvas) {
        super.onDraw(canvas);

        canvas.drawColor(Color.BLACK);
        canvas.drawColor(Color.parseColor("#88880000"));
        canvas.drawRGB(100, 200, 100);
        canvas.drawARGB(100, 100, 200, 100);
}
In the above, four methods of painting color are listed. Painting color is used to fill the whole canvas, and is often used to draw the background color. The second method adds a translucent red mask to the original painting effect.
2. Draw points
Since canvas is a canvas, we need to Paint on the canvas. We need a brush, that is, a Paint object. Here is a brief introduction to the four most common configuration items of Paint objects, which will be described in detail later.
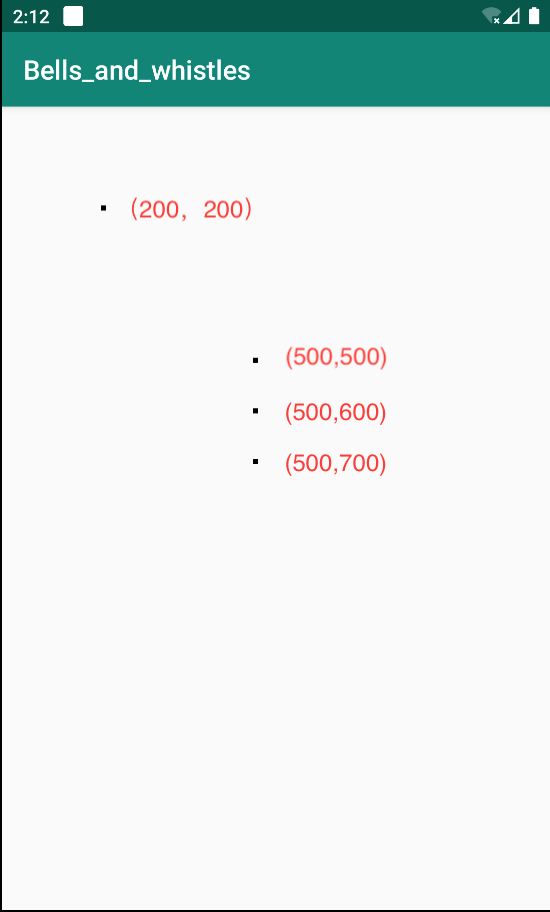
public class ColorView extends View {

    private Paint mPaint;

    public ColorView(Context context) {
        this(context,null,0);
    }

    public ColorView(Context context, @Nullable AttributeSet attrs) {
        this(context,attrs,0);
    }

    public ColorView(Context context, @Nullable AttributeSet attrs, int defStyleAttr) {
        super(context, attrs, defStyleAttr);
        initPaint();
    }

    //Initialize brush
    private void initPaint() {
        mPaint = new Paint(Paint.ANTI_ALIAS_FLAG);//Turn on anti aliasing to make the edges of graphics and text smoother
        //Set brush color
        mPaint.setColor(Color.BLACK);
        //Paint.Style.STROKE              Set brush mode to stroke
        //Paint.Style.FILL                Set brush mode to fill
        //Paint.Style.FILL_AND_STROKE set brush mode to stroke and fill
        mPaint.setStyle(Paint.Style.FILL);
        //Set brush width to 10px
        mPaint.setStrokeWidth(10f);
    }


    @Override
    protected void onDraw(Canvas canvas) {
        super.onDraw(canvas);

        //Draw a point at coordinate (200200)
        canvas.drawPoint(200,200,mPaint);
        //Draw a set of points (500500) - > (500600) - > (500700)
        canvas.drawPoints(new float[]{500,500,500,600,500,700},mPaint);
    }
}
The renderings are as follows:
3. Draw a straight line
 @Override
    protected void onDraw(Canvas canvas) {
        super.onDraw(canvas);

        //Draw a line
        canvas.drawLine(100,100,600,100,mPaint);
        //Draw multiple lines
        canvas.drawLines(new float[]{
                100,300,700,300,
                100,400,700,400},mPaint);
    }
The effect is as shown in the figure:

4. Draw rectangle
 @Override
    protected void onDraw(Canvas canvas) {
        super.onDraw(canvas);

        //Drawing rectangle method 1
        canvas.drawRect(100,100,400,400,mPaint);

        //Method 2
        Rect rect = new Rect(100,100,400,400);
        canvas.drawRect(rect,mPaint);

        //Method 3
        RectF rectF = new RectF(100,100,400,400);
        canvas.drawRect(rectF,mPaint);

    }
The system provides three methods of drawing rectangle. The difference between method 2 and method 3 is that one is double and the other is float. In fact, the effect is the same, as shown in the figure:

5. Draw a rounded rectangle
  @Override
    protected void onDraw(Canvas canvas) {
        super.onDraw(canvas);

        //The first
        RectF rectF = new RectF(100,100,800,400);
        canvas.drawRoundRect(rectF,30,30,mPaint);

        //API 2 > = 21
        canvas.drawRoundRect(100,100,800,400,30,30,mPaint);

    }
The effect is as shown in the figure:

As you can see, drawing a rounded rectangle has two more parameters than drawing a rectangle, namely rx and ry. Give a picture to illustrate: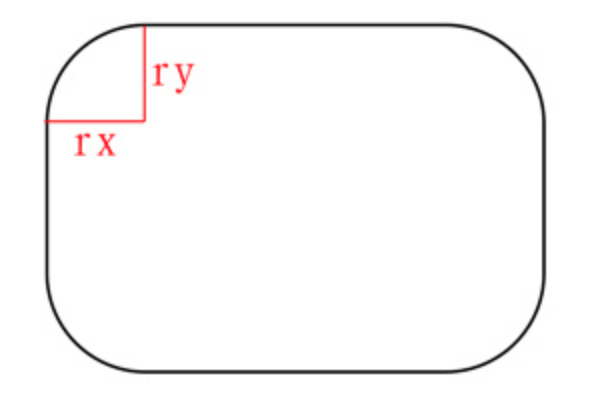
Here, the corner of the rounded rectangle is not actually an arc of a circle, but an arc of an ellipse. The two parameters here are actually two radii of an ellipse.
6. Draw ellipse
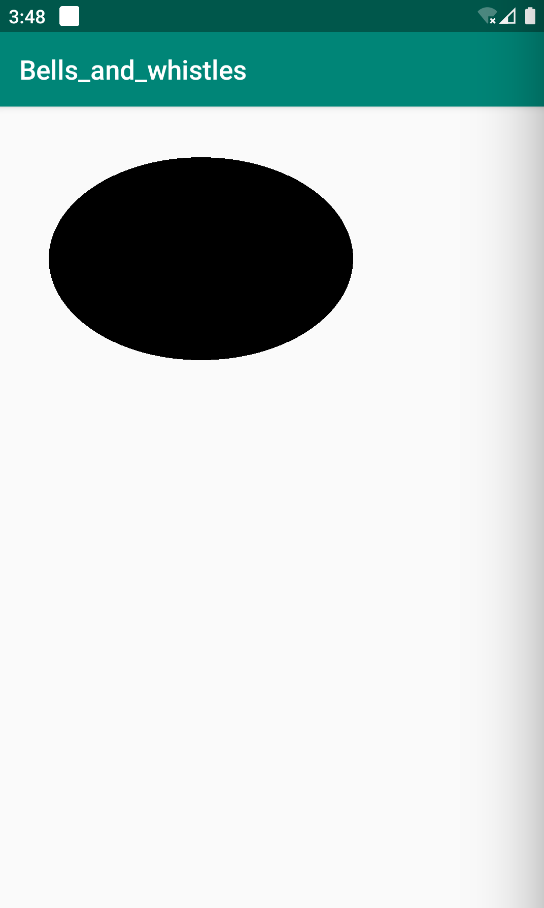
 @Override
    protected void onDraw(Canvas canvas) {
        super.onDraw(canvas);

        RectF rect = new RectF(100,100,700,500);
        canvas.drawOval(rect,mPaint);
    }
The effect is as shown in the figure:
7. Draw circle
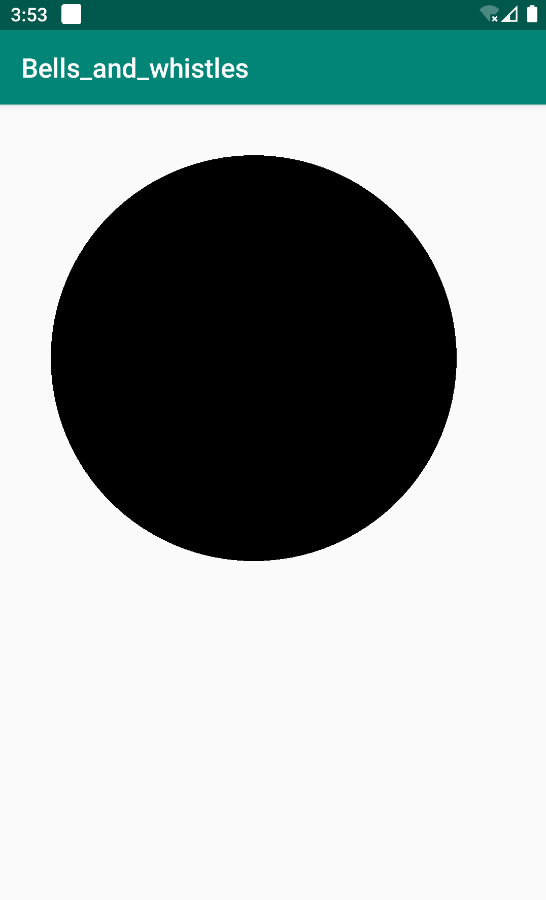
 @Override
    protected void onDraw(Canvas canvas) {
        super.onDraw(canvas);
        //(x,y, radius, brush)
        canvas.drawCircle(500,500,400,mPaint);
    }
The effect is as shown in the figure:
There are several simple ones mentioned above, and the next one is a little complicated.
8. Draw an arc
 @Override
    protected void onDraw(Canvas canvas) {
        super.onDraw(canvas);

        RectF rectF = new RectF(100,100,600,600);
        //Draw background rectangle
        mPaint.setColor(Color.GRAY);
        canvas.drawRect(rectF,mPaint);

        //Draw an arc
        mPaint.setColor(Color.BLUE);
        canvas.drawArc(rectF,0,90,false,mPaint);


        RectF rectF1 = new RectF(100,700,600,1200);
        mPaint.setColor(Color.GRAY);
        canvas.drawRect(rectF1,mPaint);

        //Draw an arc
        mPaint.setColor(Color.BLUE);
        canvas.drawArc(rectF1,0,90,true,mPaint);

}
The effect is as shown in the figure:
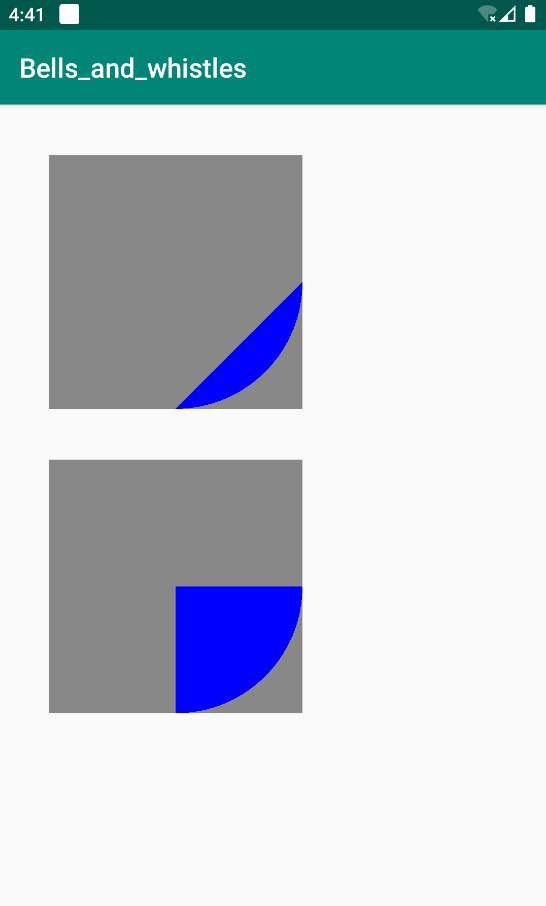
As can be seen from the above code, drawing an arc has three more parameters than drawing an ellipse:
float startAngle: the starting angle.
float sweepAngle: the angle of sweep.
boolean useCenter: whether to use the center.
The first two parameters are easy to understand. At last, you can see the above rendering. This parameter indicates whether it is connected to the center of the circle. If it is not connected to the center of the circle, it is an arc. If it is connected to the center of the circle, it is a sector.
OK, all the above are the simplest drawing methods of canvas. Here's a summary:
| explain | method |
|---|---|
| Paint color | draw(),drawRGB(),drawARGB() |
| Draw points | drawPoint() |
| draw a straight line | drawLine() |
| draw rectangle | drawRect() |
| Draw a rounded rectangle | drawRoundRect |
| Draw ellipse | drawOval() |
| Draw a circle | drawCircle() |
| Draw an arc | drawArc() |
If we want to eat more than we can chew, we will stick to "stable" word flow. First, we will learn these basic graphics. In the next article, we will introduce how to draw custom graphics, that is, how to draw irregular graphics. Let's see