Docker common installation
7.1 general steps
Search image - > pull image - > view image - > start image - > stop container - > remove container
docker search xxx` -> `docker pull xxx:TAG` -> `docker images xxx` -> `docker run [-itd -p port:port] [--name yyy] xxx:TAG` -> `docker stop container ID/yyy` -> `docker rm [-f] yyy
7.2 installing mysql
mysql5.7
docker pull mysql:5.7

docker run -p 3306:3306 --name mysql \
-v /mydata/mysql/log:/var/log/mysql \
-v /mydata/mysql/data:/var/lib/mysql \
-v /mydata/mysql/conf:/etc/mysql \
-e MYSQL_ROOT_PASSWORD=10086 \
-d mysql:5.7
Command description:
-p 12345:3306: map the 3306 port of the host to the 3306 port of the docker container.
--name mysql: running service name
-v /mydata/mysql/conf:/etc/mysql: mount the host / mydata/mysql/conf directory to the / etc/mysql directory of the container
-v /mydata/mysql/data:/var/lib/mysql: mount the host's / mydata/mysql/data directory to the container's / var/lib/mysql directory
-v /mydata/mysql/log:/var/log/mysql: mount the host's / mydata/mysql/log directory to the container's / var/log/mysql directory
-e MYSQL_ROOT_PASSWORD=10086: initialize the password of the root user.
-d mysql:5.7: the background program runs MySQL 5 seven
To connect remotely using sqlyog on windows:
Remember to turn off the host firewall or turn on port 3306
# Check the firewall information to see which ports can be accessed
firewall-cmd --list-all
# Turn off firewall
systemctl stop firewalld

# Or open 3306 port access (recommended)
firewall-cmd --permanent --zone=public --add-port=3306/tcp
systemctl restart firewalld
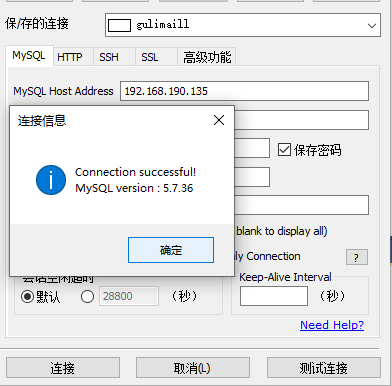
Use docker to back up the data in the mysql container
Export all databases in the docker mysql container to / mydata / mysql8 / all databases SQL file
docker exec myql Service container ID sh -c ' exec mysqldump --all-databases -uroot -p"10086" ' > /mydata/mysql8/all-databases.sql

# If UTF-16 encoding is used, replace >
docker exec myql Service container ID sh -c ' exec mysqldump --all-databases -uroot -p"10086" ' --result-file=/mydata/mysql8/all-databases.sql
mysql dump is a logical backup tool that comes with mysql. Command format: Official website mysqldump
mysqldump [option] Database name [Table name] > /route/filename.sql
mysqldump [option] --Database name [Option table name] > /route/filename.sql
mysqldump [option] --all-databases [option] > /route/filename.sql
Description of common options:
| Parameter name | abbreviation | meaning |
|---|---|---|
| --host | -h | Server IP address |
| --port | -P | Server port number |
| --user | -u | mysql user name |
| --password | -p | mysql password |
| --database | Specify the database to back up | |
| --all-databases | Back up all databases on mysql | |
| --compact | Compression mode produces less output | |
| --comments | Add comment information |
7.3 installing redis
docker pull redis

docker run -p 6379:6379 -v /mydata/redis/data:/data -v /mydata/redis/conf/redis.conf:/usr/local/etc/redis/redis.conf  -d redis redis-server /usr/local/etc/redis/redis.conf --appendonly yes
--appendonly yes means AOF is used for persistence (redis uses rdb for persistence by default)
redis. Conf is a folder, not a file (whisper BB: is this redis.conf folder too ambiguous? And when redis server starts, isn't the string followed by the specified configuration file path? It's reasonable that redis.conf should be a configuration file);
On the host / mydata / redis / conf / redis Create a new redis.conf directory Conf file
vim /mydata/redis/conf/redis.conf 📎redis.conf.txt
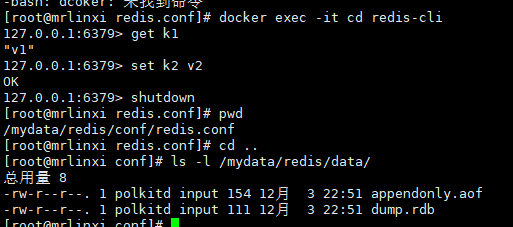
Test redis cli connection: docker exec -it redis container ID redis cli

Test generation persistent file:
8, Publish local images to alicloud
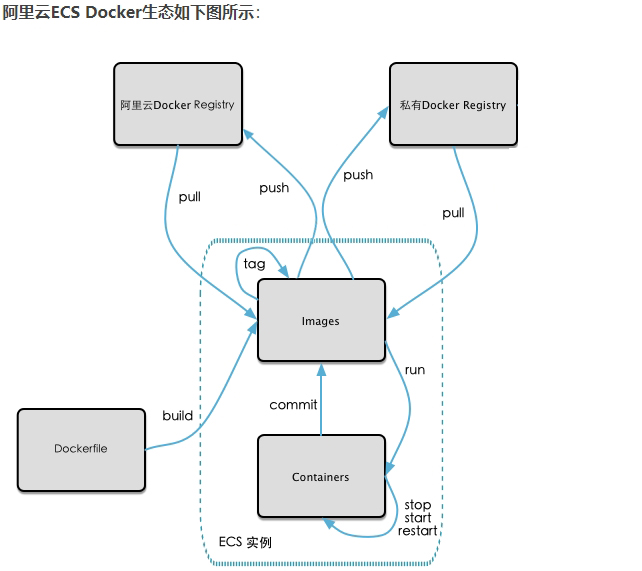
8.1 image generation method
-
DockerFile mentioned earlier
-
Create a new image from the container: docker commit [OPTIONS] container ID [REPOSITORY[:TAG]]
-
- OPTIONS option Description: - a: the author of the submitted image, - m: the description text at the time of submission
We previously made a centos containing vim and ifconfig - mycentos:0.1. Now we update it to 0.2 and generate a 0.2 image.
Let's see if mycentos:0.1 has a container docker ps -a. if not, create a container, docker run -itd mycentos:0.1.
docker commit -a mrlinxi -m "new contos 0.2 from 0.1" container ID mycentos:0.2
In this way, the image of mycentos:0.2 is obtained

8.2 push local images to alicloud
Log in to alicloud and enter the console

From the menu in the upper left corner, click search container image service:
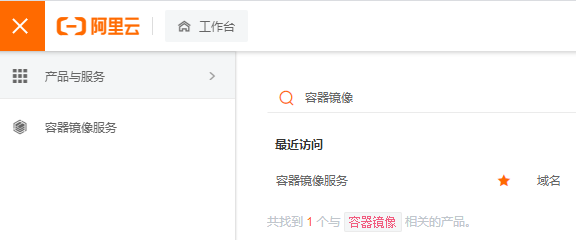
Instance list - > individuals / enterprises (asking for money) do not need to create an instance. To create an instance, you need to set a repository password
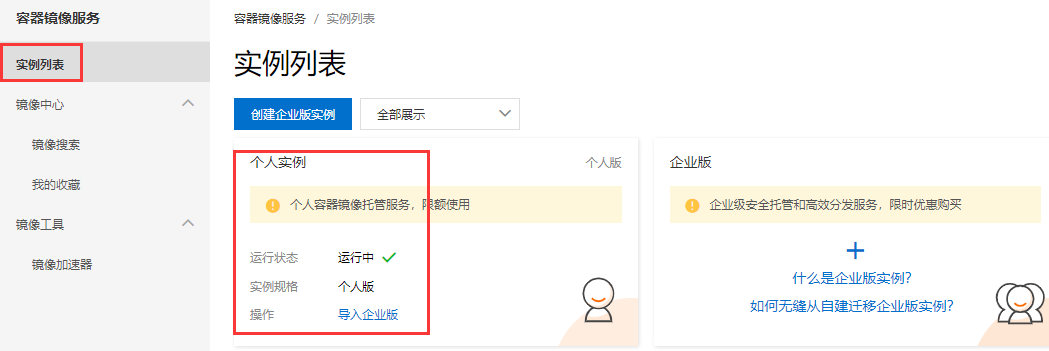
Then create a mirror warehouse
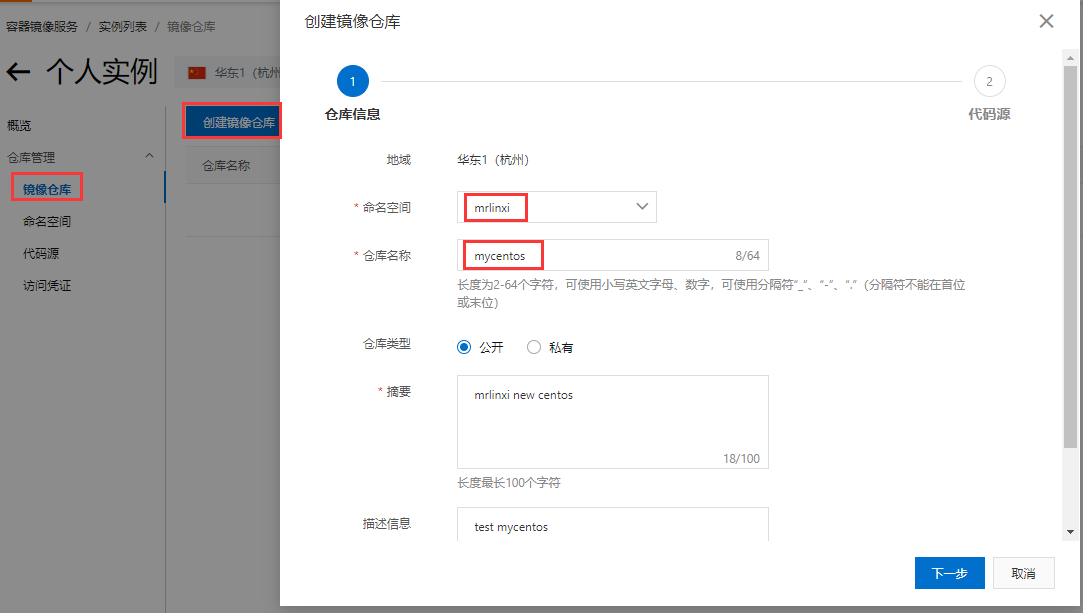
Next, select local warehouse creation:
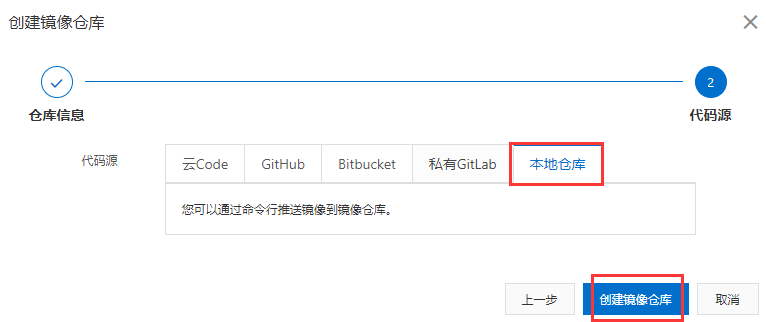
After the warehouse is created, there will be corresponding operation instructions:

# To log in to the warehouse for the first time, you need to enter the warehouse password we set before
docker login --username=Alibaba cloud account registry.cn-hangzhou.aliyuncs.com

docker tag [ImageId] registry.cn-hangzhou.aliyuncs.com/mrlinxi/mycentos:[Mirror version number]
docker push registry.cn-hangzhou.aliyuncs.com/mrlinxi/mycentos:[Mirror version number]


After submission, there will also be a submitted image locally.

We try to pull the image we just push ed from alicloud.
# Delete locally committed images
docker rmi -f registry.cn-hangzhou.aliyuncs.com/mrlinxi/mycentos:0.2.1

dokcer pull registry.cn-hangzhou.aliyuncs.com/mrlinxi/mycentos:0.2.1
