Spring's native ways of defining beans can be divided into two categories and six, and we often use only three of one of them.
This is a bit like a Transaction in Spring. We are only familiar with its declarative writing - @ Transaction. We are not familiar with the programmatic writing. Maybe you will say, yes, but it is not necessary. I don't comment here.
Spring defines beans in two ways: declarative and programmatic. As the name suggests, declarative expressions can be understood as using a tag to identify relevant information, and the bottom layer of the code will parse these identifiers; Programming focuses more on using the form of code to deal with relevant logic. The former is more user-friendly and the latter is more underlying.
1, Declarative
1. < \ bean > tag
If we start the Spring container as an xml configuration file, we can use the bean tag to define a bean in the xml configuration file
1) Entity class:
public class MoBian3XML {
}
2)spring-test.xml:
<?xml version="1.0" encoding="UTF-8"?>
<beans xmlns="http://www.springframework.org/schema/beans"
	   xmlns:xsi="http://www.w3.org/2001/XMLSchema-instance"
	   xmlns:context="http://www.springframework.org/schema/context"
	   xsi:schemaLocation="http://www.springframework.org/schema/beans http://www.springframework.org/schema/beans/spring-beans.xsd http://www.springframework.org/schema/context https://www.springframework.org/schema/context/spring-context.xsd">

	<bean id="mobian3" class="pers.mobian.springseventh.MoBian3XML">

</beans>
3) Spring container startup:
public class MainTestXML1 {
	public static void main(String[] args) {

		ClassPathXmlApplicationContext context = new ClassPathXmlApplicationContext("spring-test.xml");
		System.out.println(context.getBean("mobian3"));
	}
}
2. @ Bean annotation
In the configuration class, use the @ Bean annotation.
The @ Configuration annotation should be used on the class. Of course, you don't have to. We just want the Configuration class to have a unique identifier belonging to it
1) Configuration class:
@Configuration
public class Config {

	@Bean(name = "mobian666")
	public MoBian moBian(){
		return new MoBian();
	}
}
2) Spring container startup:
public class MainTest4 {
   public static void main(String[] args) {

      AnnotationConfigApplicationContext context = new AnnotationConfigApplicationContext(Config.class);
      System.out.println(context.getBean("mobian666"));
   }
}
3. @ Component annotation
Different from the scope of < Bean > tags and @ Bean annotations, this method can inject beans into Spring in batches, which are mostly used for classes under controller and service packages. The former is more used for customization of single entity classes.
1) Profile configuration:
1. If the xml file is started, configure it in the xml file
<context:component-scan base-package="pers.mobian.firstTest"/>
2. If it is configured in the configuration class
@Configuration
@ComponentScan("pers.mobian.firstTest")
public class ContextConfig {
}
2) At this time, you need to annotate the class with @ Component and its annotations of the same type (@ Controller, @ Service, @ Repository), so that the class can be injected into the Spring container in the form of Bean.
@Component
public class Car {
}
3) Spring container startup:
public class MoBianTestScan {
   public static void main(String[] args) {

       // Get in the form of configuration file
      AnnotationConfigApplicationContext context = new AnnotationConfigApplicationContext(Config.class);
      System.out.println(context.getBean("car"));

       // Get in the form of xml file
      ClassPathXmlApplicationContext context = new ClassPathXmlApplicationContext("spring-test.xml");
      System.out.println(context.getBean("car"));
   }
}
2, Programming
4. BeanDefinition interface
1) Spring container startup:
public class MainTest1 {
	public static void main(String[] args) {

		AnnotationConfigApplicationContext context = new AnnotationConfigApplicationContext();

        // Create a beanDefinition and set the bean type of the corresponding beanDefinition object
		AbstractBeanDefinition beanDefinition = BeanDefinitionBuilder.genericBeanDefinition().getBeanDefinition();
		beanDefinition.setBeanClass(MoBian.class);

        // Register beanDefinition in the Spring container and set the name of the corresponding Bean
		context.registerBeanDefinition("mobian",beanDefinition);
		context.refresh();

		System.out.println(context.getBean("mobian"));
	}
}
This method can be started without any configuration files. When we configure beans in a declarative way, the underlying layer is configured in this way
5. FactoryBean interface
1) Create a required class:
public class Car {
}
2) Classes implementing FactoryBean interface:
Implement FactoryBean interface and override getObject and getObjectType methods
public class MoBian2 implements FactoryBean {
	@Override
	public Object getObject() throws Exception {
		return new Car();
	}

	@Override
	public Class<?> getObjectType() {
		return Car.class;
	}
}
3) Spring container startup:
public class MainTest3 {
	public static void main(String[] args) {

		AnnotationConfigApplicationContext context = new AnnotationConfigApplicationContext();

		// Here we still define beans programmatically, that is, the fourth way
        // Of course, the Bean can also be defined declaratively here
		AbstractBeanDefinition definition = BeanDefinitionBuilder.genericBeanDefinition().getBeanDefinition();
		definition.setBeanClass(MoBian2.class);
		context.registerBeanDefinition("mobian",definition);


		context.refresh();
		// Gets the object returned by the getObject method
		System.out.println(context.getBean("mobian"));

		// Gets the name of the beanDefinition registered to the Spring container
		System.out.println(context.getBean("&mobian"));
	}
}
Using this method, two Bean objects will be generated, one is generated by the class corresponding to the returned object in the getObject method, and the other is generated by the class that implements the FactoryBean interface. The Bean registered in the Spring container is generated by the class that implements the FactoryBean interface, but when we obtain the Bean of the class that implements the FactoryBean interface, we need to use & + the name when registering the BeanDefinition, and the object returned by the getObject method is obtained by using the name used when registering the BeanDefinition.
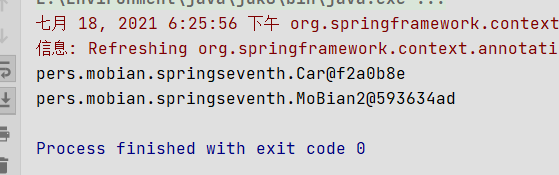
Test results of the above example:
6. Supplier interface
1) Spring container startup:
public class MainTest2 {
   public static void main(String[] args) {

      AnnotationConfigApplicationContext context = new AnnotationConfigApplicationContext();
      context.registerBean(MoBian.class, new Supplier<MoBian>() {
         @Override
         public MoBian get() {

            return new MoBian();
         }
      });

      context.refresh();
      System.out.println(context.getBean("moBian"));
   }
}
Directly register the Bean of the corresponding type into the Spring container, and the subsequent parameter is a functional interface (that is, this method is not supported until jdk1.8). Directly rewrite its get method to complete the definition of the Bean in the Spring container.