1. Preface
As mentioned in the previous article, wechat will send user messages to the server designated by us (developers).
Therefore, we need to fill in our server information through wechat public platform so that wechat can forward messages to us.
In addition, wechat will also verify whether the server information we fill in is correct and valid.
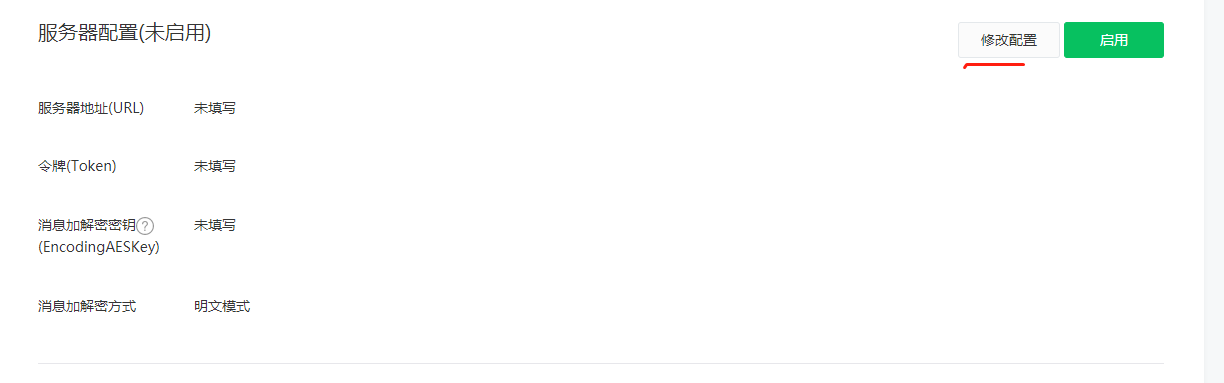
2. Fill in the server configuration
Log in to wechat public platform, click settings and development - basic configuration, and click Modify configuration, as shown in the following figure:
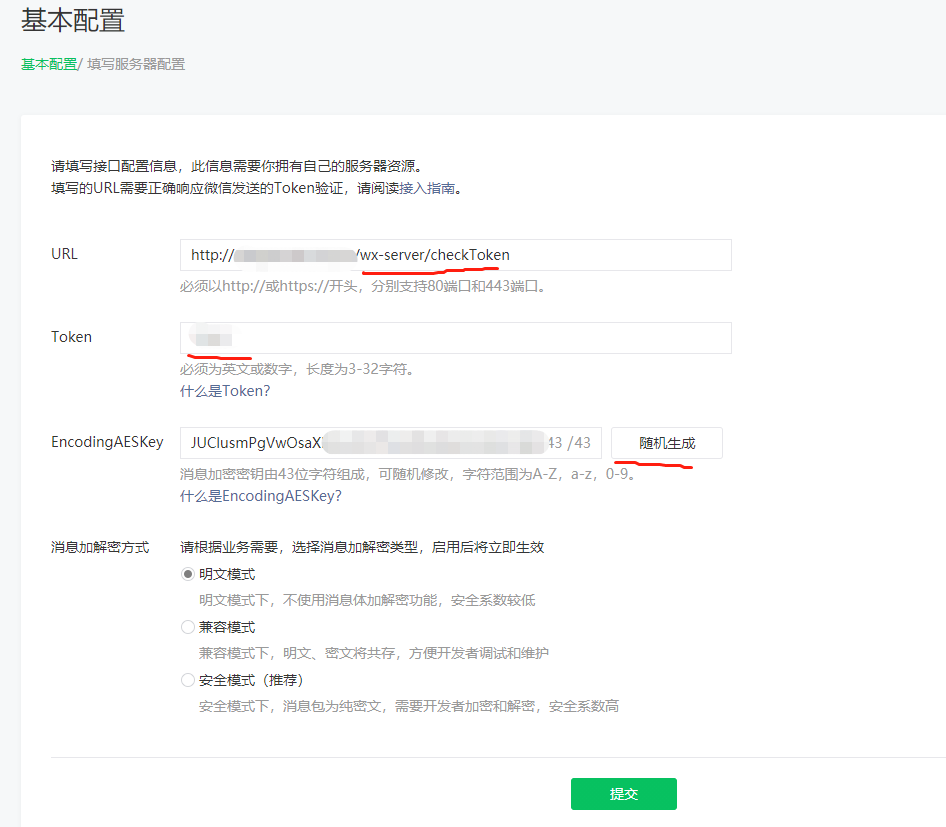
Then fill in the following information in turn. Note that one Token can be set by yourself. Encoding aeskey can generate one randomly. For convenience, select the plaintext mode first.
The most important is the URL. We use the previously selected public domain name (or IP). The Wx server and checkToken in the back represent the project name and interface address receiving the authentication message respectively.
3. Verify effectiveness
At this time, if we click Submit, wechat will remind us [request URL timeout], because wechat will call the interface corresponding to the URL to verify whether the server we configured is valid, that is, whether it can respond to the messages sent by wechat normally.

3.1 construction project
Next, we create the Wx server project. We use Maven to quickly build a Spring Boot project. The pom.xml configuration is as follows.
Note that we have used web and lombok configurations. Students who don't know about Spring Boot and lombok still need to learn about them first.
<project xmlns="http://maven.apache.org/POM/4.0.0"
	xmlns:xsi="http://www.w3.org/2001/XMLSchema-instance"
	xsi:schemaLocation="http://maven.apache.org/POM/4.0.0 https://maven.apache.org/xsd/maven-4.0.0.xsd">
	<modelVersion>4.0.0</modelVersion>
	<parent>
		<groupId>org.springframework.boot</groupId>
		<artifactId>spring-boot-starter-parent</artifactId>
		<version>2.2.5.RELEASE</version>
		<relativePath /> <!-- lookup parent from repository -->
	</parent>
	<groupId>cn.pandabrother</groupId>
	<artifactId>wx-server</artifactId>
	<version>0.0.1-SNAPSHOT</version>
	<packaging>war</packaging>
	<properties>
		<project.build.sourceEncoding>UTF-8</project.build.sourceEncoding>
		<project.reporting.outputEncoding>UTF-8</project.reporting.outputEncoding>
		<java.version>1.8</java.version>
		<maven-jar-plugin.version>3.0.0</maven-jar-plugin.version>
	</properties>
	<dependencies>
		<dependency>
			<groupId>org.springframework.boot</groupId>
			<artifactId>spring-boot-starter-web</artifactId>
		</dependency>
		<dependency>
			<groupId>org.projectlombok</groupId>
			<artifactId>lombok</artifactId>
		</dependency>
	</dependencies>
	<build>
		<plugins>
			<plugin>
				<groupId>org.springframework.boot</groupId>
				<artifactId>spring-boot-maven-plugin</artifactId>
			</plugin>
		</plugins>
	</build>
</project>
3.2 accept wechat verification message
Next, develop the controller to accept the messages sent by wechat:
@Controller
public class CheckController {
	@RequestMapping("/checkToken")
	@ResponseBody
	public String checkToken(@RequestParam("echostr") String echostr) {
		return echostr;
	}
}
According to the official requirements of wechat: the developer verifies the request by verifying the signature (the verification method is shown below). If it is confirmed that the GET request is from the wechat server, please return the content of the echostr parameter as it is. Then the access will take effect and become a developer successfully. Otherwise, the access fails. We directly return echostr here to indicate that the verification is successful.
Then, in order to start the project normally, configure application.yml:
server:
   port: 80 #port
   servlet:
      context-path: /wx-server
And add a startup class:
@SpringBootApplication
public class WxServerApplication {
	public static void main(String[] args) {
		SpringApplication.run(WxServerApplication.class, args);
	}
}
3.3 submission verification
Start wxserver application. At this time, our project will listen to port 80. The listening address is / Wx server / checktoken.
At this time, click the submit button on the basic configuration page. Because our program can correctly return the required echostr, this submission is successful, and the server configuration we filled in has passed the verification.
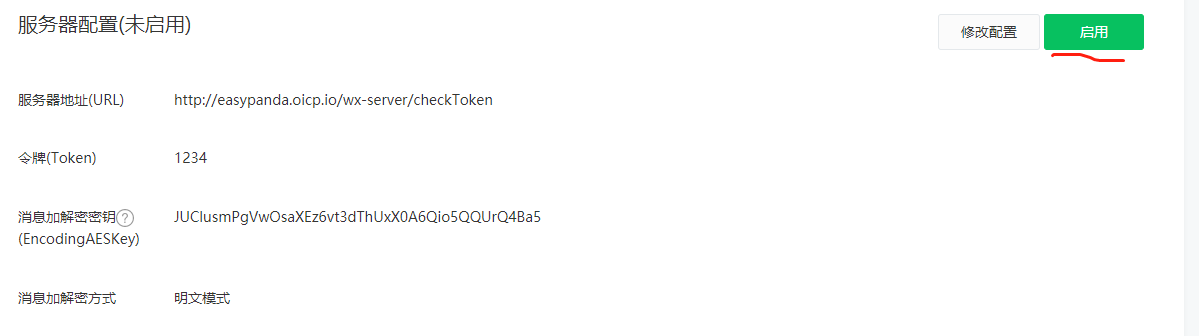
3.4 enable server configuration
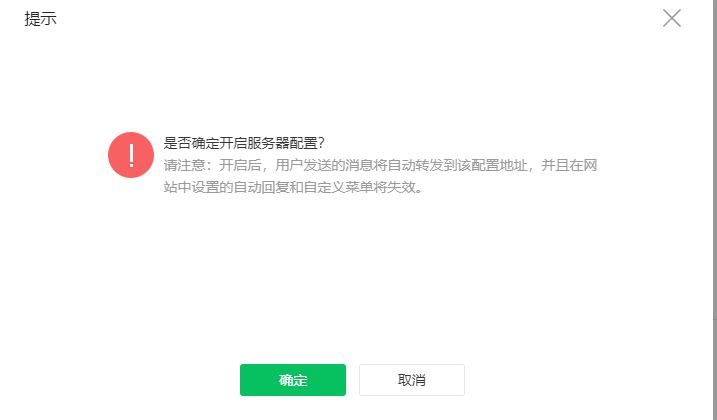
After the server configuration is in effect, it will need to be enabled. Click on the above system to show the following system. That is to say, WeChat will send the message to the official account automatically and then send it to our configured server URL.
Click OK here to enable it.
4. Summary
So far, our server has been established with WeChat. In addition, we have built a SpringBoot project to further develop the functions of WeChat official account.