Complete static resources
First find this class: webmvcoautoconfiguration. In this jar package, it is still auto configuration

There is an addResourceHandlers method in webmvcoautoconfiguration, which is used to automatically configure the static resource directory.
public void addResourceHandlers(ResourceHandlerRegistry registry) {
            if (!this.resourceProperties.isAddMappings()) {
                logger.debug("Default resource handling disabled");
            } else {
                this.addResourceHandler(registry, "/webjars/**", "classpath:/META-INF/resources/webjars/");
                this.addResourceHandler(registry, this.mvcProperties.getStaticPathPattern(), (registration) -> {
                    registration.addResourceLocations(this.resourceProperties.getStaticLocations());
                    if (this.servletContext != null) {
                        ServletContextResource resource = new ServletContextResource(this.servletContext, "/");
                        registration.addResourceLocations(new Resource[]{resource});
                    }

                });
            }
        }
Look at this first:
if (!this.resourceProperties.isAddMappings()) {
   logger.debug("Default resource handling disabled");
}
If isAddMappings is false, the print default resource mapping path is invalid. The isAddMappings method actually returns an addMappings variable (in web properties)
addMappings means running to access static resources. If you set it to false, you disable all static resource mappings.
When the webmaster wrote this tutorial, he used SpringBoot version 2.5.1, which is the latest version at present. It is found that compared with the previous version, the changes are still great. It's troublesome to turn the source code, so I'll just tell you the conclusion.
The default static resource directory is:
new String[]{"classpath:/META-INF/resources/", "classpath:/resources/", "classpath:/static/", "classpath:/public/"};
This is the same as before. Test it
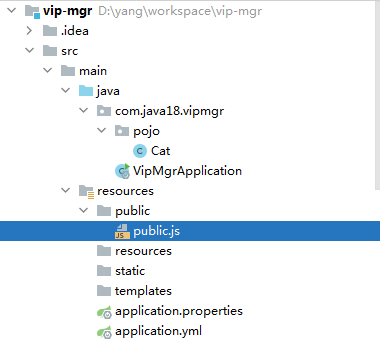
Which path can return public.js?
In WebMvcProperties, there is a staticPathPattern property.
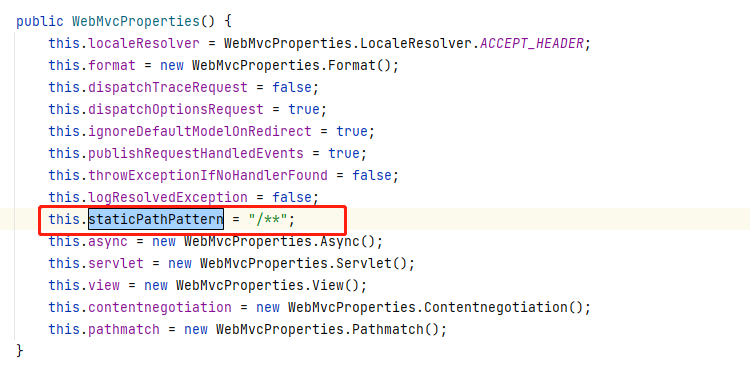
The default is / * *, so whatever you access can be accepted by the static resource processor.
Start project, access http://localhost:8888/public.js
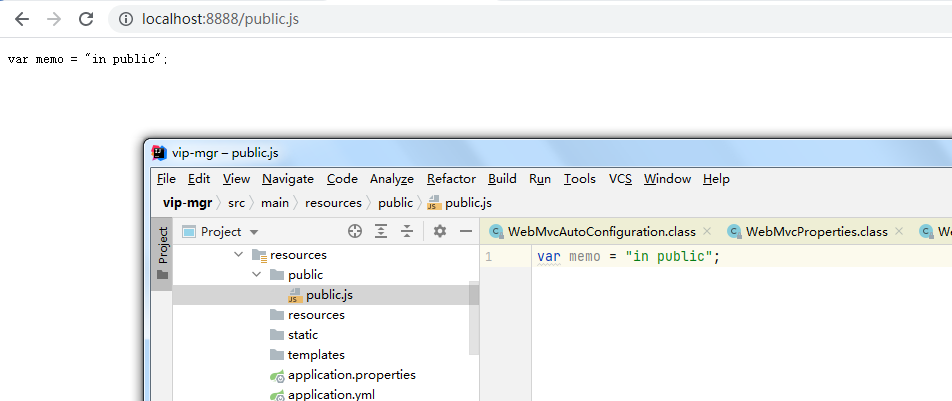
Successful access, now we manually add a static directory.
spring:
  profiles: test
  resources:
    static-locations: [classpath:/my/]

visit http://localhost:8888/my.txt , also succeeded.
Finally, you can turn off the static resource switch.
spring:
  profiles: test
  resources:
    static-locations: [classpath:/my/]
    add-mappings: false
In this way, you can't access any static resources, but generally speaking, you don't have to close it.
On static locations
Static locations indicates a custom static directory. If this property is configured, the default static resource directory will become invalid!
You can also use this configuration to access local resources
spring:
  profiles: test
  resources:
    static-locations: file:C:/upload/article/
    add-mappings: true
File: indicates access to a local file.
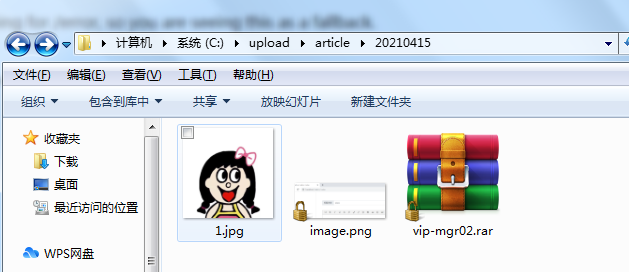
For example, I'm going to visit 1.jpg now
Restart project, access http://localhost:8888/20210415/1.jpg , can be accessed successfully.
However, other static resources cannot be accessed. Because we set static locations, which is an overwrite operation, the default directory is gone.
For accessing such local files, the directories for file upload and download are generally placed on the local disk and will not be bound to the project.
What if we want to get the original directory and access local files? At this time, do not configure static locations. We can configure an additional resource mapping.

Note that under normal circumstances, the default resource mapping is more than enough. Aren't so many folders enough for you to put resources...
(Note: the resources in the figure above should also be commented out, otherwise an error will be reported.)
Then, create a new configuration class.
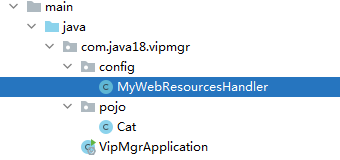
package com.java18.vipmgr.config;

import org.springframework.context.annotation.Configuration;
import org.springframework.web.servlet.config.annotation.ResourceHandlerRegistry;
import org.springframework.web.servlet.config.annotation.WebMvcConfigurer;

@Configuration
public class MyWebResourcesHandler implements WebMvcConfigurer {
    @Override
    public void addResourceHandlers(ResourceHandlerRegistry registry) {
        registry.addResourceHandler("/upload/**")
                .addResourceLocations("file:C:/upload/article/");
    }
}
Restart, access http://localhost:8888/upload/20210415/1.jpg You can see the picture, and it will not affect the original resource directory. This is the recommended practice in the project.
Spring boot integrates JDBC
Add jdbc dependency:
<dependency>
    <groupId>org.springframework.boot</groupId>
    <artifactId>spring-boot-starter-jdbc</artifactId>
</dependency>
mysql dependencies are inherently:
<dependency>
    <groupId>mysql</groupId>
    <artifactId>mysql-connector-java</artifactId>
    <scope>runtime</scope>
</dependency>
Modify yml configuration:
spring:
  profiles: test
  #resources:
    #static-locations: file:C:/upload/article/
    #add-mappings: true

  #Configure data sources
  datasource:
    driver-class-name: com.mysql.cj.jdbc.Driver
    url: jdbc:mysql://localhost:3306/idea?useUnicode=true&characterEncoding=utf-8&serverTimezone=UTC
    username: root
    password:
By default, the driver package of mysql8.x is used. Pay attention to adding the time zone to the url, otherwise an error will be reported.
Test whether the data source is loaded successfully:
@SpringBootTest
class DataTests {

    @Autowired
    DataSource dataSource;

    @Test
    void dataSource() {
        System.out.println(dataSource.getClass());
    }

}
Print: class com.zaxxer.hikari.HikariDataSource
This is the default data source for springboot.
Test sql statement query
@Test
void dataSource() {
    //System.out.println(dataSource.getClass());
    List<Map<String, Object>> users = jdbcTemplate.queryForList("select * from users");
    System.out.println(users);
}
Result: [{id=1, username=zhangsan, password=123, points=1000}]
Database:

infer other things from one fact:
1. Why can JDBC template be used directly?

Because SpringBoot has automatic configuration, the conditions are:
@ConditionalOnClass({DataSource.class, JdbcTemplate.class})
@ConditionalOnSingleCandidate(DataSource.class)
The DataSource has been configured, and the JdbcTemplate must also have spring boot starter JDBC. So it is configured automatically.
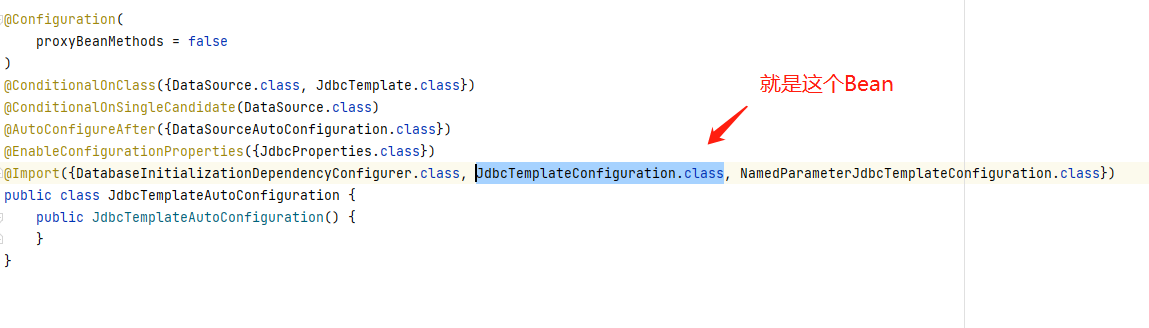
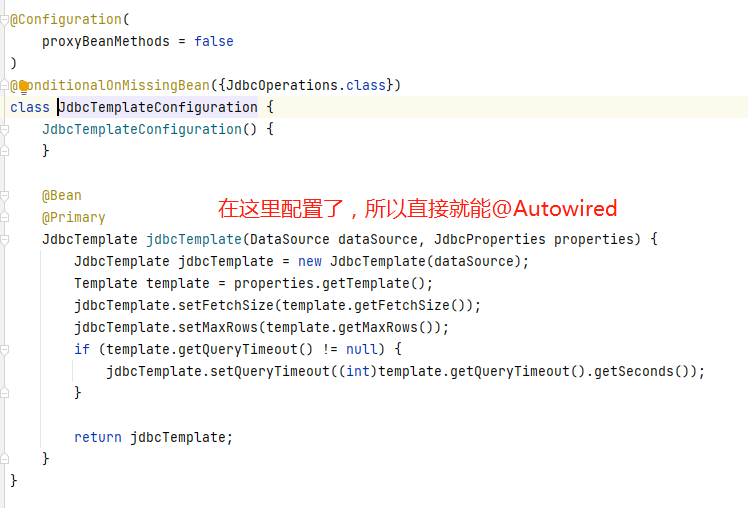
Take another look at the JdbcTemplateConfiguration:
Consolidate Druid data sources
First of all, help you clarify several concepts. What is a data source?
A data source is a connection pool. What is a connection pool?
We write jdbc code normally. Don't we want to get the connection and close the connection after using it. One on and one off, does it affect the performance!
In that case, why don't we generate 20 jdbc connections at the beginning? If you want to use it, I'll give you one. Isn't it beautiful for you to return it after you use it!
druid is a set of connection pool code encapsulated by Alibaba for jdbc. To put it bluntly, it is a jar package with some classes.
So:
**Druid data source**
=A jar package
=A dependency
Well, after understanding these concepts, we begin to integrate Druid data sources.
<dependency>
    <groupId>com.alibaba</groupId>
    <artifactId>druid</artifactId>
    <version>1.1.18</version>
</dependency>
Note that each time you import a new dependency, you must right-click the project, maven, reload, and some idea s are reimport.
Then, modify the default data source configuration in the application.yml configuration file.
#Configure data sources
  datasource:
    driver-class-name: com.mysql.cj.jdbc.Driver
    url: jdbc:mysql://localhost:3306/idea?useUnicode=true&characterEncoding=utf-8&serverTimezone=UTC
    username: root
    password:
    type: com.alibaba.druid.pool.DruidDataSource
Is to add a type attribute. If not, the default data source is used.
druid also has some other configurations, which are directly pasted on it. It is the same level as type.
initialSize: 5
minIdle: 5
maxActive: 20
maxWait: 60000
timeBetweenEvictionRunsMillis: 60000
minEvictableIdleTimeMillis: 300000
validationQuery: SELECT 1 FROM DUAL
testWhileIdle: true
testOnBorrow: false
testOnReturn: false
poolPreparedStatements: true
#   Configure the filters for monitoring statistics interception. After removal, the sql in the monitoring interface cannot be counted, 'wall' is used for firewall
filters: stat,wall,log4j
maxPoolPreparedStatementPerConnectionSize: 20
useGlobalDataSourceStat: true
connectionProperties: druid.stat.mergeSql=true;druid.stat.slowSqlMillis=500
Key: write configuration classes and enable sql monitoring
package com.java18.vipmgr.config;
import com.alibaba.druid.pool.DruidDataSource;
import com.alibaba.druid.support.http.StatViewServlet;
import com.alibaba.druid.support.http.WebStatFilter;
import org.springframework.boot.context.properties.ConfigurationProperties;
import org.springframework.boot.web.servlet.FilterRegistrationBean;
import org.springframework.boot.web.servlet.ServletRegistrationBean;
import org.springframework.context.annotation.Bean;
import org.springframework.context.annotation.Configuration;

import javax.sql.DataSource;
import java.util.Arrays;
import java.util.HashMap;
import java.util.Map;

@Configuration
public class DruidConfig {

    /**
     * Assemble the Druid object in the way of ConfigurationProperties
     * @return
     */
    @ConfigurationProperties(prefix = "spring.datasource")
    @Bean
    public DataSource druid(){
        return  new DruidDataSource();
    }

    //Configure Druid monitoring
    //In fact, it is equivalent to configuring a Servlet to manage the background in web.xml
    //After this Servlet is enabled, you can access the background page, and the mapping address is / druid/*
    @Bean
    public ServletRegistrationBean statViewServlet(){
        /**
         * Druid The built-in provides a StatViewServlet to display Druid statistics.
         * The purposes of this StatViewServlet include:
         * Provide html page for monitoring information display
         * JSON API that provides monitoring information
         */
        ServletRegistrationBean bean = new ServletRegistrationBean(new StatViewServlet(), "/druid/*");
        Map<String,String> initParams = new HashMap<>();
        //Here is the account and password of the configuration administrator. Just write it dead
        initParams.put("loginUsername","admin");
        initParams.put("loginPassword","123456");
        initParams.put("allow","");//The default is to allow all access
        initParams.put("deny","192.168.x.x"); //This is the default to disable access to an IP

        bean.setInitParameters(initParams);
        return bean;
    }

    //2. Configure a web monitoring filter
    @Bean
    public FilterRegistrationBean webStatFilter(){
        FilterRegistrationBean bean = new FilterRegistrationBean();
        bean.setFilter(new WebStatFilter());

        Map<String,String> initParams = new HashMap<>();
        initParams.put("exclusions","*.js,*.css,/druid/*");

        bean.setInitParameters(initParams);

        bean.setUrlPatterns(Arrays.asList("/*"));

        return  bean;
    }
}
To facilitate testing, we add a Controller
package com.java18.vipmgr.controller;

import org.springframework.beans.factory.annotation.Autowired;
import org.springframework.jdbc.core.JdbcTemplate;
import org.springframework.web.bind.annotation.GetMapping;
import org.springframework.web.bind.annotation.RequestMapping;
import org.springframework.web.bind.annotation.RestController;

import java.util.List;
import java.util.Map;

@RestController
@RequestMapping("user")
public class UserController {
    @Autowired
    JdbcTemplate jdbcTemplate;

    @GetMapping("getAll")
    public List<Map<String,Object>> getAll(){
        return jdbcTemplate.queryForList("select * from users");
    }
}
Note that there is a small pit here. Because we use the druid monitoring function, the log will be printed by default, so log4j needs to be introduced.
<dependency>
    <groupId>log4j</groupId>
    <artifactId>log4j</artifactId>
    <version>1.2.17</version>
</dependency>
Start project, access http://localhost:8888/user/getAll , you can query data. Then visit http://localhost:8888/druid
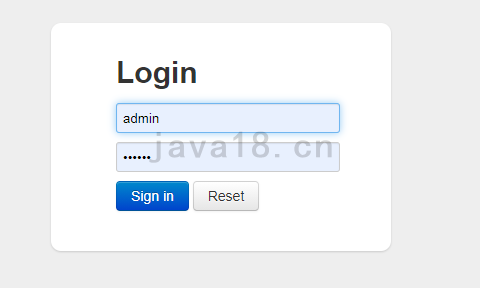
Enter the account and password to enter the monitoring page
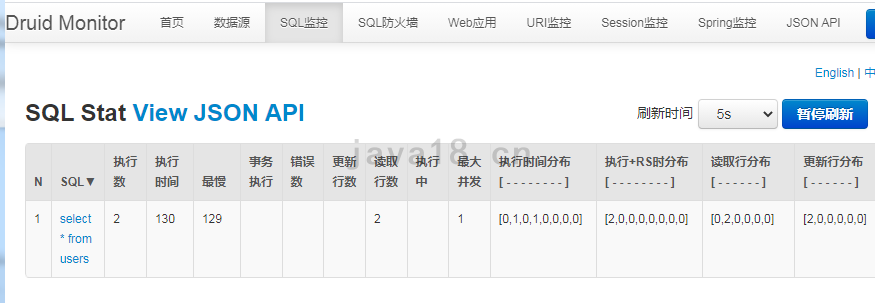
You can view the operation of each sql, which is why Druid is used.
I am Xiaobai, a salted fish with a dream. If you have any questions, please leave a message in the comment area and I will reply.