First mybatis program --> Configure mybatis (super-detailed, white can also be successfully configured)
The purpose of this article is: Recently I was watching a mad video to learn mybatis, but there are still some minor errors in the video configuration that caused me to spend a lot of time looking for bug s. Take a note here and wish you all a pleasant study. This article is very detailed and suitable for small white food. Big man skip it _
Idea flow: Set up environment -> Import Mybatis -> Write code -> Test
The purpose of this program is to query database information using mybatis.
Resources covered in this article (click directly):
Crazy Teaching Video Web Site
Video corresponding document web address
Official Documents
Start Configuration
1. Set up environment
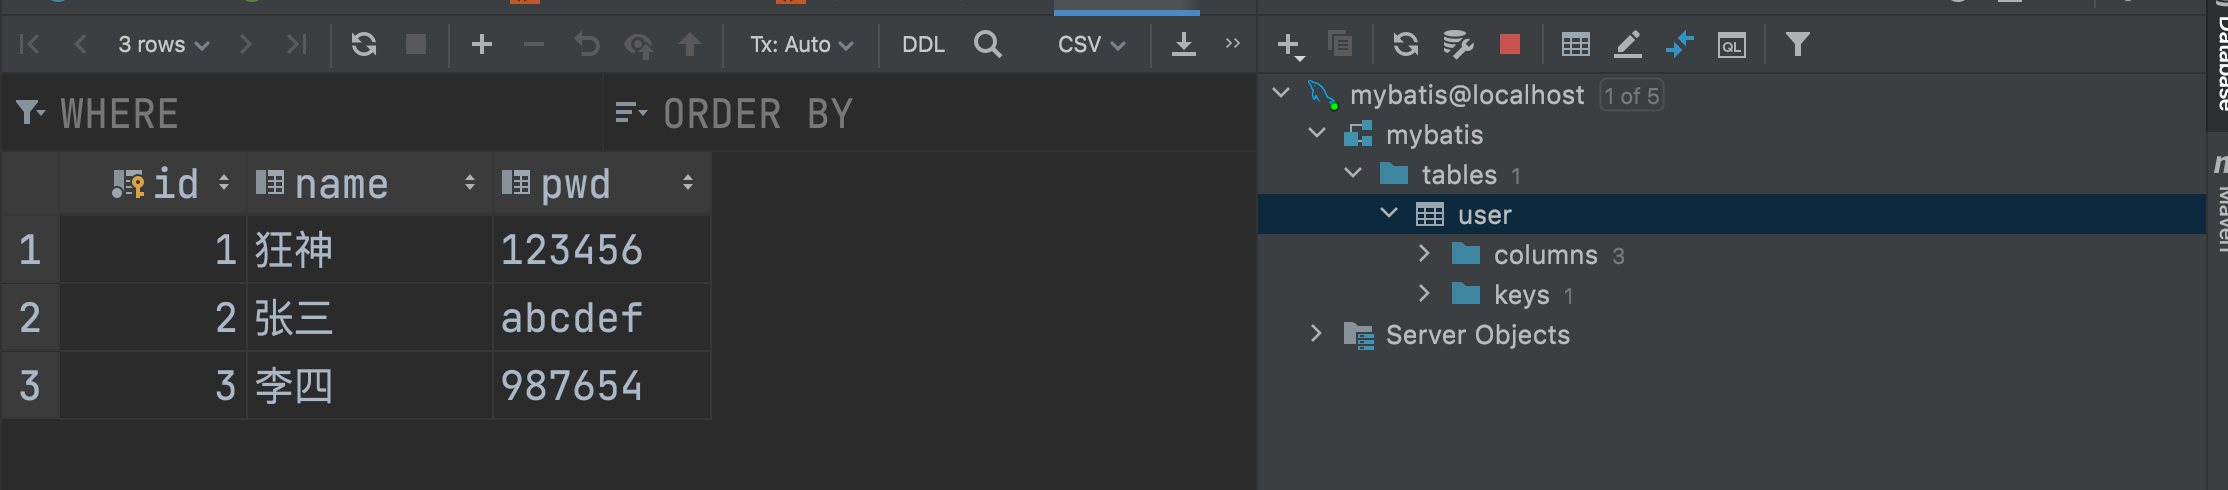
1.1. Set up the experimental database (Create a table and add data in mysqlworkbench software, you can use any software, as long as the table is built and the data is added.)
--"CREATE DATABASE`mybatis`"Use only the first time you create a database.
--Then you don't have to write this sentence if you build tables in the database.
CREATE DATABASE `mybatis`;

USE `mybatis`;

DROP TABLE IF EXISTS `user`;

CREATE TABLE `user` (
`id` int(20) NOT NULL,
`name` varchar(30) DEFAULT NULL,
`pwd` varchar(30) DEFAULT NULL,
PRIMARY KEY (`id`)
) ENGINE=InnoDB DEFAULT CHARSET=utf8;

insert  into `user`(`id`,`name`,`pwd`) values (1,'Crazy','123456'),(2,'Zhang San','abcdef'),(3,'Li Si','987654');
MySqlWorkbench runs as follows:

1.2. Create a new Maven project in IDEA --> Delete src directory --> Import Maven dependencies
(1)
(2)

(3) Add code to the pom.xml file (after the properties tag).
Note: When importing a database that depends on it, the version number of the database must match the version of the database you are using.
<!--Import Dependency-->
<dependencies>
    <dependency>
        <groupId>org.mybatis</groupId>
        <artifactId>mybatis</artifactId>
        <version>3.5.2</version>
    </dependency>
    <dependency>
        <groupId>mysql</groupId>
        <artifactId>mysql-connector-java</artifactId>
		<!--Be sure to add the corresponding version number of the database you are using-->
        <version>8.0.20</version>
    </dependency>
    <!-- junit Dependent Add-->
    <dependency>
        <groupId>junit</groupId>
        <artifactId>junit</artifactId>
        <version>RELEASE</version>
        <scope>maim</scope>
    </dependency>
</dependencies>

<!--When error occurs target No loaded configuration files are visible below the folder and dependencies need to be added-->
<build>
    <resources>
        <resource>
            <directory>src/main/java</directory>
            <includes>
                <include>**/*.properties</include>
                <include>**/*.xml</include>
            </includes>
            <filtering>false</filtering>
        </resource>
        <resource>
            <directory>src/main/resources</directory>
            <includes>
                <include>**/*.properties</include>
                <include>**/*.xml</include>
            </includes>
            <filtering>false</filtering>
        </resource>
    </resources>
</build>
2. Import MyBatis
2.1 Connect to the previously written database in IDEA.
Note: Your IDEA must be a professional side bar to have a Database. The Community Edition suggests going to the next professional edition on the official website (student certification is free to use).
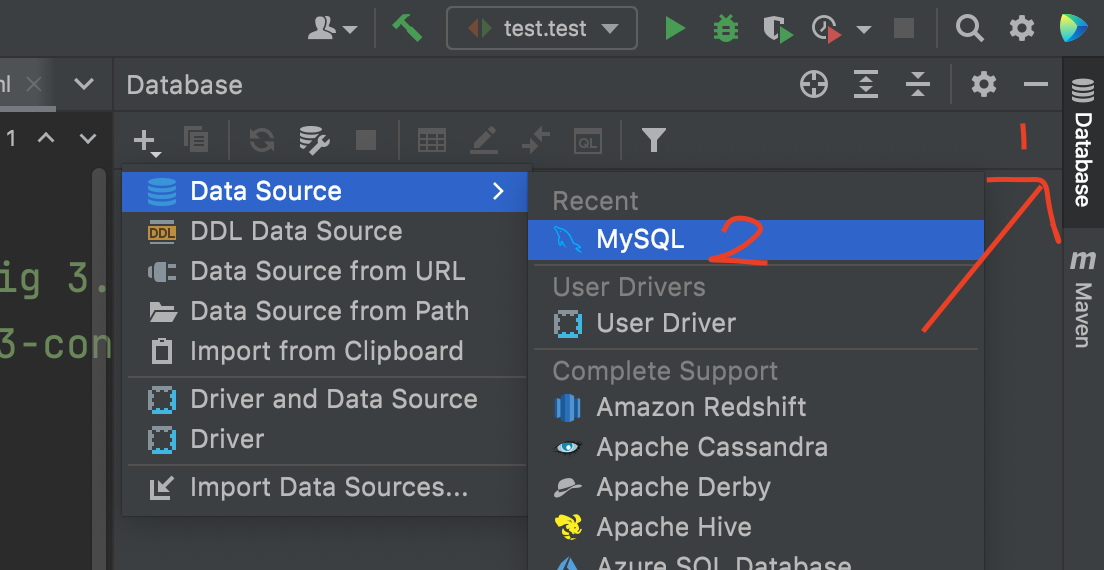
 Click ok to set up successfully as follows:
2.2 Write the MyBatis core configuration file.
(1) Create a "mybatis-config.xml" configuration file.


(2) Core Profile: Connect to Database
Note: Where you need to modify the password for the mysql account in the configuration file must be written on your own.
<?xml version="1.0" encoding="UTF-8" ?>
<!DOCTYPE configuration
PUBLIC "-//mybatis.org//DTD Config 3.0//EN"
"http://mybatis.org/dtd/mybatis-3-config.dtd">
<!--Core Profile: Connect to Database-->
<configuration>
<environments default="development">
<environment id="development">
<transactionManager type="JDBC"/>
<dataSource type="POOLED">
<property name="driver" value="com.mysql.cj.jdbc.Driver"/>
<property name="url" value="jdbc:mysql://localhost:3306/mybatis?useSSL=true&useUnicode=true&characterEncoding=utf8"/>
<!--Own mysql Account password for-->
<property name="username" value="root"/>
<property name="password" value="12345678"/>
</dataSource>
</environment>
</environments>
<!--Easy to forget: every write Mapper.xml Need to be in mybatis Register in Core Profile!!!-->
<mappers>
<mapper resource="com/zzzl/dao/UserMapper.xml"/>
</mappers>
</configuration>
(3) Write MyBatis tool class
Understand the purpose of writing the tool class (official documentation explanation): Each MyBatis-based application is centered on an instance of SqlSessionFactory. Instances of SqlSessionFactory are available through SqlSessionFactoryBuilder. SqlSessionFactoryBuilder, on the other hand, can build an instance of SqlSessionFactory from an XML configuration file. -> With the SqlSessionFactory, as the name implies, we can get an instance of SqlSession. (SqlSession provides all the methods you need to execute SQL commands in the database. You can execute mapped SQL statements directly through the SqlSession instance).
main->java->Create utils package->Create MybatisUtils tool class

public class MybatisUtils {
    private static SqlSessionFactory sqlSessionFactory;

    static {
        try {
            //Read the configuration file and new get the sqlSessionFactory object.
            String resource = "mybatis-config.xml";
            InputStream inputStream = Resources.getResourceAsStream(resource);
            sqlSessionFactory = new SqlSessionFactoryBuilder().build(inputStream);
        } catch (IOException e) {
            e.printStackTrace();
        }
    }

    //Get SqlSession Connection
    //Now that we have the SqlSessionFactory, as the name implies, we can get an instance of SqlSession from it.
    // SqlSession provides all the methods required to execute SQL commands in a database. You can execute mapped SQL statements directly through the SqlSession instance.
    public static SqlSession getSqlSession(){
        return sqlSessionFactory.openSession();
    }
}
3. Write Code
Folders are as follows:
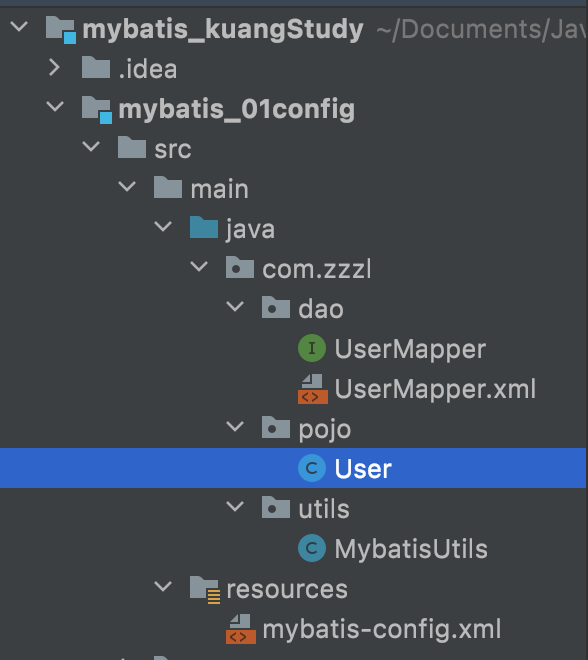
(1) Entity class User (encapsulate -> construct for variables in database, parameterized, set/get, toString())
Insert a code snippet here public class User {
    //The variable name needs to be the same as it was created in the database
    private int id;
    private String name;
    private String pwd;

    public User(){

    }
    public User(int id, String name, String pwd) {
        this.id = id;
        this.name = name;
        this.pwd = pwd;
    }

    public int getId() {
        return id;
    }

    public void setId(int id) {
        this.id = id;
    }

    public String getName() {
        return name;
    }

    public void setName(String name) {
        this.name = name;
    }

    public String getPwd() {
        return pwd;
    }

    public void setPwd(String pwd) {
        this.pwd = pwd;
    }

    @Override
    public String toString() {
        return "User{" +
                "id=" + id +
                ", name='" + name + '\'' +
                ", pwd='" + pwd + '\'' +
                '}';
    }
}
(2) Under Dao folder ->Write UserMapper interface class
public interface UserMapper {
    List<User> selectUser();
}
(3) Write a UserMapper.xml configuration file (there is no implementation class for the UserMapper interface class in the folder, where UserMapper.xml acts as the UserMapper implementation class. Because we use the mybatis framework, we can write SQL statements directly in the configuration file.)
Note: Where you need to modify --> namespace, resultType in the configuration file need to be modified based on your own fully qualified class name (package name + type).
<?xml version="1.0" encoding="UTF-8" ?>
<!DOCTYPE mapper
        PUBLIC "-//mybatis.org//DTD Mapper 3.0//EN"
        "http://mybatis.org/dtd/mybatis-3-mapper.dtd">
<!--namespace:Bind a corresponding interface id:The method name within the corresponding interface. resultType: Returns a result (the result is User Type).-->
<mapper namespace="com.zzzl.dao.UserMapper">
    <select id="selectUser" resultType="com.zzzl.pojo.User">
        select * from user
    </select>
</mapper>
Special note: Every Mapper.xml you write needs to be registered in the mybatis core configuration file mybatis-config.xml! (The mybatis-config.xml configuration file shown at the beginning of the article has already been added. There is no need to add it again here, just a reminder ⏰^_ ^) 4. Testing
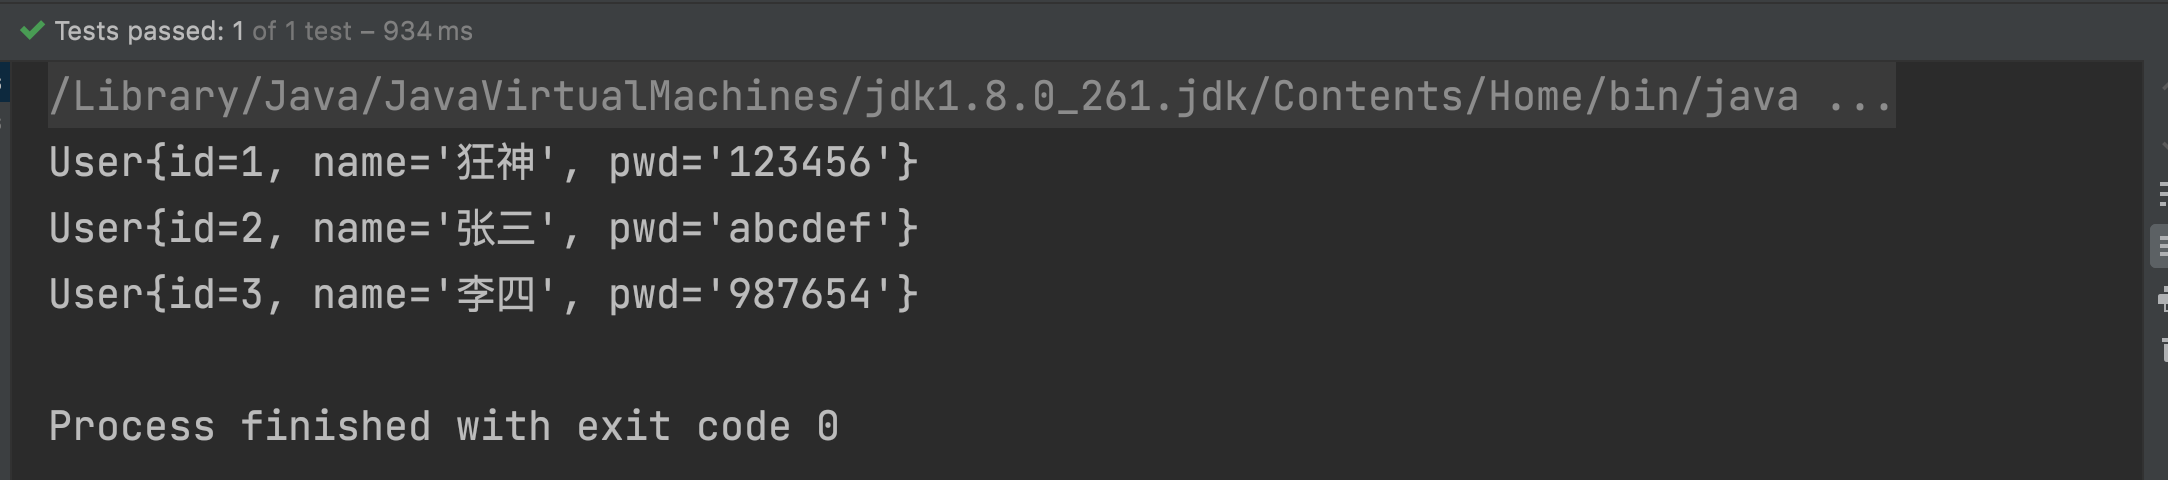
Create Test File

public class test {
    @Test
    public void test() {
        //Gets the SqlSession object.
        SqlSession session = MybatisUtils.getSqlSession();
        //Method one: Get the getMapper implementation interface and call the method of the object (this method is configured in the configuration file and is equivalent to the implementation of this method)
        UserMapper mapper = session.getMapper(UserMapper.class);
        List<User> users = mapper.selectUser();
//        System.out.println(users); A collection
        for (User user: users){
            System.out.println(user);
        }
        session.close();
    }
}
Summary: Do you think configuring mybatis is too cumbersome to write JDBC statements directly? But once configured, it's much more convenient. Wishing you a pleasant study.