1. Introduction to kubernetes dispatching
The scheduler uses kubernetes' watch mechanism to discover newly created pods in the cluster that have not yet been scheduled to nodes. The scheduler will schedule each unscheduled Pod found to run on a suitable Node.
Kube scheduler is the default scheduler for Kubernetes clusters and is part of the cluster control surface. If you really want or need this, Kube scheduler is designed to allow you to write a scheduling component and replace the original Kube scheduler.
Factors to be considered when making scheduling decisions include: individual and overall resource requests, hardware / software / policy constraints, affinity and anti affinity requirements, data locality, interference between loads, etc.
The default policy can refer to: https://kubernetes.io/zh/docs/concepts/scheduling/kube-scheduler/
2.nodename node selection constraint
NodeName is the simplest method for node selection constraints, but it is generally not recommended. If nodeName is specified in PodSpec, it takes precedence over other node selection methods.
Some limitations of using nodeName to select nodes:
If the specified node does not exist.
If the specified node has no resources to accommodate the pod, the pod scheduling fails.
Node names in a cloud environment are not always predictable or stable.
3.nodeSelector affinity
nodeSelector is the simplest recommended form of node selection constraint. Add labels to the selected nodes and schedule through labels.
3.1. Node affinity
Create a directory and write a resource list
vi pod.yaml
apiVersion: v1
kind: Pod
metadata:
  name: nginx
  labels:
    env: test
spec:
  containers:
  - name: nginx
    image: nginx
    imagePullPolicy: IfNotPresent
  nodeSelector:
    disktype: ssd
Execute and view status
kubectl apply -f pod.yaml
kubectl get pod -o wide

The reason for the successful operation is that our node has an ssd tag
kubectl get nodes --show-labels

Node affinity pod example
kubectl delete -f pod.yaml
vi pod.yaml

apiVersion: v1
kind: Pod
metadata:
  name: nginx
  labels:
    env: test
spec:
  containers:
  - name: nginx
    image: nginx
    imagePullPolicy: IfNotPresent
  affinity:
    nodeAffinity:
      requiredDuringSchedulingIgnoredDuringExecution:  #Must meet
        nodeSelectorTerms:
        - matchExpressions:
          - key: disktype
            operator: In
            values:
              - ssd
              - fc
In the experiment just now, we found that nginx pod is on server3
Remove the label on 3 before performing the view
kubectl label nodes server3 disktype-
kubectl apply -f pod.yaml
kubectl get pod -o wide
 Discovery is scheduled to server2
 kubectl label nodes server3 disktype=ssd
Add the tag back and edit pod.yaml again
kubectl delete -f pod.yaml
vi pod.yaml
apiVersion: v1
kind: Pod
metadata:
  name: nginx
  labels:
    env: test
spec:
  containers:
  - name: nginx
    image: nginx
    imagePullPolicy: IfNotPresent
  affinity:
    nodeAffinity:
      requiredDuringSchedulingIgnoredDuringExecution:
        nodeSelectorTerms:
        - matchExpressions:
          - key: disktype
            operator: In
            values:
              - ssd
              - fc
      preferredDuringSchedulingIgnoredDuringExecution: #Propensity satisfaction
        - weight: 1
          preference:
            matchExpressions:
            - key: role
              operator: In
              values:
              - prod
After execution, the view is again scheduled back to server3
kubectl apply -f  pod.yaml
kubectl get pod -o wide

3.2 example
Keep the previous nginx pod
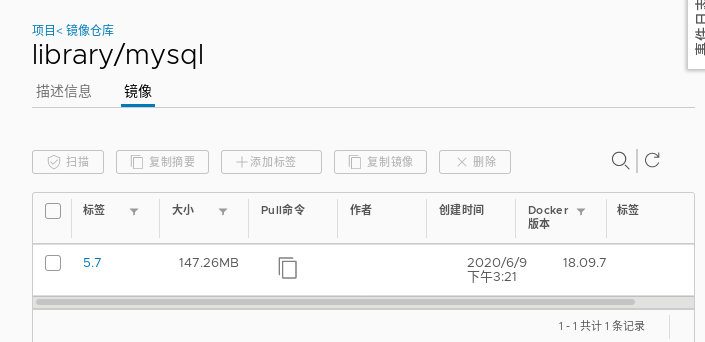
Pod affinity, mysql container affinity, nginx pod
Note that the mysql image version used is image: mysql:5.7
There needs to be in the warehouse.
vi pod1.yaml
apiVersion: v1
kind: Pod
metadata:
  name: mysql
  labels:
    app: mysql
spec:
  containers:
  - name: mysql
    image: mysql:5.7
    env:
     - name: "MYSQL_ROOT_PASSWORD"
       value: "westos"
  affinity:
    podAffinity:
      requiredDuringSchedulingIgnoredDuringExecution:
      - labelSelector:
          matchExpressions:
          - key: env    ###Find it through kubectl get pod -- show labels
            operator: In
            values:
            - test   ##ditto
        topologyKey: kubernetes.io/hostname
Execute the listing pod2.yaml to view the information
kubectl apply -f pod1.yaml
kubectl get pod -o wide

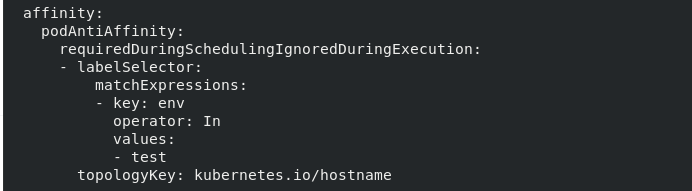
pod anti affinity
vi pod1.yaml

 podAntiAffinity:
 Execute view
 We can see that the mysql node is not on the same node as the nginx service. It separates the service from the data and is scheduled to server2.
4. Taints
NodeAffinity Node affinity is an attribute defined on the Pod, which enables the Pod to be scheduled to a Node according to our requirements. On the contrary, Taints can make the Node refuse to run the Pod or even expel the Pod.
Taints is an attribute of a Node. After setting taints, Kubernetes will not schedule the Pod to this Node.
Therefore, Kubernetes sets a property tolerance for the Pod. As long as the Pod can tolerate the stains on the Node, Kubernetes will ignore the stains on the Node and can (not necessarily) schedule the Pod.
You can use the command kubectl taint to add a taint to the node:
kubectl taint nodes node1 key=value:NoSchedule / / create
kubectl describe nodes server1 |grep Taints / / query
kubectl taint nodes node1 key:NoSchedule - / / delete
Where [effect] can take the value: [NoSchedule | PreferNoSchedule | NoExecute]
NoSchedule: POD will not be scheduled to nodes marked tails.
PreferNoSchedule: the soft policy version of NoSchedule.
NoExecute: this option means that once Taint takes effect, if the running POD in this node does not have a corresponding tolerance setting, it will be evicted directly.
For example, the Kubernetes cluster host is tainted. Therefore, generally, this node is not selected as the deployment node when deploying pod. The taint information of matser is as follows:
 kubectl  describe  nodes server1 | grep Taints
Taints: node-role.kubernetes.io/master:NoSchedule
4.1 adding stains
4.1.1 NoSchedule
kubectl taint node server3 k1=v1:NoSchedule
kubectl delete -f pod.yaml
kubectl apply -f  pod.yaml
kubectl get pod -o wide
 It was found that the pod originally running on server3 could not run
4.1.2 .NoExecute
Create a controller
vi deployment.yaml

apiVersion: apps/v1
kind: Deployment
metadata:
  name: web-server
spec:
  selector:
    matchLabels:
      app: nginx
  replicas: 3
  template:
    metadata:
      labels:
        app: nginx
    spec:
      containers:
      - name: nginx
        image: nginx
     # tolerations:
     #- operator: "Exists"
Add NoExecute:
This option means that once Taint takes effect, if the running POD in this node does not have a corresponding tollate setting, it will be evicted directly. Expelled to other node nodes.
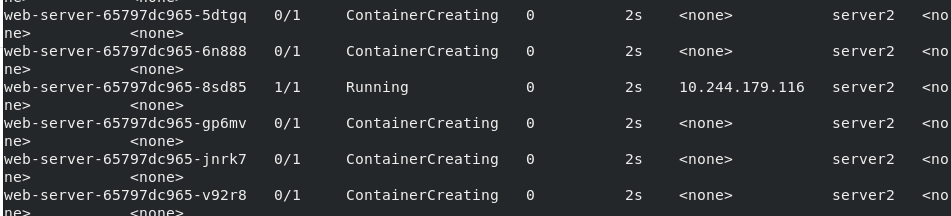
kubectl taint nodes server2 key=value:NoExecute
Because there is no tolerance and other node s, all pod s are pending
 If we remove the stain of server3, we will schedule all servers to srever3
kubectl taint node server3 k1=v1:NoSchedule-
kubectl get pod -o wide
4.2 add tolerance
Originally, server1 did not join the cluster. Now we set it to join the cluster
Let's test:
vi deployment.yaml

apiVersion: apps/v1
kind: Deployment
metadata:
  name: web-server
spec:
  selector:
    matchLabels:
      app: nginx
  replicas: 30  #The number is too small. The probability of server1 scheduling is small
  template:
    metadata:
      labels:
        app: nginx
    spec:
      containers:
      - name: nginx
        image: nginx
      tolerations:
      - operator: "Exists"    ##Tolerate all things
Delete execution view
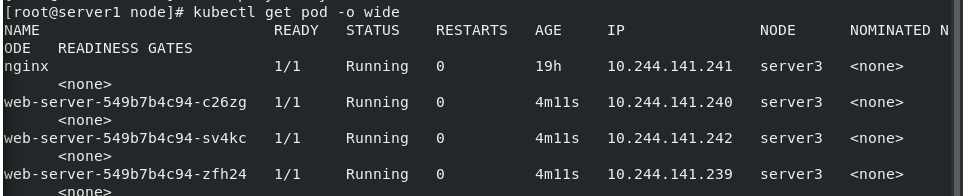
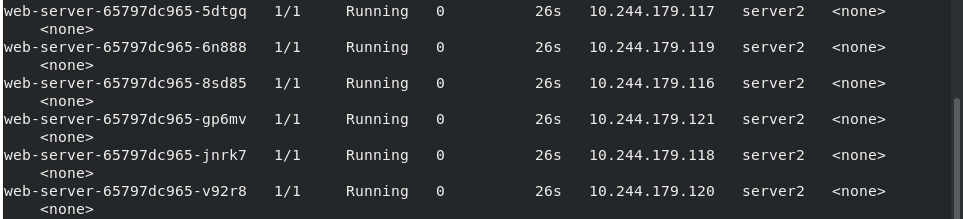
kubectl delete -f deployment.yaml
kubectl apply -f  deployment.yaml
kubectl get pod -o wide

server1 found
4.3cordon,drain,delete
Instructions affecting pod scheduling include cordon, drain and delete. Later created pods will not be scheduled to this node, but the degree of violence is different.
cordon stop scheduling:
The impact is minimal. Only the node will be set to scheduling disabled. The newly created pod will not be scheduled to the node. The original pod of the node will not be affected and will still provide services to the outside world normally.
drain expulsion node:
First expel the pod on the node, recreate it on other nodes, and then set the node to schedulendisabled.
Delete delete node
The most violent one is to expel the pod on the node and recreate it on other nodes. Then, delete the node from the master node, and the master loses control over it. To restore scheduling, you need to enter the node node and restart the kubelet service
vi deployment.yaml

apiVersion: apps/v1
kind: Deployment
metadata:
  name: web-server
spec:
  selector:
    matchLabels:
      app: nginx
  replicas: 6
  template:
    metadata:
      labels:
        app: nginx
    spec:
      containers:
      - name: nginx
        image: nginx
      tolerations:
      - operator: "Exists"
Execution view scheduling node
kubectl apply -f deployment.yaml
kubectl get pod -o wide
4.3.1 cordon
Turn off cluster scheduling for server3
kubectl cordon server3
kubectl get pod -o wide
kubectl get node


All were expelled to server2
Reschedule server3
kubectl uncordon server3
kubectl get node

4.3.2 drain
kubectl drain server2 --ignore-daemonsets

Everything in server2 is dispatched to other nodes
kubectl get node
 kubectl uncordon server2
restart
4.3.3 delete
Directly delete node server3
kubectl delete node server3

Rejoin server3 to the scheduling node
The kubelet service needs to be restarted on server3
server3:
systemctl restart kubelet
server1:
kubectl get node

5. Add a new cluster node
Because the token will only exist for 23 hours, it needs to be recreated
kubeadm token create
kubeadm token list

Token cert hash is also required:
This value will not change. Just check it out
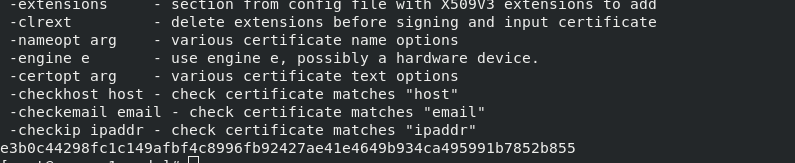
openssl x509 -pubky -in /etc/kubernetes/pki/ca.crt | openssl rsa -pubinoutform der 2>/dev/null | \
openssl dgst -sha256 -hex | sed 's/^.* //'
Then join the cluster with the following instructions
kubeadm join 172.25.0.2:6443 --token ******** --discovery-token-ca-cert-hash sha256: *******************