As one of the basic functions of microservices, the registry plays an important role. Microservices divide individual services into services under different modules, and what about communication calls for services of different modules? This requires service registration and discovery. This article will use Alibaba's open source project nacos to build the service center.
Nacos is dedicated to helping you discover, configure, and manage microservices. Nacos provides a set of easy-to-use feature sets to help you quickly realize dynamic service discovery, service configuration, service metadata and traffic management.
Nacos helps you build, deliver, and manage microservice platforms more quickly and easily. Nacos is a service infrastructure for building "service" centered modern application architecture (such as micro service paradigm and cloud native paradigm).
Download and install nacos
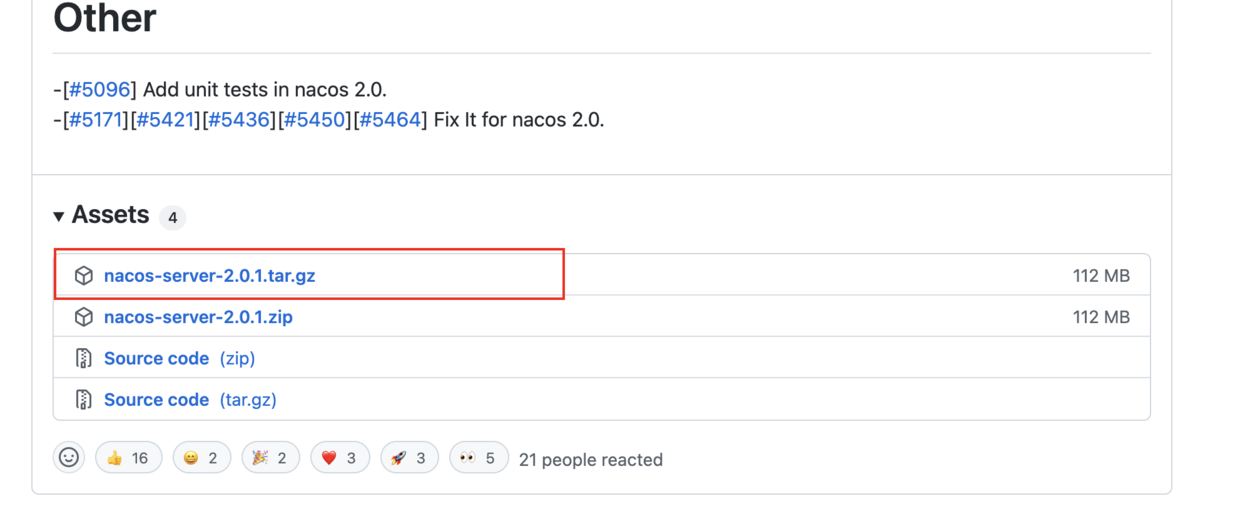
stay nacos official website Find the nacos installation package and download the gz suffix file shown below.

Unzip the file into the bin directory and execute the following command.
sh startup.sh -m
Start successful
Create a new springboot project
Build service producers
- Add maven dependency
<dependency>
	<groupId>org.springframework.boot</groupId>
	<artifactId>spring-boot-starter-web</artifactId>
</dependency>
<dependency>
	<groupId>org.springframework.cloud</groupId>
	<artifactId>spring-cloud-starter-alibaba-nacos-discovery</artifactId>
</dependency>
 <dependency>
	<groupId>org.springframework.boot</groupId>
	<artifactId>spring-boot-starter-test</artifactId>
	<scope>test</scope>
</dependency>
- Configure the application.yml file
server:
  port: 8020
spring:
  application:
    name: service-provider
  cloud:
    nacos:
      discovery:
        server-addr: 127.0.0.1:8848
- Add the @ EnableDiscoveryClient annotation to the Application.java startup file
@SpringBootApplication
@EnableDiscoveryClient
public class Application {

	public static void main(String[] args) {
		SpringApplication.run(Application.class, args);
	}

}
- Add service provided interface
@RestController
public class ProviderController {

	@Autowired
	private Environment environment;

	@GetMapping("/hello")
	public String hello(String name){
		return "hello4  " + name + " port:" + environment.getProperty("local.server.port");
	}
}
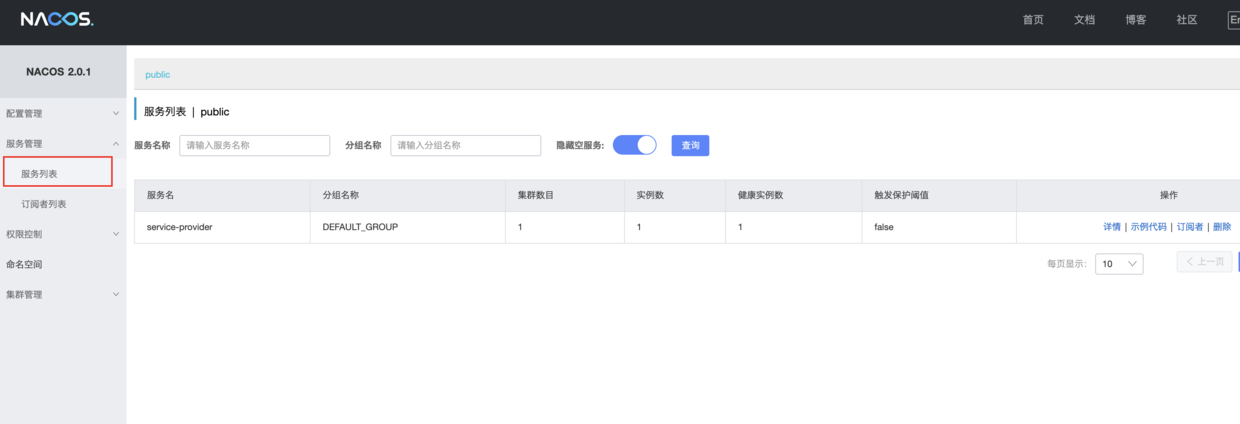
Start the above service (main method in Application.java). After successful startup, log in to the nacos console http://127.0.0.1:8848/nacos , the default login name and password are both nacos. You can find one more service in the service list. It indicates that the service provider has successfully registered into the service center.

Request access http://127.0.0.1:8020/hello , the data is returned successfully, indicating that the service can be accessed normally.
Build service consumers
- Add maven dependency
		<dependency>
			<groupId>org.springframework.boot</groupId>
			<artifactId>spring-boot-starter-web</artifactId>
		</dependency>
        <!--If only ribbon The following two dependencies are not required, if used feign ,Both of the following dependencies are required.-->
		<dependency>
			<groupId>org.springframework.cloud</groupId>
			<artifactId>spring-cloud-starter-netflix-ribbon</artifactId>
		</dependency>
		<dependency>
			<groupId>org.springframework.cloud</groupId>
			<artifactId>spring-cloud-starter-openfeign</artifactId>
		</dependency>

		<dependency>
			<groupId>org.springframework.cloud</groupId>
			<artifactId>spring-cloud-starter-alibaba-nacos-discovery</artifactId>
		</dependency>

		<dependency>
			<groupId>org.springframework.boot</groupId>
			<artifactId>spring-boot-starter-test</artifactId>
			<scope>test</scope>
		</dependency>
Compared with service providers, ribbon and feign dependencies are added here.
- Configure the application.yml file
server:
  port: 8030
spring:
  application:
    name: service-consume
  cloud:
    nacos:
      discovery:
        server-addr: 127.0.0.1:8848
- Modify the Application.java file and add the registration
@SpringBootApplication
@EnableDiscoveryClient
@EnableFeignClients
public class NacosConsumeApplication {

	public static void main(String[] args) {
		SpringApplication.run(NacosConsumeApplication.class, args);
	}

}
The @ EnableDiscoveryClient annotation and @ EnableFeignClients are added here, where @ EnableDiscoveryClient registers the service in the registry, and @ EnableFeignClients is used with feign clients.
- Start the above service (main method in Application.java). After successful startup, log in to the nacos console and find that the consumer service has also been registered in the registry.

There are two methods of service invocation: feign and ribbon
1. Use feign to call the service
- Configure client
@FeignClient(value = "service-provider")
public interface ProductClient {

    @GetMapping("/hello")
    String product(@RequestParam("name") String name);
}
The configuration value in @ FeignClient here corresponds to the service name of the service provider, and the value in @ GetMapping corresponds to the @ GetMapping path of the service provider.
- Call server
@RestController
public class FeignController {


    //This error is a compiler problem. Because this Bean is injected when the program starts, the compiler cannot perceive it, so an error is reported.
    @Autowired
    private ProductClient productClient;

    @GetMapping("/feign")
    public String feign(String name){
        return productClient.product(name);
    }

}
Using ribbon to call attendant
- Configure RestTemplate bean
@Configuration
public class RibbonConfig {

    @LoadBalanced
    @Bean
    public RestTemplate restTemplate(){
        return new RestTemplate();
    }
}
- Call service
@RestController
public class RibbonController {

	@Autowired
	private RestTemplate restTemplate;

	@GetMapping("/ribbon")
	public String ribbon(String name){
		String result = restTemplate.getForObject("http://service-provider/hello?name="+name,String.class);
		return result;
	}
}