At the beginning, let's take a look at the construction and deployment process in ancient times. Everyone must be familiar with this:
- The developer compiles, compresses and packages the source code to generate packaging files
- Upload the packaged file to the server
Obviously, this process is not only cumbersome, but also inefficient. Each release of development takes a long time to deploy and build.
Later, in order to solve this problem, CI/CD appears.
Next, let's talk about what is CI/CD?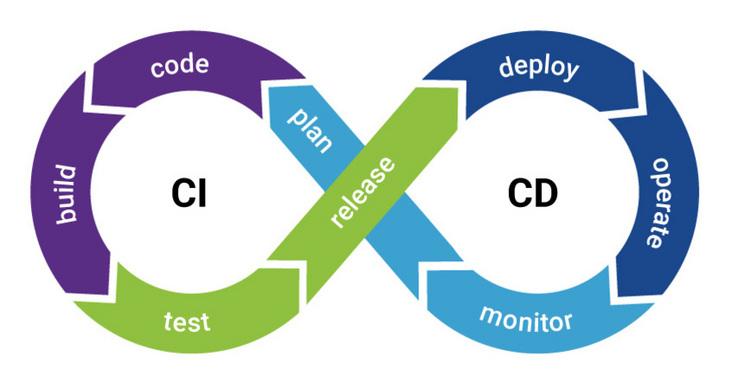
CI/CD is the abbreviation of continuous integration / continuous deployment, which translates to continuous integration / continuous deployment. CD will also be interpreted as Continuous Delivery
To be more specific:
- Continuous integration: when the code in the code warehouse changes, it will automatically test and build the code and feed back the running results.
- Continuous delivery: on the basis of continuous integration, continuous delivery can deploy the integrated code to the test environment, pre release environment and production environment in turn
After talking so much, I believe many students will say:
- Isn't this usually done by operation and maintenance?
- It's not related to business. What's the use of understanding it?
- It's all server related things, docker, nginx, ECs and so on. How should I learn?
A long time ago, I thought so too. I felt that it had nothing to do with my business and there was no great need to understand it.
But recently, when I was working on a full stack project (to break through my bottleneck), I encountered these problems and found myself in a knowledge blind spot.
I can't help but mend it.
However, after I learned this knowledge and practiced these processes in the project, my knowledge has been greatly expanded. We have a new understanding of the operating system, the actual construction and deployment, and even engineering.
Let's also put down the architecture diagram of the full stack project mentioned earlier: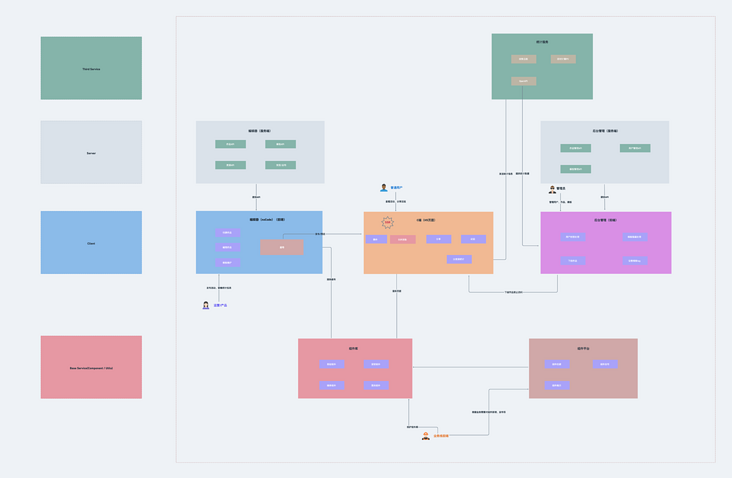
This large project takes low code as the core, including nine systems: Editor front end, editor back end, C-end H5, component library, component platform, background management system front end, background management system back end, statistical service and self-developed CLI.
The front end of the editor is How to design and implement H5 marketing page building system It has been explained in detail in the article.
At present, about 70% of the whole project has been completed, and many problems have been encountered in the process, which has also been greatly improved. There will be a wave of articles about small points in the project, which are full of dry goods.
Back to the topic of this article: using Docker Compose, nginx, SSH and Github Actions to implement the front-end Automated Deployment tester. This paper is based on the front-end of the background management system, and explains in detail how to automatically release a pure front-end project with the help of Docker, nginx and Github CI/CD capabilities. There are two starting points for choosing this project to explain the automatic release tester:
- The business of the background management system is relatively simple and can focus on the automatic deployment process
- The pure front-end project is more suitable for the current situation of most front-end students. Take it and use it immediately
Overall thinking

The front-end code is packaged with static files, which can be served by nginx. Idea:
- Build a Docker container (with nginx)
- Copy the dist / directory to the Docker container
- Start nginx service
- The host port, corresponding to the Docker container port, can be accessed
Core code change:
- nginx.conf (for nginx of Docker container)
- Dockerfile
- docker-compose.yml
⚠️ This paper will combine theoretical knowledge with practice, that is, first describe the corresponding knowledge point, and put the project code or configuration file related to this knowledge point.
The following will explain Docker, Docker compose, ssh, github actions and other knowledge points in turn.
Docker

Docker an article in official account a long time ago. Who says the front end doesn't need to learn docker? I have detailed instructions. Here is a brief explanation.
docker can be regarded as a high-performance virtual machine, which is mainly used for the virtualization of linux environment. Developers can package their applications and dependency packages into a portable container and then publish them to any popular linux machine. Containers completely use the sandbox mechanism, and there will be no interface between them.
In the container, you can do whatever the server can do, such as running npm run build package project in the container with node environment, deploying project in the container with nginx environment, etc.
Installing docker on centos
Since the ECS is centos, here's how to install docker on centos:
$ sudo yum remove docker docker-client docker-client-latest docker-common docker-latest docker-latest-logrotate docker-logrotate docker-engine

$ sudo yum install -y yum-utils device-mapper-persistent-data lvm2

$ sudo yum-config-manager --add-repo https://download.docker.com/linux/centos/docker-ce.repo

$ sudo yum install docker-ce docker-ce-cli containerd.io

$ sudo systemctl start docker

$ sudo docker run hello-world
dockerfile
docker uses dockerfile as the configuration file to build the image. Simply look at the dockerfile built by a node application:
FROM node:12.10.0

WORKDIR /usr/app

COPY package*.json ./

RUN npm ci -qy

COPY . .

EXPOSE 3000

CMD ["npm", "start"]
Explain the meaning of each keyword.
FROM
Start with this Image
WORKDIR
Set working directory
COPY
Copy file
RUN
Execute command in new layer
EXPOSE
Declare container listening port
CMD
Default value of execute command when container starts
Look at the Dockerfile file in the project:
# Dockerfile
FROM nginx

# Copy the contents of the dist file to the directory / usr/share/nginx/html /
# Therefore, you must execute npm run build to package the dist directory before. It's important!!!
COPY dist/ /usr/share/nginx/html/

# Copy nginx configuration file
COPY nginx.conf /etc/nginx/nginx.conf

# Set time zone
RUN ln -sf /usr/share/zoneinfo/Asia/Shanghai /etc/localtime && echo 'Asia/Shanghai' >/etc/timezone

# Create / admin-fe-access.log, corresponding to nginx.conf
CMD touch /admin-fe-access.log && nginx && tail -f /admin-fe-access.log
In this document, we did the following:
1. We use the Docker image of Nginx as the base image.
2. Put all the contents of the packaged folder dist / into the default HTML folder of Nginx Docker, that is, / usr/share/nginx/html /.
3. Put the customized Nginx configuration file nginx.conf into the configuration folder / etc/nginx/nginx.conf of Nginx Docker.
4. Set the time zone.
5. Create / admin-fe-access.log, start nginx and use tail -f to simulate pm2 like blocking processes.
The nginx.conf file is mentioned here:
#The number of nginx processes is usually set equal to the number of CPUs
worker_processes auto;

#Global error log definition type
#error_log  logs/error.log;
#error_log  logs/error.log  notice;
#error_log  logs/error.log  info;

#Process pid file
#pid        logs/nginx.pid;

#Reference event model
events {
    #Maximum connections of a single process (maximum connections = connections + processes)
    worker_connections  1024;
}

#Set http server
http {
    #File extension and file type mapping table
    include       mime.types;
    #Default file type
    default_type  application/octet-stream;

    #Log format setting
    #$remote_addr and $http_x_forwarded_for is used to record the ip address of the client;
    #$remote_user: used to record the client user name;
    #$time_local: used to record access time and time zone;
    #$request: used to record the url and http protocol of the request;
    #$status: used to record request status; Success is 200,
    #$body_ bytes_ Send: record the size of the main content of the file sent to the client;
    #$http_referer: used to record the links accessed from that page;
    #$http_user_agent: record the relevant information of the client browser;
    log_format  main  '$remote_addr - $remote_user [$time_local] "$request" '
                     '$status $body_bytes_sent "$http_referer" '
                     '"$http_user_agent" "$http_x_forwarded_for"';

    # access_log  logs/access.log  main;

    sendfile        on;
    #tcp_nopush     on;

    #keepalive_timeout  0;
    #Long connection timeout, in seconds
    keepalive_timeout  65;

    #gzip  on;

    #Set the size of files uploaded through nginx
    client_max_body_size   20m;

    #Configuration of virtual host
    server {
        #Listening port
        listen       80;
        #There can be multiple domain names separated by spaces
        server_name  admin-fe;

        #charset koi8-r;

        #Define the access log of this virtual host
        access_log  /admin-fe-access.log  main; # Notice that / admin-fe-access.log is created in Dockerfile

        #Settings of entry file
        location / {
            root   /usr/share/nginx/html;   #Directory of the entry file
            index  index.html index.htm;    #Default entry file name
            try_files $uri $uri/ /index.html;
        }
        #error_page  404              /404.html;

        # redirect server error pages to the static page /50x.html
        error_page   500 502 503 504  /50x.html;
        location = /50x.html {
            root   html;
        }
    }
}
The core point is to listen to port 80. The log file is defined as admin-fe-access.log, and the root directory of the entry file is / usr/share/nginx/html. These correspond to Dockerfile one by one.
Having finished Dockerfile and its related configuration files, let's take a look at several core concepts in docker.
docker core concepts
There are three very important concepts in docker:
- Mirror (image)
- container
- repository
A diagram to show the relationship: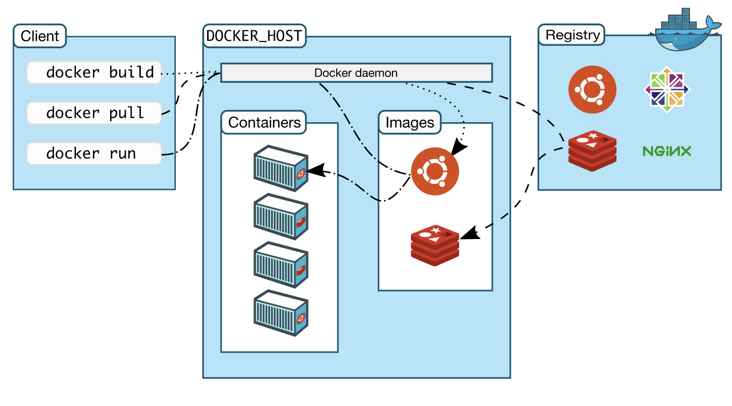
If a container is compared to a lightweight server, the image is the template for creating it. A docker image can create multiple containers, and their relationship is like the relationship between classes and instances in JavaScript.
Common image commands:
- Download Image: docker pull < image name >: < tag >
- View all images: docker images
- Delete image: docker RMI < image ID >
- Upload image: docker push < username > / < repository >: < tag >
If the repository in docker images is < none >, you can run docker image prune to delete it
Common container commands
Start container: docker run - P XXX: XXX - v = hostpath: containerpath - D -- name < container name > < image name >
- -p port mapping
- -v data volume, file mapping
- -d background operation
- --Name defines the container name
- View all containers: docker ps (add - a to show hidden containers)
- Stop container: docker stop < container ID >
- Delete container: docker RM < container ID > (add - f to force deletion)
- View container information (such as IP address): docker inspect < container ID >
- View container logs: docker logs < container ID >
- Enter the container console: docker exec - it < container ID > / bin / Sh
After the image is built, it can easily run on the current host. However, if we need to use this image on other servers, we need a centralized service for storing and distributing images, such as Docker Registry.
A Docker Registry can contain multiple repositories; Each warehouse can contain multiple tags; Each label corresponds to a mirror image. Therefore, the image warehouse is the place where Docker is used to centrally store image files, which is similar to the code warehouse we used before.
docker-compose
Docker compose project is the official open source project of docker, which is responsible for the rapid arrangement of docker container clusters. Allows users to define a set of associated application containers as a project through a separate docker-compose.yml template file (YAML format).
The biggest advantage of using compose is that you only need to define your own application stack (that is, all services required by the application) in one file, and then put the YAML file in the root directory of the project, which is version controlled together with the source code. Others only need to clone your project source code to quickly start the service.
It is generally applicable to scenarios where the project needs more running environments (corresponding to multiple docker containers), such as relying on nodejs, mysql, mongodb, redis, etc.
Drop the docker-compose.yml file here:
version: '3'
services:
  admin-fe:
    build:
      context: .
      dockerfile: Dockerfile
    image: admin-fe # Reference official website nginx image
    container_name: admin-fe
    ports:
      - 8085:80 # The host can connect to the database in the container with 127.0.0.1:8085
Create an image based on the Dockerfile above. The port mapping is 8085:80. Here, 8085 is the host port and 80 corresponds to the 80 port exposed by nginx
Common commands
- Build container: docker compose build < service name >
- Start all servers: docker compose up - D (background startup)
- Stop all services: docker compose down
- View service: docker compose PS
ssh and ECS

First, let's talk about ECs. Since you want to deploy a test machine with one click, you must have a test machine, that is, ECs. Here I use Alibaba cloud CentOS 8.4 64 bit operating system.
With a server, how can I log in?
There are generally two ways to log in to ECS locally, password login and ssh login. However, if you log in with a password, you have to enter the password every time, which is more troublesome. ssh login is used here. For information on how to log in to the remote server without secret, please refer to SSH password free login configuration
After that, you can log in directly without secret through SSH < username > @ < IP >.
ECS installation specified package
Next, you need to install the basic package for ECS. The specified package is usually installed in CentOS using yum, which is different from npm.
docker
# Step 1: uninstall the old version
sudo yum remove docker docker-client docker-client-latest docker-common docker-latest docker-latest-logrotate docker-logrotate docker-engine
# Step 2: install some necessary system tools
sudo yum install -y yum-utils
# Step 3: add software source information and use alicloud image
sudo yum-config-manager --add-repo http://mirrors.aliyun.com/docker-ce/linux/centos/docker-ce.repo
# Step 4: install docker CE
sudo yum install docker-ce docker-ce-cli containerd.io
# Step 5: start docker service
sudo systemctl start docker
# Step 6: run the Hello World Project
sudo docker run hello-world
If you have Hello from Docker like me! Then Docker will be installed successfully!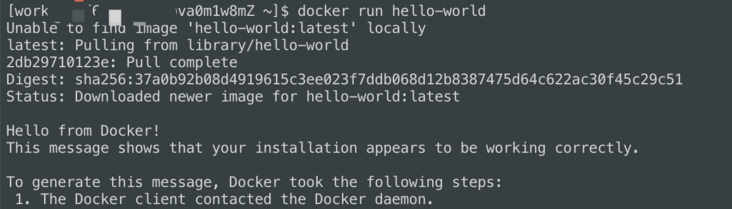
docker-compose
Through access https://github.com/docker/compose/releases/latest Get the latest version of docker compose (for example, 1.27.4), and then execute the following command to install docker compose
# Download the latest version of docker compose to the / usr/bin directory
curl -L https://github.com/docker/compose/releases/download/1.27.4/docker-compose-`uname -s`-`uname -m` -o /usr/bin/docker-compose

# Authorize docker compose
chmod +x /usr/bin/docker-compose
After installation, enter docker compose version on the command line to verify whether the installation is successful:
node
First, make sure you can access the EPEL library and install it by running the following command:
sudo yum install epel-release
You can now install Node.js using the yum command:
sudo yum install nodejs
Verify:
nginx
Installing nginx using yum is very simple. Enter a command:
$ sudo yum -y install nginx # Installing nginx
git
Also use yum to install:
yum install git
Finally, let's take a look at github actions, which also connects the points mentioned above.
github actions

As we all know, continuous integration consists of many operations, such as pulling code, executing test cases, logging in to remote servers, publishing to third-party services, and so on. GitHub calls these operations actions.
Let's first understand some terms:
- Workflow: the process of continuously integrating one run is a workflow.
- job: a workflow is composed of one or more jobs, which means that a continuous integration run can complete multiple tasks.
- Step: each job consists of multiple steps, which are completed step by step.
- action: each step can execute one or more commands (actions) in turn.
workflow file
The configuration file of GitHub Actions is called the workflow file and is stored in the. github/workflows directory of the code warehouse.
The workflow file adopts YAML format, and the file name can be taken arbitrarily, but the suffix is. YML, such as deploy.yml. A library can have multiple workflow files. If GitHub finds a. YML file in the. github/workflows directory, it will automatically run the file.
There are many configuration fields in the workflow file. Here are some basic fields.
name
The name field is the name of the workflow.
If this field is omitted, it defaults to the file name of the current workflow.
name: deploy for feature_dev
on
The on field specifies the conditions for triggering workflow, usually push and pull_request.
Specifies that branches or labels can be qualified when an event is triggered.
on:
  push:
    branches:
      - master
The above code specifies that the workflow is triggered only when the push event occurs in the master branch.
jobs
The jobs field represents one or more tasks to be performed. The runs on field specifies the virtual machine environment required to run.
runs-on: ubuntu-latest
steps
The steps field specifies the running steps of each Job, which can contain one or more steps. Each step can specify the following three fields.
- jobs.<job_ ID >. Steps. Name: step name.
- jobs.<job_ ID >. Steps. Run: the command or action that this step runs.
- jobs.<job_ ID >. Steps.env: environment variables required for this step.
Here is the. GitHub / workflows / deploy dev.yml file in the project:
name: deploy for feature_dev

on:
  push:
    branches:
      - 'feature_dev'
    paths:
      - '.github/workflows/*'
      - '__test__/**'
      - 'src/**'
      - 'config/*'
      - 'Dockerfile'
      - 'docker-compose.yml'
      - 'nginx.conf'

jobs:
  deploy-dev:
    runs-on: ubuntu-latest

    steps:
      - uses: actions/checkout@v2
      - name: Use Node.js
        uses: actions/setup-node@v1
        with:
          node-version: 14
      - name: lint and test # test
         run: |
           npm i
           npm run lint
           npm run test:local
      - name: set ssh key # Temporarily set ssh key
        run: |
          mkdir -p ~/.ssh/
          echo "${{secrets.COSEN_ID_RSA}}" > ~/.ssh/id_rsa
          chmod 600 ~/.ssh/id_rsa
          ssh-keyscan "106.xx.xx.xx" >> ~/.ssh/known_hosts
      - name: deploy
        run: |
          ssh work@106.xx.xx.xx "
            cd /home/work/choba-lego/admin-fe;
            git remote add origin https://Cosen95:${{secrets.COSEN_TOKEN}}@github.com/Choba-lego/admin-fe.git;
            git checkout feature_dev;
            git config pull.rebase false;
            git pull origin feature_dev;
            git remote remove origin;

            # Build PRD dev
            # npm i;
            # npm run build-dev;

            # Start docker
            docker-compose build admin-fe; # Consistent with docker-compose.yml service name
            docker-compose up -d;
          "
      - name: delete ssh key
        run: rm -rf ~/.ssh/id_rsa
Here is an overview:
one ️⃣ The whole process is push ed from code to feature_ Triggered when dev branches.
two ️⃣ There is only one job running in the virtual machine environment Ubuntu latest.
three ️⃣ The first step is to use the most basic actions, namely actions/checkout@v2 , its function is to let our workflow access our repo.
four ️⃣ The second step is to install node in the machine executing the workflow. The action used here is actions/setup-node@v1 .
five ️⃣ The third step is to execute lint and test.
six ️⃣ The fourth step is to temporarily set the ssh key, which is also to prepare for logging in to the server in the next step.
seven ️⃣ The fifth step is deployment. First, ssh logs in to the server, pulls the latest branch code, then installs dependencies and packages, and finally starts docker to generate an image. Here, the docker service is available on the test machine.
eight ️⃣ The last step is to delete the ssh key.
Finally, let's take a look at the complete process of github: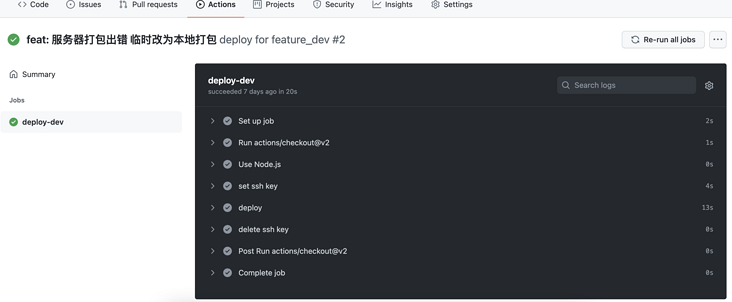
The deploy phase is the core:
summary
I've written so much. I don't know if you understand it 😂
If you have any questions, please leave a message in the comment area and will answer them as soon as you see them 😊
There will be a lot of articles about this project in the future. Please pay more attention to it