1, CSS Basics
Training address Suggest doing it
1. Get to know CSS: rich and colorful web page styles
CSS(Cascading Style Sheets) is a computer language used to add styles to structured documents (such as HTML documents or XML applications). At present, it is defined and maintained by W3C.
In front-end web page development, we use CSS to define the style of web page elements, such as background color, font display, element position, animation effect and so on.
Therefore, the combination of HTML and CSS can separate the content and style of web pages, which is conducive to improve the development efficiency.
The basic CSS syntax is like building blocks. Through various transformation designs, it constitutes a rich and colorful web page world.
example:
<!DOCTYPE html>
<html>
  <head>
    <meta charset="utf-8">
    <title>Hello World</title>
    <style type="text/css">
        body {
          background-color: teal;
        }
        h1 {
            color:white;
            font-size: 36px;
            text-align: center;
        }
    </style>
  </head>
  <body>
    <h1>CSS Make web page style richer</h1>
  </body>
</html>
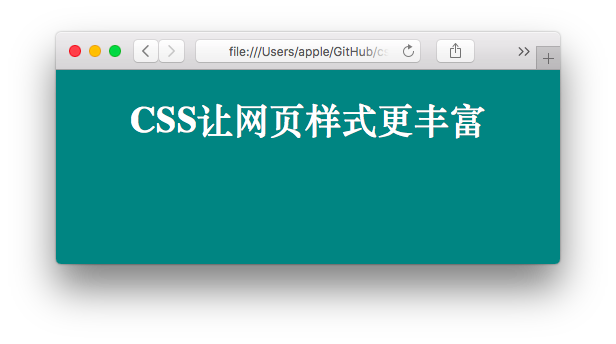
We added the < style > element to the < head > element of the HTML document, and set its attribute type to text/css, indicating that the content here is CSS.
In this CSS code, we specify:
- The background color of body is Teal;
- h1 the font color of the title is white, the font size is 36px, and it is centered in the web page.
CSS syntax mainly includes two parts: selector and declaration.
selector
What is a selector?
Selectors are used to specify the HTML elements we want to modify. For example, in the above example, body and h1 are selectors.
selector {Statement 1}
statement
By declaration, we define the element style to change. The declaration consists of attributes and values, which are contained in curly braces. The basic format is as follows:
{attribute: value;}
When developing a website, it is recommended that each statement is usually listed in a separate line to facilitate reading. When the website is published, you can use tool compression to write multi line declarations on one line, so that the CSS file size is smaller and the loading speed is faster.
example:
 h1 {
            color:white;
            font-size: 36px;
            text-align: center;
       }
Tips:
- The semicolon at the end of the statement may not be written. If multiple declarations are written on one line, they must be written. Generally, suggestions are written.
2. CSS style introduction method
Style import method
There are three ways to introduce CSS styles:
- Internal style sheet: as shown in the previous example, it is introduced in the document header;
- External style sheets: imported through external files;
- Inline style: introduced directly in a specific element.
(1) . internal style sheet
First, for the internal style sheet, the writing method is to add < style type = "text / CSS" > < / style > elements directly to the head of the HTML file.
Specific examples are as follows:
  <head>
    <meta charset="utf-8">
    <title>Hello World</title>
    <style type="text/css">
       /*Add styles here*/
    </style>
  </head>
(2) . external style sheets
The second way is to write css separately in a file with the file suffix. css. Then add css file links in < head > of HTML.
  <head>
    <meta charset="utf-8">
    <title>Hello World</title>
    /* Import external CSS files */
    <link rel="stylesheet" href="style.css" />
  </head>
The value stylesheet of the attribute rel represents the stylesheet and is usually unchanged. Href attribute value, representing the location of the file. Similar to the linking method of image path, the writing method of href attribute value depends on the specific CSS file location.
For example, when the HTML file is not in the same folder as the CSS file to be imported:
Write as follows:
<link rel="stylesheet" href="CSS/style.css" />
In the actual project, it is recommended to put the style sheet in the CSS folder to make the project structure clearer and resource management easier.
(3) . inline style
Inline style refers to adding style attributes directly within a label.
Examples are as follows:
<p style="color: Red; margin-left: 24px; font-size:20px;">inline style CSS form<p>

Common writing format:
<tag style="style sheet">
<tag style="style sheet"></tag>
Which style sheet to use?
In the actual development process, it is generally recommended to use the second method of outreach style sheet.
The main advantages are as follows:
-
Separation of content and style;
Easy to develop and maintain styles.
-
The style is easy to reuse;
The same style file can be introduced into multiple HTML files.
-
Load faster.
If the same style file is introduced in different pages. Usually, the browser will read directly from the cache without accessing the server resources again.
Priority order of styles
The order of priority introduced by the three styles is:
External style < internal style < inline style
In other words, if three styles act on the same element at the same time, the inline style will be used first.
2, CSS base selector
1. CSS element selector
element selector
The most common and understandable CSS selector is the element selector, also known as the type selector. That is, the elements in the HTML document are used directly as selectors.
For example, for HTML pages:
<body>
  <h1>Title 1</h1>
  <h2>Title 2</h2>
  <p>In ordinary paragraphs<a href="#"> deleted references</a></p>
</body>
To add an element style using the element selector:
<style type="text/css">
    html {color:black;}
    h1 {color:darkcyan;}
    h2 {color:lightSeaGreen;}
    p {color:grey;}
    a {text-decoration:line-through;}
  </style>
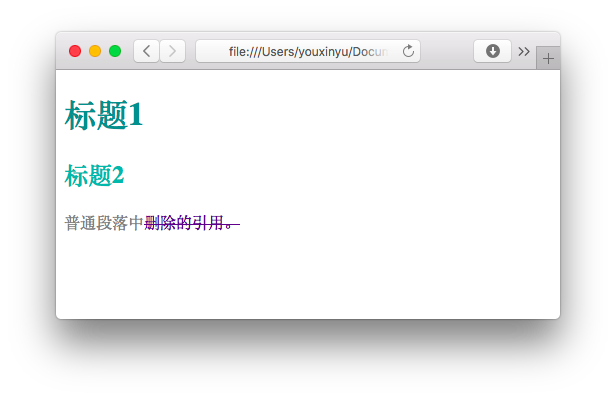
When we specify an element and set the style attribute, the style will be applied to the element in the document. For example, we set the color of p element to gray, and all p elements in the document will be gray without other styles.
Composite element selector
If you want to apply the same style to multiple elements, you can directly use the combined element selector. Separate multiple elements to be styled with commas, for example:
<body>
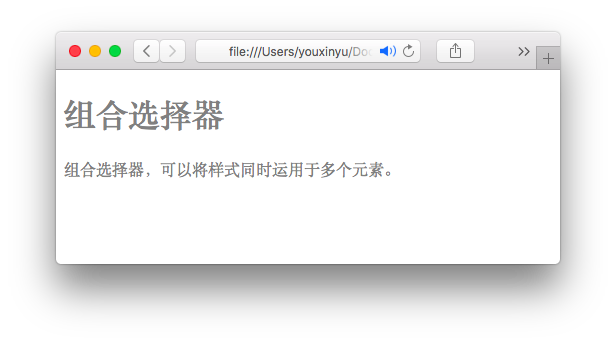
<h1>Combination selector</h1>
<p>Combining selectors allows you to apply styles to multiple elements at the same time.</p>
</body>
</html>
To add an element style using the element selector:
<style type="text/css">
/* Composite element selector */
/*Set the colors of ` h1 'and ` p' elements to gray at the same time*/
h1,p {color:grey;}
</style>
be careful:
- Commas between multiple elements are essential. If commas are missing, they will mean other meanings.
Element selector syntax
We can see that the syntax rules of the element selector are as follows:
/*Single element selector*/
element{Style declaration}

/*Composite element selector*/
Element 1, element 2 {Style declaration}
2. CSS class selector
Class selectors allow styles to be specified in a way independent of document elements. Class selectors are usually used when you only want to apply styles without considering specific elements.
For example, for HTML pages:
<body>
<div class="main">
<article class="news">
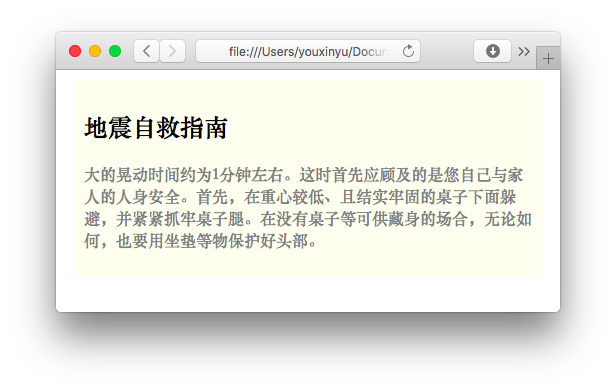
<h1>Earthquake self rescue Guide</h1>
<p>The large shaking time is about 1 minute. At this time, the first thing to consider is the personal safety of yourself and your family. First, avoid under the strong table with low center of gravity, and firmly grasp the table legs. When there is no table for hiding, in any case, protect your head with cushions and other objects.</p>
</article>
</div>
</body>
On this page, we set the class of the first div element to main and the class value of the article element to news. Generally, when setting the class name, do not set the existing element name, such as p and article.
 <style type="text/css">
  .main {
    background-color: ivory;
    margin: 10px;
  }
  .news {
    padding: 10px;
    color: black;
    font-weight: bold;
  }
  p {
    color: grey;
  }
  </style>
Different from the element selector, to apply styles to elements of the same class, you need to add a period (.) before the class name, and then write the corresponding style declaration.
design sketch
Class selector syntax
Therefore, we can see that the syntax rules of class selector are as follows:
-
First, specify the class name of the element to which you want to apply the class style in html;
<Yuansu name class="Specified class name"></Yuansu name>
<Yuansu name class="Specified class name">
-
Then, write the style of the corresponding class;
.Specified class name {Style declaration}
3. id selector
The id selector is similar to the class selector, but different in use.
When using the class selector, specify that an element belongs to a class, and use the keyword class, for example:
<body>
  <h1 class="important">reminder</h1>
  <p>Less footprints, more green.</p>
</body>
When using the id selector, the keyword id is used. For the above example of class selector, write with id selector:
<body>
  <h1 id="important">reminder</h1>
  <p>Less footprints, more green.</p>
</body>
In the style sheet, specify the style of the corresponding id name element, using # symbols, also known as checkerboard or pound sign.
#important {
    color: red;
    font-weight: bold;
}
id selector syntax
Similarly, we can see that the syntax rules of id selector are as follows:
-
First, specify the id and name of the element in the html to which you want to apply the class style.
<Yuansu name id="Specified class name"></Yuansu name>
<Yuansu name id="Specified class name">
-
Then, write the style of the corresponding class.
#Specified class name {style declaration}
The difference between class selector and id selector
Class selectors are similar to id selectors, so what's the difference between them? Under what circumstances should I use which selector?
The biggest difference between them is that in an HTML document, you can specify classes for any number of elements, but the id selector can only be used once, and an id can only be applied to one element.
Class selectors are generally recommended. In some specific cases, we recommend using id selectors. For example, an anchor is defined in a page through an id selector when writing JavaScript to apply special behavior to a specified page element.
3, Text and font styles
1. Font color, type and size
Relevant knowledge
Generally speaking, CSS properties for text can be divided into the following two categories:
- Font style: used for font attributes, including font type, size, thickness, etc;
- Text layout style: used to set the spacing of text and properties of other layout functions, including setting the space between words, how to align text, etc.
|Font color
One of the most intuitive attributes of the font is the color of the foreground content. We specify the color of the font through the color attribute.
.main {color:lightslategray}
|Font typefont family
Like the print world, the font types in web pages are also rich and diverse. We can use the font family attribute to define the font family of text.
font family
In CSS, there are two types of font families:
- General font family - a combination of font systems with similar appearance (such as "Serif" or "Monospace");
- Specific font family - specific font family (such as "Times" or "Courier").
By setting the font attributes of different cells in the HTML table, the page table visually displays the font type:
Table HTML:
<body>
  <table>
    <thead>
      <tr>
        <th>Universal font family</th>
        <th>font family</th>
        <th>describe</th>
      </tr>
    </thead>
    <tbody>
      <tr>
        <td rowspan=2>Serif</td>
        <td class="times">This is Times New Roman font.</td>
        <td class="times">Serif The characters in the font have additional decoration at the end of the line</td>
      </tr>
      <tr>
        <td class="georgia">This is Georgia font.</td>
        <td class="georgia">Serif The characters in the font have additional decoration at the end of the line</td>
      </tr>
      <tr class="arial">
        <td>Sans-serif</td>
        <td>Arial Verdana</td>
        <td>Sans The font has no additional decoration at the end</td>
      </tr>
      <tr>
        <td rowspan=2>Monospace</td>
        <td class="courier">This is Courier New font.</td>
        <td class="courier">All equal width characters have the same width</td>
      </tr>
      <tr>
        <td class="lucida">This is Lucida Console font.</td>
        <td class="lucida">All equal width characters have the same width</td>
      </tr>
    </tbody>
  </table>
Set font properties using CSS:
.times {
  font-family: "Times New Roman";
}
.georgia {
  font-family: "Georgia";
}
.arial {
  font-family: "Arial";
}
.courier {
  font-family: "Courier New";
}
.lucida {
  font-family: "Lucida Console";
}
The effects of different types of fonts are as follows: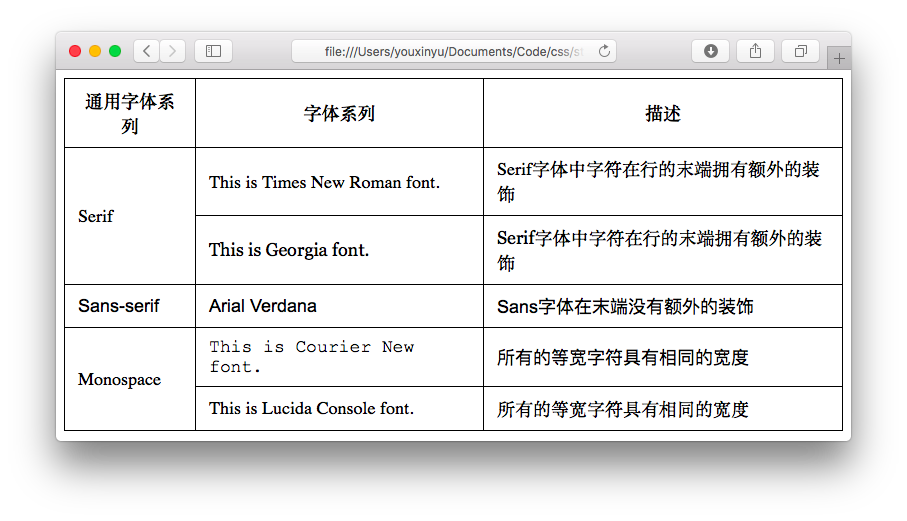
Font stack
When specifying different font types, there is usually no guarantee that the fonts you want to use on your web page are available. Therefore, we use font stack to provide multiple choices for browsers. For example:
{
	font-family:PingFang SC, Verdana, Helvetica Neue, Microsoft Yahei, Hiragino Sans GB, Microsoft Sans Serif, WenQuanYi Micro Hei, sans-serif;
}
When using the font stack, the browser checks whether the font is available in the current computer browser from the first in the list. If available, apply the font. If not available, it moves to the next font in the list and checks again. When none of the specified fonts are available, the browser's default font is used.
|Font size font size
In CSS, we set the size of text through the font size attribute. Generally, the size of text should be consistent.
Setting mode
We can set the font size in absolute and relative ways. The difference between the two settings is:
- Absolute size:
- Set the text to the specified font size;
- Users cannot change the text size in different browsers;
- Absolute size is useful in determining the size of user equipment.
- Relative size:
- Set the size relative to the surrounding elements;
- Allows users to change the text size in different browsers.
Common unit
When setting the font size, different units will be used. Next, let's learn about several common units for setting fonts.
1. Pixel px
Pixel, px, assigns the pixel to the text size. It is an absolute unit, so the pixel values calculated by the text on the page are the same on devices of different sizes.
2. em
em can solve the problem that text cannot be adjusted in some Internet Explorer.
The default text size in the browser is 16 px, and 1 em means equal to the current font size. The conversion formula between em unit and pixel is:
px/16=em in this formula, PX is the pixel size, EM is also the size, and the unit relationship of pixel / 16=em is: 1em = 16px
h1 {
    font-size:2.5em;  /* 40px/16=2.5em */
}
h2 {
    font-size:1.875em; /* 30px/16=1.875em */
}
p {
    font-size:1.125em; /* 18px/16=1.125em */
}
3. Percentage combined em
When setting the default size for the body element, you can use 100%, which is also relative to 16px:
body {
    font-size:100%;
}
2. Font thickness and style
Font weight
We use the font weight attribute to set the thickness of the text. In the print world, different font sizes will be set according to the needs of content. Similarly, more content settings should be set in web pages.
The value set by font weight is between 100 and 900, which is divided into 9 levels of coarseness. Some fonts have a built-in bold level. For example, 100 corresponds to the thinnest font and 900 corresponds to the thickest font; 400 corresponds to normal ·, while 700 is equivalent to bold.
In addition, setting the value to lighter means that the bold of the current element is set to be thinner or thicker than that of its parent element.
font-weight: 400;
Font style font style
We use the font style property when setting italic text.
Its attribute has three values:
- normal - the text is displayed normally;
- italic - text is displayed in italics;
- oblique - text is displayed obliquely.
Tips:
-
It's easy to judge when choosing normal, but how to choose between italic and oblique?
In fact, in general, italic and oblique text look exactly the same in web pages. Italic is a simple font style. In contrast, oblique text is an example of normal vertical text Oblique version.
3. Text decoration and text layout
Text decoration
We use text decoration to set the text decoration on the font.
The available values are:
- none: cancel any existing text decoration;
- Underline: text underline;
- overline: underline the text;
- Line through: the line through the text;
- Blink: blink text.
When in use, you can add multiple decoration values at the same time according to your needs.
Text layout
Next, let's look at the properties that affect the text layout.
Text align text align
We use text align to change the alignment of text lines in an element.
The available values are:
- Left: left aligned text;
- Right: right align text;
- Center: center text;
- justify: align horizontally to change the gap between words so that all text lines have the same width.
The default alignment is different in different languages. Most western languages read from left to right, and the default value of text align is left. For languages such as Hebrew and Arabic, when reading from right to left, text align defaults to right.
Line height
We use the line height attribute to set the row height.
Note: row height attribute value cannot be negative.
The available values are:
- normal: default. Set reasonable row spacing;
- Number: set a number, which will be multiplied by the current font size to set the line spacing;
- length: set fixed row spacing;
- %: percentage line spacing based on the current font size;
- inherit: inherits the value of the line height attribute from the parent element.
Letter spacing and word spacing
The letter spacing attribute is used to control the spacing between characters;
The available values are:
- normal: the default value. There is no extra space between characters;
- length: defines the fixed interval between characters (can be negative);
- inherit: inherits the value of the letter spacing attribute from the parent element.
Similarly, the word spacing attribute is used to control how many words are separated from each other.
The available values are:
- normal: default;
- length: defines the fixed interval between words;
- inherit: inherits the value of the word spacing attribute from the parent element.
4, Background style
1. Background color
We can use background color to set the background color for the element. Usually, the attribute value is color name or color coding. Because the body element in the HTML document contains all the contents of the HTML document, if you want to change the background color of the whole page, you only need to set the background color attribute of the body element.
body {
       background-color: lightyellow;
    }
2. Background picture
Set background picture
We can use the background image attribute to set the background attribute of the element. This is how common web page background images are set. Where the attribute value specifies the picture link through the url.
Writing format: background image: URL ("picture link")
Tile background image
After specifying the background image, the default background image is tiled and repeated. If you want to set the image to be tiled horizontally, vertically, or in other ways, you can set the background repeat property.
The specific attribute values are set as follows:
| style | Attribute value |
|---|---|
| Horizontal tile repeat | repeat-x |
| Vertical tile repeat | repeat-y |
| Do not repeat tiling | no-repeat |
-
Default tile
 body {
     /*Set background picture*/
     background-image:url("./Assert/sun.jpg");
 }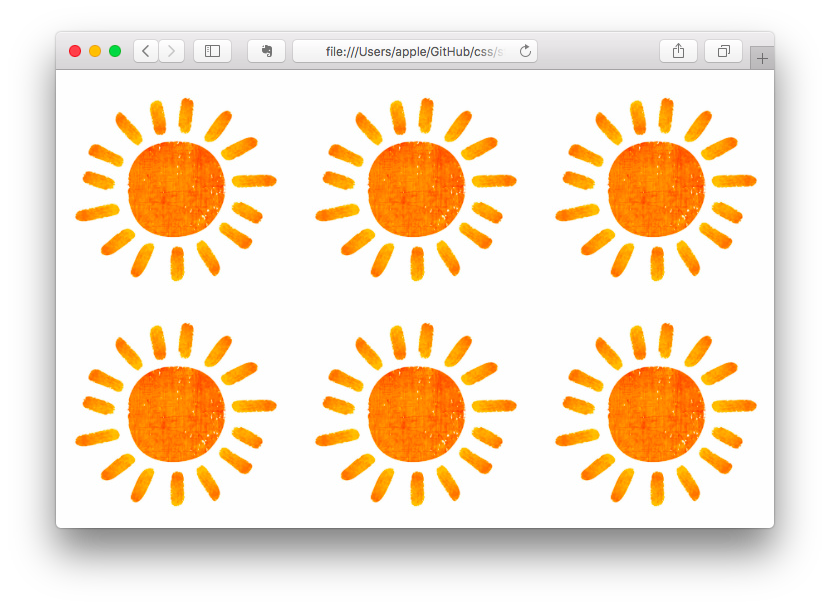
-
repeat-x
 body {
     /*Set background picture*/
     background-image:url("./Assert/sun.jpg");
     background-repeat: repeat-x;
 }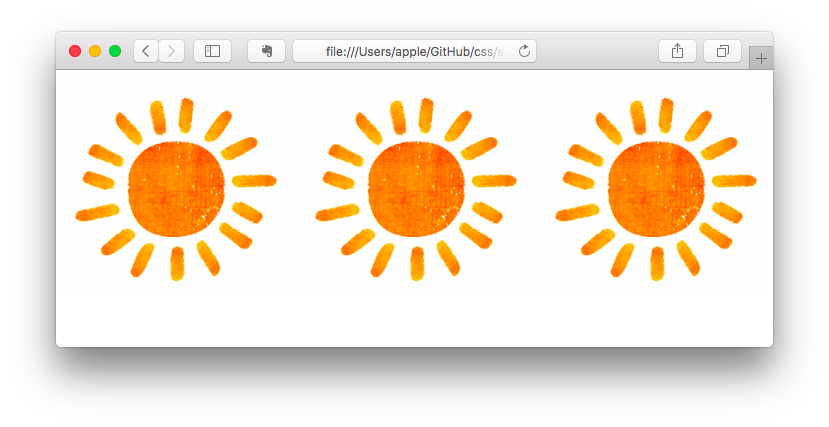
-
repeat-y
 body {
     /*Set background picture*/
     background-image:url("./Assert/sun.jpg");
     background-repeat: repeat-y;
 }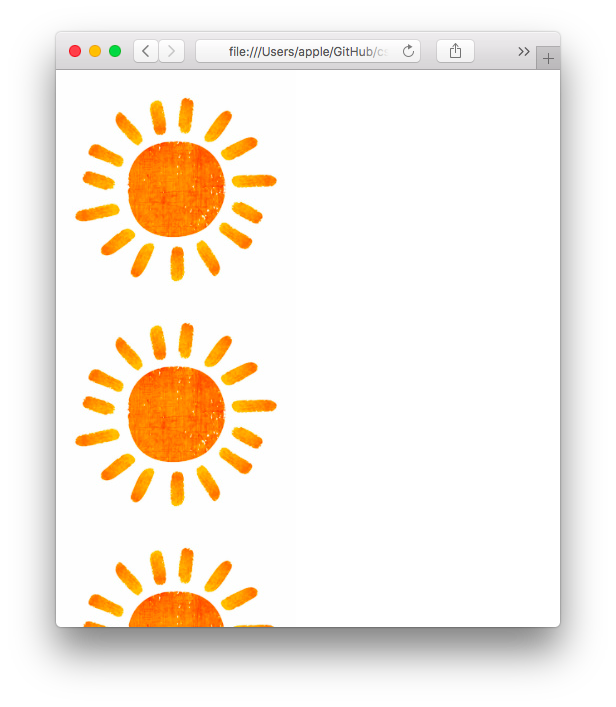
-
no-repeat
 body {
     /*Set background picture*/
     background-image:url("./Assert/sun.jpg");
     background-repeat: no-repeat;
 }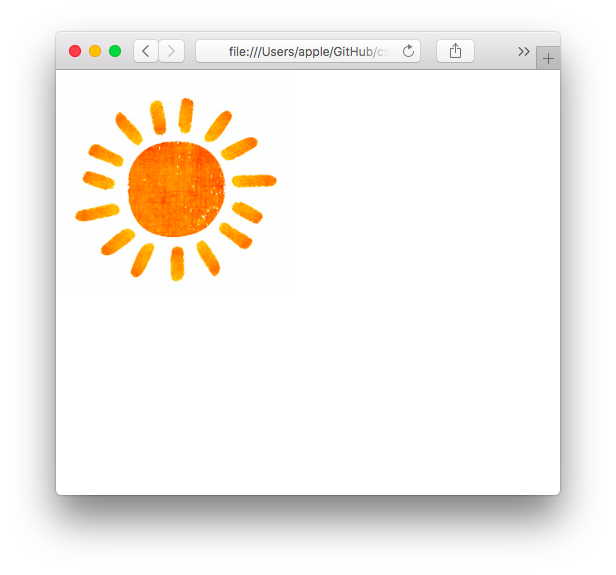
3. Background positioning and background correlation
Background positioning
When the image is displayed in the same position as the background and text, in order to make the page layout more beautiful and easier to read the text, we can use the background position attribute to change the position of the image in the background:
body {
    /*Set background picture*/
    background-image: url("https://www.educoder.net/attachments/download/211104");
 background-repeat: no-repeat;
    background-position: right top;
}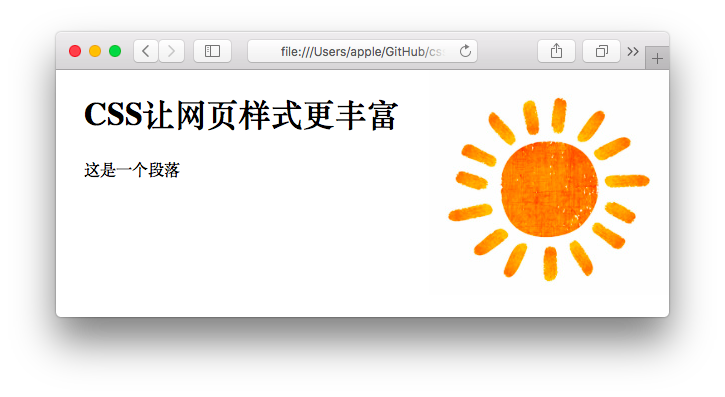
For specific locations, you can use the following keyword combinations:
| Attribute value |
|---|
| top left |
| top center |
| top right |
| center left |
| center center |
| center right |
| bottom left |
| bottom center |
| bottom right |
If the value defines a keyword, the second value will be "center". Of course, you can also use percentage and length values, which are only for understanding now.
Background correlation
When the page is long, scroll the page and the background image will also scroll. When the document scrolls past the image, the image disappears. If you want the background image not to change position as the page scrolls. You can use the background attachment property to set its value to fixed.
body {
    background-image: url("https://www.educoder.net/attachments/download/211104");
    background-repeat: no-repeat;
    background-attachment: fixed;
}
Abbreviated background
From the above example, you have learned the settings of various background attributes. In order to simplify the writing of these attributes, we can combine these attributes into one attribute.
body {
    background:#ffffff url("./Assert/sun.jpg") no-repeat right top;
}
When using short attributes, the order of attribute values is:
- background-color;
- background-image;
- background-repeat;
- background-attachment;
- background-position.
The above attributes do not need to be used completely. You can use them according to the page settings.
5, Table border
1. Table border
Table border
We use the border attribute to add borders to the table, so that the HTML table will look more in line with the table we usually use. The border attribute values can be set in order: border width, border style, and border color. Generally, the attribute name will be omitted and the attribute value will be set directly. Among them, border style can take the following four values:
- dotted: dot;
- Solid: solid line;
- Double: double line;
- Dashed: dashed line.
Collapse border
However, the address book table set in this way has a double border. This is because the table and th/td elements have independent boundaries. Therefore, we can use the border collapse property to set the collapse border. The folded border represents whether the borders are folded into a single border or separated from each other.
table {
    border-collapse: collapse; /*Set folding border*/
}
th,
td {
    padding: .5em .75em;
    border: 1px solid black; /*Set the solid black line with 1px thick border*/
}
2. Table color, text and size
Table color
The table color setting is very simple, which is the same as setting the text color. In the corresponding table element label, use the color attribute to set the text color in the table, and use the background attribute to set the background color of the table element.
<!DOCTYPE html>
<head>
    <meta charset="UTF-8" />
    <title>HTML – Simple table</title>
</head>
<body>
    <table width="400">
        <caption>Running results in the sports meeting</caption>
        <thead>
         <!-- Table header -->
            <tr>
                <th scope="col">length</th>
                <th scope="col">Li Wen</th>
                <th scope="col">Wang Qian</th>
                <th scope="col">Zhou Jia</th>
            </tr>
        </thead>
        <tbody>
            <!-- Table body -->
            <tr>
                <th scope="row">100 rice</th>
                <td>14s</td>
                <td>16s</td>
                <td>13s</td>
            </tr>
            <tr>
                <th scope="row">200 rice</th>
                <td>26s</td>
                <td>23s</td>
                <td>25s</td>
            </tr>
            <tr>
                <th scope="row">400 rice</th>
                <td>70s</td>
                <td>73s</td>
                <td>69s</td>
            </tr>
        </tbody>
        <tfoot>
            <!-- Table tail -->
            <tr>
                <th scope="row">Total time</th>
                <td>110s</td>
                <td>112s</td>
                <td>107s</td>
            </tr>
        </tfoot>
    </table>
</body>
</html>
We set the CSS style as follows:
table {
    border-collapse: collapse;
}
th,
td {
    border: 2px solid black;
}
th
{
    background-color:lightblue;  /*Table head background color*/
    color:white;                         /*Table header font color*/
}

Table text alignment and text weight
Table cells are left aligned by default. In practice, we can set the table alignment as required. Setting the text alignment in the table is the same as setting the paragraph text alignment. Both use the text align attribute. Similarly, setting the thickness of table text is the same as setting the thickness of paragraph text. Both use the font weight attribute.
table {
    border-collapse: collapse;
}
caption {
    font-weight: bold;                /*Table title text bold*/
}
th,
td {
    border: 2px solid black;
}
th {
    text-align: center;                /*Center alignment of table head*/
    background-color:lightblue;  /*Table head background color*/
    color:white;                         /*Table header font color*/
}
td {
    text-align: right;                   /*Align table body right*/
}
tfoot {
    font-weight: bold;               /*Bold text at the end of the table*/
}
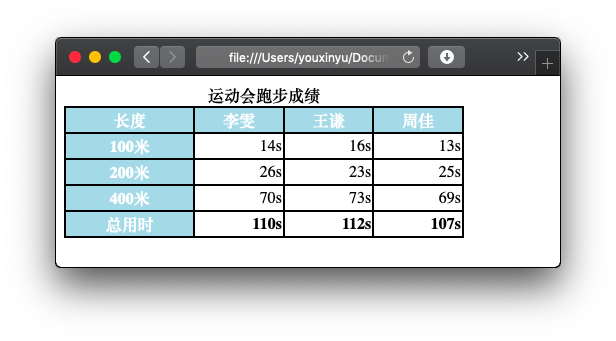
Table width and height
Use the width and height attributes in the table element to set the width and height of the table.
The table width is set to 98%, as we learned in the CSS course, and the table width always maintains 98% of the page size:
lor:lightblue; / Table head background color/
color:white; / Table header font color/
}
[External chain picture transfer...(img-B8r24cOk-1636689706241)]

##### Table text alignment and text weight

Table cells are left aligned by default. In practice, we can set the table alignment as required. Setting the alignment of text in the table is the same as setting the alignment of paragraph text`text-align`Properties. Similarly, setting the thickness of table text is the same as setting the thickness of paragraph text`font-weight`Properties.

```css
table {
    border-collapse: collapse;
}
caption {
    font-weight: bold;                /*Table title text bold*/
}
th,
td {
    border: 2px solid black;
}
th {
    text-align: center;                /*Center alignment of table head*/
    background-color:lightblue;  /*Table head background color*/
    color:white;                         /*Table header font color*/
}
td {
    text-align: right;                   /*Align table body right*/
}
tfoot {
    font-weight: bold;               /*Bold text at the end of the table*/
}
[external chain picture transferring... (img-A0bPLT8g-1636689706243)]
Table width and height
Use the width and height attributes in the table element to set the width and height of the table.
The table width is set to 98%, as we learned in the CSS course, and the table width always maintains 98% of the page size:
