SpringBoot + Vue realize file upload function
- 1, Requirement description
- 2, File upload function (upload locally on our computer)
- 3, File download function
1, Requirement description
Recently, I was developing a background management system for wechat wechat applet. In this system, I met a demand that users need to upload an Excel file to the server, the server parses the file, and then store the parsed data in the database.
At present, the function of Excel parsing using Java has been realized. Predecessors have helped us build the wheel. I can just use it directly. Through a search on the Internet, I found two ways to realize the third-party library for Excel parsing
- POI (produced by Apache)
- easyExcel (produced by Alibaba project team)
Here, I just mention what tools can help us complete file parsing. Today, our focus is how to realize the file upload function in the project created by Vue CLI4.
2, File upload function (upload locally on our computer)
2.1 function implementation of springboot backend - configuration file
Make the following configuration in the application.yml file
- Whether to enable the file upload function, the write size of the configuration file, and other contents
- Customize the file storage path (save the file uploaded from the front end to our local)
spring:
  servlet:
    multipart:
      enabled: true # Open file upload
      file-size-threshold: 2KB # Threshold for writing files to disk
      max-file-size: 100MB
      max-request-size: 215MB # Maximum request size

# Custom file save path
gorit:
  file:
    root:
      path: I:\dev\
2.2 preparation of controller for uploading springboot backend files
package cn.gorit.controller.api.v1.file;

import cn.gorit.common.lang.Result;
import io.swagger.annotations.Api;
import io.swagger.annotations.ApiOperation;
import org.slf4j.Logger;
import org.slf4j.LoggerFactory;
import org.springframework.beans.factory.annotation.Value;
import org.springframework.web.bind.annotation.*;
import org.springframework.web.multipart.MultipartFile;

import javax.servlet.http.HttpServletRequest;
import javax.servlet.http.HttpServletResponse;
import java.io.File;
import java.io.IOException;
import java.text.SimpleDateFormat;
import java.util.Date;


@Api(value = "File upload and download related functions")
@RestController
@RequestMapping("/api/v1")
public class FileController {
	// Set fixed date format
    SimpleDateFormat sdf = new SimpleDateFormat("yyyy-MM-dd");
    // Inject the custom configuration in yml here
    @Value("${gorit.file.root.path}")
    private String filePath;
    // Log printing
    private Logger log = LoggerFactory.getLogger("FileController");

    // File upload (multiple files can be uploaded)
    @PostMapping("/upload")
    public Result fileUploads(HttpServletRequest request,@RequestParam("file") MultipartFile file) throws IOException {
    	// Get the formatted date
        String format = sdf.format(new Date());
        // Get the name of the uploaded file
        String fileName = file.getOriginalFilename();
        // Time and date splicing
        String newFileName = format + "_" + fileName;
        // Get the location where the file is saved and the new file name
        File dest = new File(filePath + newFileName);
        try {
        	// The uploaded file is saved
            file.transferTo(dest);
            // Print log
            log.info("Upload succeeded. The currently uploaded file is saved in {}",filePath + newFileName);
            // You can customize the returned unified JSON format data, and you can directly return this string.
            return Result.succ("Upload succeeded");
        } catch (IOException e) {
            log.error(e.toString());
        }
        // To be completed - document type verification
        return Result.fail("Upload error");
    }
}
----------Supplement on December 2, 2020---------- The background received inquiries from several small partners, cn.spirit.common.lang.Result; What does the Result class in mean.
This class is used to customize a general return result set. Generally, the returned data format is as follows
{
	"code": 200,
	"msg": "success",
	"data": ""
}
If you want to return data in the specified format, you only need to add generics. Result < T >
package cn.gorit.common.lang;

public class Result {
    private Object data;
    private String msg;
    private int code;

	// getter setter omitted, constructor omitted
    // Data returned after successful operation
    public static Result succ(Object data) {
        return succ(200, "Operation succeeded", data);
    }

    public static Result succ(String msg) {
        return succ(200, msg, null);
    }


    public static Result succ(int code, String msg, Object data) {
        Result r = new Result();
        r.setCode(code);
        r.setMsg(msg);
        r.setData(data);
        return r;
    }

    public static Result succ(String msg, Object data) {
        return succ(200,msg,data);
    }

    // Operation exception return
    public static Result fail(int code, String msg, Object data) {
        Result r = new Result();
        r.setCode(code);
        r.setMsg(msg);
        r.setData(data);
        return r;
    }

    public static Result fail(String msg) {
        return fail(400,msg,null);
    }

    public static Result fail(int code, String msg) {
        return fail(code,msg,"null");
    }

    public static Result fail(String msg, Object data) {
        return fail(400,msg,data);
    }
}
2.3 Vue front end writing
File upload I wrote a dialog box myself
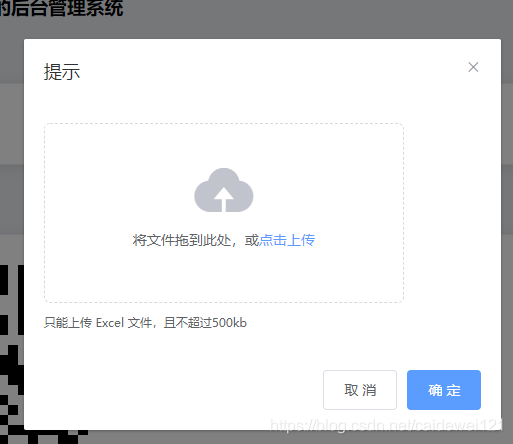
The logic code is as follows
<template>
<div>
<el-button class="btn-upload" type="primary" @click="handleUpdate">Upload question bank el-button>
<el-dialog
title="Tips"
:visible.sync="dialogVisible"
width="30%"
>
<span>
<el-upload class="upload-demo"
ref="upload"
drag
action="http://localhost:9999/api/v1/upload"
multiple
:auto-upload="false"
:limit="5"
:on-success="handleFilUploadSuccess"
:on-remove="handleRemove"
>
<i class="el-icon-upload">i>
<div class="el-upload__text">Drag the file here, or<em>Click upload em>div>
<div class="el-upload__tip" slot="tip">Upload only Excel Documents, and no more than 500 kbdiv>
el-upload>
span>
<span slot="footer" class="dialog-footer">
<el-button @click="dialogVisible = false">Cancel el-button>
<el-button type="primary" @click="handleUpload">determine el-button>
span>
el-dialog>
div>
template>
<script>
export default {
name: "Upload",
data () {
return {
dialogVisible: false
}
},
methods: {
handleRemove(file,fileList) {
console.log(file,fileList);
},
submitUpload() {
this.$refs.upload.submit();
},
// Function when the file is uploaded successfully
handleFilUploadSuccess (res,file,fileList) {
console.log(res,file,fileList)
this.$message.success("Upload succeeded")
},
handleUpdate () {
this.dialogVisible = true;
},
// Functions that handle file uploads
handleUpload () {
// console.log(res,file)
this.submitUpload()
this.dialogVisible = false
}
}
}
script>
<style scoped="scoped">
.btn-upload {
top: 70px;
right: 40px;
position: fixed;
z-index: 100;
border-radius: 30px;
box-shadow: 0 2px 12px 0 rgba(91, 156, 255, 0.9)
}
.el-upload {
margin: 5px;
}
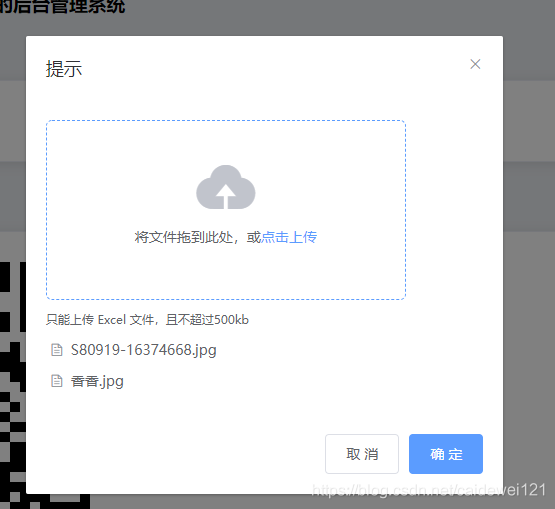
style>I also use the Element UI component for front-end upload, and I disable the function of automatic upload to the back-end. Users can add multiple files at one time and then upload them together
You can see the printed log information in the background

We enter this path to view the uploaded content
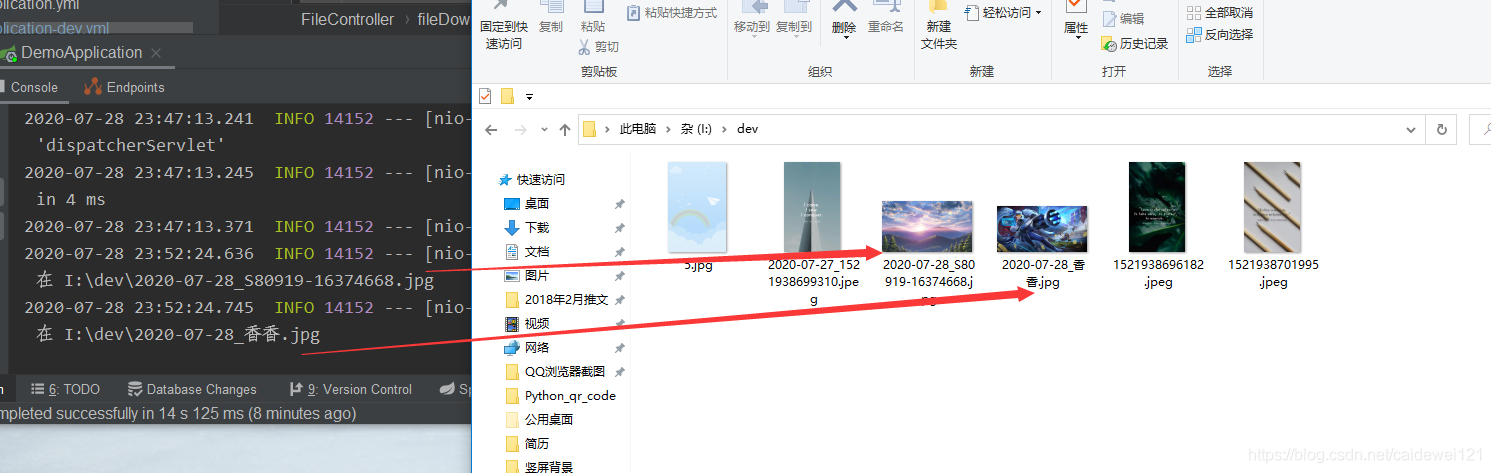
You can see the uploaded file on it
3, File download function
Supplement and update on July 31, 2020
In fact, this problem was solved the next day, and now it's the end of the month. I also draw a final plan for my article.
In fact, the logic of file download is not very complicated. We use an a tag and then add a download attribute. href corresponds to the address of static resources in the back-end service, and the download function can be realized.
3.1 configure the static resource path of the back-end service
In the created SpringBoot project, the resource directory is specially stored in the resources directory, which contains a static directory and templates directory. Here we will use the static directory as the path to our static resources.
When learning how to integrate spring MVC with SpringBoot, we need to write a configuration class to specify the directory of static resources of the SpringBoot project. The configuration class is written as follows
package cn.gorit.config;

import org.springframework.context.annotation.Configuration;
import org.springframework.web.servlet.config.annotation.ResourceHandlerRegistry;
import org.springframework.web.servlet.config.annotation.WebMvcConfigurer;

/**
 * Enable mvc support and set the static directory as the classpath
 */
@Configuration
public class WebMvcConfig implements WebMvcConfigurer {

    // Get the root path of classpath and all paths under the resources directory
    @Override
    public void addResourceHandlers(ResourceHandlerRegistry registry) {
        registry
                .addResourceHandler("/static/**")
                .addResourceLocations("classpath:/static/");
    }
}
In this way, we can write static pages in static files and display them in back-end services. However, our project is front-end and back-end separated, so we won't write any static pages in the static directory. We put the static resources we need to download into it
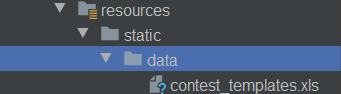
Then outside, the request path of the static resource is http://localhost:xxx/data/ Your file name
3.2 Vue front end realizes download function
Let's see what's special about this download link. Here we refer to the format given in the rookie tutorial to modify it
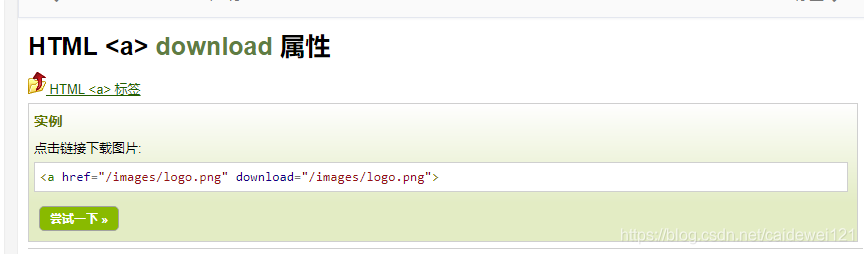
Let's look at the role of two attributes
- href indicates the path of the resource,
- download indicates the file to be downloaded
After that, change it. Our resources are placed in the resources directory of SpringBoot. We also configured the related configuration of spring MVC, so that this static resource can be obtained later.
You can see the effect first
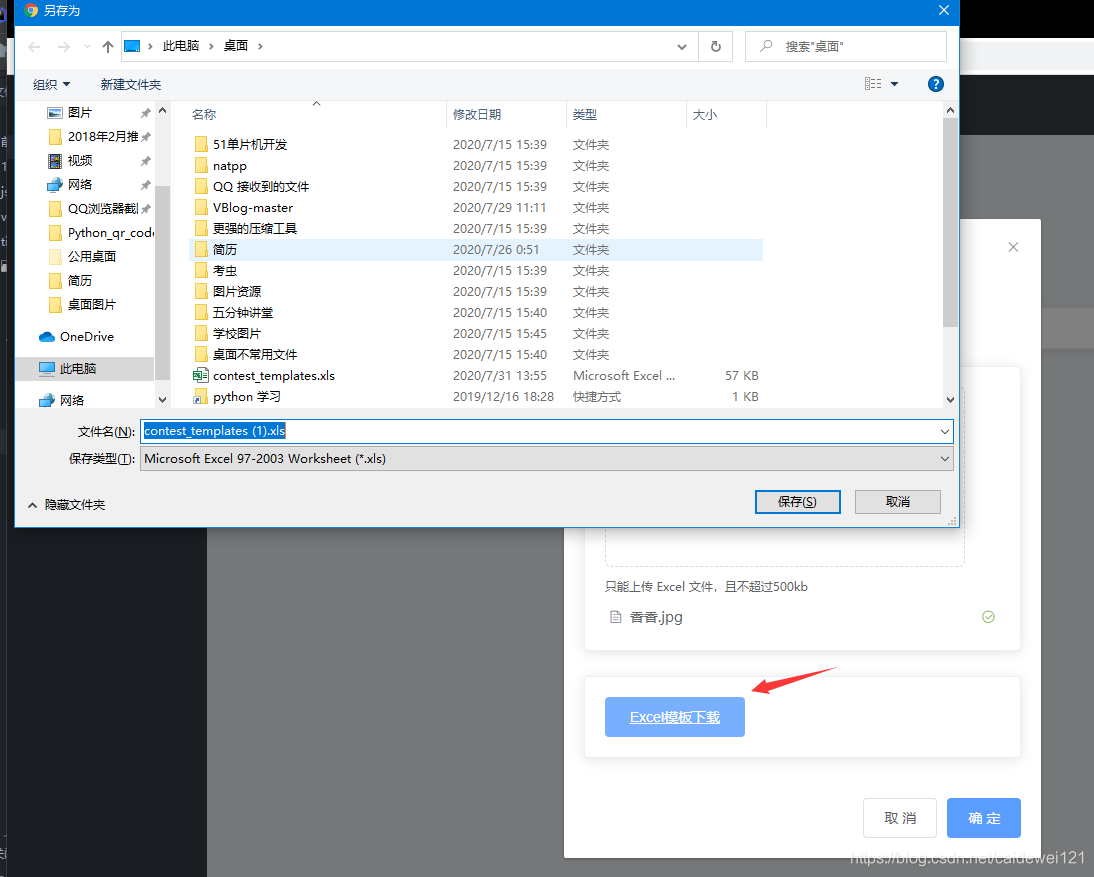
Then we directly fill in the href and specify the path of the resource at the back end to complete the download function
	<a style="color: #ffffff; " class='download' href=' http://localhost:9999/data/contest_templates.xls ' download="contest_ Templates.xls "title =" excel template download ">
		Excel Template download
	a>
If you have a better way, please leave a message and praise it~