Data cleaning
Images made by yourself are prone to bad data (such as grayscale images, for example, CV2 can't read data, and there is no shape). The following code is directly:
import os
import tensorflow as tf
from PIL import Image
import matplotlib.pyplot as plt
import numpy as np
import cv2
import shutil
from PIL import ImageFile
ImageFile.LOAD_TRUNCATED_IMAGES = True #Hard large image clipping
#cwd='F:/TFdata/test'
cwd='F:/TFdata/train'
#Data cleaning: wash out the data that cannot be opened by cv2. Pay attention to cleaning once
all_path = []
for root, dirs, files in os.walk(cwd):
        for file in files:
            if "jpg" in file:
                    all_path.append(os.path.join(root, file))
bad_image= []
bad_path = 'F:/TFdata/bad'
for i in range(len(all_path)):
    org = all_path[i]
    try:
        img = cv2.imread(org)
        ss = img.shape
    except:
        bad_image.append(all_path[i])
        shutil.move(all_path[i],bad_path)
        continue
print('share%s Zhang Zang Tu'%(len(bad_image)))
Data enhancement
In deep learning, the amount of data is very important, but limited by the actual situation, it is difficult to reach tens of thousands or hundreds of thousands. Insufficient data will lead to val_loss and val_ The accuracy is basically unchanged, but it is very poor. It is basically fixed at 30% - 40%, so it is necessary to enhance the data and enrich the input data with the original data. There are many kinds of data enhancement. Only imgaug e (powerful image data enhancement Library) is used here. It supports a wide range of enhancement technologies, allows them to be easily combined and executed in random order or on multiple CPU cores, and has a simple and powerful random interface. It can not only enhance images, but also enhance key points / landmarks, bounding boxes, heat maps and segmentation maps. Details can be learned imgaug document
1. Installation
pip install imgaug
2. Use
The data enhancement library needs to input a four-dimensional image data group. Images (n, height, weight, channels) is the number of images, image height, image width, and image channels (RGB = channels=3, grid = channels=1). Data must be uint8 type with size between 0 and 255.
First, in the program (batch), the enhancement sequence seq (clipping + horizontal flip + Gaussian blur) is directly used to store all enhancement operations to be performed. Define once at the beginning of the script, then load and expand many batches for training.
The "image" should be a 4D numpy shape array (N, height, width, channel) or a list of 3D numpy arrays, each with a shape (height, width, channel). Grayscale images must have each shape (height, width, 1). All images must have numpy data type uint8, and the value should be in the range of 0-255.
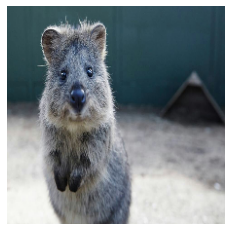
The following is an experiment using the quokka (short tailed dwarf Kangaroo) brought by imgaug
import numpy as np
import imgaug as ia
import imgaug.augmenters as iaa
import matplotlib.pyplot as plt

ia.seed(1)#Set subsequent random seeds
#Open the kangaroo picture
quo=ia.quokka(size=(224,224))#ia.quokka() is a function, including the size of the image and the number of subsequent copies
plt.imshow(quo)
plt.axis("off")
plt.show()
As a result, the original picture of short tailed Kangaroo:
Take another look at the code and results of making a graph into a four-dimensional array (that is, a batch) with batch_size=32:
#Form an array of (32224, 3)
images = np.array(
    [ia.quokka(size=(224, 224)) for _ in range(32)],
    dtype=np.uint8
)
#Display the image contained in a batch
for index in range(32):
    plt.subplot(4, 8, index + 1)
    plt.imshow(images[index])
    plt.axis("off")
plt.show()
An original picture of batch showing: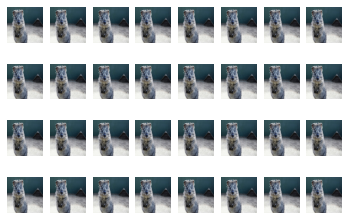
Then, add the enhancement sequence according to the introduction, including cropping and affine transformation, horizontally flipping some images, adding some noise and blur, and changing the contrast and brightness.
seq = iaa.Sequential([
    iaa.Fliplr(0.5), # 50% horizontal flip
    iaa.Crop(percent=(0, 0.1)), #Random clipping 0-0.1
    # Gaussian blur between 0-0.5, but only 50% of all pictures are blurred
    iaa.Sometimes(
        0.5,
        iaa.GaussianBlur(sigma=(0, 0.5))
    ),
    #Enhance or reduce the contrast in each image.
    iaa.LinearContrast((0.75, 1.5)),
    # For 50% of the images, the noise is sampled once per pixel
    # For the other 50% of the images, we sample the noise of each pixel and channel.
    #This can change the color of pixels (not just brightness).
    iaa.AdditiveGaussianNoise(loc=0, scale=(0.0, 0.05*255), per_channel=0.5),
    #Make some images brighter and some darker.
    #In 20% of cases, we sample the multiplier of each channel once, which will eventually change the color of the image.
    iaa.Affine(
        scale={"x": (0.8, 1.2), "y": (0.8, 1.2)},
        translate_percent={"x": (-0.2, 0.2), "y": (-0.2, 0.2)},
        rotate=(-25, 25),
        shear=(-8, 8)
    )
], random_order=True) # Apply intensifiers in random order
images_aug = seq(images=images)
#Show the effect of data enhancement
for index in range(32):
    plt.subplot(4, 8, index + 1)
    plt.imshow(images_aug[index])
    plt.axis("off")
plt.show()
After the data is enhanced, you can see that the batch has been horizontally flipped, cropped, Gaussian blur, contrast change and color change. The rest is to change the function in the enhancement sequence (seq) to increase the desired enhancement method. You can check the stronger enhancement Official English introduction of imgaug

The second is to save the enhanced image to a local file, and then disrupt all the files to take advantage of the last time (essay I) Create a new TFRecord code using the method in
import numpy as np
import cv2
from imgaug import augmenters as iaa #Introducing data enhanced packages
import matplotlib.pyplot as plt
from PIL import Image

seq = iaa.Sequential([
    iaa.PiecewiseAffine(scale=(0.01, 0.05)),  #affine
    iaa.CoarseDropout((0.03, 0.15), size_percent=(0.02, 0.05),per_channel=0.2),
    iaa.DirectedEdgeDetect(alpha=(0, 0.7), direction=(0.0, 1.0)),
    iaa.Emboss(alpha=(0, 1.0), strength=(0, 2.0)),
    iaa.Superpixels(p_replace=(0, 1.0),n_segments=(20, 200)),  #Super pixel
    iaa.Sharpen(alpha=(0, 1.0), lightness=(0.75, 1.5)),  #sharpening
    iaa.Crop(px=(1, 16)),   #Cutting
    iaa.Fliplr(0.5),   #Flip
    iaa.GaussianBlur(sigma=(0, 3.0))  #Gaussian blur
])
img = cv2.imread('C:/Users/Administrator/Desktop/quokka.jpg') #For example, a picture,
def augment_image(number,img,fn):
    for i in range(number):
        images_aug=seq.augment(images=img)
        plt.imshow(images_aug[0])
        plt.axis('off')
        string='image'+  str(i) + '.jpg'
        plt.save(fn+string)
number=64#Quantity of one sheet to multiple sheets
fn='F:/TFdata/aug'#Save path
augment_image(number,img,fn)