The supporting code and data used in this series will be open source to this warehouse. Welcome to Star, https://github.com/DesertsX/d3-tutorial
preface
Last article "Take you to D3.js data visualization series (I) - niuyi ancient willow 2021.07.30" Riguliu introduced how to add and set SVG canvas, add rectangular elements, add multiple rectangular elements according to data set, adjust layout and wrap display by using remainder and rounding operation, etc.

At the end of the article, a question is whether the width, height and spacing of each rect can be calculated automatically based on the size of data set and canvas, and then laid out automatically?
Just before Gu Liu gnawed on the source code of Atlantic manuscript visualization works, he saw the relevant implementation methods. I'll share them with you here. Related reading: "Atlantic ancient manuscript" (Part 1) - niuyi ancient willow, June 17, 2021,"Atlantic ancient manuscript" (Part 2) - niuyi ancient willow, June 22, 2021
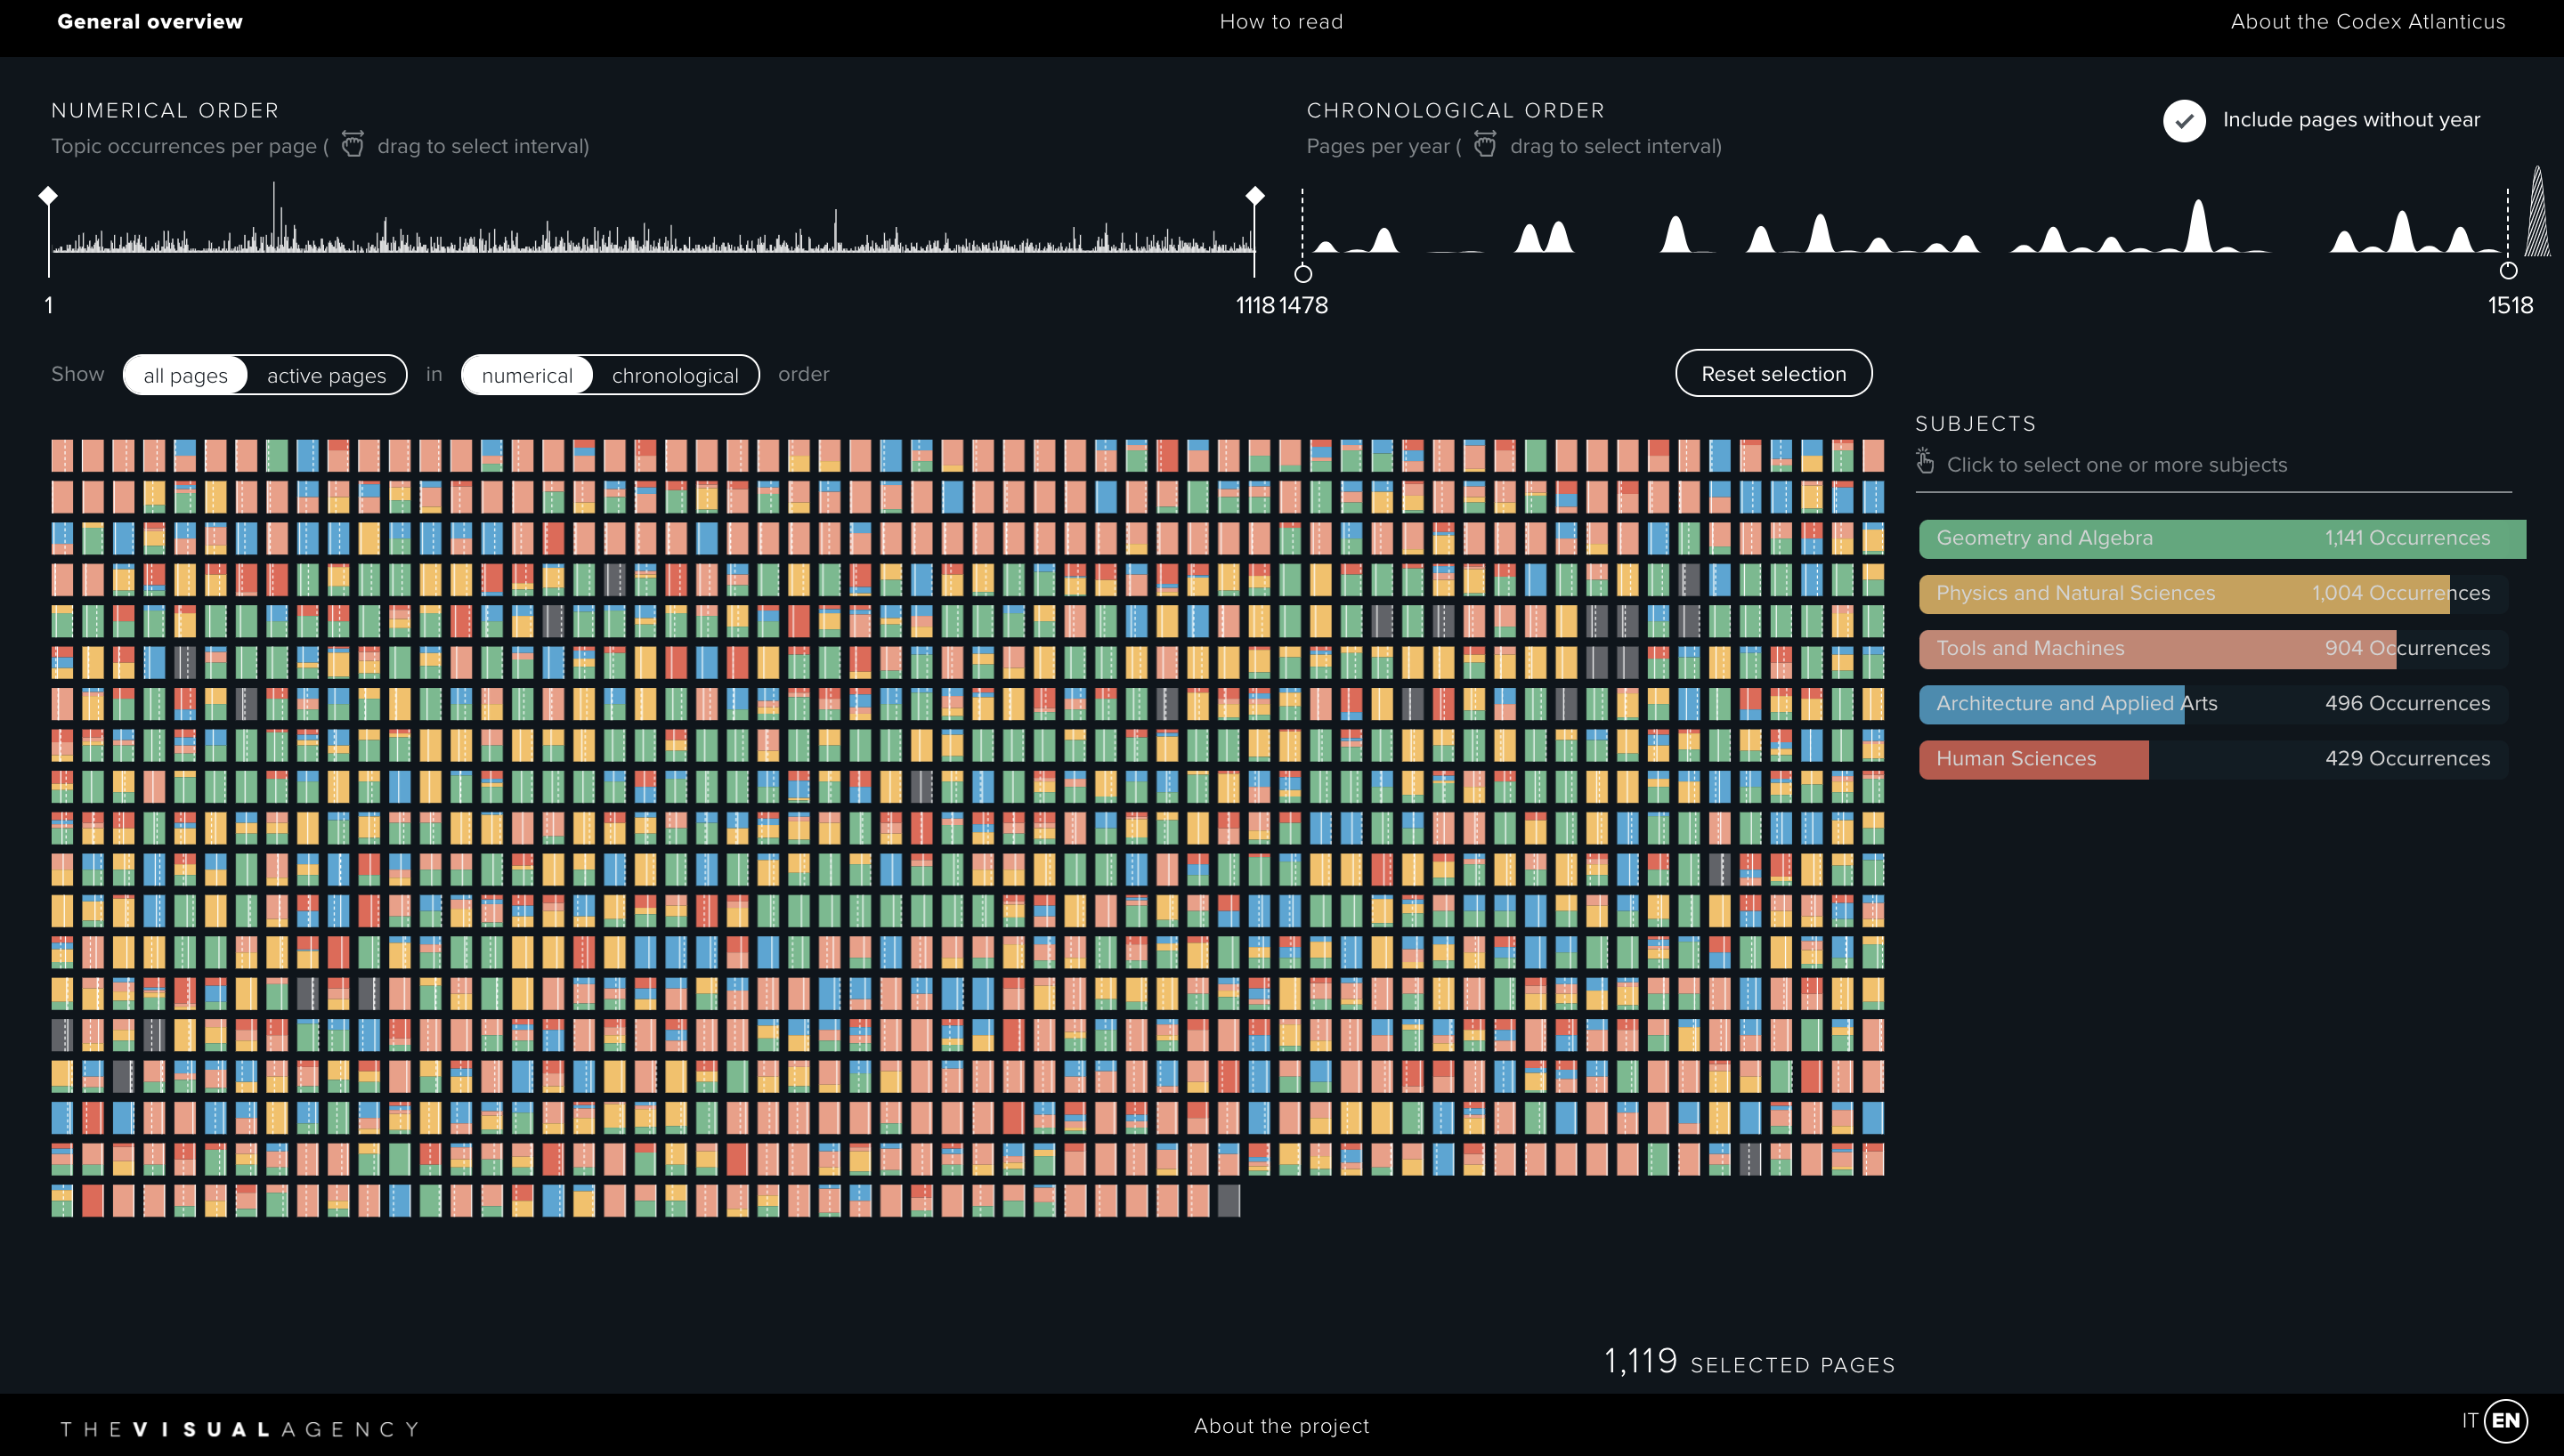
However, Gu Liu didn't understand the principle behind it. He could only write down his understanding as much as possible. On the one hand, we don't necessarily use this automatic layout method. On the other hand, it's not impossible to use direct copy to take it away. Therefore, if this part is not understood in the end, it's not a big problem and has no impact on the follow-up. Rest assured. The next article will return to the basic explanation of D3.js data visualization.
Basic code
First of all, the basic code structure is similar to the previous article. You can review what you don't understand: "Take you to D3.js data visualization series (I) - niuyi ancient willow 2021.07.30".
This time, the SVG canvas is full of the size of the web page window, and the width is no longer half the size; In addition, the dataset is set to be larger, i.e. [0, 1, 2,..., 99] has 100 pieces of data, but the layout will be calculated automatically based on the size of the data, so the number of data is not important; In addition, the colors color array remains unchanged. When drawing a rectangle, the corresponding color will still be obtained by taking the remainder. Later, the color scale will be introduced to map the Category attribute to the corresponding color. We will talk about it later.
<body>
    <div id="chart"></div>
    <script src="./d3.js"></script>
    <script>
        function drawChart() {
            const width = window.innerWidth
            const height = window.innerHeight

            const svg = d3.select('#chart')
                .append('svg')
                .attr('width', width)
                .attr('height', height)
                .style('background', '#FEF5E5')

            const dataset = d3.range(100)
            console.log(dataset) // [0, 1, 2, ..., 99]

            const colors = ['#00AEA6', '#DB0047', '#F28F00', '#EB5C36', '#242959', '#2965A7']

            // ....
        }

        drawChart()
    </script>
</body>
Calculated rectangle width of automatic layout
After the canvas is set, let's take a look at how the width rectWidth of each rectangle is calculated according to the canvas size and data in the Atlantic manuscript visualization source code. Since the height of the rectangle is 1.5 times the width, there is no need to calculate it separately. (Note: this part of the code is not completely consistent with the source code. Many variable names have been changed for the convenience of explanation, but the logic is consistent and the calculation process is the same)
const containerWidth = width
const containerHeight = height
const containerArea = containerWidth * containerHeight

const halfMargin = (containerWidth / 100) * 0.3
const totalMargin = halfMargin * 2

let rectWidth = Math.sqrt(containerArea / (1.5 * dataset.length)) - totalMargin

const columns = containerWidth / (rectWidth + totalMargin)
const rows = dataset.length / columns
const rest = dataset.length % parseInt(columns)

if (rest <= rows) {
    rectWidth = containerWidth / (columns + 1) - totalMargin
} else if (rest > rows) {
    rectWidth = containerWidth / (columns + 2) - totalMargin
}
Next, disassemble the code to see what has been done.
Canvas container area
First, calculate the canvas container area containerArea. Here containerWidth and containerHeight correspond to width and height respectively, which seems unnecessary. However, sometimes the canvas width and height are not set manually, but are specified after obtaining the width and height of the element through getBoundingClientRect(). In a similar way, containerWidth = svg.getBoundingClientRect().width, containerHeight = svg.getBoundingClientRect().height. In short, you need to calculate the area first. Link: https://developer.mozilla.org/zh-CN/docs/Web/API/Element/getBoundingClientRect
const containerWidth = width
const containerHeight = height
const containerArea = containerWidth * containerHeight
Blank space
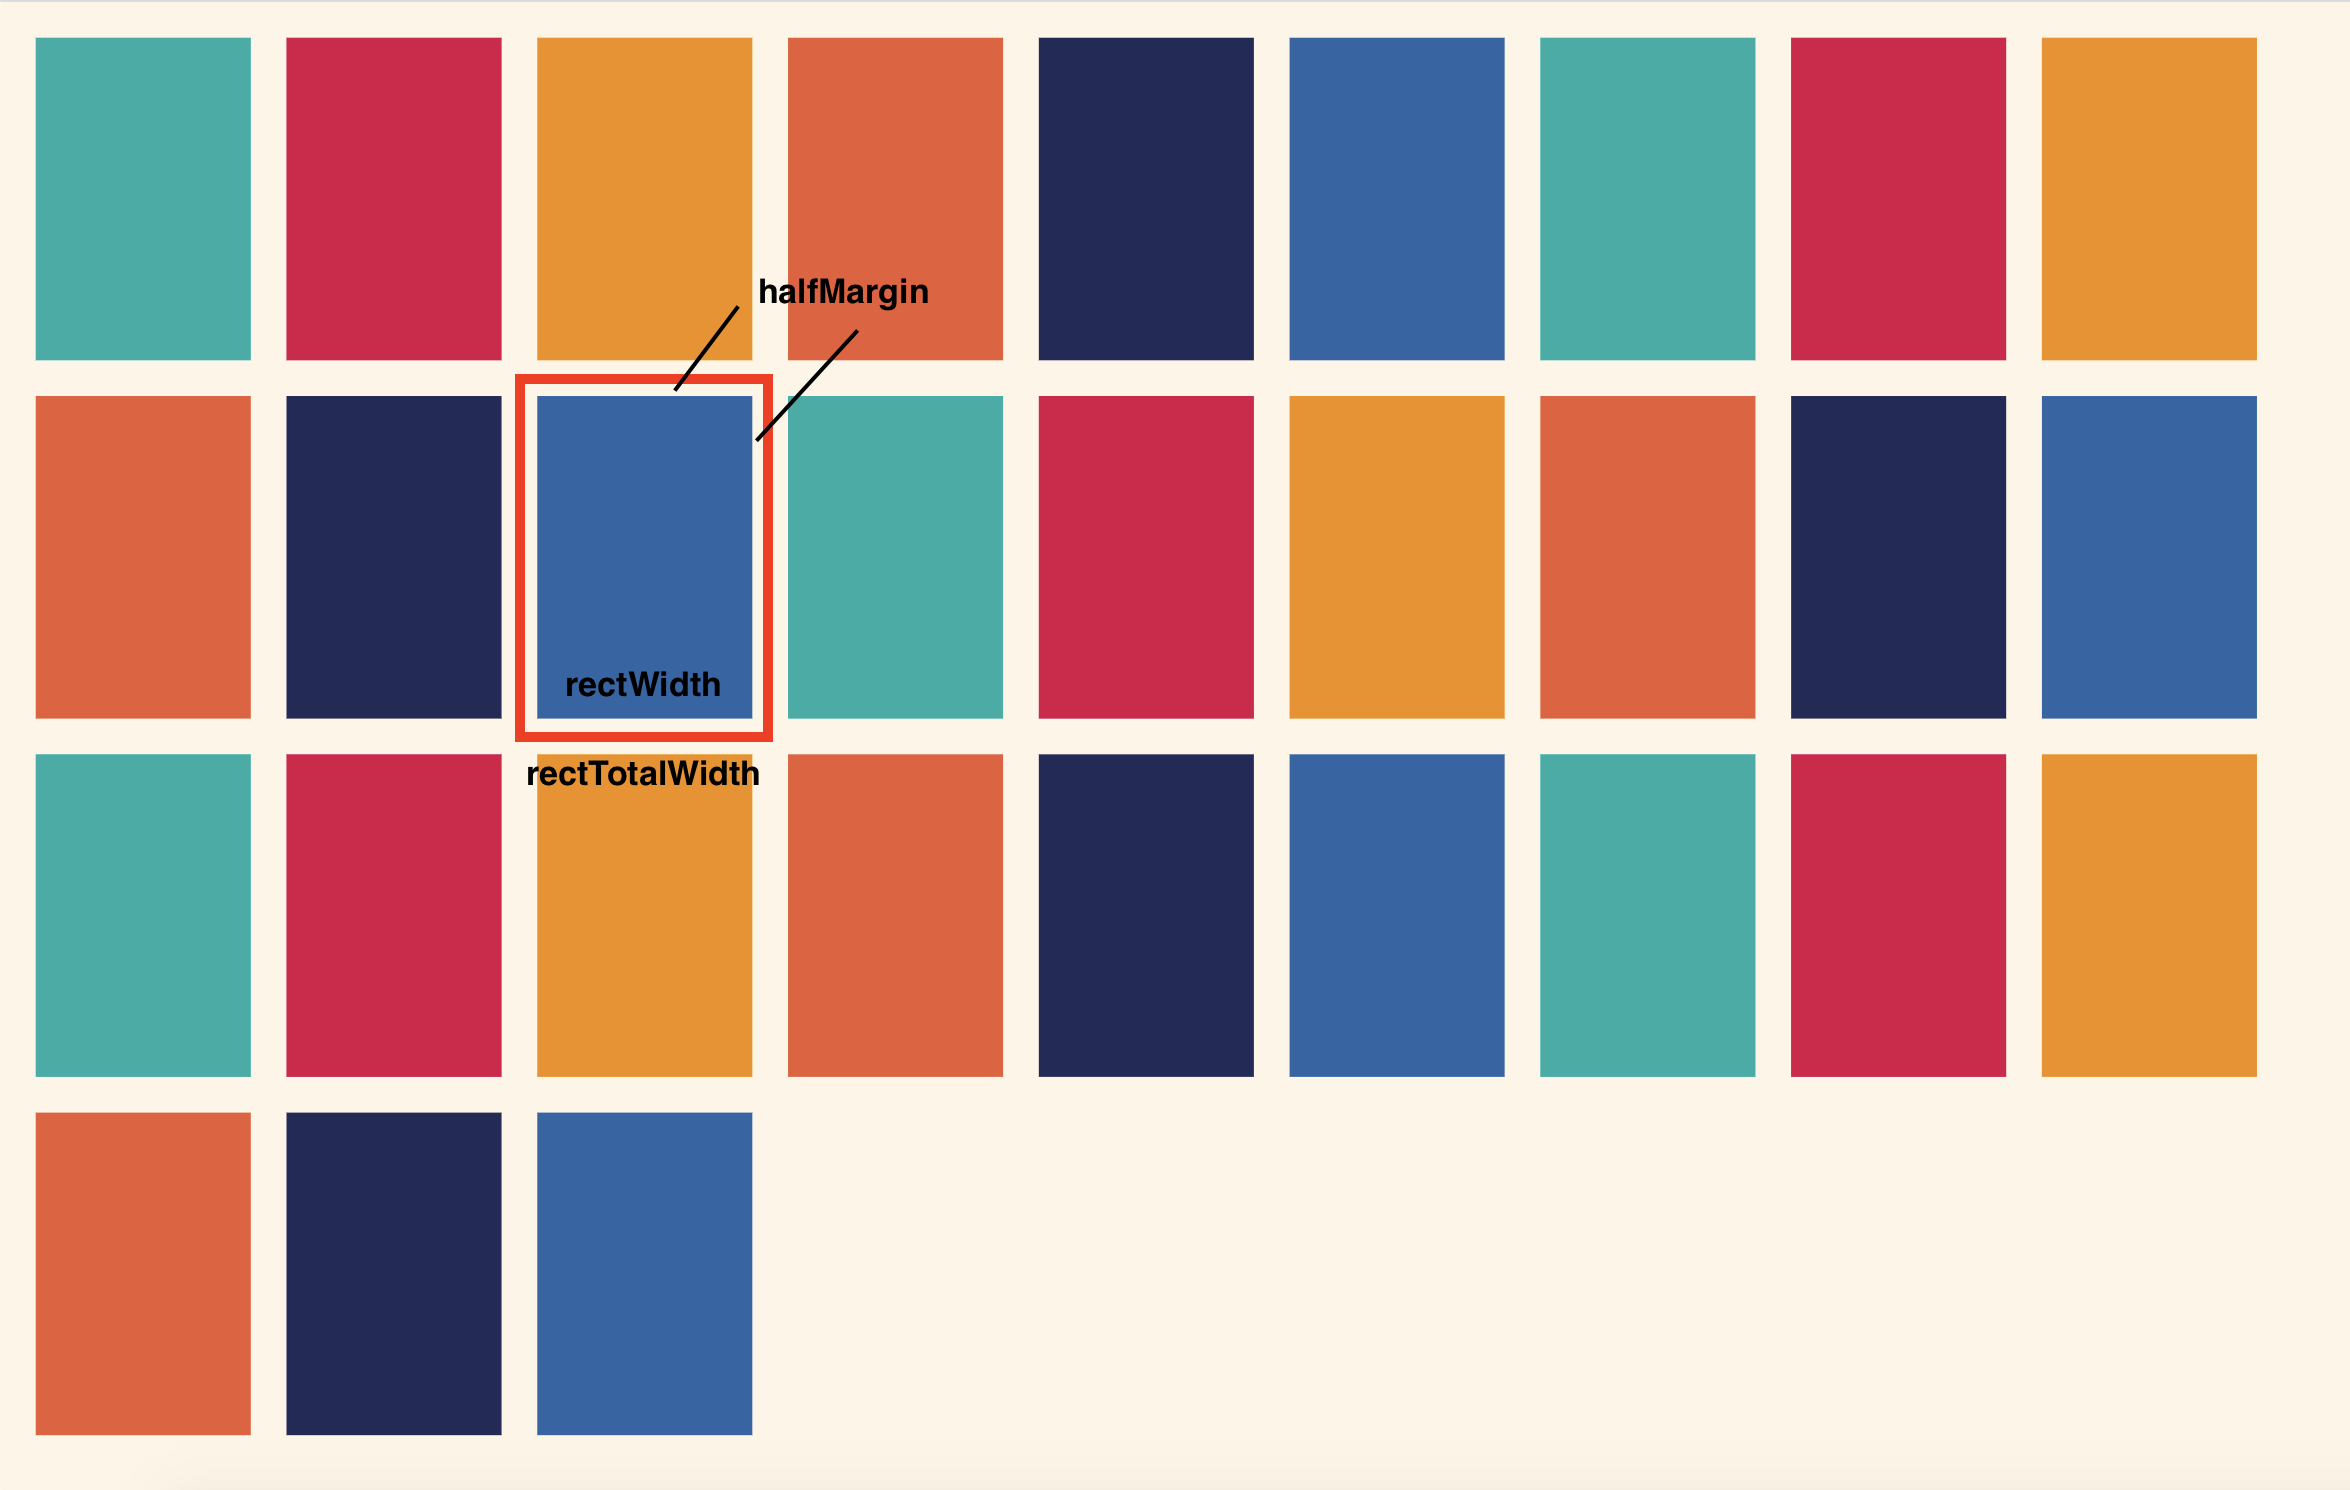
Then calculate the space between the rectangles. Here, the halfMargin of the upper, lower, left and right circles of the rectangle is calculated by the container width, i.e. (containerWidth / 100) * 0.3. It can be seen that the larger the container width, the greater the spacing, and vice versa; totalMargin is the left + right or upper + lower spacing, which is twice that of halfMargin.
const halfMargin = (containerWidth / 100) * 0.3
const totalMargin = halfMargin * 2
At this time, the overall width of each rectangle containing spacing is rectWidth + totalMargin, and the overall height is 1.5 * rectWidth + totalMargin (as mentioned above, the actual height of a rectangle is always 1.5 times the width).
The actual width of the rectangle is preliminarily calculated
Then, in the source code, the actual width rectWidth of the rectangle is preliminarily calculated through the following formula. It can be seen that the overall area of all rectangles is equal to the area of the container, but it seems a little different.
// The actual width of the rectangle is preliminarily calculated
let rectWidth = Math.sqrt(containerArea / (1.5 * dataset.length)) - totalMargin

// After transformation
// (rectWidth + totalMargin) * 1.5 * (rectWidth + totalMargin) * dataset.length = containerArea
Theoretically, the overall area of a single rectangle = overall width * overall width = (rectWidth + totalMargin) * (1.5 * rectWidth + totalMargin). The original area formula should be as follows, and the approximate calculation formula seems to be used in the source code. Gu Liu guesses that it may be based on the reason of simplifying the calculation, otherwise the rectWidth can be calculated only by solving the univariate quadratic equation according to the original formula. In addition, when the rectangle is actually drawn later, it will be found that the actual height of the rectangle is indeed 1.5 times of the actual width, rather than the overall height is 1.5 times of the overall width. Therefore, it can be seen that after approximation, it should be to simplify the calculation.
// Calculation formula of original area
(rectWidth + totalMargin) * (1.5 * rectWidth + totalMargin) * dataset.length = containerArea

// It is calculated directly after approximation without solving the univariate quadratic equation
(rectWidth + totalMargin) * 1.5 * (rectWidth + totalMargin) * dataset.length = containerArea
Final width of rectangle
As mentioned above, the actual width rectWidth of the rectangle is preliminarily calculated because the final rectWidth is calculated by comparing the larger of rows and rest in the following way. First, columns are obtained by dividing the width of the container by the overall width of a single rectangle. Since there is no rounding down here, there are decimals; Then, according to the number of data, calculate the rows, also with decimals; Then calculate rest according to the number of data and the columns rounded down; Finally, if rest < = rest, add one more column to the number of columns, otherwise add two more columns, and then calculate the final rectangular width rectWidth.
let rectWidth = Math.sqrt(containerArea / (1.5 * dataset.length)) - totalMargin

const columns = containerWidth / (rectWidth + totalMargin)
const rows = dataset.length / columns
const rest = dataset.length % parseInt(columns)

if (rest <= rows) {
    rectWidth = containerWidth / (columns + 1) - totalMargin
} else if (rest > rows) {
    rectWidth = containerWidth / (columns + 2) - totalMargin
}
In fact, Gu Liu doesn't understand why to do this. Although it can be said that this can really avoid the rectangle from exceeding the canvas and occupy the canvas space as much as possible, he is not sure about the principle behind it. (if someone understands, you can tell Gu Liu in the group!)
But Gu Liu thought of something similar to the previous article "Take you to D3.js data visualization series (I) - niuyi ancient willow 2021.07.30" If the width and height are also limited here, that is, the last rectangle of each row should be in the canvas as a whole, and the last rectangle of each column should be in the canvas as a whole, and then list the formula to see if it can be calculated. However, I won't try here for the time being. First, I will introduce the source code in Atlantic manuscript.
draw rectangle
After calculating the actual width rectWidth of the rectangle, the height will be known; Here, reset the blank spacing rectTotalMargin, and then get the overall width and height rectTotalWidth and rectTotalHeight of the rectangle with spacing; Next, divide the width of the container by the overall width of a single rectangle and round it down, that is, the number of last rectangles in each row columnNum; Finally, the rectangle is also used in these three steps svg.selectAll('rect').data(dataset).join('rect'), and the x/y coordinate value of each rectangle is calculated by using the remainder and rounding operation, which is similar to the last one in the last adjustment layout and the line changing display.
const rectHeight = 1.5 * rectWidth
const rectTotalMargin = containerWidth * 0.005
const rectTotalWidth = rectWidth + rectTotalMargin
const rectTotalHeight = rectHeight + rectTotalMargin

const columnNum = Math.floor(containerWidth / rectTotalWidth)

const rects = svg.selectAll('rect')
    .data(dataset)
    .join('rect')
    .attr('x', d => rectTotalMargin + d % columnNum * rectTotalWidth)
    .attr('y', d => rectTotalMargin + Math.floor(d / columnNum) * rectTotalHeight)
    .attr('width', rectWidth)
    .attr('height', rectHeight)
    .attr('fill', d => colors[d % colors.length])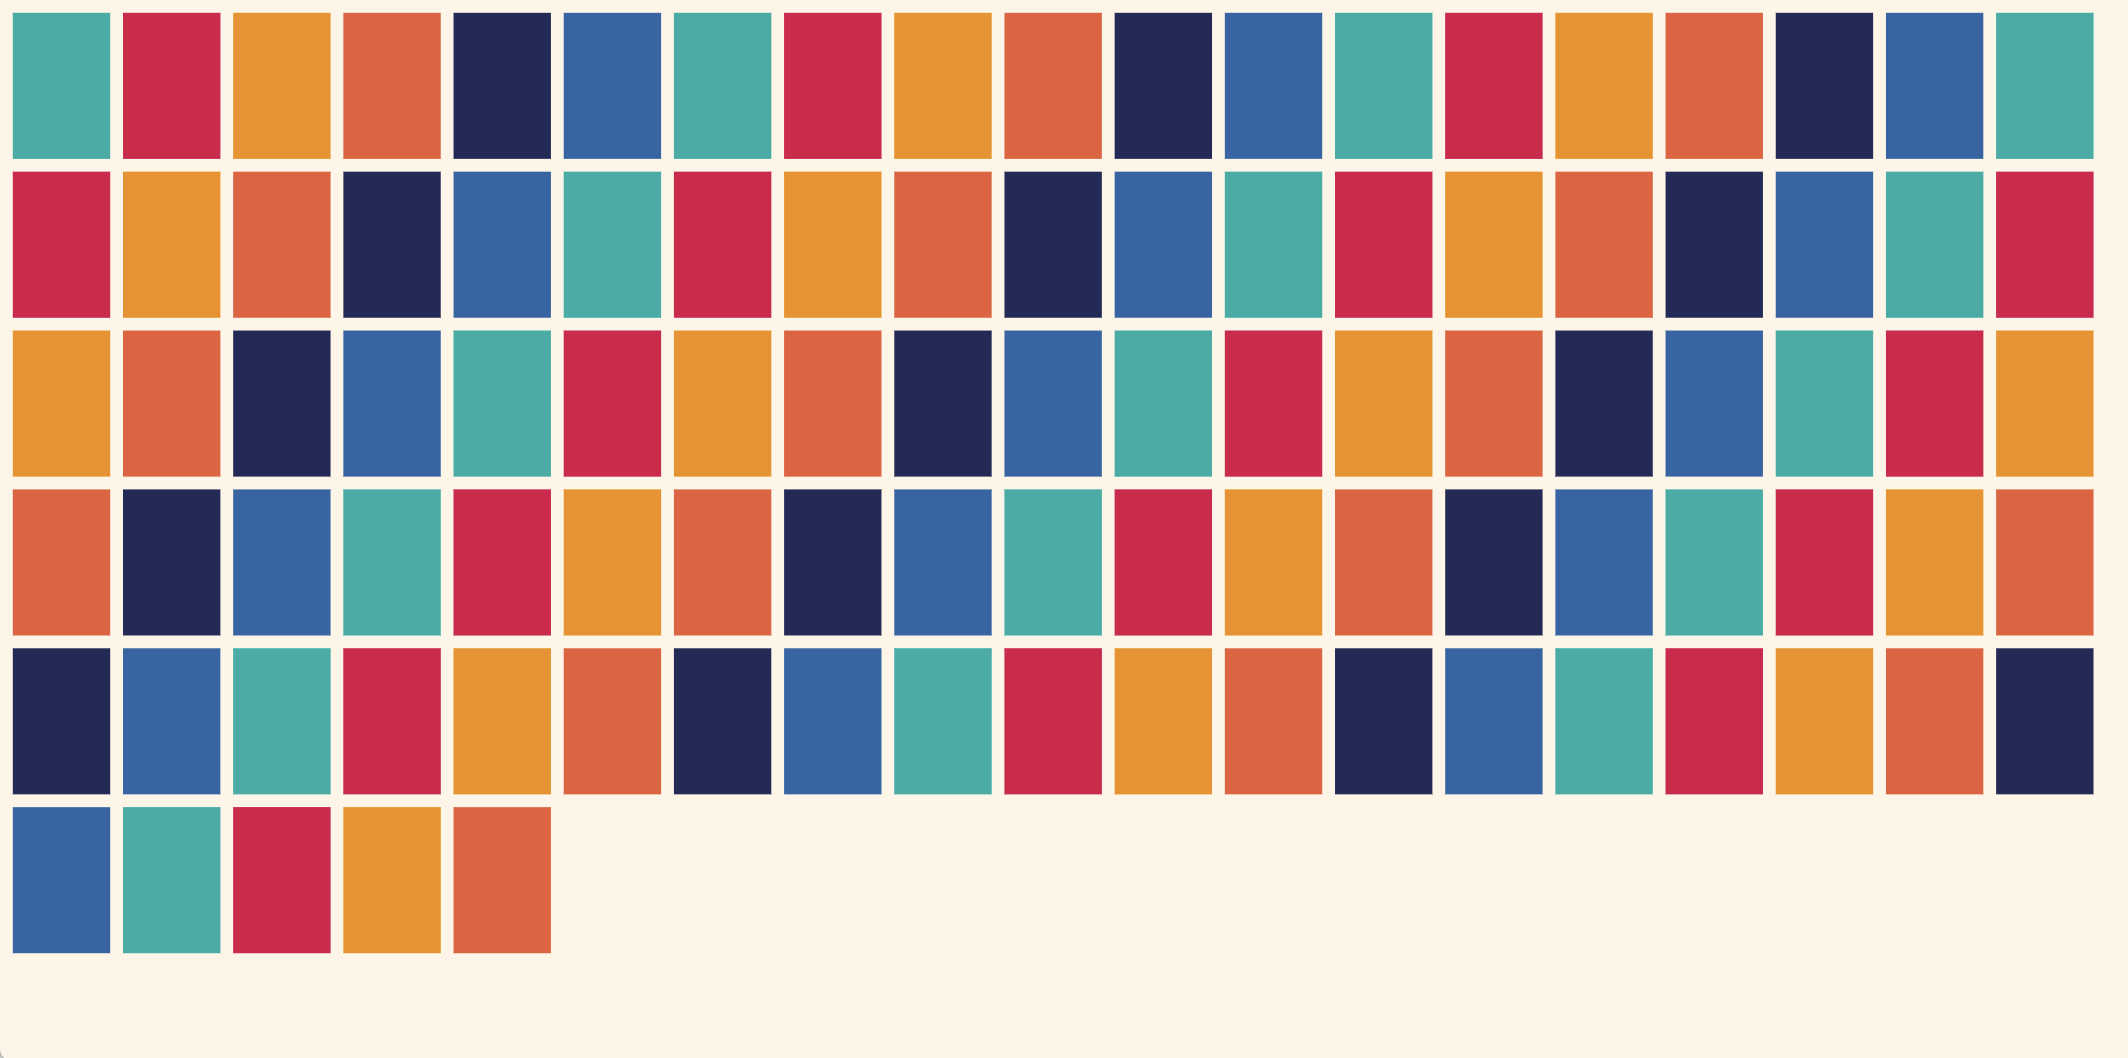
The source code is implemented by component
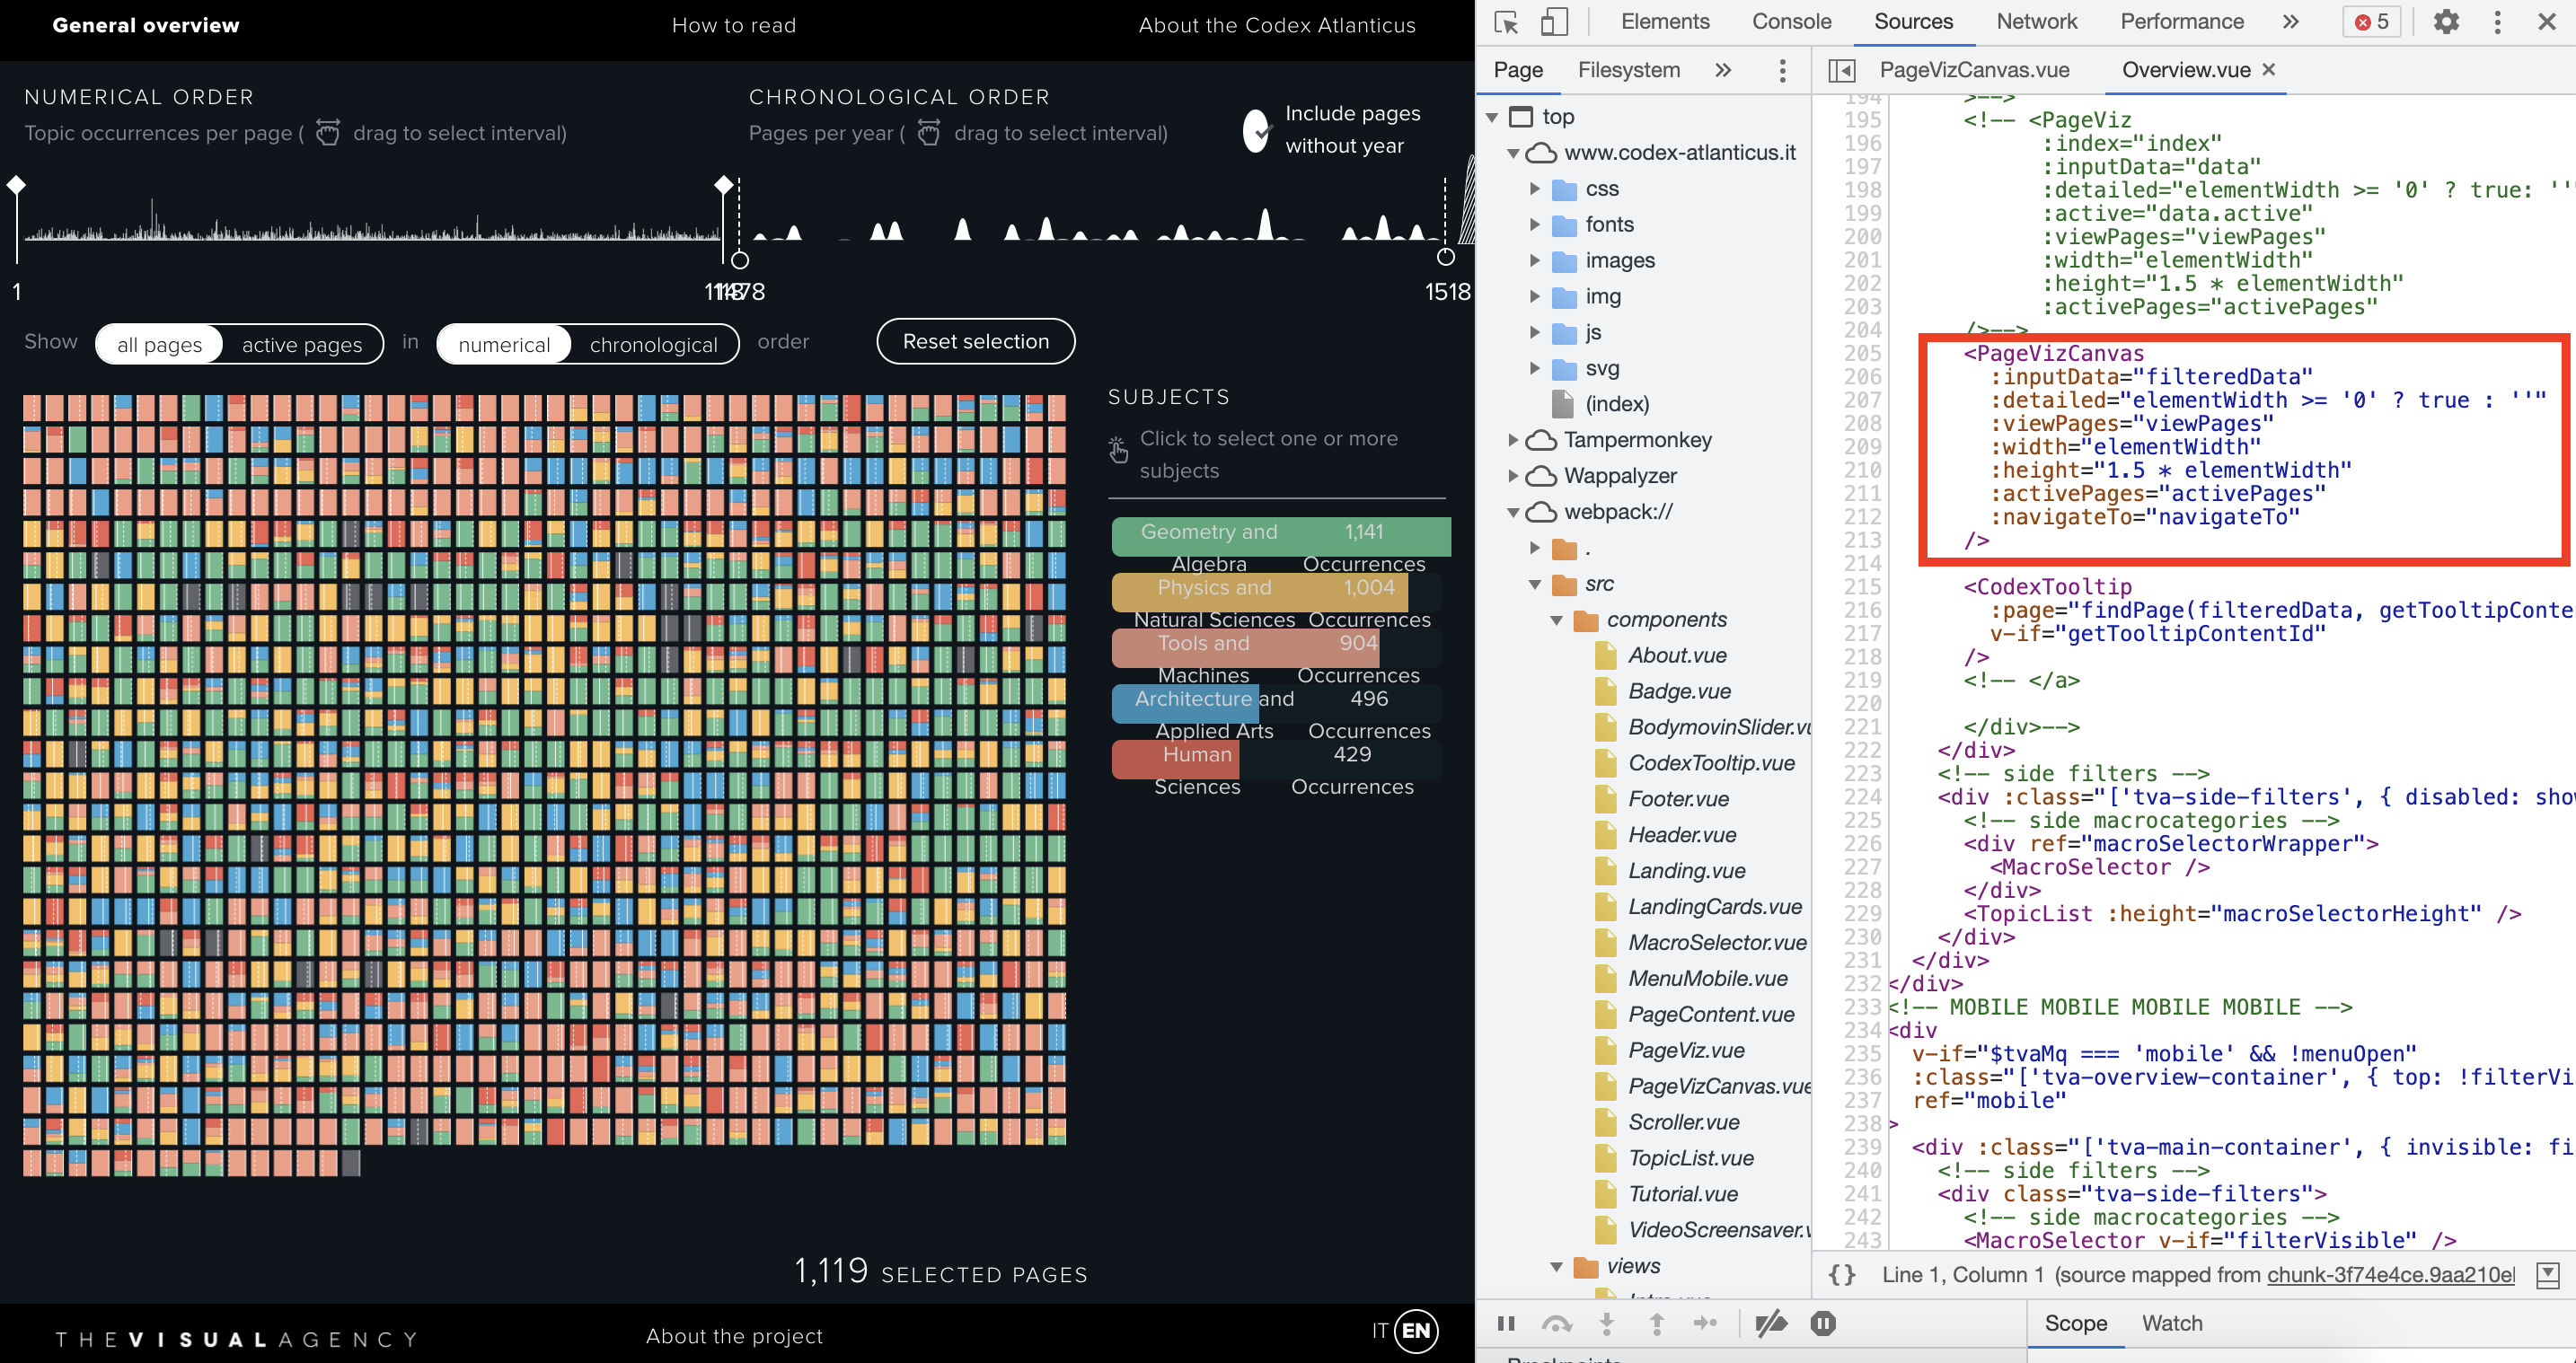
It may need to be mentioned here that the source code of Atlantic Codex is implemented with Vue framework, and Vue konva is used for the visualization part. In the source code, after the actual width of the rectangle rectWidth is calculated in the parent component, that is, the following elementWidth, the data is passed to the child component PageVizCanvas, and then the component completes the visualization function. Therefore, operations such as resetting the blank space above are also carried out in the child component, although it is not sure why it is multiplied by 0.005, It's inconsistent with the previous one again, but if there's no bug, let it go first. Link: https://cn.vuejs.org/ Link: https://github.com/konvajs/vue-konva
<PageVizCanvas
    :inputData="filteredData"
    :viewPages="viewPages"
    :width="elementWidth"
    :height="1.5 * elementWidth"
    :activePages="activePages"
    :navigateTo="navigateTo"
/>
Of course, novices do not understand Vue framework and component-based development, which can be ignored for the time being.
Summary
The article is not short. As the second article in this series, Gu Liu briefly shared the method of automatic layout based on dataset size and canvas size involved in the source code of excellent visualization works. It's true that it doesn't seem good to write it like this when Gu Liu doesn't fully understand it, but it's still that sentence. This series is written according to the logic Gu Liu wants to write. Then, in the order of the previous article, I think everything is not abrupt and logical. Write it. In the next article, I'll return to the basic explanation of D3.js data visualization.