elaborate
After completing the "big sword" menu through the previous tutorial, if you follow me to do it, it means that your React has been introduced.
It is also a good start. Although the next road is still long, it will be much smoother. This article will talk about some small pits that should be paid attention to in JSX syntax.
JSX code comments
The code annotation in JSX is very particular, and it is rarely introduced in this book, so I'll talk about it here, because I stepped on the pit here when I first learned React.
The first time I wrote a JSX comment, I wrote it directly. Of course, it's completely wrong to write it like this.
<Fragment>
    //The first time I write a comment, this is wrong
    <div>
        <input value={this.state.inputValue} onChange={this.inputChange.bind(this)} />
        <button onClick={this.addList.bind(this)}> Increase services </button>
    </div>
</Fragment>
There are two ways to write JSX notes:
<Fragment>
    {/* Correct annotation */}
    <div>
        <input value={this.state.inputValue} onChange={this.inputChange.bind(this)} />
        <button onClick={this.addList.bind(this)}> Increase services </button>
    </div>
</Fragment>
If you can't remember, a simple way is to use the shortcut key of VSCode and press Ctrl + /, and the correct comments will be generated automatically.
You can understand this as writing javascript code in JSX.
So when we go out, we put {}, and then there is a multi line javascript comment inside. If you want to use single line comments / /, you need to write the code like this.
<Fragment>
    {
        //Correct annotation
    }
    <div>
        <input value={this.state.inputValue} onChange={this.inputChange.bind(this)} />
        <button onClick={this.addList.bind(this)}> Increase services </button>
    </div>
</Fragment>
That is, you need to wrap lines, so I personally think this method is not elegant, so I recommend the first annotation method.
class trap in JSX
For example, we should add yellow to the simple interface to make our text box thick and yellow.
Let's start with the error demonstration.
Step 1:
First write a CSS style file and create a new style in the src directory CSS style file.
.input {border:3px solid #ae7000}
Step 2:
At Xiaojiejie JS, import is used first, and import can be used to import, which is the credit of webpack.
import './style.css'
Part III:
Add class to JSX. Note that the following code is wrong.
<input class="input" value={this.state.inputValue} onChange={this.inputChange.bind(this)} />
Although the page can display the results normally, you will find a Warning when you open the browser console.
index.js:1437 Warning: Invalid DOM property `class`. Did you mean `className`?
    in input (at Meinv.js:19)
    in div (at Meinv.js:18)
    in Xiaojiejie (at src/index.js:5)
It means to replace class with className. It is to prevent conflicts with the class name in js, so it is required to replace it.
This is a small pit.
html parsing in JSX
If you want to enter a < H1 > label in the text box and render it.
The default will not take effect. It will only print the < H1 > label on the page, which is not what I want.
If there is such a requirement at work, you can use the dangerouslySetInnerHTML attribute to solve it.
The specific codes are as follows:
<ul>
    {
        this.state.list.map((item,index)=>{
            return (
                <li
                    key={index+item}
                    onClick={this.deleteItem.bind(this,index)}
                    dangerouslySetInnerHTML={{__html:item}}
                >
                </li>
            )
        })
    }
</ul>
The above code can realize the output in html format.
style.css
.input {border:3px solid #ae7000}
Xiaojiejie.js
import './style.css'
Beauty.js
import React,{Component,Fragment } from 'react'

class Beauty extends Component{
    //js constructor, due to the execution of any other function
    constructor(props){
        //Call the constructor of the parent class, fixed writing method
        super(props)
        this.state={
            inputValue:'<h1>willem</h1>' , // Value in input
            //----------Main code ---------- start
            list:['<h1>willem</h1>','Basic massage','Essential oil push back']
            //----------Main code ---------- end
        }
    }

    render(){
        return  (
            <Fragment>
                <div>
                    <input className="input" value={this.state.inputValue} onChange={this.inputChange.bind(this)} />
                    <button onClick={this.addList.bind(this)}> Increase services </button>
                </div>
                <ul>
                    {
                        this.state.list.map((item,index)=>{
                            return (
                                <li
                                    key={index+item}
                                    onClick={this.deleteItem.bind(this,index)}
                                    dangerouslySetInnerHTML={{__html:item}}
                                >
                                </li>
                            )
                        })
                    }
                </ul>
            </Fragment>
        )
    }

    inputChange(e){
        // console.log(e.target.value);
        // this.state.inputValue=e.target.value;
        this.setState({
            inputValue:e.target.value
        })
    }

    //Button response method for adding service
    addList(){
        this.setState({
            list:[...this.state.list,this.state.inputValue]
        })
    }

    //Delete single service
    deleteItem(index){
        let list = this.state.list
        list.splice(index,1)
        this.setState({
            list:list
        })

    }
}

export default Beauty
Pit of < label > tag in JSX
The < label > pit in JSX is also a relatively large pit. Label is an auxiliary tag in html and a very useful tag.
First look at the following code. We add a < label > in front of the text box.
<div>
    <label>Join service:</label>
    <input className="input" value={this.state.inputValue} onChange={this.inputChange.bind(this)} />
    <button onClick={this.addList.bind(this)}> Increase services </button>
</div>
At this time, if you want to click "join service", you can directly activate the text box for easy input.
According to the original idea of html, you can add ID directly.
The code is as follows:
<div>
    <label for="willem">Join service:</label>
    <input id="willem" className="input" value={this.state.inputValue} onChange={this.inputChange.bind(this)} />
    <button onClick={this.addList.bind(this)}> Increase services </button>
</div>
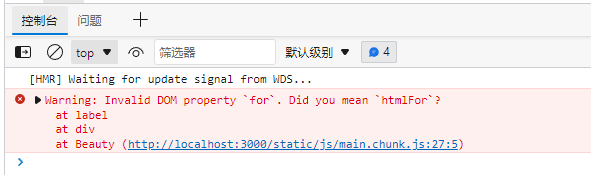
At this time, although your browsing effect can be normal, there is still a red warning prompt in the console.
It is easy to be confused with the for loop in javascript and will prompt you to use htmlfor.
<div>
    <label htmlFor="willem">Join service:</label>
    <input id="willem" className="input" value={this.state.inputValue} onChange={this.inputChange.bind(this)} />
    <button onClick={this.addList.bind(this)}> Increase services </button>
</div>
At this time, the code is correct. Click < label > to activate the < input > tag.
This section is a summary of some of the pits in JSX. I hope my friends will step less on these pits and get started with React quickly.
Beauty.js
import React,{Component,Fragment } from 'react'

class Beauty extends Component{
    //js constructor, due to the execution of any other function
    constructor(props){
        //Call the constructor of the parent class, fixed writing method
        super(props)
        this.state={
            inputValue:'<h1>willem</h1>' , // Value in input
            //----------Main code ---------- start
            list:['<h1>willem</h1>','Basic massage','Essential oil push back']
            //----------Main code ---------- end
        }
    }

    render(){
        return  (
            <Fragment>
                <div>
                    <label htmlFor="willem">Join service:</label>
                    <input id="willem" className="input" value={this.state.inputValue} onChange={this.inputChange.bind(this)} />
                    <button onClick={this.addList.bind(this)}> Increase services </button>
                </div>
                <ul>
                    {
                        this.state.list.map((item,index)=>{
                            return (
                                <li
                                    key={index+item}
                                    onClick={this.deleteItem.bind(this,index)}
                                    dangerouslySetInnerHTML={{__html:item}}
                                >
                                </li>
                            )
                        })
                    }
                </ul>
            </Fragment>
        )
    }

    inputChange(e){
        // console.log(e.target.value);
        // this.state.inputValue=e.target.value;
        this.setState({
            inputValue:e.target.value
        })
    }

    //Button response method for adding service
    addList(){
        this.setState({
            list:[...this.state.list,this.state.inputValue]
        })
    }

    //Delete single service
    deleteItem(index){
        let list = this.state.list
        list.splice(index,1)
        this.setState({
            list:list
        })

    }
}

export default Beauty