1, Refer to link description
The article involves image download and reference materials as follows:
Rocky Linux Official website:
https://rockylinux.org/
Rocky Linux official website installation manual document: https://docs.rockylinux.org/zh/guides/installation/
Rcoky Linux version 8.5 image download link: https://www.rockylinux.org/download/
Alibaba open source mirror station:
https://developer.aliyun.com/mirror/
Alibaba Rocky Linux image source link:
https://developer.aliyun.com/mirror/rockylinux?spm=a2c6h.13651102.0.0.46951b11x4Qj3N
2, What is Rocky Linux?
Rocky Linux is a community enterprise operating system designed to be 100% compatible with top Enterprise Linux distributions in the United States because its downstream partners have changed direction. It is being intensively developed by the community. Rocky Linux is led by Gregory Kurtzer, founder of CentOS project. Please contact contributors using the communication options available on this site.

Rocky Linux is a branch of CentOS, which is located downstream of Red Hat Enterprise Linux (RHEL). Like CentOS, it provides a stable version of Linux that is very suitable for servers. It is intended to be a fully compatible alternative to CentOS.
3, Installation steps of Rocky Linux system
1. Download the official image of Rocky Linux
Rocky-8.5-x86_64-dvd1.iso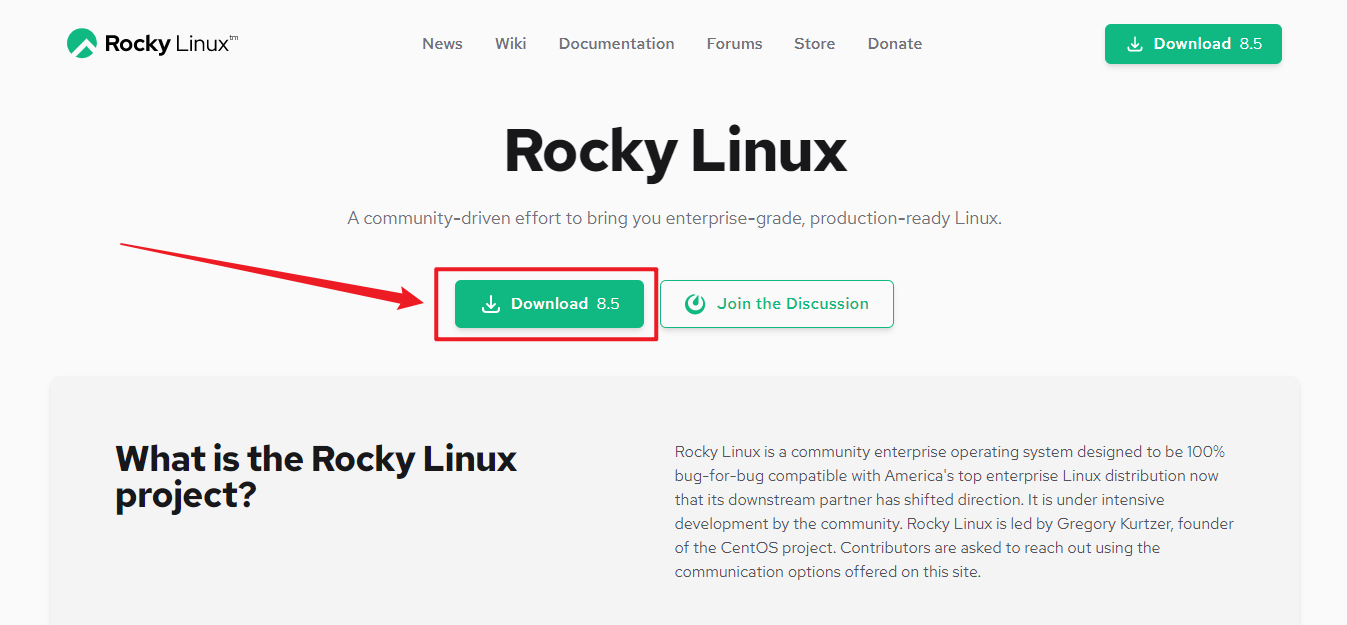
Select the corresponding version to download and install as needed.
This experiment uses rocky-8.5-x86_ 64-dvd1. Install the ISO image.
(the size of this image is about 9.98 GB, which can be downloaded and prepared locally in advance.)
2. Enter the initial installation interface of Rocky Linux
After selecting install Rocky Linux 8, press enter to start installing Rocky Linux.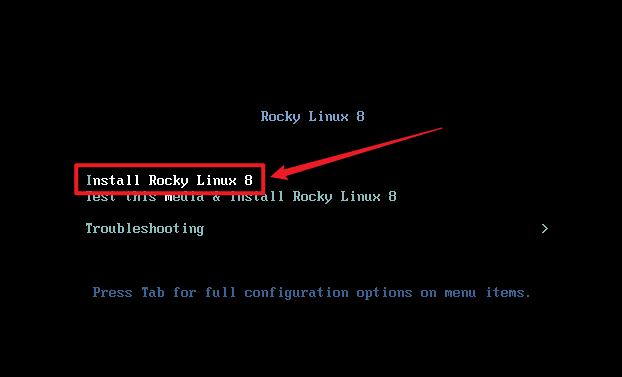
3. Select the language for the installation process
This experiment is installed in Chinese. Click continue.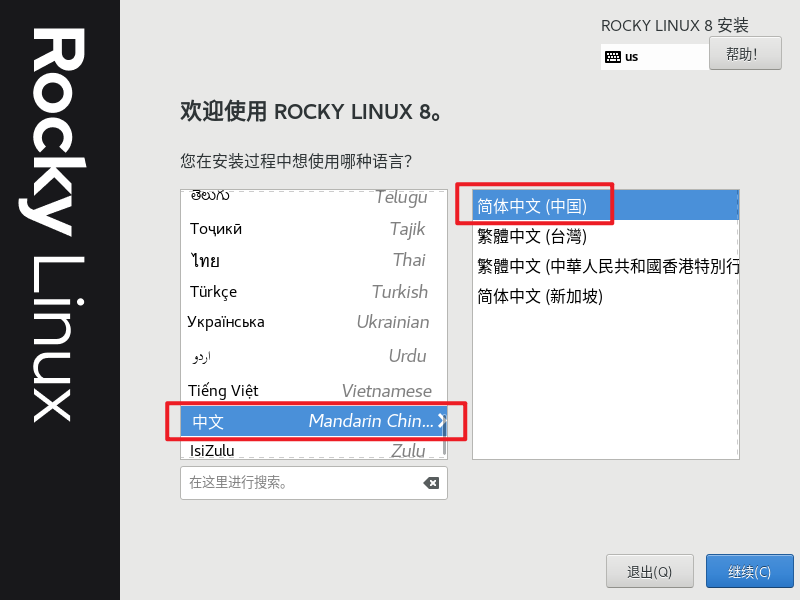
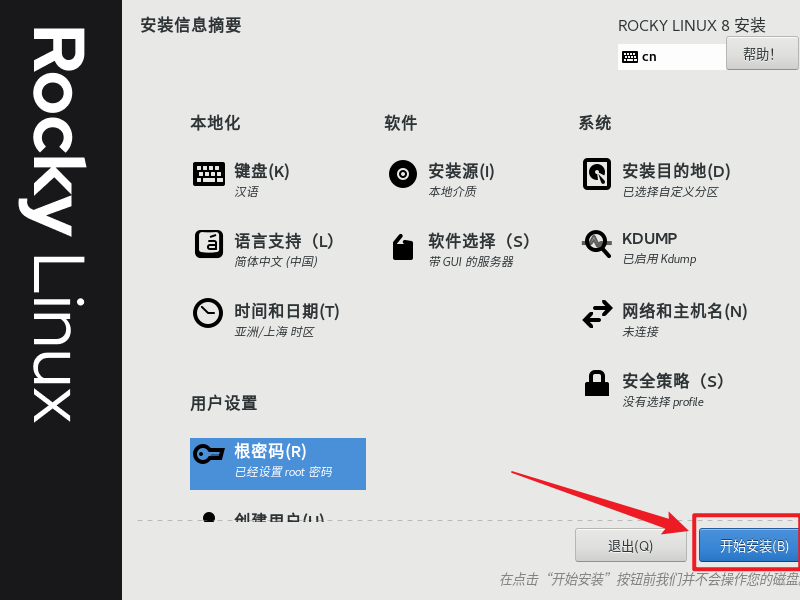
4. Summary of setup related installation information
This interface is divided into the following four parts:
Localization (keyboard, language support, and time and date)
Software (installation source and software selection)
System (installation destination and network and host name)
User settings (setting root password and creating ordinary users)
(1) Modify time and date in localization
The setting area is Asia and the city is Shanghai.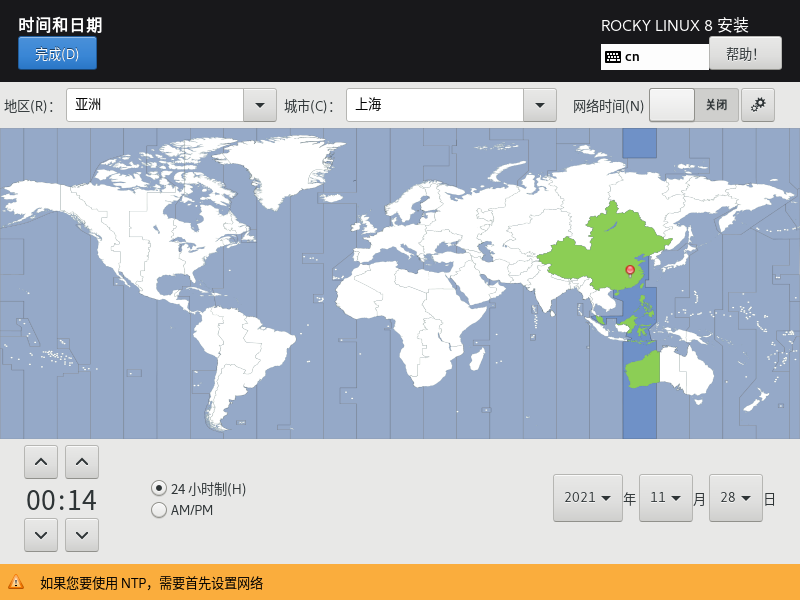
(2) Set the software selection in the software.
A server with GUI is used here. Click finish.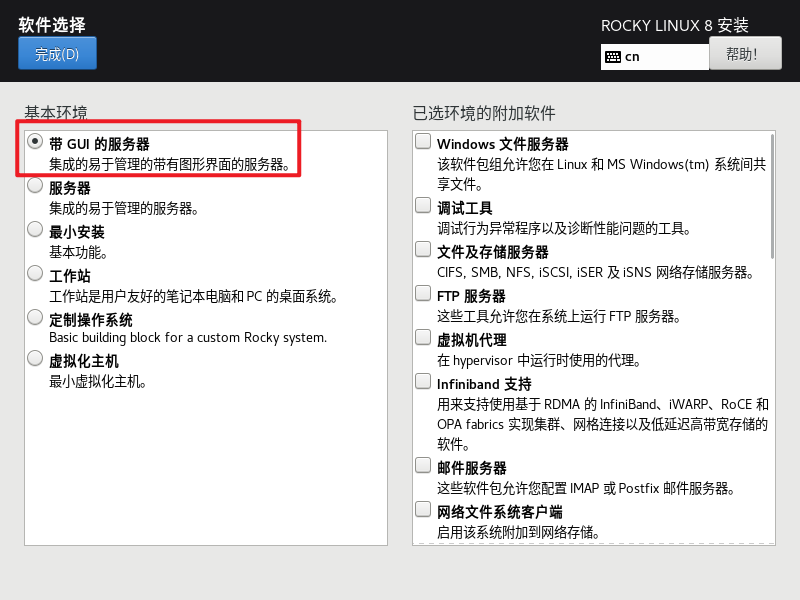
(3) Set the disk partition in the system
Select custom to partition. Click finish. Enter the next interface.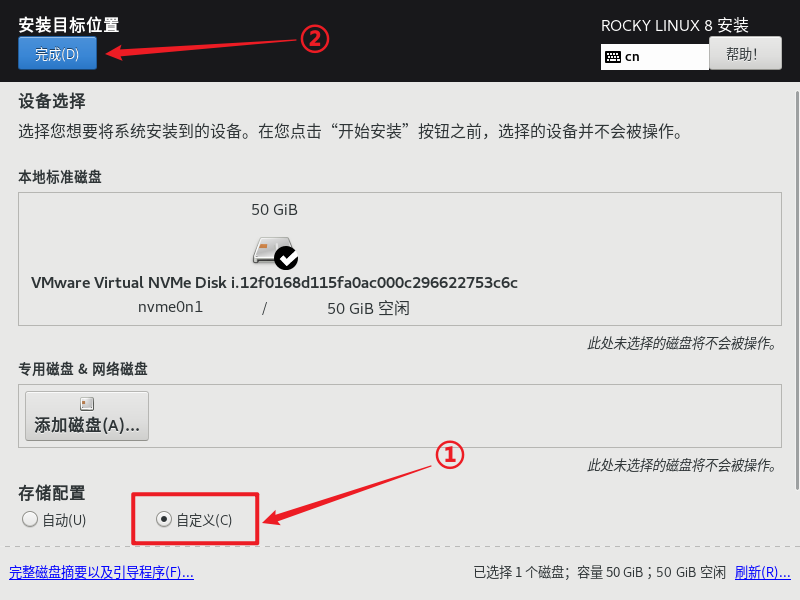
Select the LVM disk partition scheme here and click "click here to automatically create them" to complete the disk partition. 😊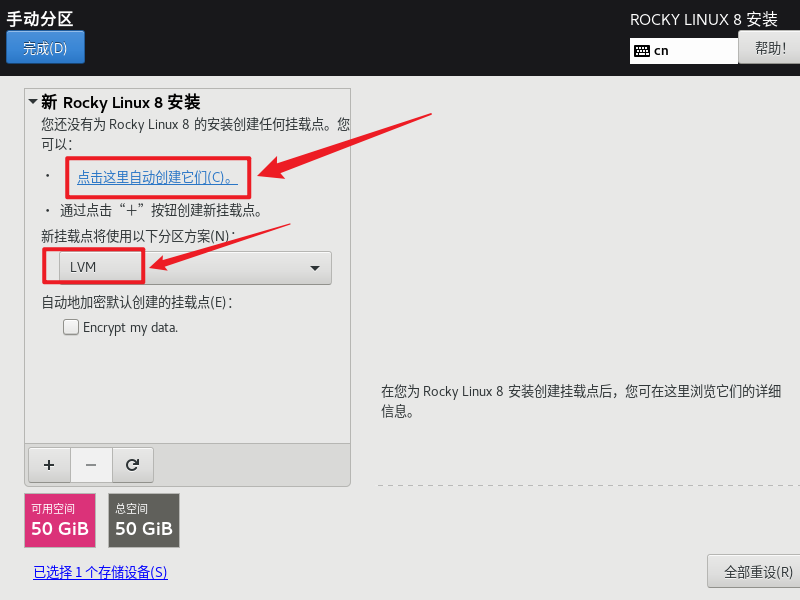
When the disk partition is complete, click finish.
Confirm the disk partition and click "accept changes".
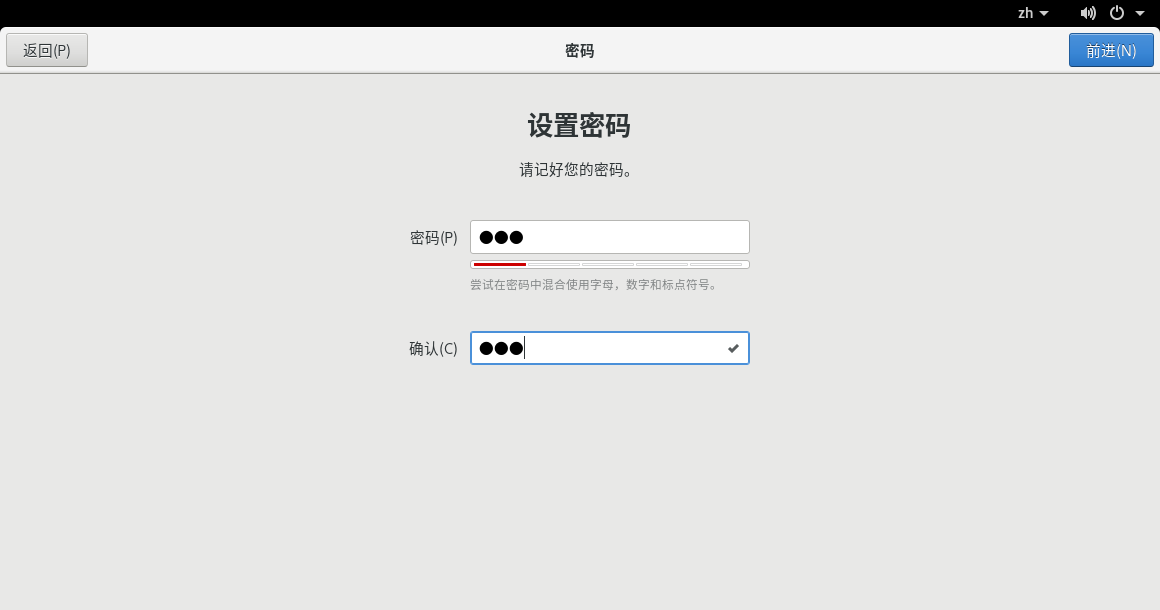
(4) Set the ROOT password in user settings
If the set ROOT password is too simple, you need to press the finish button twice to allow setting.
5. After setting the installation information, start the installation
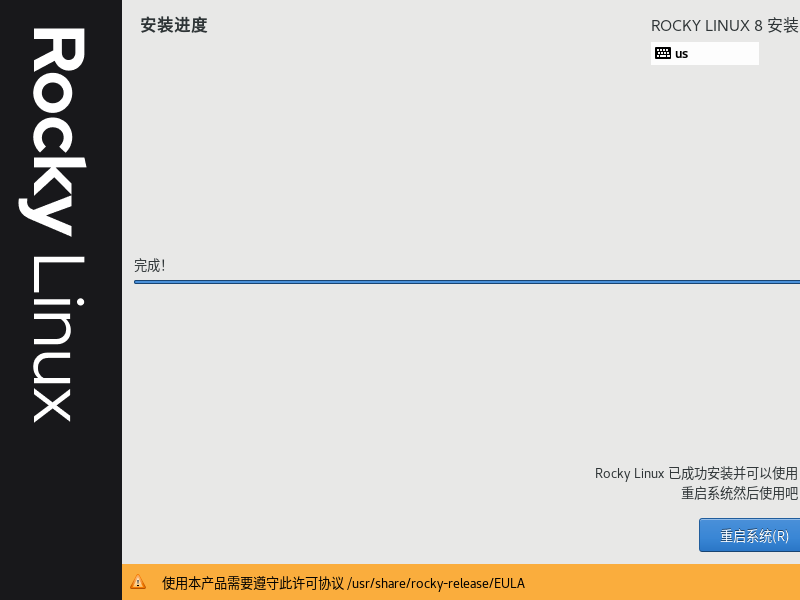
Wait for the installation to complete.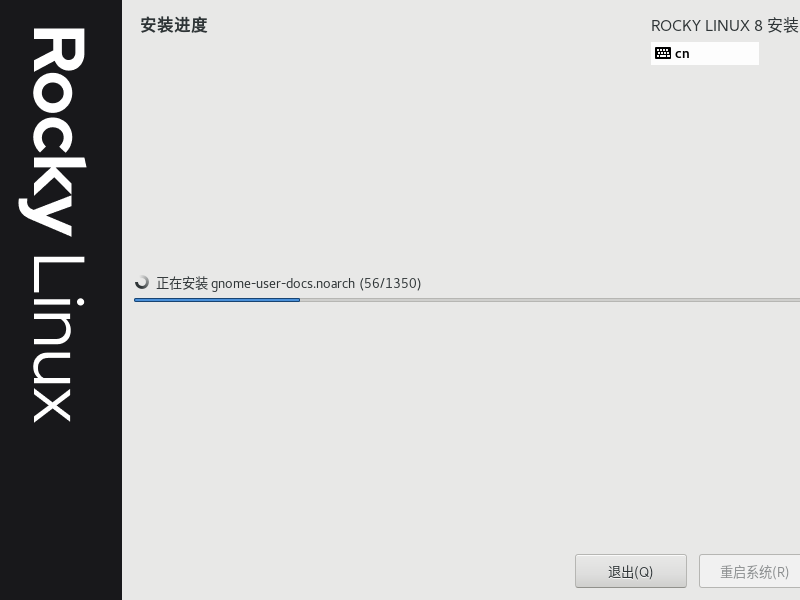
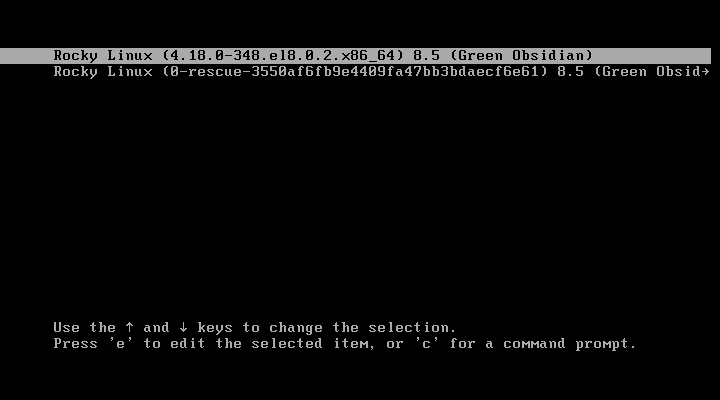
6. After installation, restart the system
7. After restarting the system, perform initialization
(1) Tick ✔ License terms
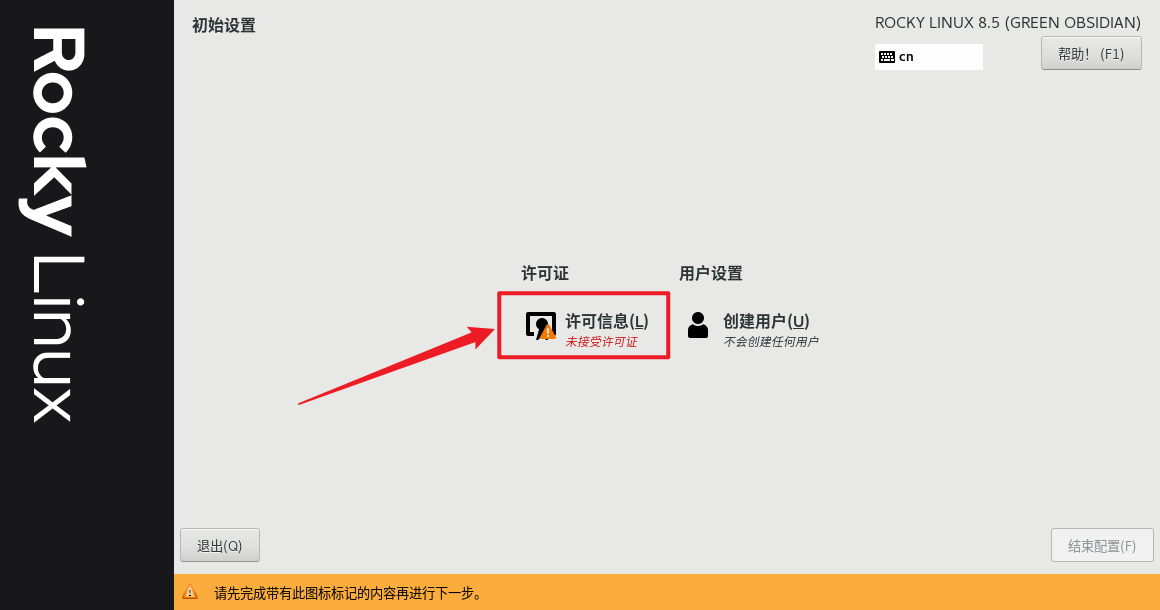

(2) End configuration
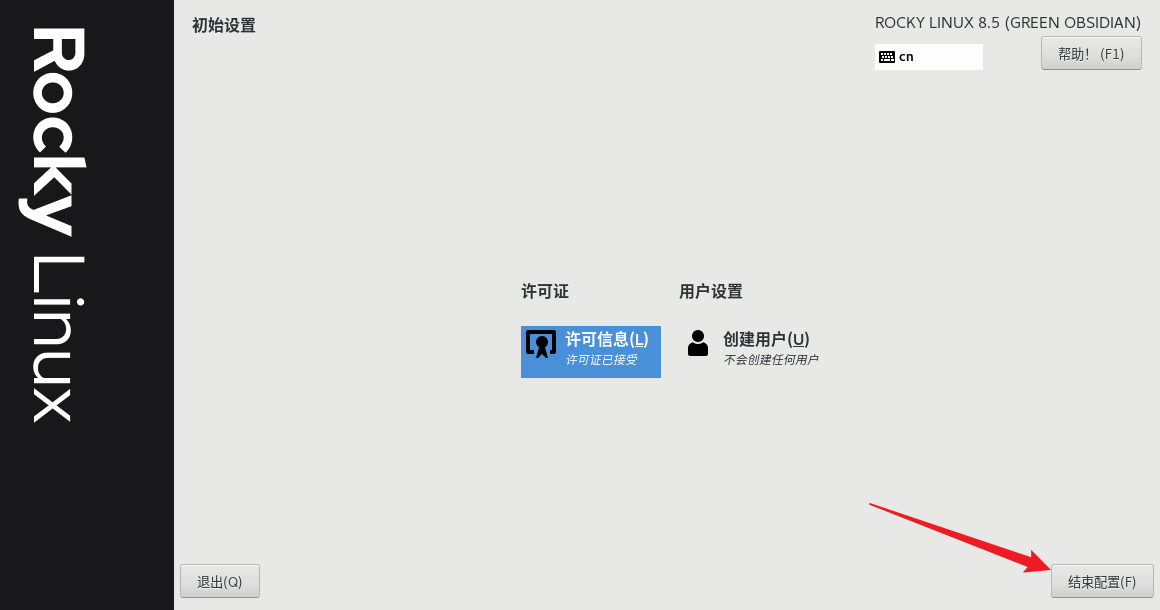
(3) Set user name

(4) Set user name and password
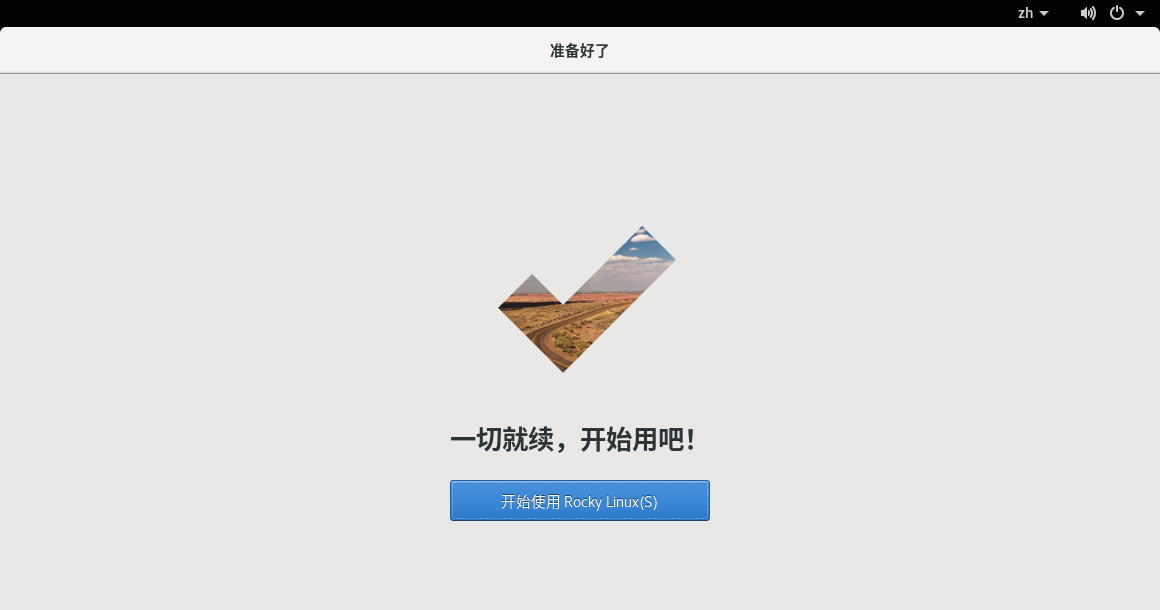
8. Initialization completed, start using


3, Rocky Linux system configuration steps
1. Modify host name
hostnamectl set-hostname rockstar

2. Configure network information
(1) Modify ifcfg-ens160 network configuration file
[root@rockstar ~]# vi /etc/sysconfig/network-scripts/ifcfg-ens160
[root@rockstar ~]# cat /etc/sysconfig/network-scripts/ifcfg-ens160
TYPE=Ethernet
PROXY_METHOD=none
BROWSER_ONLY=no
BOOTPROTO=static
DEFROUTE=yes
IPV4_FAILURE_FATAL=no
IPV6INIT=yes
IPV6_AUTOCONF=yes
IPV6_DEFROUTE=yes
IPV6_FAILURE_FATAL=no
NAME=ens160
UUID=f0ef2848-1724-475a-9187-31960c3e500a
DEVICE=ens160
ONBOOT=yes
IPADDR=192.168.1.150
PREFIX=24
GATEWAY=192.168.1.1
DNS1=8.8.8.8
DNS2=114.114.114.114
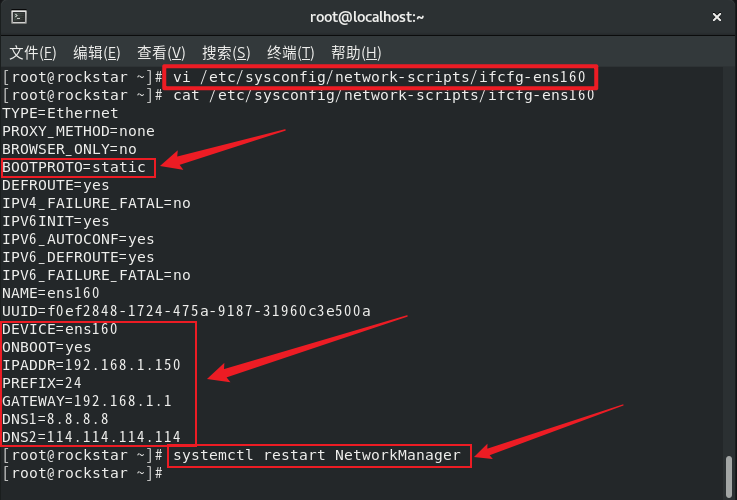
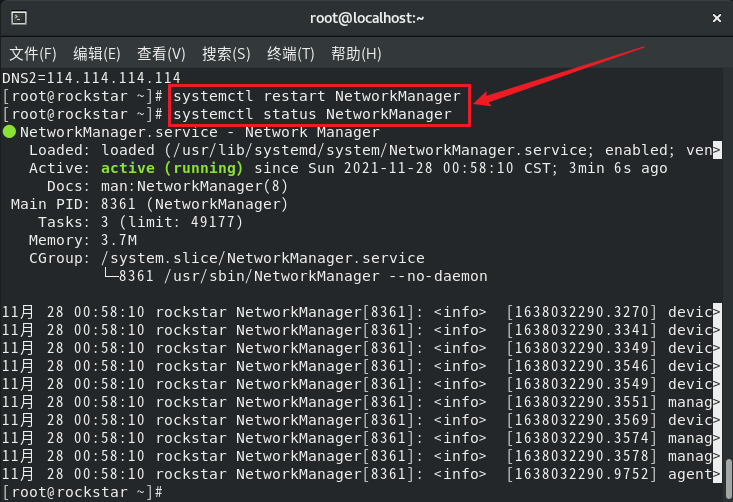
(2) Restart the network and view the status
systemctl restart NetworkManager
systemctl status NetworkManager
(3) Check that the network configuration has been applied correctly
[root@rockstar ~]# nmcli device show ens160
GENERAL.DEVICE:                         ens160
GENERAL.TYPE:                           ethernet
GENERAL.HWADDR:                         00:0C:29:37:F2:F5
GENERAL.MTU:                            1500
GENERAL.STATE:                          100((connected)
GENERAL.CONNECTION:                     ens160
GENERAL.CON-PATH:                       /org/freedesktop/NetworkManager/ActiveC>
WIRED-PROPERTIES.CARRIER:               open
IP4.ADDRESS[1]:                         192.168.1.150/24
IP4.GATEWAY:                            192.168.1.1
IP4.ROUTE[1]:                           dst = 0.0.0.0/0, nh = 192.168.1.1, mt =>
IP4.ROUTE[2]:                           dst = 192.168.1.0/24, nh = 0.0.0.0, mt >
IP4.DNS[1]:                             8.8.8.8
IP4.DNS[2]:                             114.114.114.114
IP6.ADDRESS[1]:                         fe80::20c:29ff:fe37:f2f5/64
IP6.GATEWAY:                            --
IP6.ROUTE[1]:                           dst = fe80::/64, nh = ::, mt = 100
[root@rockstar ~]#
(4) View all interface details
Practical tip use the - c flag for a more readable color output: ip -c a. IP accepts abbreviations, so ip a, ip addr, and ip address are equivalent. As shown in the figure.
[root@rockstar ~]# ip -c a
1: lo: <LOOPBACK,UP,LOWER_UP> mtu 65536 qdisc noqueue state UNKNOWN group default qlen 1000
    link/loopback 00:00:00:00:00:00 brd 00:00:00:00:00:00
    inet 127.0.0.1/8 scope host lo
       valid_lft forever preferred_lft forever
    inet6 ::1/128 scope host
       valid_lft forever preferred_lft forever
2: ens160: <BROADCAST,MULTICAST,UP,LOWER_UP> mtu 1500 qdisc mq state UP group default qlen 1000
    link/ether 00:0c:29:37:f2:f5 brd ff:ff:ff:ff:ff:ff
    inet 192.168.1.150/24 brd 192.168.1.255 scope global noprefixroute ens160
       valid_lft forever preferred_lft forever
    inet6 fe80::20c:29ff:fe37:f2f5/64 scope link noprefixroute
       valid_lft forever preferred_lft forever
3: virbr0: <NO-CARRIER,BROADCAST,MULTICAST,UP> mtu 1500 qdisc noqueue state DOWN group default qlen 1000
    link/ether 52:54:00:f3:e3:6f brd ff:ff:ff:ff:ff:ff
    inet 192.168.122.1/24 brd 192.168.122.255 scope global virbr0
       valid_lft forever preferred_lft forever
4: virbr0-nic: <BROADCAST,MULTICAST> mtu 1500 qdisc fq_codel master virbr0 state DOWN group default qlen 1000
    link/ether 52:54:00:f3:e3:6f brd ff:ff:ff:ff:ff:ff
(5) Test network connectivity

3. Replace the default source with the alicloud Rocky Linux image source
Reference link: Alibaba cloud open source image station - Rocky Linux image
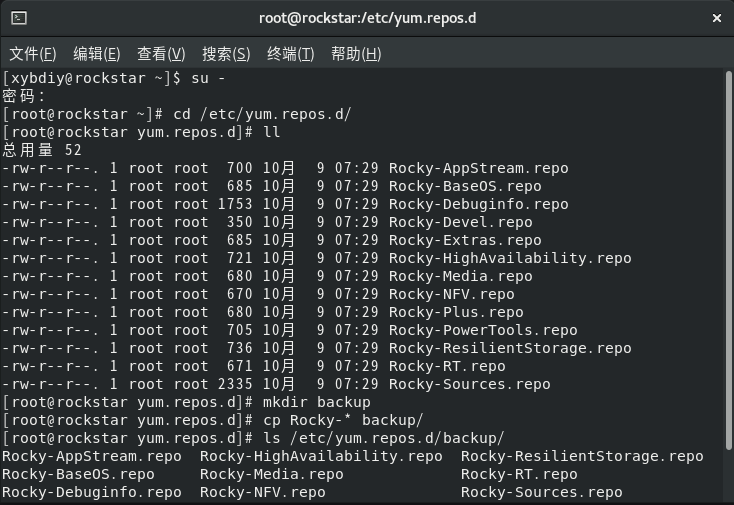
(1) Open the terminal and back up the default source
[xybdiy@rockstar ~]$ su -
password:
[root@rockstar ~]# cd /etc/yum.repos.d/
[root@rockstar yum.repos.d]# ll
 Total consumption 52
-rw-r--r--. 1 root root  700 10 September 7:29 Rocky-AppStream.repo
-rw-r--r--. 1 root root  685 10 September 7:29 Rocky-BaseOS.repo
-rw-r--r--. 1 root root 1753 10 September 7:29 Rocky-Debuginfo.repo
-rw-r--r--. 1 root root  350 10 September 7:29 Rocky-Devel.repo
-rw-r--r--. 1 root root  685 10 September 7:29 Rocky-Extras.repo
-rw-r--r--. 1 root root  721 10 September 7:29 Rocky-HighAvailability.repo
-rw-r--r--. 1 root root  680 10 September 7:29 Rocky-Media.repo
-rw-r--r--. 1 root root  670 10 September 7:29 Rocky-NFV.repo
-rw-r--r--. 1 root root  680 10 September 7:29 Rocky-Plus.repo
-rw-r--r--. 1 root root  705 10 September 7:29 Rocky-PowerTools.repo
-rw-r--r--. 1 root root  736 10 September 7:29 Rocky-ResilientStorage.repo
-rw-r--r--. 1 root root  671 10 September 7:29 Rocky-RT.repo
-rw-r--r--. 1 root root 2335 10 September 7:29 Rocky-Sources.repo
[root@rockstar yum.repos.d]# mkdir backup
[root@rockstar yum.repos.d]# cp Rocky-* backup/
[root@rockstar yum.repos.d]# ls /etc/yum.repos.d/backup/
Rocky-AppStream.repo  Rocky-HighAvailability.repo  Rocky-ResilientStorage.repo
Rocky-BaseOS.repo     Rocky-Media.repo             Rocky-RT.repo
Rocky-Debuginfo.repo  Rocky-NFV.repo               Rocky-Sources.repo
Rocky-Devel.repo      Rocky-Plus.repo
Rocky-Extras.repo     Rocky-PowerTools.repo
(2) Replace alicloud image source
Execute the following command to replace the default source
sed -e 's|^mirrorlist=|#mirrorlist=|g' \
    -e 's|^#baseurl=http://dl.rockylinux.org/$contentdir|baseurl=https://mirrors.aliyun.com/rockylinux|g' \
    -i.bak \
    /etc/yum.repos.d/Rocky-*.repo

dnf makecache

Please pay attention to more service operations Rocky Linux Official website.
---------------------
Author: xybDIY
Source: CSDN
Original text: https://blog.csdn.net/qq_45392321/article/details/121585755