It's silly to use Alibaba cloud server to set up this hadoop cluster, which wastes me nearly a week.
1. Preparation
Prepare three alicloud servers
| Namenode | 121.196.224.191 |
|---|---|
| Datanode1 | 121.196.226.12 |
| Datanode2 | 47.96.42.166 |
Port setting (pit behind)
Namenode
Open 9000 ports manually through security groups
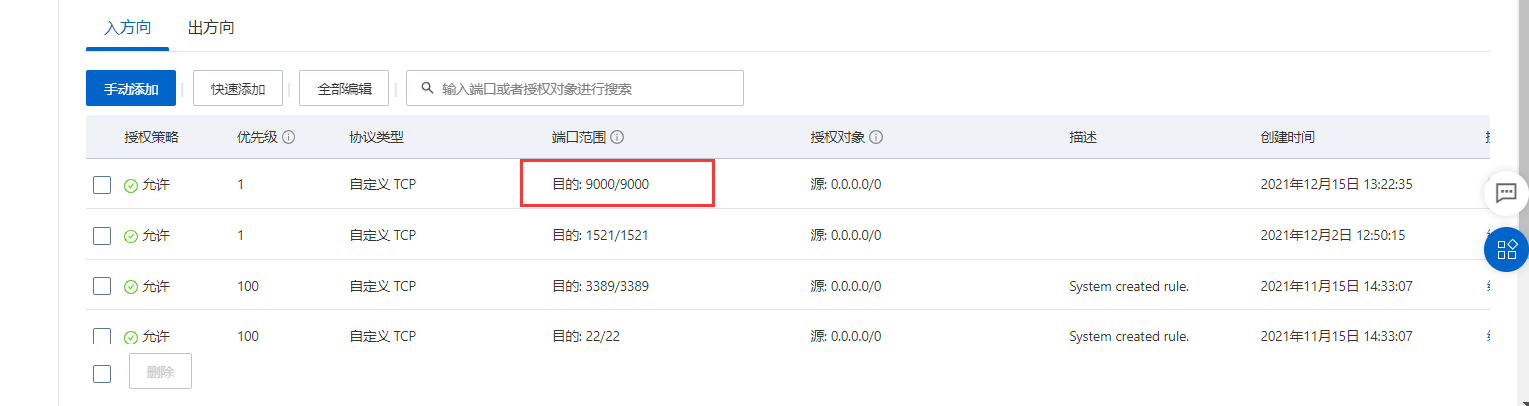
View the private ip address of the Namenode on the console
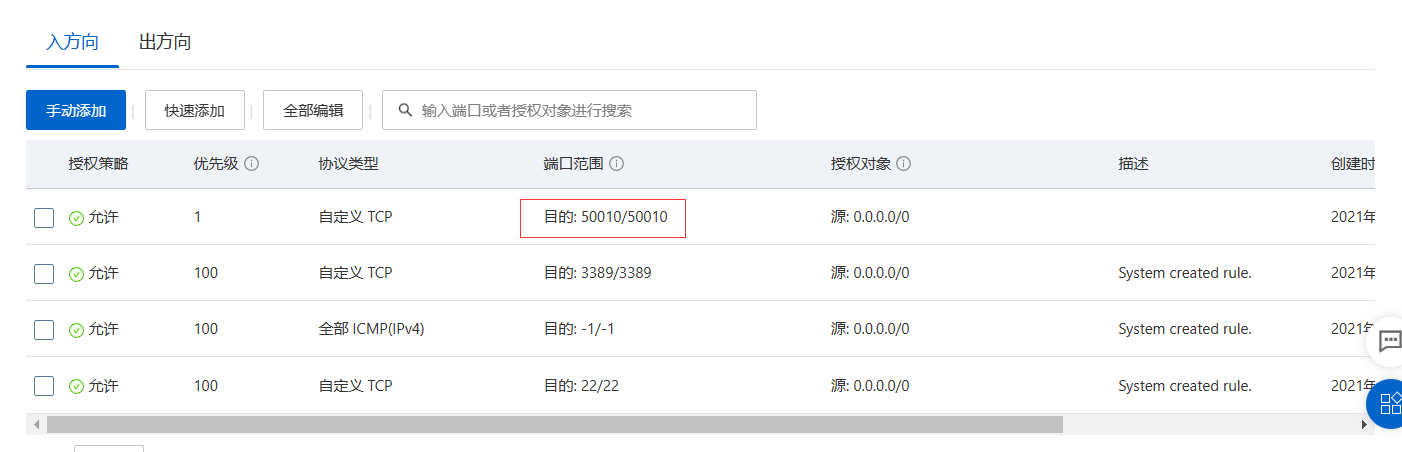
Datanode1 and Datanode2
Open 50010 port through security group
2. Configuration environment
We only need to configure the Namenode environment, and other datanode s can use the master transfer method
Configuring the Namenode environment
- Download and unzip the required packages
ssh 121.196.224.191    //Connect Namenode node
mkdir  /home/hadoop
cd /home/hadoop/
wget http://denglab.org/cloudcomputing/download/hadoop.tar.gz
tar -zxvf hadoop.tar.gz
mkdir /home/jdk
cd /home/jdk/
wget http://denglab.org/cloudcomputing/download/jdk.tar.gz
tar -zxvf jdk.tar.gz
- Set bash profile
vi ~/.bash_profile
Replace the original configuration with the following code
#export PATH
export JAVA_HOME=/home/jdk/jdk1.7.0_75
export JAVA_JRE=/home/jdk/jdk1.7.0_75/jre
export HADOOP_HOME=/home/hadoop/hadoop-2.6.0

# path
export PATH=$HADOOP_HOME/bin:$HADOOP_HOME/sbin:$PATH
export PATH=$JAVA_HOME/bin:$PATH
source ~/.bash_profile / / save the configuration
- Modify the Hadoop configuration file (replace the original configuration below)
cd $HADOOP_HOME
mkdir namenode
mkdir datanode
cd etc/hadoop/
vi core-site.xml
<configuration>
	<property>
		<name>fs.default.name</name>
		<value>hdfs://Namenode:9000</value>
	</property>
	<property>
		<name>hadoop.tmp.dir</name>
		<value>/home/hadoop/hadoop-2.6.0/tmp/hadoop-${user.name}</value>
	</property>
</configuration>
vi hdfs-site.xml
<configuration>
	<property>
		<name>dfs.replication</name>
		<value>2</value>
	</property>
	<property>
		<name>dfs.namenode.name.dir</name>
		<value>/home/hadoop/hadoop-2.6.0/namenode/name_1, /home/hadoop/hadoop-2.6.0/namenode/name_2</value>
	</property>
	<property>
		<name>dfs.datanode.data.dir</name>
		<value>/home/hadoop/hadoop-2.6.0/datanode/data_1, /home/hadoop/hadoop-2.6.0/datanode/data_2</value>
	</property>
</configuration>
vi mapred-site.xml
<configuration>
	<property>
		<name>mapred.job.tracker</name>
		<value>Namenode:9001</value>
	</property>
</configuration>
vi hadoop-env.sh
export JAVA_HOME=/home/jdk/jdk1.7.0_75
vi slaves
Set data node
Datanode1
Datanode2
- Set password free access between 3 nodes
Change host name
ssh 121.196.224.191
vi /etc/hostname
Namenode
vi /etc/hosts
121.196.224.191	Namenode
121.196.226.12	Datanode1
47.96.42.166	Datanode2
ssh 121.196.226.12
vi /etc/hostname
Datanode1
ssh 47.96.42.166
vi /etc/hostname
Datanode2
ssh Namenode
vi /etc/hosts
Change Namenode to private ip
Copy the Namenode node configuration to the datanode
scp /etc/hosts root@121.196.226.12:/etc/hosts
scp /etc/hosts root@47.96.42.166:/etc/hosts
scp ~/.bash_profile root@121.196.226.12:~/.bash_profile
scp ~/.bash_profile root@47.96.42.166:~/.bash_profile
Key generation
SSH keygen - t RSA / / click enter three times
ssh Datanode1
SSH keygen - t RSA / / click enter three times
scp /root/.ssh/id_rsa.pub root@Namenode:/root/.ssh/id_rsa.pub.Datanode1
ssh Datanode2
SSH keygen - t RSA / / click enter three times
scp /root/.ssh/id_rsa.pub root@Namenode:/root/.ssh/id_rsa.pub.Datanode2
Key interaction
ssh Namenode
cd /root/.ssh
cat id_rsa.pub >> authorized_keys
cat id_rsa.pub.Datanode1 >> authorized_keys
cat id_rsa.pub.Datanode2 >> authorized_keys
chmod 644 authorized_keys
scp ~/.ssh/authorized_keys root@Datanode1:/root/.ssh/authorized_keys
scp ~/.ssh/authorized_keys root@Datanode2:/root/.ssh/authorized_keys
Test connection
ssh Datanode1
ssh Datanode2
ssh Namenode
- Start and test hadoop
Copy hadoop, jdk files and configuration from namenode to datanode
scp -r /home/hadoop/ root@Datanode1:/home/hadoop
scp -r /home/hadoop/ root@Datanode2:/home/hadoop
scp -r /home/jdk/ root@Datanode1:/home/jdk
scp -r /home/jdk/ root@Datanode2:/home/jdk
cd $HADOOP_HOME
cd etc/hadoop
hdfs namenode -format   //Do not initialize hadoop multiple times, which may cause the generated id not to be unique
start-all.sh
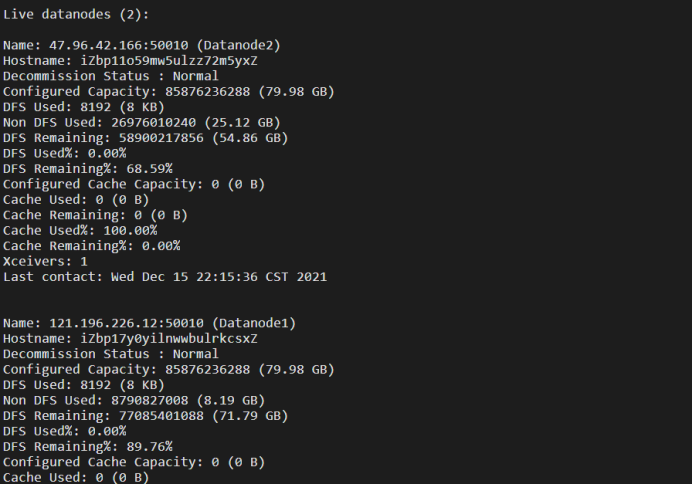
Viewing HDFS file system status
hdfs dfsadmin -report
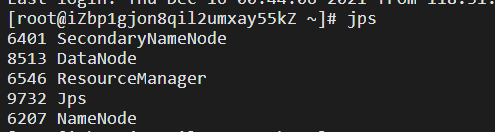
jps
Test HDFS file system
hadoop fs -ls /
vi aaa.txt
hadoop fs -put aaa.txt /aaa.txt
Congratulations on being here. Next, let's look at the more uncomfortable pit
- The namenode is not started. jps cannot find the namenode. Run hdfs dfsadmin -report and report the following error
Retrying connect to server: hadoop/121.196.224.191:9000. Already tried 0 time(s);
Reason: after copying the configuration to the datanode node, the ip address of the namenode in the / etc/hosts file in the namenode is not changed to the private ip address
See this article for details Blog - Datanode is not started. Check the datanode log file and find the following error
Retrying connect to server: Namenode/121.196.224.191:9000. Already tried 0 time(s);
Reason: the 9000 port of namenode is not opened through the security group rule setting - hadoop fs -put aaa.txt /aaa.txt this step takes a long time to report this error
INFO hdfs.DFSClient: Excluding datanode 47.96.42.166:50010
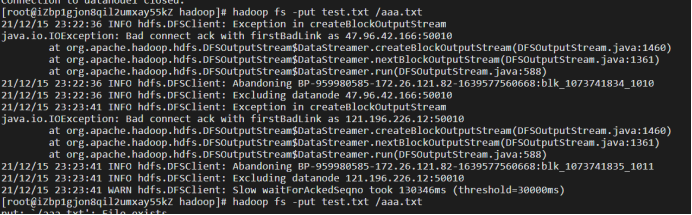
Cause: not open 47.96 42.166 the 50010 port of datanode2 can be opened through security group rule settings.
4. If datanode is not started at this time, Hadoop daemon is available SH start datanode