01# Preface#
In the previous series of appium sharing, we have a series of appium related sharing. We target multiple devices, Appium series (XVIII) multi device parallel execution test cases . For the management of multiple devices, we use the method of multi process and multi thread to control. Of course, this problem can be solved, but is there any other solution. This article takes you to see how to manage devices based on Selenium Grid.
02# text#
1, What is Selenium Grid?
Selenium Grid is a part of selenium suite. It is specially used to run multiple test cases in parallel on different browsers, operating systems and machines.
Selenium Grid has two versions - the old version Grid 1 and the new version Grid 2. We only introduce the new version, because the selenium team has gradually abandoned the old version.
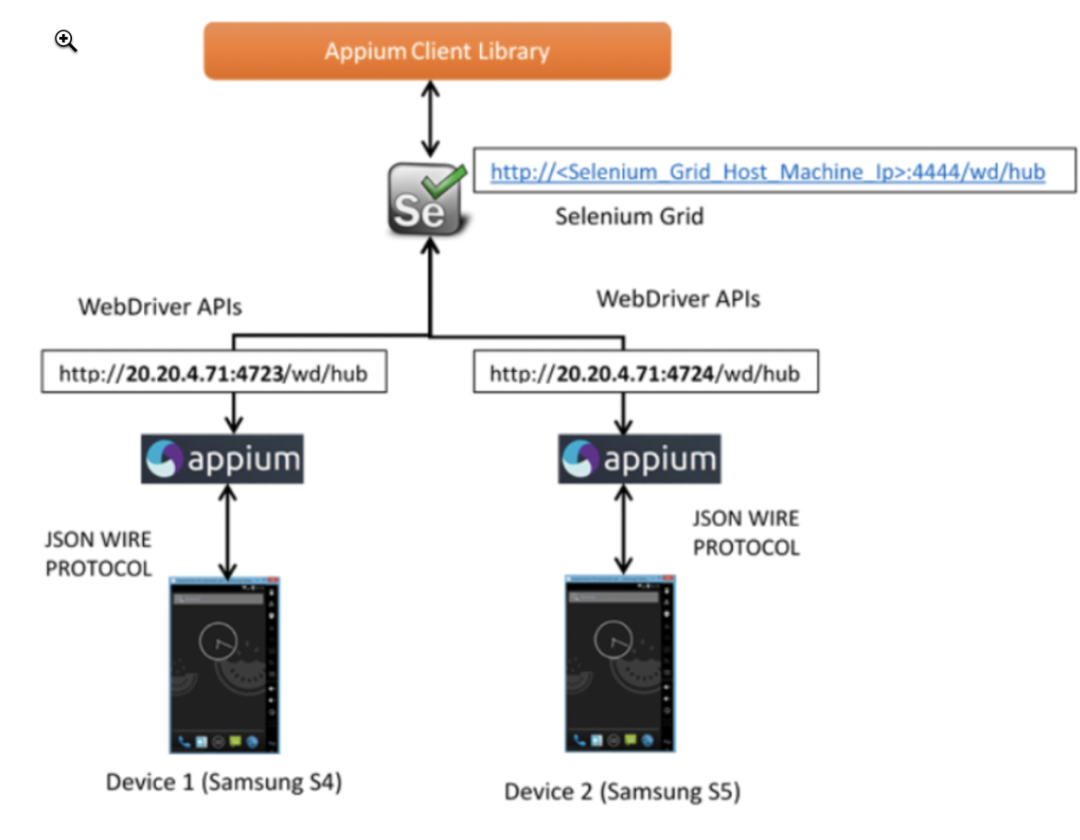
Selenium Grid mainly uses the concept of master slaves (or hub nodes) - one master/hub and multiple slave nodes registered based on master/hub. When we run test cases based on different browsers / systems on the master, the master will be distributed to the appropriate node to run.
After construction, its overall structure is as follows:

2, There are two very important components in Grid mode:
1. The role of hub is similar to that of switch, which is connected to various devices through network cable. The official explanation is that the hub is used to manage the registration and status information of each node, accept the request call of the remote client code, and then forward the requested command to the node for execution.
2. The node executes the script code. As can be seen from the figure above, the hub sends the request to the node for execution. The node here is the Appium Server side.
3, Let's see how to deploy it?
For building appium environment, please refer to: Yiwen takes you through the pitfalls of building appium test environment on mac
We download Selenium Grid service at
https://npm.taobao.org/mirrors/selenium/3.9/
I downloaded version 3.9.
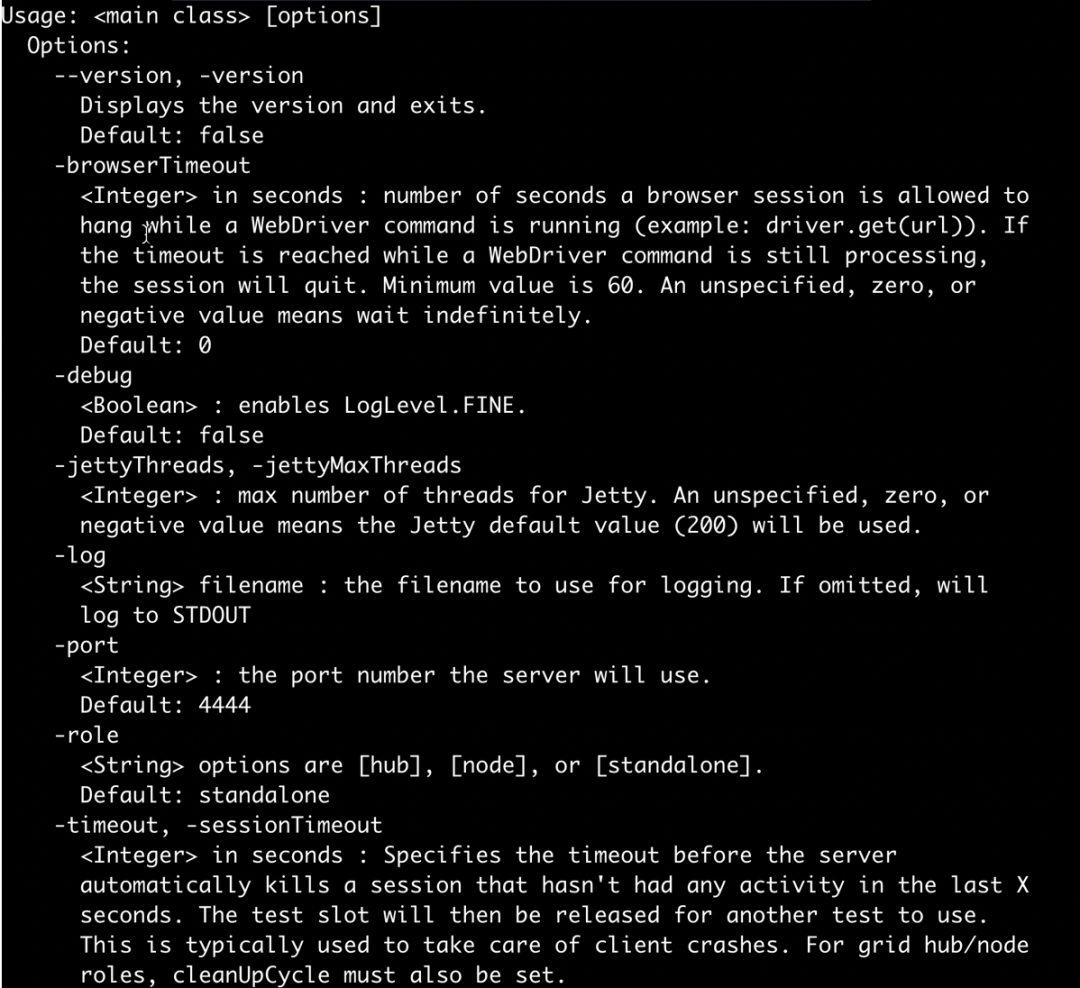
After downloading, we'll check it out
java -jar selenium-server-standalone-3.9.1.jar --help
result

We can see the commands that can be followed and the meaning.
Start under
java -jar selenium-server-standalone-3.9.1.jar -role hub -log log.txt
Post startup access
http://0.0.0.0:4444/

We can view the linked devices in the console

Let's configure the nodes of a single device. The devices are as follows
{
  "capabilities":
      [
        {
      "deviceName": "192.168.56.109:5555",   #This is the device name detected by adb devices
          "version":"10.0",  #System version of simulator / real machine
          "maxInstances": 1,  #Maximum number of instances
          "platform":"ANDROID", #Test platform: Android
      "browserName": ""   #The test common App can be left blank. If it is a test browser such as chrome, it can be written
        }
      ],
  "configuration":
  {
    "cleanUpCycle":2000,
    "timeout":30000,
    "proxy": "org.openqa.grid.selenium.proxy.DefaultRemoteProxy",
    "hub":"0.0.0.0:4444/grid/register",  #Registered interface address of hub
    "url":"http://0.0. 0.0:4723 / WD / hub ", #appium server's default access path
    "host": "127.0.0.1",  #IP address of Appium Server
    "port": 4723,  #Appium Server port number
    "maxSession": 1,
    "register": true,
    "registerCycle": 5000,
    "hubPort": 4444,  #hub port number
    "hubHost": "127.0.0.1",  #hub IP address, which is started on the local machine. If it is on another machine, its external IP address needs to be used, such as 192.168 1.111 this
    "hubProtocol": "http"  #Protocol. The default is http
  }
}
After configuration, it can be started as follows:
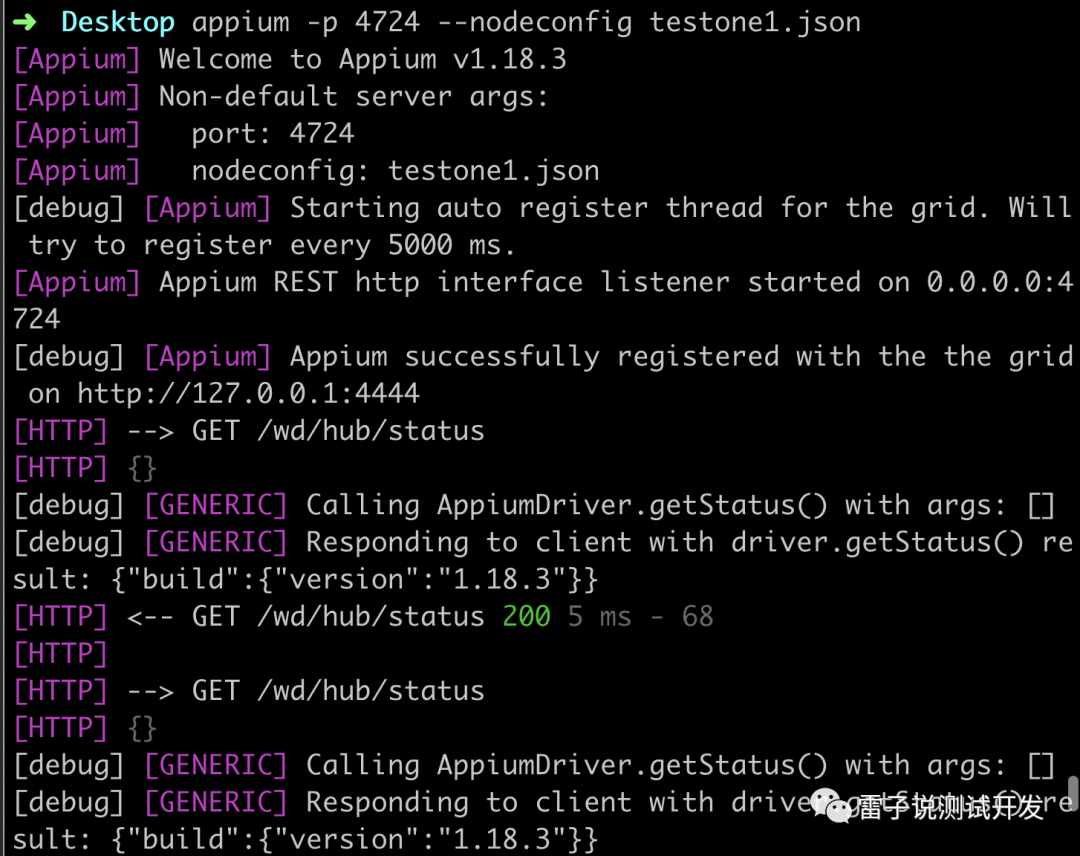
appium -p 4723 --nodeconfig testone.json
 It can also be used
 node . --nodeconfig /path/to/nodeconfig.json,This needs to be specified main.js Namely appium of
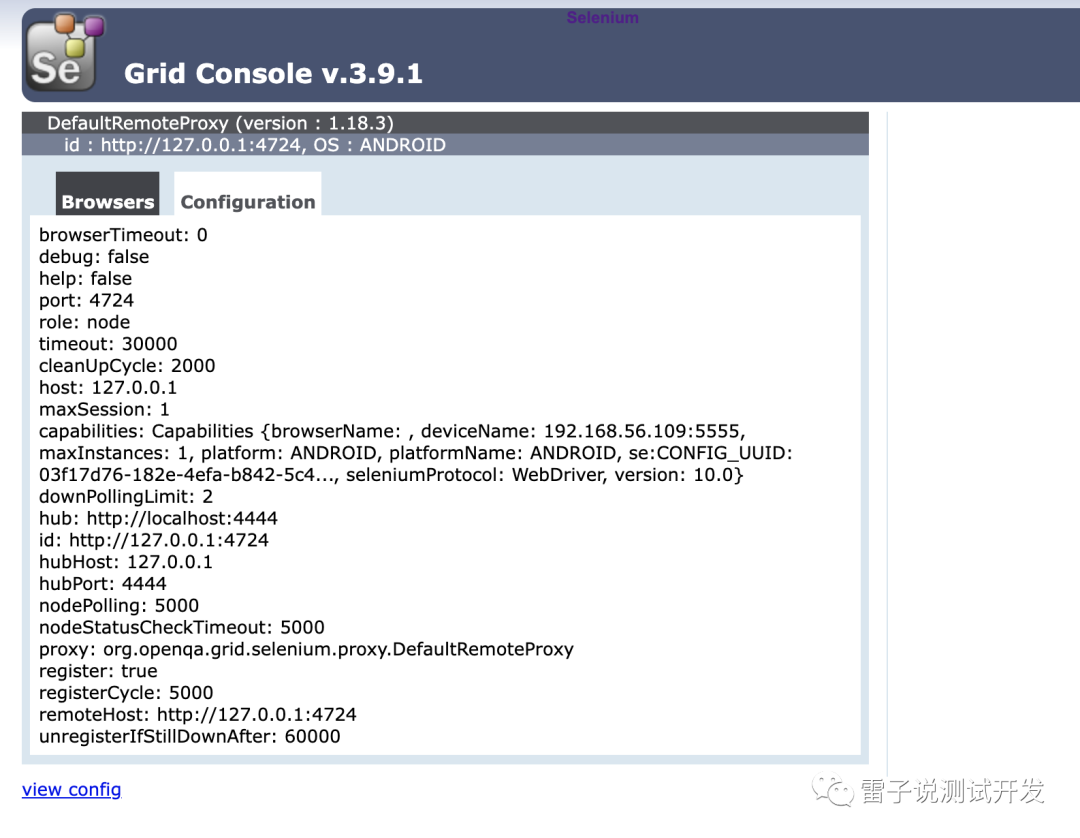
After startup, we can access
http://localhost:4444/grid/console
Then the configuration of the corresponding connected device.

Let's take a look at the corresponding service startup of appium

Every once in a while, it will communicate with grid. Then the connection mode of other equipment is described above. After configuration, you can http://0.0.0.0:4444/grid/console# see.
At this point, the construction is completed. Let's see how to use the code later?