1.ss5 build sock5 server
1.1 download ss5 source code
https://sourceforge.net/projects/ss5/files/ss5/
https://nchc.dl.sourceforge.net/project/ss5/ss5/3.8.9-8/ss5-3.8.9-8.tar.gz
1.2 installation related requirements
yum install -y pam-devel
yum install -y openldap-devel
yum install -y openssl-devel
1.3 compilation and installation
tar xvf ss5-3.8.9-8.tar.gz
cd ss5-3.8.9
./configure && make && make install
1.4 modify SS5 configuration file
##Find and cancel the following two lines of comments
vi /etc/opt/ss5/ss5.conf
auth 0.0.0.0/0 – –
permit – 0.0.0.0/0 – 0.0.0.0/0 – – – – –
After the installation, these two lines are annotated. Just UN annotate these two lines. At this time, it is in the non authentication state and everyone can access it
1.5 add executable permissions to bash file / etc / RC d/init. d/ss5
chmod +x /etc/rc.d/init.d/ss5
1.6 start / stop / restart ss5
/etc/rc.d/init.d/ss5 start
/etc/rc.d/init.d/ss5 stop
/etc/rc.d/init.d/ss5 restart
1.7 if you need to open account password authentication
##The two lines in step 1.4 need to be modified to:
auth 0.0.0.0/0 – u
permit u 0.0.0.0/0 – 0.0.0.0/0 – – – – –
##Add user name and password / etc / opt / SS5 / SS5 Passwd, one user + password per line (with spaces between them), and then restart the service: / etc / RC d/init. d/ss5 restart
vi /etc/opt/ss5/ss5.passwd
admin admin123
1.8 modify the default 1080 port if necessary
vi /etc/sysconfig/ss5
#Connect SS5_ Opts = "- U root" uncomment and change it to the following. For example, change the port to 9080, and then restart the service: / etc / RC d/init. d/ss5 restart
SS5_OPTS=" -u root -b 0.0.0.0:9080"
1.9 check the process port
[root@localhost ss5-3.8.9]# netstat -luntp|grep ss5
tcp        0      0 0.0.0.0:9080            0.0.0.0:*               LISTEN      10616/ss5
If there is no netstat command, execute Yum install - y net tools to install
2. Build sock5 client with proxychains ng
ProxyChains is a UNIX program, that hooks network-related libc functions
  in DYNAMICALLY LINKED programs via a preloaded DLL (dlsym(), LD_PRELOAD)
  and redirects the connections through SOCKS4a/5 or HTTP proxies.
  It supports TCP only (no UDP/ICMP etc).
2.1 download proxychains
https://github.com/rofl0r/proxychains-ng/tree/master
https://codeload.github.com/rofl0r/proxychains-ng/zip/refs/tags/v4.15
2.2 compilation and installation
# unzip
unzip proxychains-ng-4.15.zip
cd proxychains-ng-4.15

# configure and install
./configure --prefix=/usr --sysconfdir=/etc
make && make install

# installs /etc/proxychains.conf
make install-config
Gcc compiler is required for the above compilation. If GCC + + is not available, execute Yum install - y gcc gcc gcc-c + + installation
Some installation logs are as follows:
cc src/daemon/hsearch.o src/daemon/sblist.o src/daemon/sblist_delete.o src/daemon/daemon.o src/daemon/udpserver.o  -o proxychains4-daemon
./tools/install.sh -D -m 644 libproxychains4.so /usr/lib/libproxychains4.so
./tools/install.sh -D -m 755 proxychains4 /usr/bin/proxychains4
./tools/install.sh -D -m 755 proxychains4-daemon /usr/bin/proxychains4-daemon
[root@localhost proxychains-ng-4.15]#
[root@localhost proxychains-ng-4.15]# make install-config
./tools/install.sh -D -m 644 src/proxychains.conf /etc/proxychains.conf
2.3 make a binary file directory and save it for subsequent use
You can put the files compiled and installed in step 2 in a directory and make them tar GZ package, so that it can be directly decompressed and used on other machines with the same operating system without re compilation, saving time and steps, as follows:
##Establish a directory, such as proxychains_ bin_ centos7. six
mkdir proxychains_bin_centos7.6

##Copy the required files into the directory
cp /usr/lib/libproxychains4.so proxychains_bin_centos7.6/
cp /usr/bin/proxychains4 proxychains_bin_centos7.6/
cp /etc/proxychains.conf proxychains_bin_centos7.6/

##Make it into a compressed package to get a proxychain_ bin_ centos7. 6.tar. gz
tar -zcvf proxychains_bin_centos7.6.tar.gz proxychains_bin_centos7.6
2.4 use of proxychains
Usage:  ./proxychains4 -q -f config_file program_name [arguments]
        -q makes proxychains quiet - this overrides the config setting
        -f allows one to manually specify a configfile to use
        for example : proxychains telnet somehost.com
More help in README file
##The required configuration tells the server which sock5 proxy to connect, for example:
###A simple configuration example is attached:
socks4  127.0.0.1 9050  #sock4
socks5	10.9.17.96		1080  #sock5,no auth
socks5 	192.168.56.101	9080	admin admin123 #sock5 need auth
For example, I'm at proxychains The last line of conf configures Socks5 192.168 56.101 1080 admin admin123, tell the server that I need to pass 192.168 The server of 56.101 performs proxy access and is the way of authentication.
[testuser@localhost proxychains_bin_centos7.6]$ tail -f proxychains.conf
#       proxy types: http, socks4, socks5, raw
#         * raw: The traffic is simply forwarded to the proxy without modification.
#        ( auth types supported: "basic"-http  "user/pass"-socks )
#
[ProxyList]
# add proxy here ...
# meanwile
# defaults set to "tor"
socks5  192.168.56.101 9080 admin admin123
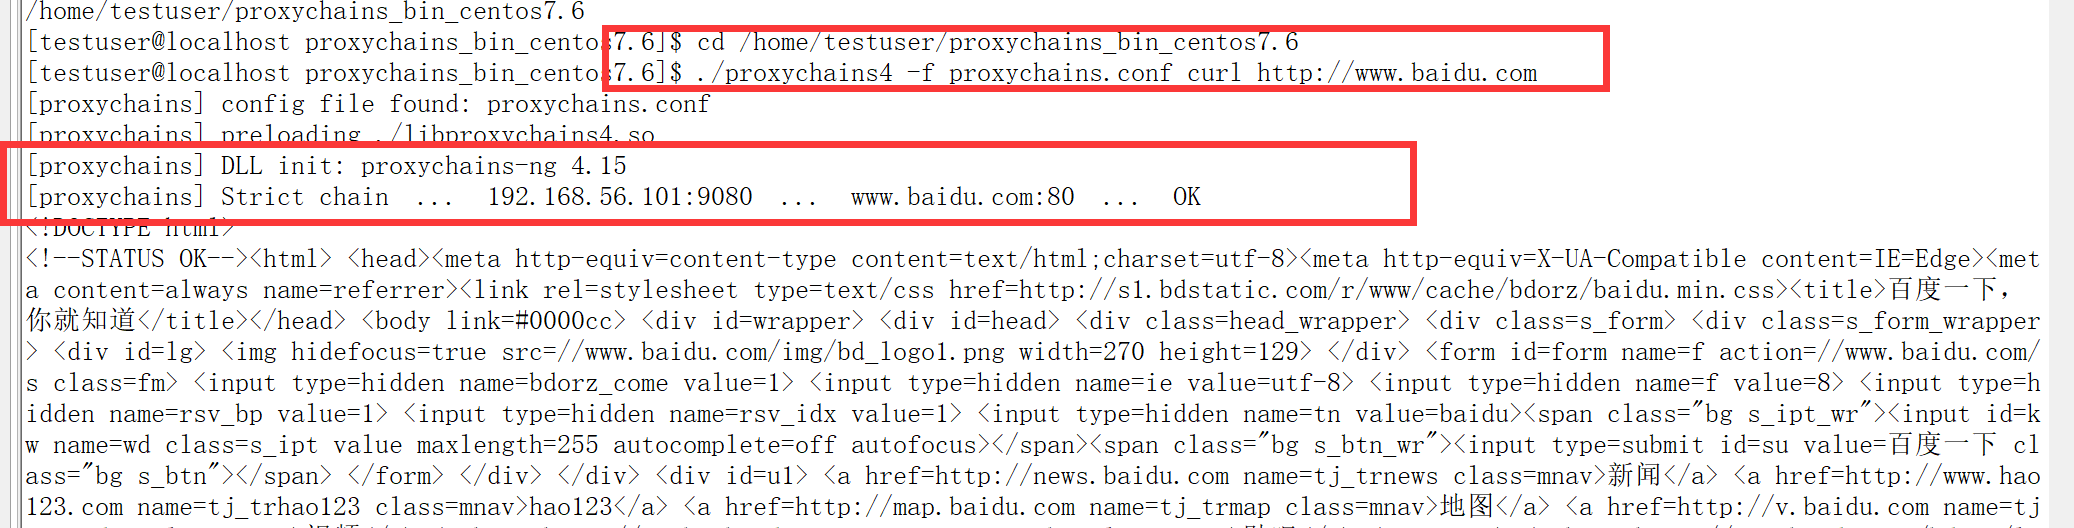
##Usage 1: the proxy connection information will be printed
Usage: ./proxychains4 -f config_file program_name [arguments], such as
cd /home/testuser/proxychains_bin_centos7.6
./proxychains4 -f proxychains.conf curl http://www.baidu.com
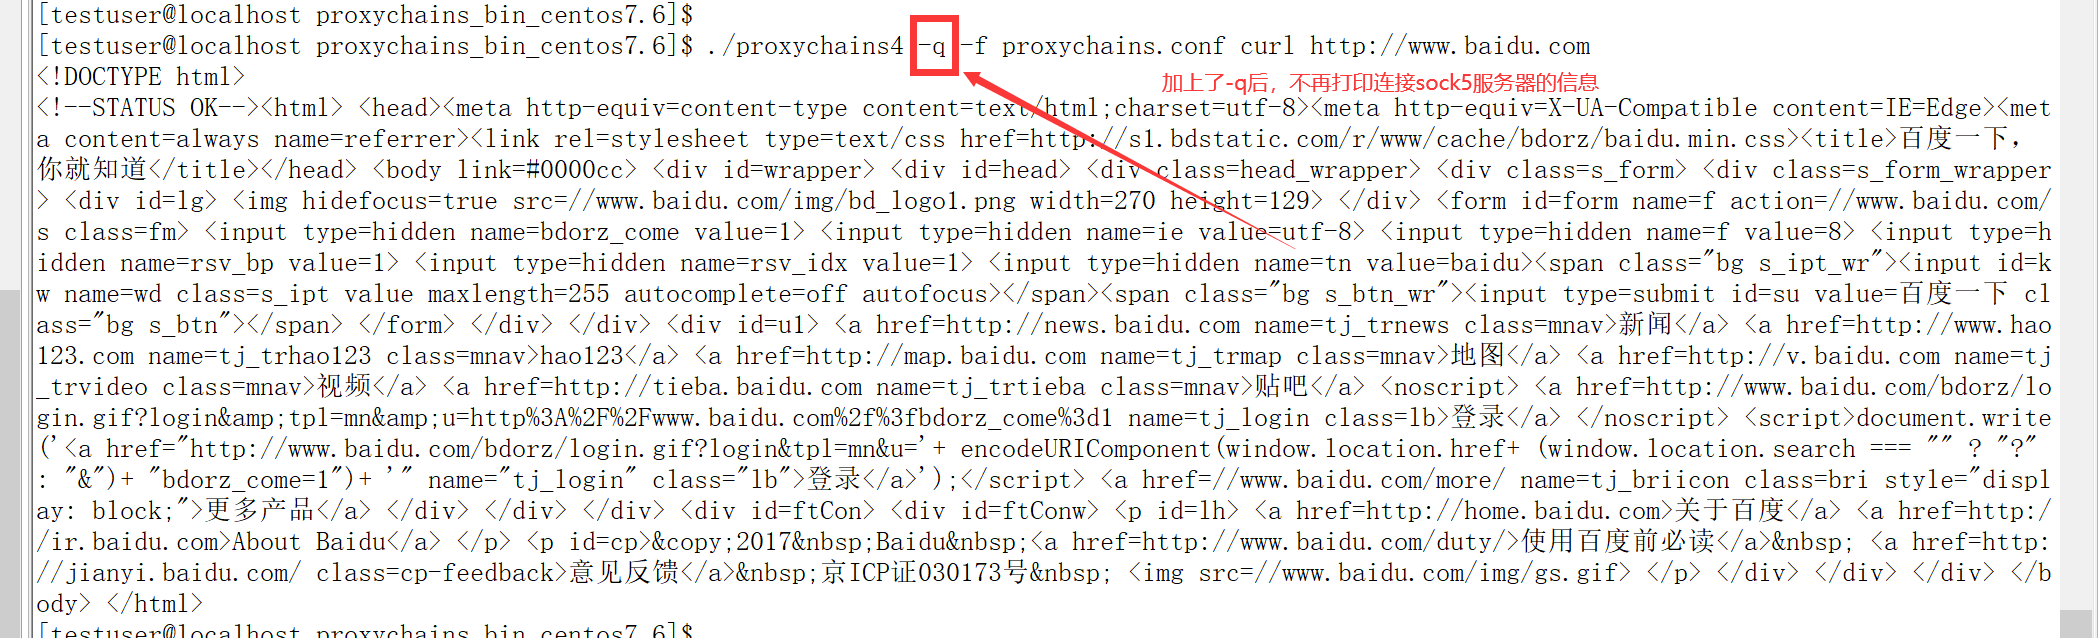
##Use mode 2. Add the - q parameter to use it quietly and do not print the agent's information
cd /home/testuser/proxychains_bin_centos7.6
./proxychains4 -q -f proxychains.conf curl http://www.baidu.com
##Mode 3: direct access via absolute path, such as:
##Direct acquisition command absolute path + program_name [arguments], for example:
/home/testuser/proxychains_bin_centos7.6/proxychains4 -f /home/testuser/proxychains_bin_centos7.6/proxychains.conf curl http://www.baidu.com