introduce
During the project security inspection of the company, it is found that there are four high-risk and medium risk copper leakage in the figure on windows server 2012R2 server, which need to be handled.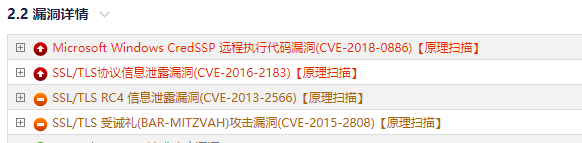
CVE-2018-0886
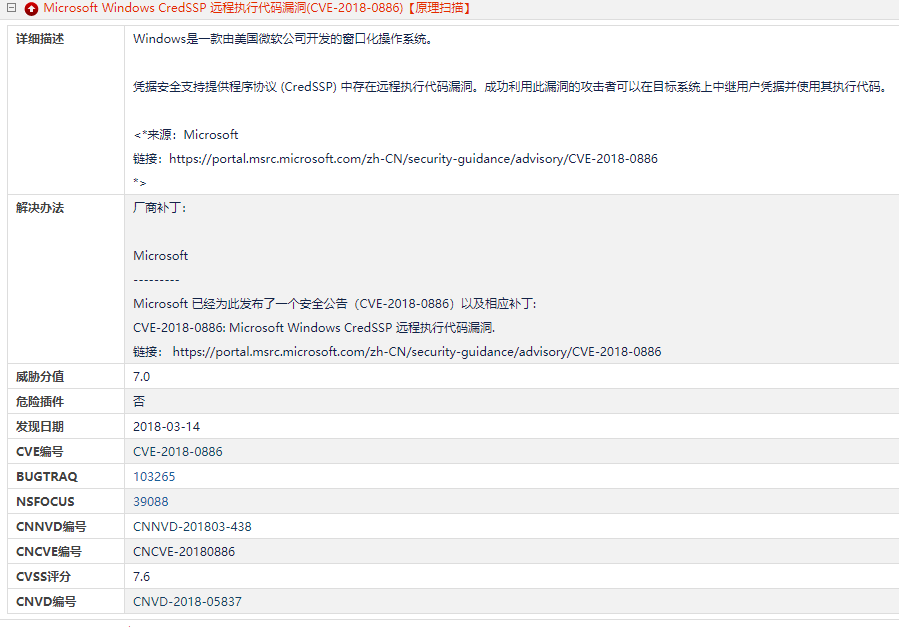
1. Solutions have been identified at: https://portal.msrc.microsoft.com/zh-CN/security-guidance/advisory/CVE-2018-0886 , the website may not be opened. You need to register an account on the organ online.
2. After opening the website, find the patch package of the corresponding system according to the figure below


After that, double-click the downloaded file on the server to complete the execution.
If there are other problems, please refer to this article: https://www.cnblogs.com/stars-one/p/14589698.html , the boss wrote in detail
CVE-2016-2183
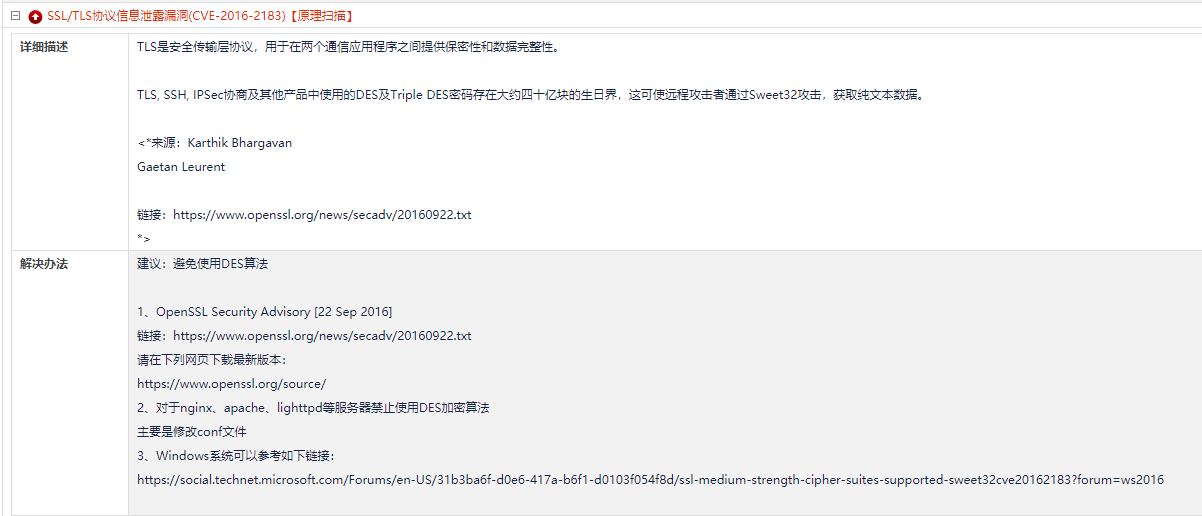
I found many great God articles on the Internet and found the following solutions:
Method 1: use FIPS from Windows instead of SSL encryption
1. Enable FIPS
Operating steps: management tools - > local security policy - > security settings - > local policy - > Security Options - > find the "system encryption: use FIPS compatible algorithms for encryption, hash and signature" option - > right click "properties - > under" local security settings ", select" enabled (E) ", click" apply "and" OK ".

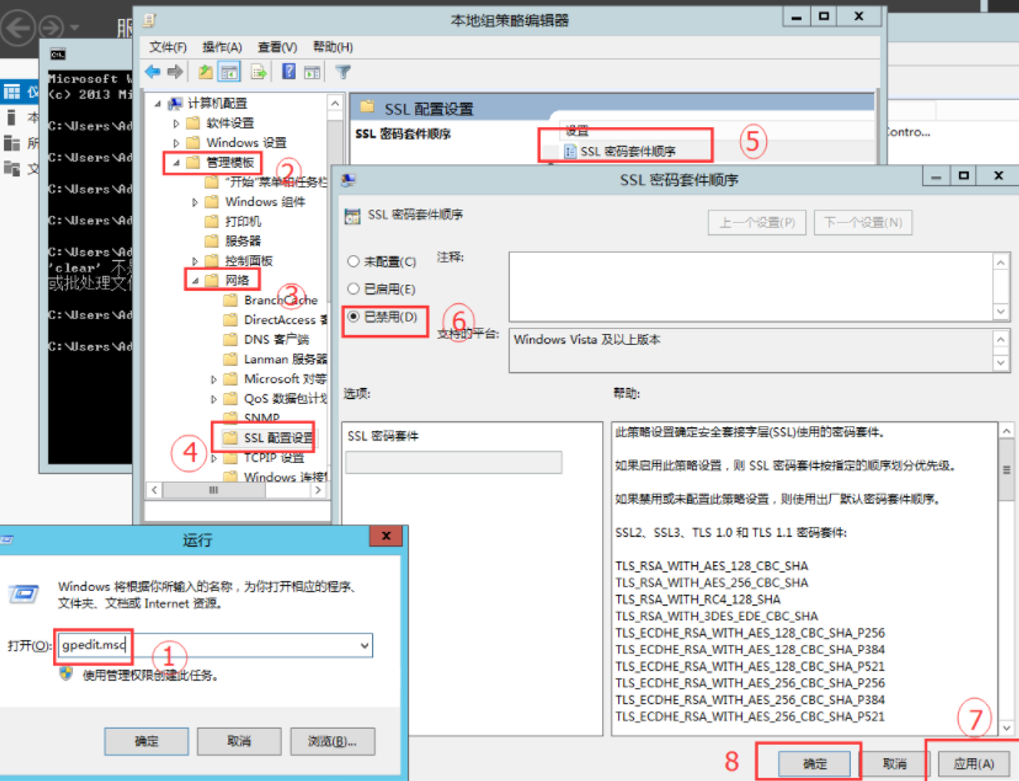
2. Disable SSL cryptographic Suite
Operating steps: Press' Win + R ', enter "run", type "gpedit.msc", open "Local Group Policy Editor" - > computer configuration - > Network - > SSL configuration settings - > on the "SSL cipher suite order" option, right-click "Edit" -> select "disabled (D)" in "SSL cipher suite order", click "apply" and "OK".
3. Delete default CA certificate
Operation steps: Press' Win + R ', enter "run", and type "M MC", Open management console - > file - > Add / remove snap in - > select certificate under available snap in - > click Add - > select computer user (C) in certificate snap in, click Next - > select local computer (computer running this console) (L) in select computer, and click Finish - > Return to Add / remove snap in, click OK - > return to console - > Certificate (local computer) - > remote desktop - > Certificate - > right click Delete on the default certificate.

After completing the above steps, it is found that the problem has not been completely solved. After testing with tools, it will still report that it is a medium risk. Then, the following methods are adopted.
Method 2: upgrade SSL encryption CA certificate
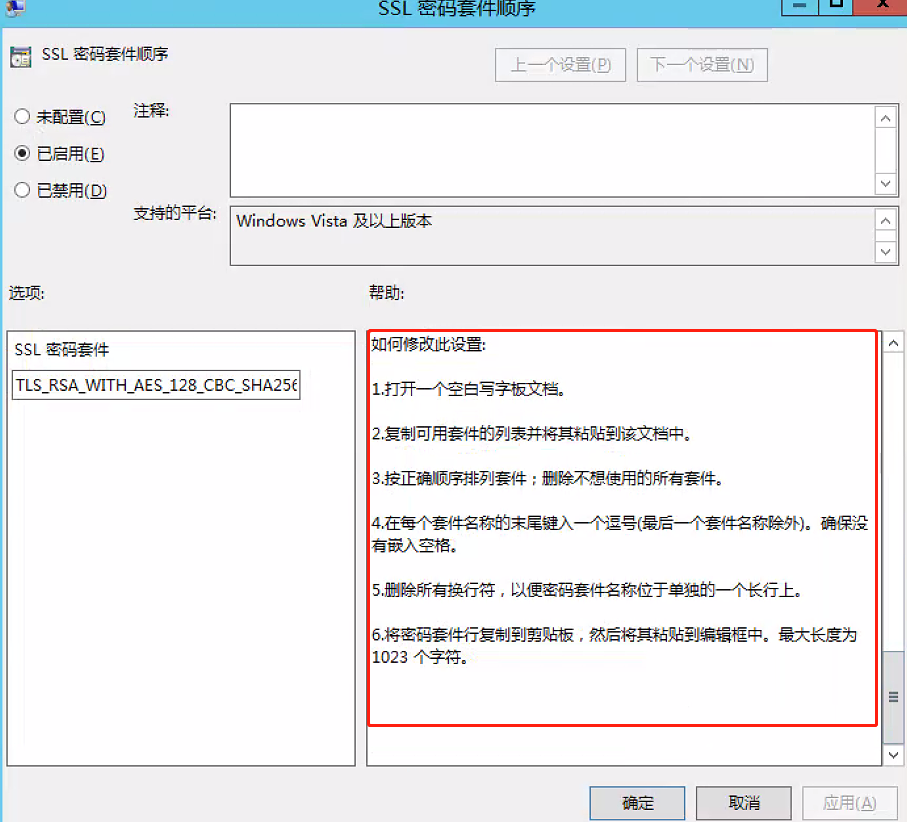
Operating steps: Press' Win + R ', enter "run", type "gpedit.msc", open "Local Group Policy Editor" - > computer configuration - > Network - > SSL configuration settings - > on the "SSL cipher suite order" option, Right click Edit - > select enabled in SSL cipher suite order, modify the SSL cipher suite algorithm under SSL cipher suite, and only keep TLS 1.2 SHA256 and SHA384 cipher suites and TLS 1.2 ECC GCM cipher suites.
In the second step of method 1, select enabled instead of disabled to modify the original password suite
Note: the modified content can also be modified according to the content provided in the lower right corner of the "SSL cipher suite order" interface
Original Password Suite:
TLS_RSA_WITH_AES_128_CBC_SHA256,TLS_RSA_WITH_AES_128_CBC_SHA,TLS_RSA_WITH_AES_256_CBC_SHA256,TLS_RSA_WITH_AES_256_CBC_SHA,TLS_RSA_WITH_RC4_128_SHA,TLS_RSA_WITH_3DES_EDE_CBC_SHA,TLS_ECDHE_RSA_WITH_AES_128_CBC_SHA256_P256,TLS_ECDHE_RSA_WITH_AES_128_CBC_SHA256_P384,TLS_ECDHE_RSA_WITH_AES_128_CBC_SHA_P256,TLS_ECDHE_RSA_WITH_AES_128_CBC_SHA_P384,TLS_ECDHE_RSA_WITH_AES_256_CBC_SHA_P256,TLS_ECDHE_RSA_WITH_AES_256_CBC_SHA_P384,TLS_ECDHE_ECDSA_WITH_AES_128_GCM_SHA256_P256,TLS_ECDHE_ECDSA_WITH_AES_128_CBC_SHA256_P256,TLS_ECDHE_ECDSA_WITH_AES_256_GCM_SHA384_P384,TLS_ECDHE_ECDSA_WITH_AES_256_CBC_SHA384_P384,TLS_ECDHE_ECDSA_WITH_AES_128_CBC_SHA_P256,TLS_ECDHE_ECDSA_WITH_AES_128_CBC_SHA_P384,TLS_ECDHE_ECDSA_WITH_AES_256_CBC_SHA_P256,TLS_ECDHE_ECDSA_WITH_AES_256_CBC_SHA_P384,TLS_DHE_DSS_WITH_AES_128_CBC_SHA256,TLS_DHE_DSS_WITH_AES_128_CBC_SHA,TLS_DHE_DSS_WITH_AES_256_CBC_SHA256,TLS_DHE_DSS_WITH_AES_256_CBC_SHA,TLS_DHE_DSS_WITH_3DES_EDE_CBC_SHA,TLS_RSA_WITH_RC4_128_MD5,SSL_CK_RC4_128_WITH_MD5,SSL_CK_DES_192_EDE3_CBC_WITH_MD5,TLS_RSA_WITH_NULL_SHA256,TLS_RSA_WITH_NULL_SHA
Modified:
TLS_RSA_WITH_AES_128_CBC_SHA256,TLS_RSA_WITH_AES_256_CBC_SHA256,TLS_ECDHE_RSA_WITH_AES_128_CBC_SHA256_P256,TLS_ECDHE_RSA_WITH_AES_128_CBC_SHA256_P384,TLS_ECDHE_RSA_WITH_AES_128_CBC_SHA256_P521,TLS_ECDHE_RSA_WITH_AES_256_CBC_SHA384_P256,TLS_ECDHE_RSA_WITH_AES_256_CBC_SHA384_P384,TLS_ECDHE_RSA_WITH_AES_256_CBC_SHA384_P521,TLS_ECDHE_ECDSA_WITH_AES_128_CBC_SHA256_P256,TLS_ECDHE_ECDSA_WITH_AES_128_CBC_SHA256_P384,TLS_ECDHE_ECDSA_WITH_AES_128_CBC_SHA256_P521,TLS_ECDHE_ECDSA_WITH_AES_256_CBC_SHA384_P384,TLS_ECDHE_ECDSA_WITH_AES_256_CBC_SHA384_P521,TLS_DHE_DSS_WITH_AES_128_CBC_SHA256,TLS_DHE_DSS_WITH_AES_256_CBC_SHA256,TLS_RSA_WITH_NULL_SHA256,TLS_ECDHE_ECDSA_WITH_AES_128_GCM_SHA256_P256,TLS_ECDHE_ECDSA_WITH_AES_128_GCM_SHA256_P384,TLS_ECDHE_ECDSA_WITH_AES_128_GCM_SHA256_P521,TLS_ECDHE_ECDSA_WITH_AES_256_GCM_SHA384_P384,TLS_ECDHE_ECDSA_WITH_AES_256_GCM_SHA384_P521
The following regulations shall be followed for modification of internal use:
According to method 2, after restarting the server, the test problem has been repaired
CVE-2013-2566,CVE-2015-2808
The two vulnerabilities can be handled according to the first step of method 1 in CVE-2016-2183
After the repair is completed, pay attention to restart the server