preface
Not long ago, Tencent cloud's Double Twelve activities have begun. Have you guys snapped up their favorite products? Do the big guys who follow the trend have trouble not knowing what to do? Today, bloggers continue to bring you the playing method of Tencent cloud lightweight application server. I have always sorted out all kinds of pictures and photos. Now the online disk can also easily sort out photos, but many people still want to have their own photo management program. Let's start!
preparation
One Tencent cloud lightweight application server (HK or domestic)
Why use Tencent cloud lightweight application server? When we reinstalled the system of Tencent cloud lightweight application server, pagoda cooperated with Tencent cloud to launch Tencent cloud exclusive pagoda. Compared with the ordinary version, the exclusive version integrates Tencent cloud COSFS, CDN and DNS resolution plug-ins by default, making it easier for users to use the pagoda panel to manage and operate Tencent cloud products. The image is based on CentOS 7.8 64 bit operating system. When we reinstall the system of Tencent cloud lightweight application server, we can select the application image, and then select pagoda Linux panel 7.6 0 Tencent cloud exclusive edition, and then we can use Tencent cloud lightweight application server and pagoda Linux panel 7.6 0 Tencent cloud exclusive edition is easier and more convenient to deploy and build the programs we need!
be careful
The software in this article is based on the installation of Tencent cloud lightweight application server. The minimum 2C4G configuration is recommended. The Tencent cloud lightweight application server system used in the tutorial is CentOS 7.8! Theoretically, Tencent cloud lightweight application server is pagoda Linux panel 7.6 0 the server operation of Tencent cloud exclusive edition and CentOS 7.8 should be basically consistent with this article (including process and error reporting, and other servers should be similar to this article!
LibrePhotos official website
Interface demonstration
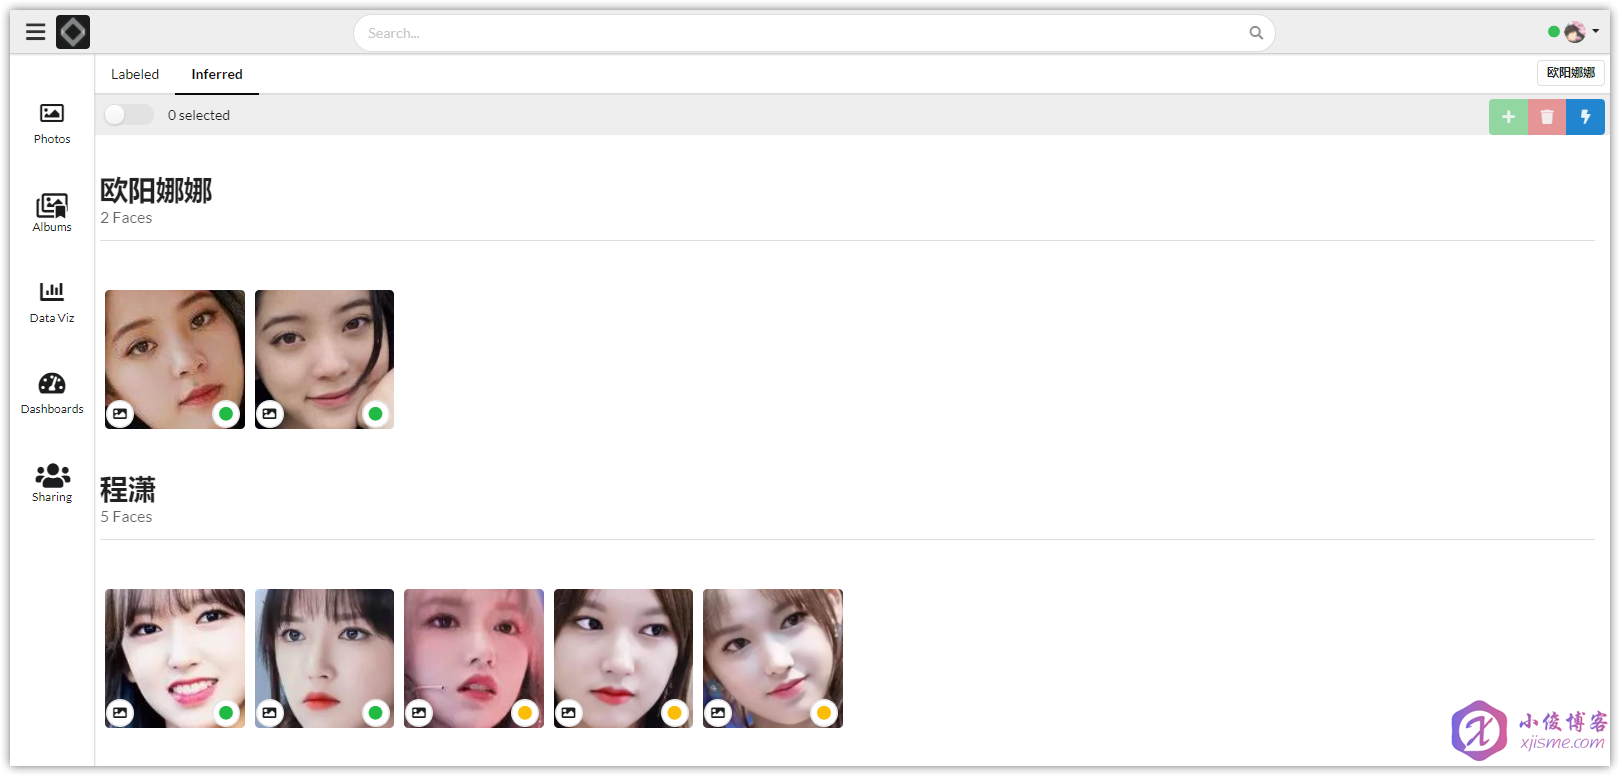
Installing LibrePhotos
1. Environmental preparation
1. Install the required software
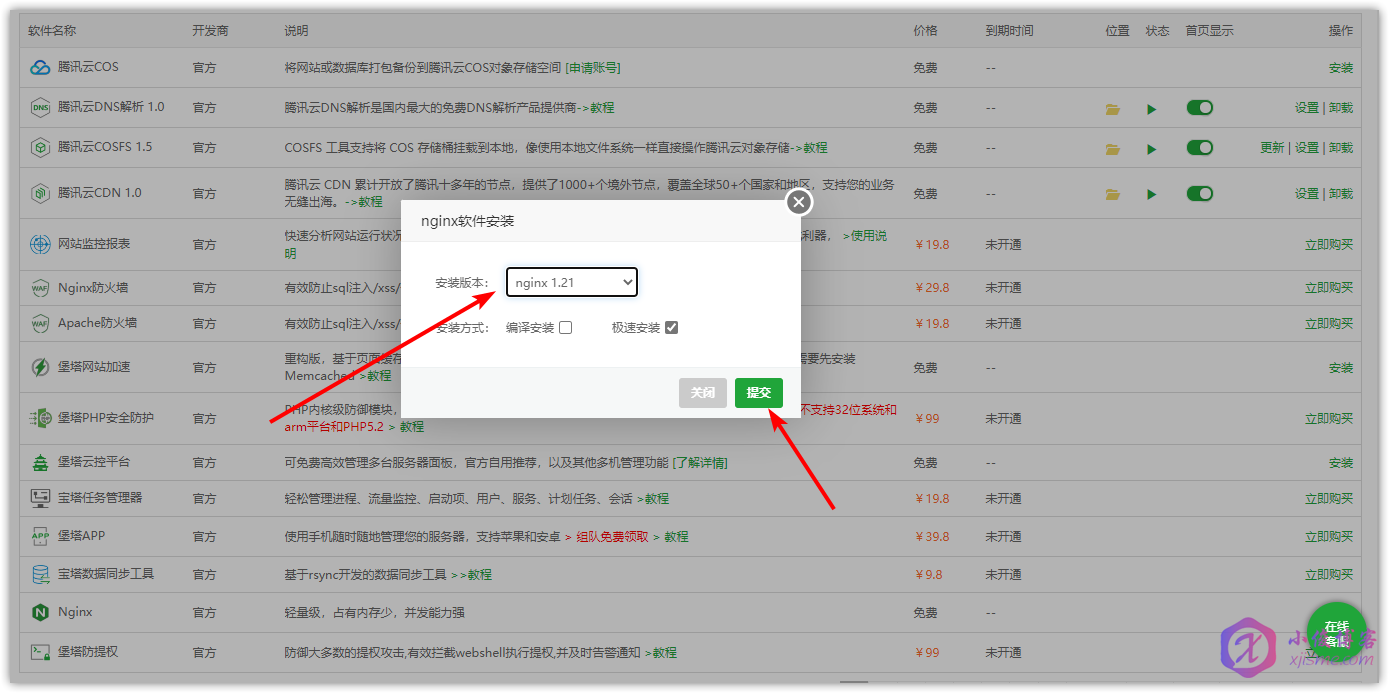
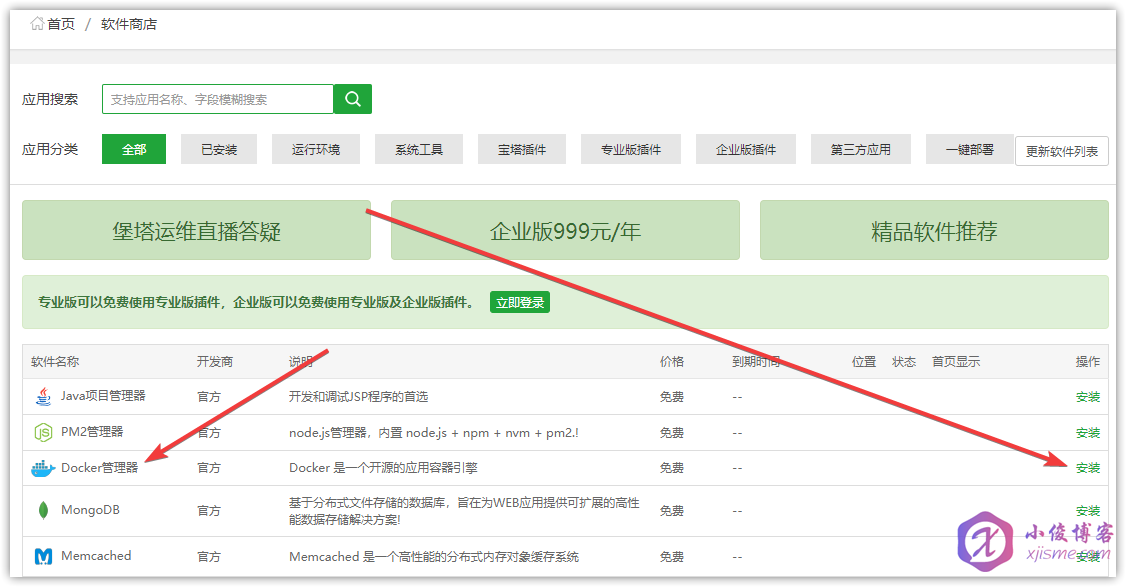
Enter the software store, search for Nginx and Docker, and click Install. Please use compile to install the production environment!!!
2. Install docker compose
curl -L https://github.com/docker/compose/releases/download/1.29.2/docker-compose-`uname -s`-`uname -m` -o /usr/local/bin/docker-compose
chmod +x /usr/local/bin/docker-compose
Domestic machines can use Github anti substitution
curl -L https://hub.fastgit.org/docker/compose/releases/download/1.29.2/docker-compose-`uname -s`-`uname -m` -o /usr/local/bin/docker-compose
chmod +x /usr/local/bin/docker-compose

2. Install LibrePhotos
1. Clone repository
Clone repository
git clone https://github.com/LibrePhotos/librephotos-docker.git
cd librephotos-docker
Domestic machines can use Github anti substitution
git clone https://hub.fastgit.org/LibrePhotos/librephotos-docker.git
cd librephotos-docker

2. Copy the configuration and modify it
cp librephotos.env .env
vi .env
Modify the items listed below
timeZone=Asia/Shanghai // Time zone, you need to add this line configuration by yourself!
userName=xjisme // Administrator user name
userPass=xjisme // Administrator password
adminEmail=i@xjisme.com // Administrator mailbox
shhhhKey=xjisme // Random key
httpPort=2077 // Exposed service port
dbName=librephotos // Database name
dbUser=docker // Database user
dbPass=xjisme // Database user password
gunniWorkers=4 // Number of workers, each worker is expected to consume 800MB RAM
HEAVYWEIGHT_PROCESS=4 // For multi-threaded scanning, each worker is expected to consume 800MB RAM
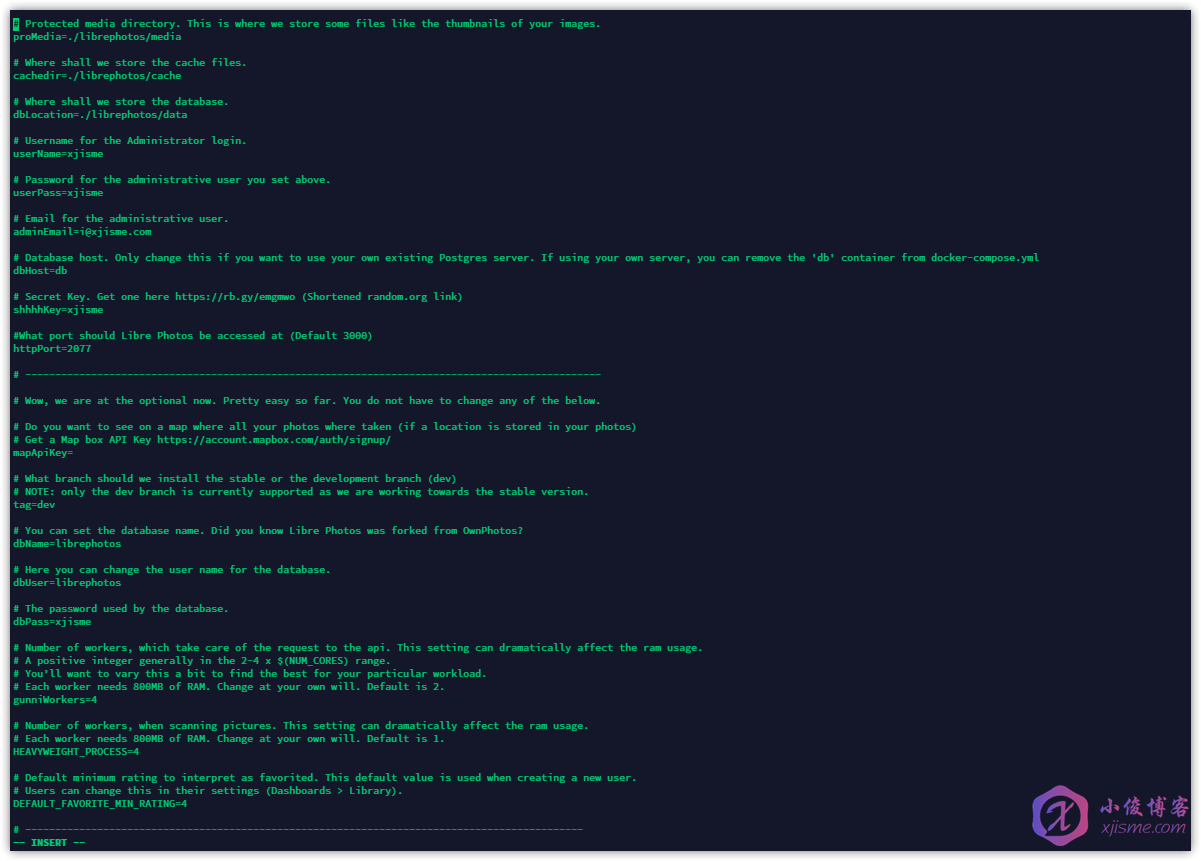
Then ESC +: WQ exit and save.
3. Start up procedure
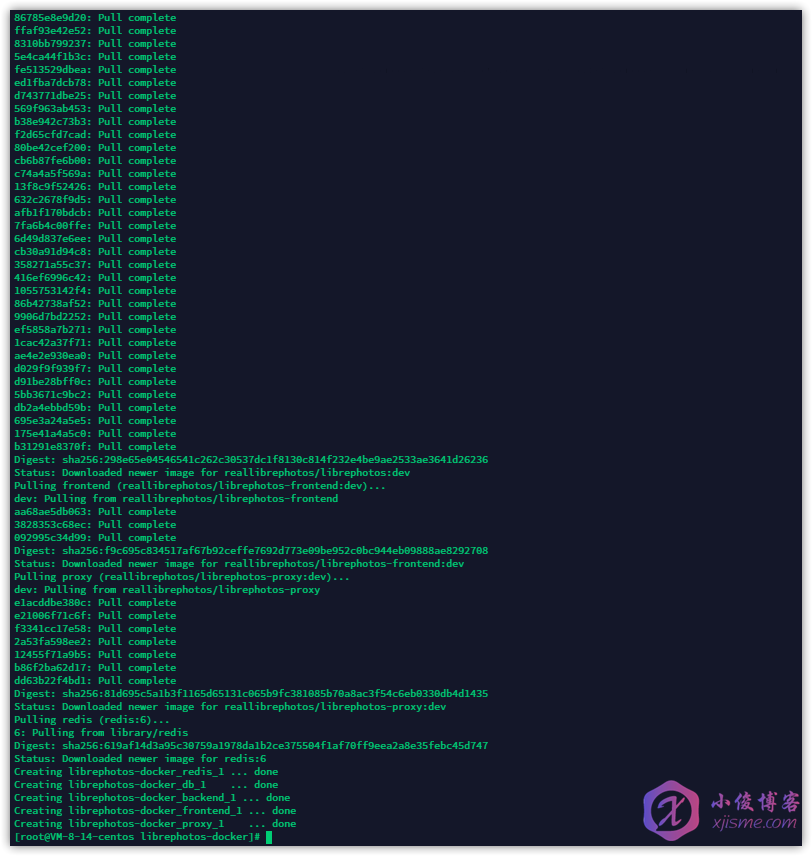
Enter the following command to start the program
docker-compose -f docker-compose.yml up -d
The ARM machine starts the program by entering the following command
docker-compose -f docker-compose.arm.yml up -d
Then enter the following command again to check the operation status of each container. If it is Up, it will be normal!
docker-compose ps
3. Set anti substitution
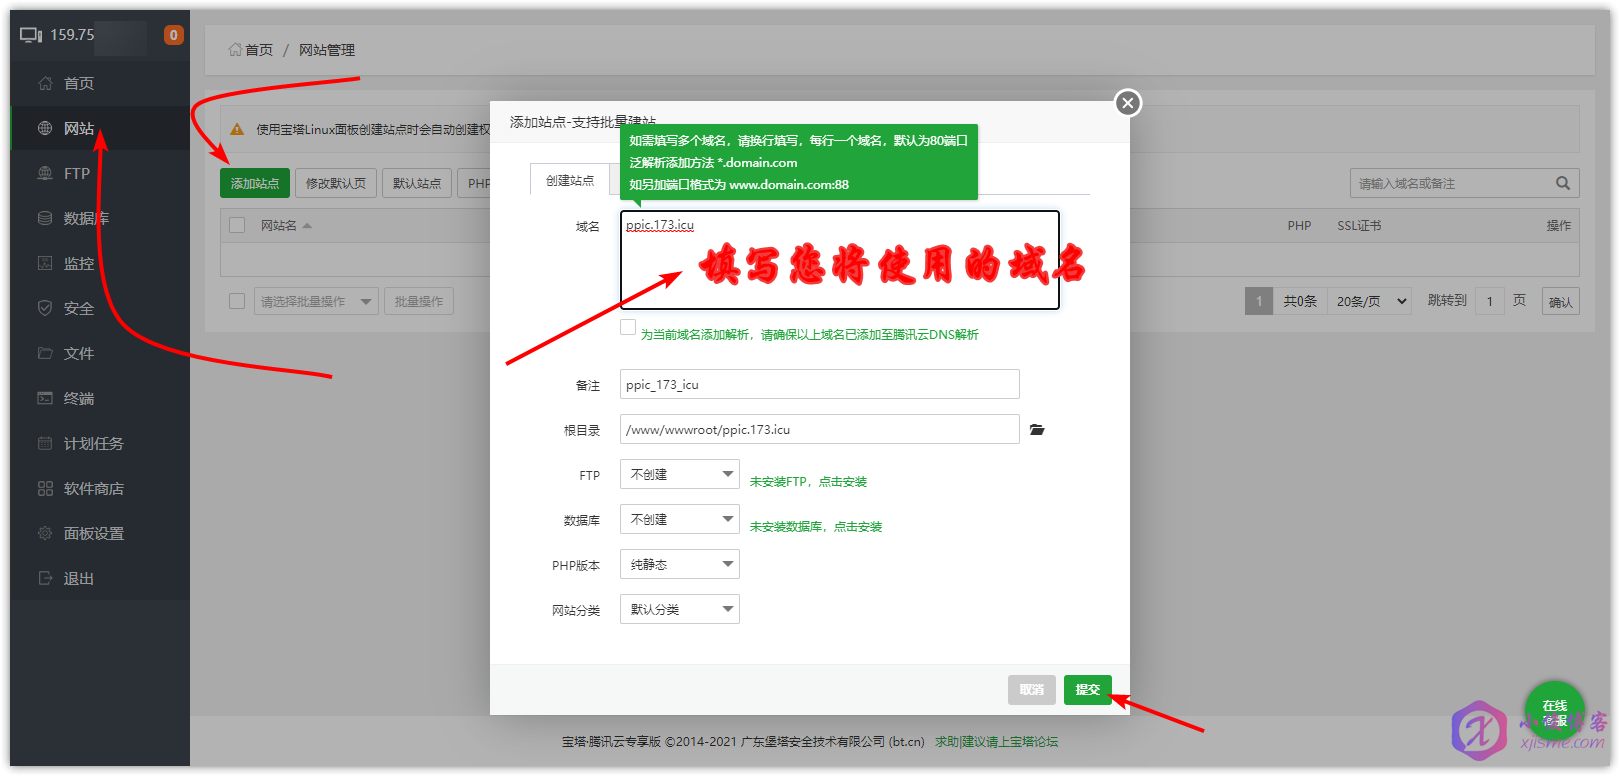
1. Add website
Enter the pagoda panel, enter the website, add the website and fill in the domain name
2. Set anti substitution
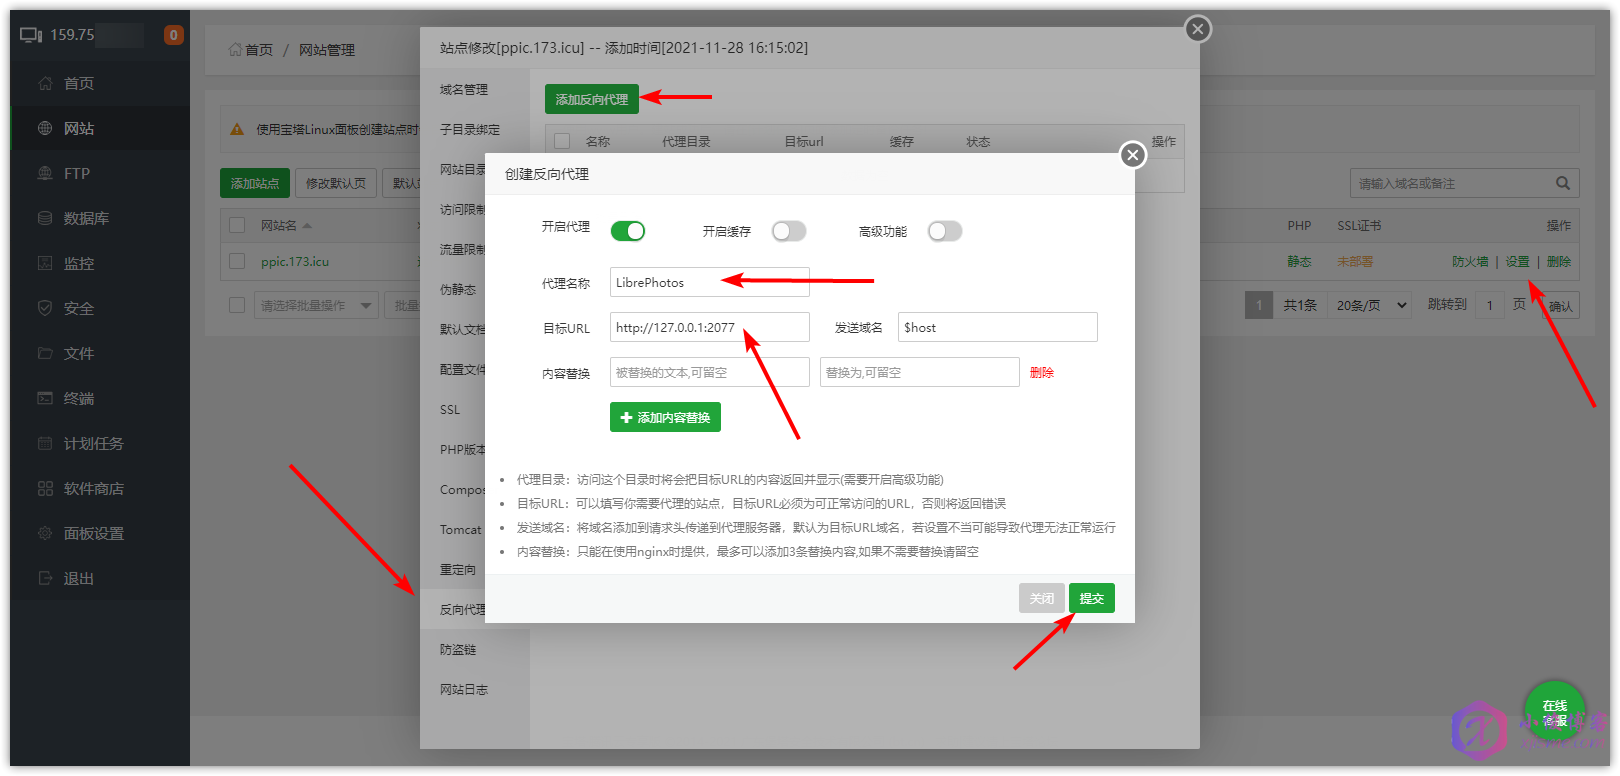
Click reverse proxy to add reverse proxy. Fill in the proxy name arbitrarily and the target IP generally http://127.0.0.1:2077 Note: if the port you previously exposed in docker compose is not 2077, it needs to be modified to the corresponding one. If the whole process is built according to this article, it is generally 2077.
3. Set Certificate (optional)
Click SSL to apply for or fill in the existing certificate!
4. Program use
1. Open LibrePhotos
Open your domain name in the browser, visit LibrePhotos, and use Log in to LibrePhotos with the account and password set in env
2. Set directory
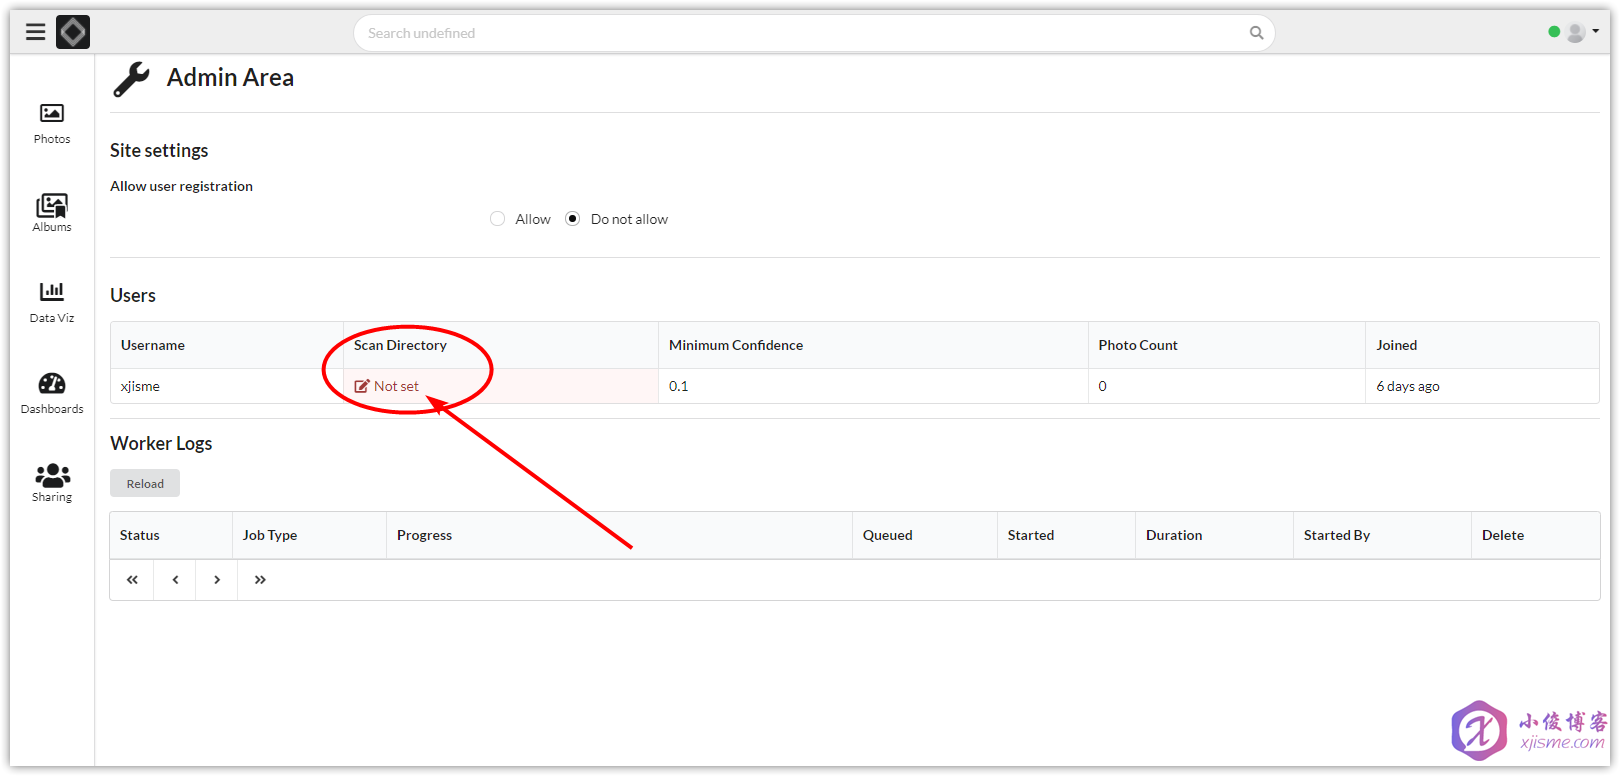
After opening LibrePhotos, click the avatar in the upper right corner and click Admin Area to enter the management area
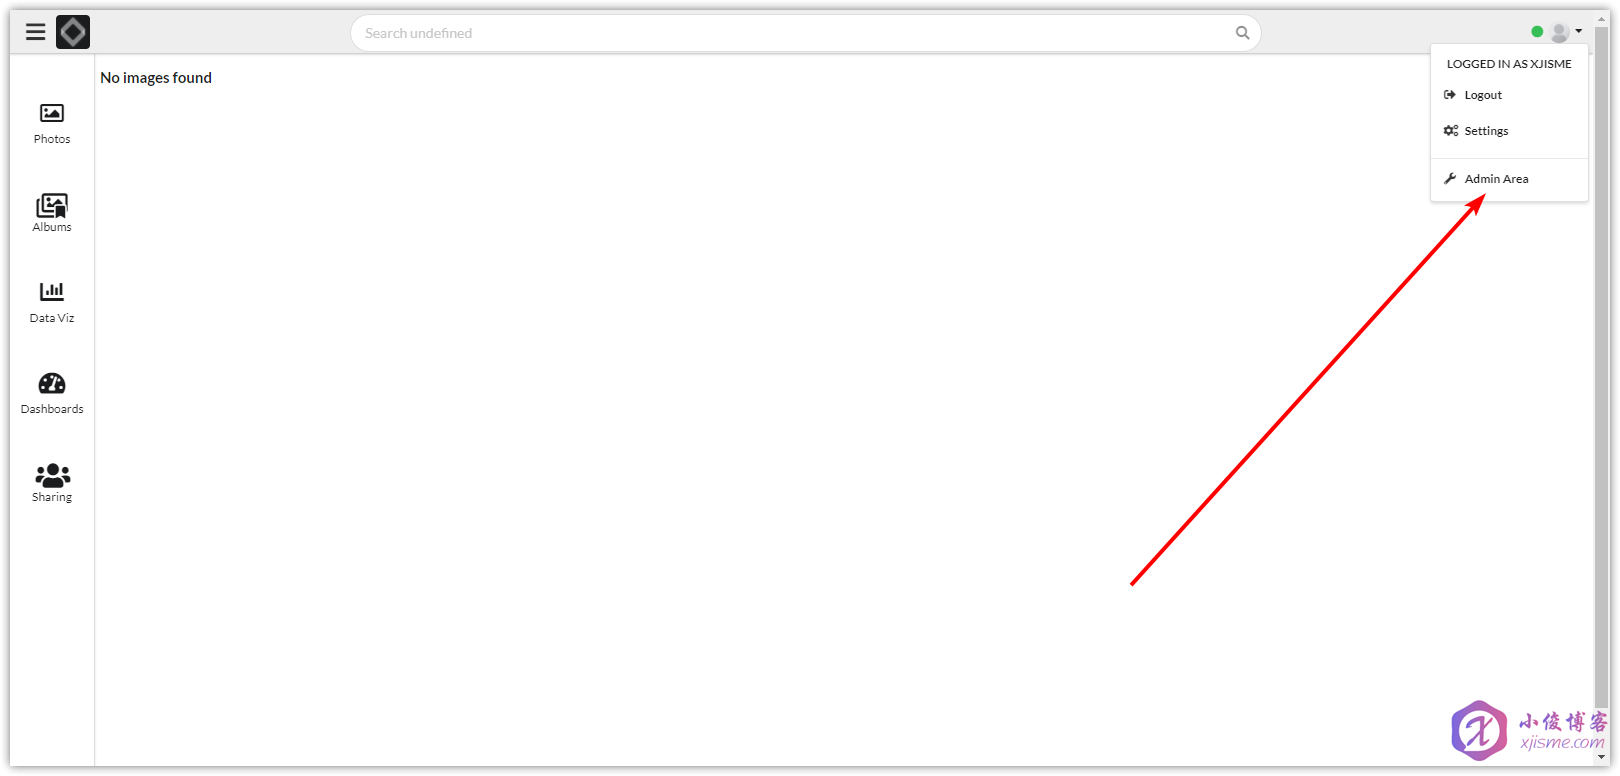
Click the edit icon under Scan Directory to set Scan Directory
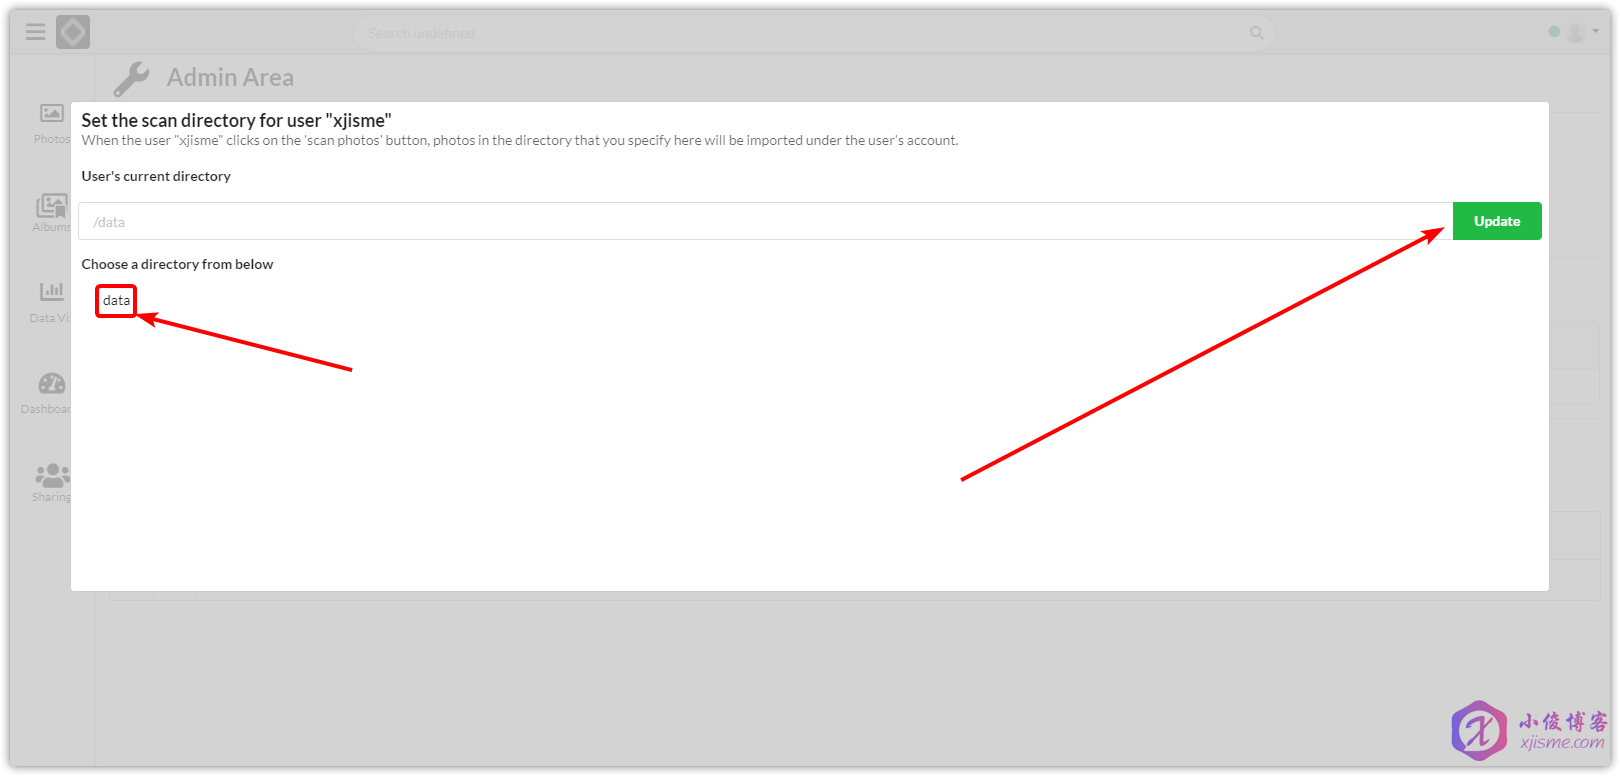
For personal use, select the default / data
3. Program experience
Xiaojun sent several photos of Ouyang Nana and Cheng Xiao respectively, and manually marked one of them
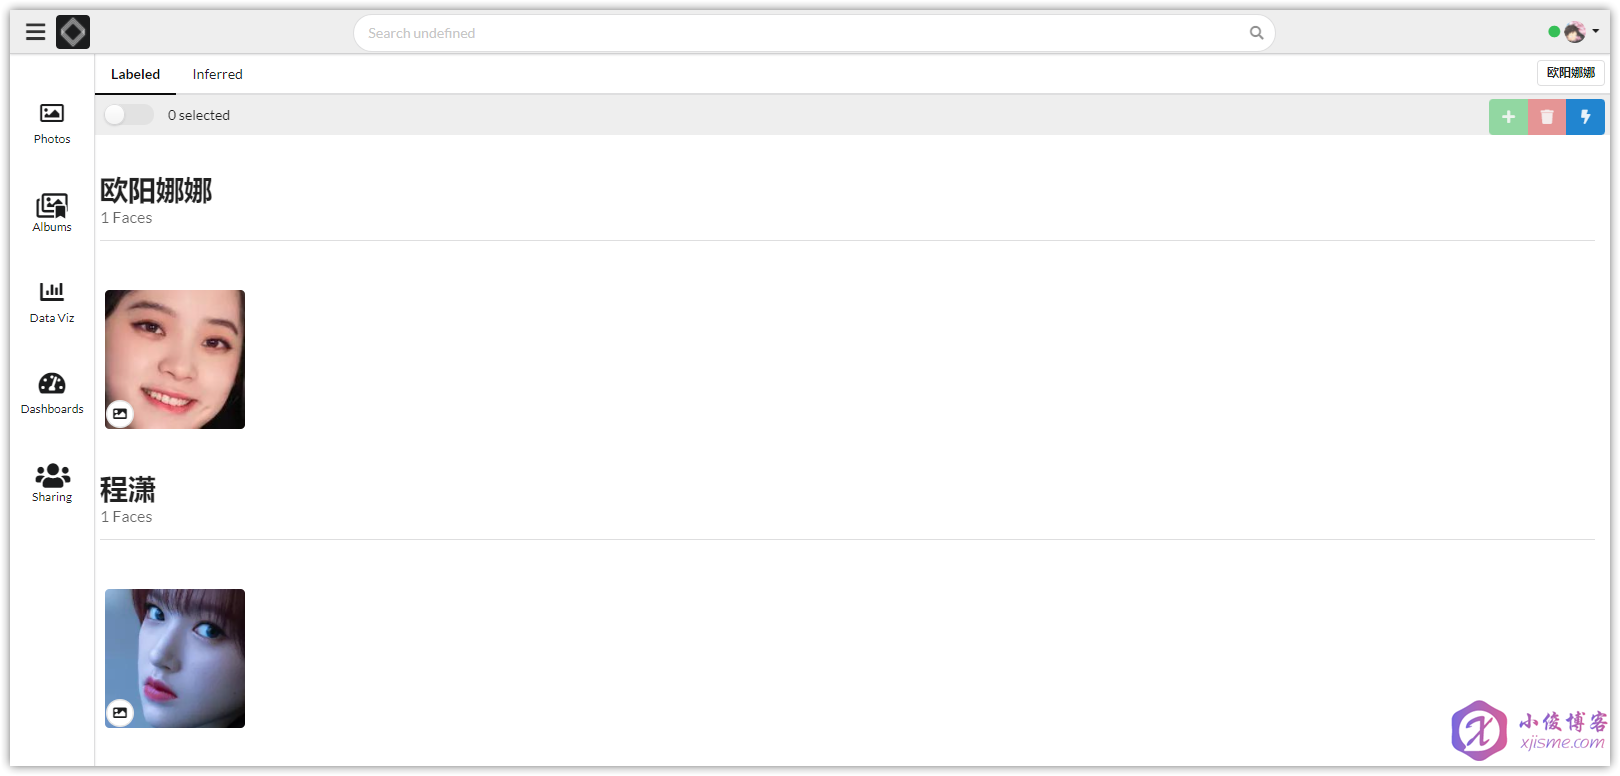
The photos of Ouyang Nana and Cheng Xiao were sent again, and then the face training of the program was started. You can see that the results are very powerful, and all the photos passed later were classified correctly
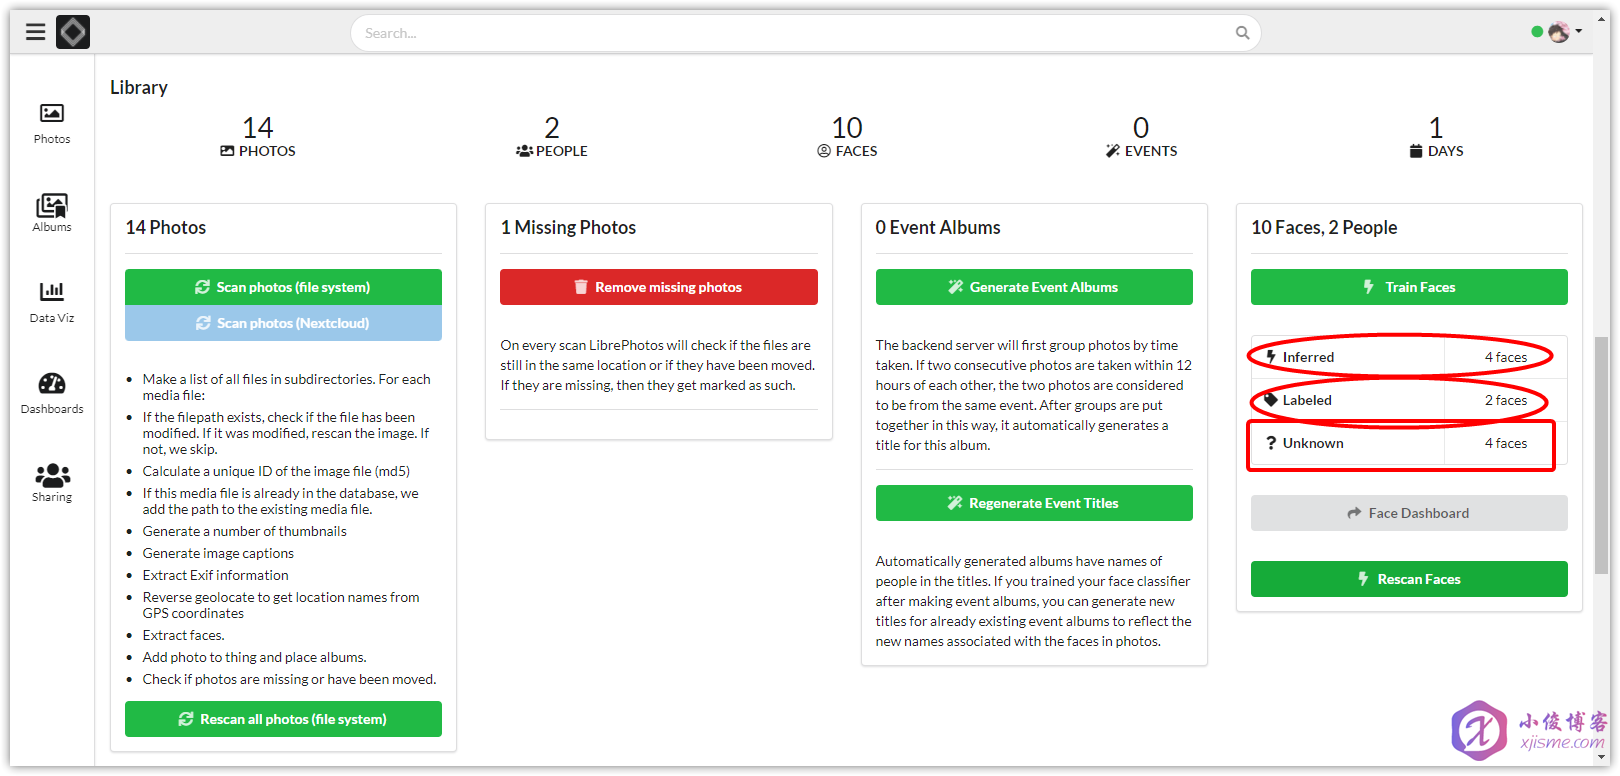

So far, we have built LibrePhotos photo manager!!! The browser can access the domain name you just set! After logging in, you can enjoy it. Let's operate it quickly! Ps: you need to open the corresponding port in the background firewall of Tencent cloud lightweight application server! By default, 8888 TCP, 80 TCP and 443 tcp need to be opened.