preface
What is code server
Code server is a Visual Studio Code instance running on a remote server, which can be accessed through any web browser. It allows you to code with a consistent integrated development environment (IDE) anywhere and on any device, such as a tablet or laptop.
As long as you deploy the code server on your own server (I use Alibaba cloud student computer CentOS 7.6), you can run a cloud vscode on any browser to realize cloud programming, which is also one of the easiest ways to program with ipad.
background
There are many tutorials on installing code server on the Internet, but the basic way to start the service is to use the command export PASSWORD = "your password" & &/ code-server --host 0.0. 0.0 -- port 8080. This command has been cancelled in the latest version of code server. The following two simplest and feasible implementation methods are given.
Install code server
RTFM
- Open the official website
Code server GitHub project home page - View manual
Installation guide
Take CentOS as an example
Method 1
- Create a directory to store the installation package
- Download the code server installation package for your server architecture
wget https://github.com/cdr/code-server/releases/download/v3.11.1/code-server-3.11.1-amd64.rpm
- Execute installation command
sudo rpm -i code-server-3.11.1-amd64.rpm
# Replace 3.11 1 replace with the corresponding version of the installation package
Method 2
Download the installation package on the computer, upload it to the server, and then refer to method 2
Method 3
curl -fOL https://github.com/cdr/code-server/releases/download/v$VERSION/code-server-$VERSION-amd64.rpm
sudo rpm -i code-server-$VERSION-amd64.rpm
sudo systemctl enable --now code-server@$USER
# Now visit http://127.0.0.1:8080. Your password is in ~/.config/code-server/config.yaml
Configure code server
Note that replace $VERSION with the corresponding VERSION number and go to GitHub release page View version
- Start the code server service
sudo systemctl enable --now code-server@$USER
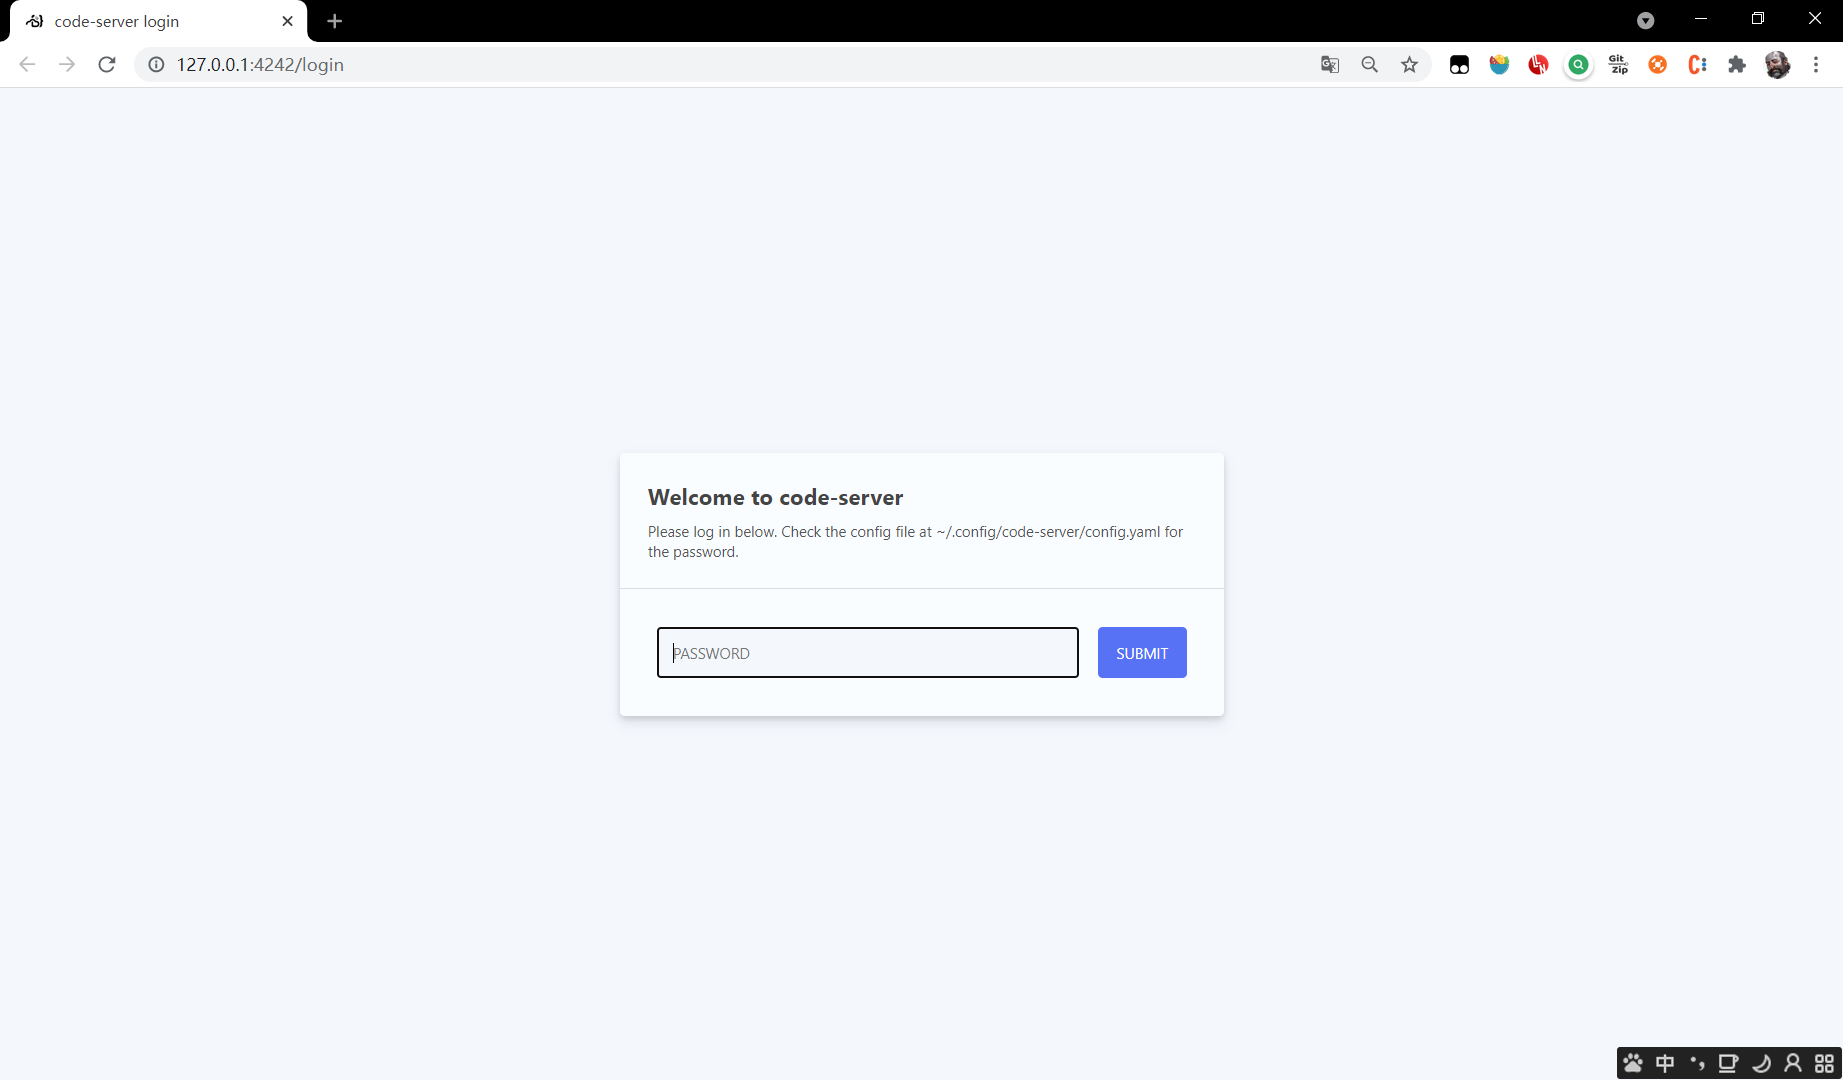
- So far, the code server has been deployed in the loopback address of your server. If your ssh tool supports (such as vscode), you can access it directly with your browser http://127.0.0.1:8080. Your password is set in the configuration file ~ / config/code-server/config.yaml
- Modify profile
sudo vi ~/.config/code-server/config.yaml
- port
Bind addr: followed by the ip: port number bound by coder server. Note that the default is 8080, which may conflict with tomcat. Modify it yourself - password
Password: set password
*Restart code server
sudo systemctl restart code-server@$USER
Realize public network IP access
Now the code server is only deployed in your loopback address and cannot be accessed externally. We need to do some work to directly access the code server through your public ip and domain name.
Method 1 - deploy directly in 0.0 zero
This method is essentially a command/ code-server --host 0.0.0.0 --port 8080 is the same
- Modify code server configuration file
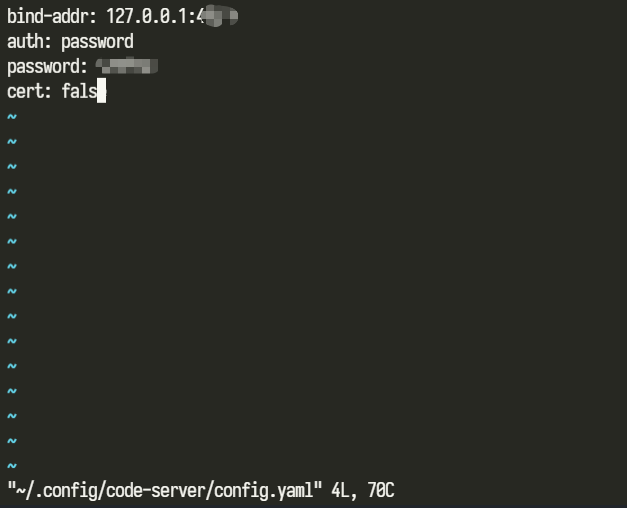
sudo vi ~/.config/code-server/config.yaml
- Bind the address directly to 0.0 0.0, where the port is 7777 or 4396 (in the server, 0.0.0.0 refers to all IPV4 addresses on the machine)
bind-addr: 0.0.0.0:7777
auth: password
password: 123456
cert: false
- Restart code server
sudo systemctl restart code-server@$USER
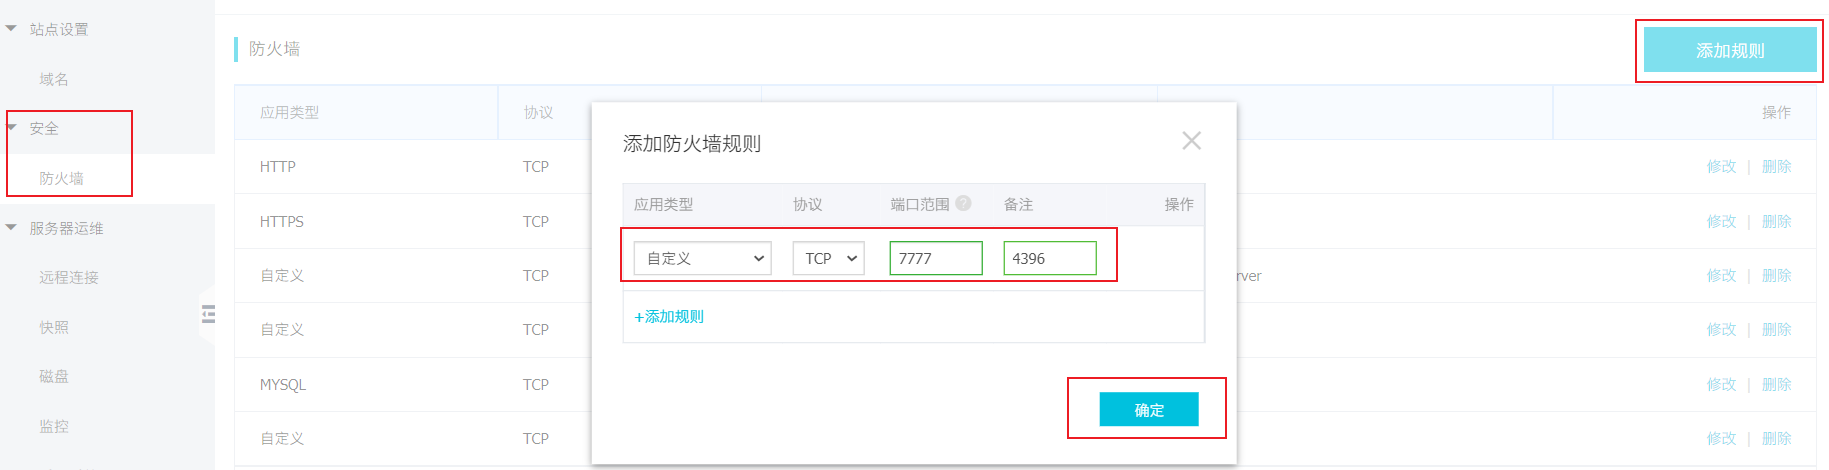
- Firewall open port
firewall-cmd --zone=public --add-port=7777/tcp --permanent
-
Log in to alicloud's official website and open port 7777 in the security firewall
*
-
Then you can use the public ip:7777 to access the code server
Method 2 - Nginx reverse proxy
-
We do not need to modify the code server configuration file, but still bind the service to 127.0 0.1:8080 or any intranet ip, using Nginx as a reverse proxy
-
How to install Nginx is not described here. Please see course
-
After installation, enter the nginx configuration directory
/usr/local/nginx/conf
- Modify nginx configuration file
sudo vi nginx.conf
- We only modify the server block in the http block
#user  nobody;
worker_processes  1;

#error_log  logs/error.log;
#error_log  logs/error.log  notice;
#error_log  logs/error.log  info;

#pid        logs/nginx.pid;


events {
    worker_connections  1024;
}


http {
    include       mime.types;
    default_type  application/octet-stream;

    #log_format  main  '$remote_addr - $remote_user [$time_local] "$request" '
    #                  '$status $body_bytes_sent "$http_referer" '
    #                  '"$http_user_agent" "$http_x_forwarded_for"';

    #access_log  logs/access.log  main;

    sendfile        on;
    #tcp_nopush     on;

    #keepalive_timeout  0;
    keepalive_timeout  65;

    #gzip  on;

    server {
        listen       880;
        server_name  localhost;

        #charset koi8-r;

        #access_log  logs/host.access.log  main;

        location /  {
	proxy_pass http://127.0.0.1:7777/;
	 proxy_set_header Host $host;
     	 proxy_set_header Upgrade $http_upgrade;
	proxy_set_header Connection upgrade;
      	proxy_set_header Accept-Encoding gzip;

           # root   html;
           # index  index.html index.htm;
        }

        #error_page  404              /404.html;

        # redirect server error pages to the static page /50x.html
        #
        error_page   500 502 503 504  /50x.html;
        location = /50x.html {
            root   html;
        }

        # proxy the PHP scripts to Apache listening on 127.0.0.1:80
        #
        #location ~ \.php$ {
        #    proxy_pass   http://127.0.0.1;
        #}

        # pass the PHP scripts to FastCGI server listening on 127.0.0.1:9000
        #
        #location ~ \.php$ {
        #    root           html;
        #    fastcgi_pass   127.0.0.1:9000;
        #    fastcgi_index  index.php;
        #    fastcgi_param  SCRIPT_FILENAME  /scripts$fastcgi_script_name;
        #    include        fastcgi_params;
        #}

        # deny access to .htaccess files, if Apache's document root
        # concurs with nginx's one
        #
        #location ~ /\.ht {
        #    deny  all;
        #}
    }


    # another virtual host using mix of IP-, name-, and port-based configuration
    #
    #server {
    #    listen       8000;
    #    listen       somename:8080;
    #    server_name  somename  alias  another.alias;

    #    location / {
    #        root   html;
    #        index  index.html index.htm;
    #    }
    #}


    # HTTPS server
    #
    #server {
    #    listen       443 ssl;
    #    server_name  localhost;

    #    ssl_certificate      cert.pem;
    #    ssl_certificate_key  cert.key;

    #    ssl_session_cache    shared:SSL:1m;
    #    ssl_session_timeout  5m;

    #    ssl_ciphers  HIGH:!aNULL:!MD5;
    #    ssl_prefer_server_ciphers  on;

    #    location / {
    #        root   html;
    #        index  index.html index.htm;
    #    }
    #}

}
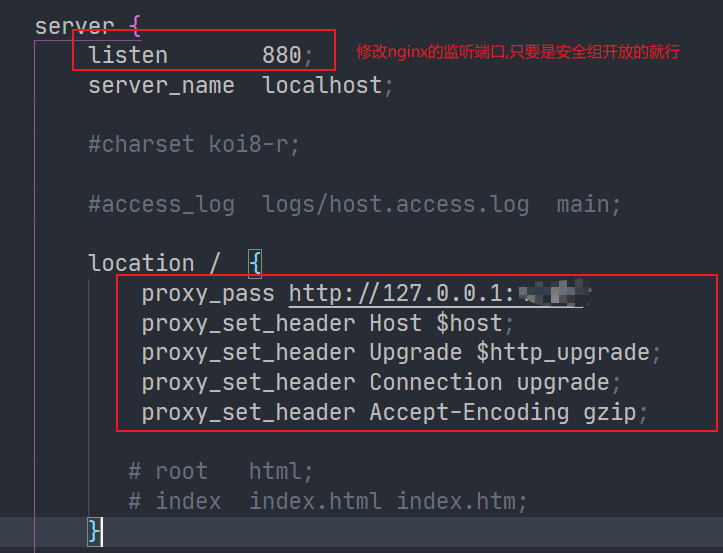
- The content we actually modified is very few, and the key part is like this
server {
    listen 880; 	# nginx listening port
    server_name localhost;

    location / {
      proxy_pass http://127.0. 0.1:7777/; #  It should be consistent with the bind addr in the code server configuration file
      proxy_set_header Host $host;
      proxy_set_header Upgrade $http_upgrade;
      proxy_set_header Connection upgrade;
      proxy_set_header Accept-Encoding gzip;
    }
}
- Start nginx service
cd /usr/local/nginx/sbin
./nginx
If you have started nginx service before, you can restart it here/ nginx -s reload
- be accomplished
Other methods
You can also use caddy instead of nginx, or directly use ssh to connect to the server to access the code server. Refer to the specific steps file
Effect list
iPad programming
- Download serverat the App Store
- Select Self Hosted Server
- Set the code server URL just accessed in the browser
For example, your domain name: 7777 - Enter the code server password Instance password (if any)
- Click Save
- OK