ESP8266 and ESP32 intelligent lantern development series article directory
Part 1: the simplest DIY intelligent color lamp ① based on ESP8266 (use the button to light up the ordinary RGB lamp on the web page)
Part 2: the simplest DIY intelligent color lamp based on ESP8266 ② (RGB lamp is controlled by buttons and sliding bars on Web pages)
preface
The simplest of the core original technologies of the Internet of things DIY intelligent color lights based on ESP8266 ② (RGB lights are controlled by buttons and sliding bars on Web pages).
There are various open-source intelligent color lamp control programs on the market, but some are complex and simple. If you want to get started quickly and use the web scroll bar to light up the ordinary RGB lamp wirelessly, this scheme will give you a fast and efficient scheme.
1, What is the simplest DIY intelligent color lamp based on ESP8266 ② (RGB lamp controlled by keys and sliding bars on Web pages)?
According to the fact that the price of domestic STM32 chips has soared to sky high prices, what daodanjishui needs to do is to focus his creation on domestic chips. Due to the advent of the Internet of things era and the interconnection of all things, of course, wifi chips are indispensable. In embedded devices, ESP8266 and ESP32 chips stand out based on cost and other considerations, and the domestic chips rise, No price increase. Developing national science and technology starts with me. Although I can't manufacture domestic chip hardware, I can write Internet of things software ecology for most domestic chips. Here's the main topic.
Compared with the function of the first article: the simplest DIY is based on the intelligent color lamp ① of ESP8266 (lighting the ordinary RGB lamp with a button on the web page), the function of the second article is based on the first article, adding three more web page scroll bars to control the RGB color lamp at the same time.
Youku video demonstration effect: https://v.youku.com/v_show/id_XNTEzOTY4MzI2NA==.html
Watch the video directly
The simplest DIY intelligent color lamp based on ESP8266 ② (use the slider to control the RGB lamp on the web page)
ESP8266 really became popular in 2018, Major open source STM32 development board tutorials AT that time (including punctual atom and wildfire) both adopt the way of wireless internet access with external ESP8266 module, but the technology is not good enough. The ECS has not been successfully built, and the tutorial has not been written. Instead, the onboard uses ENC28J60 Ethernet module to connect to the Internet cable, or uses a better DM9000 chip to connect to the Internet cable. Both wired network cards need to run a UIP or LWIP Protocol can access the Internet. AT that time, the tutorials of the two wired network cards were quite rich!!! Tempt me. AT that time, I also went into the pit of the programs of the two wired network cards. I won't say if the speed is slow. It also involves a pile of registers, pointers and structures. I have to use other resources of the single chip microcomputer to control the two network cards. Now I forget how to use them. In short, I have taken a detour. AT that time, the development board used wireless internet access. In China, it basically used the serial port of advanced MCU STM32 to send AT commands to control ESP8266. In fact, this also wasted ESP8266 resources, recited a lot of AT commands, and now I forget it. AT that time, I read all the posts of punctual atom on ESP8266, but I didn't gain much. AT most, I independently designed an air mouse and applied for a software copyright.
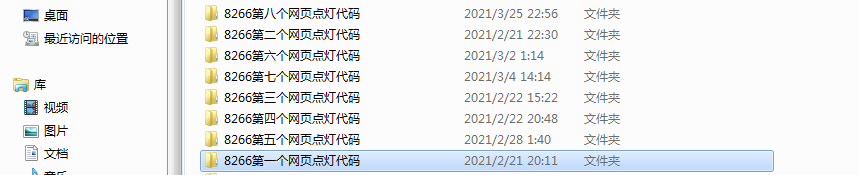
What really bothered me about ESP8266 was that during the past two years, it was too cumbersome to develop ESP8266 with the eclipse SDK provided by anxinco. Later, I found that developing ESP8266 with Arduino would get twice the result with half the effort. AT instructions were no longer needed. Instead, Arduino's on-demand open source library was available for me, So far, I have been using Arduino development environment to develop ESP8266 and ESP32. Now some smart homes on the market are made with ESP8266, with much lower cost. My Internet of things works for Circuit City website now include: ESP32 video monitoring manipulator system (upper computer and lower computer), ESP8266 color lamp matrix system (upper computer and lower computer), ESP32 domestic Internet of things camera system (upper computer and lower computer), ESP8266+Zigbee open source agricultural greenhouse monitoring system (upper computer and lower computer) and so on. It is planned to open source, but it takes time to write the tutorial, and the code has been written. For example, the current smart light series is shown in the figure below:
In the past, RT5350 was used as a gateway or wireless network card, including the RT5350 scheme used by people in Jinan to realize the single chip microcomputer serial port to network. However, it should be understood that RT5350 is a routing chip produced by Taiwan MediaTek. It is a high-end chip, and the price is not cheap, so the price of selling these wireless network cards is outrageous, However, their advantage is that they can directly access the Internet and directly process data. In addition, Shanghai Beirui Information Technology Co., Ltd. in Shanghai, its main product is intranet mapping peanut stick, which uses RT5350! The website developed by our own computer can be accessed by others on the public network.
Now the majority of program lovers are confused about whether ESP8266 or ESP32 can be used as a router chip to directly access the Internet? Can you be a gateway directly? Can it replace Linux? Can you communicate with MCU? Can I download data and save it on my hard disk? Can MQTT protocol be used? Can you pass it on? Can I display web pages? Can I take a picture? Let me use my open source tutorial to answer questions and solve doubts. ESP32 has been born for less than 5 years, but it is now widely used. Its performance is almost the same as that of STM32F4, and it can be self-sufficient. Counting fingers, I also have ten years of experience in playing with embedded. Who can stick to an interest for ten years, and then sell a tutorial for more than ten yuan after ten years of experience. Buying my open source software is equivalent to supporting domestic production.
Now ESP8266 and ESP32 can be made in China, and Shanghai Lexin Technology Co., Ltd. is the original manufacturer of these two chips. In the case of the dispute between Chinese and American chips, I hope I can do several open-source projects and adopt the scheme of domestic chips to enable developers to focus on their own chips and develop and strengthen their own science and technology. For the time being, I don't consider chip software schemes such as MediaTek or raspberry school. Although these chips running Linux system are very easy to use and popular, Moreover, I am a group of players who play ARM9 earlier. For chips running Linux system such as RT5350, it can be said that if I learn to crawl, I can learn to run directly. I don't need to walk to run this stage.
2, Use steps
1. Prepare hardware
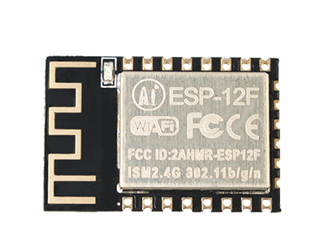
(1) Purchase ESP8266 development board: mini D1 wifi ESP-12F N ESP8266.
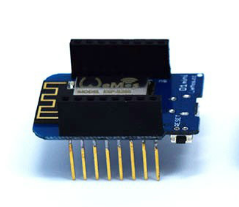
The chip packaging is as follows:
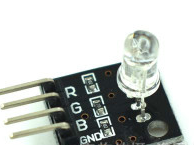
(2) Buy ordinary RGB lamps, which are sold everywhere.
2. Build Arduino development environment
(1) The first step is to download the Arduino IDE installation. Double click Next until it is completed. It is recommended not to use the Chinese path.
(2) Download the ESP8266 installation package plug-in, which is the most convenient. If you search and install in Arduino, you will find it very slow, especially in this critical period of intense chip competition, download it according to this website: https://www.arduino.cn/thread-76029-1-1.html
(3) Double click one of the three packages downloaded in (2). I double-click to install the second package. Restart Arduino to install it.
After installation, you will find that there are more development boards such as ESP8266. If you can't, just try other tutorials. There's no need to teach this development environment step by step.
(4) Open my project: double click to open it,

At first glance, you can see that ESP8266 creates an AP hotspot for notebook or mobile phone links. There is no password.
(5) Configure development board and serial port information
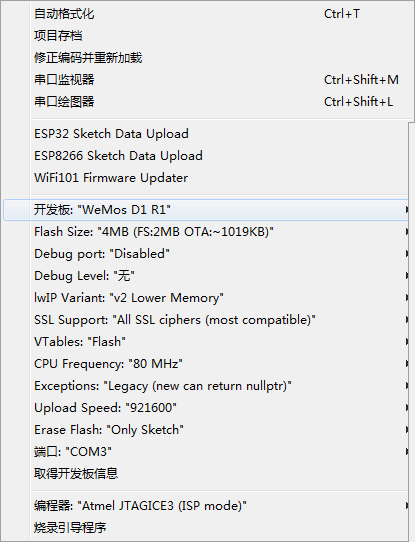
Pay attention to what type of development board you choose, and what serial port number your development board occupies when connected to the computer
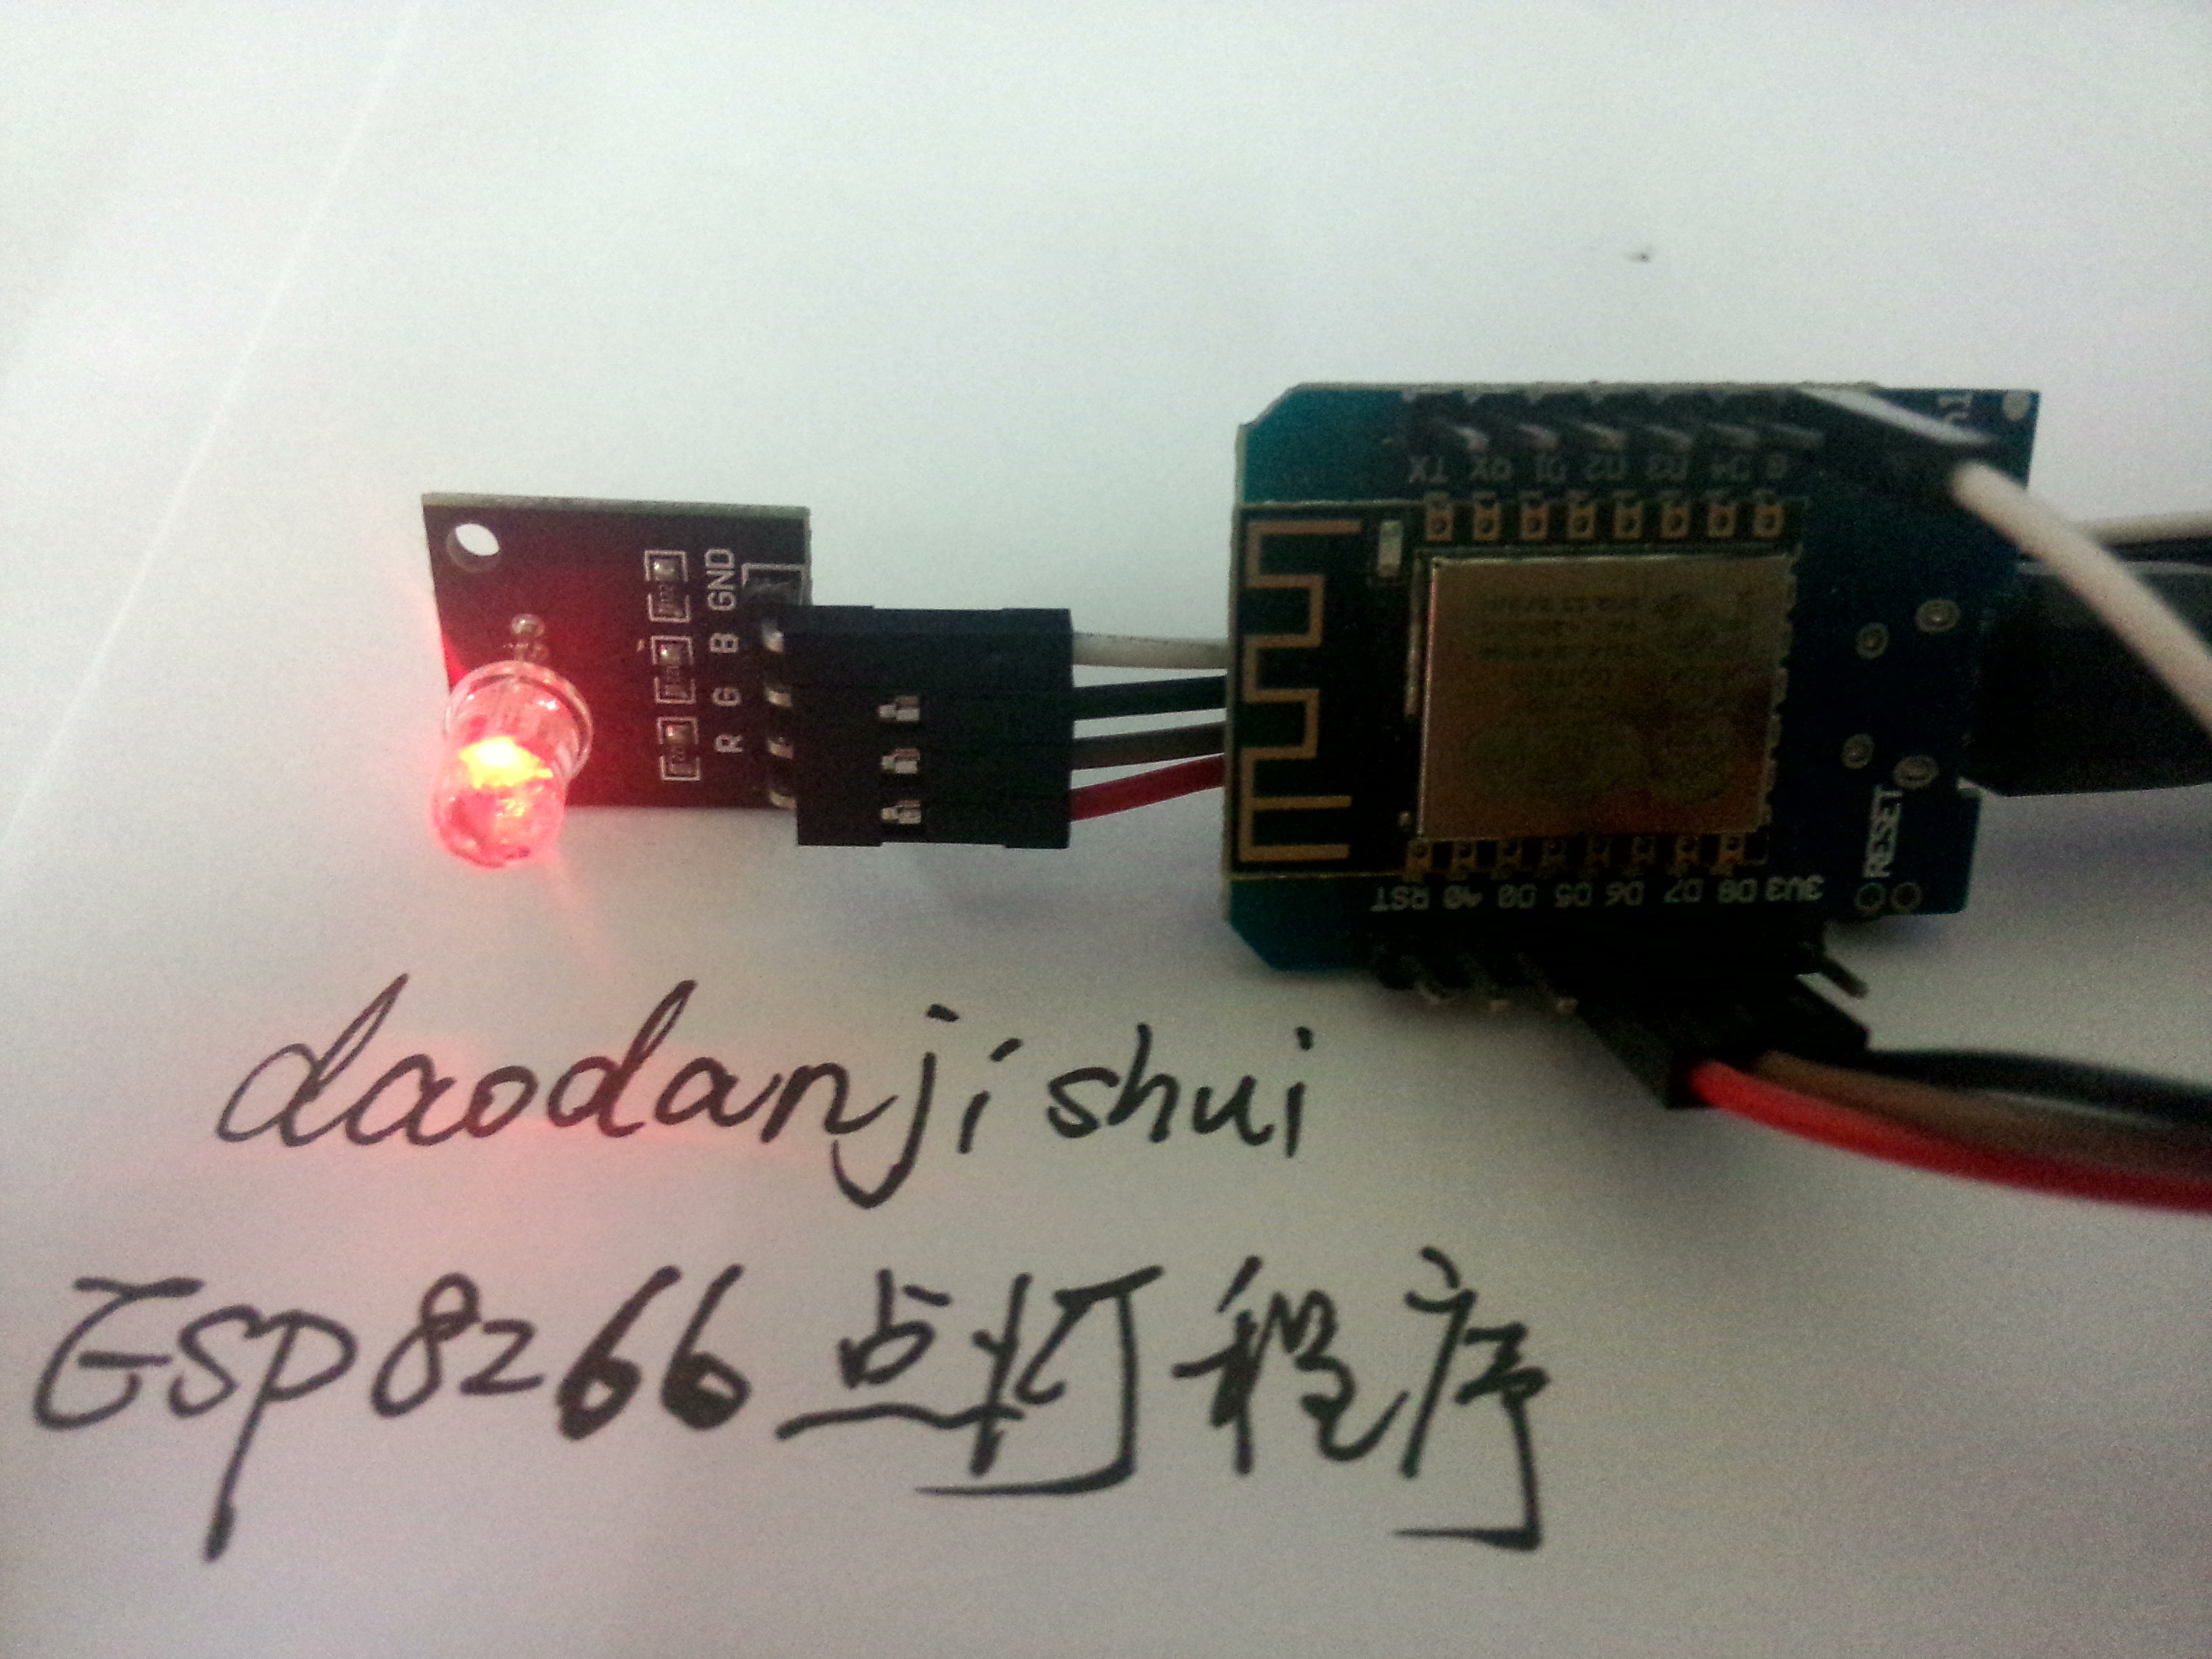
(6) Connect the RGB light according to the IO port of the source code, and then click download
#define LAMP_PIN1 14 //R–D5
#define LAMP_PIN2 12 //G–D6
#define LAMP_PIN3 13 //B–D7
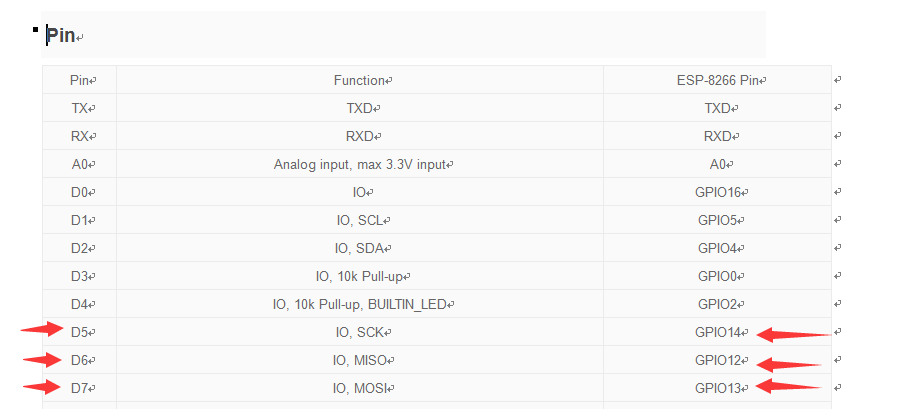
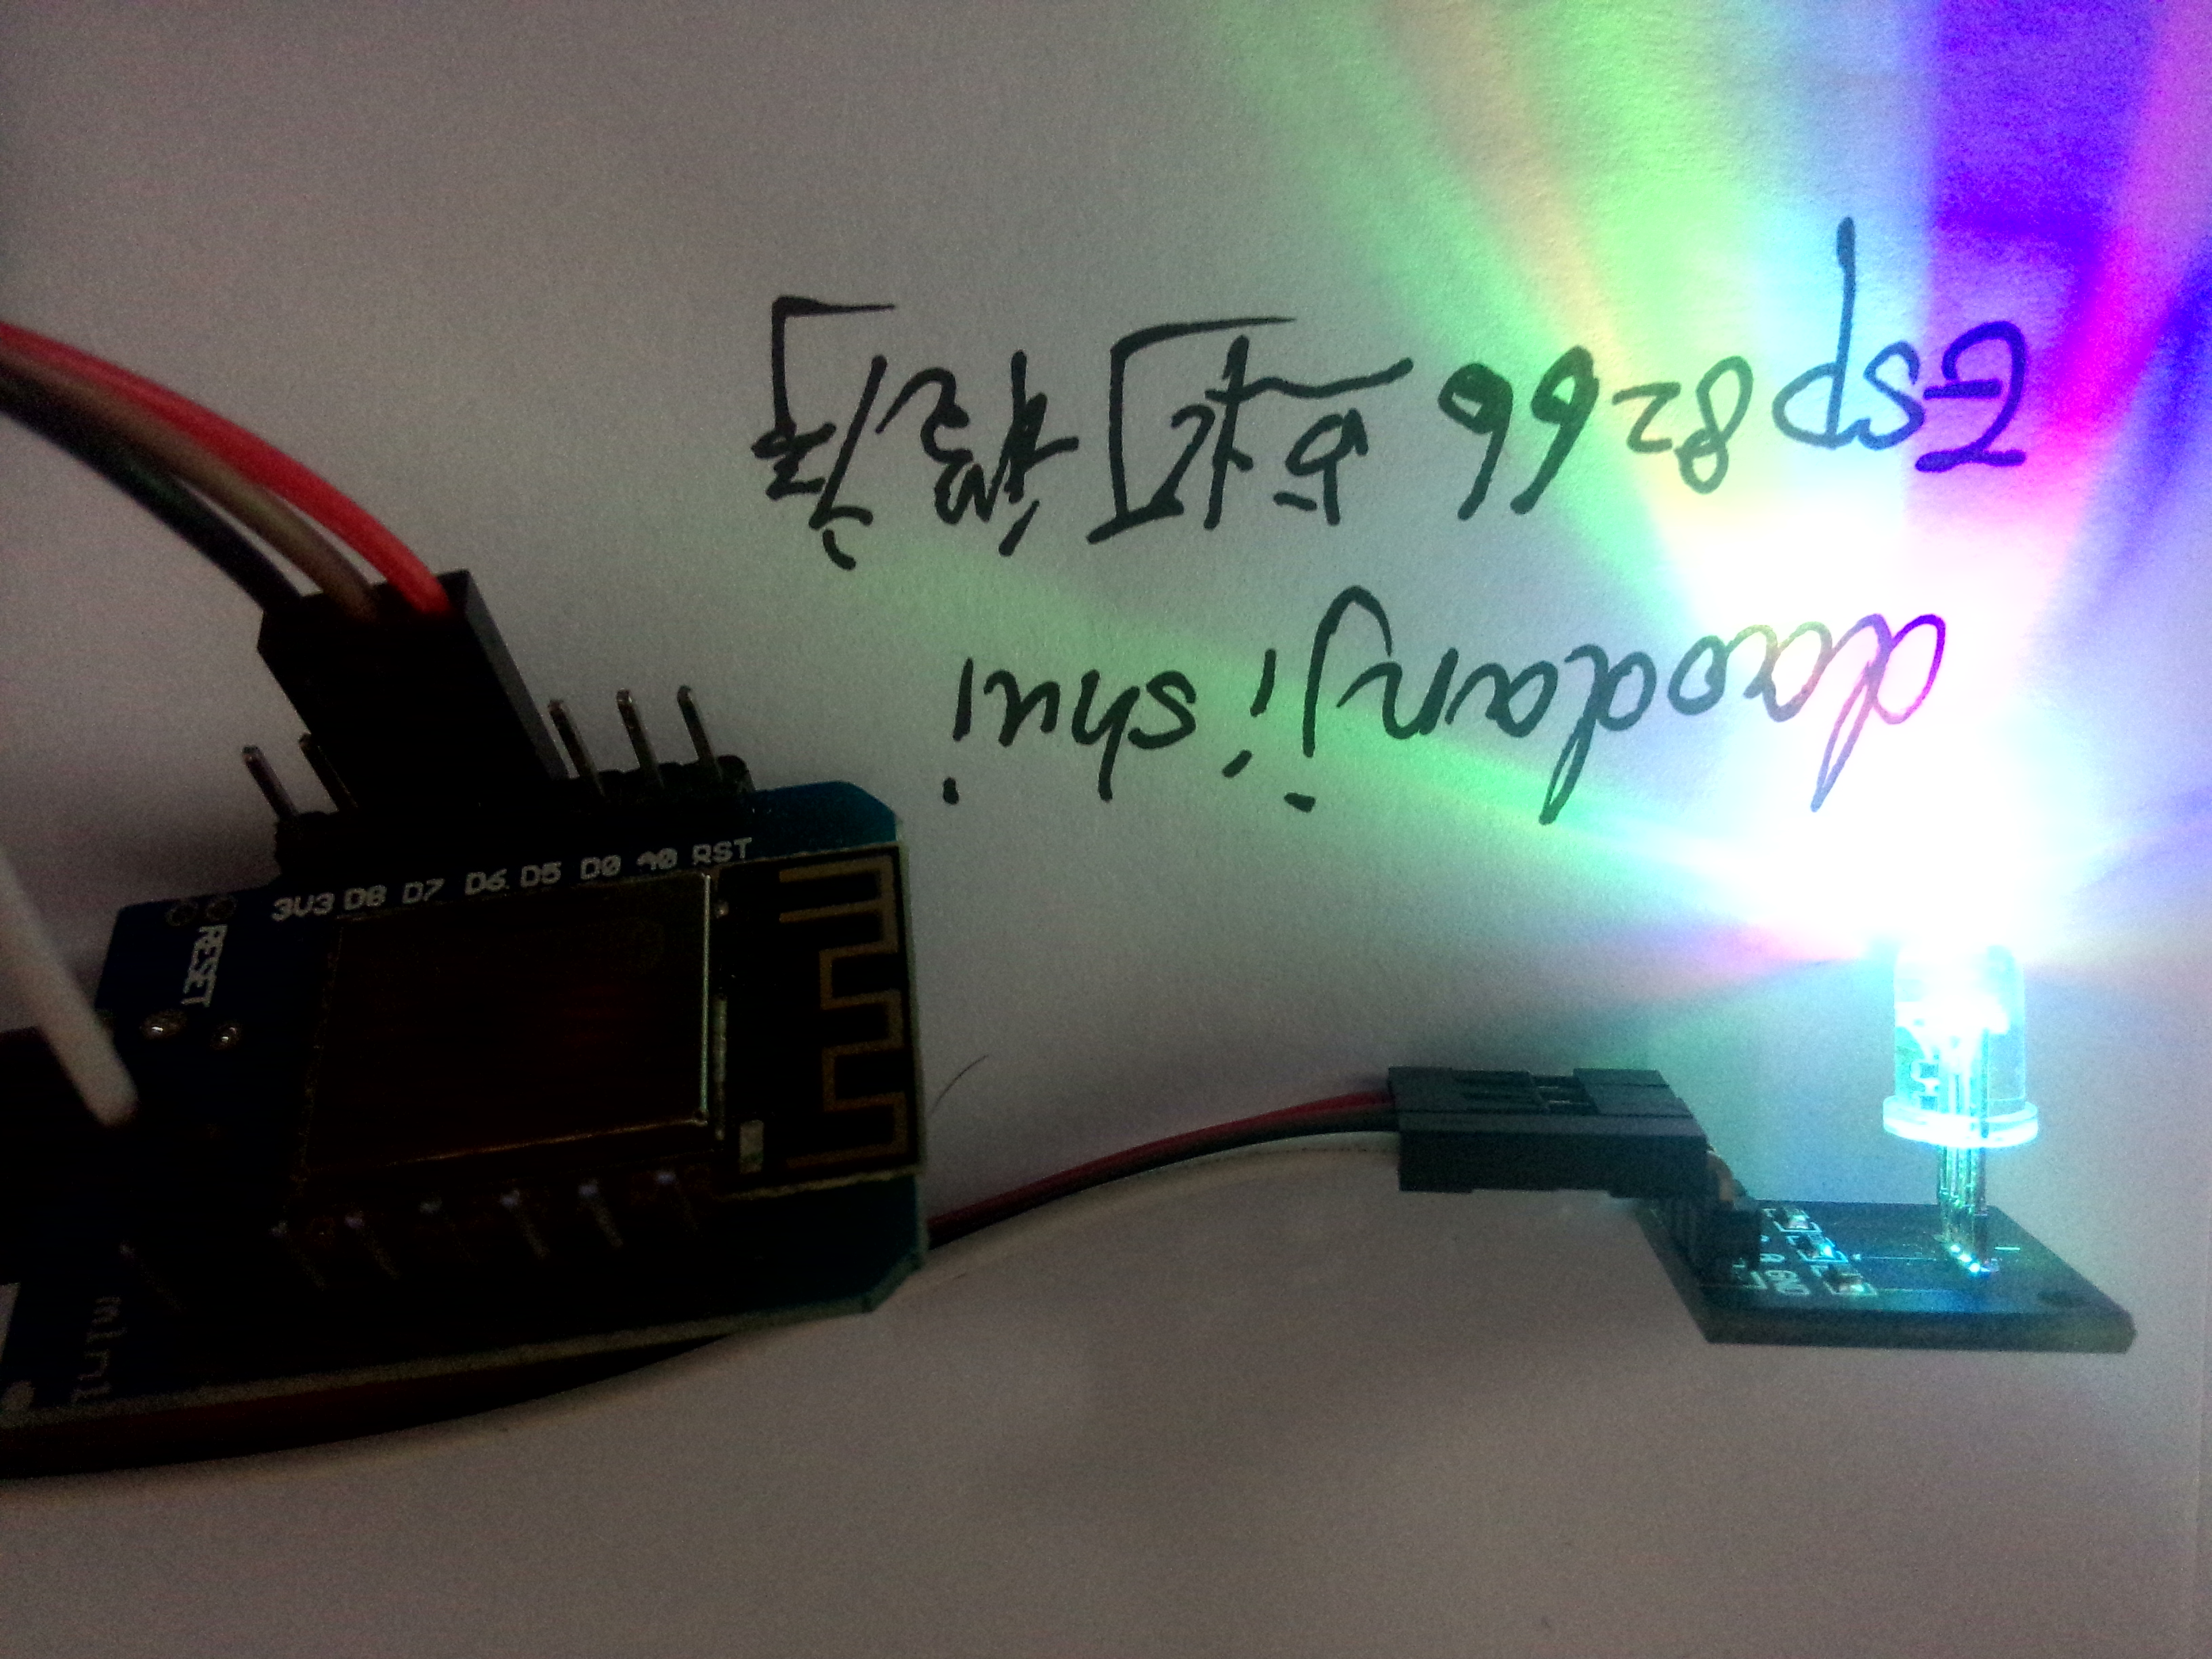
Note that the GND of the lamp is connected with the GND of the single chip microcomputer. Three PWM waves are generated in the code to control the filament light corresponding to the three RGB pins.
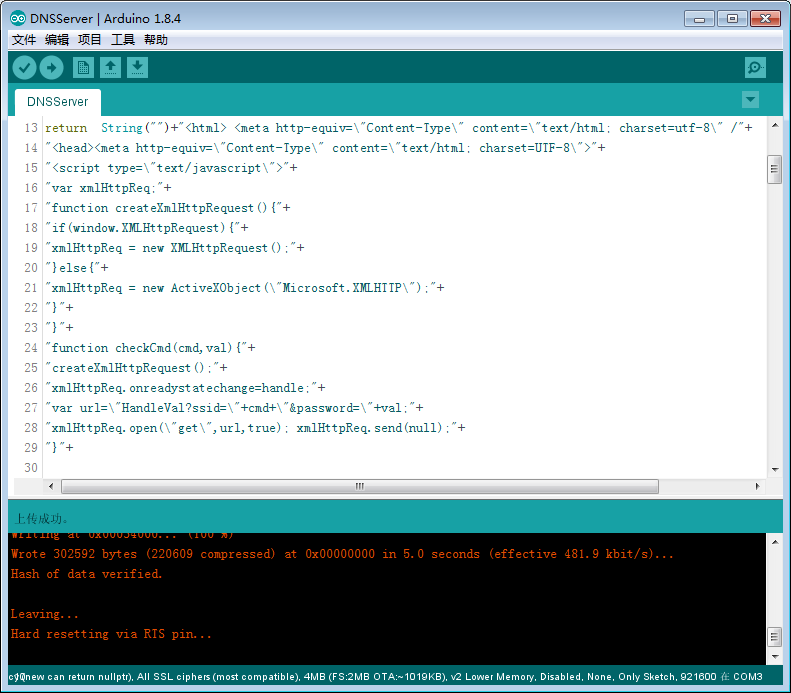
After downloading, you can run the program.
3. Prepare a web server source code
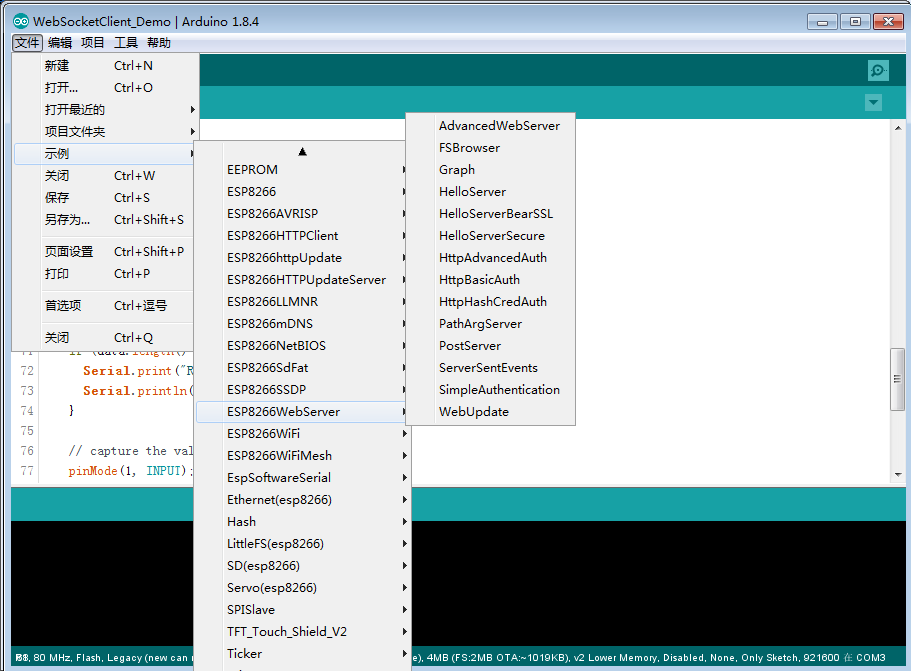
Because to develop web lighting, you must use an embedded web server. Thanks to Arduino's library, after installing the ESP8266 development environment, there is ready-made source code for readers in the Arduino IDE. Beginners can learn by downloading the source code of the IDE. This is also a shortcut I have taken all the way to share with you.
The source code path is shown in the figure below: (the first source code is selected)
/*
   Copyright (c) 2015, Majenko Technologies
   All rights reserved.

   Redistribution and use in source and binary forms, with or without modification,
   are permitted provided that the following conditions are met:

 * * Redistributions of source code must retain the above copyright notice, this
     list of conditions and the following disclaimer.

 * * Redistributions in binary form must reproduce the above copyright notice, this
     list of conditions and the following disclaimer in the documentation and/or
     other materials provided with the distribution.

 * * Neither the name of Majenko Technologies nor the names of its
     contributors may be used to endorse or promote products derived from
     this software without specific prior written permission.

   THIS SOFTWARE IS PROVIDED BY THE COPYRIGHT HOLDERS AND CONTRIBUTORS "AS IS" AND
   ANY EXPRESS OR IMPLIED WARRANTIES, INCLUDING, BUT NOT LIMITED TO, THE IMPLIED
   WARRANTIES OF MERCHANTABILITY AND FITNESS FOR A PARTICULAR PURPOSE ARE
   DISCLAIMED. IN NO EVENT SHALL THE COPYRIGHT HOLDER OR CONTRIBUTORS BE LIABLE FOR
   ANY DIRECT, INDIRECT, INCIDENTAL, SPECIAL, EXEMPLARY, OR CONSEQUENTIAL DAMAGES
   (INCLUDING, BUT NOT LIMITED TO, PROCUREMENT OF SUBSTITUTE GOODS OR SERVICES;
   LOSS OF USE, DATA, OR PROFITS; OR BUSINESS INTERRUPTION) HOWEVER CAUSED AND ON
   ANY THEORY OF LIABILITY, WHETHER IN CONTRACT, STRICT LIABILITY, OR TORT
   (INCLUDING NEGLIGENCE OR OTHERWISE) ARISING IN ANY WAY OUT OF THE USE OF THIS
   SOFTWARE, EVEN IF ADVISED OF THE POSSIBILITY OF SUCH DAMAGE.
*/

#include <ESP8266WiFi.h>
#include <WiFiClient.h>
#include <ESP8266WebServer.h>
#include <ESP8266mDNS.h>

#ifndef STASSID
#define STASSID "your-ssid"
#define STAPSK  "your-password"
#endif

const char *ssid = STASSID;
const char *password = STAPSK;

ESP8266WebServer server(80);

const int led = 13;

void handleRoot() {
  digitalWrite(led, 1);
  char temp[400];
  int sec = millis() / 1000;
  int min = sec / 60;
  int hr = min / 60;

  snprintf(temp, 400,

           "<html>\
  <head>\
    <meta http-equiv='refresh' content='5'/>\
    <title>ESP8266 Demo</title>\
    <style>\
      body { background-color: #cccccc; font-family: Arial, Helvetica, Sans-Serif; Color: #000088; }\
    </style>\
  </head>\
  <body>\
    <h1>Hello from ESP8266!</h1>\
    <p>Uptime: %02d:%02d:%02d</p>\
    <img src=\"/test.svg\" />\
  </body>\
</html>",

           hr, min % 60, sec % 60
          );
  server.send(200, "text/html", temp);
  digitalWrite(led, 0);
}

void handleNotFound() {
  digitalWrite(led, 1);
  String message = "File Not Found\n\n";
  message += "URI: ";
  message += server.uri();
  message += "\nMethod: ";
  message += (server.method() == HTTP_GET) ? "GET" : "POST";
  message += "\nArguments: ";
  message += server.args();
  message += "\n";

  for (uint8_t i = 0; i < server.args(); i++) {
    message += " " + server.argName(i) + ": " + server.arg(i) + "\n";
  }

  server.send(404, "text/plain", message);
  digitalWrite(led, 0);
}

void drawGraph() {
  String out;
  out.reserve(2600);
  char temp[70];
  out += "<svg xmlns=\"http://www.w3.org/2000/svg\" version=\"1.1\" width=\"400\" height=\"150\">\n";
  out += "<rect width=\"400\" height=\"150\" fill=\"rgb(250, 230, 210)\" stroke-width=\"1\" stroke=\"rgb(0, 0, 0)\" />\n";
  out += "<g stroke=\"black\">\n";
  int y = rand() % 130;
  for (int x = 10; x < 390; x += 10) {
    int y2 = rand() % 130;
    sprintf(temp, "<line x1=\"%d\" y1=\"%d\" x2=\"%d\" y2=\"%d\" stroke-width=\"1\" />\n", x, 140 - y, x + 10, 140 - y2);
    out += temp;
    y = y2;
  }
  out += "</g>\n</svg>\n";

  server.send(200, "image/svg+xml", out);
}

void setup(void) {
  pinMode(led, OUTPUT);
  digitalWrite(led, 0);
  Serial.begin(115200);
  WiFi.mode(WIFI_STA);
  WiFi.begin(ssid, password);
  Serial.println("");

  // Wait for connection
  while (WiFi.status() != WL_CONNECTED) {
    delay(500);
    Serial.print(".");
  }

  Serial.println("");
  Serial.print("Connected to ");
  Serial.println(ssid);
  Serial.print("IP address: ");
  Serial.println(WiFi.localIP());

  if (MDNS.begin("esp8266")) {
    Serial.println("MDNS responder started");
  }

  server.on("/", handleRoot);
  server.on("/test.svg", drawGraph);
  server.on("/inline", []() {
    server.send(200, "text/plain", "this works as well");
  });
  server.onNotFound(handleNotFound);
  server.begin();
  Serial.println("HTTP server started");
}

void loop(void) {
  server.handleClient();
  MDNS.update();
}
4. Modify the webserver source code
In general, there are still a lot of changes. It has been changed beyond recognition, and a lot of content has been added in order to improve its function. Project screenshot:
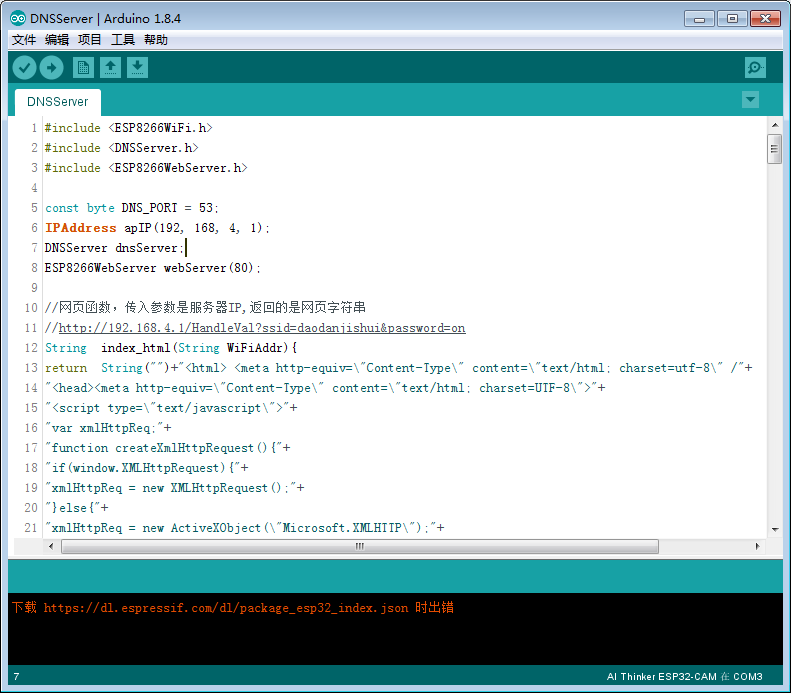
The key is to receive the code of network request, because when submitting a form on a web page, the MCU needs to respond to the request of the web page. Here, I use the technique of converting a string into an integer to convert the form submitted by the scroll bar into an integer number, which is also my own exploration:
/*****************************************************
 * Function name: HandleVal()
 * Function Description: process the return value of client request
 * Parameter Description: None
******************************************************/
void HandleVal()
{
    String wifis = webServer.arg("ssid"); //Find the value of ssid from the data sent by JavaScript
    String wifip = webServer.arg("password"); //Find the value of password from the data sent by JavaScript
    Serial.println(wifis);
    Serial.println(wifip);  //The received data is processed here
    if(wifis.equals("pwm")){
      int i=wifip.toInt();//Here, convert WiFi into INT value for subsequent use
       Serial.println(i);
       analogWrite(LAMP_PIN, i);
    }

     if(wifis.equals("r")){
      int i=wifip.toInt();//Here, convert WiFi into INT value for subsequent use
       Serial.println(wifis+" "+i);
       analogWrite(LAMP_PIN1, i);
     }else  if(wifis.equals("g")){
      int i=wifip.toInt();//Here, convert WiFi into INT value for subsequent use
       Serial.println(wifis+" "+i);
       analogWrite(LAMP_PIN2, i);
     }else if(wifis.equals("b")){
      int i=wifip.toInt();//Here, convert WiFi into INT value for subsequent use
       Serial.println(wifis+" "+i);
       analogWrite(LAMP_PIN3, i);
     }


    if(wifip.equals("on")){
         Serial.println("turn on the light");
         controlLamp(true);
      }else if(wifip.equals("off")){
         Serial.println("Turn off the lights");
          controlLamp(false);
      }else if(wifip.equals("data")){
         Serial.println("getdata");
          //Here, the data is returned directly to the client
      }
    String  cmd="ssid="+wifis+" password="+wifip+" is OK";
    webServer.send(200, "text/plain", cmd);//Data is returned to the client here
}
Please download the detailed source code at the back of my project source code to respect originality and labor achievements.
3, Operation and commissioning
(1) Test the software and hardware with the mobile phone. After downloading the ESP8266 program, it will restart automatically. A hotspot named DNSServer example is opened. There is no password. After connecting with the mobile phone wifi, enter 192.168.4.1 in the browser to enter the following home page:
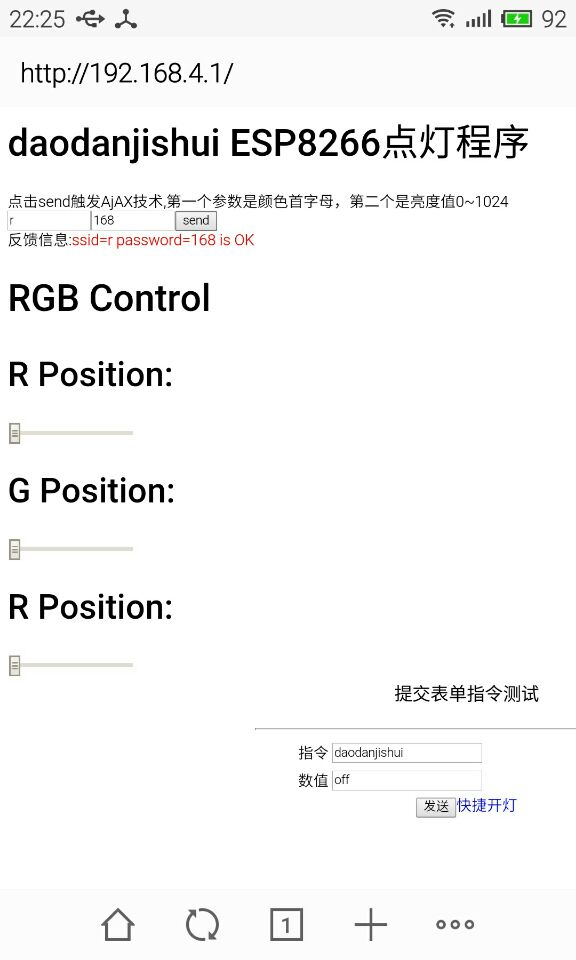
(2) Start the test and click the send button: send will see the red font, which is the feedback information given by ESP8266. According to this feedback, we know whether the machine has responded to your request. We don't know how many people can't tune it out. At the same time, we see that the light has changed. The red light r brightness value is 168. Note that the page will not jump when submitting the form. There are software solutions on the market 80% will jump, but mine doesn't. If you don't believe it, you can try the "submit form instruction test" on the page to experience the jump page. Therefore, my unique function can be easily transformed into a wifi remote control, but the trouble encountered in debugging is better to download my scheme directly, as shown below:
(3) Then continue the color effect of the combination of red, green and blue filaments. You need to manually adjust the slider (this slider is implemented in ESP8266. I don't know how many people can't do it, and can respond and feedback in real time when scrolling. If I set the download threshold, everyone can have it):
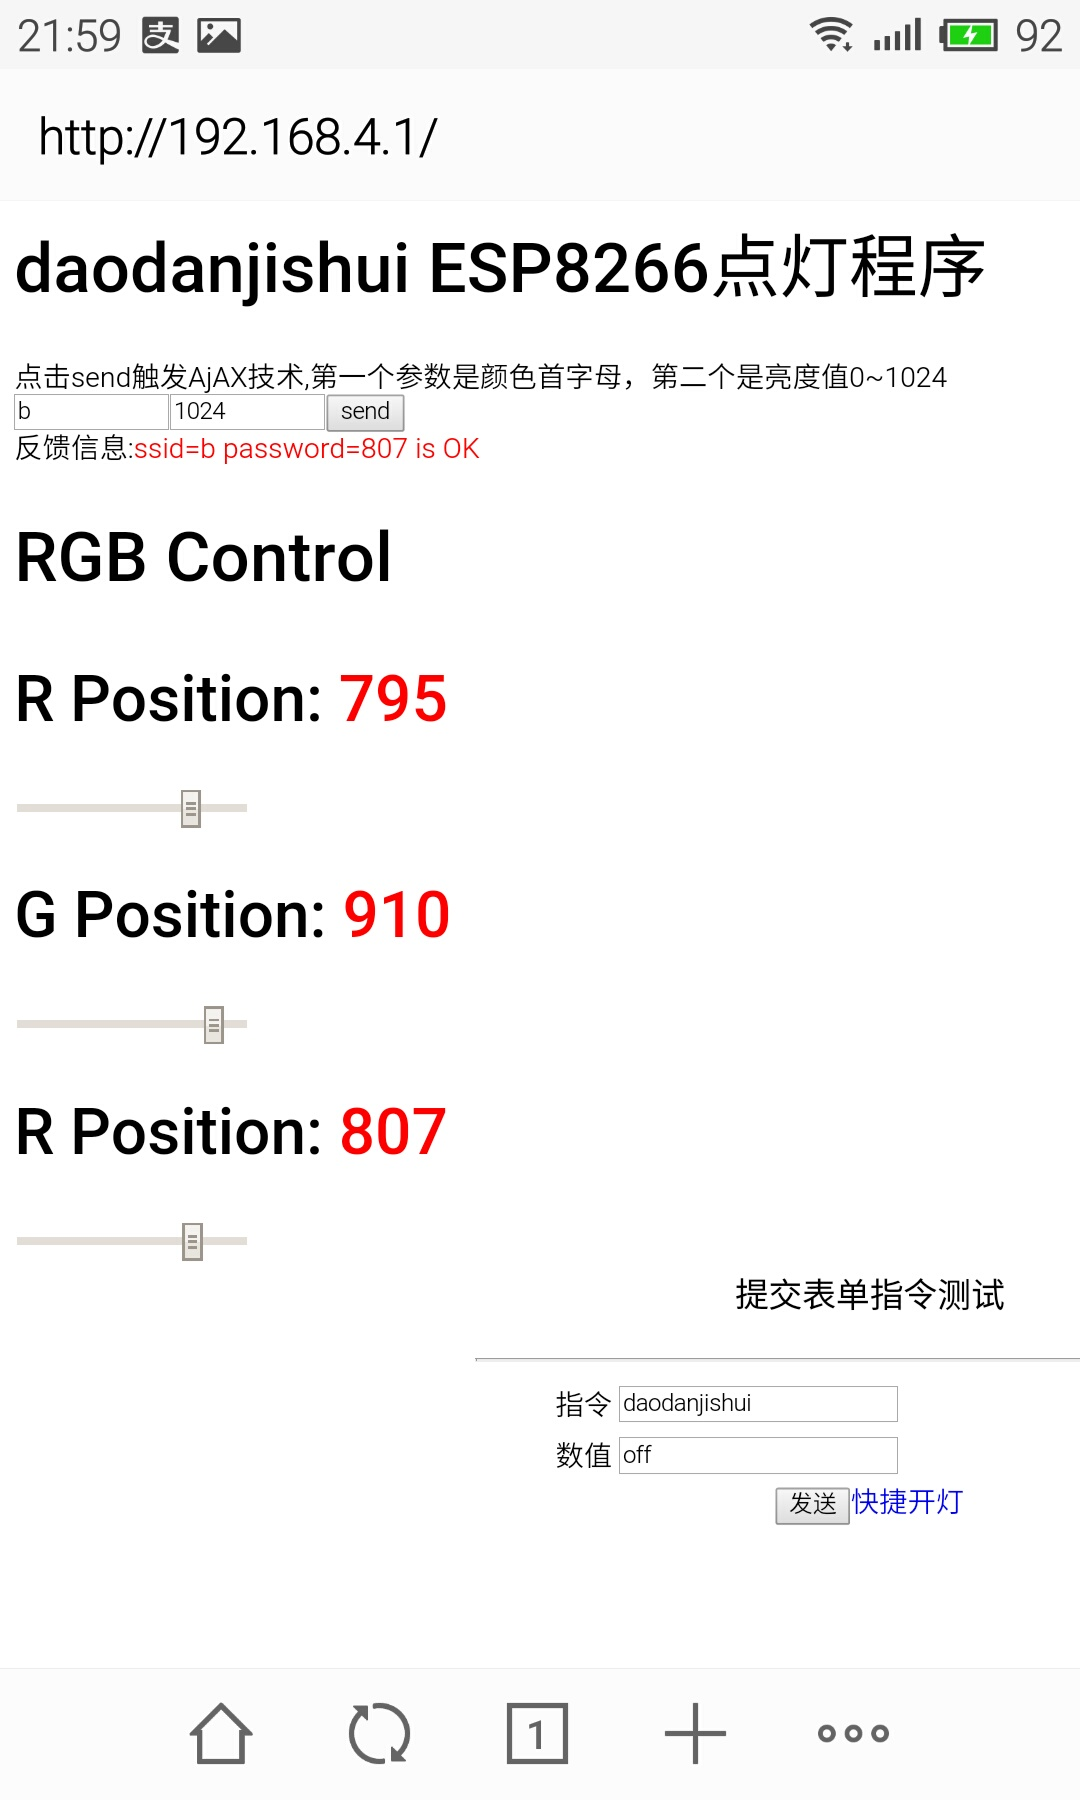
The maximum brightness is 1024 and the minimum brightness is 0, which is equivalent to off. The most beautiful color ratio is shown in the figure below (223 lines of code, I don't know how much it can be worth?):
summary
Through the above operation and debugging, the state is good, and the program and hardware meet the requirements put forward by the blog. So far: the browser web page scroll bar lights up the ordinary RGB light wirelessly.
If there is a problem with the installation and development environment, please search the Internet carefully for a solution to the problem; If I suspect that my code is wrong, it is impossible. I write the code myself and test the hardware myself. If you have more needs, please talk to me privately. What I lack is not technology, but a strange idea or creativity······
Finally, the download address of this blog post code is attached: https://www.cirmall.com/circuit/23946/
Direct jump