preface
In the previous chapter, Yige took you through subcontracting to realize the function of configuring multiple data sources in a project at the same time. As I told you before, there are two ways to configure multiple data sources, so next I will lead you to realize the second way to configure multiple data sources through AOP aspect configuration, which is written on the basis of the previous case.
I Implementation process
1. Create a Web project
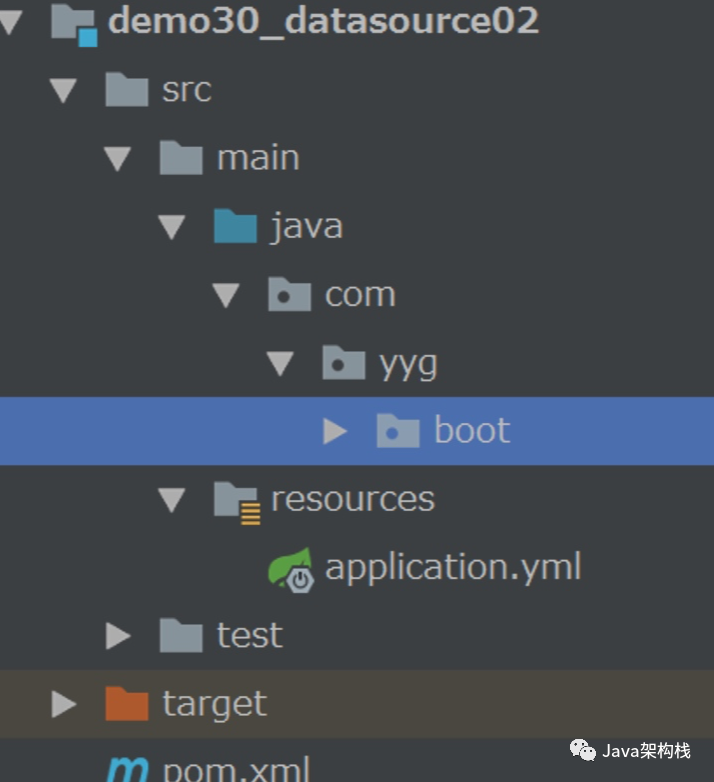
According to our previous experience, we create a SpringBoot Web program. For the specific process, you can refer to the following figure to create the project.
2. Add dependent packages
In POM Add several core dependency packages to the XML file.
<dependency>
   <groupId>org.springframework.boot</groupId>
   <artifactId>spring-boot-starter-data-jpa</artifactId>
</dependency>

<dependency>
   <groupId>mysql</groupId>
   <artifactId>mysql-connector-java</artifactId>
</dependency>

<dependency>
   <groupId>com.alibaba</groupId>
   <artifactId>druid</artifactId>
   <version>1.1.10</version>
</dependency>
3. Create application YML profile
In this configuration file, to configure two databases, we use the default HikariDataSource data source in this case.
spring:
  main:
    allow-bean-definition-overriding: true
  datasource:
    #First database information
    ds1:
      url: jdbc:mysql://localhost:3306/db1?characterEncoding=utf-8&useSSL=false&serverTimezone=UTC
      username: root
      password: syc
      driverClassName: com.mysql.jdbc.Driver
    #2nd database information
    ds2:
      url: jdbc:mysql://localhost:3306/db4?characterEncoding=utf-8&useSSL=false&serverTimezone=UTC
      username: root
      password: syc
      driverClassName: com.mysql.jdbc.Driver
    type: com.zaxxer.hikari.HikariDataSource
    #type: com.alibaba.druid.pool.DruidDataSource
  jpa:
    database: mysql
    show-sql: true
    hibernate:
      ddl-auto: update
      naming:
        physical-strategy: org.hibernate.boot.model.naming.PhysicalNamingStrategyStandardImpl
    database-platform: org.hibernate.dialect.MySQL5Dialect
4. Create database configuration class
4.1 first database configuration class
Here, we first write the first database configuration class to read the database information in ds1.
package com.yyg.boot.config.properties;

import lombok.Data;
import org.springframework.boot.context.properties.ConfigurationProperties;
import org.springframework.stereotype.Component;

/**
 * @Author One brother Sun
 * @Date Created in 2020/4/3
 * @Description db1 Data source configuration class
 */
@ConfigurationProperties(prefix = "spring.datasource.ds1")
@Component("ds1Properties")
@Data
public class Ds1Properties {

    private String url;

    private String username;

    private String password;

    private String driverClassName;

}
4.2 the second database configuration class
Then write the second database configuration class to read the database information in ds2.
package com.yyg.boot.config.properties;

import lombok.Data;
import org.springframework.boot.context.properties.ConfigurationProperties;
import org.springframework.stereotype.Component;

/**
 * @Author One brother Sun
 * @Date Created in 2020/4/3
 * @Description db4 Data source configuration class
 */
@ConfigurationProperties(prefix = "spring.datasource.ds2")
@Component("ds2Properties")
@Data
public class Ds2Properties {

    private String url;

    private String username;

    private String password;

    private String driverClassName;

}
5. Register data source
Next, we can register two data sources in a class at the same time. Note that we load two data sources in this configuration class.
package com.yyg.boot.config;

import org.springframework.beans.factory.annotation.Qualifier;
import org.springframework.boot.autoconfigure.jdbc.DataSourceProperties;
import org.springframework.boot.context.properties.ConfigurationProperties;
import org.springframework.context.annotation.Bean;
import org.springframework.context.annotation.Configuration;
import org.springframework.context.annotation.Primary;

import javax.sql.DataSource;

/**
 * @Author One brother Sun
 * @Date Created in 2020/4/3
 * @Description Configuration class of data source
 */
@Configuration
public class DataSourceRegisterConfig {

    /**
     * Master data source configuration} ds1 data source
     */
    @Primary
    @Bean(name = "ds1Properties")
    @ConfigurationProperties(prefix = "spring.datasource.ds1")
    public DataSourceProperties ds1DataSourceProperties() {
        return new DataSourceProperties();
    }

    /**
     * Master data source} ds1 data source
     */
    @Primary
    @Bean(name = "ds1DataSource")
    public DataSource ds1DataSource(@Qualifier("ds1Properties") DataSourceProperties dataSourceProperties) {
        //HikariDataSource","org.apache.tomcat.jdbc.pool.DataSource", "org.apache.commons.dbcp2.BasicDataSource
        return dataSourceProperties.initializeDataSourceBuilder().build();
    }

    /**
     * Second ds2 data source configuration
     */
    @Bean(name = "ds2Properties")
    @ConfigurationProperties(prefix = "spring.datasource.ds2")
    public DataSourceProperties ds2DataSourceProperties() {
        return new DataSourceProperties();
    }

    /**
     * Second ds2 data source
     */
    @Bean("ds2DataSource")
    public DataSource ds2DataSource(@Qualifier("ds2Properties") DataSourceProperties dataSourceProperties) {
        return dataSourceProperties.initializeDataSourceBuilder().build();
    }

}
6. Configure data source, connection factory, transaction manager and scan dao directory
After configuring the two data sources, we also use the transaction manager to associate the two data sources respectively. Pay attention to the rational use of @ Primary annotation here!
6.1 configuring the first data source Manager
Associate the first data source in this data source manager.
package com.yyg.boot.config;

import org.springframework.beans.factory.annotation.Autowired;
import org.springframework.beans.factory.annotation.Qualifier;
import org.springframework.boot.orm.jpa.EntityManagerFactoryBuilder;
import org.springframework.context.annotation.Bean;
import org.springframework.context.annotation.Configuration;
import org.springframework.context.annotation.Primary;
import org.springframework.data.jpa.repository.config.EnableJpaRepositories;
import org.springframework.orm.jpa.JpaTransactionManager;
import org.springframework.orm.jpa.LocalContainerEntityManagerFactoryBean;
import org.springframework.transaction.PlatformTransactionManager;
import org.springframework.transaction.annotation.EnableTransactionManagement;

import javax.sql.DataSource;

/**
 * @Author One brother Sun
 * @Date Created in 2020/4/3
 * @Description Configure data source, connection factory, transaction manager, dao directory
 */
@Configuration
@EnableTransactionManagement
@EnableJpaRepositories(
        entityManagerFactoryRef = "managerFactory1", //Configure connection factory
        transactionManagerRef = "transactionManager1", //Configure transaction manager
        basePackages = {"com.yyg.boot.dao.db01"} //Set the location of dao

)
public class ManagerFactory01Config {

    /**
     * Configure the data source and connect the first data source
     */
    @Autowired
    @Qualifier("ds1DataSource")
    private DataSource ds1DataSource;

    @Primary
    @Bean(name = "managerFactory1")
    public LocalContainerEntityManagerFactoryBean buildEntityManagerFactory1(EntityManagerFactoryBuilder builder) {
        return builder
                //Set data source
                .dataSource(ds1DataSource)
                //Set the location of the Entity class Scan all classes with @ Entity annotation
                .packages("com.yyg.boot.entity")
                //Spring will inject the EntityManagerFactory into the Repository With {EntityManagerFactory,
                //The Repository can use it to create an EntityManager, and then the EntityManager can perform operations on the database
                .persistenceUnit("ds1PersistenceUnit")
                .build();

    }

    /**
     * Configure transaction manager
     */
    @Bean(name = "transactionManager1")
    public PlatformTransactionManager transactionManagerDatabase1(EntityManagerFactoryBuilder builder) {
        return new JpaTransactionManager(buildEntityManagerFactory1(builder).getObject());
    }

}
6.2 configuring the second data source Manager
Associate the second data source in this data source manager.
package com.yyg.boot.config;

import org.springframework.beans.factory.annotation.Autowired;
import org.springframework.beans.factory.annotation.Qualifier;
import org.springframework.boot.orm.jpa.EntityManagerFactoryBuilder;
import org.springframework.context.annotation.Bean;
import org.springframework.context.annotation.Configuration;
import org.springframework.context.annotation.Primary;
import org.springframework.data.jpa.repository.config.EnableJpaRepositories;
import org.springframework.orm.jpa.JpaTransactionManager;
import org.springframework.orm.jpa.LocalContainerEntityManagerFactoryBean;
import org.springframework.transaction.PlatformTransactionManager;
import org.springframework.transaction.annotation.EnableTransactionManagement;

import javax.sql.DataSource;

/**
 * @Author One brother Sun
 * @Date Created in 2020/4/3
 * @Description Configure data source, connection factory, transaction manager, dao directory
 */
@Configuration
@EnableTransactionManagement
@EnableJpaRepositories(
        entityManagerFactoryRef = "managerFactory2", //Configure connection factory
        transactionManagerRef = "transactionManager2", //Configure transaction manager
        basePackages = {"com.yyg.boot.dao.db02"} //Set the location of dao

)
public class ManagerFactory02Config {

    /**
     * Configure the data source and connect the second data source
     */
    @Autowired
    @Qualifier("ds2DataSource")
    private DataSource ds2DataSource;

    @Bean(name = "managerFactory2")
    public LocalContainerEntityManagerFactoryBean buildEntityManagerFactory2(EntityManagerFactoryBuilder builder) {
        return builder
                //Set data source
                .dataSource(ds2DataSource)
                //Set the location of the Entity class Scan all classes with @ Entity annotation
                .packages("com.yyg.boot.entity")
                //Spring will inject the EntityManagerFactory into the Repository With {EntityManagerFactory,
                //The Repository can use it to create an EntityManager, and then the EntityManager can perform operations on the database
                .persistenceUnit("ds2PersistenceUnit")
                .build();

    }

    /**
     * Configure transaction manager
     */
    @Bean(name = "transactionManager2")
    public PlatformTransactionManager transactionManagerDatabase1(EntityManagerFactoryBuilder builder) {
        return new JpaTransactionManager(buildEntityManagerFactory2(builder).getObject());
    }

}
7. Create data source type
Here, I use ThreadLocal to ensure thread security, so that each thread will not affect each other.
package com.yyg.boot.datasource;

import lombok.extern.slf4j.Slf4j;

/**
 * @Author One brother Sun
 * @Date Created in 2020/4/7
 * @Description Data source type
 */
@Slf4j
public class DataSourceType {

    public enum SourceType {
        /**
         * User data source
         */
        DS_USER,
        /**
         * Commodity data source
         */
        DS_SHOP
    }

    /**
     * Using ThreadLocal to ensure thread safety
     */
    private static final ThreadLocal<SourceType> TYPES = new ThreadLocal<>();

    /**
     * Set the data source type to the current process
     */
    public static void setDataSourceType(SourceType dataSourceType) {
        if (dataSourceType == null) {
            throw new NullPointerException();
        }
        log.warn("[Set current data source as]: " + dataSourceType);
        TYPES.set(dataSourceType);
    }

    /**
     * Get data source type
     */
    public static SourceType getDataSourceType() {
        SourceType dataSourceType = TYPES.get() == null ? SourceType.DS_USER : TYPES.get();
        log.warn("[The current data source type is]: " + dataSourceType);
        return dataSourceType;
    }

    /**
     * Clear data type
     */
    public static void removeDataSourceType() {
        TYPES.remove();
    }

}
8. Define dynamic data sources
Define a dynamic data source, inherit the AbstractRoutingDataSource abstract class, and override the determineCurrentLookupKey() method.
AbstractRoutingDataSource is the key to the implementation of multiple data sources. It is used to dynamically switch data sources.
There is a target Data Sources collection in this class, which is a map type attribute of Abstract Routing DataSource, where key represents the name of each data source and value is each data source.
Then obtain the key value of the current data source in the map according to the determineCurrentLookupKey() method, and then dynamically obtain the current data source in the determineTargetDataSource() method. If the current data source does not exist and the default data source does not exist, an exception will be thrown.
package com.yyg.boot.datasource;

import org.springframework.jdbc.datasource.lookup.AbstractRoutingDataSource;

/**
 * @Author One brother Sun
 * @Date Created in 2020/4/7
 * @Description Dynamically switch data sources
 */
public class DynamicDataSource extends AbstractRoutingDataSource {

    @Override
    protected Object determineCurrentLookupKey() {
        return DataSourceType.getDataSourceType();
    }

}
9. Configure multiple data sources
Here you can configure multiple data sources.
package com.yyg.boot.datasource;

import org.springframework.beans.factory.annotation.Qualifier;
import org.springframework.boot.context.properties.ConfigurationProperties;
import org.springframework.boot.jdbc.DataSourceBuilder;
import org.springframework.context.annotation.Bean;
import org.springframework.context.annotation.Configuration;
import org.springframework.context.annotation.Primary;
import org.springframework.core.io.support.PathMatchingResourcePatternResolver;

import javax.sql.DataSource;
import java.util.HashMap;
import java.util.Map;

/**
 * @Author One brother Sun
 * @Date Created in 2020/4/7
 * @Description Multi data source configuration
 */
@Configuration
public class DynamicDataSourceConfig {

    @Bean(name = "dynamicDataSource")
    public DynamicDataSource dynamicDataSource(@Qualifier("ds1DataSource") DataSource ds1DataSource,
                                        @Qualifier("ds2DataSource") DataSource ds2DataSource) {
        Map<Object, Object> targetDataSource = new HashMap<>();
        targetDataSource.put(DataSourceType.SourceType.DS_SHOP, ds1DataSource);
        targetDataSource.put(DataSourceType.SourceType.DS_USER, ds2DataSource);
        DynamicDataSource dataSource = new DynamicDataSource();
        dataSource.setTargetDataSources(targetDataSource);
        dataSource.setDefaultTargetDataSource(ds2DataSource);
        return dataSource;
    }

}
10. Define AOP section
Write the AOP aspect class here and configure the pre notification method through the @ Before annotation.
package com.yyg.boot.datasource;

import lombok.extern.slf4j.Slf4j;
import org.aspectj.lang.annotation.Aspect;
import org.aspectj.lang.annotation.Before;
import org.springframework.stereotype.Component;

/**
 * @Author One brother Sun
 * @Date Created in 2020/4/7
 * @Description Description
 */
@Aspect
@Component
@Slf4j
public class DataSourceAop {

    @Before("execution(* com.yyg.boot.service.impl.GoodsServiceImpl.*(..))")
    public void setDataSource01() {
        log.warn("db01 Commodity data source");
        DataSourceType.setDataSourceType(DataSourceType.SourceType.DS_SHOP);
    }

    @Before("execution(* com.yyg.boot.service.impl.UserServiceImpl.*(..))")
    public void setDataSource02() {
        log.warn("db02 User data source");
        DataSourceType.setDataSourceType(DataSourceType.SourceType.DS_USER);
    }

}
11. Create Entity class
11.1 Goods
Encapsulates an entity class of commodity information.
package com.yyg.boot.entity;

import lombok.Data;

import javax.persistence.*;

/**
 * @Author One brother Sun
 * @Date Created in 2020/4/3
 * @Description db1 Item list in
 */
@Entity
@Table(name = "goods")
@Data
public class Goods {

    @Id
    @GeneratedValue(strategy=GenerationType.IDENTITY)
    private Long id;

    private String name;

}
11.2 User class
Entity class that encapsulates user information.
package com.yyg.boot.entity;

import lombok.Data;

import javax.persistence.*;

/**
 * @Author One brother Sun
 * @Date Created in 2020/4/3
 * @Description db4 User table in
 */
@Entity
@Table(name = "user")
@Data
public class User {

    @Id
    @GeneratedValue(strategy=GenerationType.IDENTITY)
    private Long id;

    private String username;

    private String birthday;

    private String sex;

    private String address;

}
12. Create Dao layer code 12.1 GoodsRepository class
12.1 GoodsRepository class
Write the database Dao layer interface for operating Goods commodity information.
package com.yyg.boot.dao.db01;

import com.yyg.boot.entity.Goods;
import com.yyg.boot.entity.User;
import org.springframework.data.jpa.repository.JpaRepository;
import org.springframework.data.jpa.repository.JpaSpecificationExecutor;
import org.springframework.stereotype.Repository;

/**
 * @Author One brother Sun
 * @Date Created in 2020/4/3
 * @Description Description
 */
@Repository
public interface GoodsRepository extends JpaRepository<Goods, Long>,JpaSpecificationExecutor<User> {
}
12.2 UserRepository class
Write the database Dao layer interface for operating User information.
package com.yyg.boot.dao.db02;

import com.yyg.boot.entity.User;
import org.springframework.data.jpa.repository.JpaRepository;
import org.springframework.data.jpa.repository.JpaSpecificationExecutor;
import org.springframework.stereotype.Repository;

/**
 * @Author One brother Sun
 * @Date Created in 2020/4/3
 * @Description Description
 */
@Repository
public interface UserRepository extends JpaRepository<User, Long>,JpaSpecificationExecutor<User> {
}
13. Create Service code
13.1 UserServiceImpl implementation class
Write UserServiceImpl implementation class and call UserRepository for database operation.
package com.yyg.boot.service.impl;

import com.yyg.boot.dao.db02.UserRepository;
import com.yyg.boot.entity.User;
import com.yyg.boot.service.UserService;
import org.springframework.beans.factory.annotation.Autowired;
import org.springframework.stereotype.Service;

import java.util.List;

/**
 * @Author One brother Sun
 * @Date Created in 2020/4/7
 * @Description Description
 */
@Service
public class UserServiceImpl implements UserService {

    @Autowired
    private UserRepository userRepository;

    @Override
    public List<User> findAll() {
        return userRepository.findAll();
    }

}
13.2 GoodsServiceImpl implementation class
Write the GoodsServiceImpl implementation class and call GoodsRepository for database operation.
package com.yyg.boot.service.impl;

import com.yyg.boot.dao.db01.GoodsRepository;
import com.yyg.boot.dao.db02.UserRepository;
import com.yyg.boot.entity.Goods;
import com.yyg.boot.entity.User;
import com.yyg.boot.service.GoodsService;
import com.yyg.boot.service.UserService;
import org.springframework.beans.factory.annotation.Autowired;
import org.springframework.stereotype.Service;

import java.util.List;

/**
 * @Author One brother Sun
 * @Date Created in 2020/4/7
 * @Description Description
 */
@Service
public class GoodsServiceImpl implements GoodsService {

    @Autowired
    private GoodsRepository goodsRepository;

    @Override
    public List<Goods> findAll() {
        return goodsRepository.findAll();
    }

}
14. Create Controller interface
Then we create a Controller class and define several interfaces here for later testing.
package com.yyg.boot.web;

import com.yyg.boot.entity.Goods;
import com.yyg.boot.entity.User;
import com.yyg.boot.service.GoodsService;
import com.yyg.boot.service.UserService;
import org.springframework.beans.factory.annotation.Autowired;
import org.springframework.web.bind.annotation.GetMapping;
import org.springframework.web.bind.annotation.RestController;

import java.util.List;

/**
 * @Author One brother Sun
 * @Date Created in 2020/4/3
 * @Description Description
 */
@RestController
public class GoodsController {

    @Autowired
    private UserService userService;

    @Autowired
    private GoodsService goodsService;

    @GetMapping(value = "/users")
    public List<User> users() {
        return userService.findAll();
    }

    @GetMapping(value = "/goods")
    public List<Goods> goods() {
        return goodsService.findAll();
    }

}
15. Create an entry class
Finally, write a project entry class to start the project.
package com.yyg.boot;
import org.springframework.boot.SpringApplication;
import org.springframework.boot.autoconfigure.SpringBootApplication;
/**
* @Author One brother Sun
* @Date Created in 2020/4/3
* @Description Description
*/
@SpringBootApplication
public class DataSourceApplication {
public static void main(String[] args){
SpringApplication.run(DataSourceApplication.class,args);
}
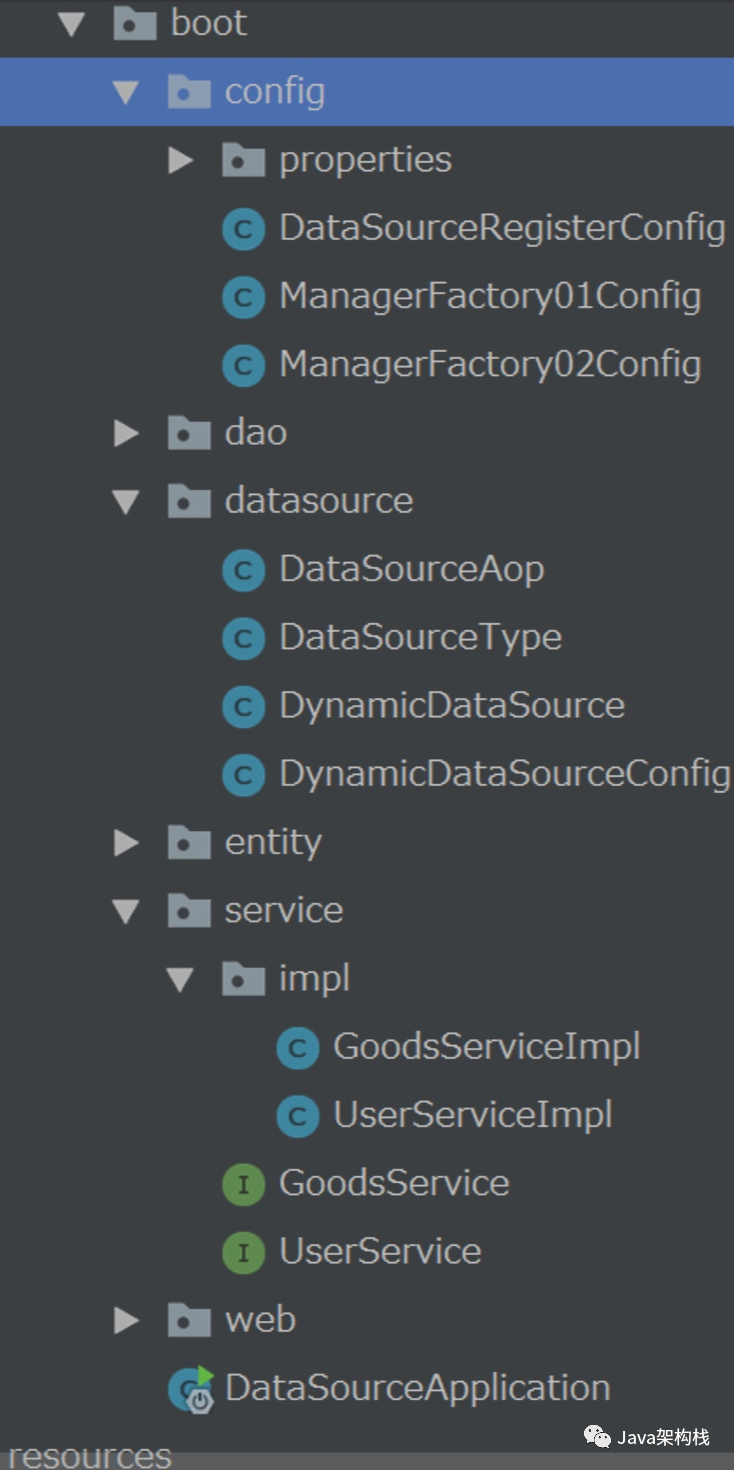
}16. Project structure
Finally, we can take a look at the code structure of the project. You can refer to the following figure to create it.
17. Operation test
17.1 test commodity database
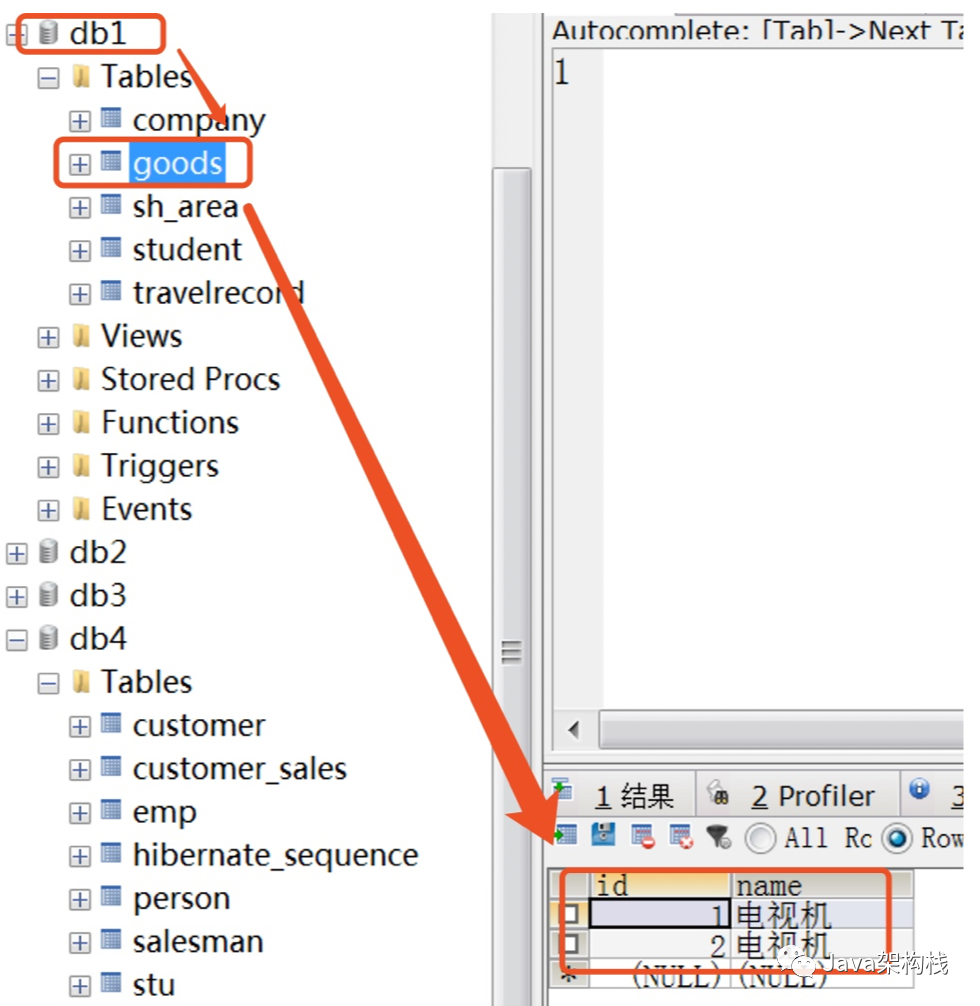
Let's start the project. First, test the goods interface. Here we query the data in the db1 database.
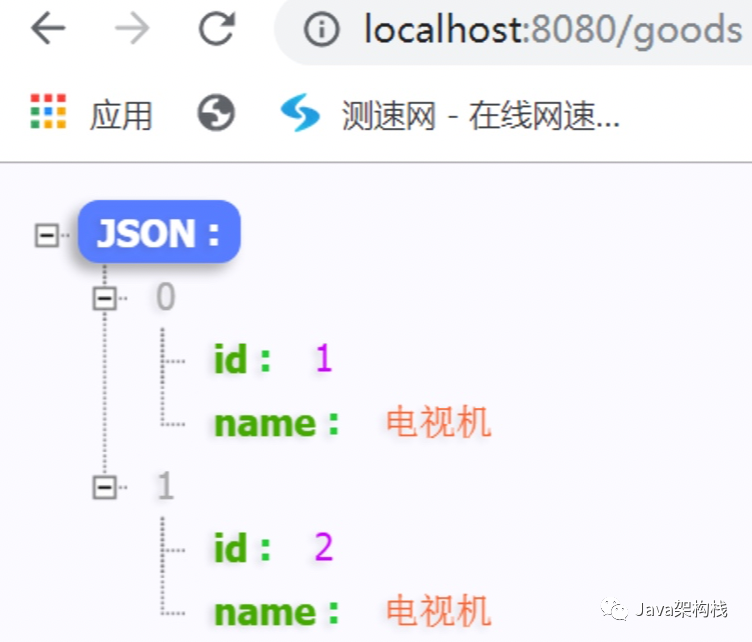
This corresponds to the data in the db1 database.
17.2 test user database
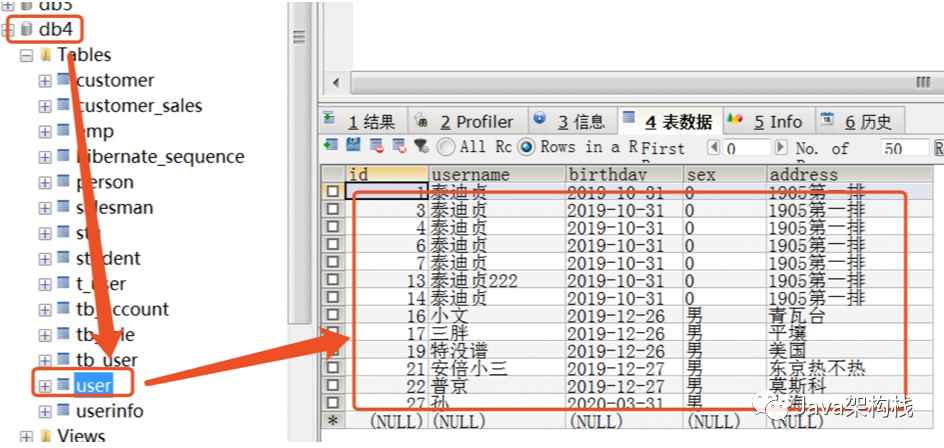
Then we will test the users interface, where the data in the db4 database is queried.
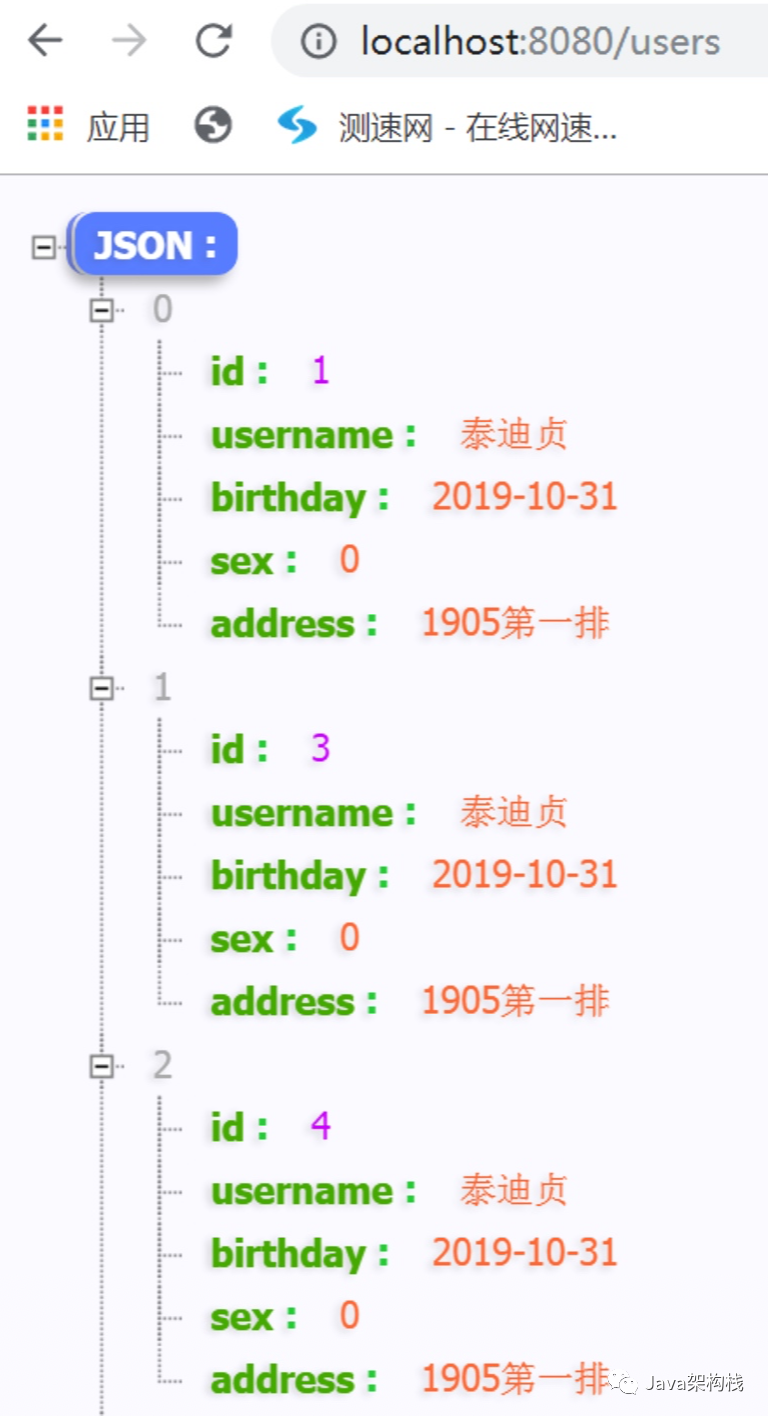
This corresponds to the data in the db4 database.
If you need more tutorials, just scan the code on wechat

👆👆👆
Don't forget to scan the code to get the information [HD Java learning roadmap]
And [full set of learning videos and supporting materials of various disciplines]