So far, the character has realized moving, jumping and squatting. Next, add animation to the character to make the character "move".
1, Add animation
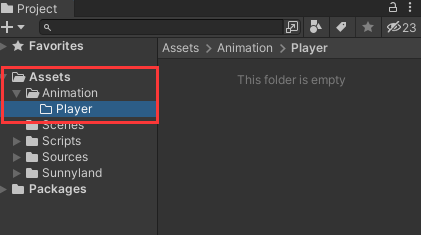
1. Create two folders animation - > player in project - > asset.
2. Open the toolbar window - > Animation - > animation, and drag the window to a convenient position.
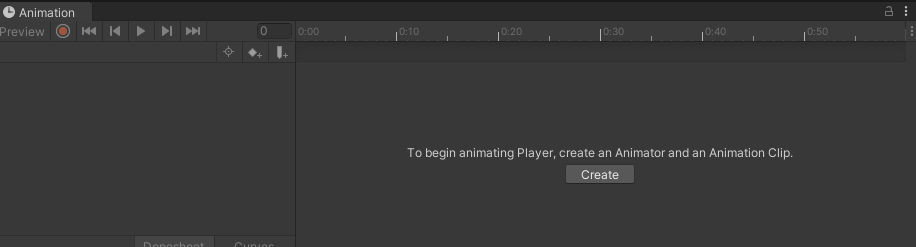
3. Select Player in the Hierarchy window, click Create in the Animation window to Create an Animation, and save it to the Animation - > Player folder just created

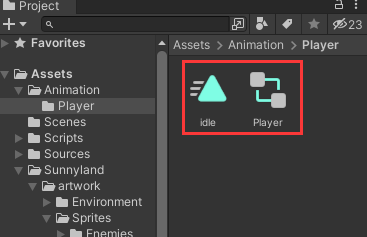
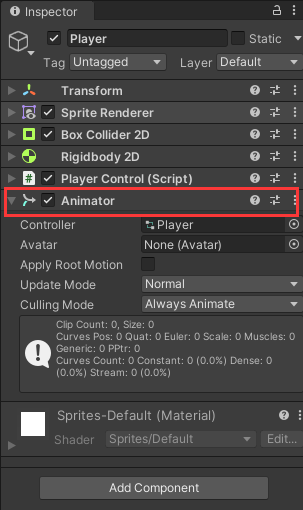
In this way, an Animator controller (named Player) and Animation (idle) will be generated in the Animation - > Player folder. At the same time, you can see that the Animator component has been hung in the Inspector window of the Player.
(another creation method: 1. Right click to create an Animator in the Animation - > Player folder and drag it to the Inspector window of Player 2. Right click to create an Animation and drag it to Player)
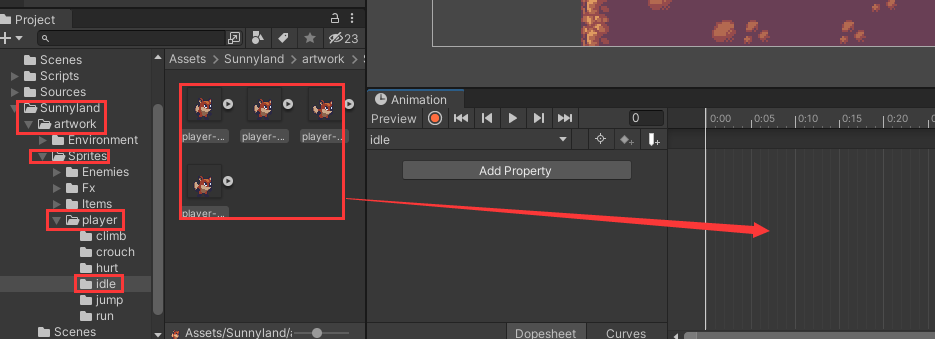
4. Open sunny land - > artwork - > sprites - > Player - > idle, select all idle animations, change the Pixels Per Unit to 16 in the Inspector window, then select Player and drag it to the Animation window of Player.
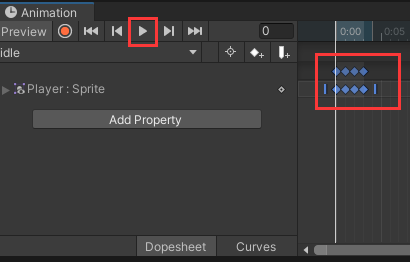
At this time, click play Animation in the Animation window to see the character move. (you can drag the blue Animation frame in the figure to adjust the Animation playback speed)
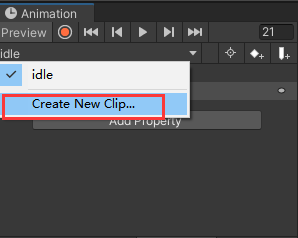
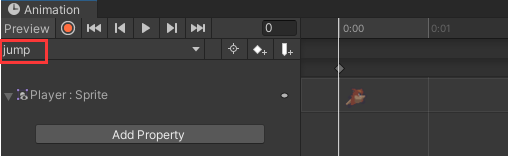
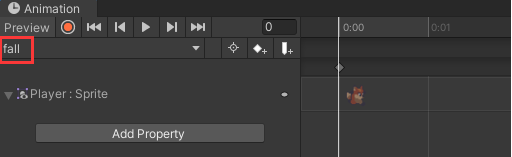
5. Through the same steps, add the Animation option as shown in the figure below to add the Animation in the crouch and run folders to the character. The two animations in the jump folder need to create the Animation of jump and fall respectively.
After adding, make some adjustments, as shown in the figure below

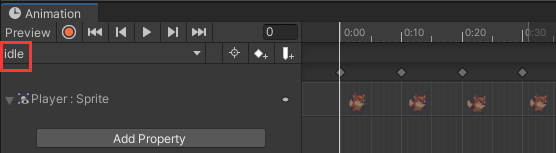
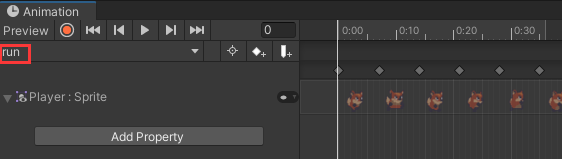
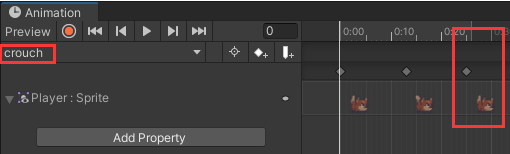
(note that the crouch part of the squat can be supplemented by one more frame in order to make the character's action more smooth)
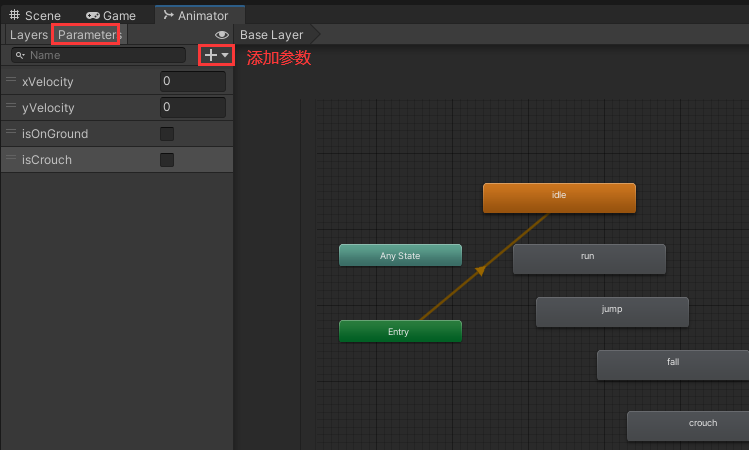
2, Add animation parameters
1. Double click the animation controller in animation - > Player to open the Animator window. We need to add several Parameters to control the state machine in the window on the right in the Parameters column.
Float: xVelocity,yVelocity; Bool: isOnGround,isCrouch
3, Use animation parameters to control switching between animations
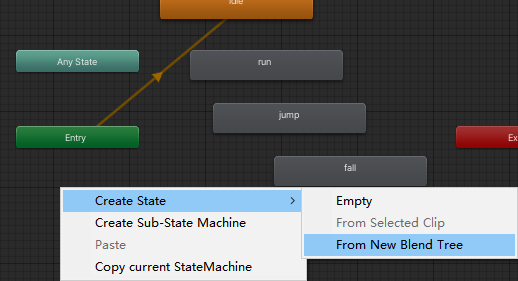
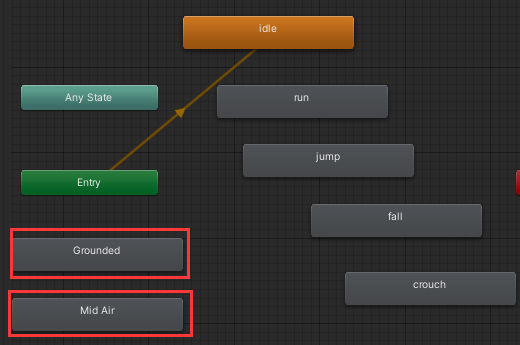
1. As shown in the following figure, right-click on the right part of the Animator window to create two blend trees named Grounded and Mir Air respectively
2. Set Blend Tree
Double click Grounded to open it. Right click to add two motions in the Blend Tree
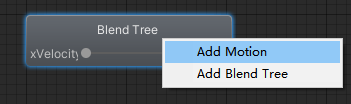
Hang the animation of idle and run on the Inspector window of Blend Tree respectively
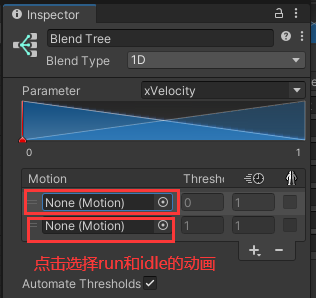
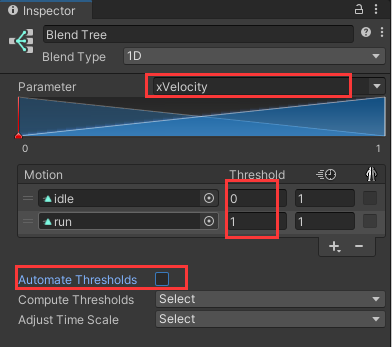
Set the relevant parameters in the figure below (meaning that when the lateral speed xVelocity changes between 0 and 1, the character switches between standing and running animation)
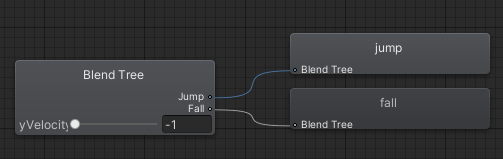
3. Similarly, set the parameters of Mid Air as shown in the figure below

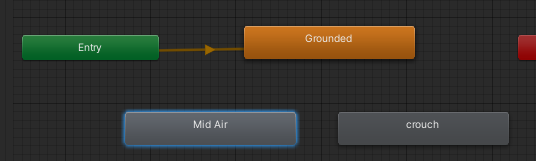
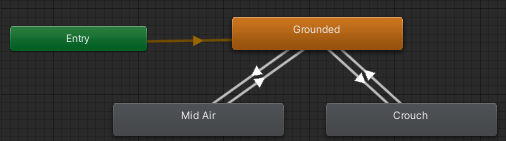
4. Sorting state machine
Because we establish the key between idle, run, jump and fall in the Blend Tree, we can delete these states here

Right click Entry to point the default state to Grounded

After adjustment, our state machine becomes a concise structure as shown in the figure below
5. Establish the switching relationship between actions
Right click Grounded, select Make Transition, and point to Mir Air and crush (meaning that idle and run states can be changed to jump and fall States).
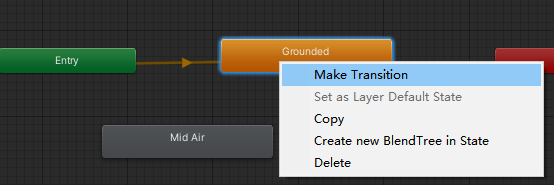
Similarly, create a Transition to Grounded.
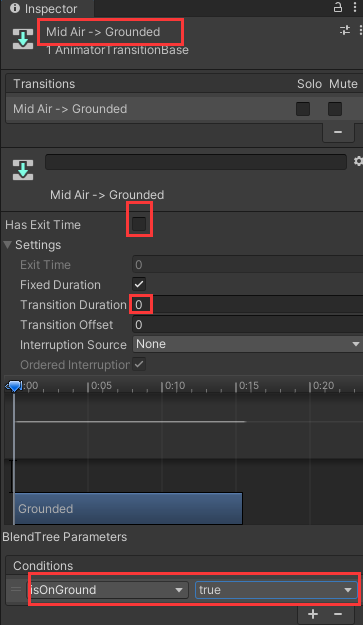
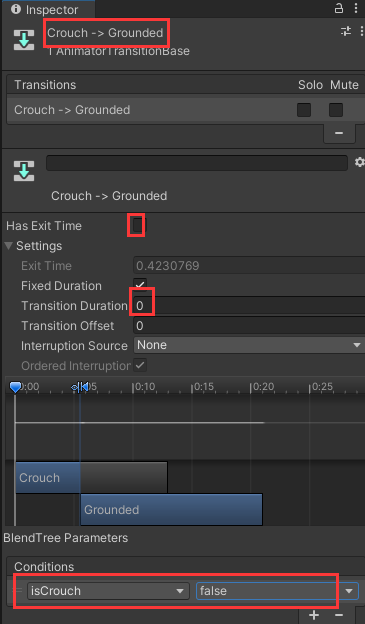
6. Establish switching conditions between actions
Check the established Transition

Modify the condition of switching action in the Inspector window
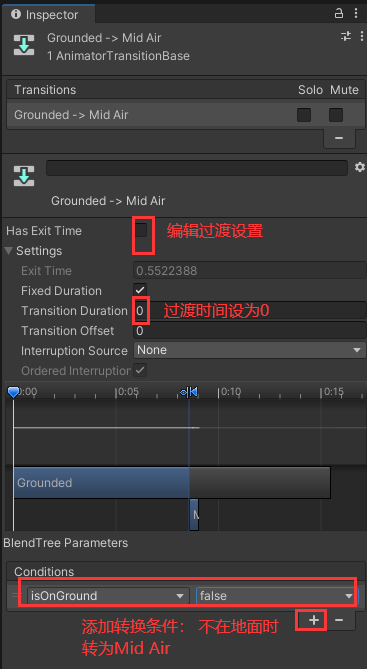
Similarly, set other conversion conditions

4, Add script control
Through the above steps, we have established the switching between character actions, and then we need to pass the keyboard input to these actions through the script.
1. Optimize the PlayControl script in (03) note and add some states
using UnityEngine;

public class PlayerControl : MonoBehaviour
{
  public bool isOnGround; //Modify private - > public
  public bool isCoruchHeld;//Add a variable to judge whether it is squatting
}
void Update()
{
  //Keep original logic

  //Press squat key S (add judgment squat logic)
  if (Input.GetButtonDown(Key_Crouch) && isOnGround)
  {
    isCoruchHeld = true;
  }
}

private void MidAirMovement()
{
  if (isJumpPressed && isOnGround)
  {
    isJumpPressed = false;
    if (!isCoruchHeld)//Add judgment:! isCoruchHeld, you can't jump while squatting
      player_Rbody.AddForce(new Vector2(0, jumpForce), ForceMode2D.Impulse);//Add longitudinal forces to your character's rigid bodies
  }
}

private void Crouch()
{
  if (!isOnGround)
	return;

  if (isCrouch)
  {
    //Keep original logic
  }
  else if (!isHeadBlocked)
  {
    //Keep original logic

    //Release the squatting state (add: release the squatting state only when you stand up)
    isCoruchHeld = false;

  }
}
2. Create a C# script named PlayerAnimation in the scripts - > player folder
using UnityEngine;

public class PlayerAnimation : MonoBehaviour
{
    Animator anim; //Animator
    PlayerControl playerControl;//Role control script
    Rigidbody2D player_Rbody;//Character rigid body

    //The id of the parameter set in the animator
    int isOnGroundID;
    int isCrouchID;
    int xVelocityID;
    int yVelocityID;

    void Start()
    {
        anim = GetComponent<Animator>();
        playerControl = GetComponent<PlayerControl>();
        player_Rbody = GetComponent<Rigidbody2D>();

        //Note: the Parameters in StringToHash should be consistent with the Parameters set in Animator
        isOnGroundID = Animator.StringToHash("isOnGround");
        isCrouchID = Animator.StringToHash("isCrouch");
        xVelocityID = Animator.StringToHash("xVelocity");
        yVelocityID = Animator.StringToHash("yVelocity");
    }

    void Update()
    {
        //Control the parameters in the Animator through the input in playerControl to control the character action switching
        anim.SetBool(isOnGroundID, playerControl.isOnGround);//Conditions for switching to Mid Air
        anim.SetBool(isCrouchID, playerControl.isCoruchHeld);//Switch squat conditions
        anim.SetFloat(xVelocityID, Mathf.Abs(player_Rbody.velocity.x));//Lateral velocity, idle and run
        anim.SetFloat(yVelocityID, player_Rbody.velocity.y);//Longitudinal speed, jump and fall
    }
}
Now that you have finished animating the character, you will add some collections and animation events to the scene