preface
in the previous article, we completed the use of Gaode map and the display of map weather. Now we can view the current local weather on the map. In this paper, we will switch other cities in China, move the map and query the weather. At the same time, reload the Fragment in the Fragment, and switch through TabLayout and ViewPager.
text
from easy to difficult, first load fragments in fragments. Now HomeActivity loads three fragments, of which NewsFragment and VideoFragment have some similar properties. Therefore, we can load and display these two fragments in one Fragment, which can save space in HomeActivity.
1, Parent Fragment loads child Fragment
Very simple, let's create an InfoFragment under the fragment package and the corresponding layout info_fragment.xml, the code is as follows:
<?xml version="1.0" encoding="utf-8"?>
<layout xmlns:android="http://schemas.android.com/apk/res/android"
    xmlns:app="http://schemas.android.com/apk/res-auto"
    xmlns:tools="http://schemas.android.com/tools">

    <RelativeLayout
        android:layout_width="match_parent"
        android:layout_height="match_parent"
        tools:context=".ui.fragment.InfoFragment">

        <com.google.android.material.tabs.TabLayout
            android:id="@+id/tab"
            android:layout_width="match_parent"
            android:layout_height="wrap_content"
            app:tabIndicatorColor="@color/purple_500"
            app:tabTextColor="@color/purple_500" />

        <androidx.viewpager.widget.ViewPager
            android:id="@+id/vp"
            android:layout_width="match_parent"
            android:layout_height="match_parent"
            android:layout_below="@+id/tab" />

    </RelativeLayout>
</layout>
① Fragment adapter
Then we create a Fragment adapter and create an InfoFragmentAdapter class in the adapter package. The code is as follows:
public class InfoFragmentAdapter extends FragmentPagerAdapter {

    String titleArr[];
    List<Fragment> mFragmentList;

    public InfoFragmentAdapter(FragmentManager fm, List<Fragment> list, String[] titleArr) {
        super(fm);
        mFragmentList = list;
        this.titleArr = titleArr;
    }

    @Override
    public Fragment getItem(int i) {
        return mFragmentList.get(i);
    }

    @Override
    public int getCount() {
        return mFragmentList != null ? mFragmentList.size() : 0;
    }

    @Nullable
    @Override
    public CharSequence getPageTitle(int position) {
        return titleArr[position];
    }

    @Override
    public void destroyItem(@NonNull ViewGroup container, int position, @NonNull Object object) {
//        super.destroyItem(container, position, object);
    }

}
② TabLayout combo ViewPager
the following two controls are combined in InfoFragment. The code in InfoFragment is as follows:
public class InfoFragment extends BaseFragment {


    public static InfoFragment newInstance() {
        return new InfoFragment();
    }

    private InfoFragmentBinding binding;

    /**
     * Title Array
     */
    private final String[] titles = {"Journalism","video"};
    private final List<Fragment> fragmentList = new ArrayList<>();

    @Override
    public View onCreateView(@NonNull LayoutInflater inflater, @Nullable ViewGroup container,
                             @Nullable Bundle savedInstanceState) {
        binding = DataBindingUtil.inflate(inflater,R.layout.info_fragment,container,false);
        return binding.getRoot();
    }

    @Override
    public void onActivityCreated(@Nullable Bundle savedInstanceState) {
        super.onActivityCreated(savedInstanceState);

        fragmentList.add(new NewsFragment());
        fragmentList.add(new VideoFragment());
        binding.vp.setAdapter(new InfoFragmentAdapter(getChildFragmentManager(), fragmentList, titles));
        binding.tab.setupWithViewPager(binding.vp);
    }

}
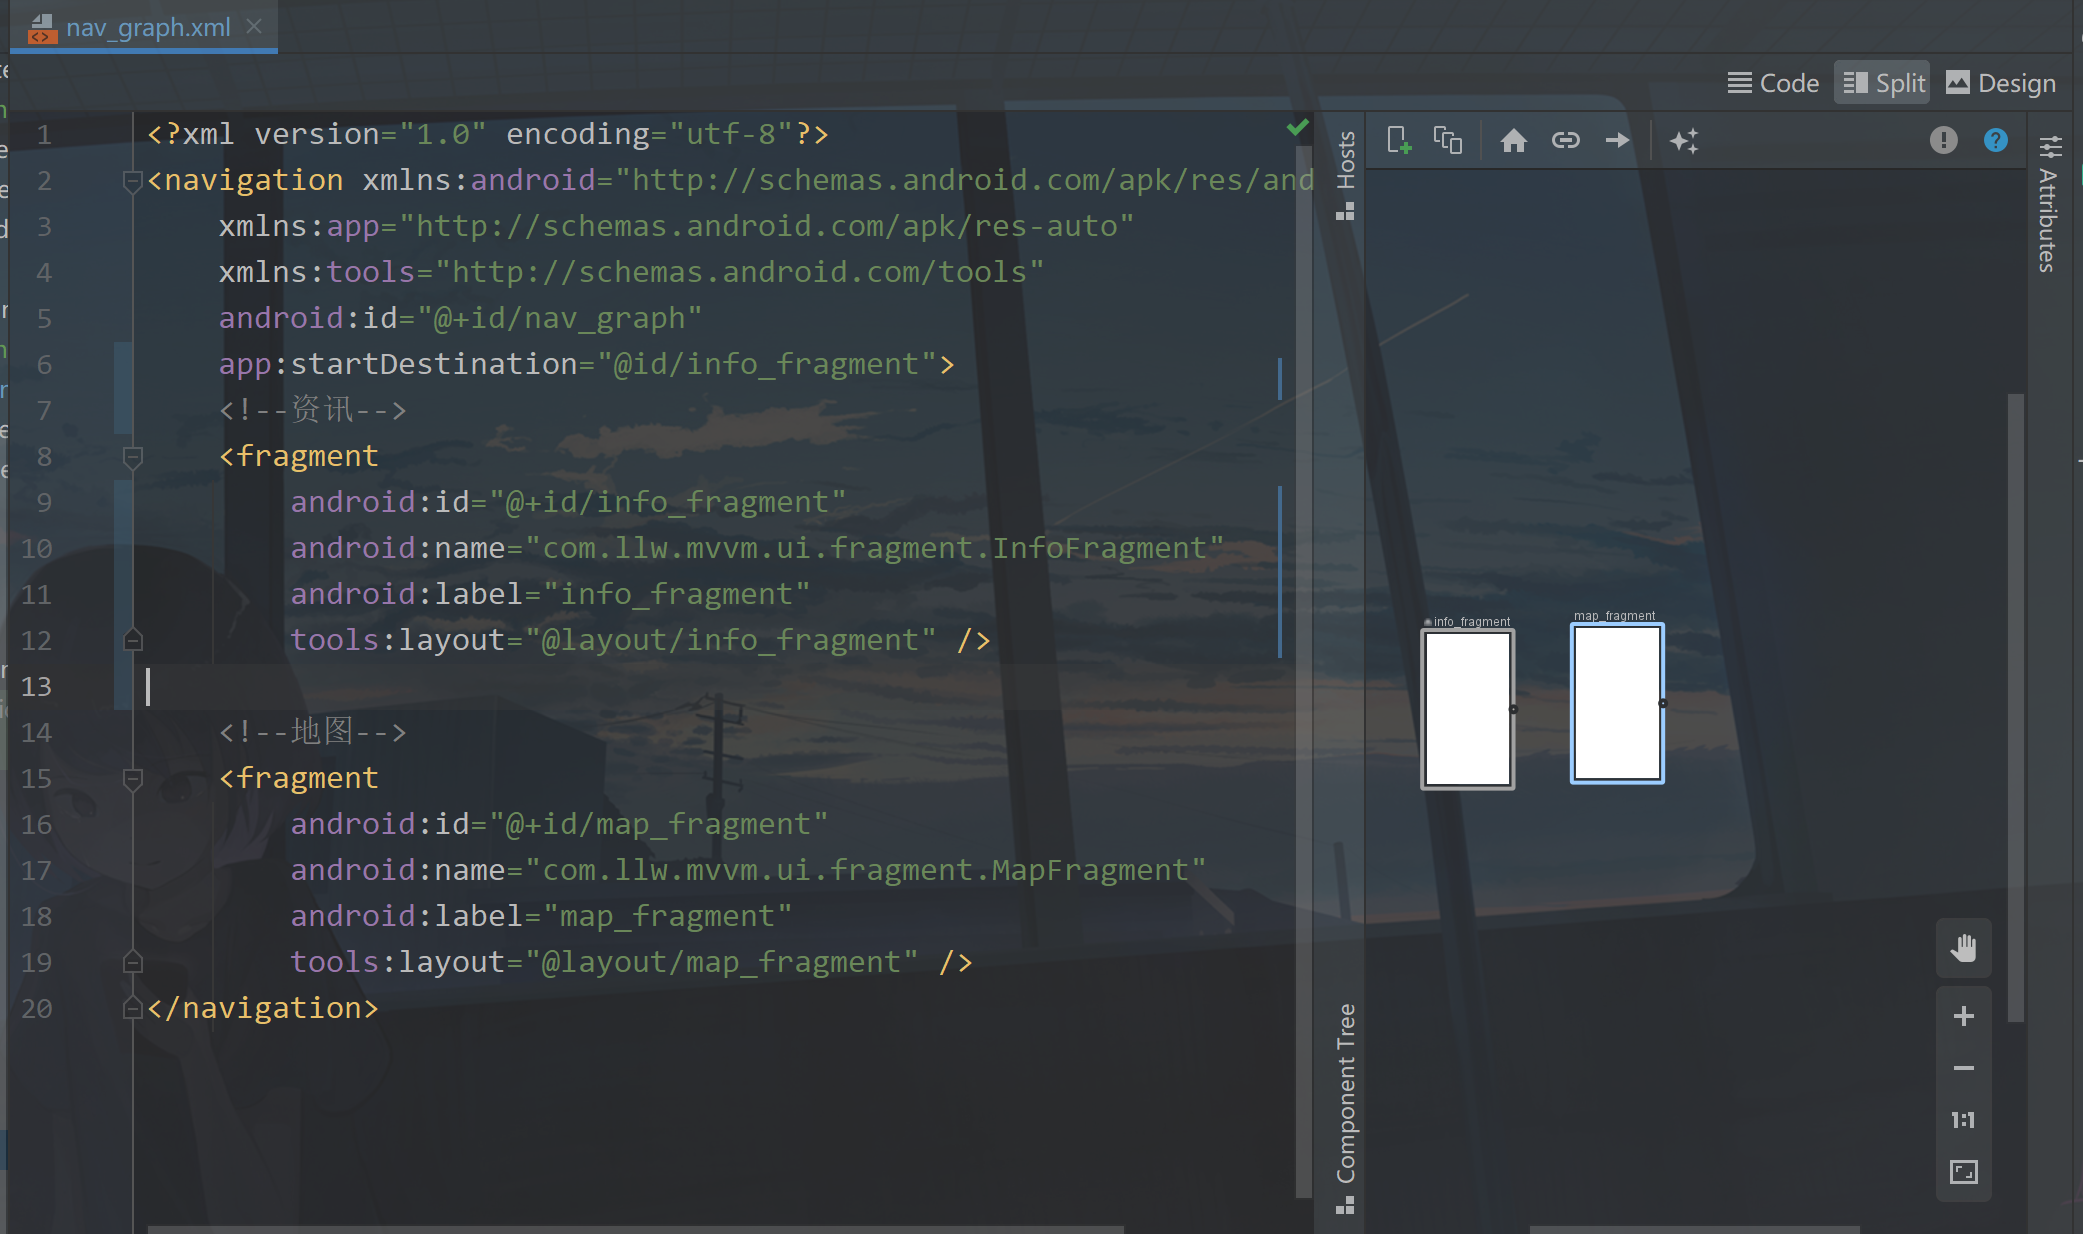
Now that the InfoFragment is written, the following is to remove NAV_ graph. The NewsFragment and VideoFragment in XML are removed as shown in the following figure
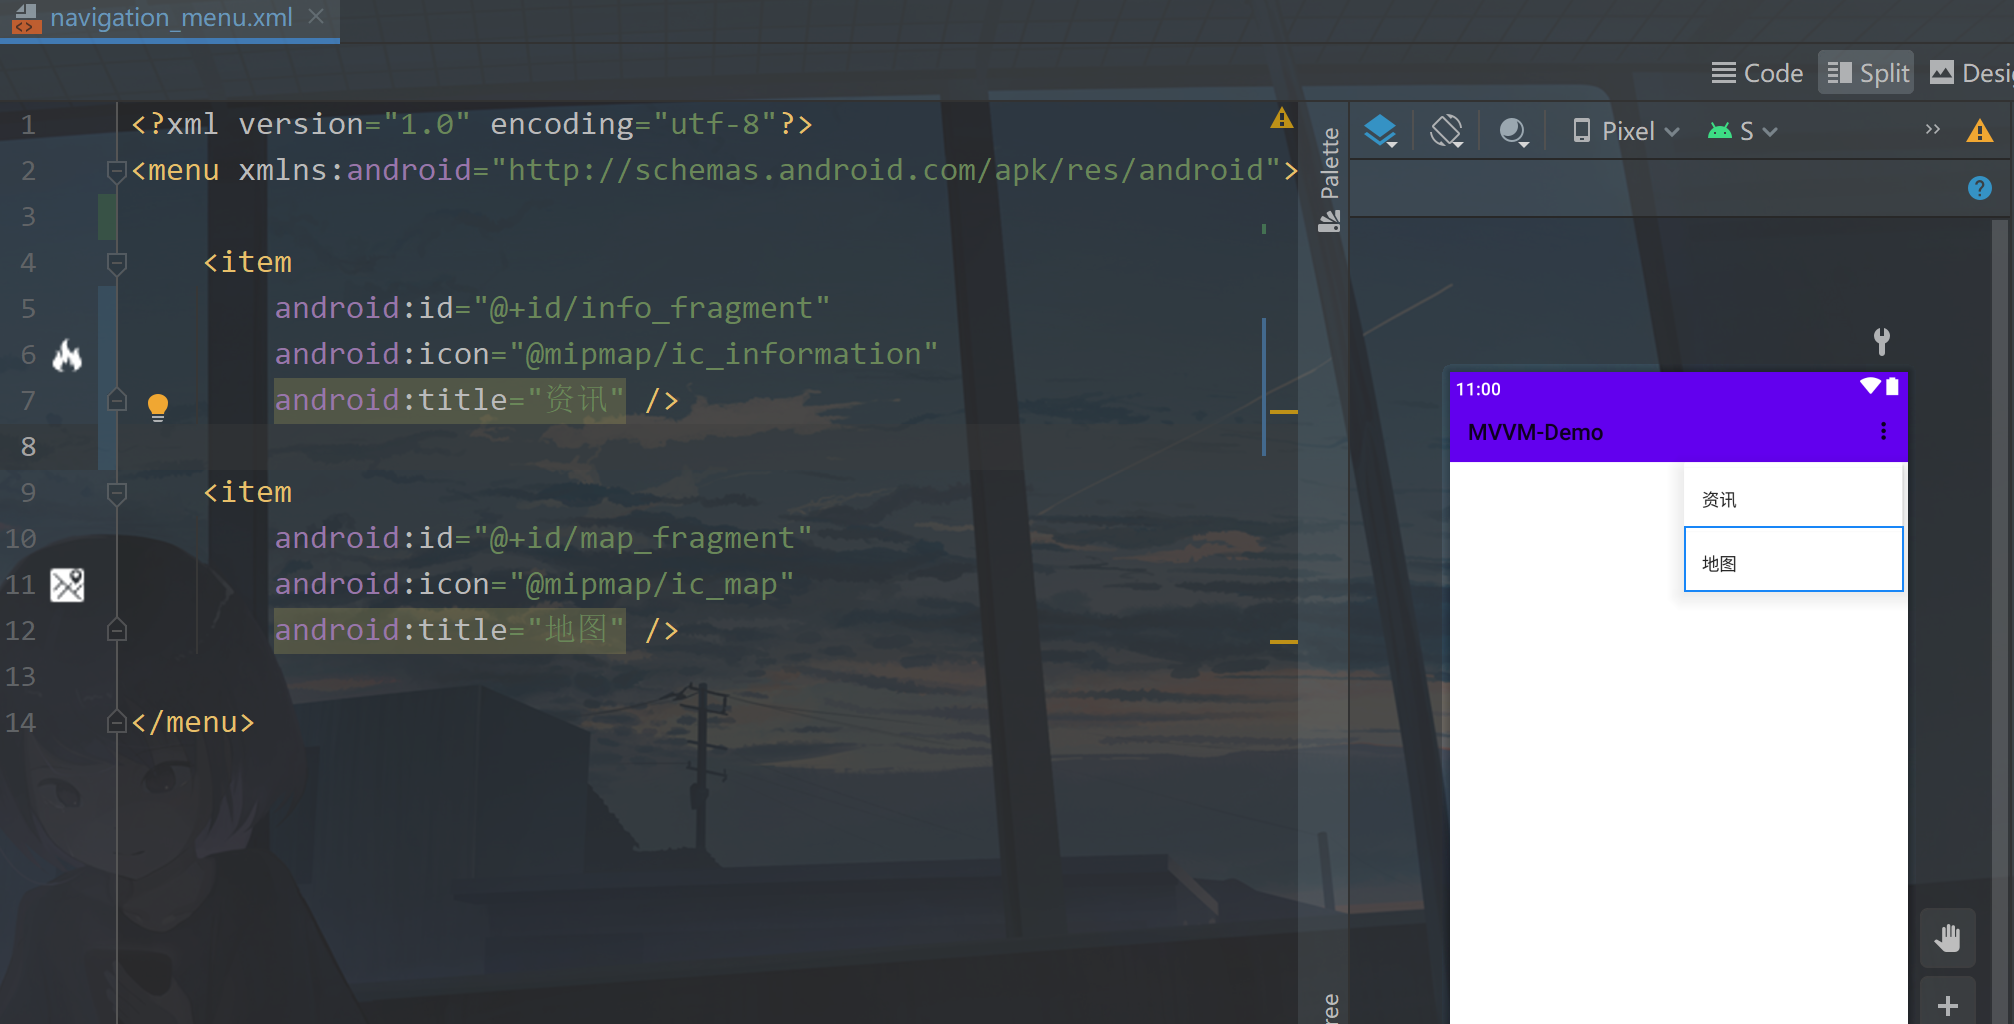
Then there is the menu removal at the bottom, navigation_ menu. Remove news and video from XML, as shown in the following figure:
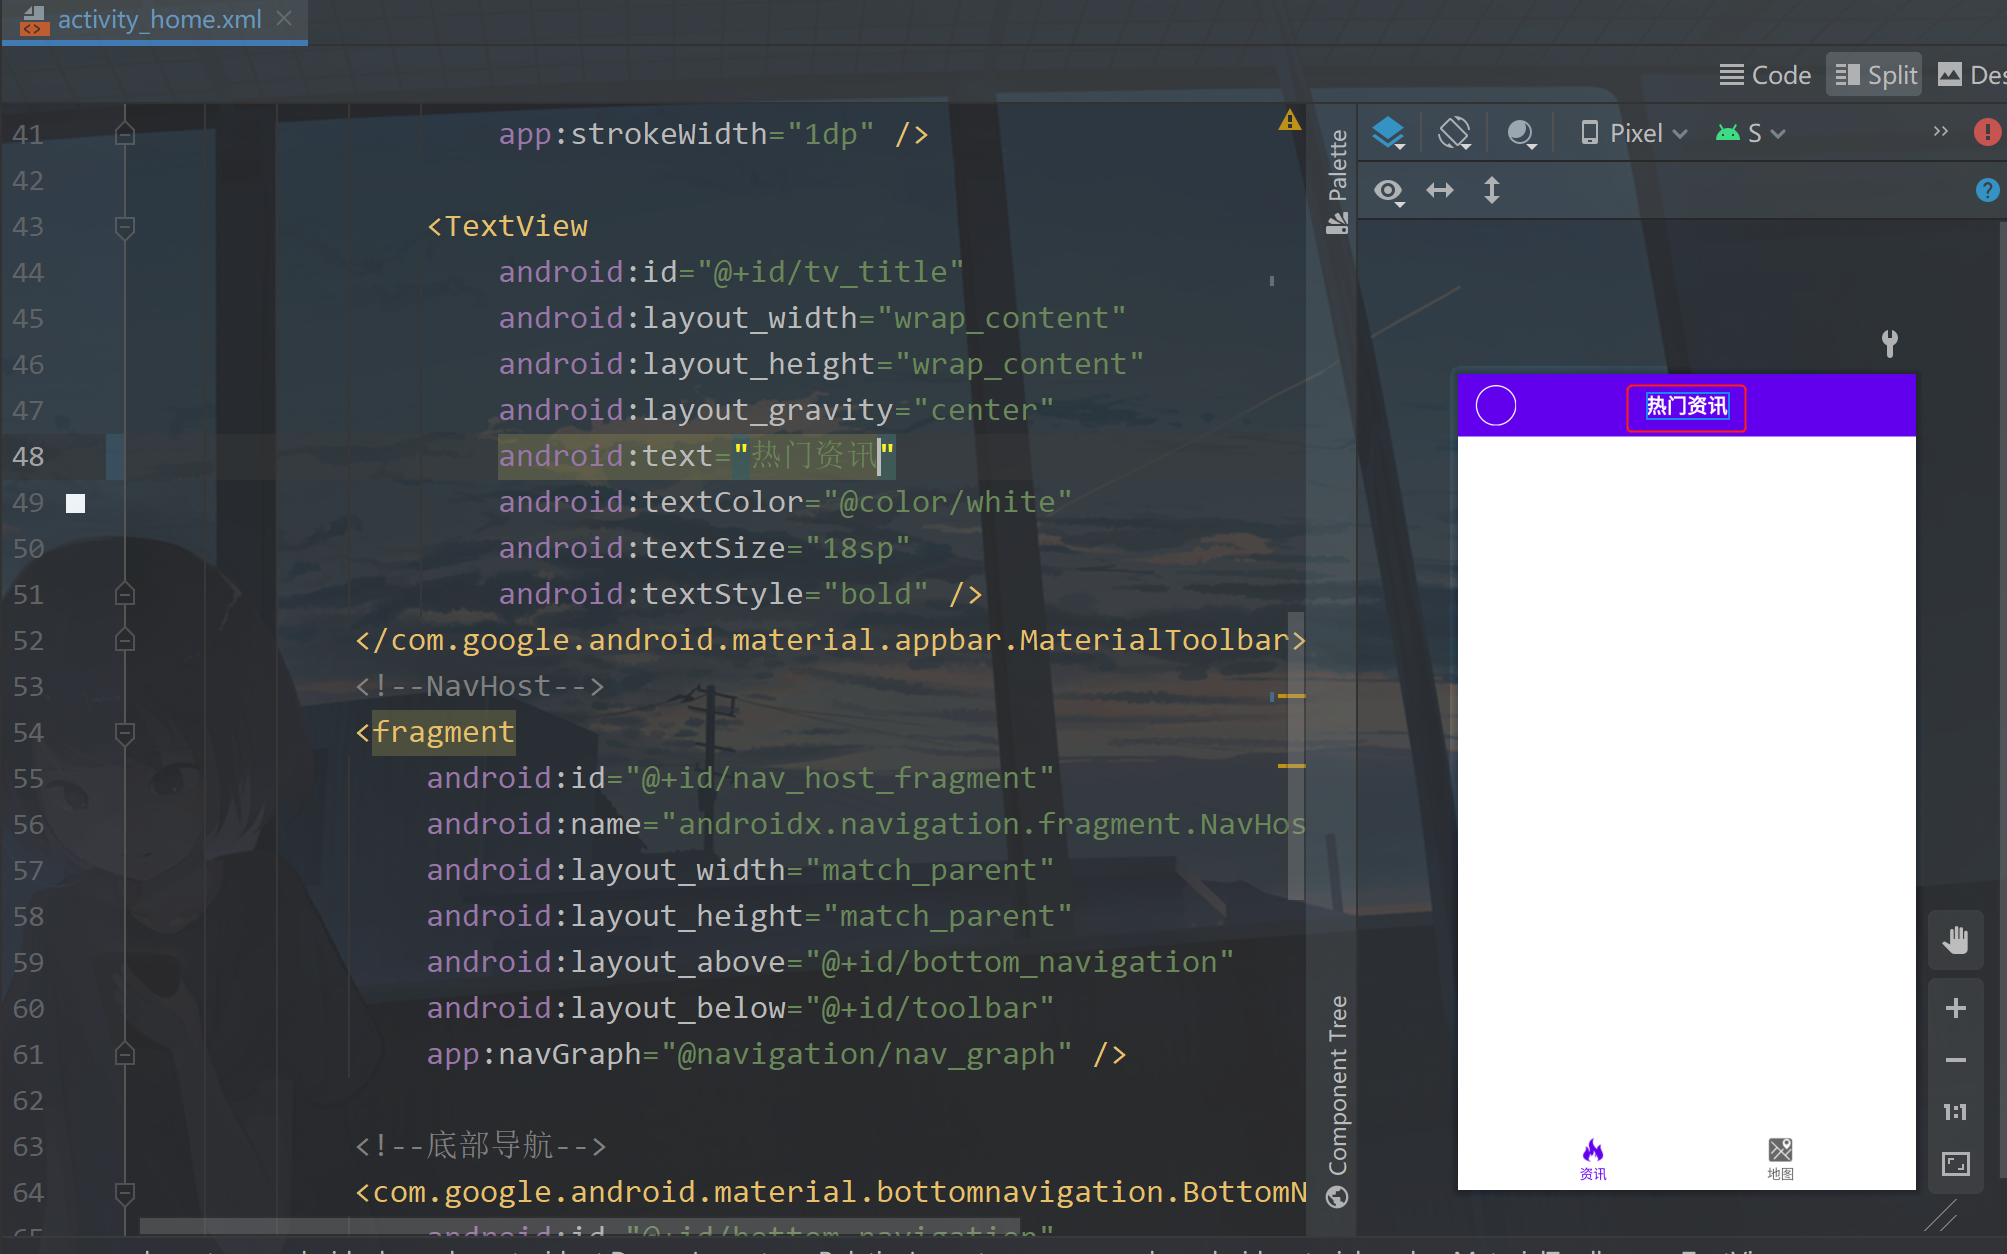
OK, finally check the activity_home.xml. Change the title
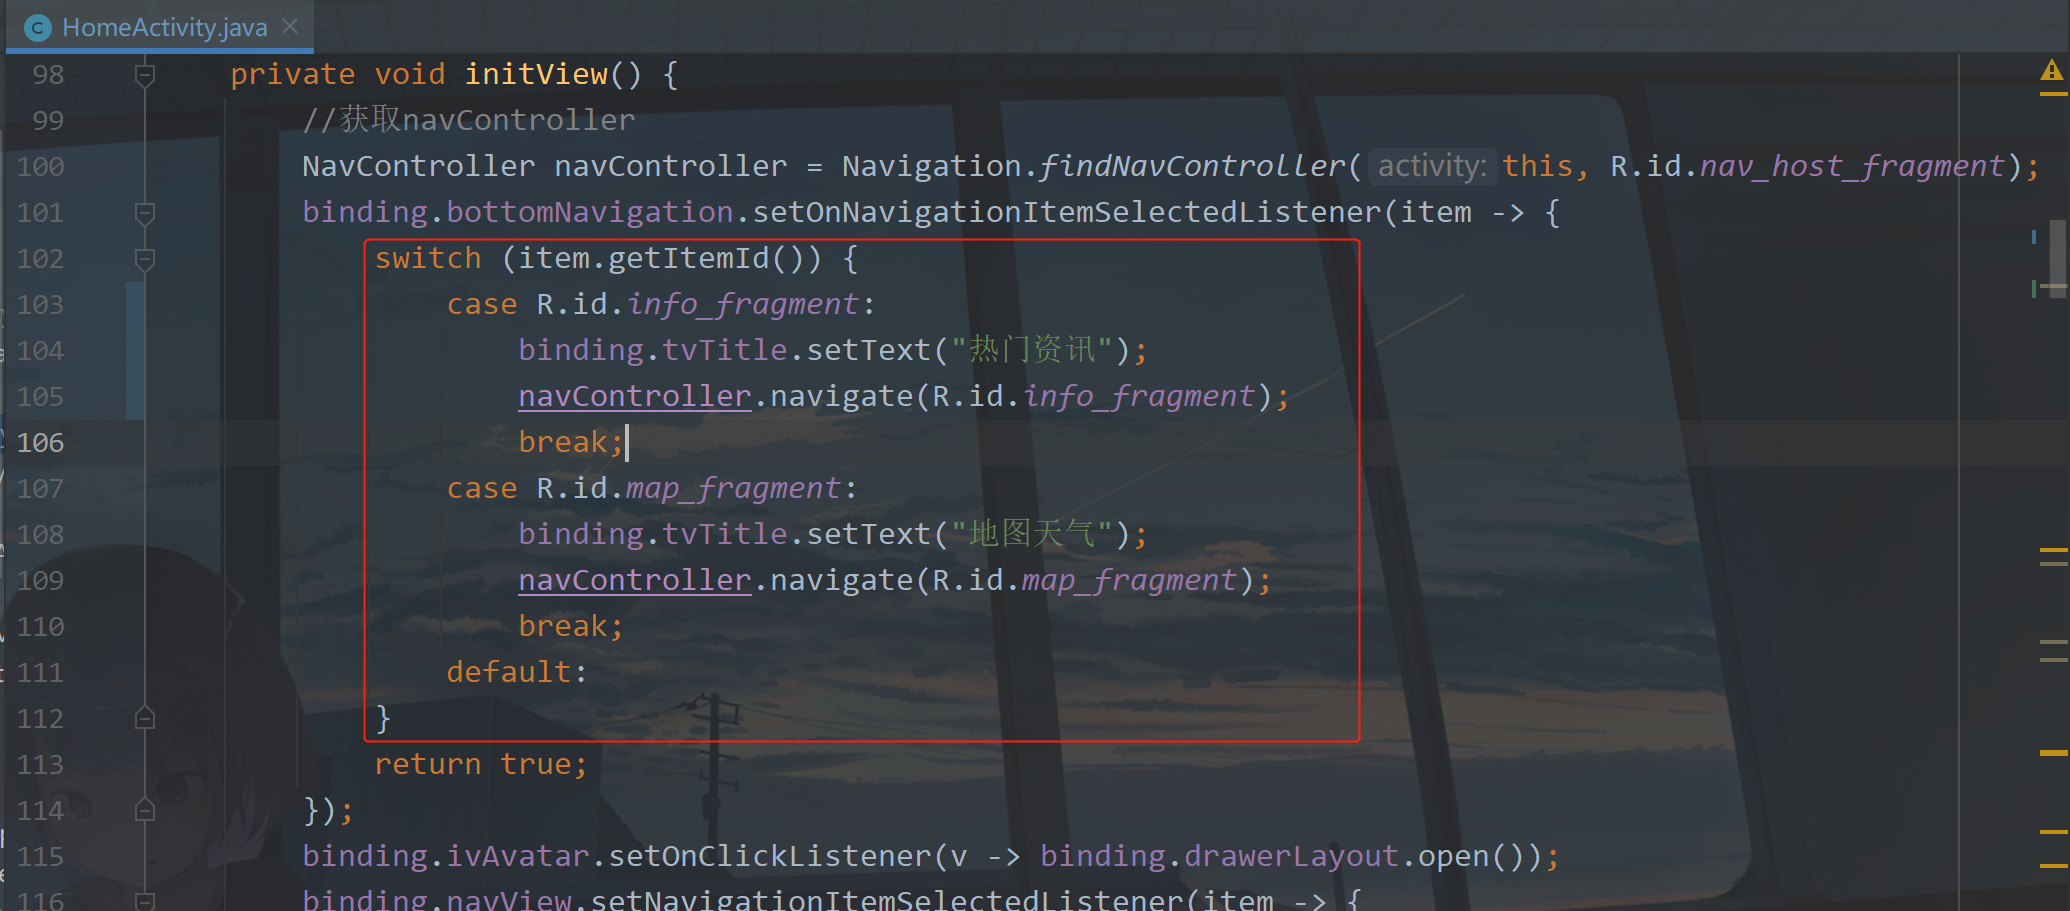
Then modify the code in the initView method in HomeActivity, as shown in the following figure:
Run the following:

2, Drawer menu
the drawer menu was used in HomeActivity on the main page before. Now it needs to be used in MapFragment to load city information, such as provinces, cities, districts / counties and towns across the country.
First modify the map_ The page layout code of fragment is as follows:
<?xml version="1.0" encoding="utf-8"?>
<layout xmlns:android="http://schemas.android.com/apk/res/android"
    xmlns:app="http://schemas.android.com/apk/res-auto"
    xmlns:tools="http://schemas.android.com/tools">

    <androidx.drawerlayout.widget.DrawerLayout
        android:id="@+id/drawer_layout"
        android:layout_width="match_parent"
        android:layout_height="match_parent">
        <!-- Main page -->
        <RelativeLayout
            android:layout_width="match_parent"
            android:layout_height="match_parent"
            tools:context=".ui.fragment.MapFragment">

            <com.amap.api.maps.MapView
                android:id="@+id/map_view"
                android:layout_width="match_parent"
                android:layout_height="match_parent" />

            <LinearLayout
                android:layout_width="wrap_content"
                android:layout_height="wrap_content"
                android:layout_alignParentEnd="true"
                android:layout_alignParentBottom="true"
                android:layout_marginEnd="20dp"
                android:orientation="vertical">

                <com.google.android.material.floatingactionbutton.FloatingActionButton
                    android:id="@+id/fab_weather"
                    android:layout_width="wrap_content"
                    android:layout_height="wrap_content"
                    android:layout_marginBottom="20dp"
                    android:contentDescription="weather"
                    android:src="@mipmap/ic_weather"
                    android:visibility="gone"
                    app:backgroundTint="@color/white"
                    app:fabSize="auto"
                    tools:ignore="UsingOnClickInXml" />

                <com.google.android.material.floatingactionbutton.FloatingActionButton
                    android:id="@+id/fab_city"
                    android:layout_width="wrap_content"
                    android:layout_height="wrap_content"
                    android:layout_marginBottom="20dp"
                    android:contentDescription="city"
                    android:src="@mipmap/ic_city"
                    android:visibility="gone"
                    app:backgroundTint="@color/white"
                    app:fabSize="auto"
                    tools:ignore="UsingOnClickInXml" />
            </LinearLayout>


        </RelativeLayout>
        <!-- Drawer page -->
        <LinearLayout
            android:id="@+id/lay"
            android:layout_width="match_parent"
            android:layout_height="match_parent"
            android:layout_gravity="end"
            android:background="@color/white"
            android:orientation="vertical">

        </LinearLayout>
    </androidx.drawerlayout.widget.DrawerLayout>

</layout>
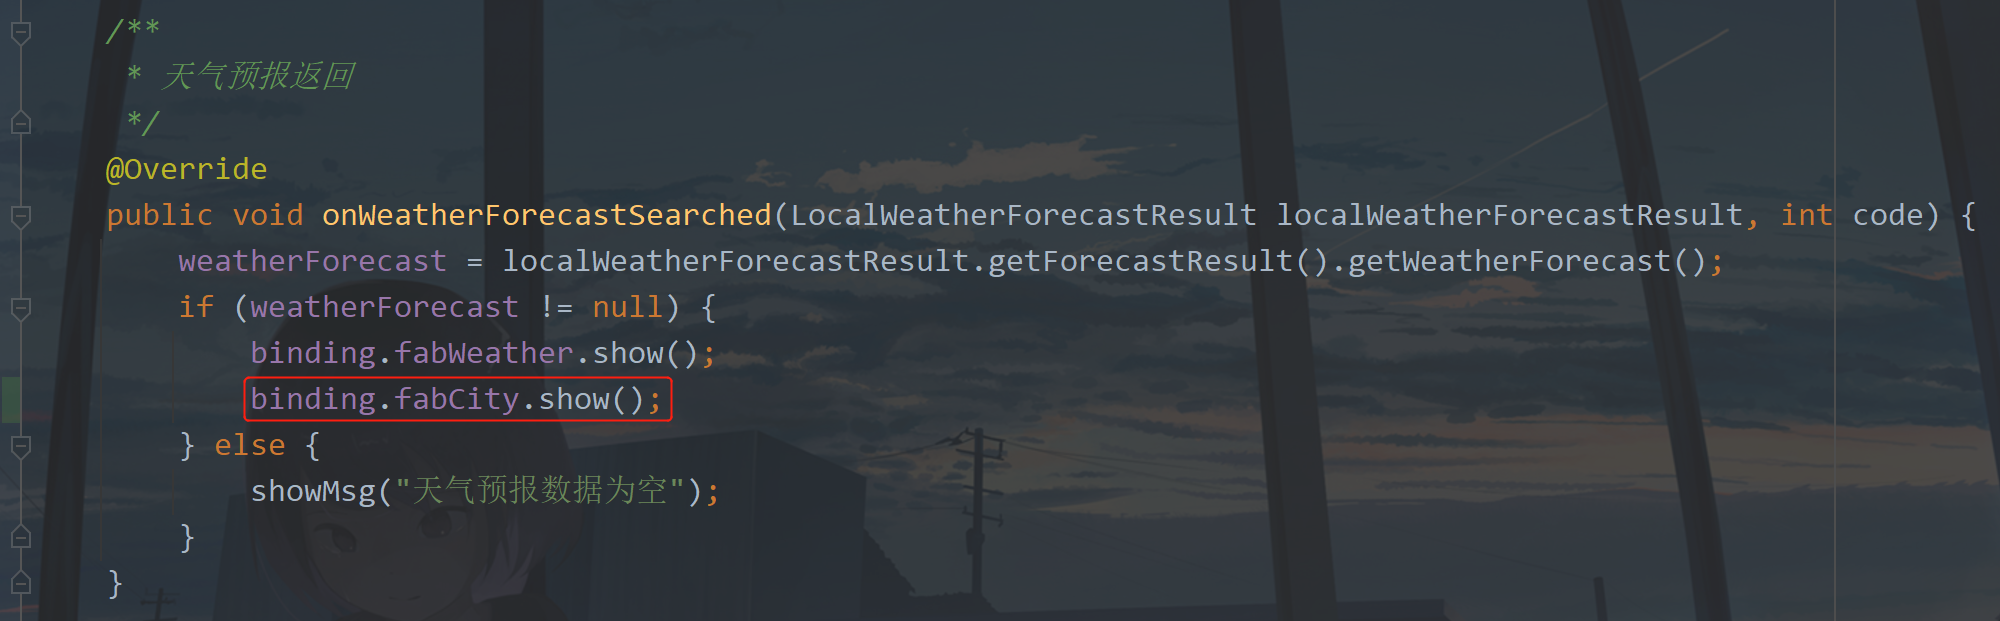
Here, I added a floating button for the city. The icon is obtained from my source code. This button is also displayed after obtaining the weather forecast information. Therefore, it needs to be added in MapFragment first, as shown in the following figure:
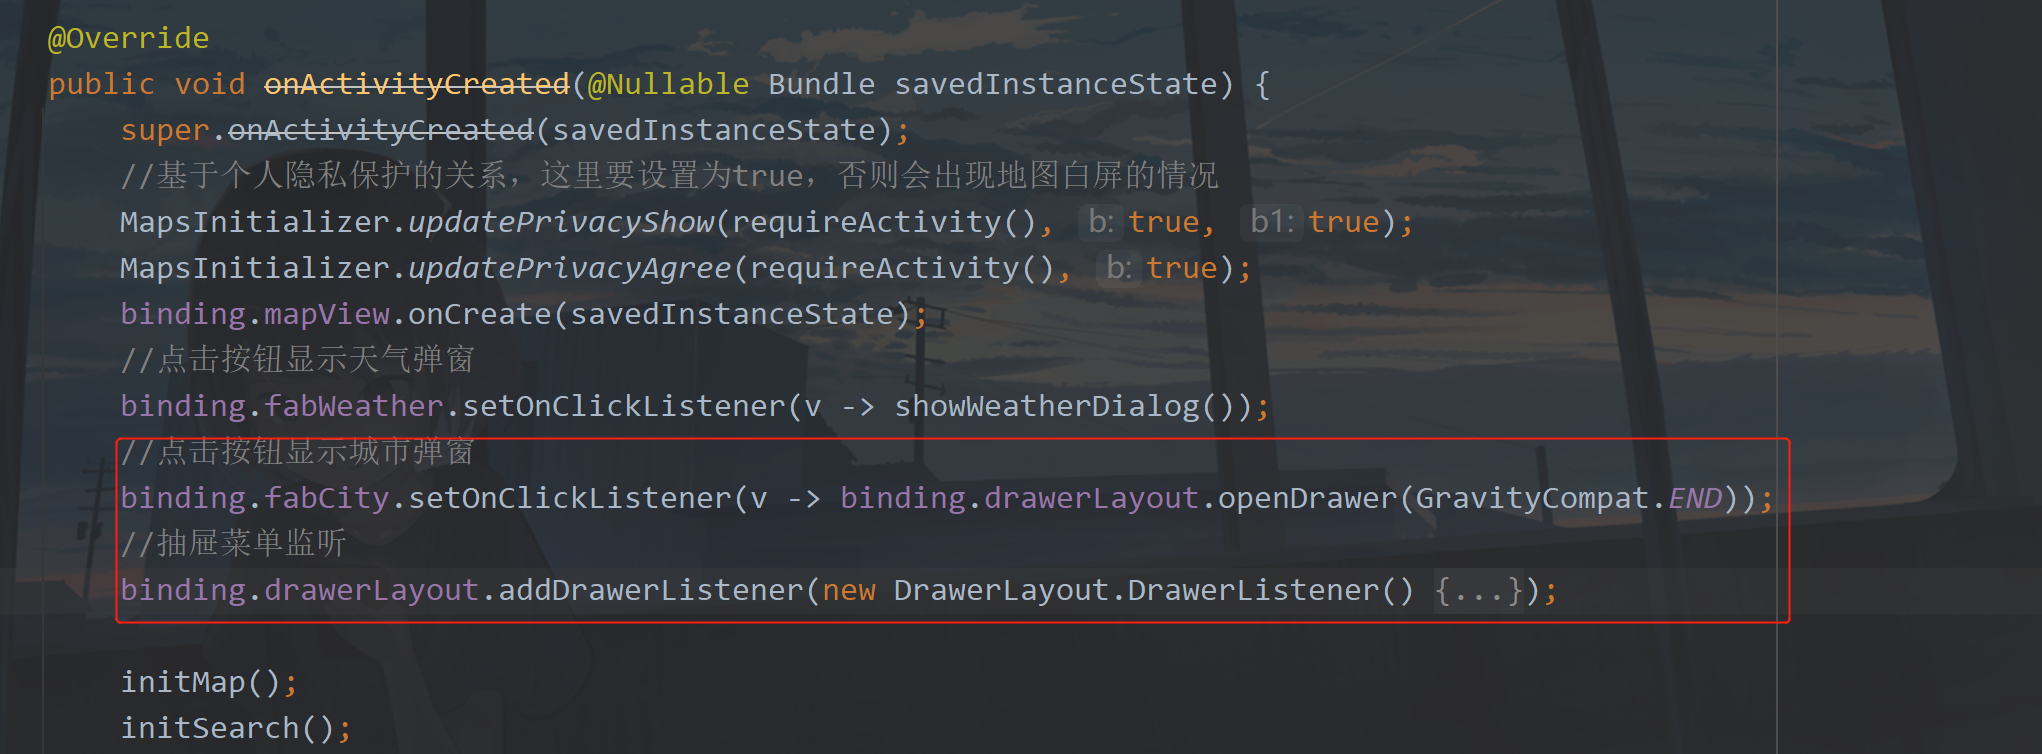
Here, we need to give the button a click event and add the following code in the onActivityCreated method:
		//Click the button to display the city pop-up window
        binding.fabCity.setOnClickListener(v -> binding.drawerLayout.openDrawer(GravityCompat.END));
Click the button here to display the drawer page. The setting here is to open from the right side of the screen. If it is not set, it will open from the left by default, because we set the drawer position on the right side in the layout.
Then there is the monitoring of the drawer. To open and close, you need to control the display and hiding of the floating button. The code is still in the onActivityCreated method, as follows:
		//Drawer menu monitor
        binding.drawerLayout.addDrawerListener(new DrawerLayout.DrawerListener() {
            @Override
            public void onDrawerSlide(@NonNull @NotNull View drawerView, float slideOffset) {

            }

            @Override
            public void onDrawerOpened(@NonNull @NotNull View drawerView) {
                binding.fabCity.hide();
            }

            @Override
            public void onDrawerClosed(@NonNull @NotNull View drawerView) {
                binding.fabCity.show();
            }

            @Override
            public void onDrawerStateChanged(int newState) {

            }
        });
It is clear at a glance that there is not much attention to the addition position, as shown in the following figure:
Let's run it, as shown in the figure below:

3, Administrative region search
now that the drawer menu is available, the following is to get the data. Where to get it? Gaode provides us with an API. First, create an object and add the following code in MapFragment:
	//Area search
    private DistrictSearch districtSearch;
    //Region search query
    private DistrictSearchQuery districtSearchQuery;
Then, because it is the same search, we can put it in the same place as the geocoding search, and add the following code in the initSearch method:
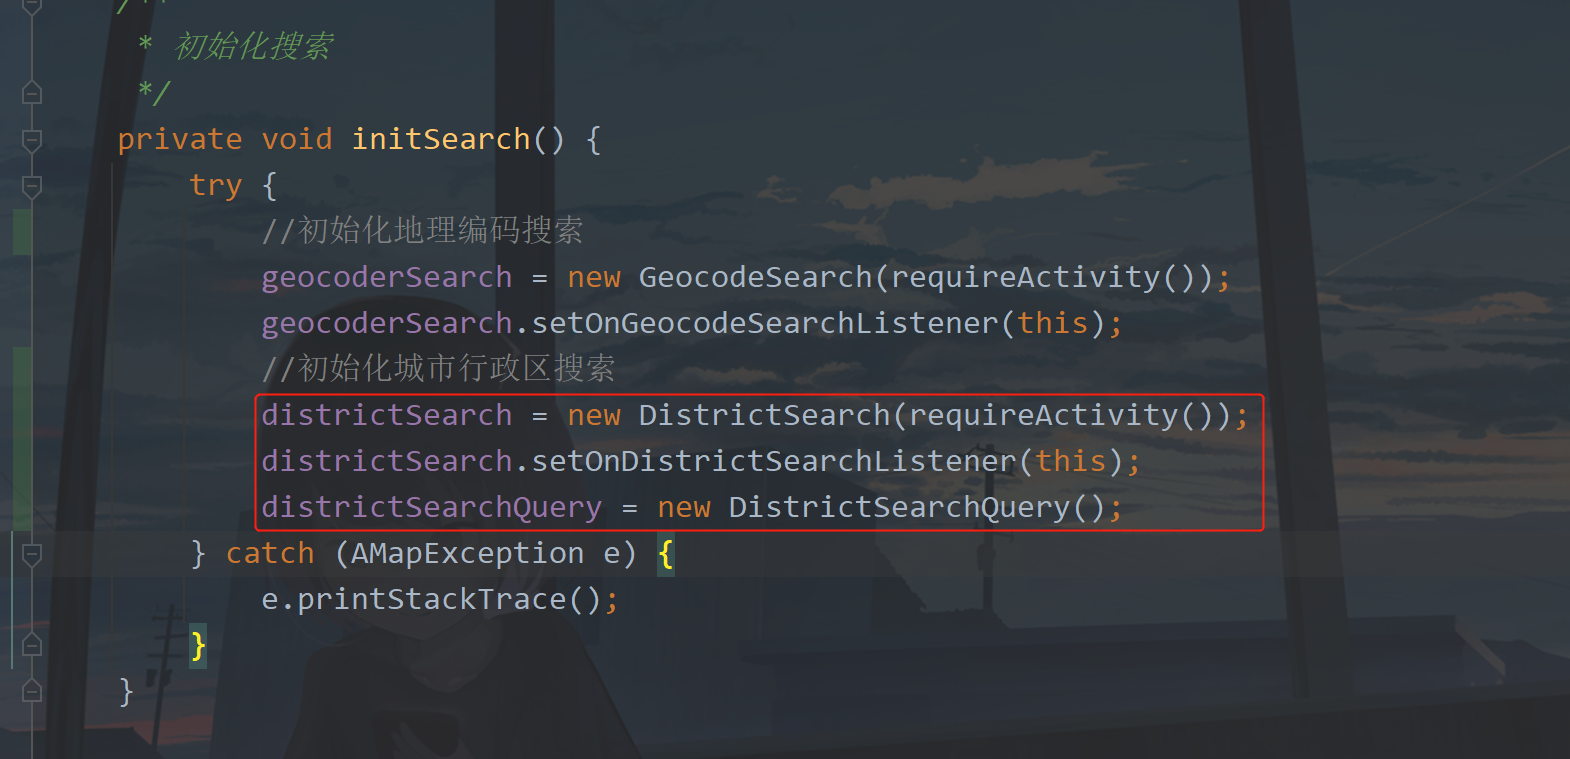
Note that this here means that the current page needs to implement the callback of listening, as shown in the following figure:

Then implement the method:
	/**
     * Administrative region search return
     *
     * @param districtResult search result
     */
    @Override
    public void onDistrictSearched(DistrictResult districtResult) {

    }
The callback here will return the search results. Let's test it. Write a method to start the region search. The code is as follows:
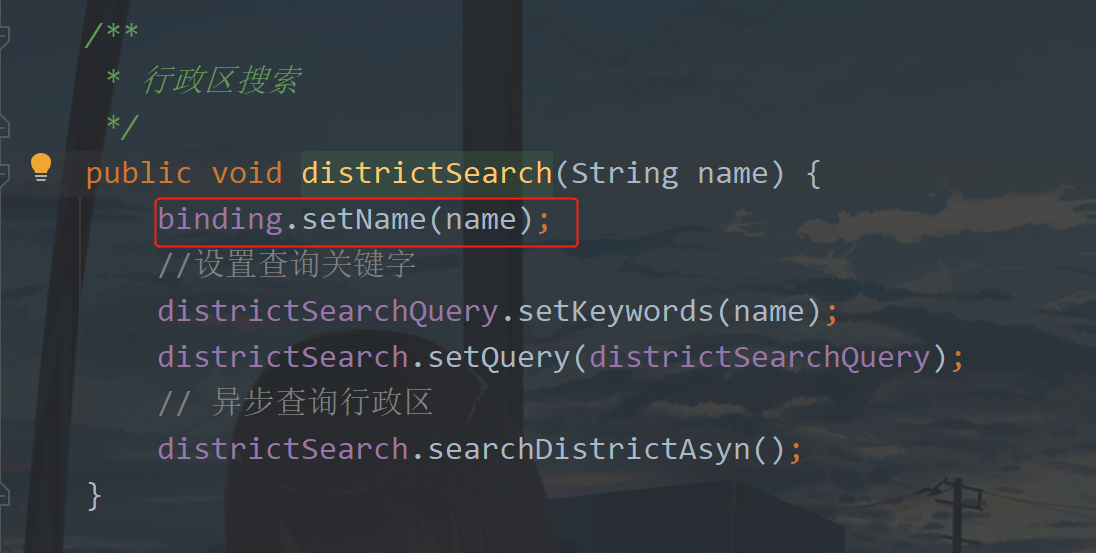
	/**
     * Administrative region search
     */
    public void districtSearch(String name) {
        //Set query keyword
        districtSearchQuery.setKeywords(name);
        districtSearch.setQuery(districtSearchQuery);
        // Asynchronous query Administrative Region
        districtSearch.searchDistrictAsyn();
    }
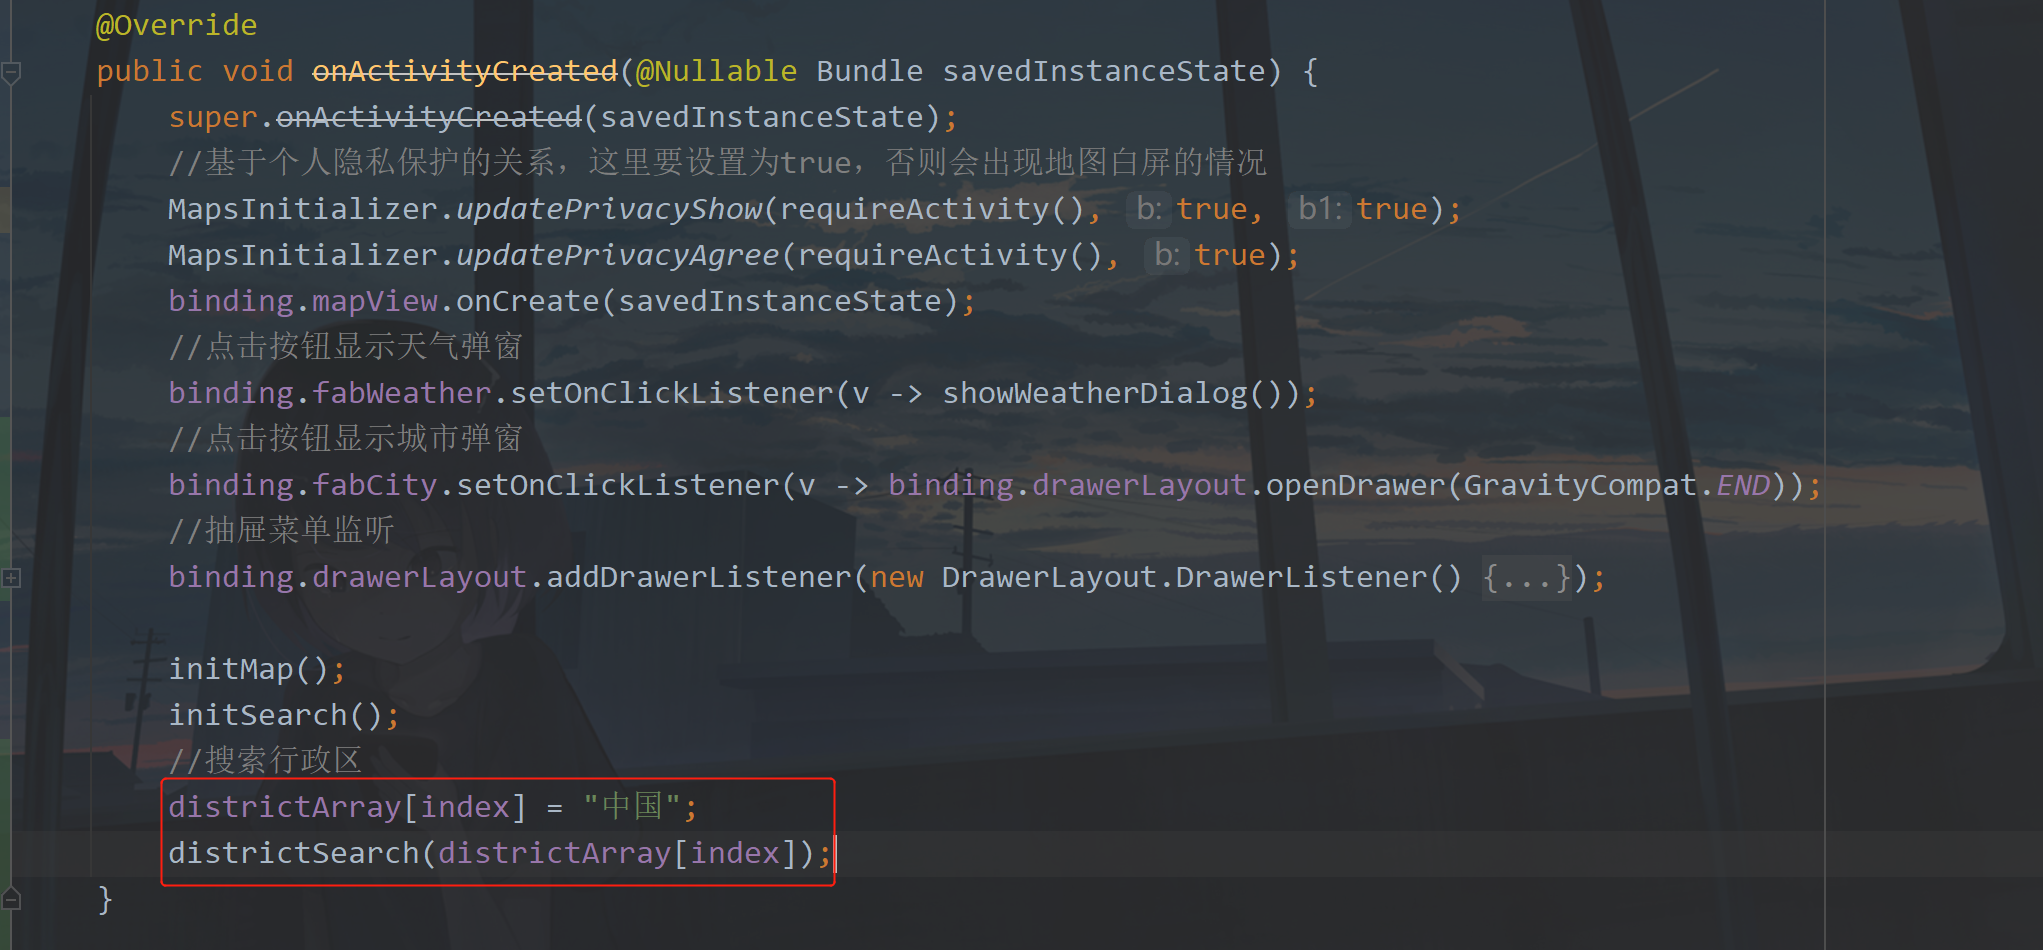
Through this method, we can start to query. For example, we can query the number of provinces, cities and administrative regions in China at the beginning and create variables:
	//Array subscript
    private int index = 0;
    //Administrative Region array
    private final String[] districtArray = new String[5];
Then we print the data returned from the area to see what it looks like. Modify the code in onDistrictSearched as follows:
	/**
     * Administrative region search return
     *
     * @param districtResult search result
     */
    @Override
    public void onDistrictSearched(DistrictResult districtResult) {
        if (districtResult != null) {
            if (districtResult.getAMapException().getErrorCode() == AMapException.CODE_AMAP_SUCCESS) {
                final List<String> nameList = new ArrayList<>();

                List<DistrictItem> subDistrict1 = districtResult.getDistrict().get(0).getSubDistrict();
                for (int i = 0; i < subDistrict1.size(); i++) {
                    String name = subDistrict1.get(i).getName();
                    nameList.add(name);
                }
                Log.e(TAG, "onDistrictSearched: " + subDistrict1.size());
                for (DistrictItem districtItem : subDistrict1) {
                    Log.e(TAG, "onDistrictSearched: "+districtItem.getName());
                }
            } else {
                showMsg(districtResult.getAMapException().getErrorCode() + "");
            }
        }
    }
After running, you can see the data printed on the console as long as you switch to the map, as shown in the following figure:
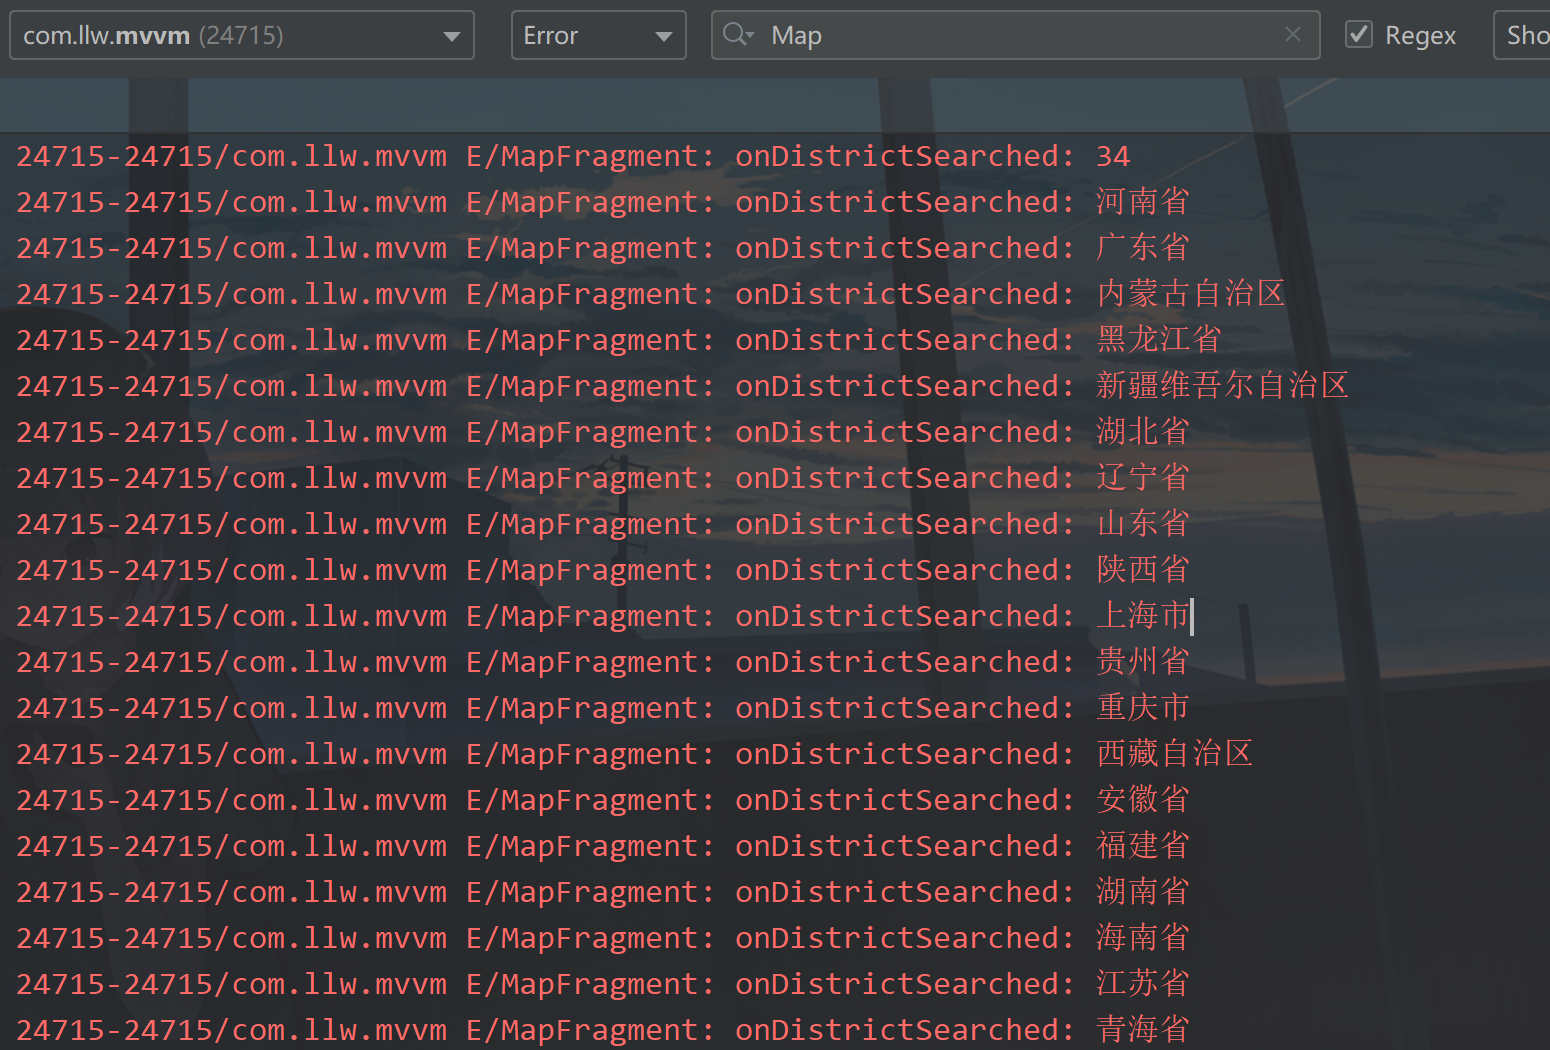
This shows that we have got the provincial administrative regions of the country, so let's show them to the drawer menu.
4, District display
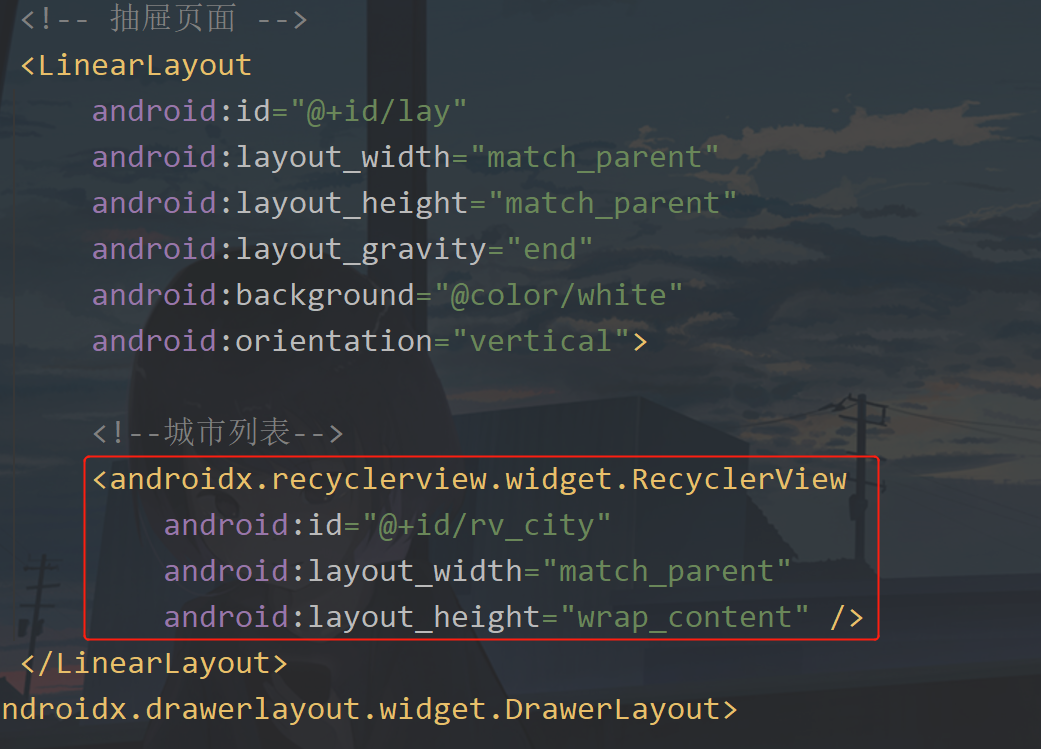
The presentation of data is usually done using lists, which is no exception here, so we need to modify the map_fragment.xml, as shown in the following figure:
If there is a list, there will be an adapter. If there is an adapter, there will be an item layout. First create an item layout and create an item under layout_ city. XML, the code is as follows:
<?xml version="1.0" encoding="utf-8"?>
<layout xmlns:android="http://schemas.android.com/apk/res/android">

    <data>
        <variable
            name="cityName"
            type="String" />
    </data>

    <TextView
        android:id="@+id/tv_name"
        android:layout_width="match_parent"
        android:foreground="?selectableItemBackground"
        android:layout_height="wrap_content"
        android:background="@drawable/shape_line_black"
        android:gravity="center"
        android:text="@{cityName}"
        android:padding="12dp"
        android:textColor="@color/black" />
</layout>
Shape here_ line_ black. XML is an underscore. Create it under drawable. The code is as follows:
<?xml version="1.0" encoding="utf-8"?>
<layer-list xmlns:android="http://schemas.android.com/apk/res/android" >

    <item
        android:left="-2dp"
        android:right="-2dp"
        android:top="-2dp">
        <shape>
            <solid android:color="#00FFFFFF" />

            <stroke
                android:width="1px"
                android:color="@color/black" />
        </shape>
    </item>

</layer-list>
Then create a new CityAdapter under the adapter package. The code is as follows:
public class CityAdapter extends BaseQuickAdapter<String, BaseDataBindingHolder<ItemCityBinding>> {

    public CityAdapter(@Nullable List<String> data) {
        super(R.layout.item_city, data);
    }

    @Override
    protected void convert(@NotNull BaseDataBindingHolder<ItemCityBinding> bindingHolder, String s) {
        ItemCityBinding binding = bindingHolder.getDataBinding();
        if (binding != null) {
            binding.setCityName(s);
            binding.executePendingBindings();
        }
    }
}
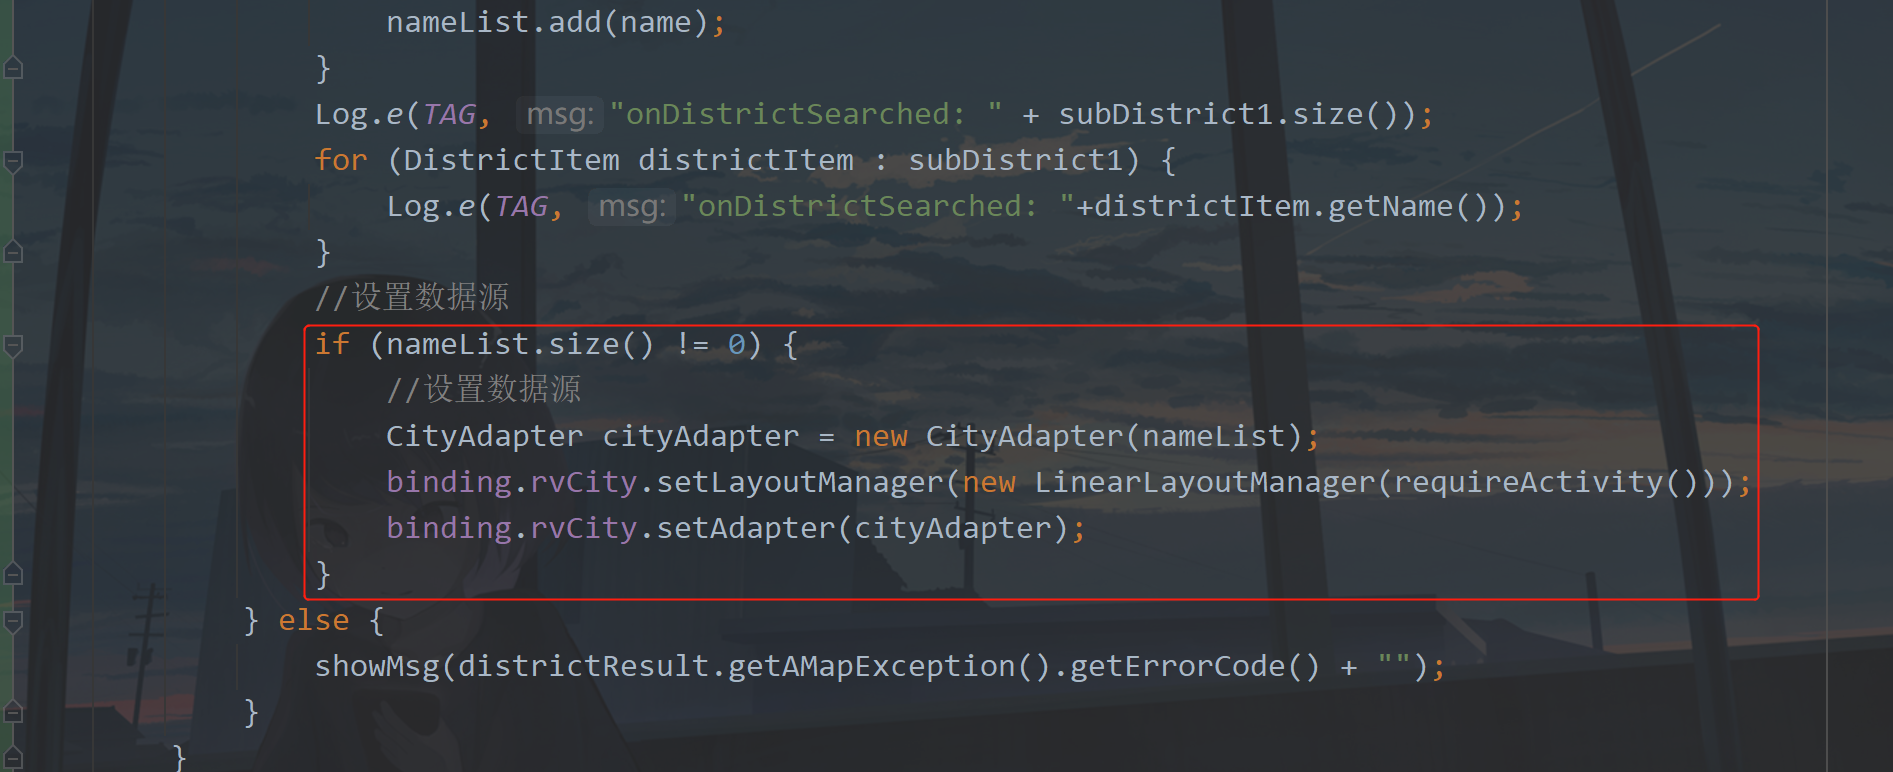
Then go back to the onDistrictSearched method in MapFragment and add the following code:
				//set up data sources
                if (nameList.size() != 0) {
                    //set up data sources
                    CityAdapter cityAdapter = new CityAdapter(nameList);
                    binding.rvCity.setLayoutManager(new LinearLayoutManager(requireActivity()));
                    binding.rvCity.setAdapter(cityAdapter);
                }
Now you can run it. The effect diagram is as follows:
Is it simple? Now I have to think about another question. What if I want to check the cities under this province? Very simply, we can add a click event to the list item. When clicking, we can search the administrative region of a province.
① Provincial and Municipal Federation
Still modify the code in the onDistrictSearched method, as shown in the following figure:
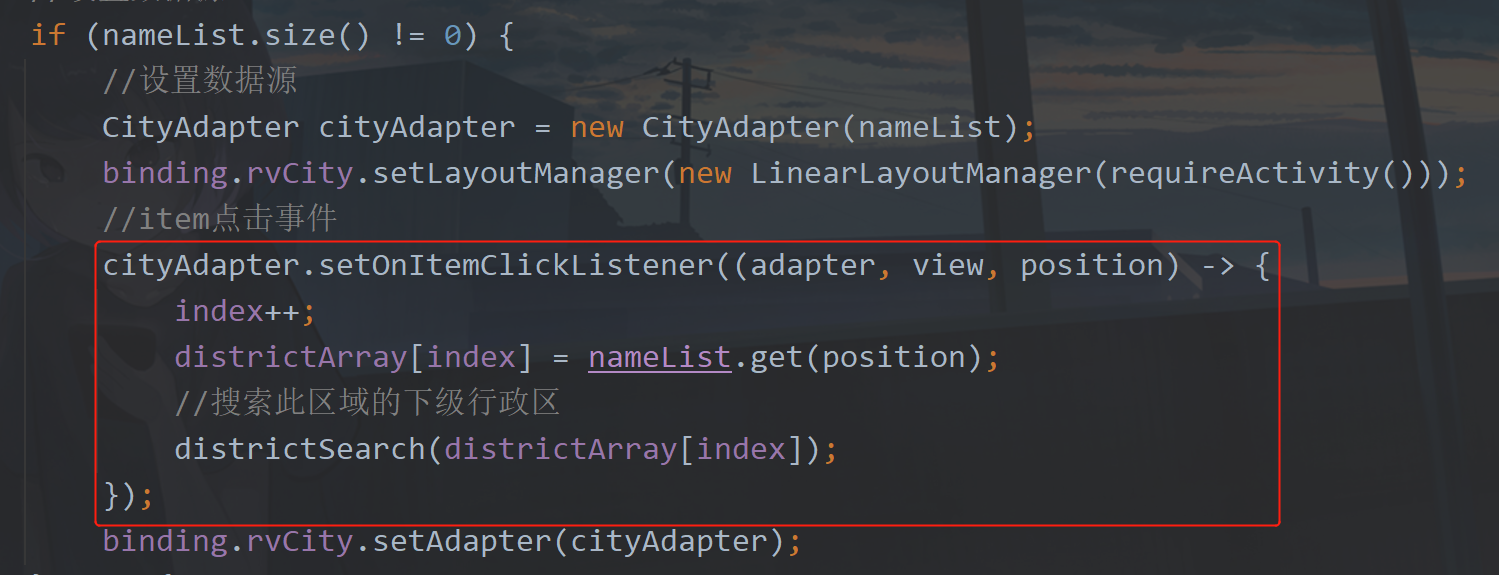
A click event is added here, and then in the click event, the first is index + +; This is index=1, and then assign a value to the administrative region array, then the array at this time is ["China", "Guangdong Province], and then call the districtSearch method to search. In this way, it is connected. Let's run it below.
In this way, the view of provincial, urban and town is realized. At this time, you will think, if I want to return to the upper level, for example, I am now in Shenzhen, I want to return to the upper level and see other cities in Guangdong Province. To tell you the truth, I also want to see it. So how to achieve it? It's also very simple.
② Return to the previous level
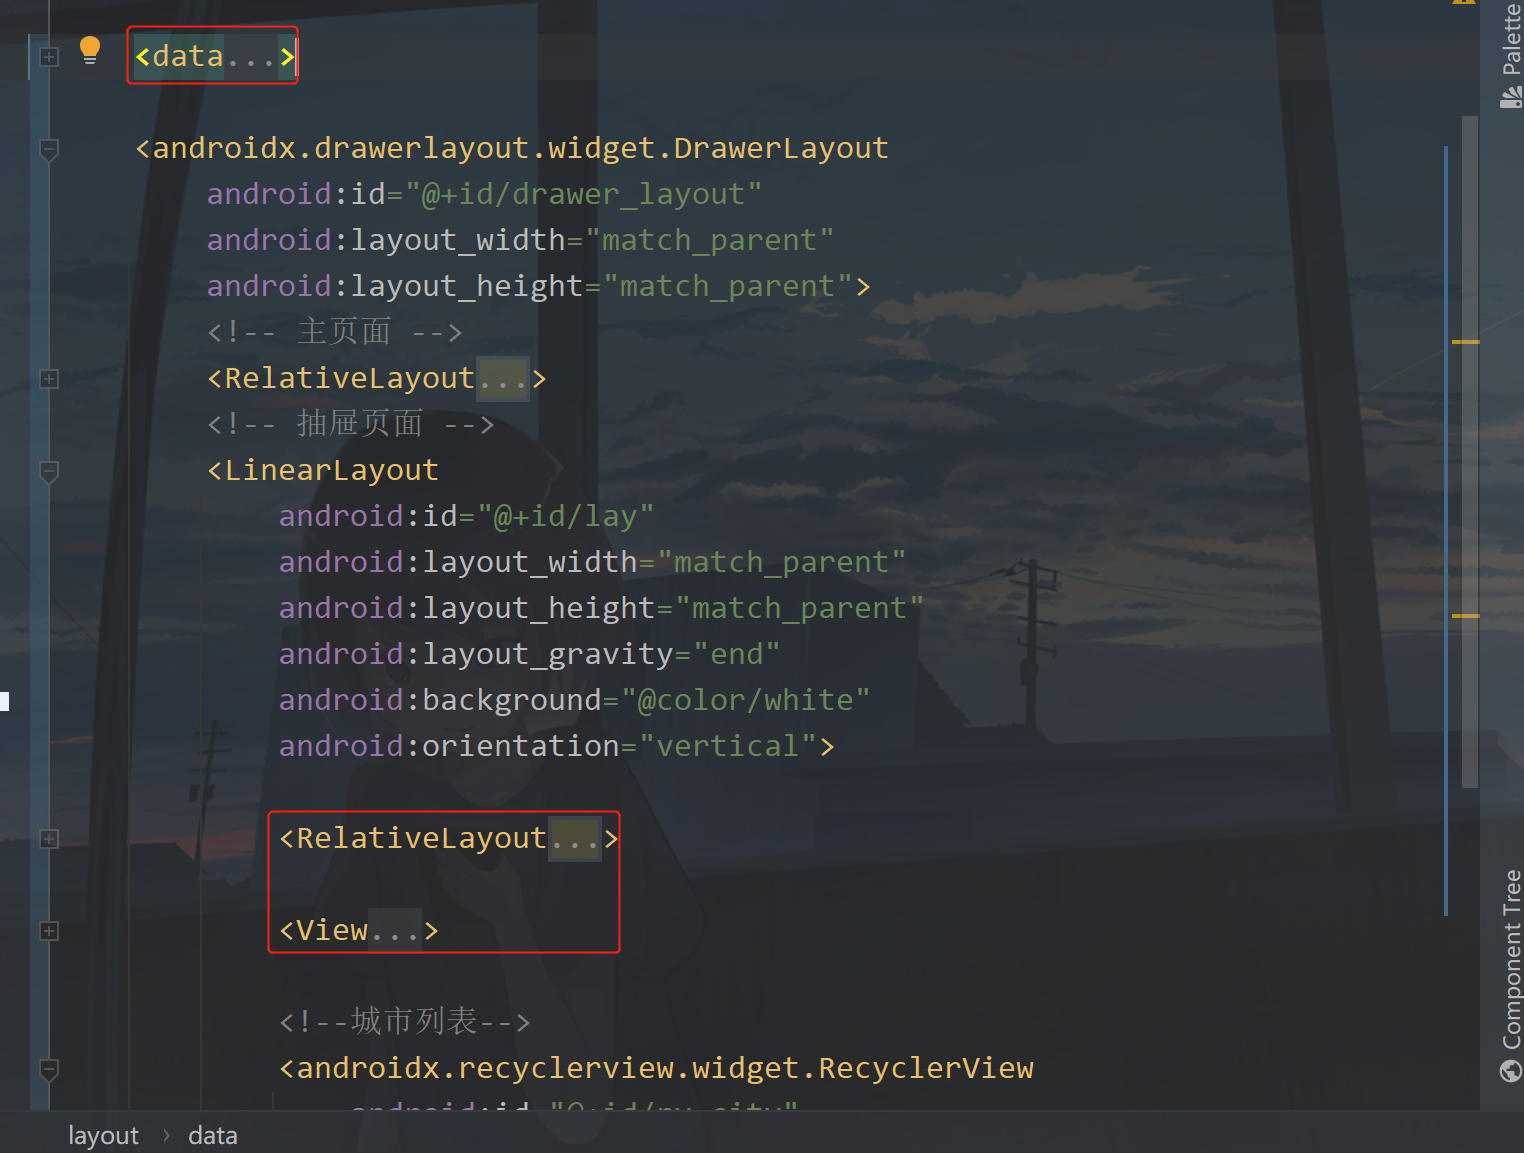
Here we need to modify the map_fragment.xml, add the following layout code:
			<RelativeLayout
                android:layout_width="match_parent"
                android:layout_height="?attr/actionBarSize">
                <!--Return Icon-->
                <ImageView
                    android:id="@+id/iv_back"
                    android:padding="12dp"
                    android:visibility="gone"
                    android:layout_centerVertical="true"
                    android:layout_width="wrap_content"
                    android:layout_height="wrap_content"
                    android:src="@mipmap/ic_back_black" />
                <!--Parent Administrative Region-->
                <TextView
                    android:layout_centerInParent="true"
                    android:id="@+id/tv_title"
                    android:layout_width="wrap_content"
                    android:layout_height="wrap_content"
                    android:layout_gravity="center"
                    android:text="@{name}"
                    android:textColor="@color/black"
                    android:textSize="16sp" />
            </RelativeLayout>

            <View
                android:layout_width="match_parent"
                android:layout_height="1dp"
                android:background="@color/black" />
Add a data at the same time
	<data>
        <variable
            name="name"
            type="String" />
    </data>
Add location as shown in the figure below:
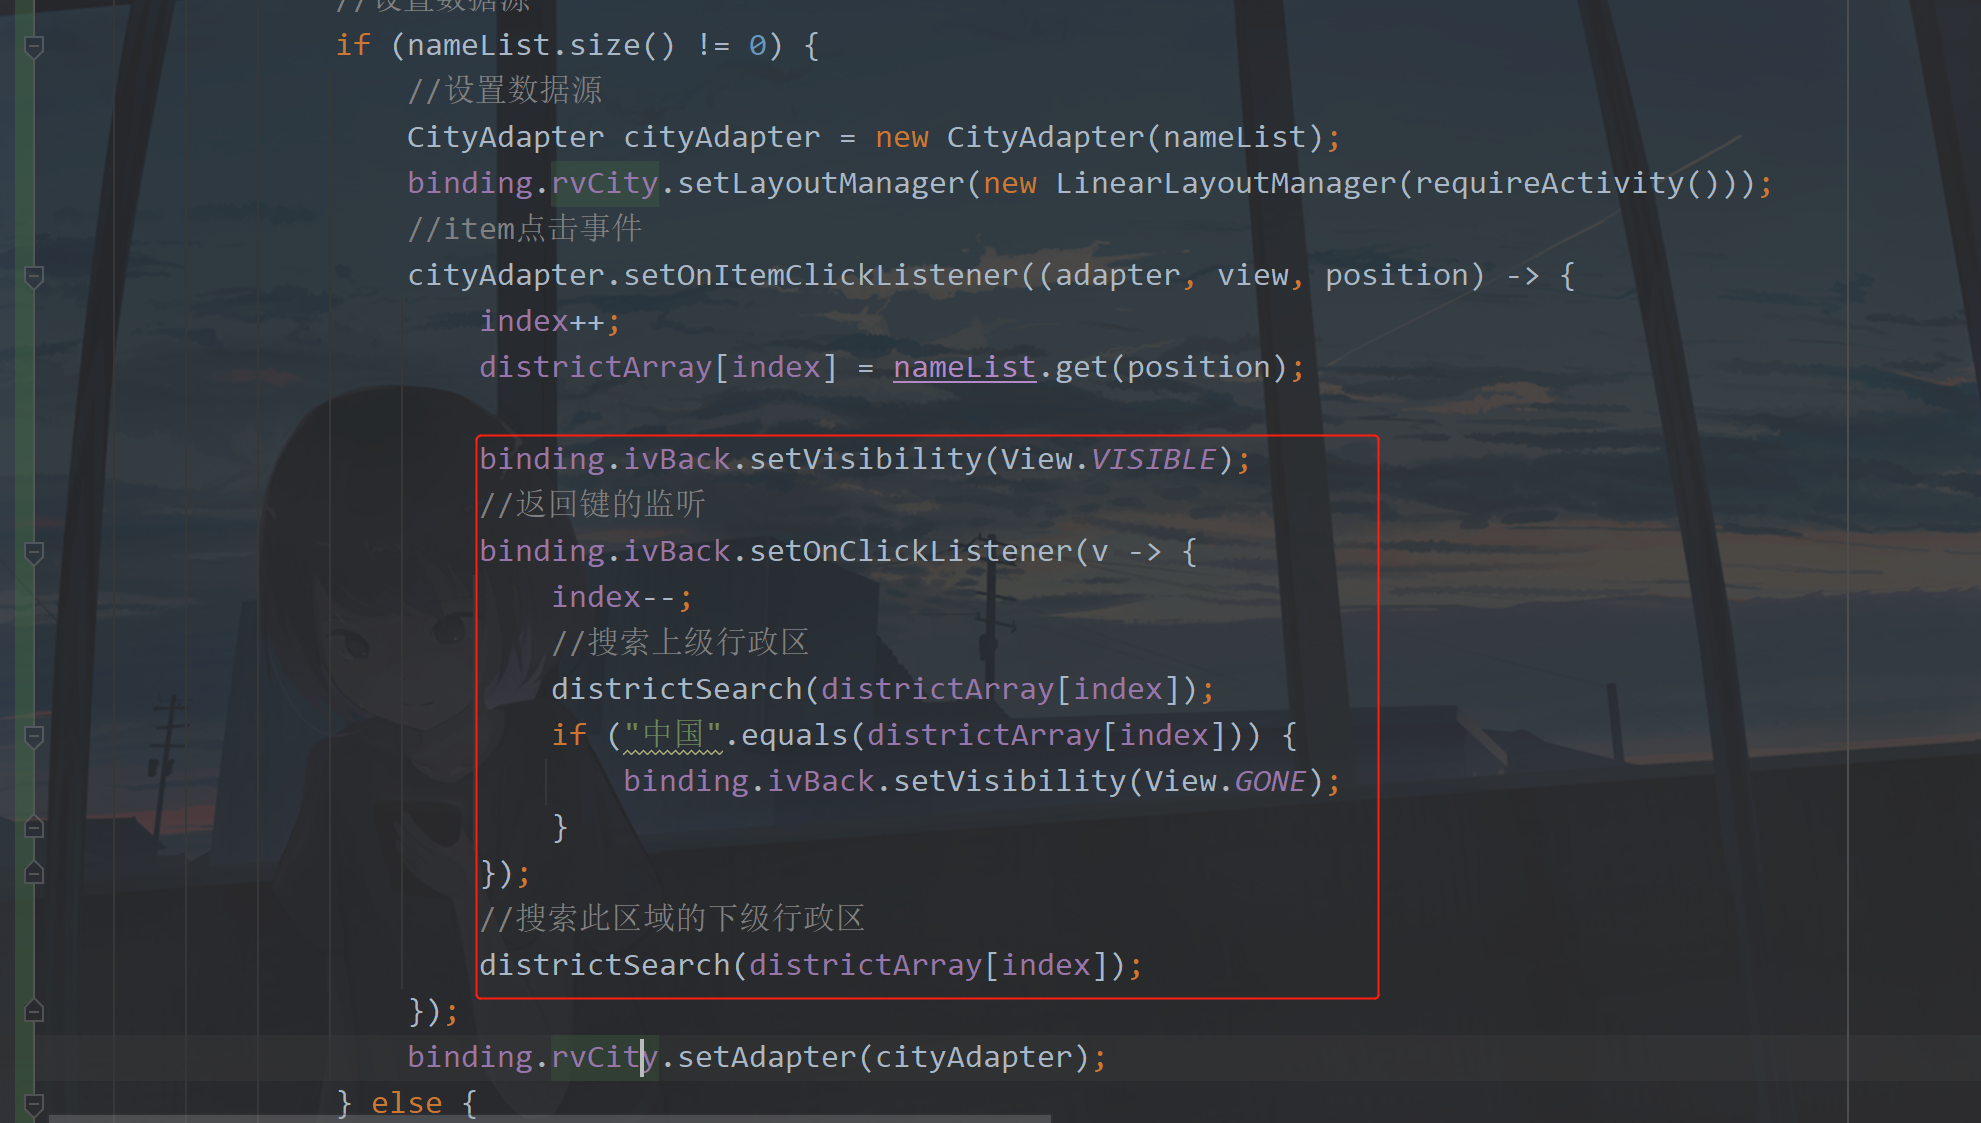
Then go back to the onDistrictSearched method in MapFragment and add the following code:
						binding.ivBack.setVisibility(View.VISIBLE);
                        //Return key listening
                        binding.ivBack.setOnClickListener(v -> {
                            index--;
                            //Search superior administrative region
                            districtSearch(districtArray[index]);
                            if ("China".equals(districtArray[index])) {
                                binding.ivBack.setVisibility(View.GONE);
                            }
                        });
Add location as shown in the figure below:
At the same time, you need to set the title and add a line of code, as shown in the following figure:
Run the following:

The next step is to click a place to obtain the specific longitude and latitude coordinates
5, Address to coordinate
Add a new method in MapFragment. The code is as follows:
/**
* Address to latitude and longitude coordinates
*/
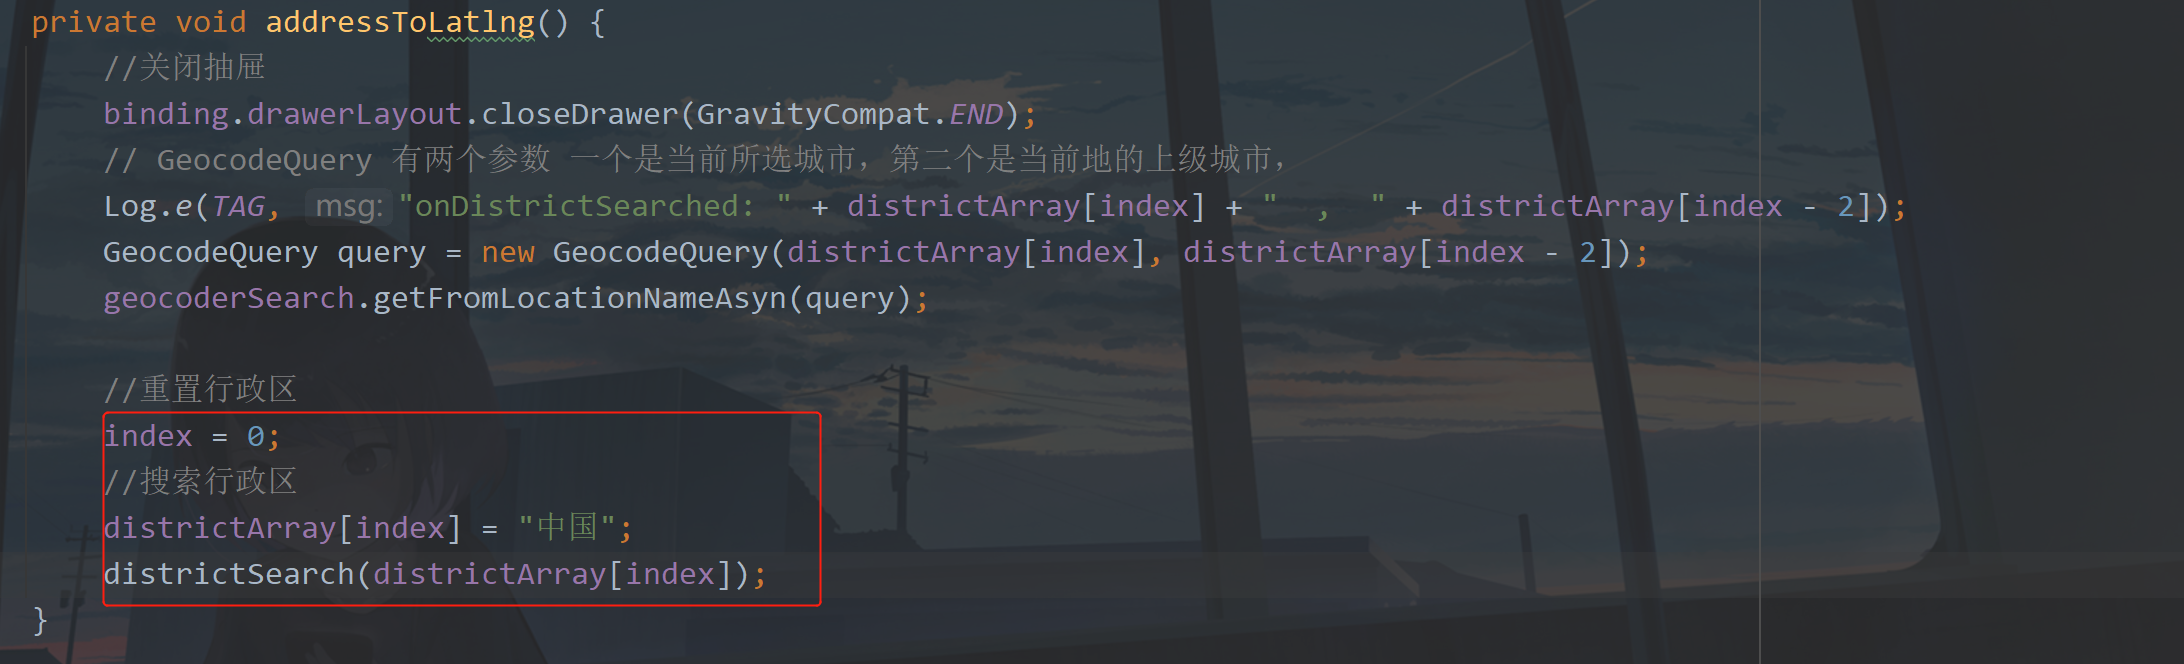
private void addressToLatlng() {
//close drawer
binding.drawerLayout.closeDrawer(GravityCompat.END);
// GeocodeQuery has two parameters: one is the currently selected city, and the other is the parent city of the current location,
Log.e(TAG, "onDistrictSearched: " + districtArray[index] + " , " + districtArray[index - 2]);
GeocodeQuery query = new GeocodeQuery(districtArray[index], districtArray[index - 2]);
geocoderSearch.getFromLocationNameAsyn(query);
}
Here, we use a place name and its superior city to find the specific longitude and latitude location. For example, it is currently Bao'an District. Then we use the superior City Guangdong Province as a reference. getFromLocationNameAsyn will trigger the callback method onGeocodeSearched.
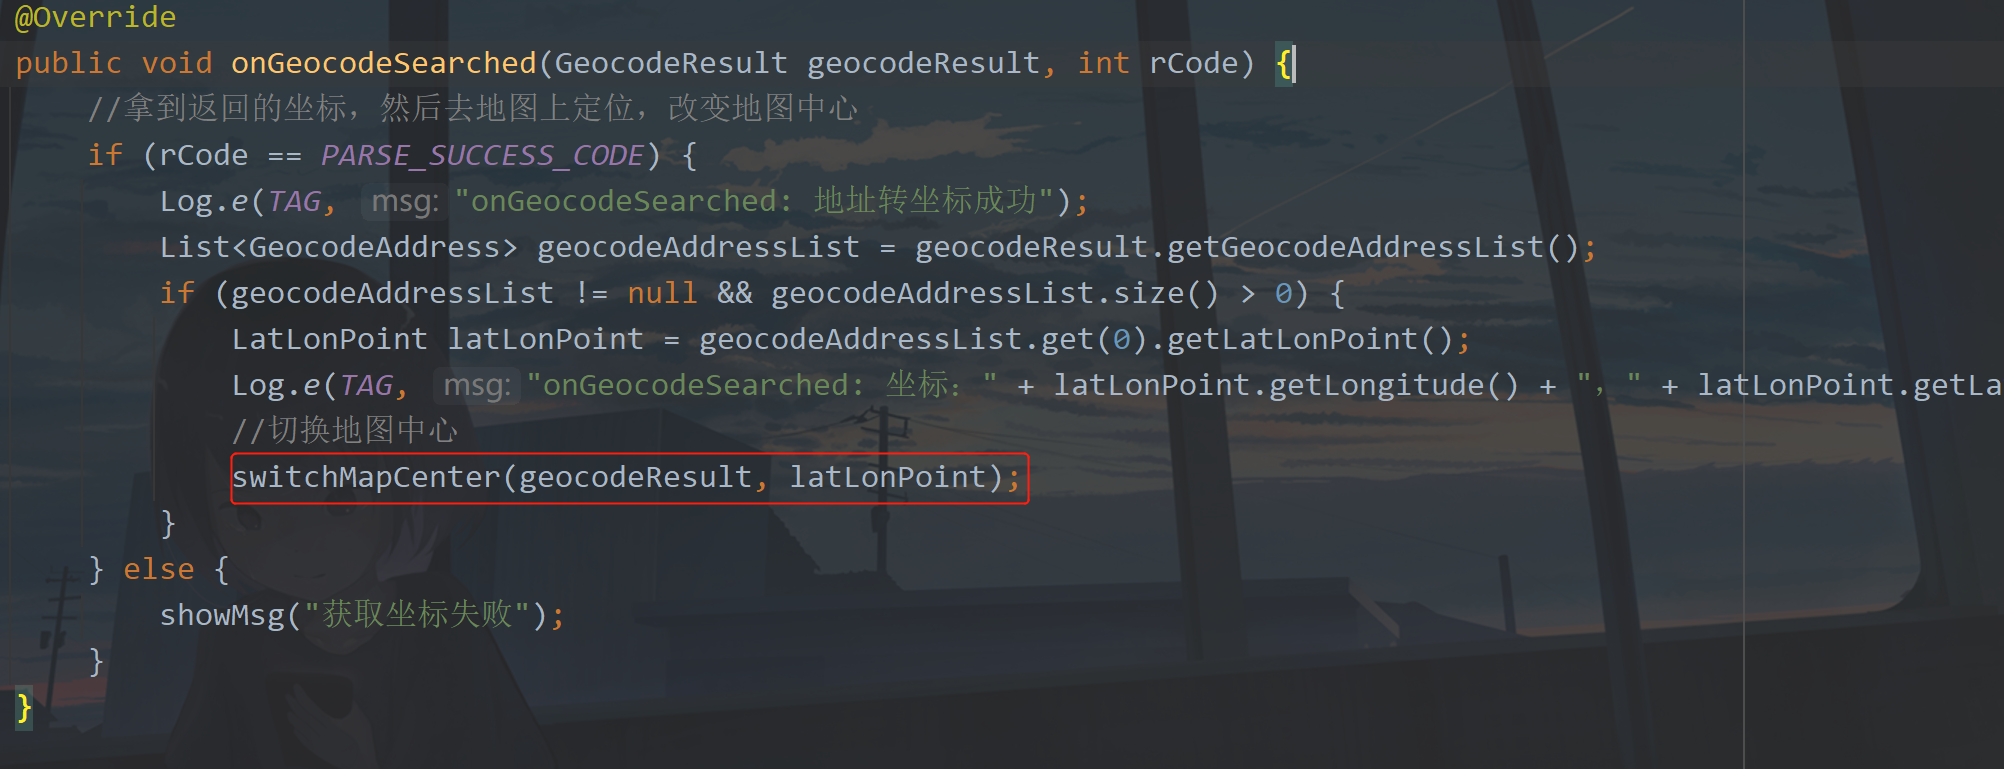
Now print the coordinates in this method.
	/**
     * Address to coordinate
     */
    @Override
    public void onGeocodeSearched(GeocodeResult geocodeResult, int rCode) {
        //Get the returned coordinates, then locate on the map and change the center of the map
        if (rCode == PARSE_SUCCESS_CODE) {
            Log.e(TAG, "onGeocodeSearched: Address coordinate conversion succeeded");
            List<GeocodeAddress> geocodeAddressList = geocodeResult.getGeocodeAddressList();
            if (geocodeAddressList != null && geocodeAddressList.size() > 0) {
                LatLonPoint latLonPoint = geocodeAddressList.get(0).getLatLonPoint();
                Log.e(TAG, "onGeocodeSearched: Coordinates:" + latLonPoint.getLongitude() + "," + latLonPoint.getLatitude());
            }
        } else {
            showMsg("Failed to get coordinates");
        }
Of course, there needs to be a place to call the addressToLatlng method. Of course, the place to call is still in the onDistrictSearched method, as shown in the following figure:
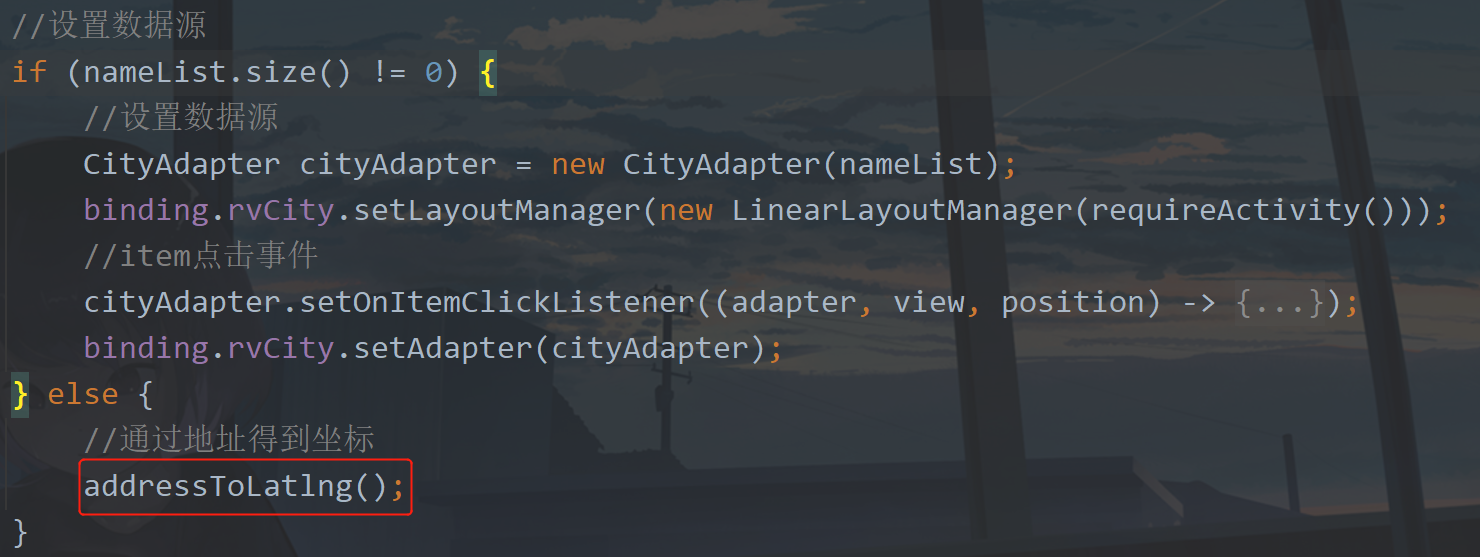
Here, I call the address coordinate conversion method when the size of nameList is 0. Why? Because what does size=0 mean, it means that it has no subordinate administrative region, that is, it has reached the unit of town. Of course, some places are also called streets. Therefore, when you click here, call this method to convert the address coordinates. Let's try what the coordinates are. The cities I tested are Guangdong Province, Shenzhen City, Bao'an District and Shajing street. The longitude and latitude obtained are: coordinates: 113.830294, 22.735361

This shows success. What's the next step? After having the coordinates, I change the center point of the map. Of course, I want to move the map wherever I switch.
6, Switch map Center
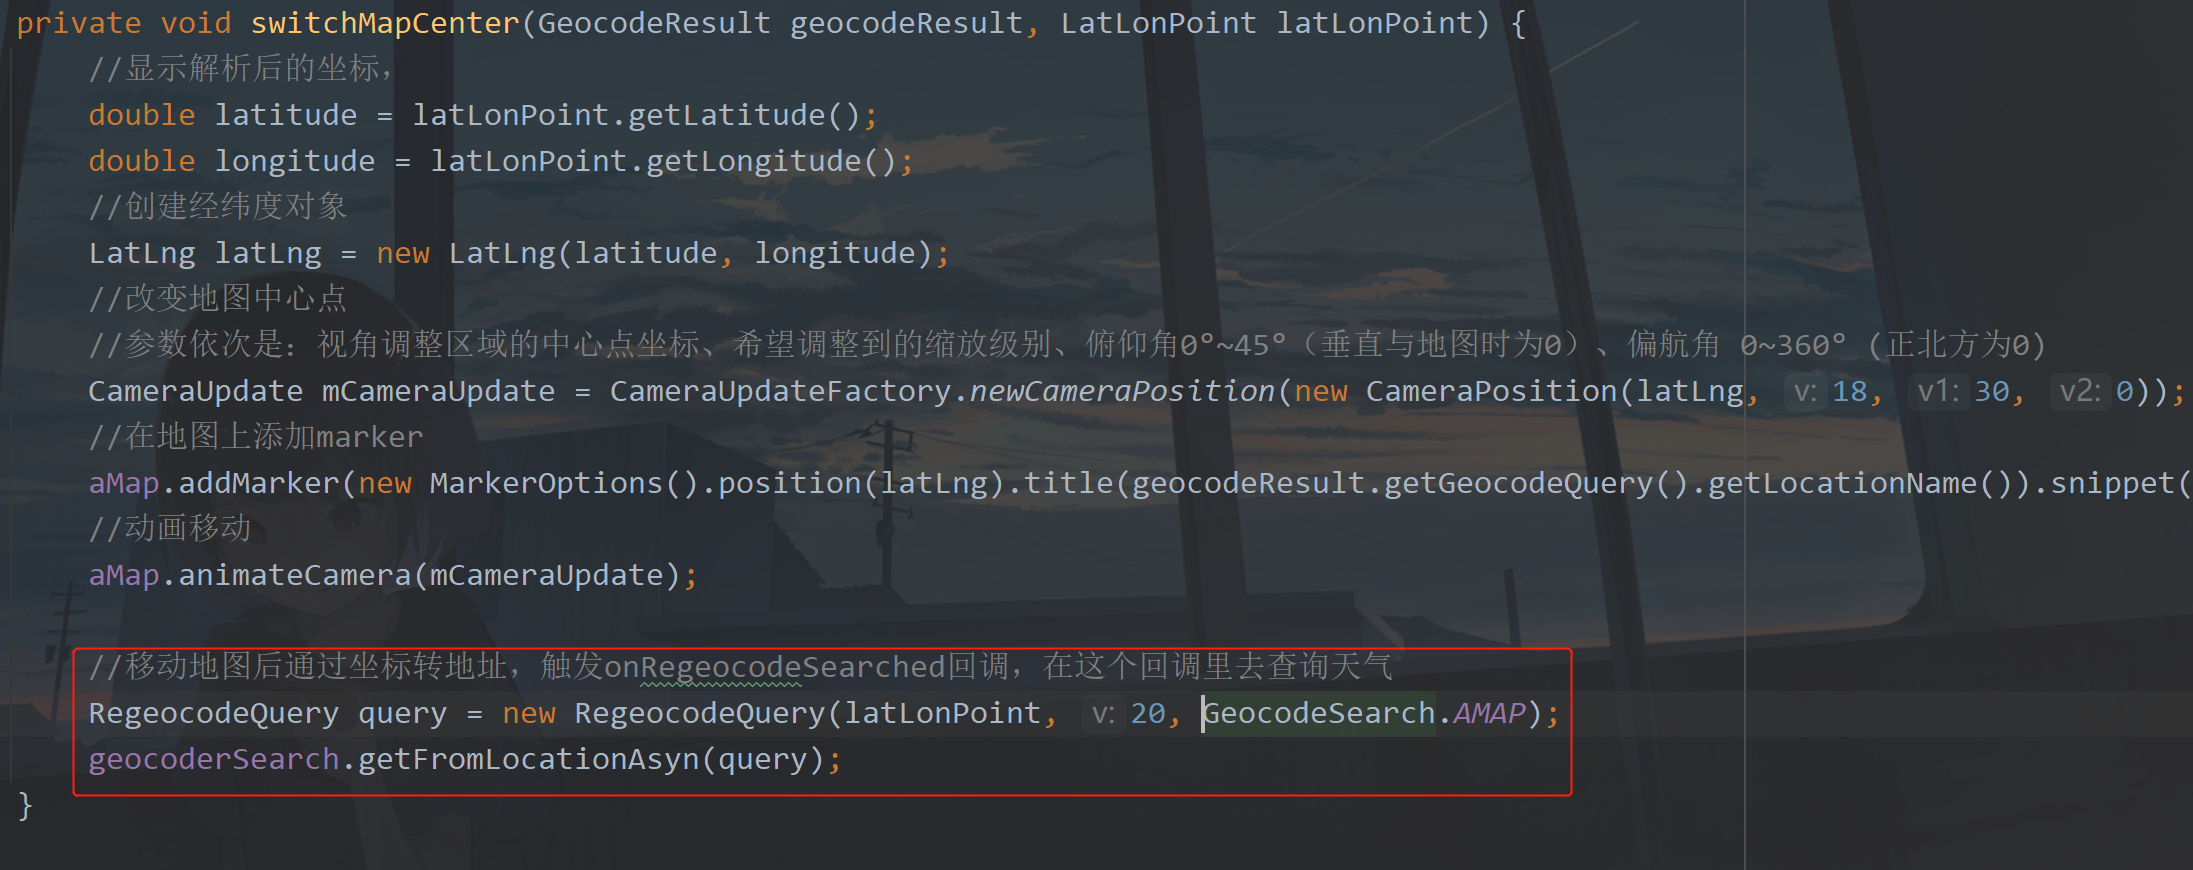
after switching the map center and obtaining the latitude and longitude through the address information, add a new method in the MapFragment. The code is as follows:
	/**
     * Switch map Center
     */
    private void switchMapCenter(GeocodeResult geocodeResult, LatLonPoint latLonPoint) {
        //Display the resolved coordinates,
        double latitude = latLonPoint.getLatitude();
        double longitude = latLonPoint.getLongitude();
        //Create latitude and longitude objects
        LatLng latLng = new LatLng(latitude, longitude);
        //Change map center point
        //The parameters are: the center point coordinates of the viewing angle adjustment area, the zoom level you want to adjust, the pitch angle of 0 ° ~ 45 ° (0 when perpendicular to the map), and the yaw angle of 0 ~ 360 ° (0 when due north)
        CameraUpdate mCameraUpdate = CameraUpdateFactory.newCameraPosition(new CameraPosition(latLng, 18, 30, 0));
        //Add marker on map
        aMap.addMarker(new MarkerOptions().position(latLng).title(geocodeResult.getGeocodeQuery().getLocationName()).snippet("DefaultMarker"));
        //Animation movement
        aMap.animateCamera(mCameraUpdate);
    }
The method called is shown in the following figure
Now you can run it. The effect diagram is as follows:

7, View weather
after map switching, it is also necessary to query the weather of the switched place. Here we need to change the code and add the following code:
		//After the map is moved, the address is transferred through the coordinates to trigger the onRegeocodeSearched callback, where you can query the weather
        RegeocodeQuery query = new RegeocodeQuery(latLonPoint, 20, GeocodeSearch.AMAP);
        geocoderSearch.getFromLocationAsyn(query);
Add location as follows:
Then reset the administrative region array after each city switching. The code is as follows:
		//Reset Administrative Region
        index = 0;
        //Search Administrative Region
        districtArray[index] = "China";
        districtSearch(districtArray[index]);
Add location as follows:
Run the following:

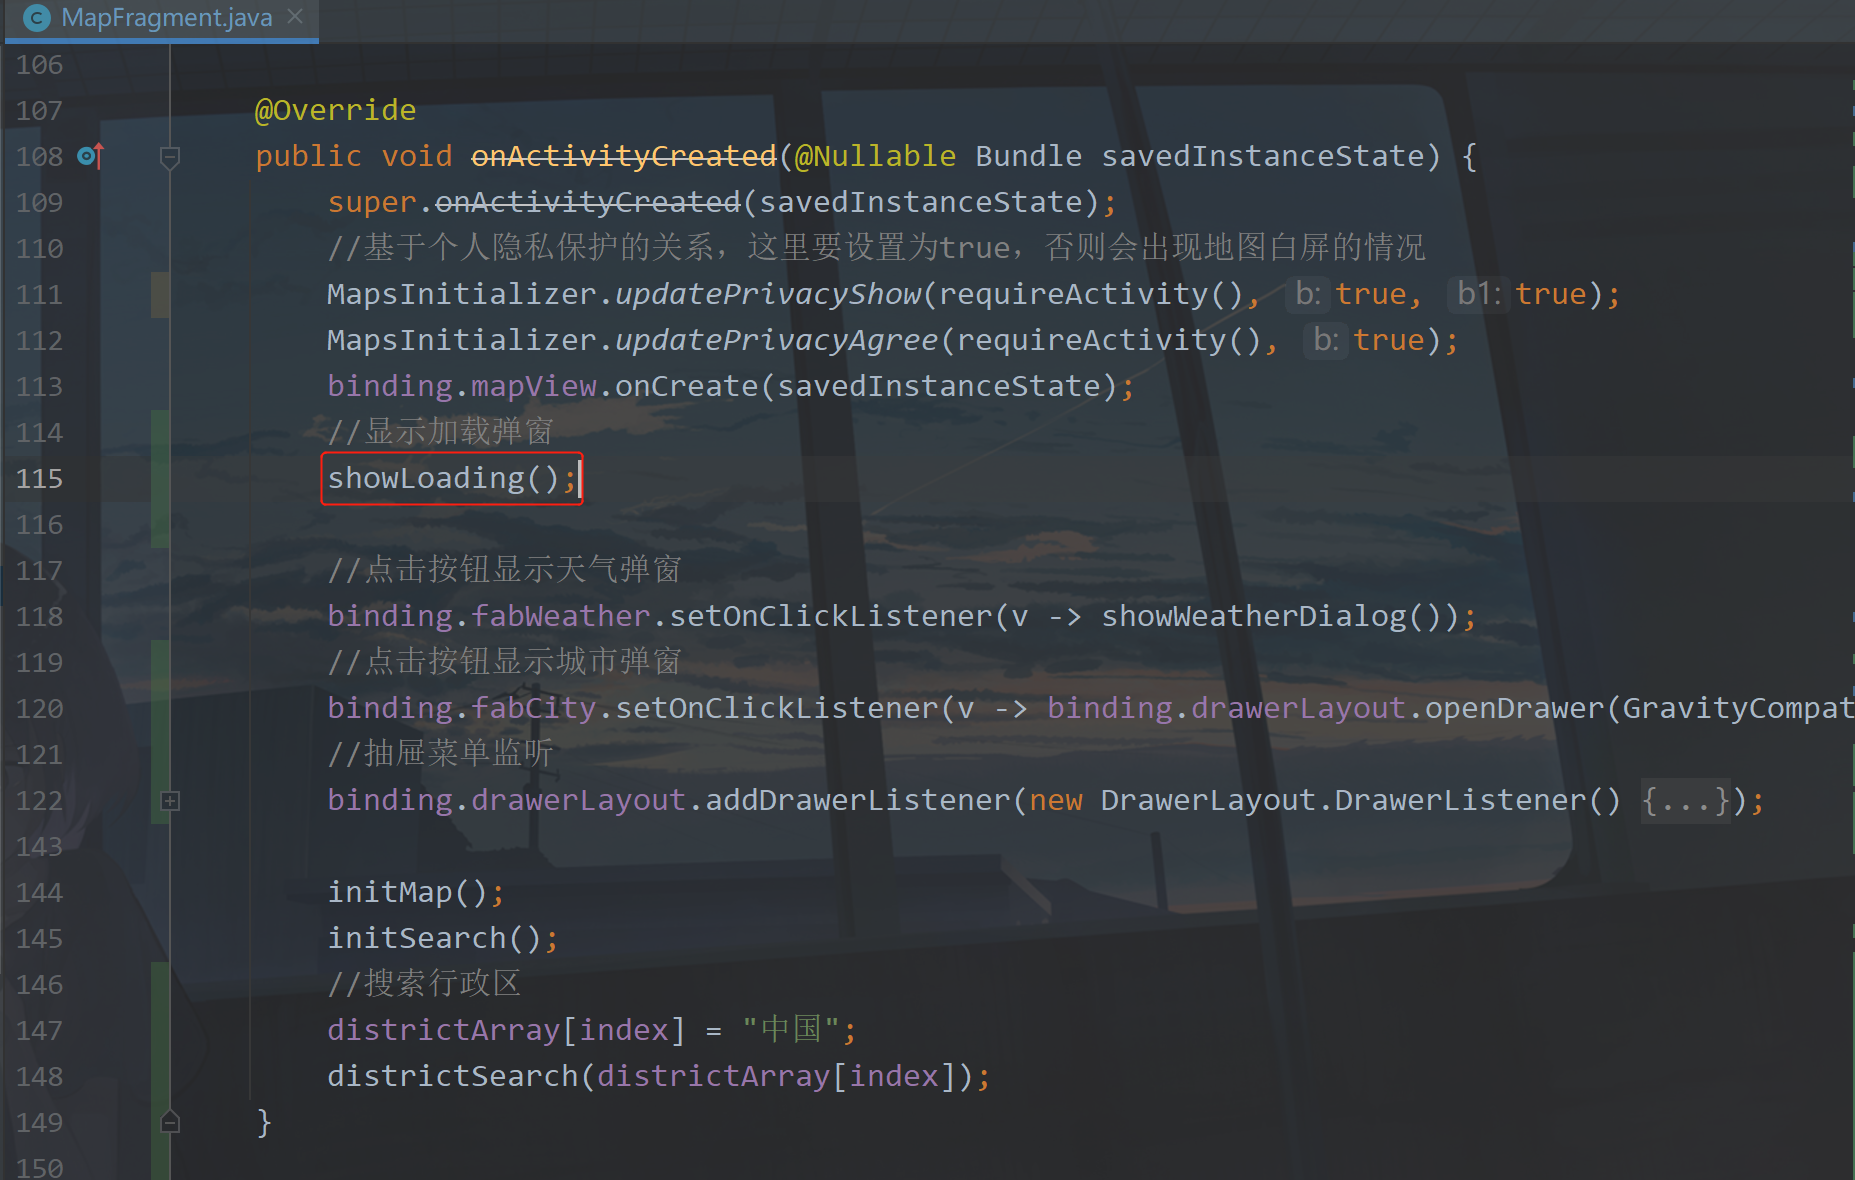
8, Load Popup
a loading pop-up window has been added in BaseActivity before to be used in this MapFragment when the network loading data is not displayed, because the Gaode map API actually obtains data from the network. If the network is bad, the data cannot be loaded. Add the following code in BaseFragment:
	private LoadingDialog loadingDialog;
    /**
     * Show load pop-up
     */
    protected void showLoading() {
        loadingDialog = new LoadingDialog(context);
        loadingDialog.show();
    }

    /**
     * Show load pop-up
     *
     * @param isClose true Click the pop-up window in other areas to close, false does not close.
     */
    protected void showLoading(boolean isClose) {
        loadingDialog = new LoadingDialog(context, isClose);
    }

    /**
     * Hide load Popup
     */
    protected void dismissLoading() {
        if (loadingDialog != null) {
            loadingDialog.dismiss();
        }
    }
Then it is used in MapFragment. The first is to display
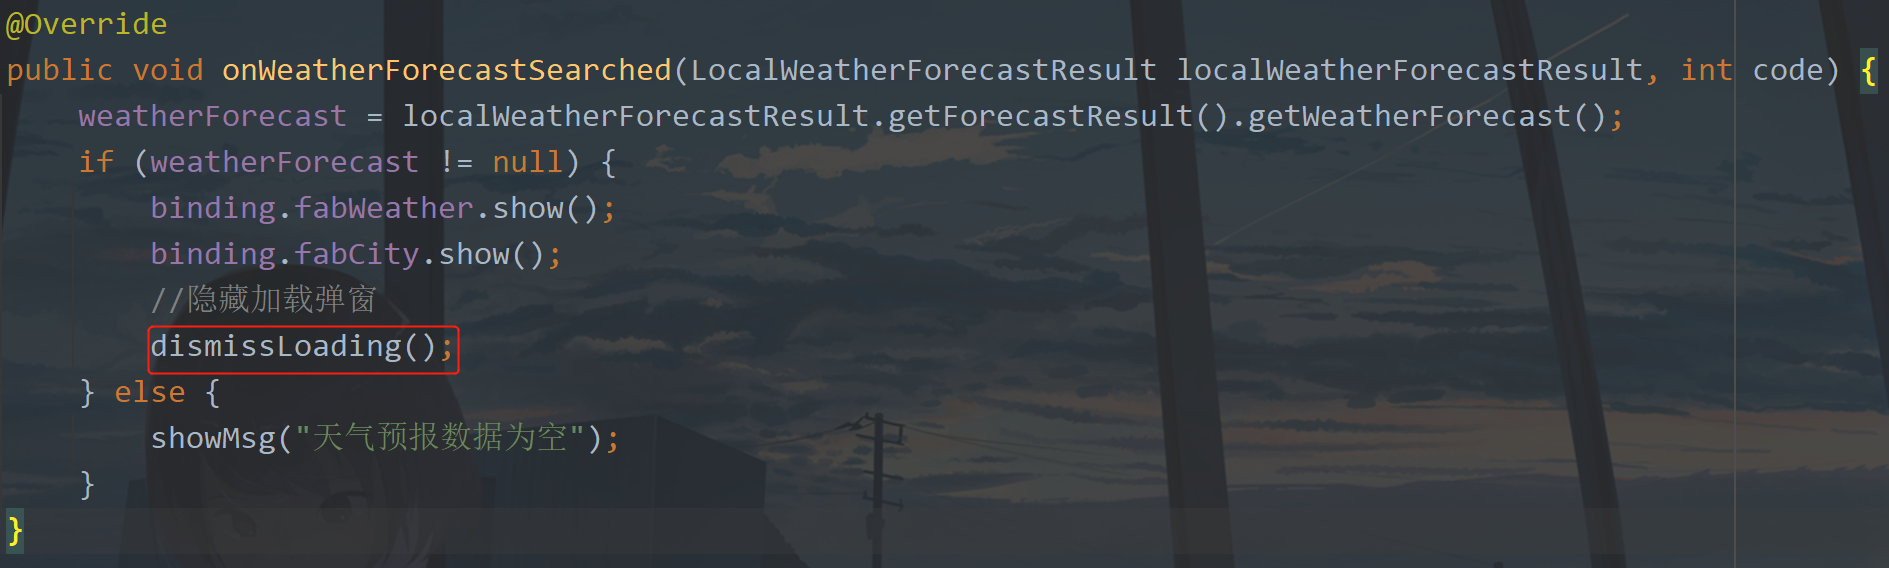
Then hide
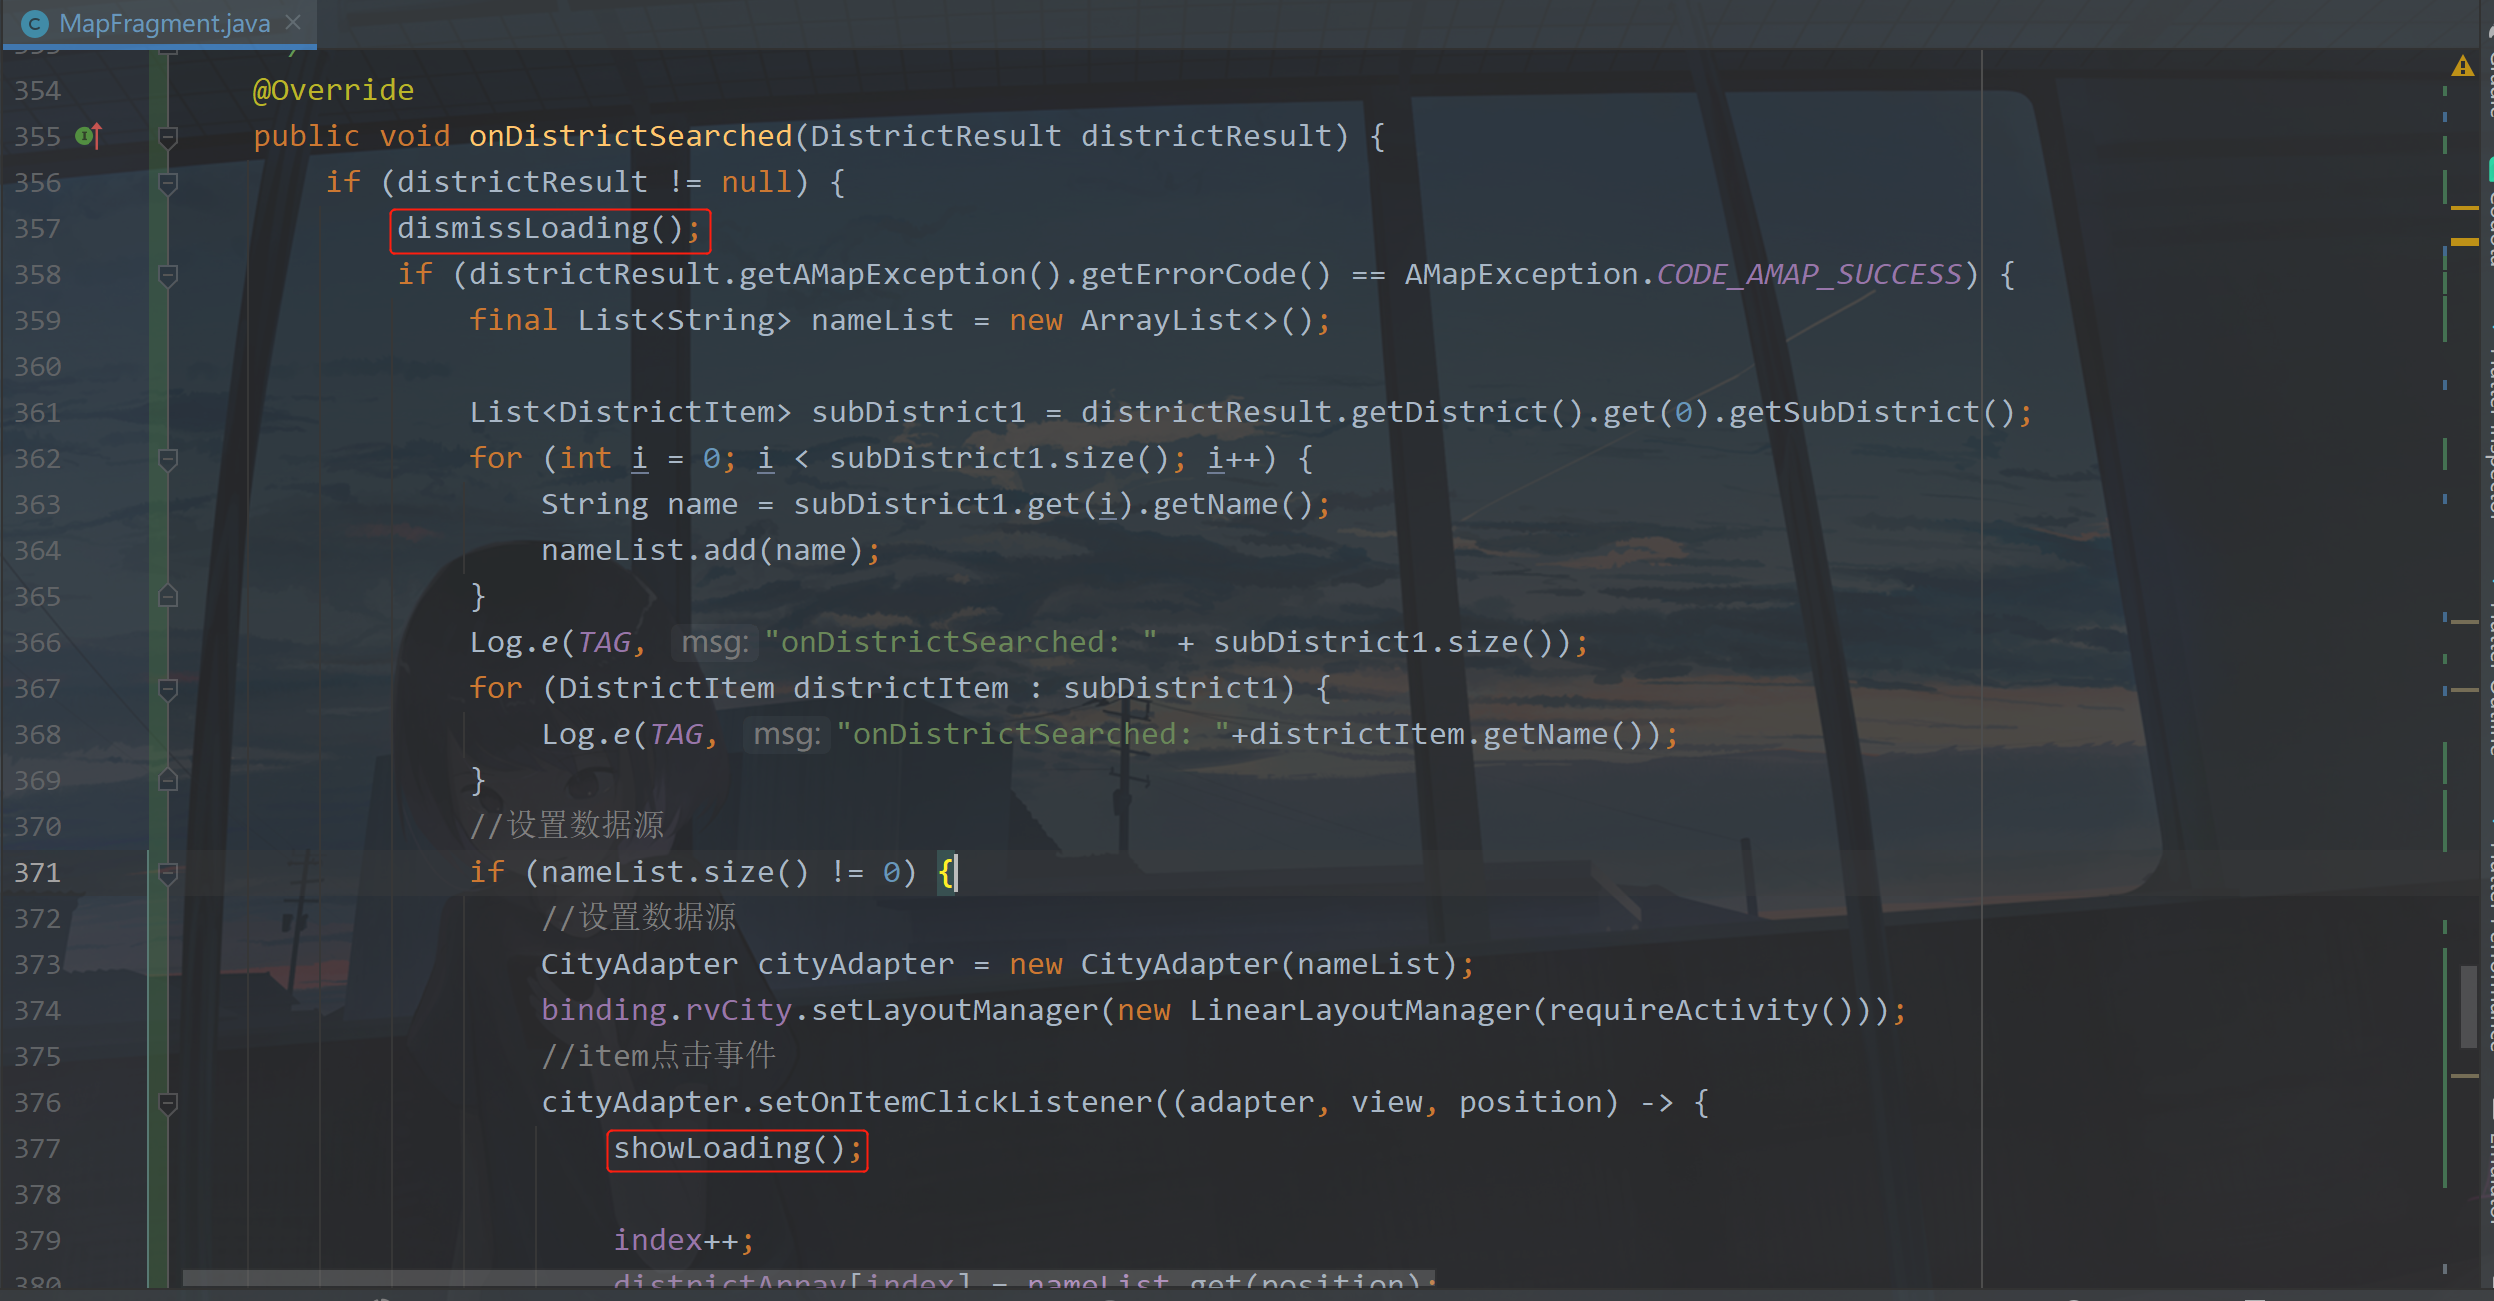
Then it shows and hides the loading pop-up window when switching administrative regions
Finally, close the drawer and display the loading pop-up window
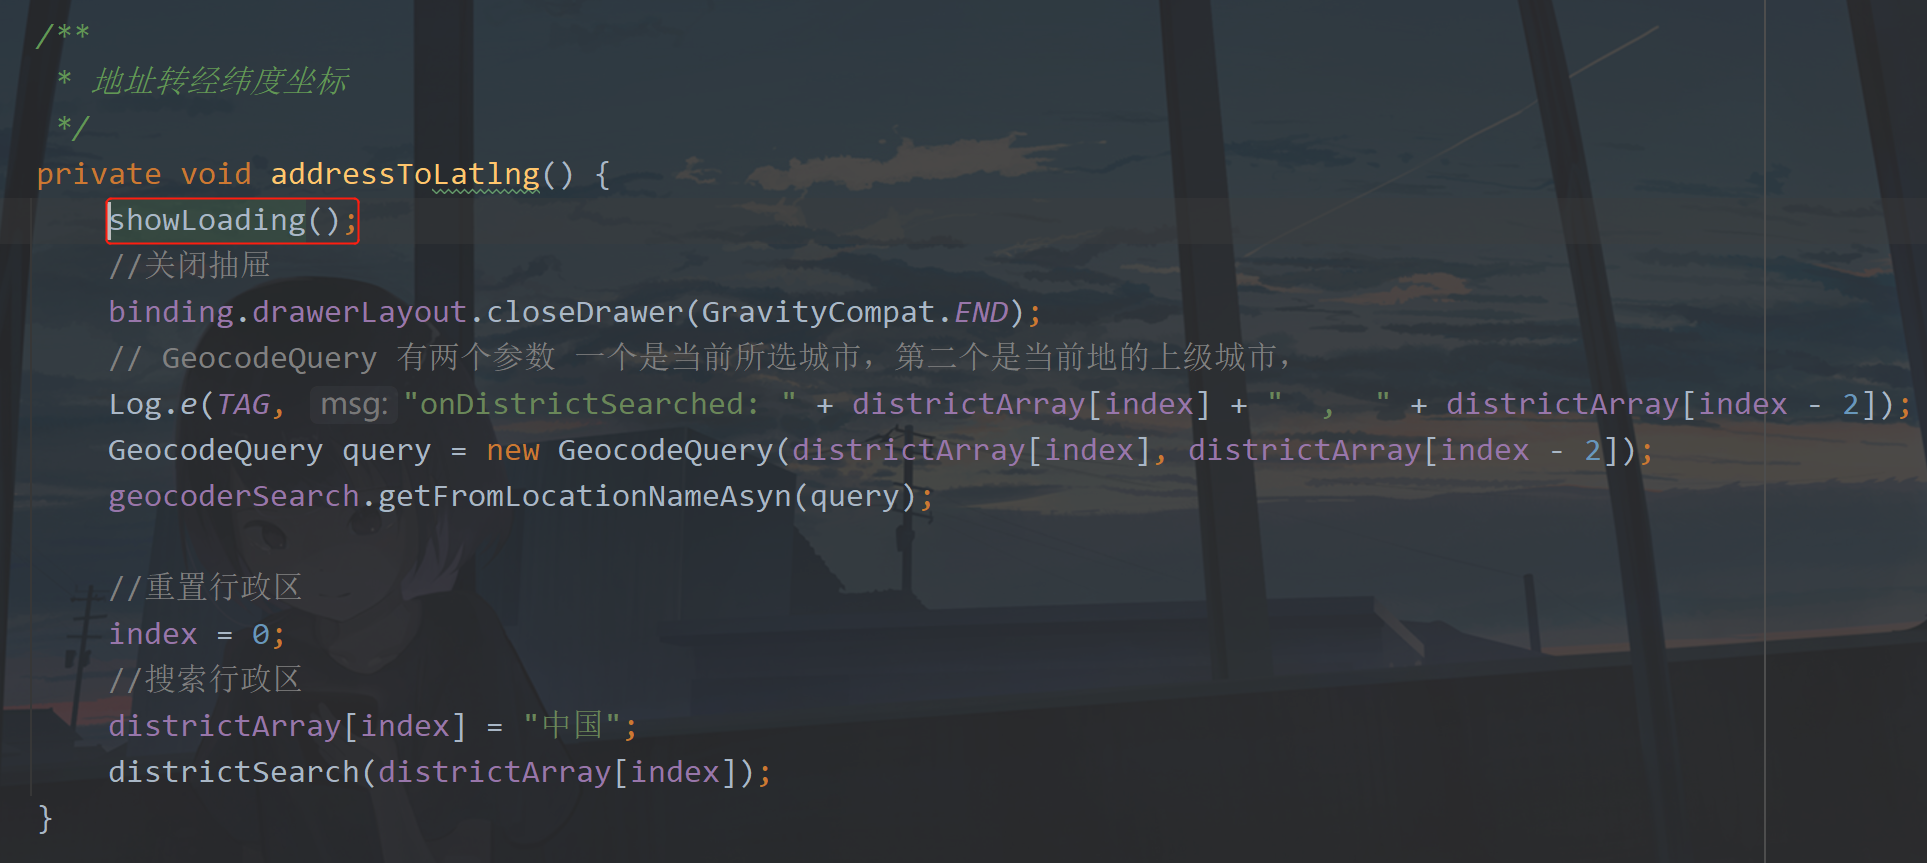
Run it again. The code is as follows:

Well, this article is written here. Mountains are high and rivers are long. I'll see you later~
9, Source code
GitHub: MVVM-Demo
CSDN: MVVMDemo_9.rar