1, Two wordy words
It's not Christmas. Watching everyone say how to make a Christmas tree, I think, you can only sprinkle it on the computer if you don't turn it on. You can't see it if you don't turn it on. You can't give it to the object. In case the object doesn't play with the computer, right.
But Christmas is coming again. It must be arranged, high and low~
So it occurred to me that don't Santa still have a hat? This doesn't give the object a Christmas hat.
Ah, this... This color is not right

Oh, no, Christmas hats. We should be red
Then I'll give this to you

Ordinary people are PS batch drawings. We are different. As technicians, we have to write our own programs. Isn't this more interesting than P diagram?
Today, let's explore using Python to automatically add Christmas hats to girlfriend photos~
what? Just want software? But it's a real punishment. Let's turn to the end and talk about how to package software that can be used by adults. I'll put the packaged software at the end. After taking it, remember to praise it. After praising it, it's good for your waist, legs and kidney. Your girlfriend loves you more~
2, Process ideas
Since we want to make a software, we must first write the interface to operate.
Then prepare a picture of your girlfriend and a Christmas hat~
What? No girlfriend? emmmm…
Then use your brother's, hehe~
To put the hat on your girlfriend, you must first recognize her facial features, and then put the hat on your girlfriend.
That's about it~
We mainly make images → interface development → package exe executable files, with face recognition~
3, Prepare these
This is the module and package we need to use. The installation method is written in the notes.
cv2     	   # pip install opencv-python
dlib   		   # pip install dlib
numpy          # pip install pandas
PySimpleGUI    # pip install PySimpleGui
os             # It comes with the system and does not need to be installed
Install the module slowly, add the domestic image source, and compare with my following methods.
When installing this dlib module, please note that direct installation is unsuccessful, otherwise it is very difficult. Firstly, it lacks two packages Cmake and CBoot, so it needs to be installed first.
Install Cmake
# Normal download method
pip install cmake
# Use the image source download method, which is faster.
pip install cmake -i https://mirror.baidu.com/pypi/simple
Install CBoot
# Normal download method
pip install boost
# Using the image source download method
pip install boost -i https://mirror.baidu.com/pypi/simple
Then install dlib. Generally speaking, it can be installed normally, but it may fail. I list them here.
# 1. Direct pip installation
pip install dlib

# 2. Install using mirror source
pip install dlib -i https://mirror.baidu.com/pypi/simple

# 3. Use the downloaded whl package installation
# Where the downloaded files are placed, you can operate in your folder in the command prompt window. For example, if you download them to Disk C, use the C: command to enter Disk C and then execute them.
# python3.7 package installation
pip install dlib-19.17.99-cp37-cp37m-win_amd64.whl
# python3.8 package installation
pip install dlib-19.19.0-cp38-cp38-win_amd64.whl
# Scan the code collar on the left side of the two bags, and pull the article to the top left to see it.

# 4. If it still fails, try this method. That's how I installed it successfully.
pip instal1 dlib==19.6.1
4, Image making
About the setting and preparation of Christmas hat
Prepare a png Christmas hat picture. The png picture can be directly used as a mask with the Alpha channel. Even if you are in jpg format, you should first convert it to png format. Do not rename or change the format directly. Either you find a picture and change the format of screenshot to png, or find a software, such as PS, to change it.
Find something like this

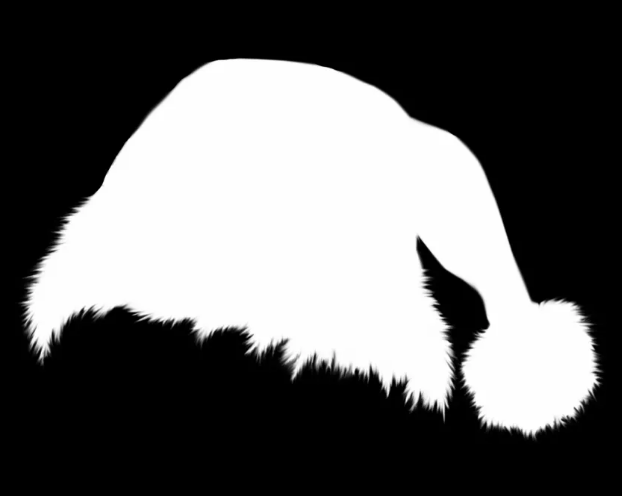
In order to operate with the head image of RGB channel, the hat image should be separated into RGB channel image and alpha channel image.
r,g,b,a = cv2.split(hat_img)
rgb_hat = cv2.merge((r,g,b))
cv2.imwrite("hat_alpha.jpg",a)
The alpha channel image obtained after separation is as follows:
Then face recognition is realized
For your study, I really put all my efforts into testing my girlfriend's photos~
Come on, take a picture
Since you want to do face recognition, you must take a real person's front photo, otherwise you can't recognize the whole side~
If you can't recognize it, the hat will automatically change color, become greener and greener, and fly to your head

Next, face detection is carried out with dlib's face detector, and five key points of face are extracted with the model provided by dlib.
#  Face key detector
predictor_path = "shape_predictor_5_face_landmarks.dat"
predictor = dlib.shape_predictor(predictor_path)

# Face detector
detector = dlib.get_frontal_face_detector()

# Face detection
dets = detector(img, 1)

# If a face is detected
if len(dets)>0:
    for d in dets:
        x,y,w,h = d.left(),d.top(), d.right()-d.left(), d.bottom()-d.top()
        # x,y,w,h = faceRect
        cv2.rectangle(img,(x,y),(x+w,y+h),(255,0,0),2,8,0)

        # Key point detection, 5 key points.
        shape = predictor(img, d)
        for point in shape.parts():
            cv2.circle(img,(point.x,point.y),3,color=(0,255,0))

        cv2.imshow("image",img)
        cv2.waitKey()
Picture printing effect

Automatically adjust the size of the hat
Select the points of two corners of the eye, find the center as the reference coordinate in the x direction for placing the hat, and the coordinate in the y direction is represented by the y coordinate on the face frame.
The size of the hat is adjusted according to the size of the face detected, so that the size of the hat is appropriate.
So ah, how positive the face of your girlfriend's photo is, how good the effect is.
# Select the corner of the left and right eyes
point1 = shape.part(0)
point2 = shape.part(2)

# Find the center of two points
eyes_center = ((point1.x+point2.x)//2,(point1.y+point2.y)//2)

#  Adjust the size of the hat according to the size of the face
factor = 1.5
resized_hat_h = int(round(rgb_hat.shape[0]*w/rgb_hat.shape[1]*factor))
resized_hat_w = int(round(rgb_hat.shape[1]*w/rgb_hat.shape[1]*factor))

if resized_hat_h > y:
    resized_hat_h = y-1

# Adjust the size of the hat according to the size of the face
resized_hat = cv2.resize(rgb_hat,(resized_hat_w,resized_hat_h))
Hat area processing
First, use the alpha channel of the hat as the mask:
mask = cv2.resize(a,(resized_hat_w,resized_hat_h))
mask_inv =  cv2.bitwise_not(mask)
Then remove the area where the hat needs to be added from the portrait:
# Offset of hat relative to face frame line
dh = 0
dw = 0
# Original ROI
# bg_roi = img[y+dh-resized_hat_h:y+dh, x+dw:x+dw+resized_hat_w]
bg_roi = img[y+dh-resized_hat_h:y+dh,(eyes_center[0]-resized_hat_w//3):(eyes_center[0]+resized_hat_w//3*2)]

# Extract the area where the hat is placed from the ROI of the original image
bg_roi = bg_roi.astype(float)
mask_inv = cv2.merge((mask_inv,mask_inv,mask_inv))
alpha = mask_inv.astype(float)/255

# Ensure that the two sizes are consistent before multiplying (may be inconsistent due to rounding)
alpha = cv2.resize(alpha,(bg_roi.shape[1],bg_roi.shape[0]))
# print("alpha size: ",alpha.shape)
# print("bg_roi size: ",bg_roi.shape)
bg = cv2.multiply(alpha, bg_roi)
bg = bg.astype('uint8')
Effect drawing after extraction

Then extract the hat area
hat = cv2.bitwise_and(resized_hat,resized_hat,mask = mask)
design sketch

Wear a hat for your girlfriend
After the hat is processed, it's time to put it on her. Add the extracted Christmas hat area and the area extracted in the picture and put it in the original picture.
Note: resize before adding to ensure that the two sizes are consistent.
# Ensure that the two sizes are consistent before adding (they may be inconsistent due to rounding)
hat = cv2.resize(hat,(bg_roi.shape[1],bg_roi.shape[0]))
# The two ROI regions are added
add_hat = cv2.add(bg,hat)
# cv2.imshow("add_hat",add_hat)

# Put the area with the hat back to the original image
img[y+dh-resized_hat_h:y+dh,(eyes_center[0]-resized_hat_w//3):(eyes_center[0]+resized_hat_w//3*2)] = add_hat
Final renderings

5, Software interface
Effect display
There are too many girlfriends, so I choose my current girlfriend here to avoid these ex girlfriends coming back to me.

GUI interface implementation code
import PySimpleGUI as sg
import os.path
import cv2

file_list_column = [
    [sg.Submit('Wear a hat immediately', key='Go', size=(15, 1)), sg.Cancel('Slip away, slip away', key='Cancel', size=(15, 1))],
    [
        sg.Text("Picture storage location"),
        sg.In(size=(25, 1), enable_events=True, key="-FOLDER-"),
        sg.FolderBrowse('choice'),
    ],
    [
        sg.Listbox(
            values=[], enable_events=True, size=(40, 20), key="-FILE LIST-"
        )
    ]
]
image_viewer_column = [
    [sg.Text("Choose one of the girlfriends on the left:")],
    [sg.Image(key="-IMAGE-")]
]
layout = [
    [
        sg.Column(file_list_column),
        sg.VSeperator(),
        sg.Column(image_viewer_column),
    ]
]
window = sg.Window("Add a Christmas hat to your girlfriend", layout)
filename = ''
while True:
    event, values = window.read()
    if event == "Cancel" or event == sg.WIN_CLOSED:
        break
    if event == "-FOLDER-":
        folder = values["-FOLDER-"]
        try:
            file_list = os.listdir(folder)
        except:
            file_list = []
        fnames = [
            f
            for f in file_list
            if os.path.isfile(os.path.join(folder, f))
               and f.lower().endswith((".jpg", ".png"))
        ]
        window["-FILE LIST-"].update(fnames)
    elif event == "-FILE LIST-":
        try:
            filename = os.path.join(values["-FOLDER-"], values["-FILE LIST-"][0])
            if filename.endswith('.jpg'):
                im = cv2.imread(filename)
                cv2.imwrite(filename.replace('jpg', 'png'), im)
            window["-IMAGE-"].update(filename=filename.replace('jpg', 'png'))
        except Exception as e:
            print(e)
    elif event == "Go":
        try:
            # output = add_hat(filename)
            # Display effect
            # cv2.imshow("output",output)
            # cv2.waitKey(0)
            # cv2.imwrite("output.png",output)
            # print(output)
            window["-IMAGE-"].update(filename='output.png')
        except:
            print('OMG!Failed to add!')

        cv2.destroyAllWindows()
The interface is made with PySimpleGUI framework and is divided into left and right parts. On the left is OK / cancel / folder selection / picture file list, and on the right is picture display bar.
After selecting the folder for storing photos, your prepared girlfriend photos will be displayed in the picture file list. There are no restrictions on pictures here. JPG/PNG format can be used.
Select the girlfriend in the list and click it to display the photo on the right.
Which one you choose, you put a hat on the back
So why not restrict the image format here?
Because the picture display of PySimpleGUI only supports png format by default, I added a judgment in this part. If it is a picture in jpg format, I will convert it into png format with cv2 for display.
The key steps have been completed here, and then integrate the two parts of the code.
When you click the "cap now" button on the GUI interface, the path of the picture is received in the background and passed to our picture processing function. After processing, save the picture in a folder and update the picture displayed on the right side of the GUI interface.
Final effect display
6, Package as exe software
It is still packaged with the commonly used pyinstaller. I won't talk about module installation. Several modules have been installed in front, and they will not be pulled out to lock up~
Then I said hurry up
win+r open the search, enter cmd, click OK to open the command prompt window, and enter pip install pyinstaller to install the module.
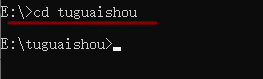
After the installation is successful, do not close the command prompt window, enter the disk where the code is stored, such as disk C, enter C:, and switch the directory to the disk where your code is located.

Add the name of the folder where the code is stored to the input cd
Then enter pyinstaller + space + - F -w + your code file name in the command prompt window py

-F packaging program, -w solve the black box of packaging and running software, -f must use capital F, otherwise an error may occur.
The program runs two dependent files: Christmas hat pictures and face recognition training set. You need to put these two files in the folder where the EXE file is located.
7, Write it at the back
It's not just Christmas hats. You can try anything you want. If you can't find it, pull it to the top QR code on the left to find out.
There are software, packages, and so on.
Brothers, look at the time. In order for you to do it before your girlfriend gets up, I write it out from morning to night. I can't go until I like it!