How to write this series of columns
This series of column writing will adopt the first question and answer writing form to quickly let you learn the primary, intermediate and advanced knowledge of OpenCV.
5. Detailed description of slider in Python opencv and solutions to common problems
The use scenarios of slider in OpenCV related cases are very rich, and it is often necessary to obtain relevant parameters with the help of slider.
To master the slider, you only need to master CV2 Createtrackbar and CV2 Gettrackbarpos two functions.
The prototypes of the above two functions can be viewed directly through the help function. This series of columns only briefly describe the function prototypes
createTrackbar(trackbarName, windowName, value, count, onChange) -> None
getTrackbarPos(trackbarname, winname) -> retval
Including CV2 The createtrackbar function has more parameters, CV2 The gettrackbarpos function is its child.
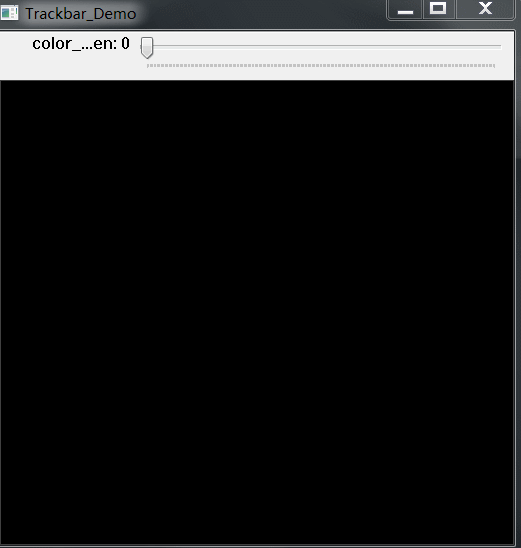
Next, through a simple case, the basic application of the slider is realized. Drag to change the color of a rectangle in the window.
import cv2
import numpy as np

cv2.namedWindow("Trackbar_Demo", cv2.WINDOW_NORMAL)

# In order to occupy the parameter position in the slider


def nothing():
    pass


ret = np.zeros([512, 512, 3], np.uint8)
# Create a slider
cv2.createTrackbar("color_green", "Trackbar_Demo", 0, 255, nothing)

while 1:
    # Gets the value of the slider
    color_green = cv2.getTrackbarPos("color_green", "Trackbar_Demo")
    cv2.rectangle(ret, (100, 100), (200, 200), (0, color_green, 0), -1)
    cv2.imshow("Trackbar_Demo", ret)
    if cv2.waitKey(1) & 0xFF == ord('q'):
        break

cv2.destroyAllWindows()
If the following bugs occur during code writing, the parameters are missing:
TypeError: function takes exactly 5 arguments (4 given)
This BUG indicates CV2 The last onChange parameter is missing in the createtrackbar function. You can add this parameter and the function body pointed to by the parameter can be empty.
The animation effect after running the code is as follows:
cv2. Solutions to problems related to onChange parameter in createtrackbar function
If you search all Chinese materials on the Internet, you will find a knowledge point in CV2 The createtrackbar function is often ignored in the application. This content is the onChange parameter. The official description of this parameter is as follows:
Pointer to the function to be called every time the slider changes position. This function should be prototyped as void Foo(int,void*); , where the first parameter is the trackbar position and the second parameter is the user data (see the next parameter). If the callback is the NULL pointer, no callbacks are called, but only value is updated.
One detail to note here is that when opencv is written in C + +, there is an additional parameter in this function called userdata, that is, the prototype of this function in C + + is as follows:
int createTrackbar(const String& trackbarname, const String& winname, int* value, int count, TrackbarCallback onChange=0, void* userdata=0)
However, Python integrates them and completes the operation of two data values through one parameter, so that we can perform corresponding operations on the slider every time we drag it.
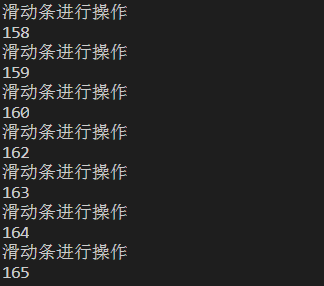
The modified code is as follows. The length relationship is as follows. Only the nothing function is modified. When running the code, the following contents will appear:
# Callback function for each step of the slider
def nothing(x):
    print("Slide bar operation")
    print(x)
I can even directly adjust the code logic and put the operation of drawing a rectangle into the callback function of the scroll bar. The specific code and description are as follows:
import cv2
import numpy as np

cv2.namedWindow("Trackbar_Demo", cv2.WINDOW_NORMAL)

# Callback function for each step of the slider
def nothing(x):
    print("Slide bar operation")
    cv2.rectangle(ret, (100, 100), (200, 200), (0, x, 0), -1)


ret = np.zeros([512, 512, 3], np.uint8)
# Create a slider
cv2.createTrackbar("color_green", "Trackbar_Demo", 0, 255, nothing)


# color_green = cv2.getTrackbarPos("color_green", "Trackbar_Demo")
while True:
    cv2.imshow("Trackbar_Demo", ret)
    if cv2.waitKey(1) & 0xFF == ord('q'):
        break

cv2.destroyAllWindows()
With this logic, we can design the slider as a switch and drag it to different values to show different effects.
For more details, you can continue to read the relevant contents of the manual, Access address
Split slider and picture window in OpenCV
In the actual coding process, it is recommended to split the sliding bar window and the picture window for display, so as to facilitate the adjustment of various parameters.
For example, the following manual parameter adjustment operation to realize binarization (which will be covered in subsequent articles).
import cv2
import numpy as np


def nothing(a):
    pass


cv2.namedWindow("HSV",cv2.WINDOW_AUTOSIZE)

cv2.createTrackbar("HUE Min", "HSV", 0, 255, nothing)
cv2.createTrackbar("HUE Max", "HSV", 180, 255, nothing)
cv2.createTrackbar("SAT Min", "HSV", 255, 255, nothing)
cv2.createTrackbar("SAT Max", "HSV", 43, 255, nothing)
cv2.createTrackbar("VALUE Min", "HSV", 255, 255, nothing)
cv2.createTrackbar("VALUE Max", "HSV", 46, 255, nothing)

while True:

    img = cv2.imread("./t1.jpg")
    imgHsv = cv2.cvtColor(img, cv2.COLOR_BGR2HSV)

    h_min = cv2.getTrackbarPos("HUE Min", "HSV")
    h_max = cv2.getTrackbarPos("HUE Max", "HSV")
    s_min = cv2.getTrackbarPos("SAT Min", "HSV")
    s_max = cv2.getTrackbarPos("SAT Max", "HSV")
    v_min = cv2.getTrackbarPos("VALUE Min", "HSV")
    v_max = cv2.getTrackbarPos("VALUE Max", "HSV")

    lower = np.array([h_min, s_min, v_min])
    upper = np.array([h_max, s_max, v_max])
    mask = cv2.inRange(imgHsv, lower, upper)
    result = cv2.bitwise_and(img, img, mask=mask)

    mask = cv2.cvtColor(mask, cv2.COLOR_GRAY2BGR)
    hStack = np.hstack([img, mask, result])
    cv2.imshow('Horizontal Stacking', hStack)
    if cv2.waitKey(1) & 0xFF == 27:
        break


cv2.destroyAllWindows()
After the above code runs, it will present a very convenient operation. Drag one window and dynamically present the corresponding changes in another window.
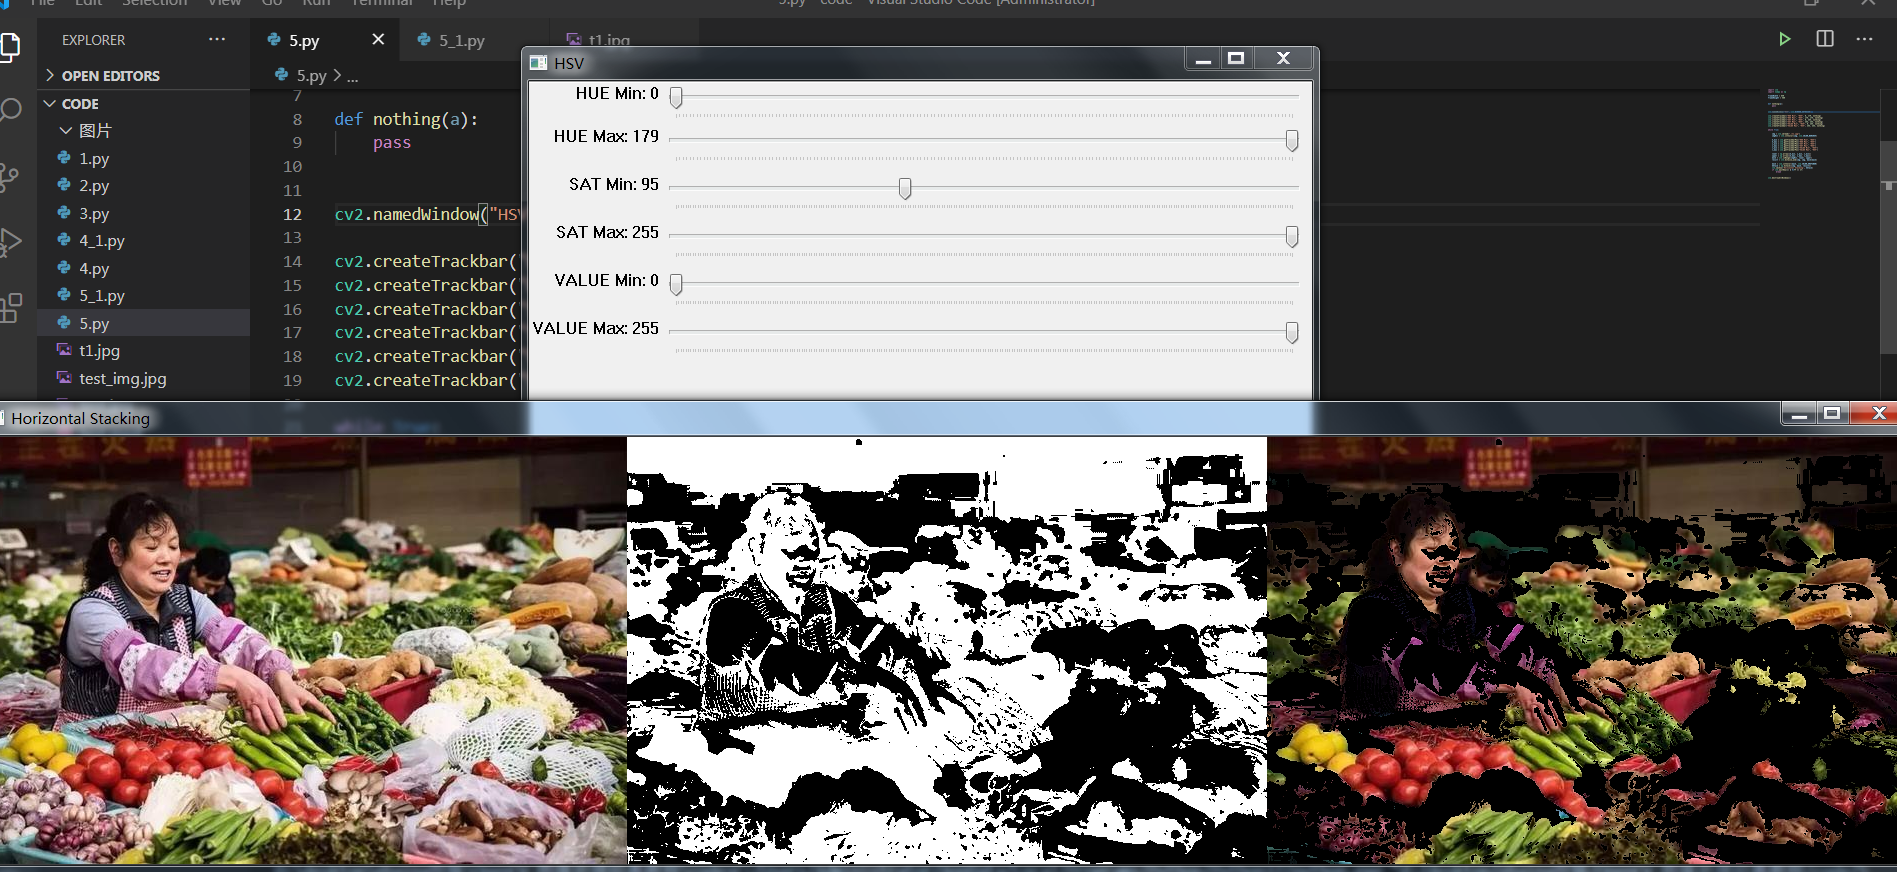
There is a caution when coding this place, that is, CV2 For the namedwindow ("HSV", cv2.WINDOW_AUTOSIZE) function, use CV2 WINDOW_ Autosize value. If this value is not used, it is easy to cause disordered version of the slider window or uneven distribution of window parameters.
Finally, another function of the slider, the conversion button, is emphasized again. After all, there is no button function in OpenCV. Using a slider with a fixed value can effectively solve this problem.
The use code is as follows:
cv2.createTrackbar(switch,'image',0,1,nothing)
If this value is not used, it is easy to cause disordered version of the slider window or uneven distribution of window parameters.

Finally, another function of the slider, the conversion button, is emphasized again. After all OpenCV There is no button function in. Using the slider with fixed value can effectively solve this problem.

The use code is as follows:

```python
cv2.createTrackbar(switch,'image',0,1,nothing)