Tip: the following is the main content of this article. The following cases can be used for reference
preface
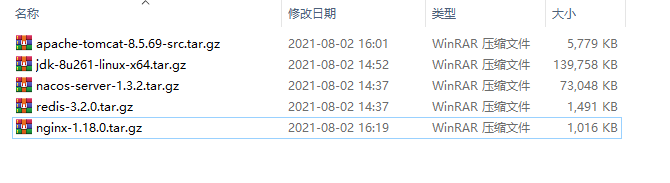
Download the compressed package first
Link: https://pan.baidu.com/s/1a3y3sKzP0fTddDe98cYEUg
Extraction code: 1024
Decompression code: 1024
linux connection tool: finalShell
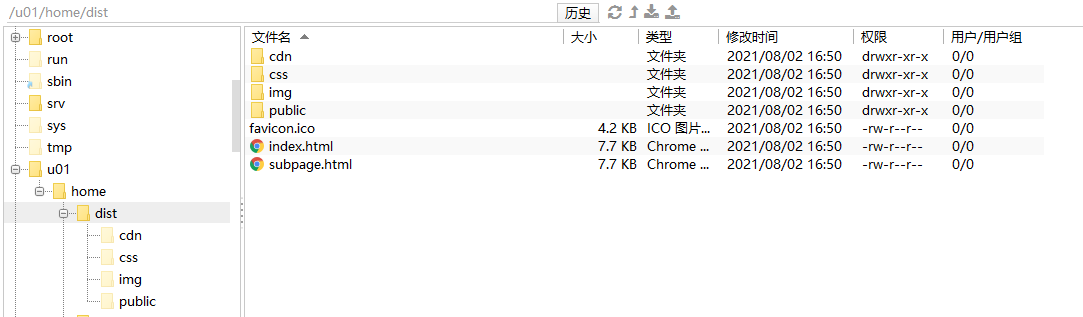
Front end packaging file address: / u01/home/dist
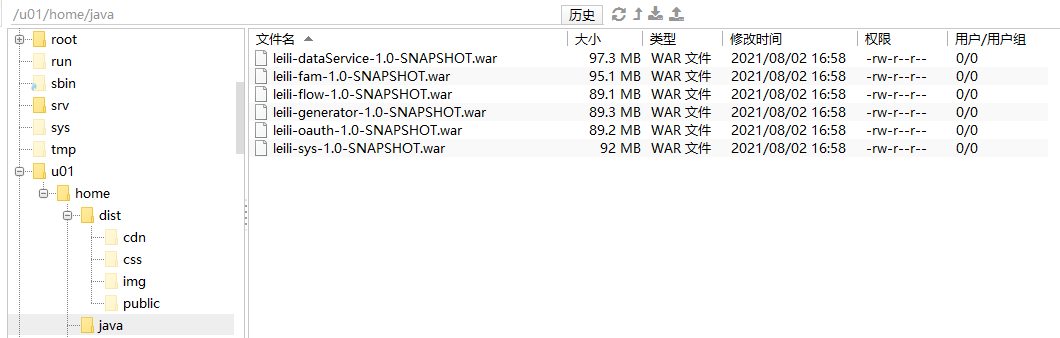
Backend war package file address: / u01/home/java
1, Turn off firewall
This step will affect the subsequent web page access. It is best to close it directly.
Disable firewall
systemctl stop firewalld
Stop and disable boot
sytemctl disable firewalld
2, Install JDK
1. Delete openJdk from liunx
1. Use Xshell to connect to the liunx system
2. Enter the following commands in the command interface
rpm -qa | grep jdk
3. If the data cannot be queried, skip to the installation of JDK directly. If the following data exists, follow the steps. As long as openjdk exists, it needs to be deleted. The openjdk versions installed in different liunx systems may be different;
java-1.8.0-openjdk-headless-1.7.0.51-2.4.5.5.el7.x86_64
java-1.8.0-openjdk-1.7.0.51-2.4.5.5.el7.x86_64
4. Delete openjdk XXXXXX X only represents the version number, which is actually entered according to the queried version
rpm -e --nodeps java-1.8.0-openjdk-xxxxxx.x86_64
rpm -e --nodeps java-1.8.0-openjdk-xxxxx.x86_64
2. Unzip to the specified file
1) Create a java address under / usr/local / to store the JDK;
2) Upload the JDK to the created java folder through XFTP
3) Decompress
The decompression command is as follows:
tar -zxvf java.xxxxxx.tar.gz
3. Configure system variables
1) Open profile file via vim
vi /etc/profile
2) Add the following configuration
Add the following configuration in the last line of the profile, / usr / local / Java / jdk1 8.0_ 13 this is the address of the JDK configuration
export JAVA_HOME=/usr/local/java/jdk1.8.0_261
export JRE_HOME=${JAVA_HOME}/jre
export CLASSPATH=.:${JAVA_HOME}/lib:${JRE_HOME}/lib:$CLASSPATH
export JAVA_PATH=${JAVA_HOME}/bin:${JRE_HOME}/bin
export PATH=$PATH:${JAVA_PATH}
3) Save exit
Press the ESC button on the keyboard and enter the: wq command to save and exit
4. Reload the configuration file
source can make the profile take effect without restarting
Input: source /etc/profile
5. Test
[root@localhost ~]# java -version
java version "1.8.0_261"
Java(TM) SE Runtime Environment (build 1.8.0_261-b12)
Java HotSpot(TM) 64-Bit Server VM (build 25.261-b12, mixed mode)
3, Redis deployment scheme
The redis project uses redis 3.2. Even version is recommended for version 0
1. Decompression
Create a redis folder in the superior path of the project, put the downloaded redis version into the created folder, and enter the decompression command;
tar -zxvf redis.xxx.tar.gz
2. Configure gcc environment
[root@bogon redis-4.0.6]# Yum install gcc-c + + Yum install GCC
[root@bogon redis-4.0.6]# make distclean clears the residual files that failed to compile last time
[root@bogon redis-4.0.6]# Make & & make install execute compilation and installation
3. Installation and configuration
Enter the src folder where redis is installed, execute make install to install, and then configure redis to run in the background through redis in the upper src folder Modify the daemon in the conf file and change the value of daemon from no to yes;
4. Start
In the src folder, enter the following command redis server redis Conf start
Input: redis server conf
5. Test
[root@localhost ~]# cd /u01/home/redis/redis-3.2.0/src
[root@localhost src]# ./redis-cli
127.0.0.1:6379> keys *
(empty list or set)
127.0.0.1:6379>
4, Nacos deployment scheme
1. Decompression and installation
After creating a nacos folder in the project's parent path, extract it into the nacos folder by tar;
tar -zxvf nacos.1.3.2.tar.gz
2. Start
Enter the created nacos/bin folder; Use sh startup SH start;
nohup sh startup.sh -m standalone
Single machine background operation;
3. Test
Access according to the configured ip address. If the account nacos password nacos can be accessed, the installation can be successful;
For example, the IP address of Linux is 192.168 0.143, log in 192.168 on another computer 0.143:8848/nacos
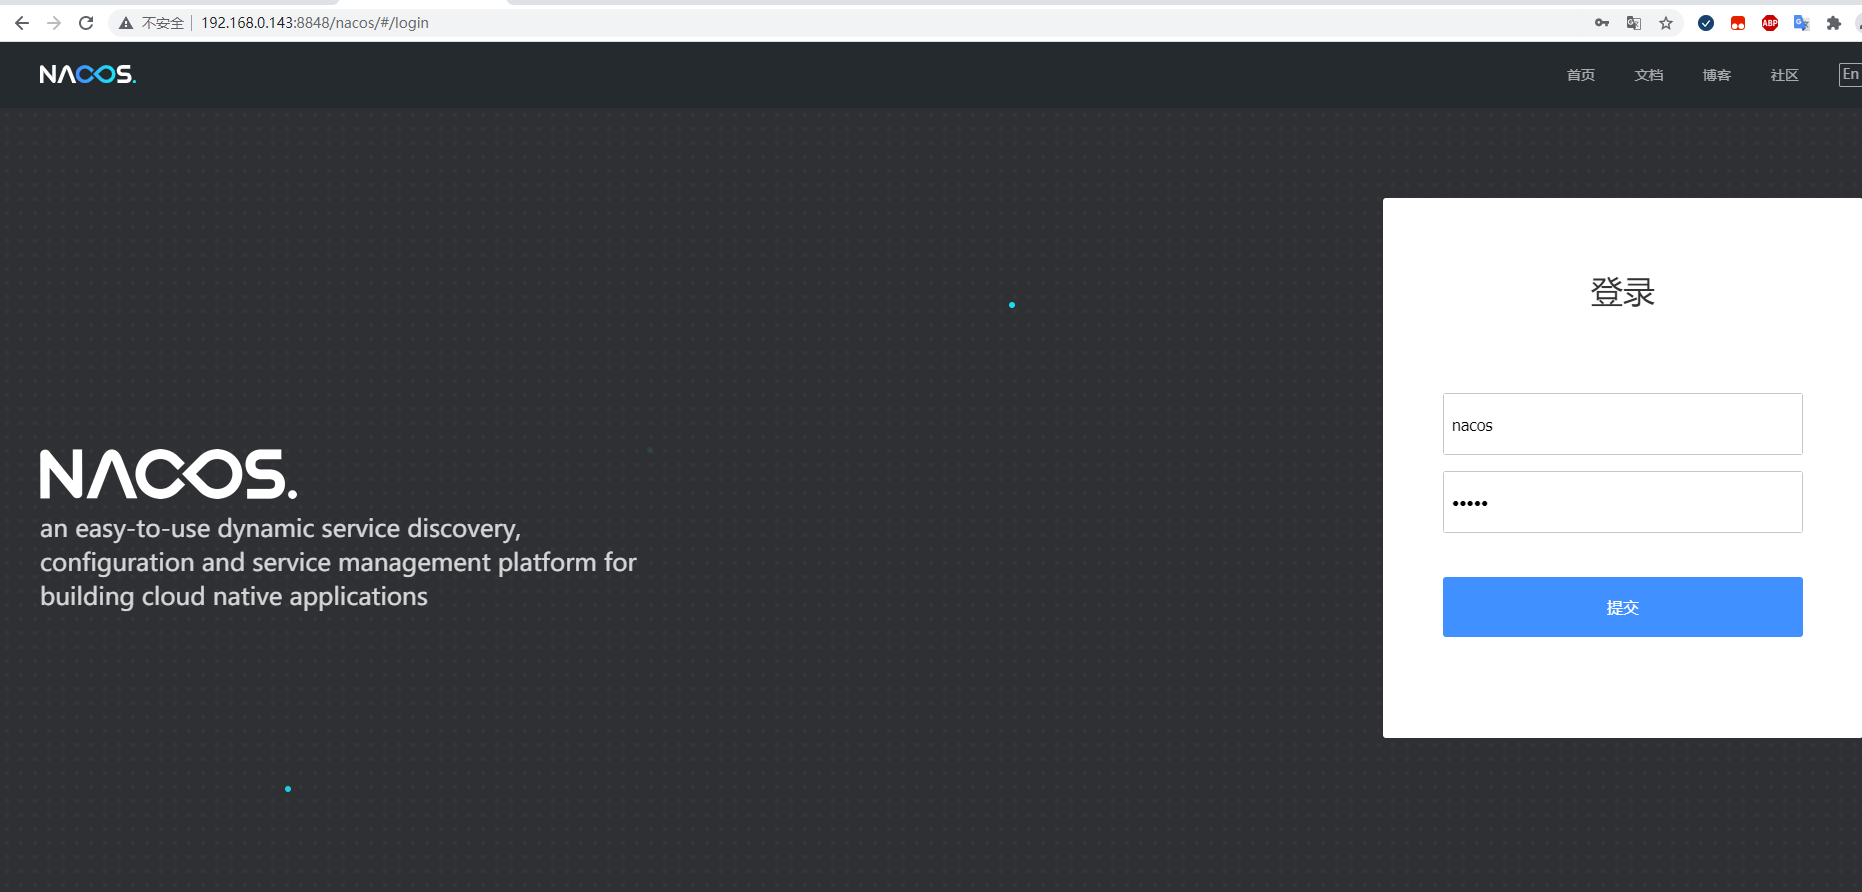
If the firewall is not turned off, you cannot log in
5, tomcat deployment scheme
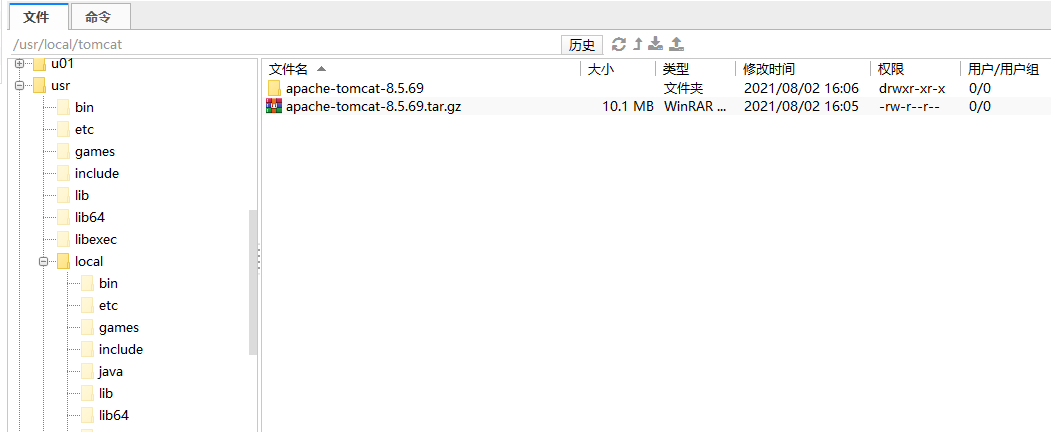
1. Decompression and installation
After creating a tomcat folder in the / usr/local path, put the compressed package into the folder and decompress it into the nacos folder by tar;
tar -zxvf apache-tomcat-8.5.69.tar.gz
2. Edit XML file
The path of the configuration file is / usr / local / Tomcat / apache-tomcat-8.5 69/conf/server. xml
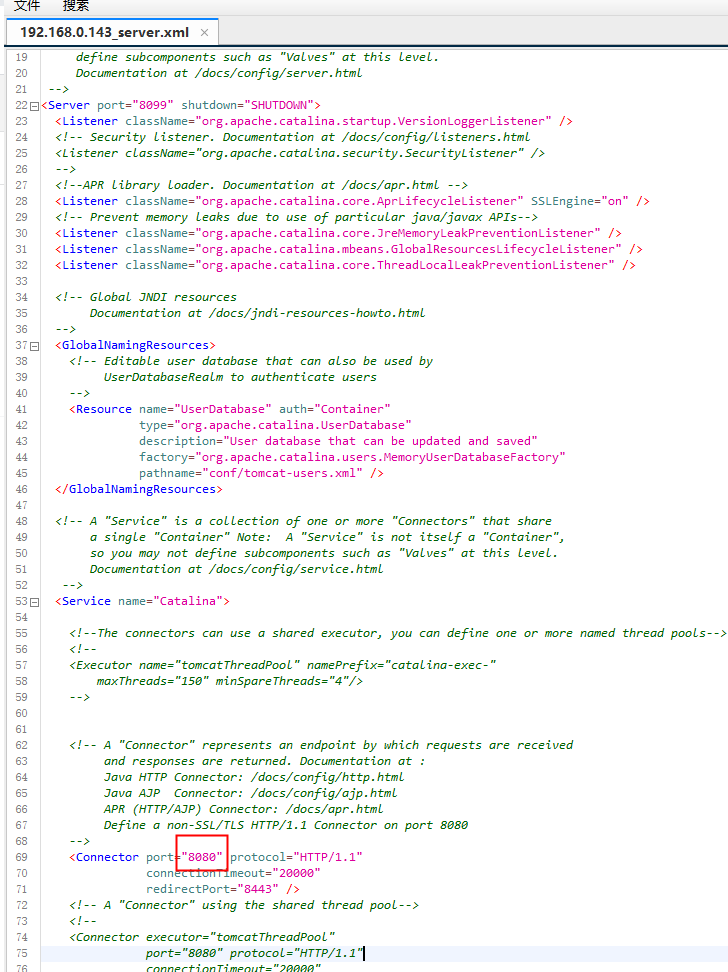
Port default 8080
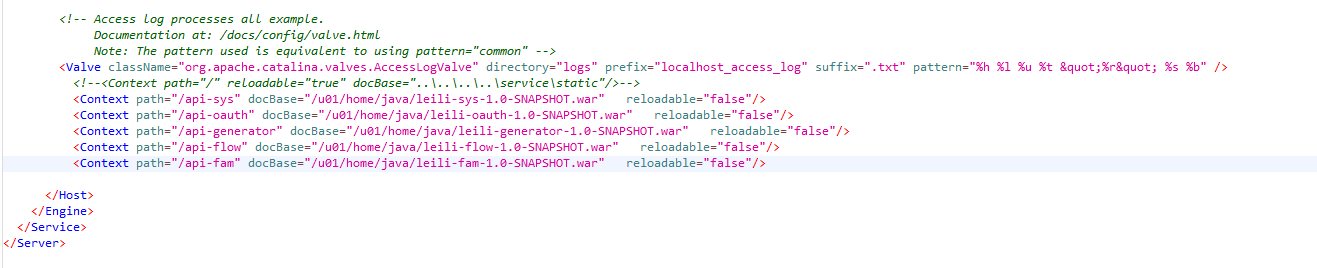
		<Context path="/api-sys" docBase="/u01/home/java/leili-sys-1.0-SNAPSHOT.war"   reloadable="false"/>
		<Context path="/api-oauth" docBase="/u01/home/java/leili-oauth-1.0-SNAPSHOT.war"   reloadable="false"/>
		<Context path="/api-generator" docBase="/u01/home/java/leili-generator-1.0-SNAPSHOT.war"   reloadable="false"/>
		<Context path="/api-flow" docBase="/u01/home/java/leili-flow-1.0-SNAPSHOT.war"   reloadable="false"/>
		<Context path="/api-fam" docBase="/u01/home/java/leili-fam-1.0-SNAPSHOT.war"   reloadable="false"/>
I use the WAR package in the project, and write your tomcat configuration file according to the actual situation
3. Solve the Chinese garbled code in the log
If there is Chinese garbled code in the log, open logging properties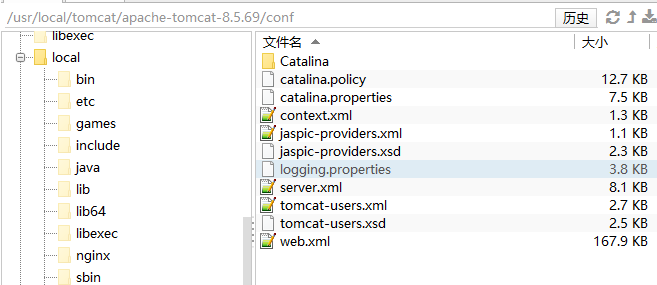
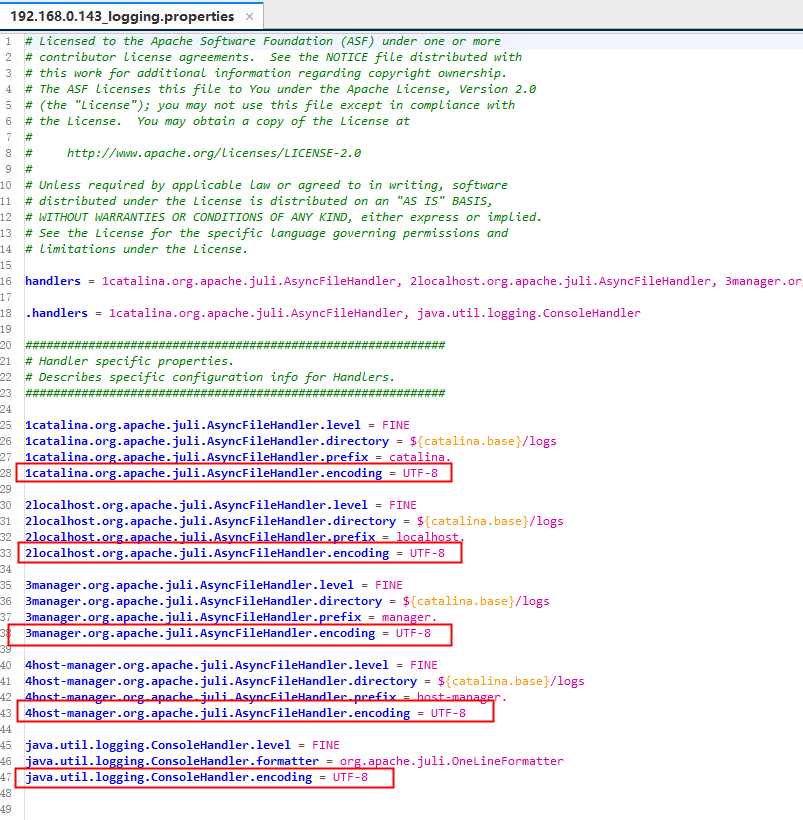
Change all UTF-8 to GBK
4. Operation and test
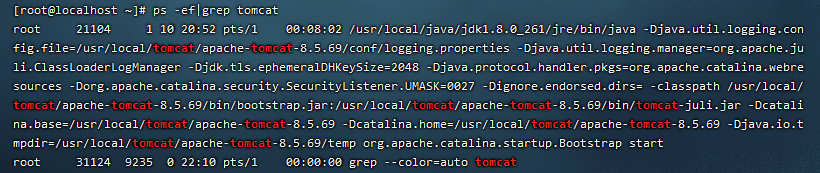
Go to the bin folder of Tomcat and nohup sh startup SH start tomcat, ps -ef|grep tomcat and check whether Tomcat is running.
[root@localhost ~]# cd /usr/local/tomcat/apache-tomcat-8.5.69/bin
[root@localhost bin]# nohup sh startup.sh
nohup: Ignore input and append output to"nohup.out"
[root@localhost bin]# ps -ef|grep tomcat
root     28323     1 99 22:41 pts/1    00:00:12 /usr/local/java/jdk1.8.0_261/jre/bin/java -Djava.util.logging.config.file=/usr/local/tomcat/apache-tomcat-8.5.69/conf/logging.properties -Djava.util.logging.manager=org.apache.juli.ClassLoaderLogManager -Djdk.tls.ephemeralDHKeySize=2048 -Djava.protocol.handler.pkgs=org.apache.catalina.webresources -Dorg.apache.catalina.security.SecurityListener.UMASK=0027 -Dignore.endorsed.dirs= -classpath /usr/local/tomcat/apache-tomcat-8.5.69/bin/bootstrap.jar:/usr/local/tomcat/apache-tomcat-8.5.69/bin/tomcat-juli.jar -Dcatalina.base=/usr/local/tomcat/apache-tomcat-8.5.69 -Dcatalina.home=/usr/local/tomcat/apache-tomcat-8.5.69 -Djava.io.tmpdir=/usr/local/tomcat/apache-tomcat-8.5.69/temp org.apache.catalina.startup.Bootstrap start
root     28423  9235  0 22:41 pts/1    00:00:00 grep --color=auto tomcat
If a large list of things is returned, tomcat is started successfully
[root@localhost ~]# curl 127.0.0.1:8080
<!DOCTYPE html>
<html lang="en">
    <head>
        <meta charset="UTF-8" />
        <title>Apache Tomcat/8.5.69</title>
        <link href="favicon.ico" rel="icon" type="image/x-icon" />
        <link href="tomcat.css" rel="stylesheet" type="text/css" />
    </head>
    <body>
        <div id="wrapper">
            <div id="navigation" class="curved container">
You can know whether tomcat can be accessed locally and return the page code
6, Nginx deployment plan
1. Decompression and installation
After creating an nginx folder in the / usr/local path, put the compressed package into the file and decompress it into the nginx folder by tar;
tar -zxvf nginx-1.18.0.tar.gz
2. Modify the configuration file
Enter nginx / nginx-1.18 0 / conf folder; Modify nginx Conf file, multiple backend, respectively configured;
server {
        listen       80;
        server_name  localhost 192.168.0.143;
        #Front end package file path
		location / {
            root /u01/home/dist;
            index index.html;
        }
		location ^~ /api-sys/ {
			proxy_set_header Host $host;
			proxy_set_header X-Real-Ip $remote_addr;
			proxy_set_header X-Forwarded-For $remote_addr;
			proxy_cache_methods POST;
            proxy_pass http://localhost:8080;

        }
		location ^~ /api-oauth/ {
			proxy_set_header Host $host;
			proxy_set_header X-Real-Ip $remote_addr;
			proxy_set_header X-Forwarded-For $remote_addr;
			proxy_cache_methods POST;
            proxy_pass http://localhost:8080;

        }
		location ^~ /api-fam/ {
			proxy_set_header Host $host;
			proxy_set_header X-Real-Ip $remote_addr;
			proxy_set_header X-Forwarded-For $remote_addr;
			proxy_cache_methods POST;
            proxy_pass http://localhost:8080;

        }
		location ^~ /api-generator/ {
			proxy_set_header Host $host;
			proxy_set_header X-Real-Ip $remote_addr;
			proxy_set_header X-Forwarded-For $remote_addr;
			proxy_cache_methods POST;
            proxy_pass http://localhost:8080;

        }
		location ^~ /api-flow/ {
			proxy_set_header Host $host;
			proxy_set_header X-Real-Ip $remote_addr;
			proxy_set_header X-Forwarded-For $remote_addr;
			proxy_cache_methods POST;
            proxy_pass http://localhost:8080;

        }
        location ^~ /api- {
			proxy_set_header Host $host;
			proxy_set_header X-Real-Ip $remote_addr;
			proxy_set_header X-Forwarded-For $remote_addr;
			proxy_cache_methods POST;
            proxy_pass http://localhost:8099;

        }
        error_page   500 502 503 504  /50x.html;
        location = /50x.html {
            root   html;
        }
    }
3. Operation and test
Run / usr/local/nginx/sbin/nginx directly, and ps -ef|grep nginx tests whether it runs successfully.
[root@localhost ~]# /usr/local/nginx/sbin/nginx
[root@localhost ~]# ps -ef|grep nginx
root     13518     1  0 22:59 ?        00:00:00 nginx: master process /usr/local/nginx/sbin/nginx
nobody   13519 13518  0 22:59 ?        00:00:00 nginx: worker process
nobody   13520 13518  0 22:59 ?        00:00:00 nginx: worker process
nobody   13521 13518  0 22:59 ?        00:00:00 nginx: worker process
nobody   13522 13518  0 22:59 ?        00:00:00 nginx: worker process
root     14893  9235  0 23:01 pts/1    00:00:00 grep --color=auto nginx
If a port is returned, nginx is started successfully
summary
The above is what I want to talk about today. This article only briefly introduces the basic usage of installing redis, nacos, tomcat, JDK and nginx under Linux, and deploying the front and back-end separation project running environment. If you are interested or encounter difficulties, you can discuss it in depth.