Don't bother python course
Due to the pytorch version, some knowledge needs to be found during class. The course is very good. (no money, only for sharing)
definition
Baidu Encyclopedia
The structure of convolutional neural network is composed of convolution, activation and pooling
convolution
After reading too many online explanations, I found that I still didn't understand them. Because my ability was limited, I didn't know much about online explanations. I didn't want to start with formulas, and I didn't study professionally, so I only understood what convolution was based on the current project.
For the current example of handwriting recognition, a convolution kernel is defined to move continuously on the picture, and the corresponding required features are obtained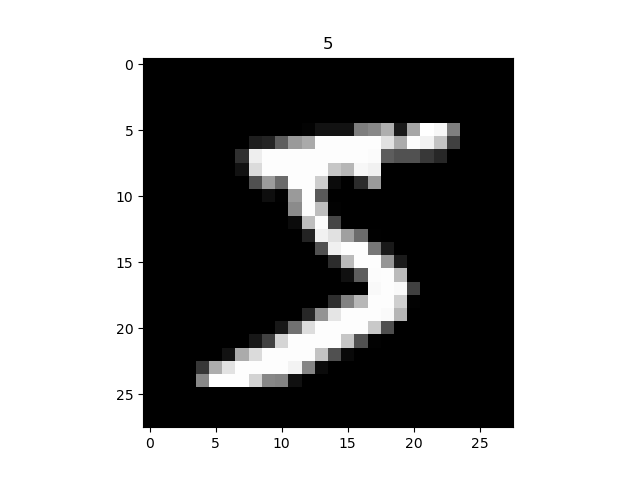
We define a convolution kernel (of course, the initial value is random, and then the corresponding final parameters are obtained by continuously calculating loss). The convolution kernel multiplies the scanned features by the values in the convolution kernel, and finally adds them to obtain the corresponding data to obtain the image data suitable for training..
The next step is the code implementation (paste the complete code at the end of the text)
- Import related packages
import os
import torch
import torch.nn as nn
import torch.utils.data as Data
import torchvision
import matplotlib.pyplot as plt
from matplotlib import cm
from icecream import ic

EPOCH = 1
BATCH_SIZE = 50
LR = 0.001
DOWNLOAD_MNIST = False
- Firstly, the corresponding training data and experimental data are imported
Use torchvision data. MNIST and carry out corresponding transformation
train_data = torchvision.datasets.MNIST(
	# The first is the stored folder
    root='./mnist/',
    # Whether to extract corresponding data from training data
    train=True,
    # Because the input to the neural network must be a tensor, use this to transform it into a tensor
    transform=torchvision.transforms.ToTensor(),
    # Whether to download or not. Select False directly for downloading, and select True for not downloading
    download=False
)

# Batch training, turn the data into a small batch of data for training.
# DataLoader is used to wrap the data used, throw a batch of data each time, and delete the dimension of the picture at the same time
# From the original (60000, 28, 28) to (50, 1, 28, 28), only 50 data are thrown at a time
train_loader = Data.DataLoader(dataset=train_data, batch_size=50, shuffle=True)

# pick 2000 samples to speed up testing
test_data = torchvision.datasets.MNIST(root='./mnist/', train=False)
# This mainly ensures that the input image is four-dimensional weight
test_x = torch.unsqueeze(test_data.data, dim=1).type(torch.FloatTensor)[
         :2000] / 255.  # shape from (2000, 28, 28) to (2000, 1, 28, 28), value in range(0,1)
For batch_ I don't know much about size. I finally found that every batch is thrown_ Size data
3. Construct neural network
class CNN(nn.Module):
    def __init__(self):
        super(CNN, self).__init__()
        self.conv1 = nn.Sequential(  # input shape (1, 28, 28)
            nn.Conv2d(
            	# Enter the number of channels of the picture. The number of channels of the gray picture is 1, and the number of channels of the color picture is 3
                in_channels=1,  # input height
                # The number of channels of the output picture is equal to the number of convolution kernels
                out_channels=16,  # n_filters
                kernel_size=5,  # filter size
                stride=1,  # filter movement/step
                # After convolution operation, the original image size is still the same, and the calculation method of padding is
                # if want same width and length of this image after Conv2d, padding=(kernel_size-1)/2 if stride=1
                # The reason for dividing by 2 is that both sides need to be expanded, and padding only represents one side
                padding=2,
            ),  # output shape (16, 28, 28)
            nn.ReLU(),  # activation
            # Perform the corresponding pooling layer. The size of the convolution kernel is 2x2. Take the maximum value in the size area of the image convolution kernel
            nn.MaxPool2d(kernel_size=2),  # choose max value in 2x2 area, output shape (16, 14, 14)
        )
        self.conv2 = nn.Sequential(  # input shape (16, 14, 14)
            nn.Conv2d(16, 32, 5, 1, 2),  # output shape (32, 14, 14)
            nn.ReLU(),  # activation
            nn.MaxPool2d(2),  # output shape (32, 7, 7)
        )
        self.out = nn.Linear(32 * 7 * 7, 10)  # fully connected layer, output 10 classes

    def forward(self, x):
        x = self.conv1(x)
        x = self.conv2(x)
        x = x.view(x.size(0), -1)  # flatten the output of conv2 to (batch_size, 32 * 7 * 7)
        output = self.out(x)
        return output, x  # return x for visualization
torch. nn. Understanding of conv2d() function and channel
Convolution layer is to extract the image features and remove the corresponding redundant information
Pool layer is to enlarge the features in the picture and select better features
Reference documents: Deeply study the significance of convolution layer and pooling layer in convolution neural network
You may have a problem here:
- Why can the maximum represent significant characteristics?
Because the convolution kernel only has the features close to the features to be extracted when extracting the features of the picture
Will be multiplied by the convolution kernel to get the maximum value - Why should the output result of convolution be flattened and input to the output layer after x = x.view(x.size(0), -1)
Because the output layer adopts a fully connected network, the value of input and output is required to be one-dimensional
Reference documents: x = x.view(x.size(0), -1)
- Establish the corresponding neural network
cnn = CNN()
print(cnn)  # net architecture
# Define optimization function
optimizer = torch.optim.Adam(cnn.parameters(), lr=LR)  # optimize all cnn parameters
# Define loss function
loss_func = nn.CrossEntropyLoss()  # the target label is not one-hotted
Conduct relevant training
for epoch in range(EPOCH):
    for step, (b_x, b_y) in enumerate(train_loader):  # gives batch data, normalize x when iterate train_loader
        output = cnn(b_x)[0]  # cnn output
        loss = loss_func(output, b_y)  # cross entropy loss
        # Perform gradient clearing
        optimizer.zero_grad()  # clear gradients for this training step
        loss.backward()  # backpropagation, compute gradients
        optimizer.step()  # apply gradients
Add full code
There are corresponding drawing codes in the complete code (you do not need to copy the above)
import os
import torch
import torch.nn as nn
import torch.utils.data as Data
import torchvision
import matplotlib.pyplot as plt
from matplotlib import cm
from icecream import ic

EPOCH = 1
BATCH_SIZE = 50
LR = 0.001
DOWNLOAD_MNIST = False

# Determine whether the dataset exists
if not (os.path.exists('./mnist/')) or not os.listdir('./mnist/'):
    DOWNLOAD_MNIST = True

train_data = torchvision.datasets.MNIST(
    root='./mnist/',
    train=True,
    transform=torchvision.transforms.ToTensor(),
    download=DOWNLOAD_MNIST
)

# plot one example
print(train_data.data.size())  # (60000, 28, 28)
print(train_data.targets.size())  # (60000)
plt.imshow(train_data.data[0].numpy(), cmap='gray')
plt.title('%i' % train_data.targets[0])
plt.show()

# Data Loader for easy mini-batch return in training, the image batch shape will be (50, 1, 28, 28)
train_loader = Data.DataLoader(dataset=train_data, batch_size=BATCH_SIZE, shuffle=True)

# pick 2000 samples to speed up testing
test_data = torchvision.datasets.MNIST(root='./mnist/', train=False)
test_x = test_data.data.type(torch.FloatTensor)[
         :2000] / 255.  # shape from (2000, 28, 28) to (2000, 1, 28, 28), value in range(0,1)
print(test_x)
test_y = test_data.targets[:2000]
# print(test_x[4].size())

class CNN(nn.Module):
    def __init__(self):
        super(CNN, self).__init__()
        self.conv1 = nn.Sequential(  # input shape (1, 28, 28)
            nn.Conv2d(
                in_channels=1,  # input height
                out_channels=16,  # n_filters
                kernel_size=5,  # filter size
                stride=1,  # filter movement/step
                # After convolution operation, the original image size is still the same, and the calculation method of padding is
                # if want same width and length of this image after Conv2d, padding=(kernel_size-1)/2 if stride=1
                # The reason for dividing by 2 is that both sides need to be expanded, and padding only represents one side
                padding=2,
            ),  # output shape (16, 28, 28)
            nn.ReLU(),  # activation
            nn.MaxPool2d(kernel_size=2),  # choose max value in 2x2 area, output shape (16, 14, 14)
        )
        self.conv2 = nn.Sequential(  # input shape (16, 14, 14)
            nn.Conv2d(16, 32, 5, 1, 2),  # output shape (32, 14, 14)
            nn.ReLU(),  # activation
            nn.MaxPool2d(2),  # output shape (32, 7, 7)
        )
        self.out = nn.Linear(32 * 7 * 7, 10)  # fully connected layer, output 10 classes

    def forward(self, x):
        x = self.conv1(x)
        x = self.conv2(x)
        x = x.view(x.size(0), -1)  # flatten the output of conv2 to (batch_size, 32 * 7 * 7)
        output = self.out(x)
        return output, x  # return x for visualization


cnn = CNN()
print(cnn)  # net architecture
optimizer = torch.optim.Adam(cnn.parameters(), lr=LR)  # optimize all cnn parameters
loss_func = nn.CrossEntropyLoss()  # the target label is not one-hotted

try:
    from sklearn.manifold import TSNE

    HAS_SK = True
except:
    HAS_SK = False
    print('Please install sklearn for layer visualization')


def plot_with_labels(lowDWeights, labels):
    plt.cla()
    X, Y = lowDWeights[:, 0], lowDWeights[:, 1]
    for x, y, s in zip(X, Y, labels):
        # Randomly generate corresponding colors
        # x and y are coordinates
        c = cm.rainbow(int(255 * s / 9))
        plt.text(x, y, s, backgroundcolor=c, fontsize=9)
    plt.xlim(X.min(), X.max())
    plt.ylim(Y.min(), Y.max())
    plt.title('Visualize last layer')
    plt.show()
    plt.pause(0.01)


plt.ion()
# training and testing
for epoch in range(EPOCH):
    for step, (b_x, b_y) in enumerate(train_loader):  # gives batch data, normalize x when iterate train_loader
        output = cnn(b_x)[0]  # cnn output
        loss = loss_func(output, b_y)  # cross entropy loss
        optimizer.zero_grad()  # clear gradients for this training step
        loss.backward()  # backpropagation, compute gradients
        optimizer.step()  # apply gradients

        if step % 50 == 0:
            test_output, last_layer = cnn(test_x)
            pred_y = torch.max(test_output, 1)[1].data.numpy()
            accuracy = float((pred_y == test_y.data.numpy()).astype(int).sum()) / float(test_y.size(0))
            print('Epoch: ', epoch, '| train loss: %.4f' % loss.data.numpy(), '| test accuracy: %.2f' % accuracy)
            if HAS_SK:
                # The similarity of data is transformed into corresponding probability
                # Perflexity is a floating point type, n_components is embedded, dimension is 2, init is embedded initialization, n_iter is the number of iterations
                tsne = TSNE(perplexity=30, n_components=2, init='pca', n_iter=5000)
                plot_only = 500
                # Dimensionality reduction of data
                low_dim_embs = tsne.fit_transform(last_layer.data.numpy()[:plot_only, :])
                labels = test_y.numpy()[:plot_only]
                plot_with_labels(low_dim_embs, labels)
plt.ioff()

# print 10 predictions from test data
# Go to the first ten to test the model and compare it with the original label
test_output, _ = cnn(test_x[:10])
pred_y = torch.max(test_output, 1)[1].data.numpy()
print(pred_y, 'prediction number')
print(test_y[:10].numpy(), 'real number')