This article mainly demonstrates the deployment of Tencent cloud serverless
Web function management
The operation principle of Web function is shown in the following figure:
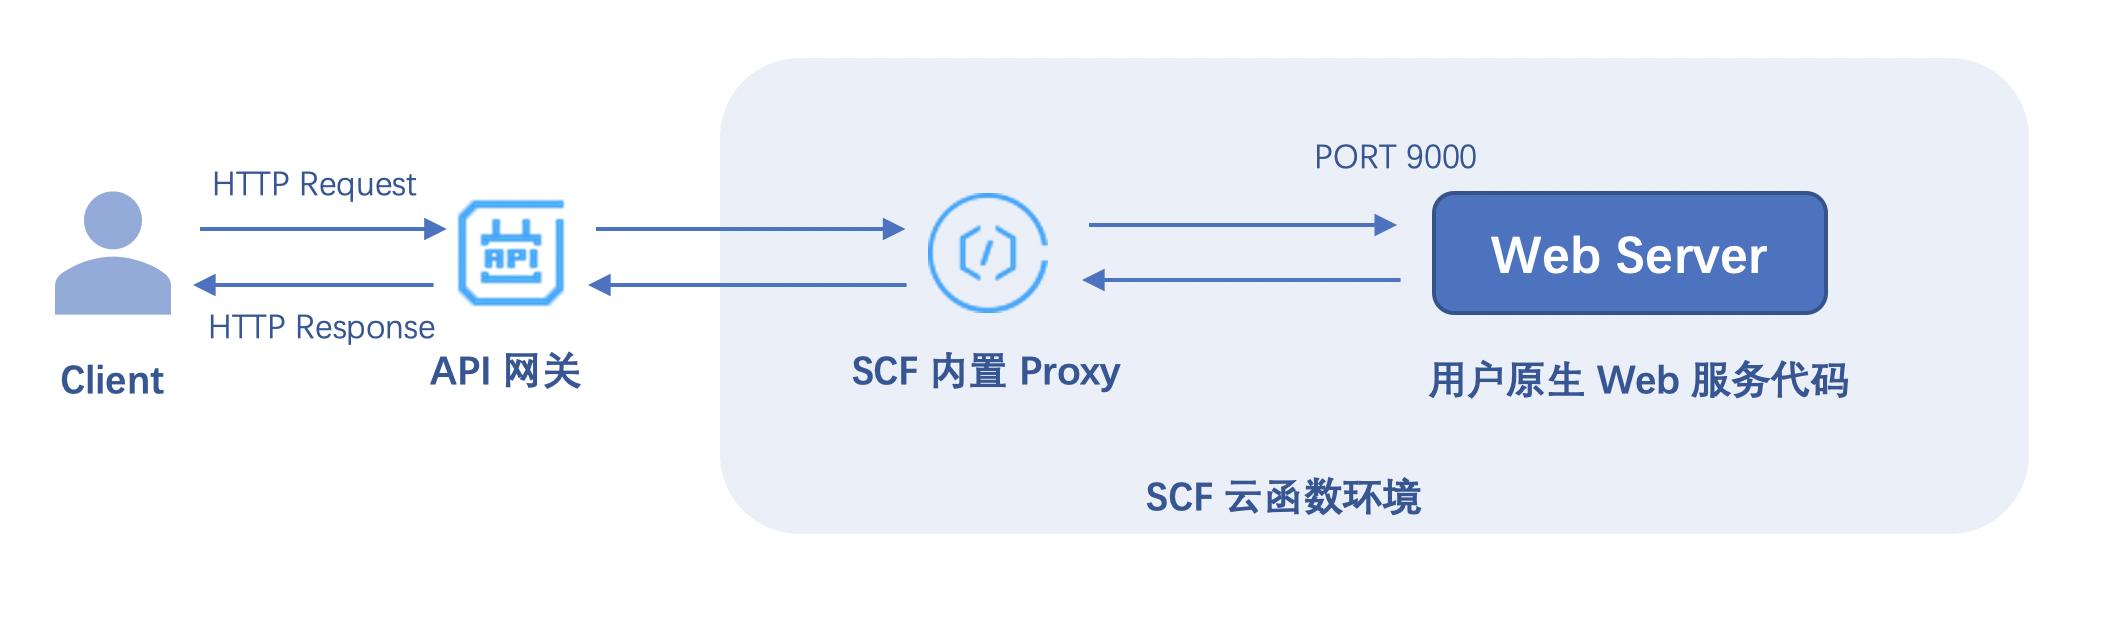
After the HTTP request sent by the user passes through the API gateway, the gateway side directly transparently transmits the native request. At the same time, the function name, function region and other contents required for the gateway to trigger the function are added to the request header and passed to the function environment to trigger the execution of the back-end function.
In the function environment, Nginx forwarding is realized through the built-in Proxy, the request information of non product specification in the header is removed, and the native HTTP request is sent to the user's Web Server service through the specified port.
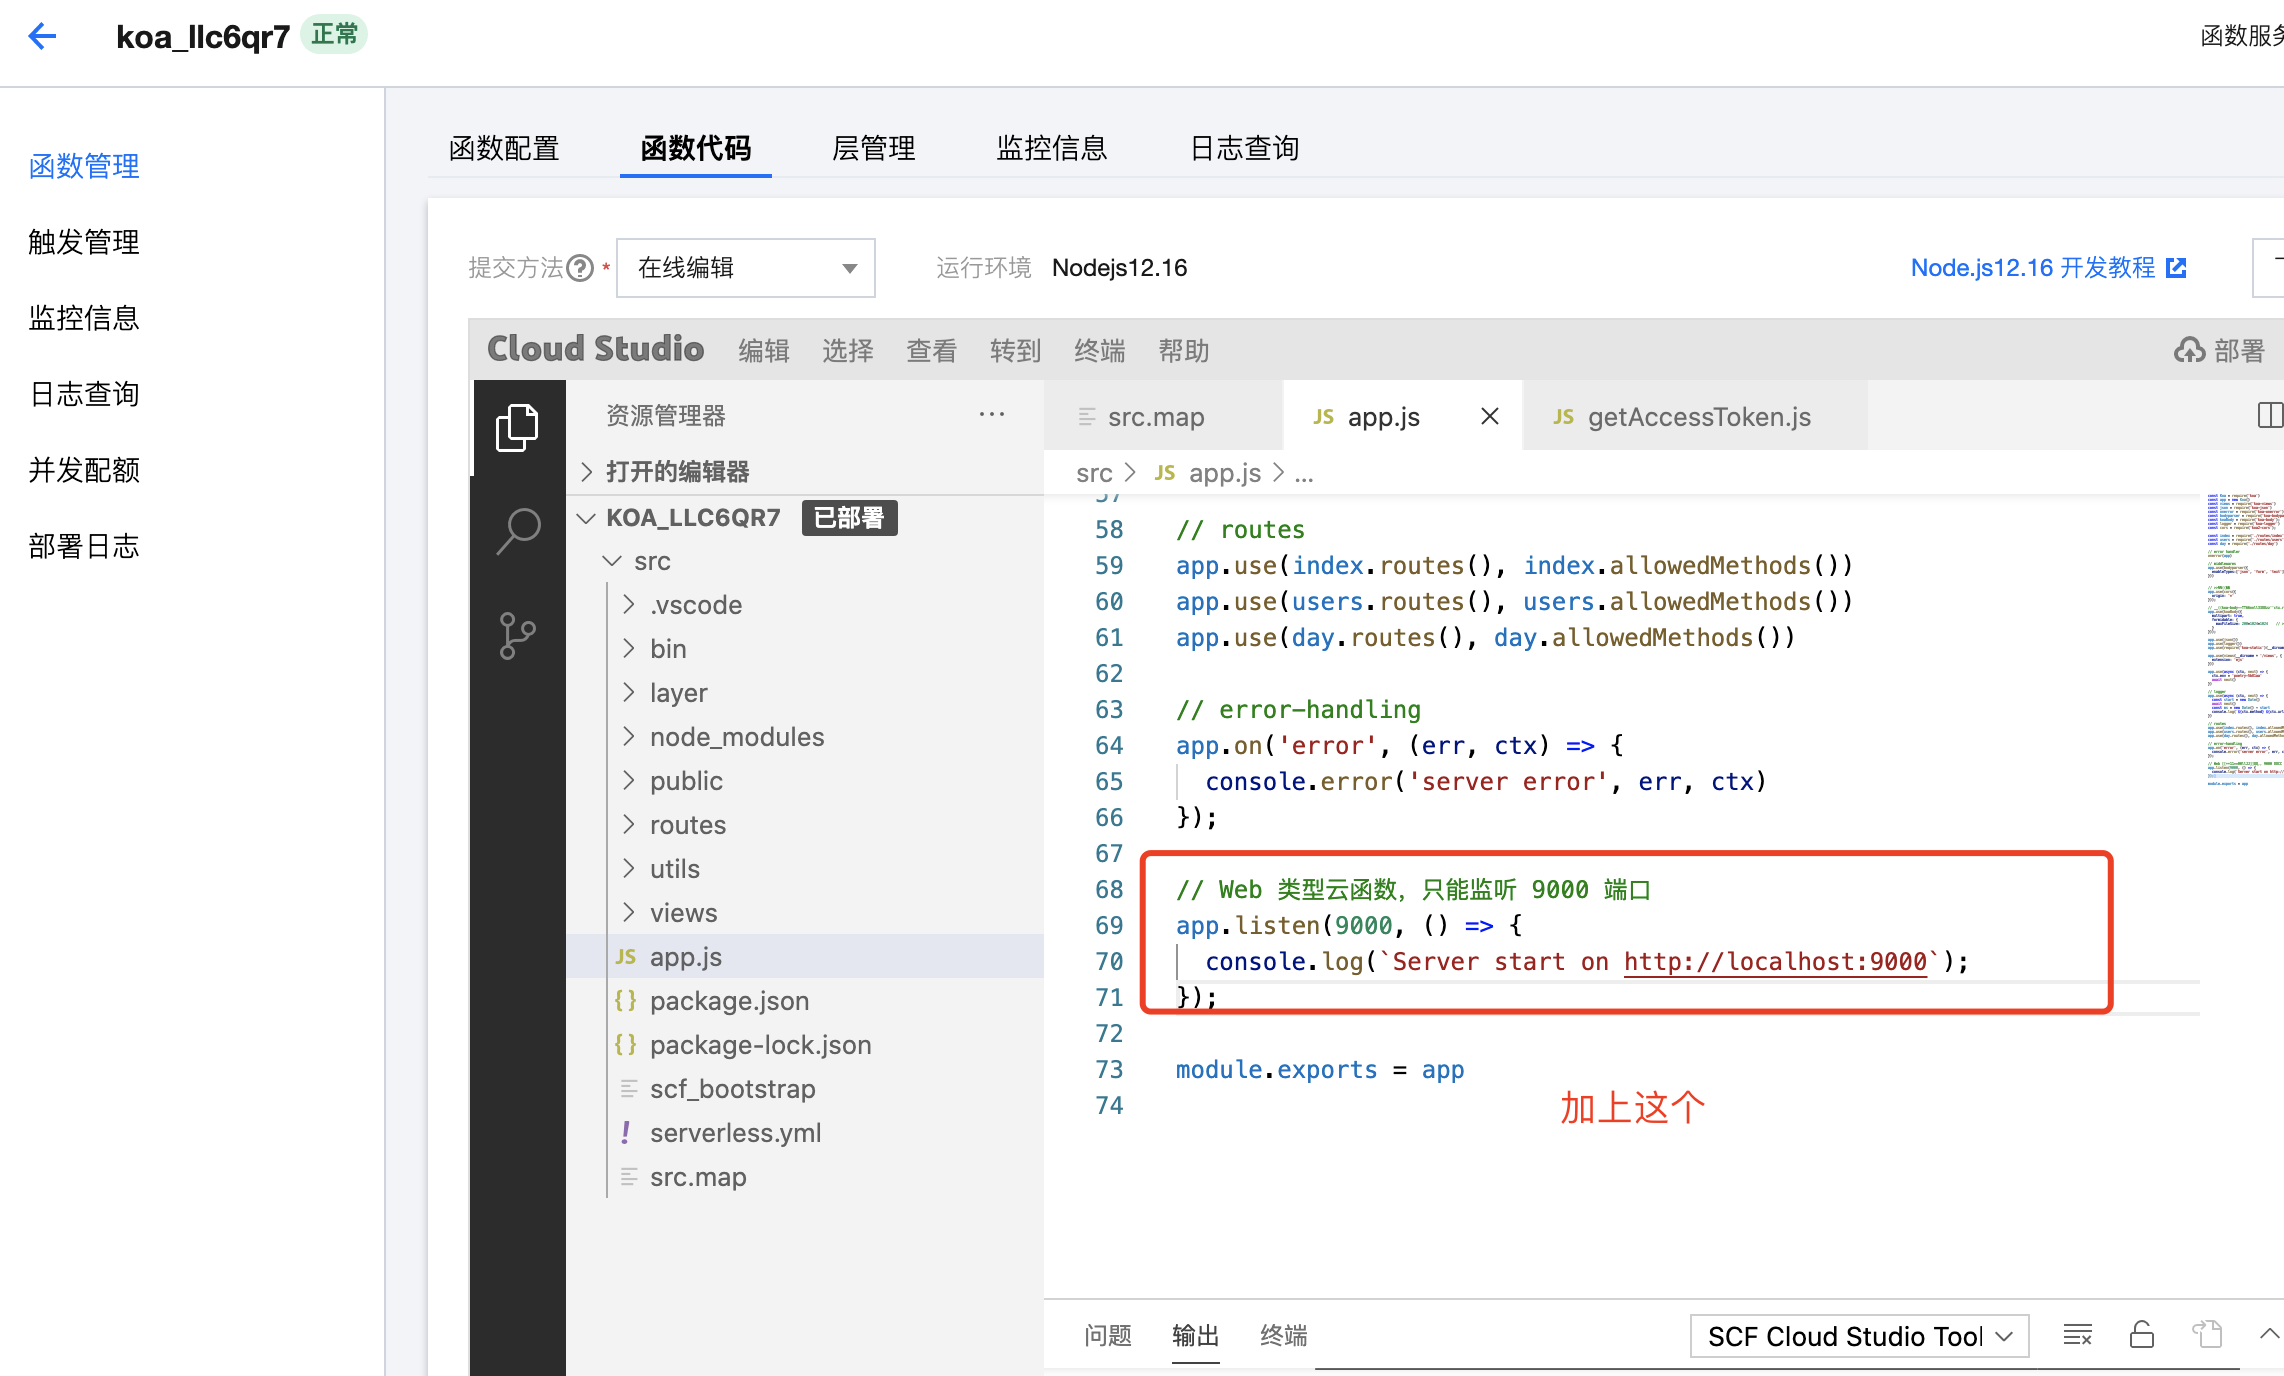
After the user's Web Server is configured with the specified listening port 9000 and service startup file, it is deployed to the cloud, and HTTP requests are obtained and processed through this port.
Web function request limit
- Web functions can only be called through the API gateway. Triggering through the API interface is not supported.
- There are the following restrictions in Response headers:
- The size of all key s and value s shall not exceed 4KB.
- The size of the body does not exceed 6MB.
- When deploying your Web service, you must listen to the specified 9000 port, not the internal loopback address 127.0.0.1.
- At present, the Connection field in the HTTP request Header does not support custom configuration.
Startup file function
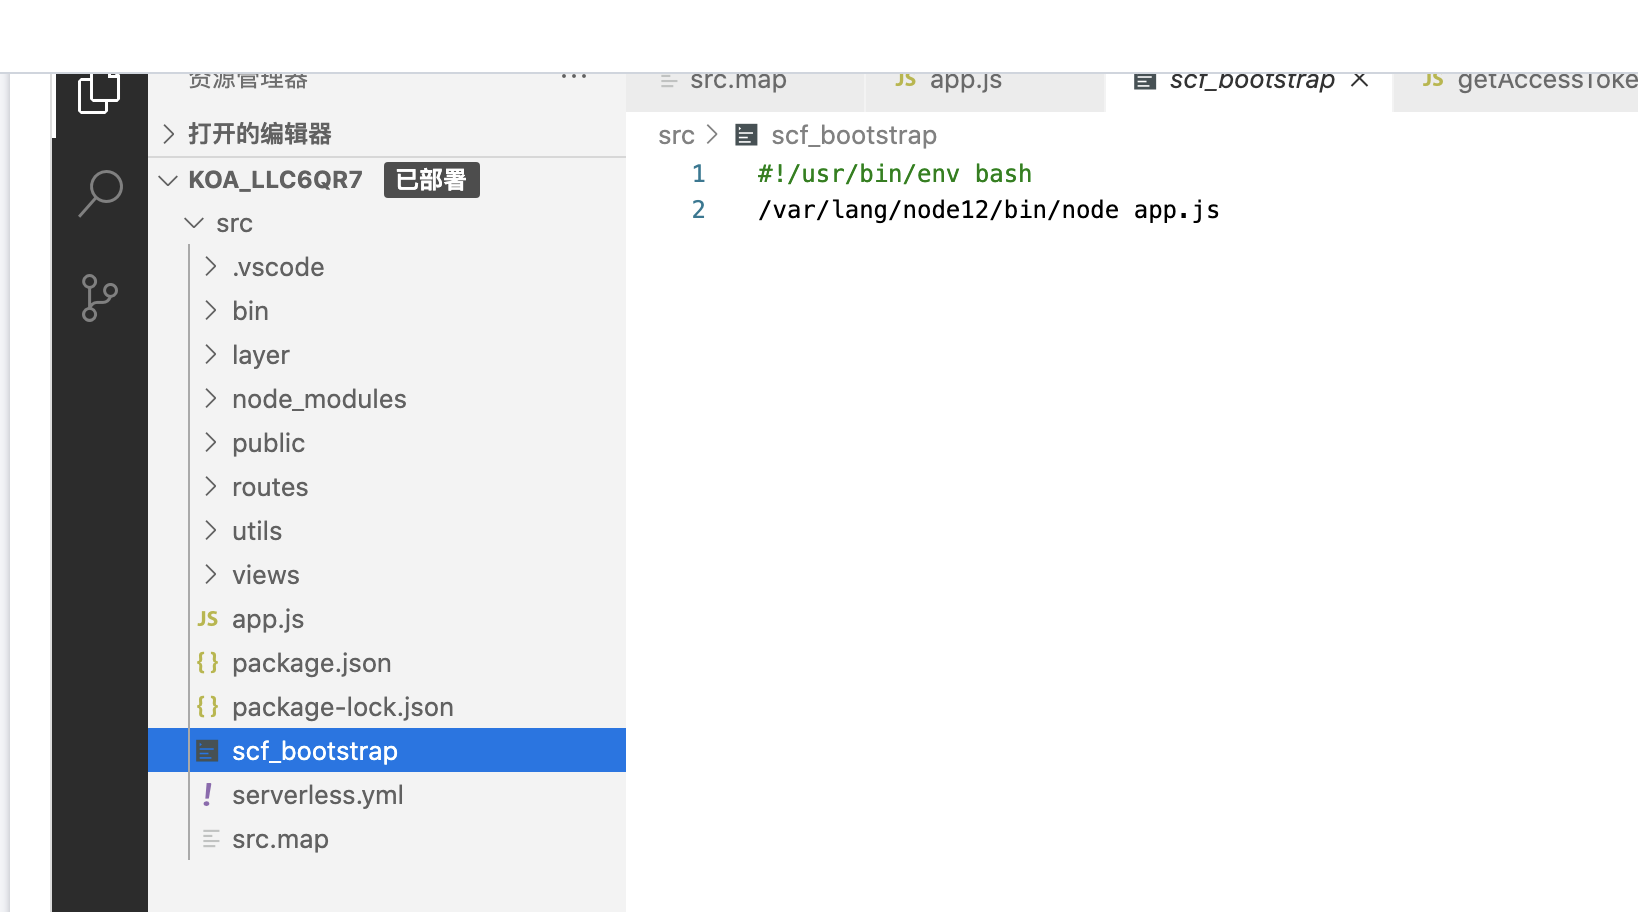
scf_bootstrap is the startup file of the Web Server to ensure that your Web service starts normally and listens for requests. In addition, you can also use SCF as needed_ Customize and implement more personalized operations in bootstrap:
- Set the path and environment variables of the runtime dependent library.
- Load the library files and extension programs that the user-defined language and version depend on. If there are still dependent files that need to be pulled in real time, they can be downloaded to the / tmp directory.
- Parse the function file and execute the global operation or initialization program required before function call (such as initialization of development kit client HTTP CLIENT, creation of database connection pool, etc.) to facilitate reuse in the call stage.
- Start security, monitoring and other plug-ins.

Use premise
- You need to have executable permission, please ensure your SCF_ The bootstrap file has 777 or 755 permissions, otherwise it cannot be executed because of insufficient permissions.
- It can run in SCF system environment (CentOS 7.6).
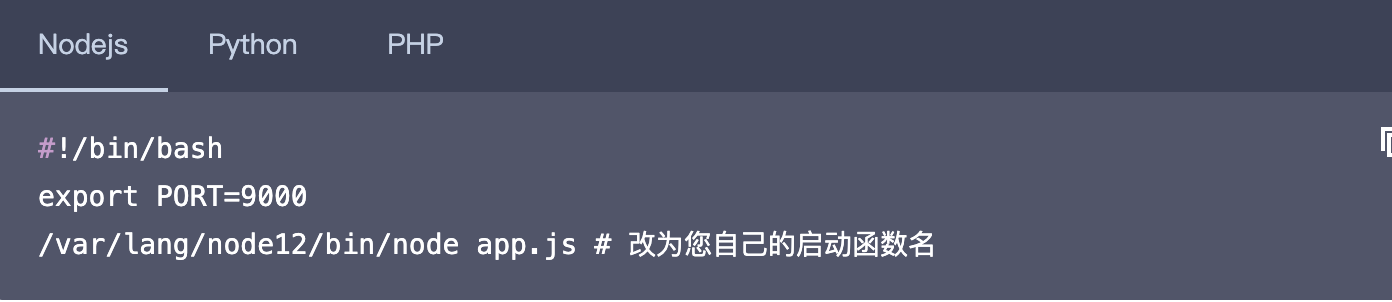
- If the startup command file is a shell script, the first line needs to have #/ bin/bash.
- The startup command must be an absolute path / var/lang/${specific_lang}${version}/bin/${specific_lang}, otherwise it cannot be called normally. See Standard locale absolute path.
- It is recommended to use the listening address as 0.0.0.0, and the internal loopback address 127.0.0.1 cannot be used
Standard locale absolute path

Common Web Server startup command template
Serverless fromwork and console deployment
Serverless documentation https://www.serverless.com/cn/framework/docs/
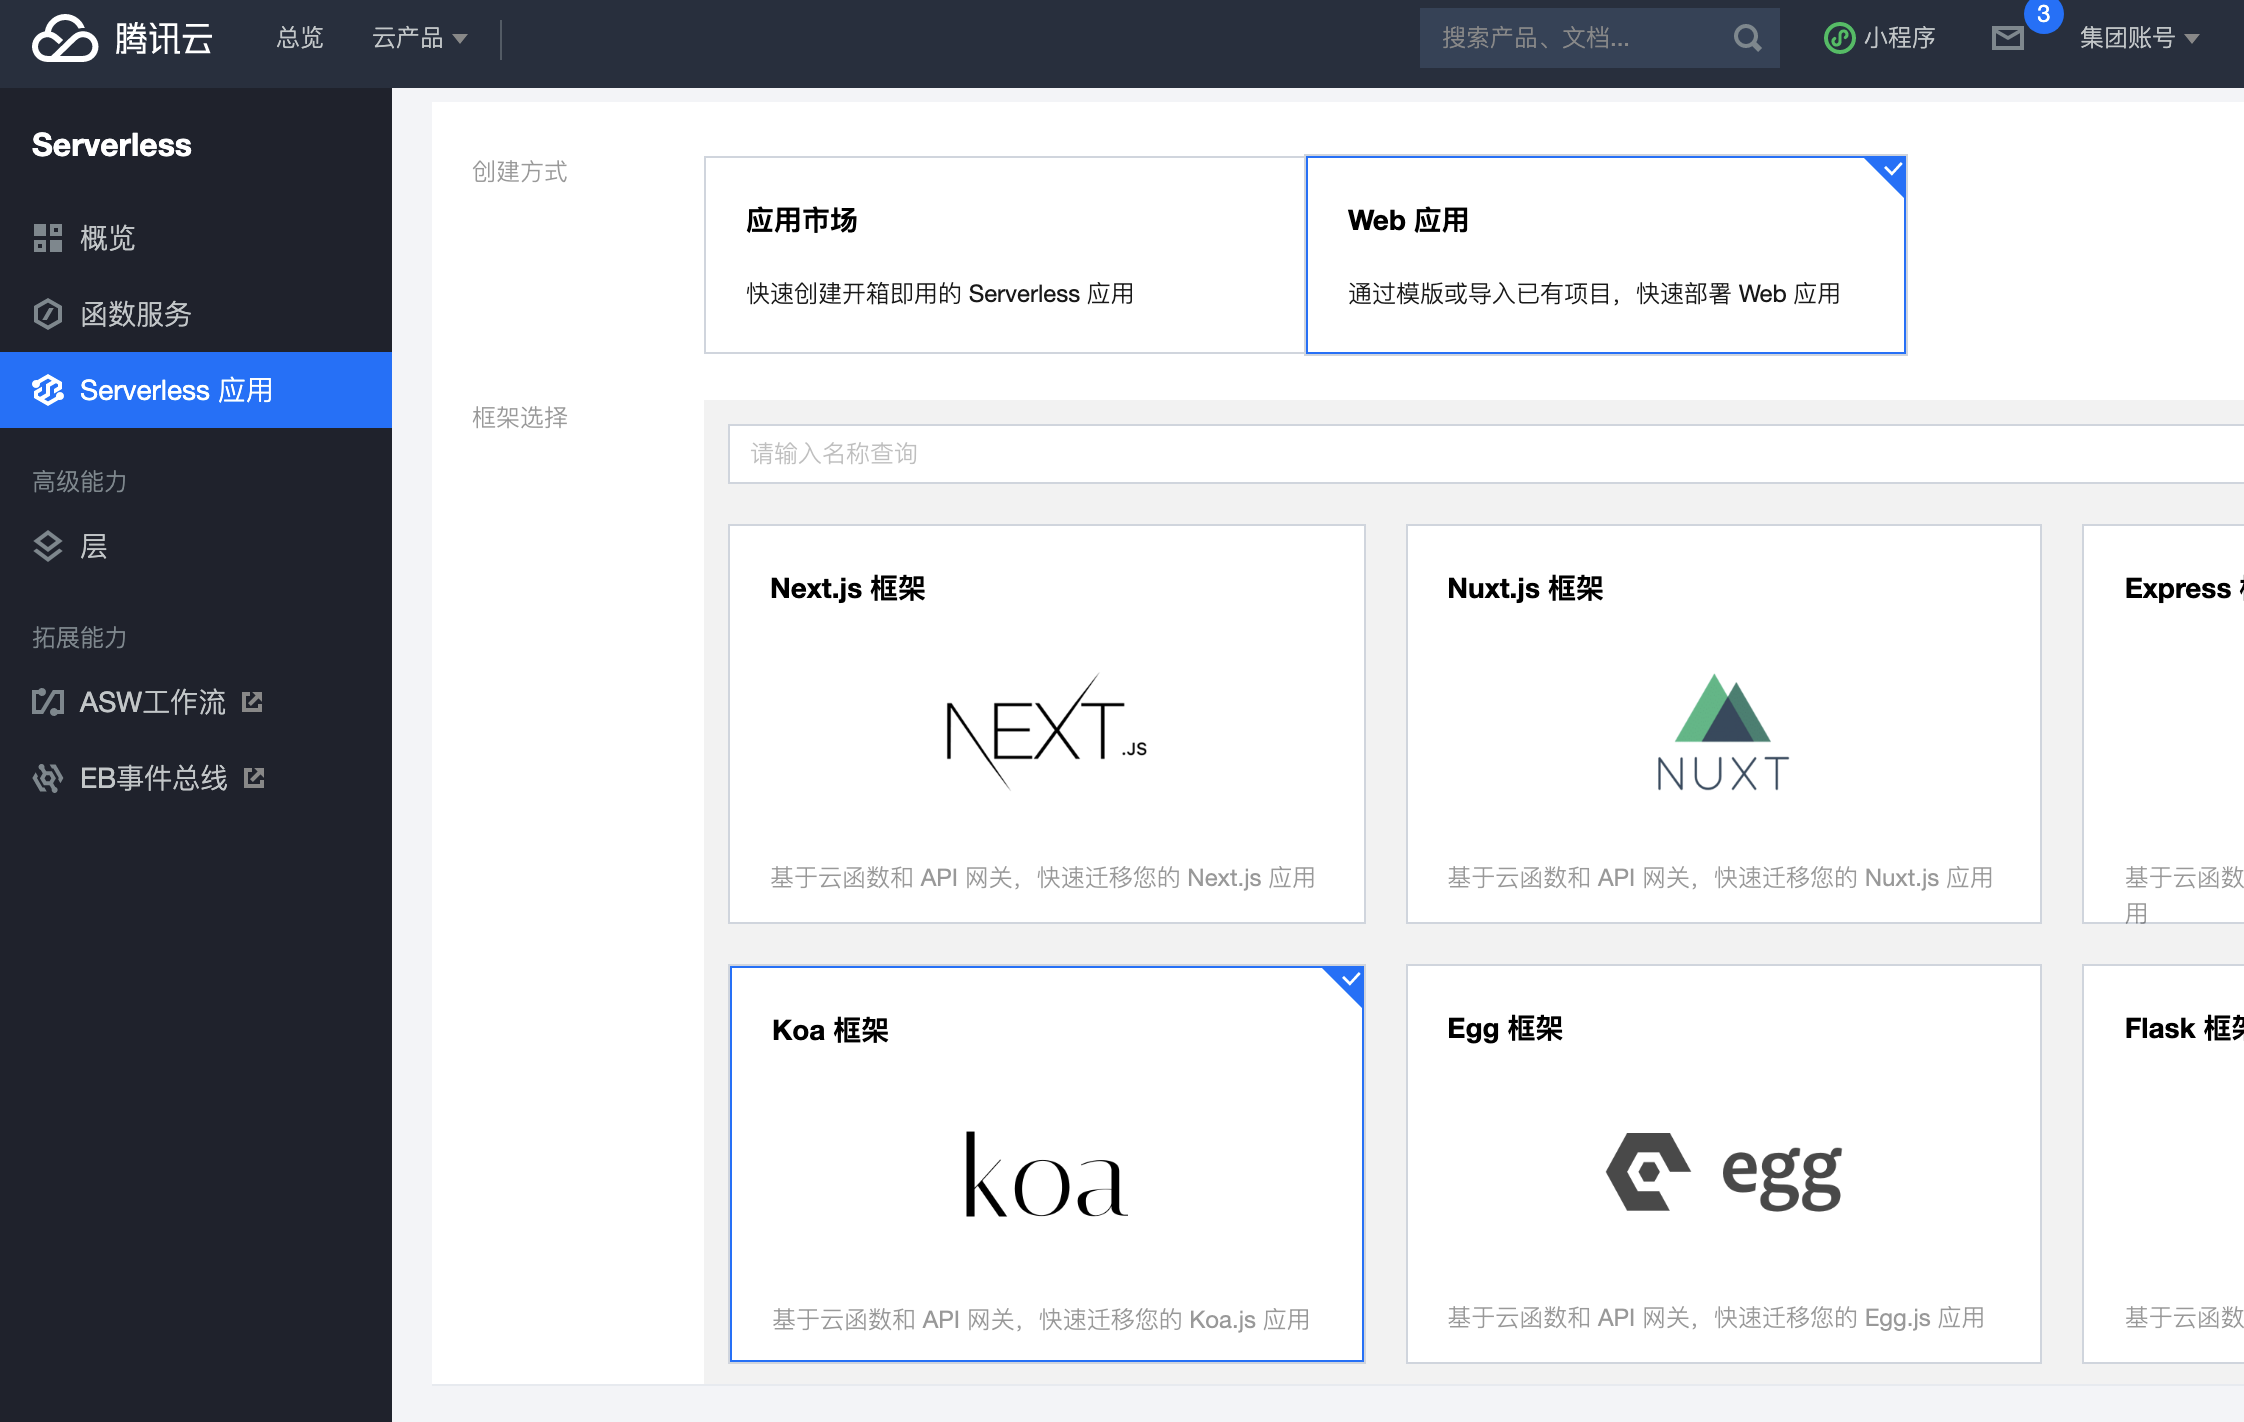
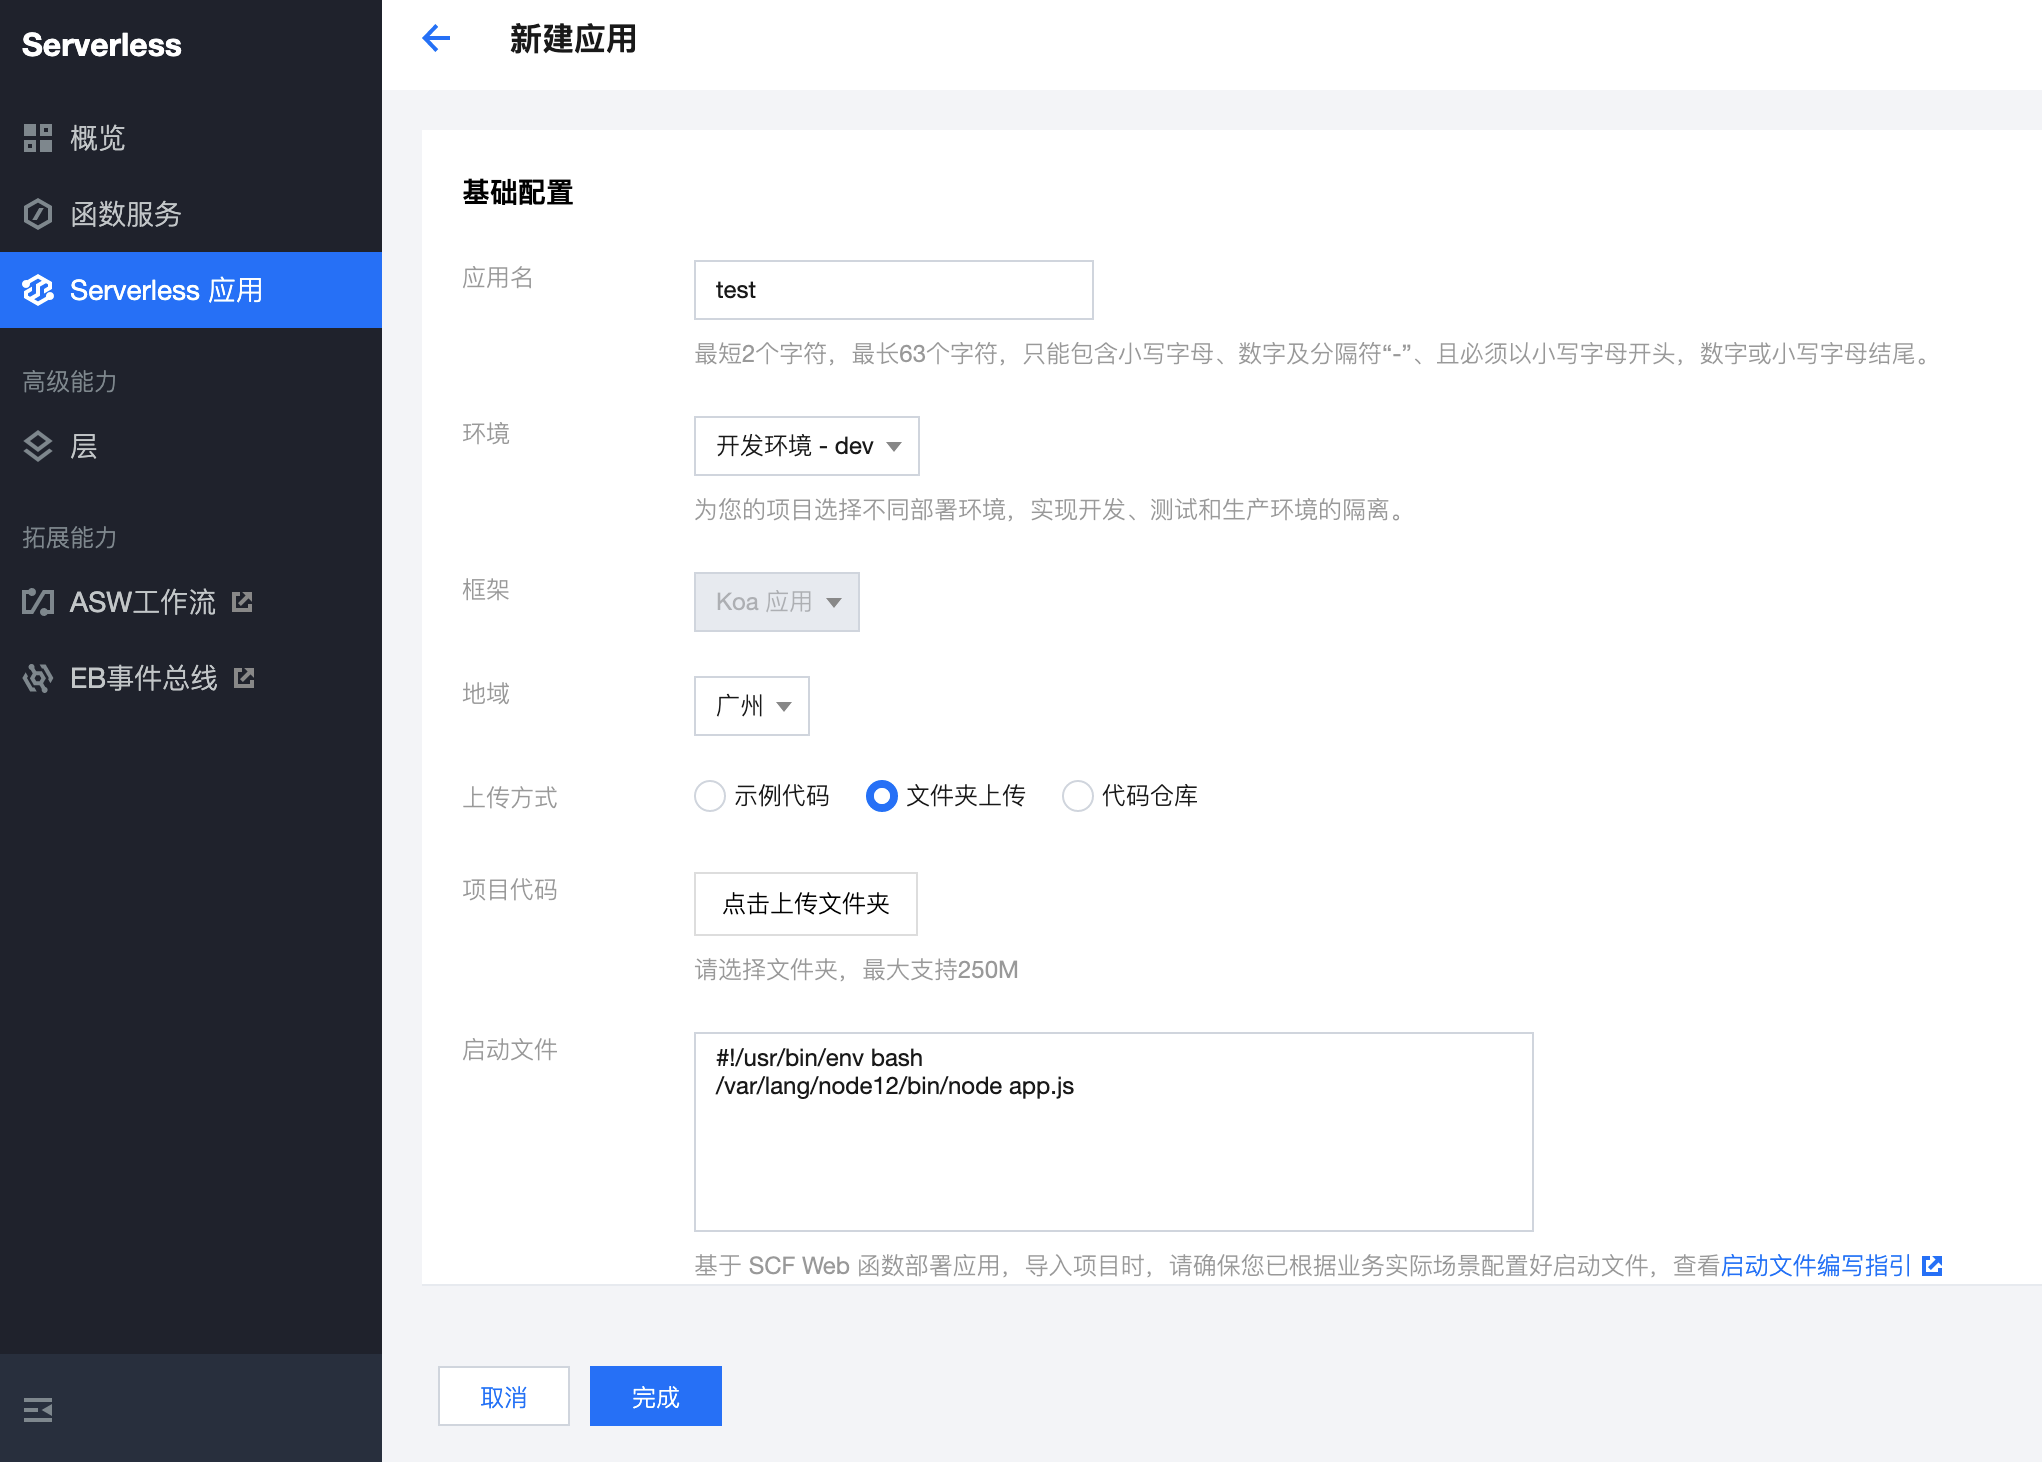
1. Console deployment
Deploy koa2 management interface
Official demo https://github.com/tencentyun/serverless-demo/blob/master/WebFunc-KoaDemo/src/app.js
The warehouse is associated with GitHub, and the git code is submitted for automatic update

2. Command line deployment - Serverless Framework mode
The difference between cloud function and serverless
- Serverless Framework is an open source serverless application development framework launched by serverless company.
- The Serverless Framework is composed of Serverless Framework Plugin and Serverless Framework Components.
- Serverless Framework Plugin is actually a function management tool. Using this tool, you can easily deploy functions, delete functions, trigger functions, view function information, view function logs, rollback functions, view function data, etc. A simple summary is that serverless is actually a collection of cloud functions. After using serverless, the cloud functions we create do not need to manually create triggers and other operations.
- Official address
Serverless Framework application scenario
In fact, in the actual development process, we all use serverless instead of cloud functions. After all, the use scenarios of cloud functions are limited, or more basic. For a simple example, when writing js to operate dom, will you choose to use native js or the same metaphor as jquery.
- Command line development tool based on cloud function
- Through the Serverless Framework, developers can complete the development, deployment and debugging of functions on the command line. It can also combine front-end services, API gateways, databases and other cloud resources to realize the rapid deployment of full stack applications.
- Rapid migration of traditional application framework
- The Serverless Framework provides a general framework migration scheme by using the framework components provided by the Serverless Framework (Egg/Koa/Express, etc.), For more framework support, please refer to ), the original application can be quickly migrated to the function platform by simply modifying a few lines of code. It also supports the development mode of command line and console.
Use the serverless command to create the first application
Global install command
npm install -g serverless
serverless -v
Create project
Run the command in an empty directory on your computer
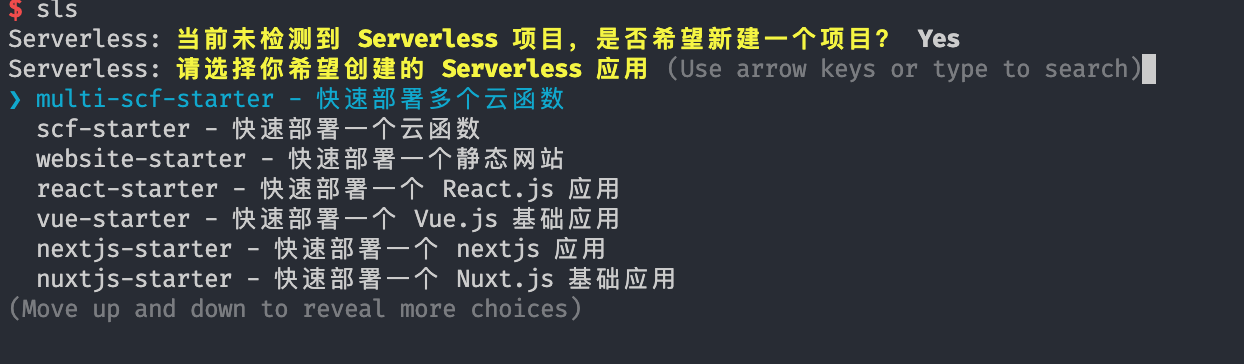
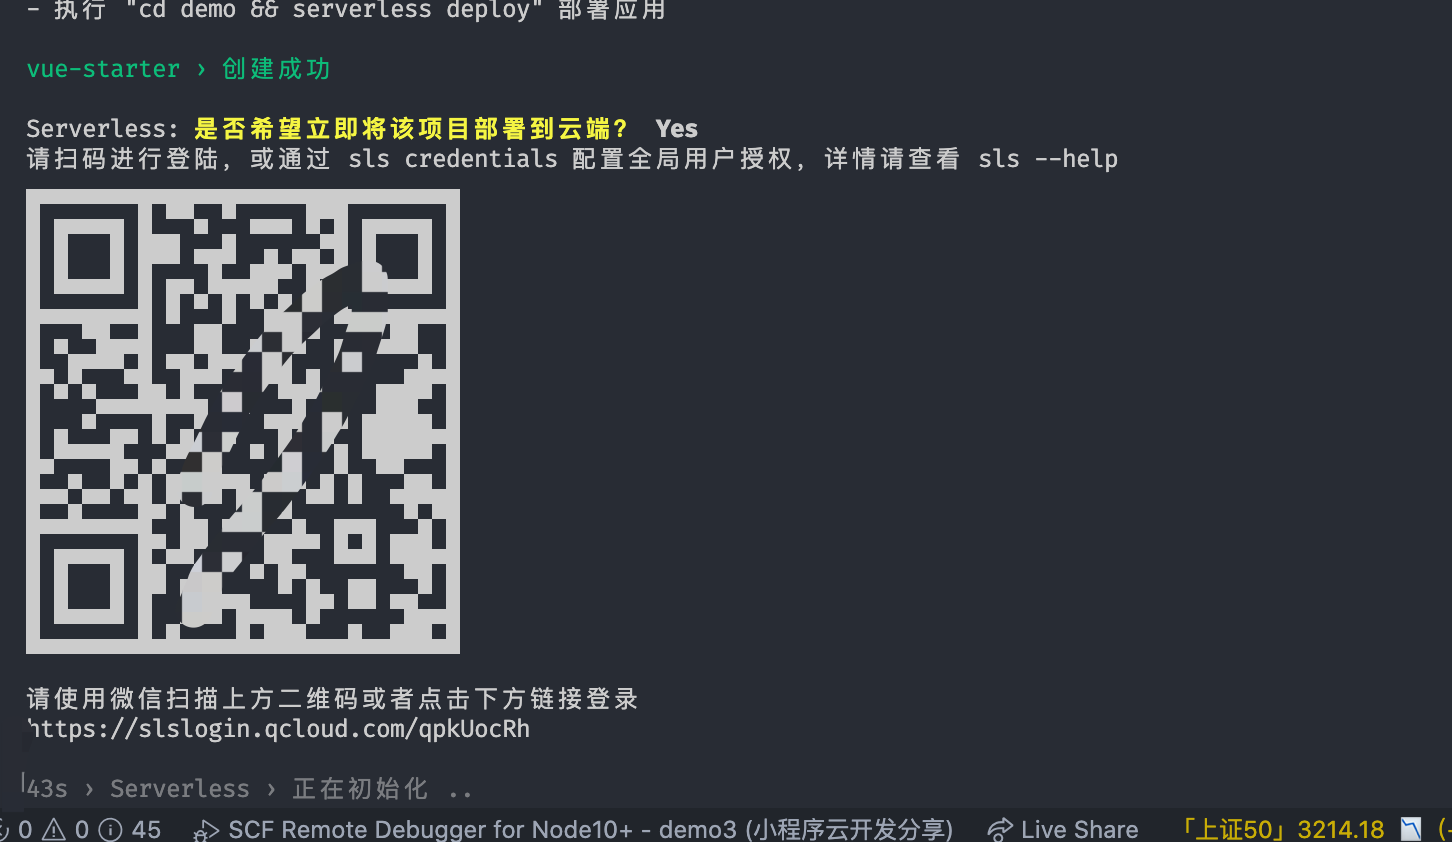
serverless
Follow the prompts to select the template you want to create
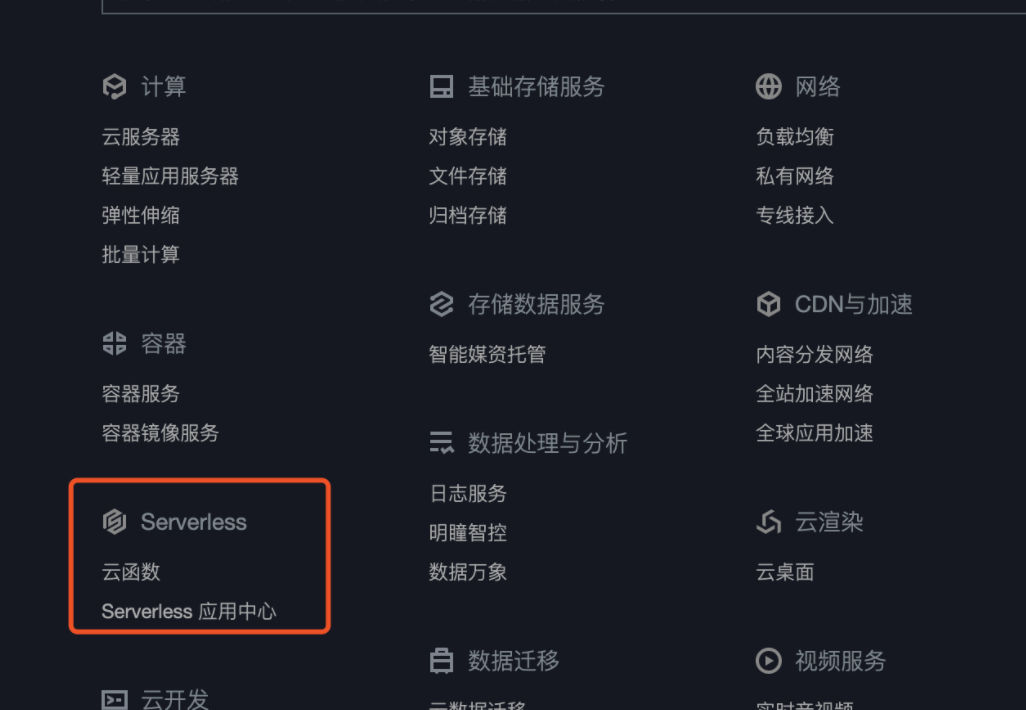
Enter serverless from the console
Select the corresponding template
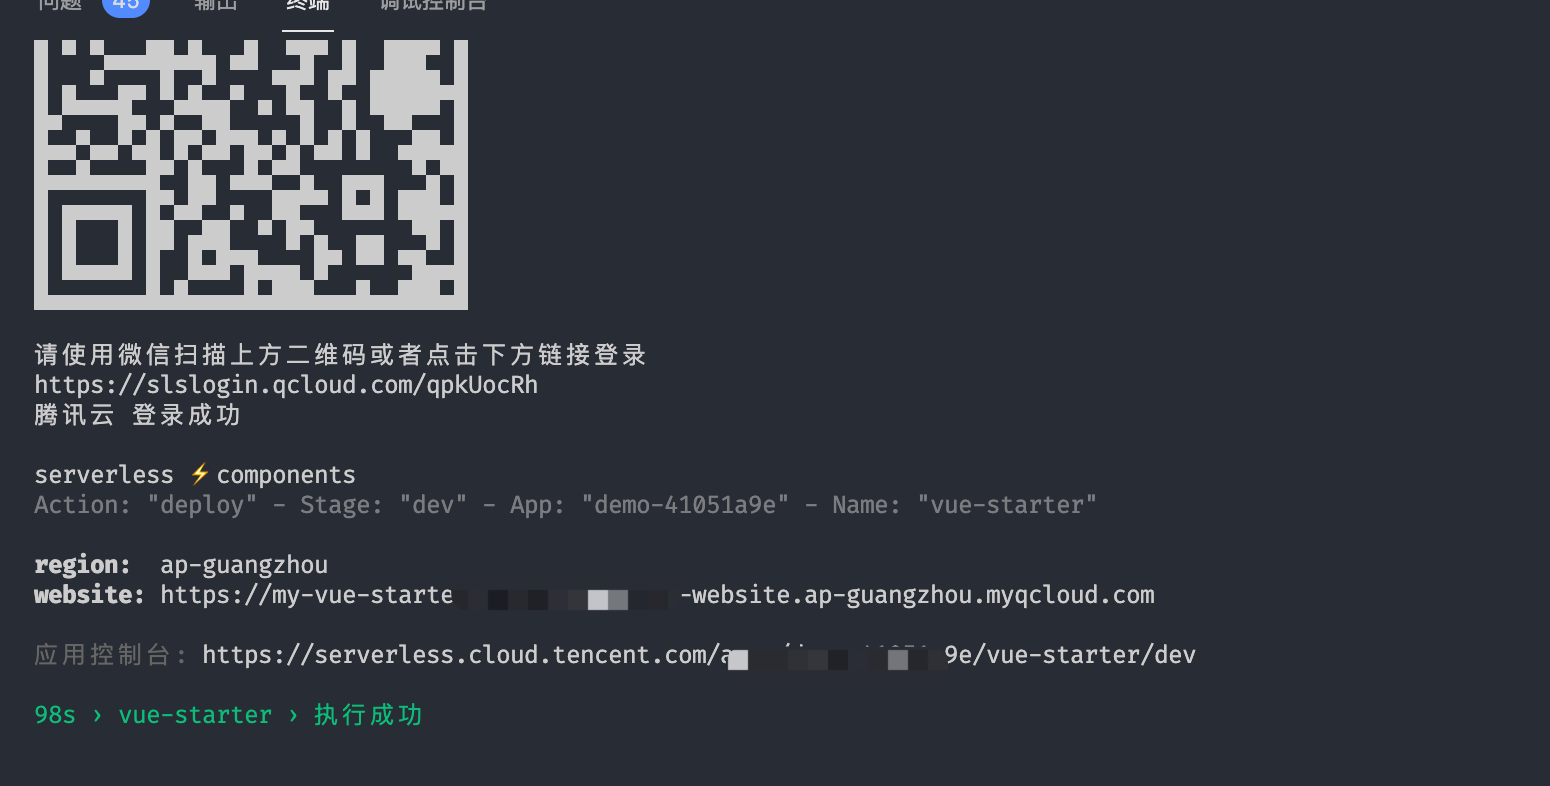
Deploy Online
serverless deploy
serverless.yml configuration details
https://github.com/serverless-components/tencent-http/blob/master/docs/configure.md
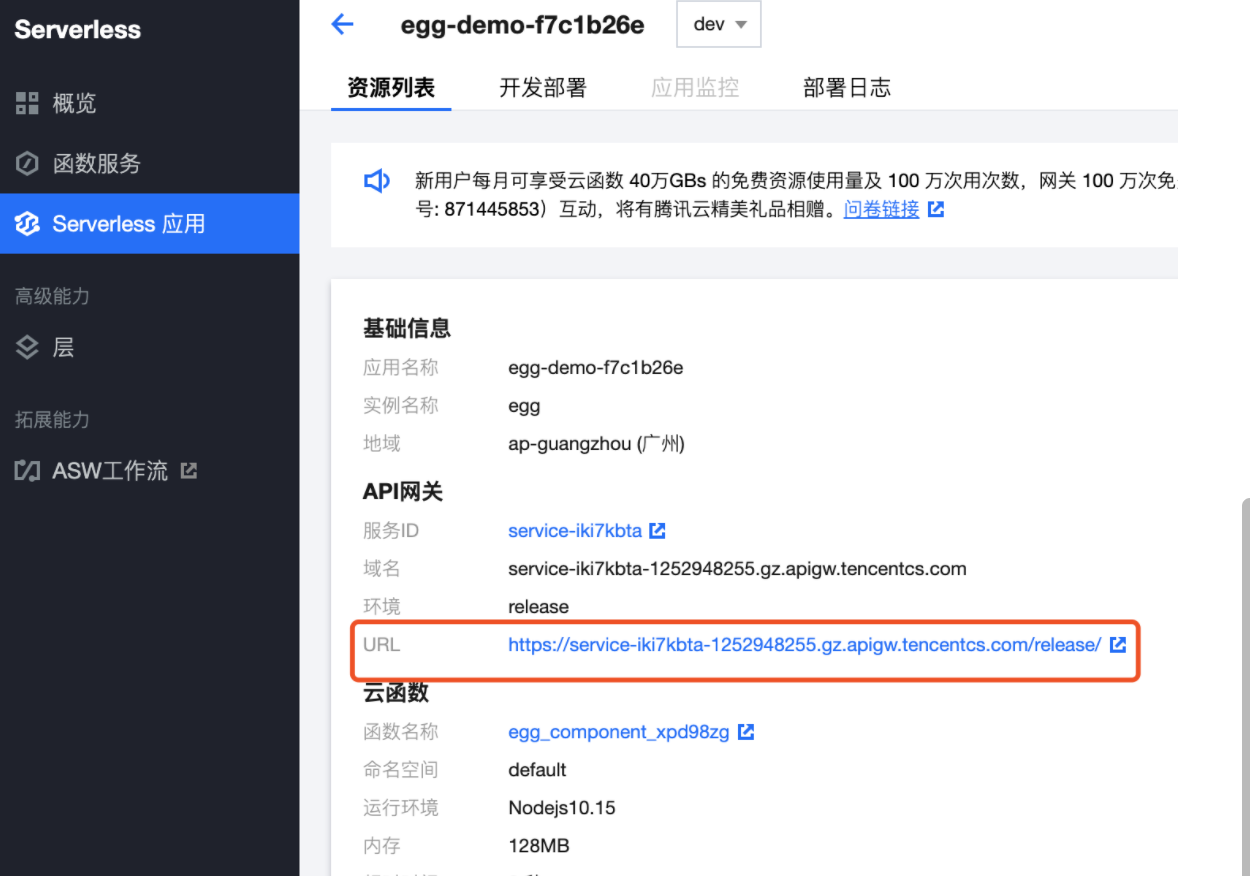
After the deployment goes online, you can view your project here
Test deployed projects
Delete deployed items

3. Configure plug-ins in vscode to develop serverless
Installing plug-ins on vscode
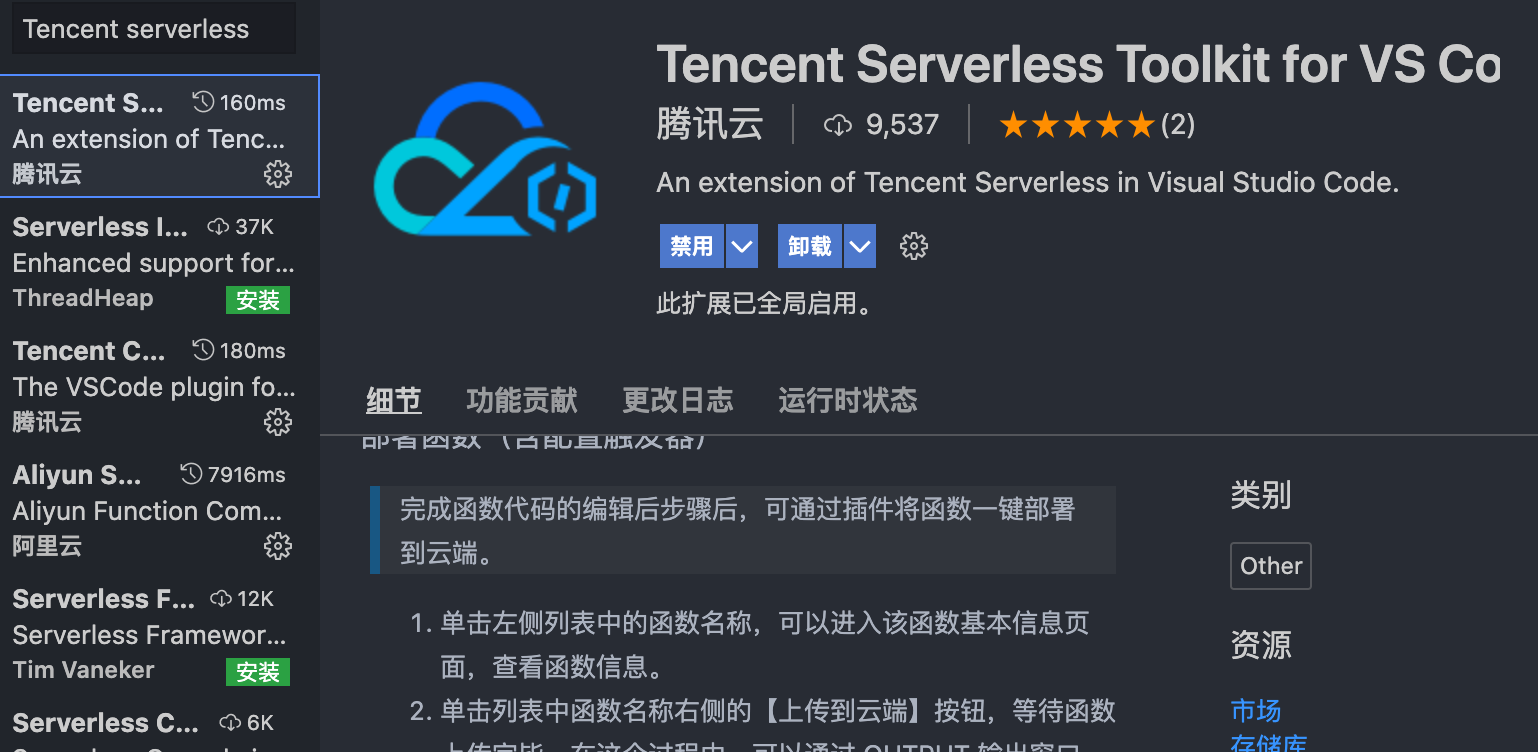
After vscode is installed, the plug-in logs in and pulls the application
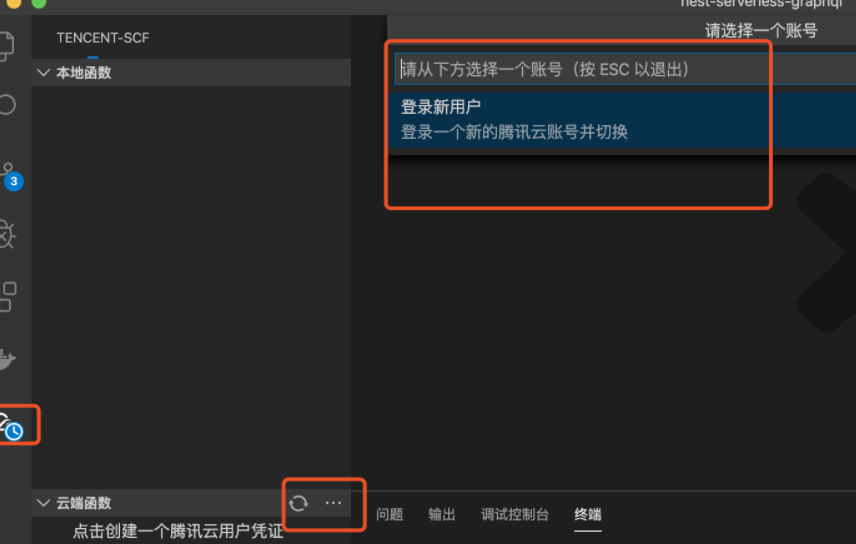
About login account and key View address
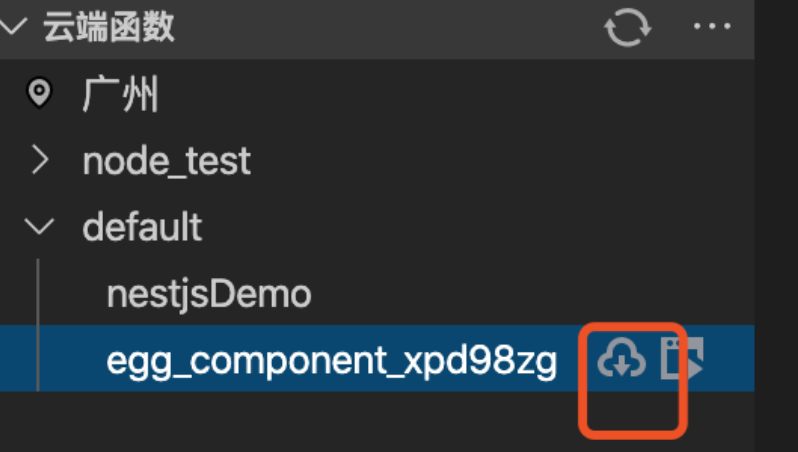
Remote pull code
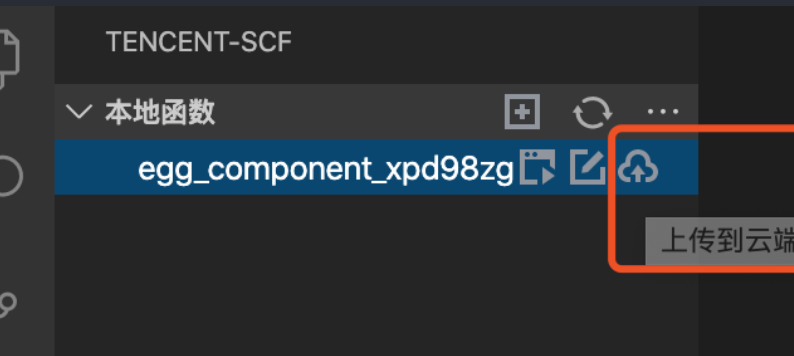
If you want to upload the downloaded code, you can also upload it directly
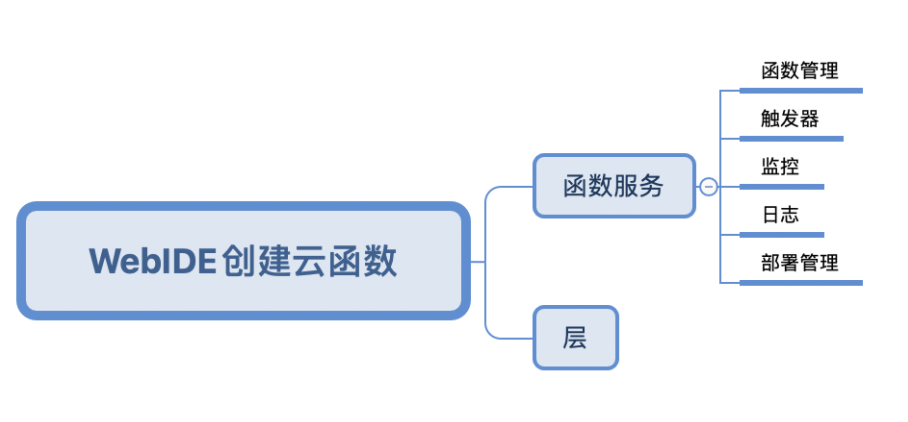
Practice of creating cloud function in WebIDE
serverless deployment front end project
It is recommended to use Serverless Framework CLI to quickly deploy local cloud functions
- Generating vue project files using commands
- Just push the code directly to the cloud
- You may be curious. In our normal vue project deployment, we must first npm run build, and then transfer the packaged dist directory to the nginx static directory on the server, so as to access it
- Note that all front-end project deployments are stored in oss
- The project generated by using serverless is vue2 by default. If you want to deploy the project of vue3, you need to build it manually
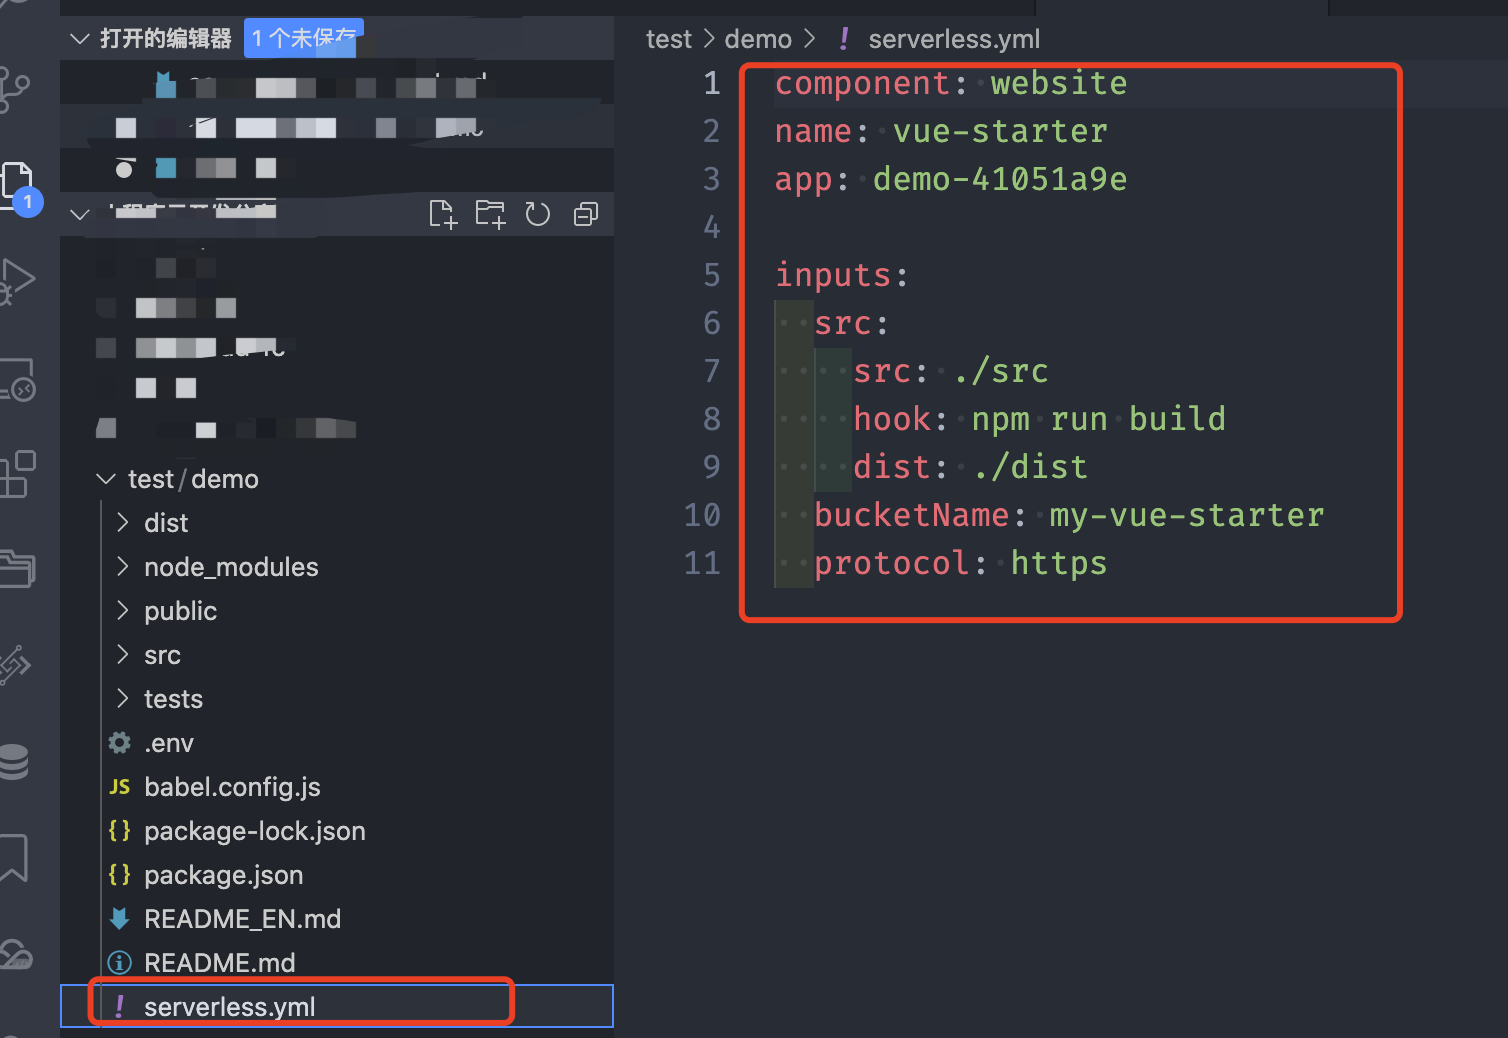
# serverless.yml file
component: website
name: vue-starter
app: vue-demo-70a4c710

inputs:
  src:
    src: ./src
    # After this hook is configured, build will be started each time it is released
    hook: npm run build
    dist: ./dist
  bucketName: my-vue-starter
  protocol: https
Build a vue3 project manually
- Reference documents
- Create a vue3 project using scaffolding
- Initialize a serverless YML file
serverless init website-starter --name example
Put this serverless Copy the YML file into the vue3 project
Simple modification
component: website
name: websiteDemo
app: vue3-demo-6cb9842a

inputs:
  src:
    src: ./src
    hook: npm run build
    dist: ./dist
  region: ap-guangzhou
  bucketName: my-website-starter
  protocol: https
Deploy online serverless deploy
Manually deploy react project
Manually create a react project
npx create-react-app react-demo --template typescript
Create a serverless in the react root directory YML file
component: website
# Modify here
name: react-starter
# Modify here
app: reactDemo

inputs:
  src:
    src: ./src
    hook: npm run build
    # Here, according to your packaged directory
    dist: ./build
  # Under this definition
  bucketName: my-react-starter
  protocol: https
Push to cloud serverless deploy
Deploying front-end projects using static file hosting
- First, package it according to the local project command
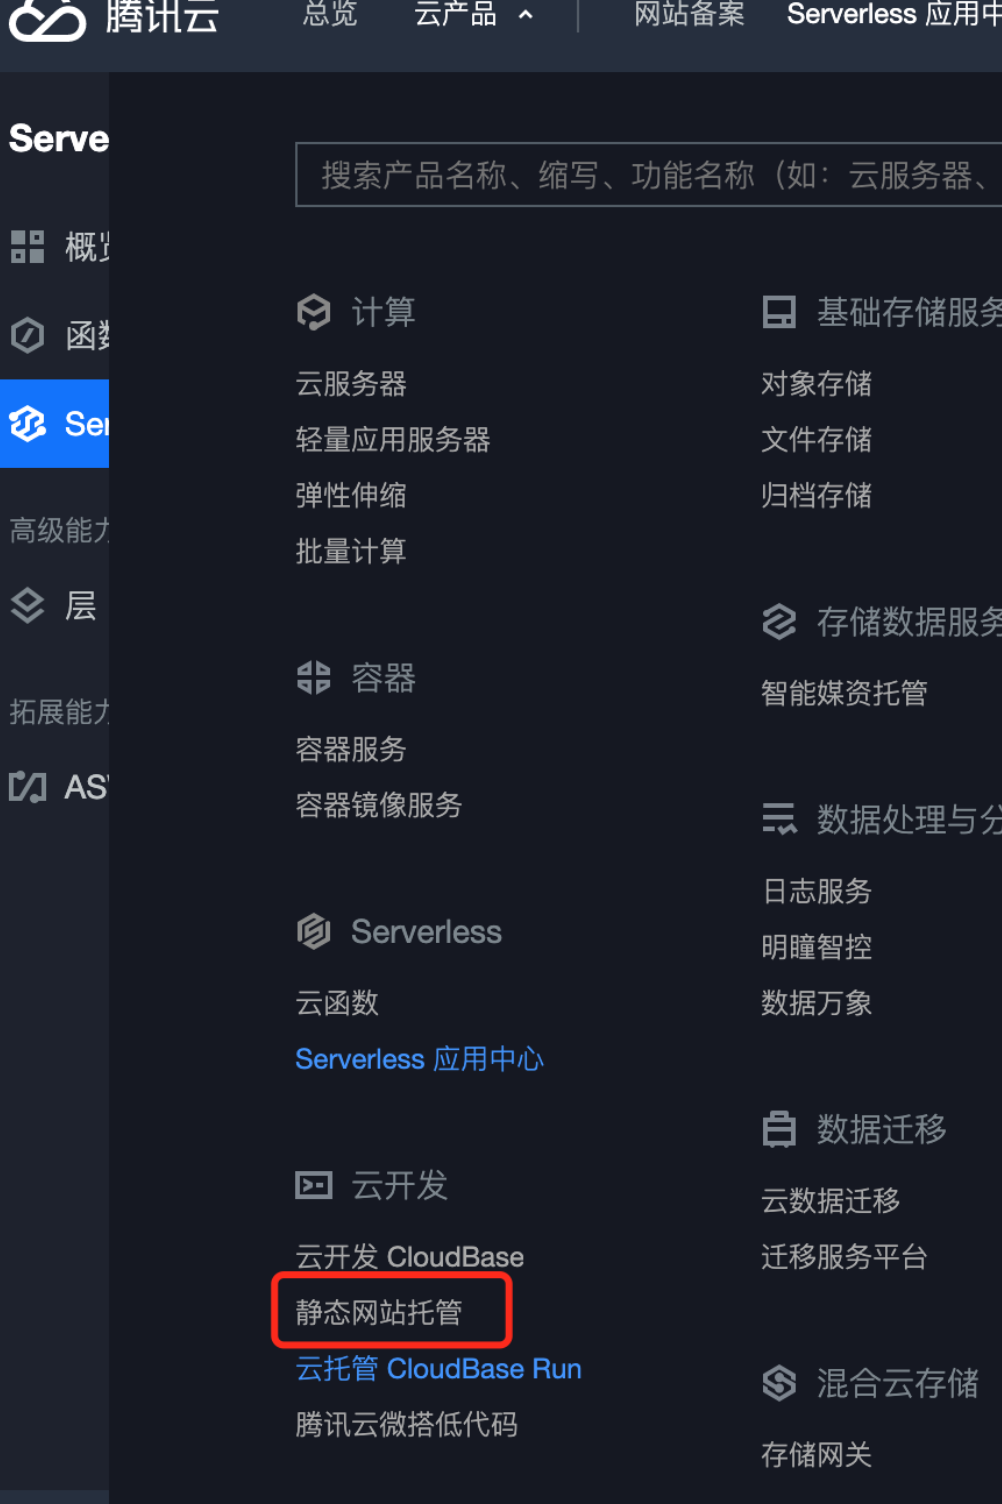
- Select static file hosting in cloud products
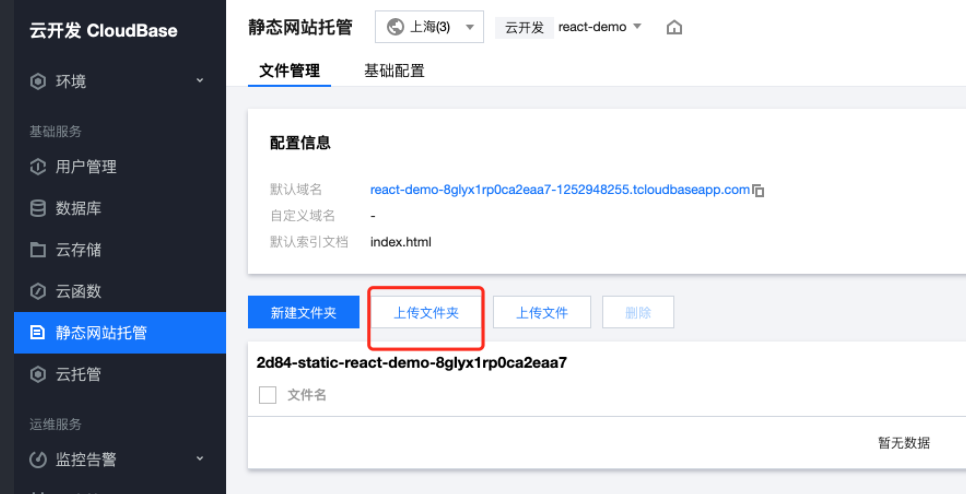
- Directly upload your packaged code
Connect mysql in serverless
Database preparation
Developing with serverless is different from using ECS ourselves, because we can't install software on serverless (we can't install mysql, docker, redis and other third-party software). Therefore, when we develop with serverless, if we use mysql, redis, rabbitMQ We need to solve the problem of RocketMQ class by ourselves. Several methods are described below
- We have a backup ECS. We have installed the required software on it, provided the IP or domain name externally, and opened the port number in the security group for use in serverless. In fact, if you own ECS, you may not consider using serverless for development
- Use the third-party paid or volume based databases separately, such as:
- Alibaba cloud RDS MySQL
- Tencent cloud database Cloud database
- Use the NoSQL database with Free Quota officially provided by Tencent cloud Reference documents , this training camp will introduce how to use it, but it will not be used in the project.
- I used docker to build a MySQL 8 database on my server for everyone to learn and use. I created my own database on it according to my name. You can save the address by yourself. If you have a server, you can build it on your own server, so you don't need to use me
# ip address
8.129.234.99
# user name
root
# password
123456
Connect mysql in serverless
This case only tests the connection of the official case to the database, and does not involve any knowledge points. Choose whether to skip according to your own conditions
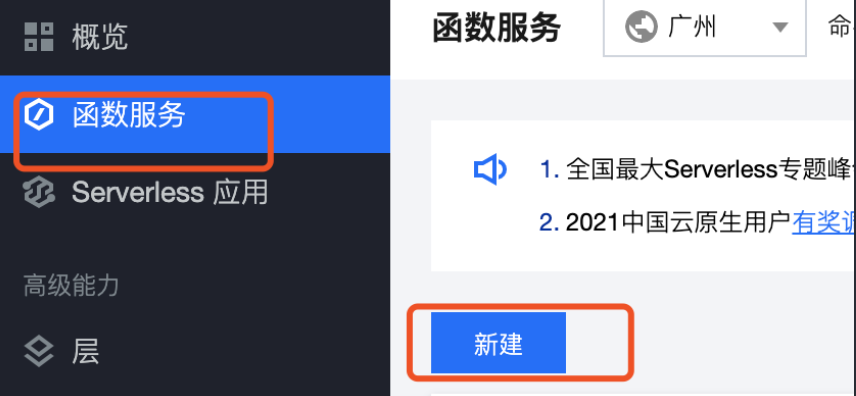
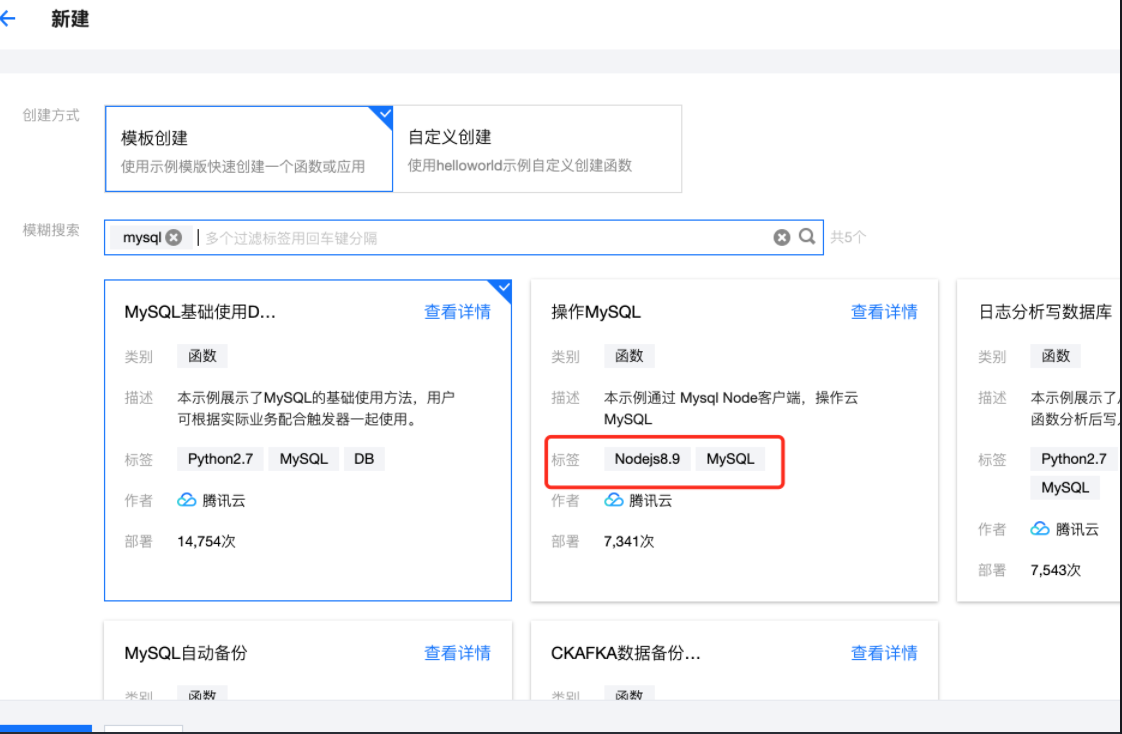
Select the mysql database template in the function service to create a database cloud function application. Pay attention to the selected voice and area
Create databases and data tables in your own database
-- Create data table sql
CREATE TABLE `account` (
  `id` int(11) NOT NULL AUTO_INCREMENT COMMENT 'Primary key id',
  `username` varchar(50) NOT NULL COMMENT 'user name',
  `password` varchar(100) NOT NULL COMMENT 'password',
  `created_at` timestamp(6) NOT NULL DEFAULT CURRENT_TIMESTAMP(6) COMMENT 'Creation time',
  `updated_at` timestamp(6) NOT NULL DEFAULT CURRENT_TIMESTAMP(6) ON UPDATE CURRENT_TIMESTAMP(6) COMMENT 'Update time',
  `deleted_at` timestamp(6) NULL DEFAULT NULL COMMENT 'Soft delete time',
  PRIMARY KEY (`id`)
) ENGINE=InnoDB DEFAULT CHARSET=utf8mb4;
-- Insert several pieces of data sql
insert into account(username, password) values('admin', '123456');
insert into account(username, password) values('Zhang San', '123456');
Open the code management of the cloud function and modify the connection configuration of the database
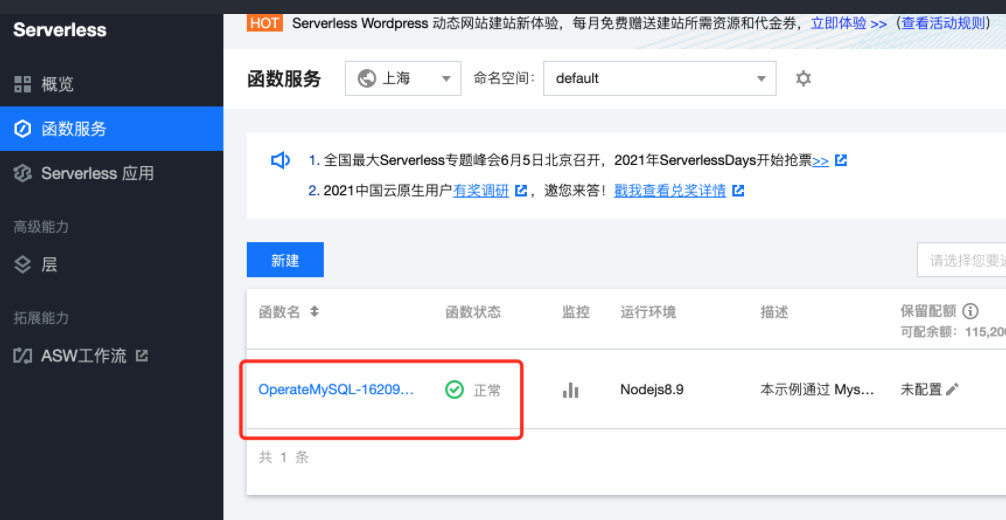
Enter the function code editing interface
function wrapPromise(connection, sql) {
  return new Promise((res, rej) => {
    connection.query(sql, function(error, results, fields) {
      if (error) {
        rej(error)
      }
      res(results)
    })
  })
}
exports.main_handler = async (event, context, callback) => {
  const mysql = require('mysql');
  const connection = mysql.createConnection({
    host: '8.129.234.99', //  Cloud database instance ip address
    user: 'root', // Cloud database user name, such as root
    password: '123456', // Cloud database password
    database: 'serverless_nest' //  Database name
  });

  connection.connect();
  // sql file you need to query
  const querySql = `SELECT * from account`
  // Query results
  let queryResult = await wrapPromise(connection, querySql)

  connection.end();

  return queryResult
}
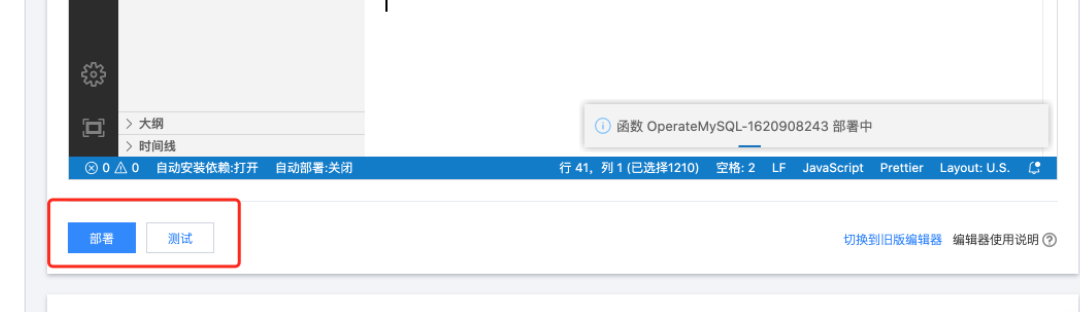
After modification, click deploy and test
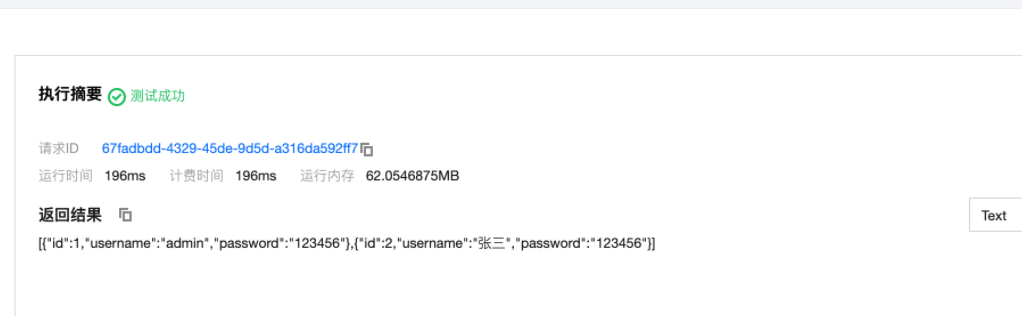
The following interface shows that you have successfully connected mysql in the cloud function
If you want to test access on the browser, you can click trigger management
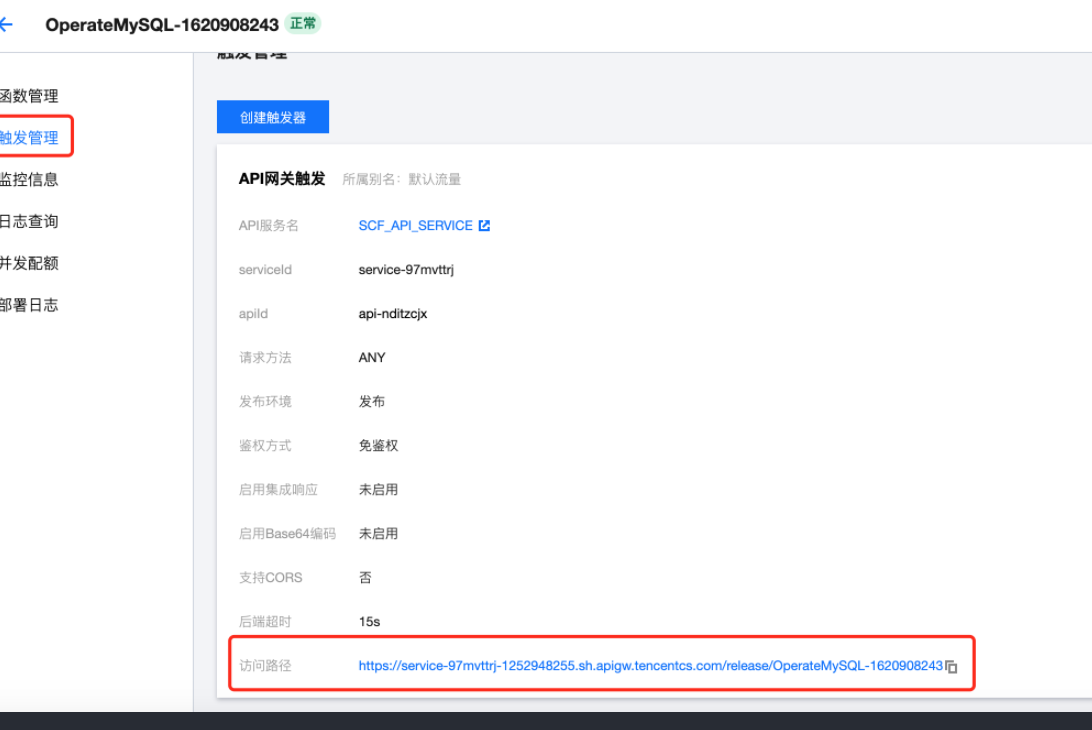
The difference between cloud development and serverless
- Serverless Framework is a serverless application framework that provides a business framework for combining resources such as cloud function SCF, API gateway, object storage COS and cloud database DB. Developers can write business logic directly based on the framework without paying attention to the configuration and management of underlying resources.
- Tencent CloudBase (TCB) is a cloud original integrated development environment and tool platform provided by Tencent cloud. It provides developers with high availability, automatic resilient expansion of the rear end cloud services, including computing, storage, hosting and other serverless capabilities, which can be used for cloud integration development of multiple end applications (small programs, official account, Web applications, Flutter clients, etc.) It helps developers build and manage back-end services and cloud resources in a unified way, avoiding cumbersome server construction and operation and maintenance in the process of application development. Developers can focus on the implementation of business logic, with lower development threshold and higher efficiency.
- The biggest difference between the two is that the platform support for developers is different. Cloud development supports web side, QQ, wechat applet level static website hosting and other platform services.
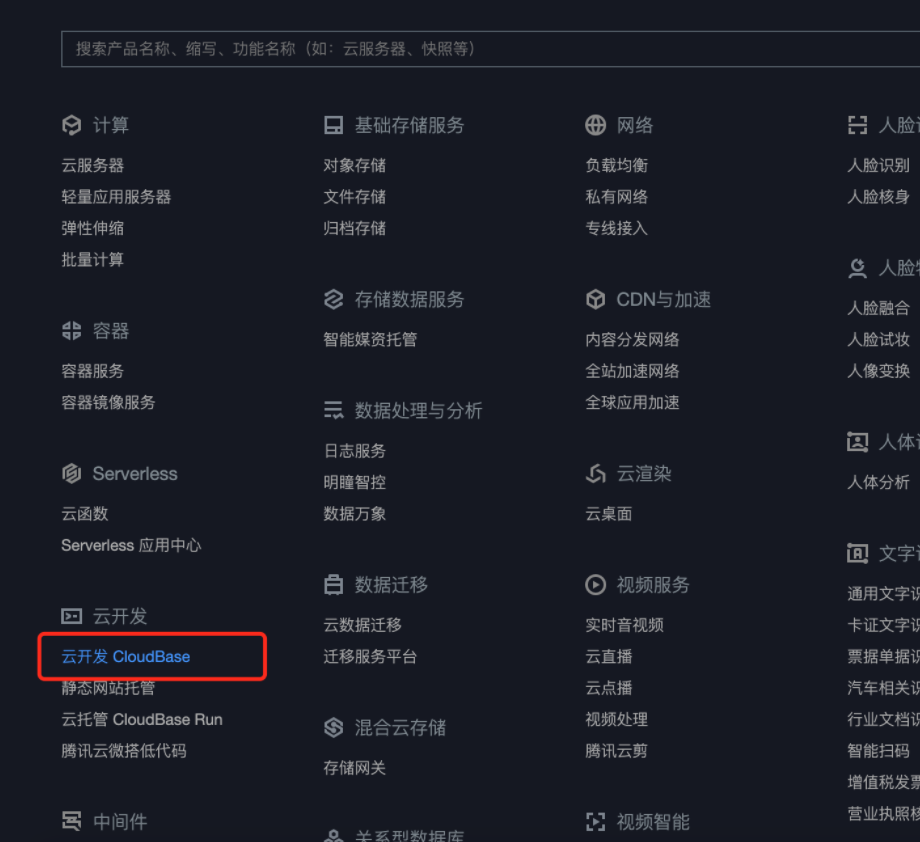
Create a nest project using cloud development
Select cloud development products in products
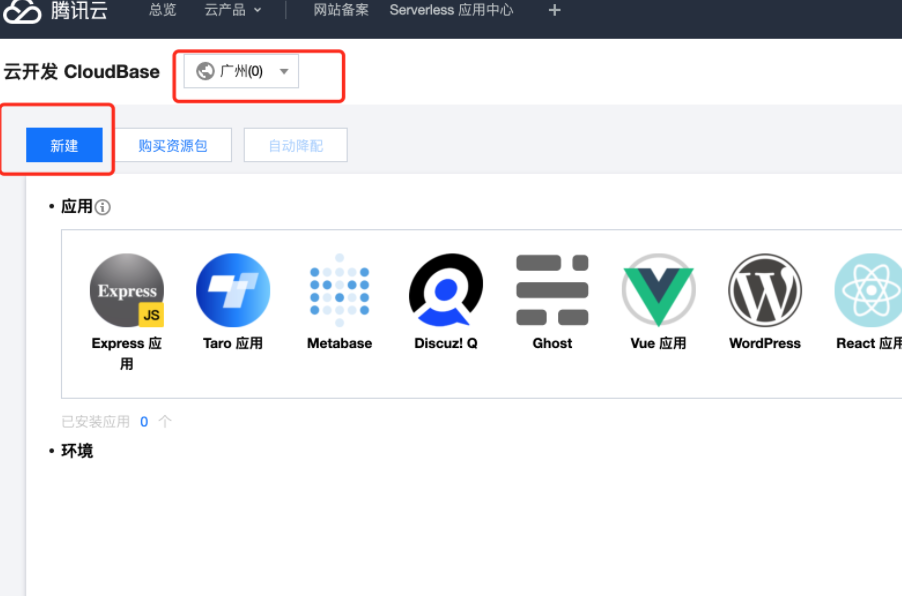
When creating a project, note: select a good area here. The next time you create a project, the area is different, and the project may not be visible
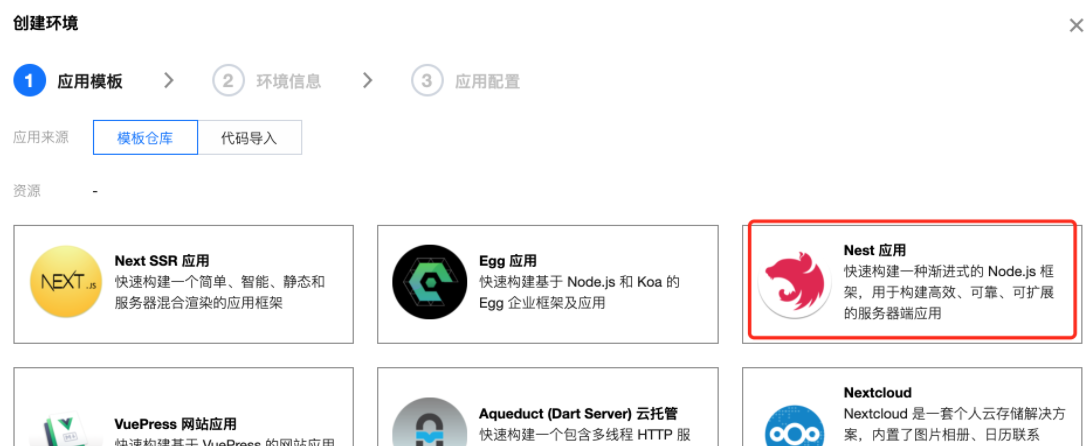
Create with template
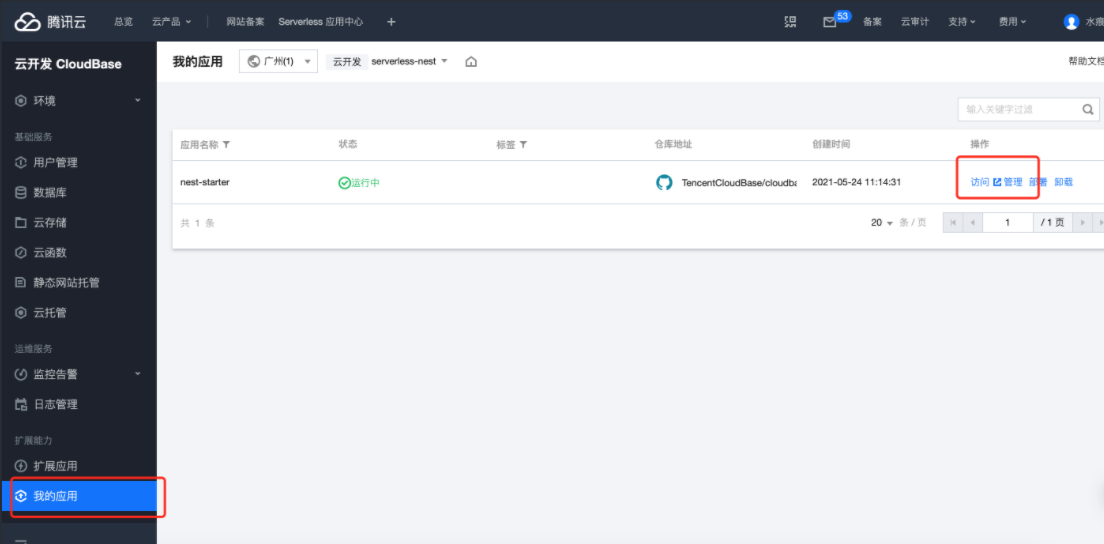
View the apps you created and access
Create using scaffolding
Global installation scaffold package Official address
npm i -g @cloudbase/cli
Test for successful installation
cloudbase -v
Sign in
cloudbase login
Create project locally
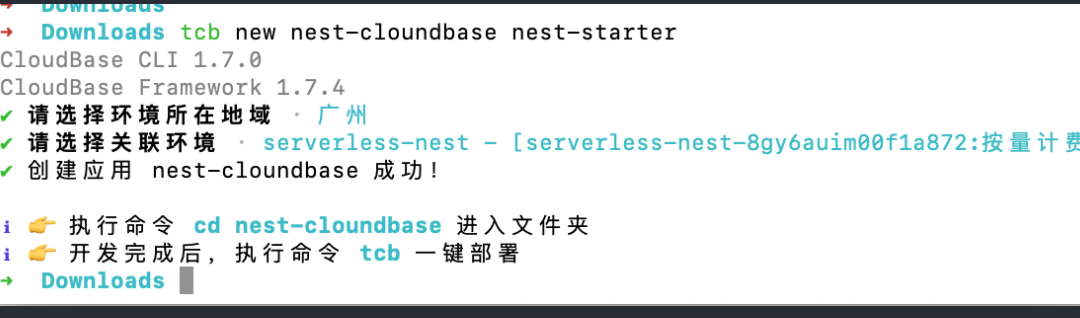
tcb new <appName> [template]
# such as
tcb new nest-cloundbase nest-starter
Select the environment you have created. If not, create a new environment. At this time, the browser will open
Open the project locally and install the dependent package
npm run dev
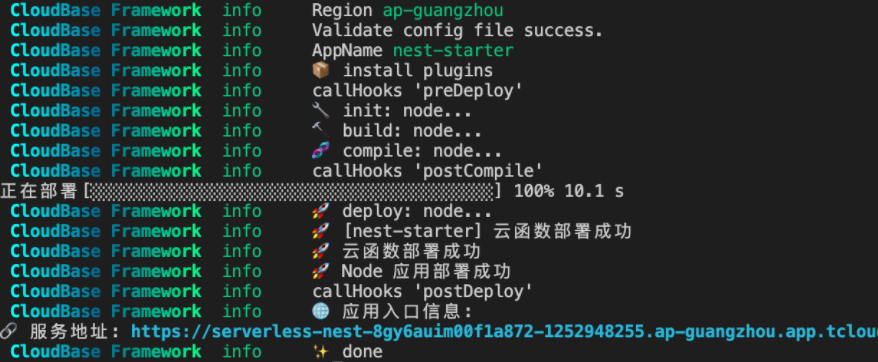
Deploy to online
npm run deploy
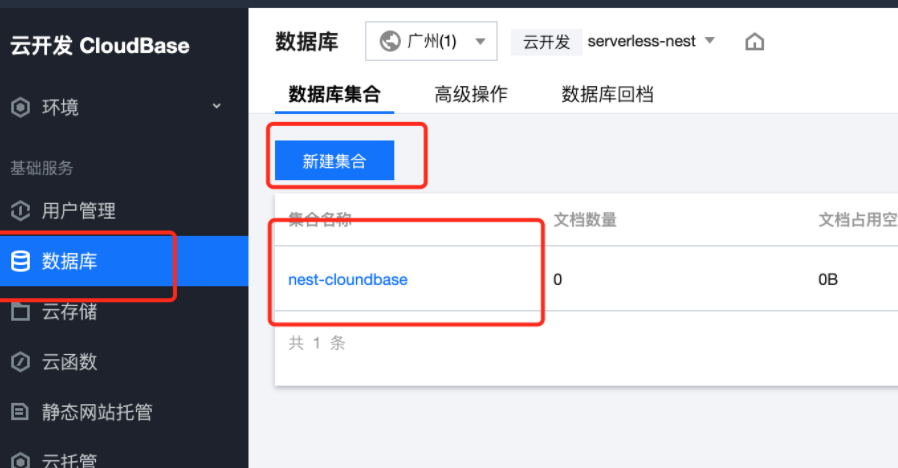
Using NoSQL in cloud development
Create a NoSQL database on the panel, Reference address
Install the SDK to connect to the database in the project Reference documents
npm install @cloudbase/node-sdk
Initialize database connection Reference address
import cloudbase from '@cloudbase/node-sdk';

// Note that the following parameters are required, and the document says they are not required
const app = cloudbase.init({
  secretId: 'xx',
  secretKey: 'yy',
  env: 'xx',
  // According to the area you created, there are only AP Shanghai and AP Guangzhou
  region: 'ap-shanghai'
})

// 1. Get database reference
const db = app.database();
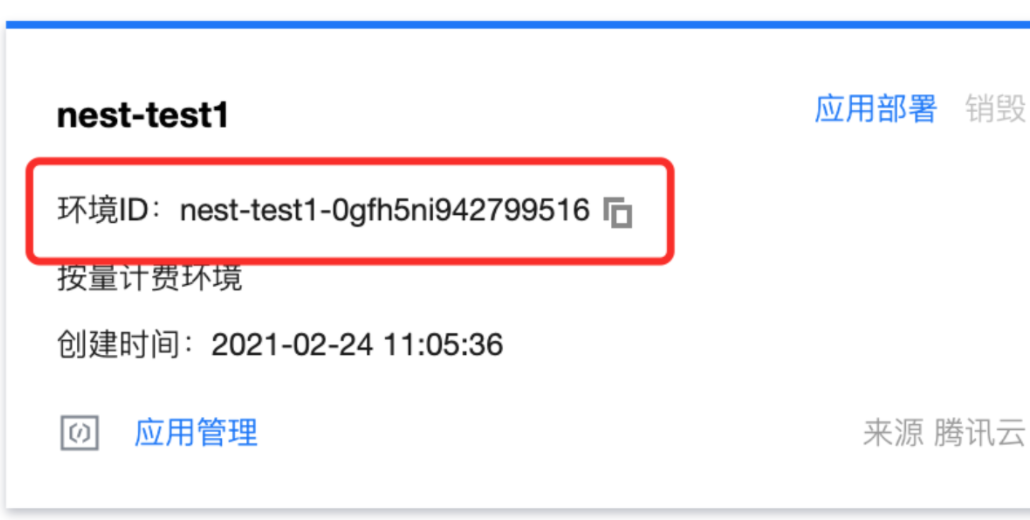
About obtaining the addresses of secretId, secretKey and env
- Get address of env
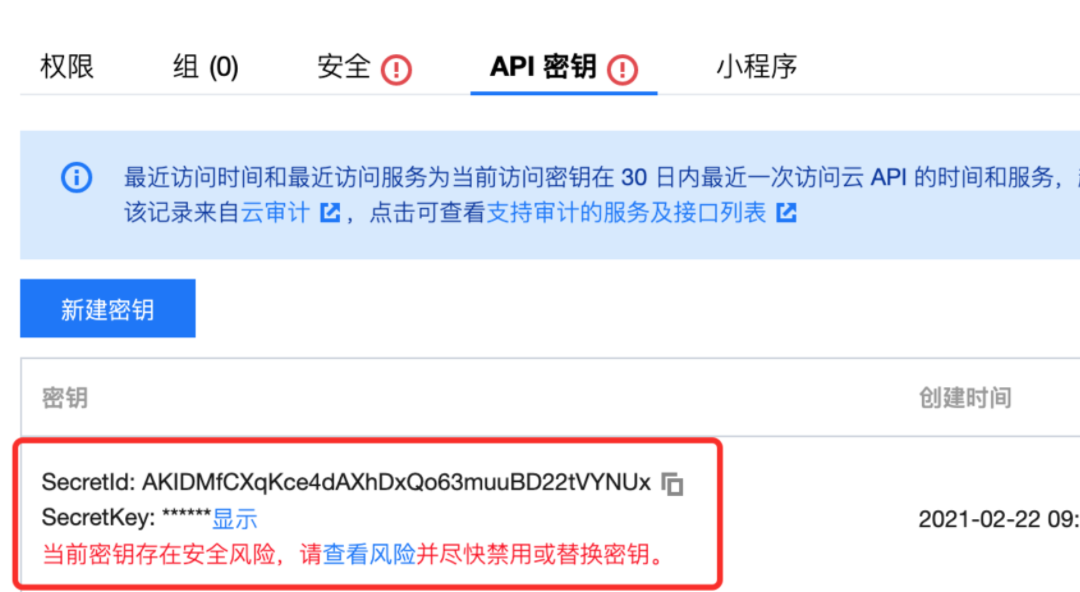
- secretId and secretKey acquisition
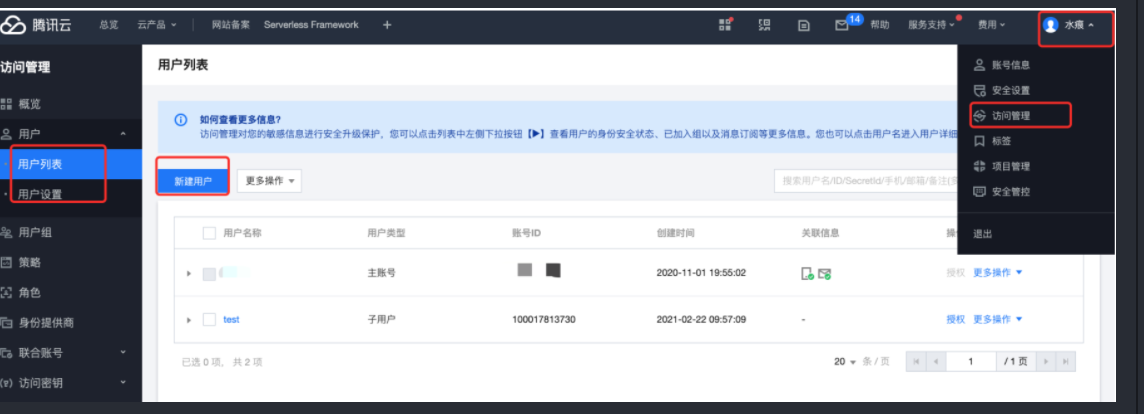
- Click test user to enter
According to the document, we will insert a piece of data (also ignore type detection first)
async createAccount(data: any): Promise<any> {
  const res = await db.collection('account')
    .add({
      ...data,
    });
  return res;
}
Configuration of environment variables
Configuration of local development environment variables
- Install dependent packages
npm install dotenv
npm install @types/dotenv -D
Create a in the project root directory env files are used to store some sensitive information
PORT=7000

SECRET_ID = AKIDMfCxx2stVYNUx
SECRET_KEY = d3C7pxxxv1VqiMrBHS
ENV = serverlxxim00f1a872
REGION = ap-guangzhou
Use the value of the environment variable in the application
const app = cloudbase.init({
  secretId: process.env.SECRET_ID,
  secretKey: process.env.SECRET_KEY,
  env: process.env.ENV,
  // According to the area you created, there are only AP Shanghai and AP Guangzhou
  region: process.env.REGION
})
I am a programmer Xiaoyue. More dry goods are shared in the company's "front-end advanced journey"