Project introduction
System introduction
This project, named sec tools, is a multi-functional Web application penetration test system based on Python Django, including vulnerability detection, directory identification, port scanning, fingerprint identification, domain name detection, side station detection, information leakage detection and other functions.
Project function
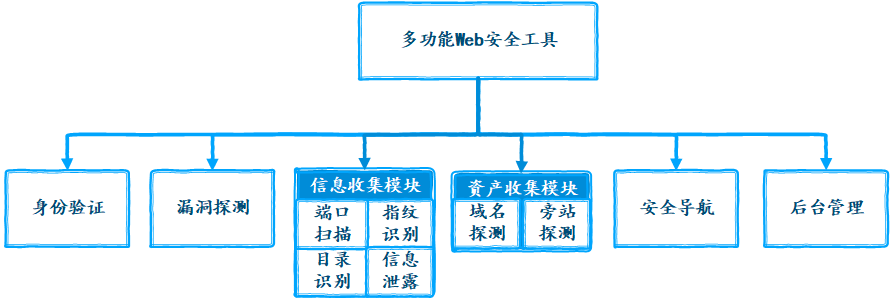
The system collects the assets of the website to be tested through the side station detection and domain name detection functions, collects the information of the website to be tested through the port scanning, fingerprint identification, directory identification and information leakage detection functions, and evaluates the potential security risks of the website through the collected information analysis, Then use the vulnerability detection function to reveal the vulnerabilities and hazard level of the website, and give repair suggestions. Through this series of steps, we can comprehensively detect the Web application, so as to find the security risks of the website. Therefore, users can make emergency response to the corresponding network threats, so as to improve the security of the site.
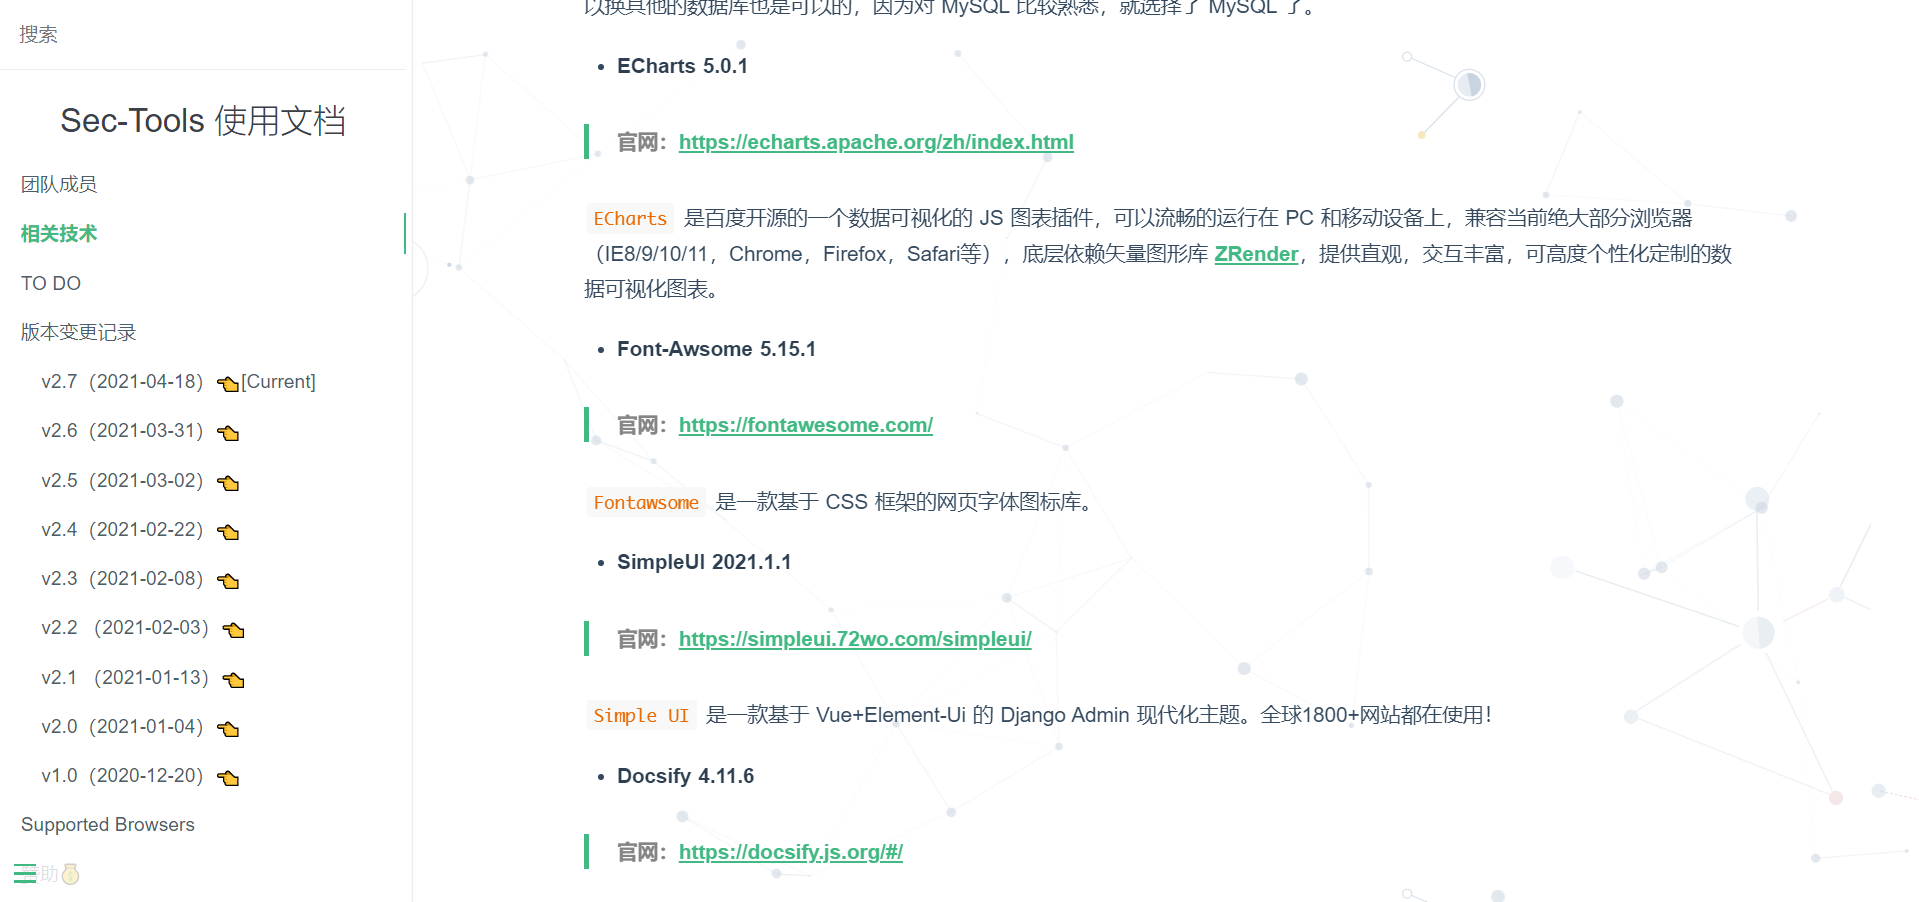
Related technology
| name | Python | Django | SQLite | ECharts | Tabler | Layer | Docsify | SimpleUI | Boostrap Table |
|---|---|---|---|---|---|---|---|---|---|
| edition | 3.7.0 | 3.1.4 | 3.35.2 | 5.0.1 | 1.0.0 | 3.2.0 | 4.11.6 | 2021.1.1 | 1.18.2 |
Project home page
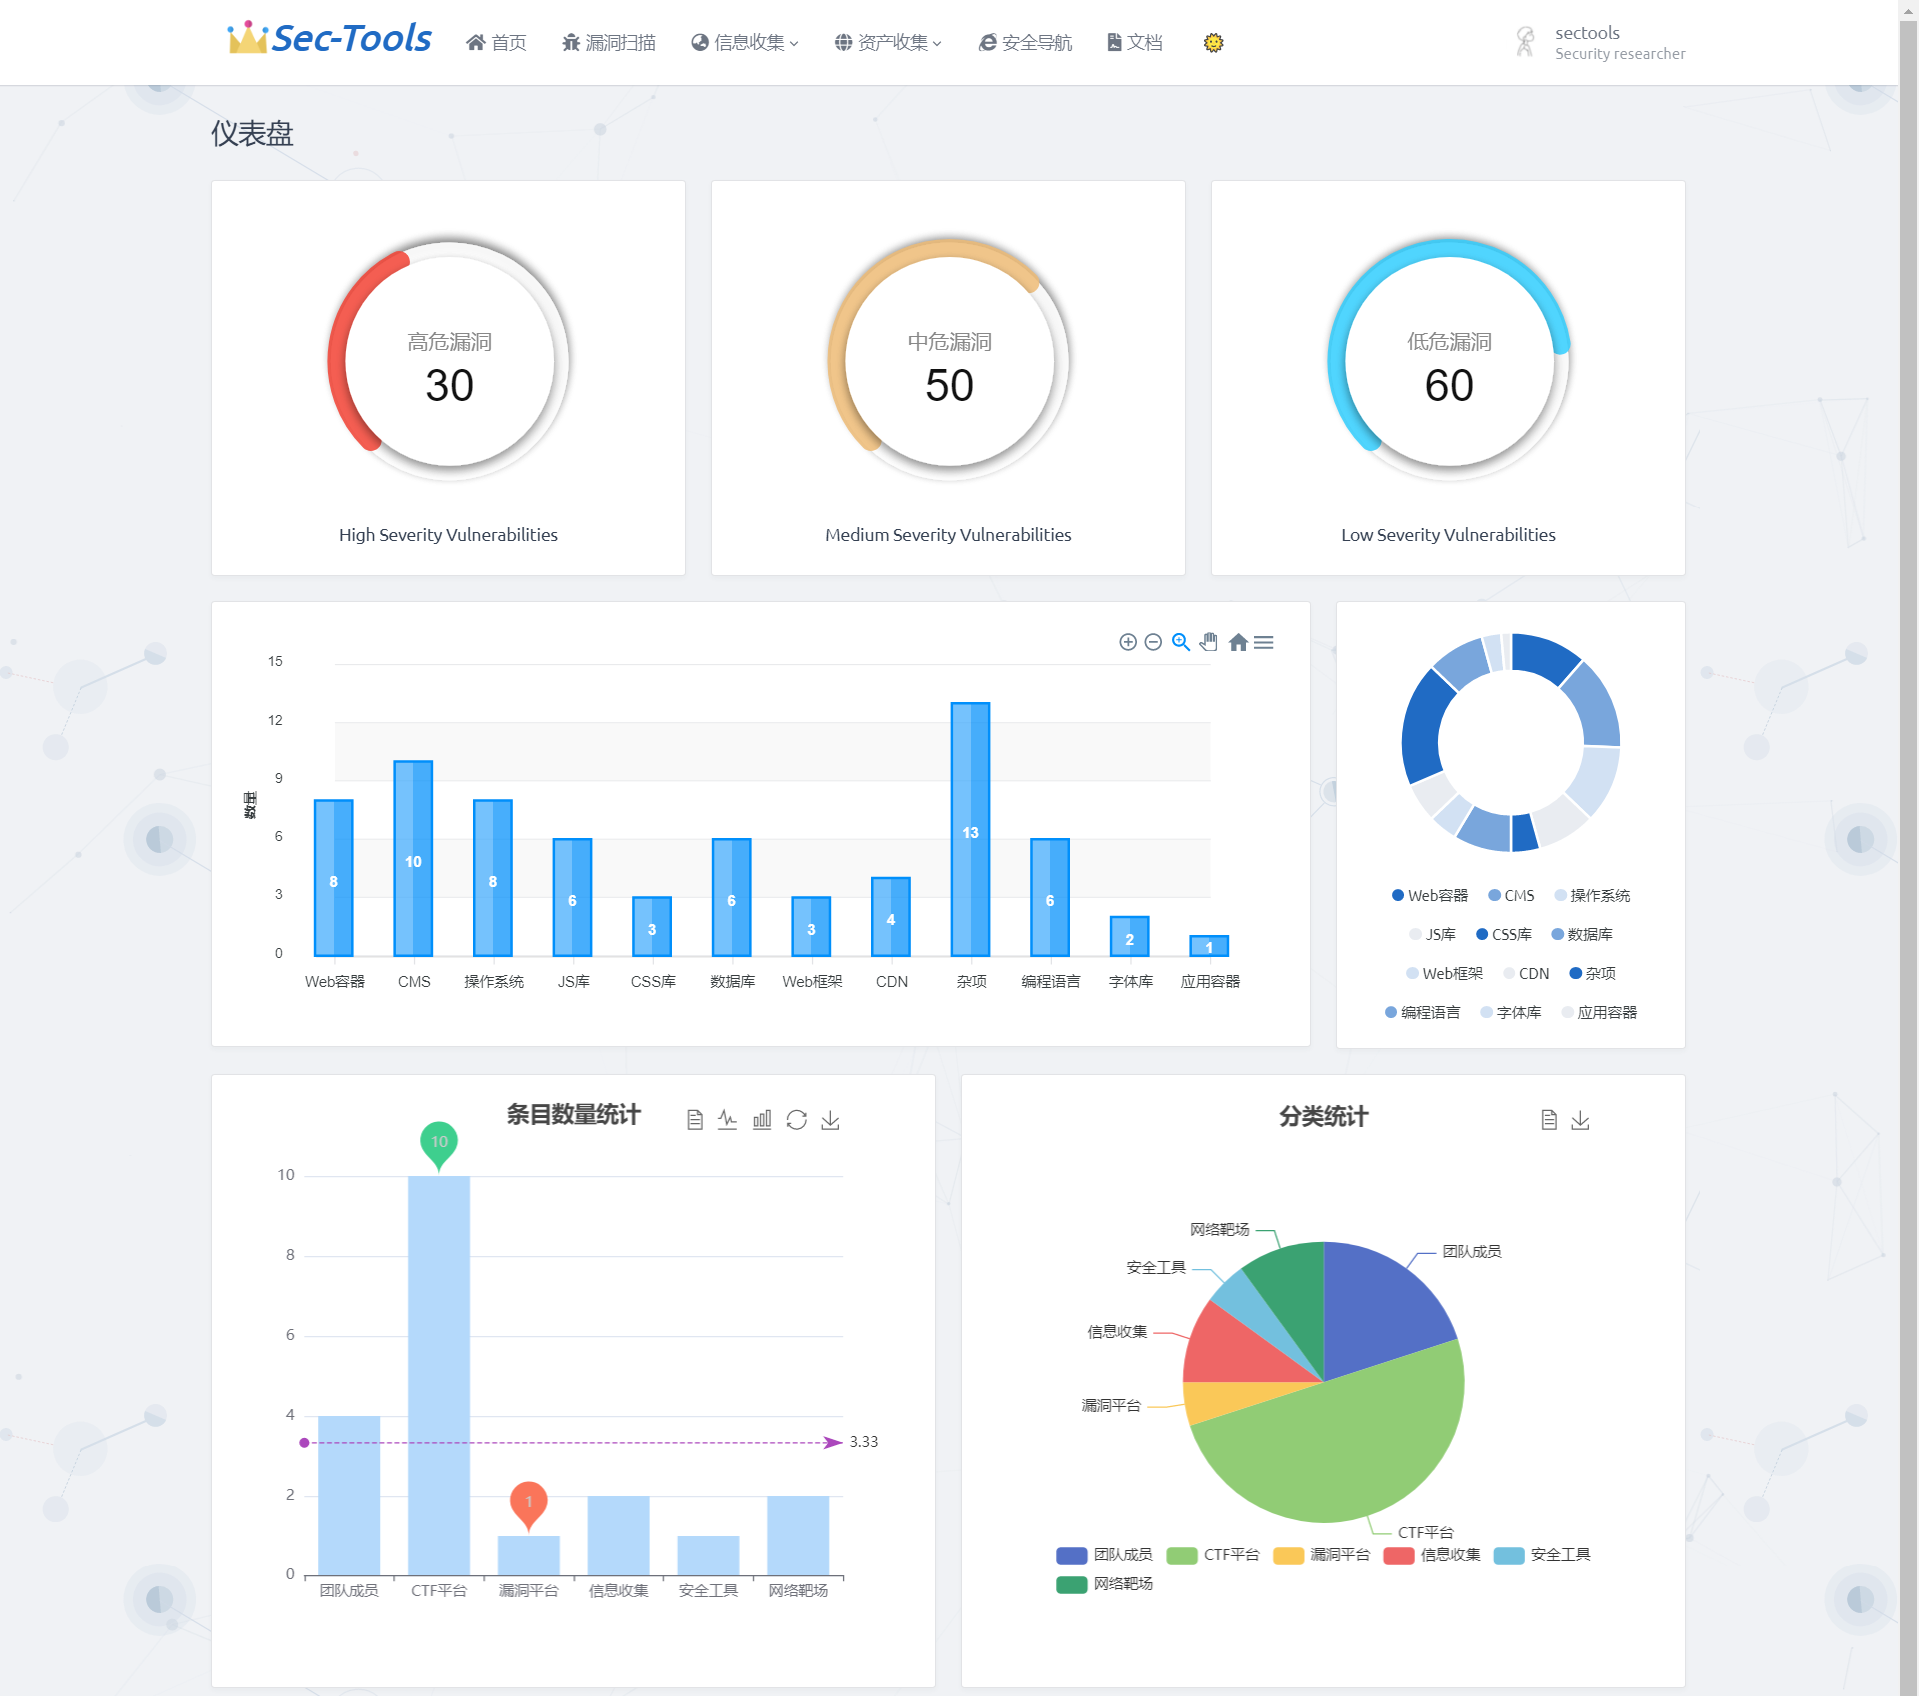
The home page uses ECharts to make a visual chart display of vulnerability level, fingerprint identification component and security navigation data of vulnerability scanning. The style of the chart is not unified. Let's make do with it
Authentication
New users who want to use system functions must register and log in, and tourists can only visit some pages. The system has ordinary users and super users. Ordinary users can use all the functions of the system, but they can't log in to the background management system. Super users can not only use the functions used, but also log in to the background management system to manage all user permissions and data.
Design idea: the login and registration module is implemented on the basis of Django's own authentication module. Therefore, in the background -- > user and authorization, you can assign permissions and manage registered users accordingly. We use Django's own database SQLite to store account information and reconstruct the database table auth_user table, added user mailbox field, auth_ The password field in user is the value after adding the sha256 value of salt and base64 coding, which ensures the user's information security.
| Landing page | 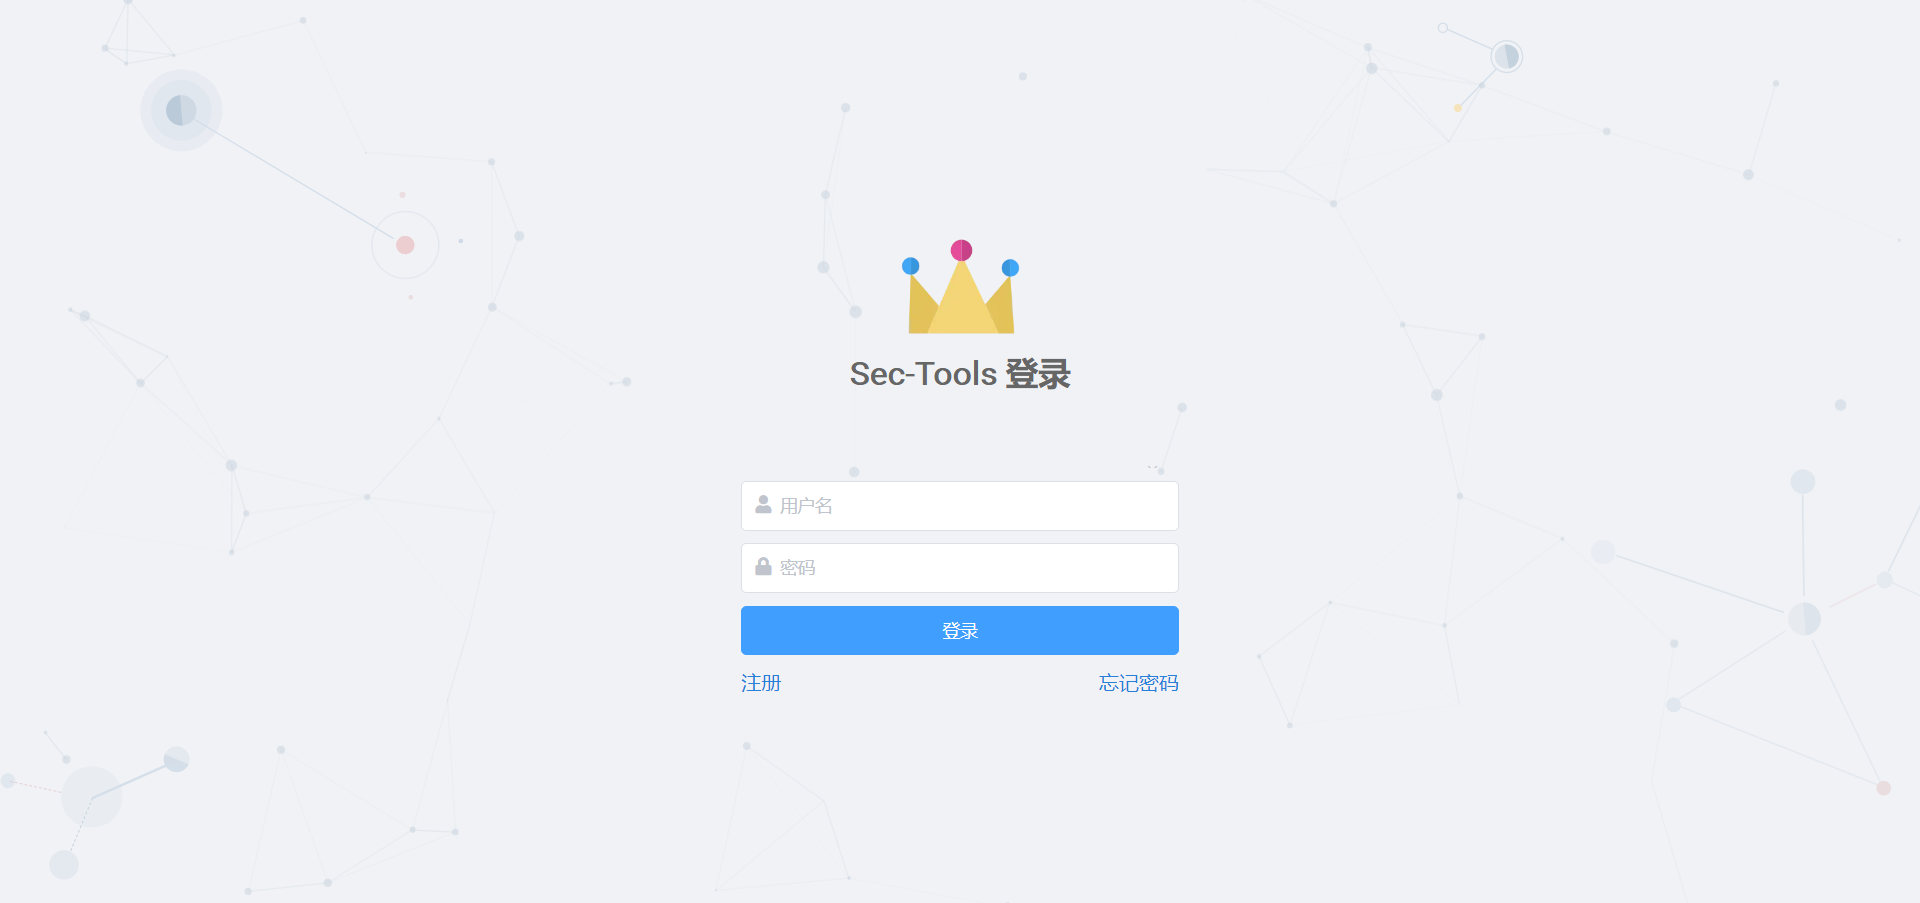 |
|---|---|
| Registration page | 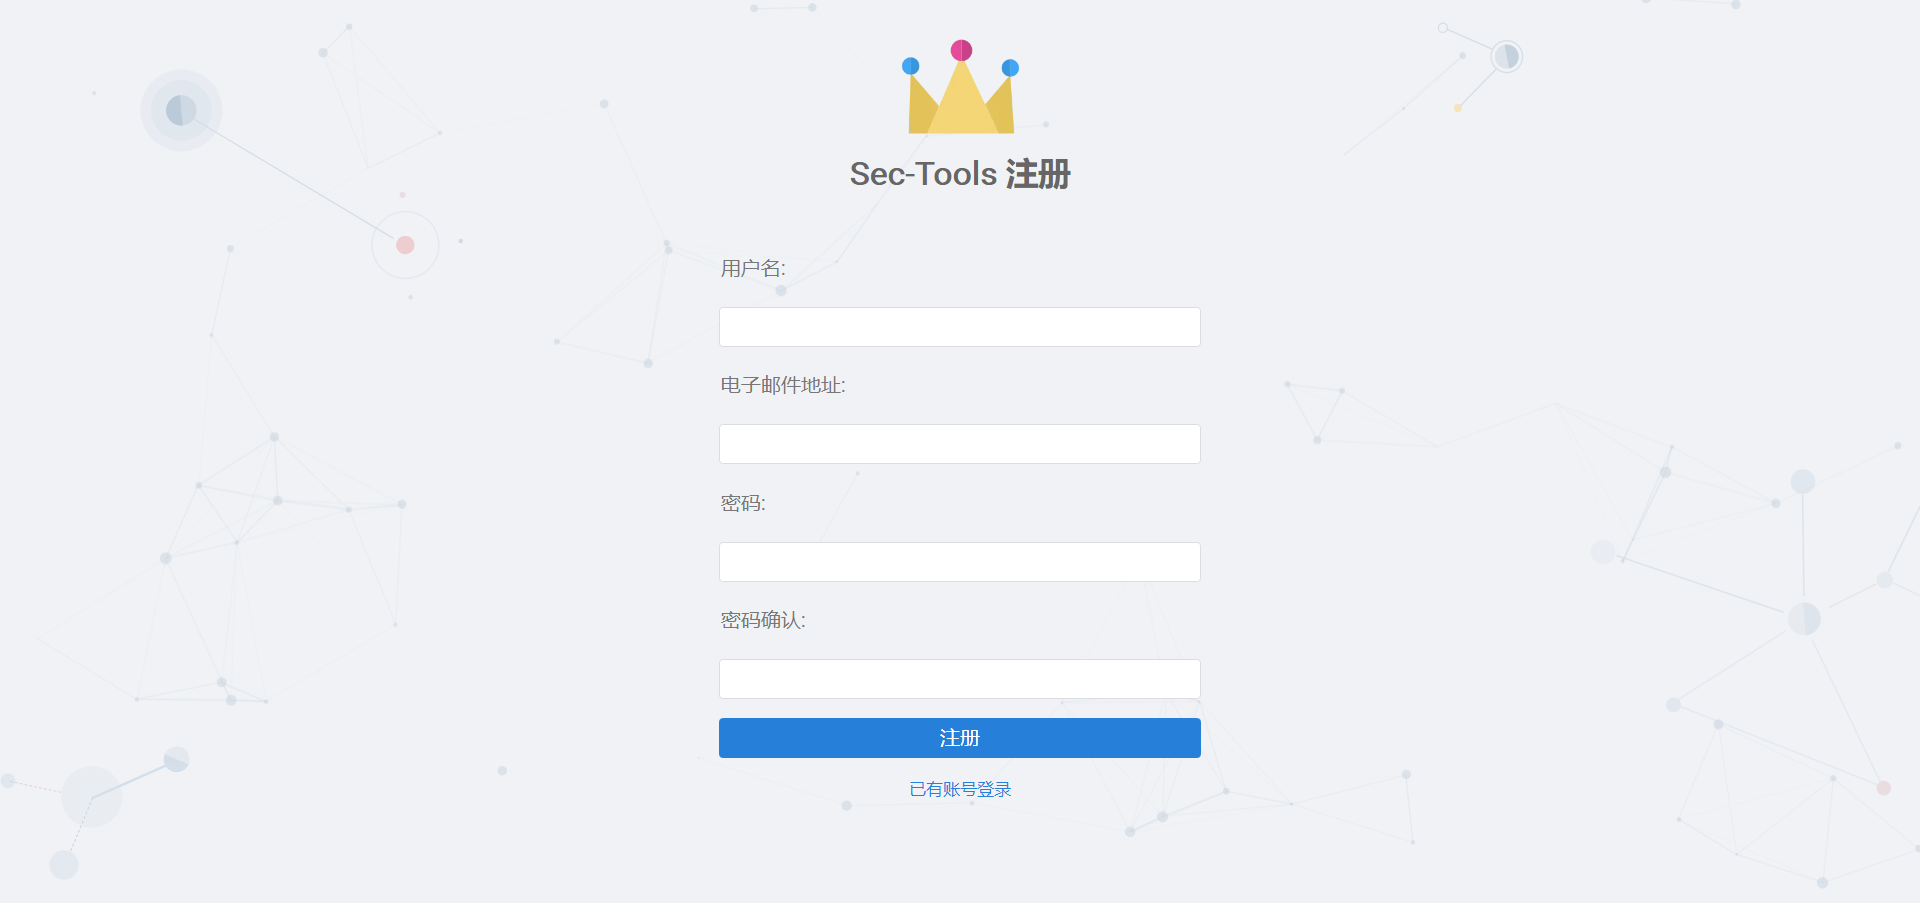 |
The password reset function is implemented by calling the third-party package Django password reset
| Step 1 |  |
|---|---|
| Step 2 |  |
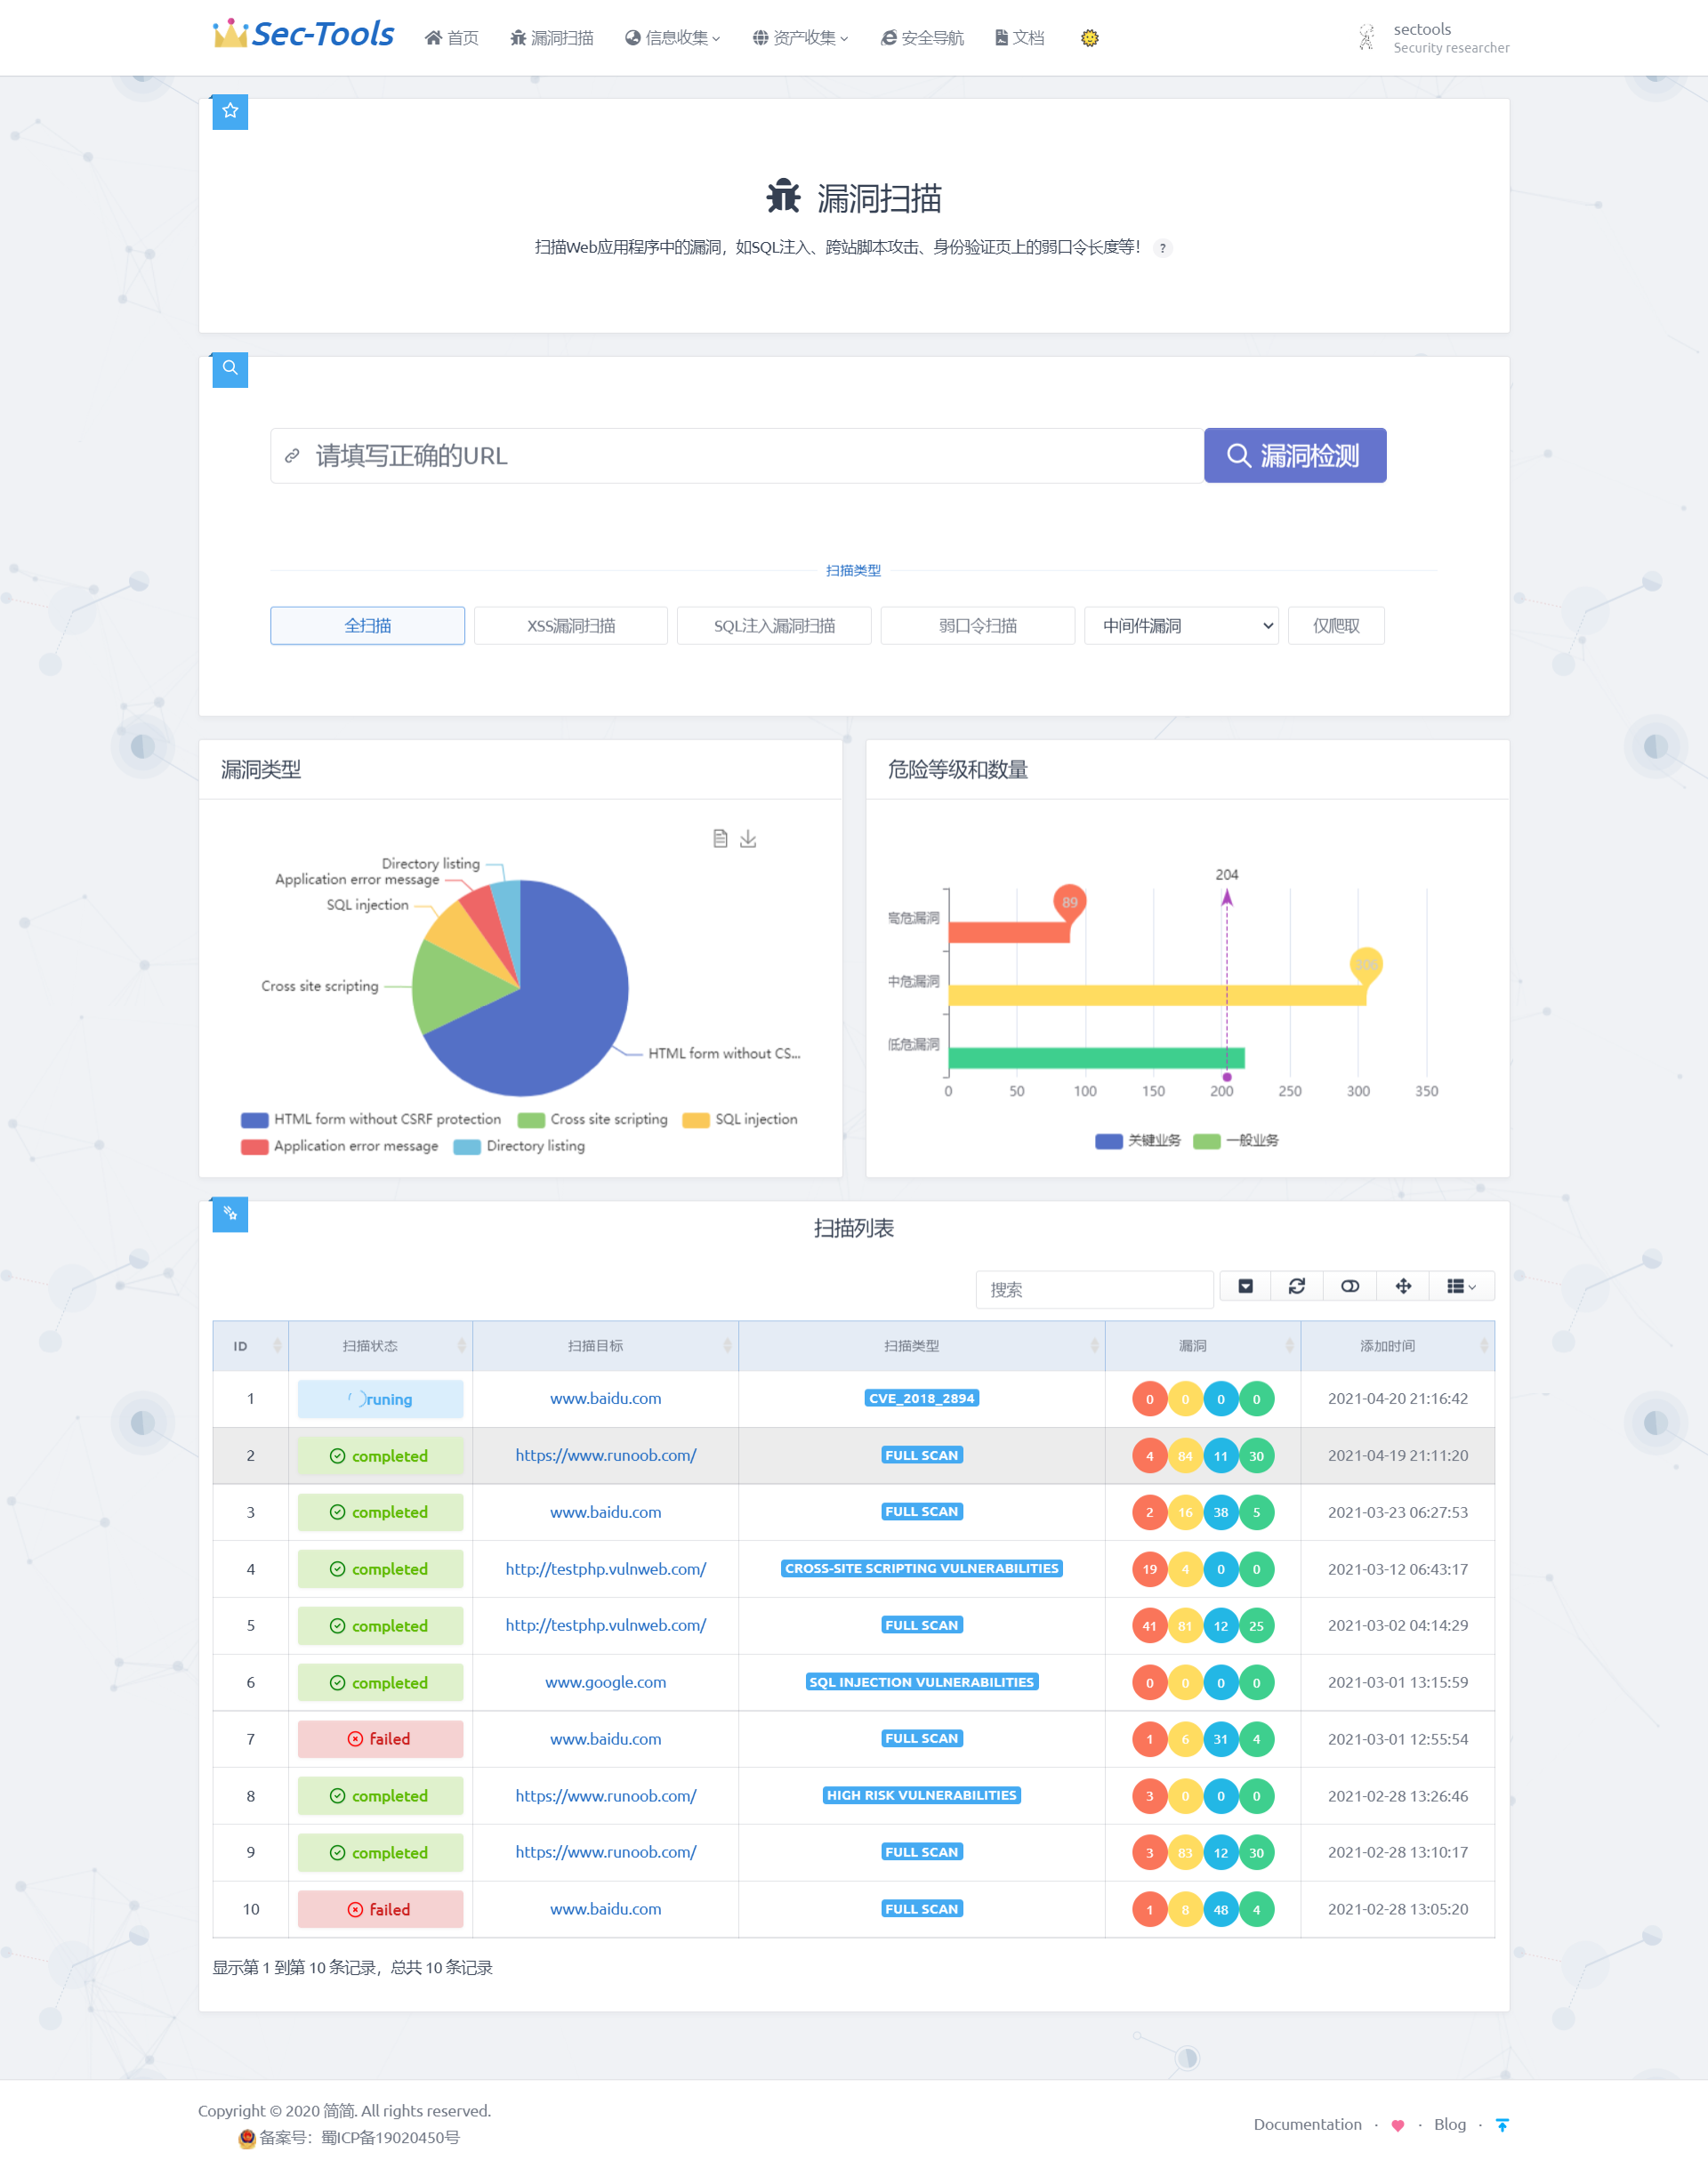
Vulnerability detection
This module mainly scans the target Web system for security vulnerabilities, including SQL injection, cross site scripting attack (XSS), weak password and middleware vulnerabilities. Middleware vulnerability scanning includes detecting known vulnerabilities of Weblogic, struts 2, Tomcat, Jboss, Drupal and Nexus. The user provides the target URL and selects the CVE vulnerability number.
Design ideas
The full scan, SQL injection vulnerability scan, XSS vulnerability scan, weak password scan and crawl only of the module are implemented by calling AWVS API. Middleware vulnerability scanning is implemented by simulating network requests based on scripts. According to the cause of the vulnerability, generate some test payloads and send them to the target system, and then judge whether the payload is valid by the returned status code and data.
Realization effect
Click the scan target to jump to the vulnerability results page:

Then click the of the scanning target to jump to the vulnerability details page:

Detailed implementation
Add scan target
The initial work of vulnerability scanning is to add the scanning target to the scanning queue of AWVS. AWVS provides an API interface: / api/v1/targets, which uses POST requests. The POST request parameters are: {address":"XXXX.XXXX.XXXX","description":"xxxx","criticality":"10 "}.
When the target is added successfully, a target will be returned_ ID, which is unique in all scans. Through target_ ID determines whether the target is added successfully. After adding the target, the scan does not start. You need to use another API interface: / api/v1/scans. Use the POST request to pass in the target generated by the newly added target_ ID and the scanning type selected by the user. The POST request parameters are: {"target_id":"xxxxxxx","profile_id":"xxxxxxx"}. Starting the scan will return status code 200.
Use Python's third-party library requests to implement API interface access. The core code is as follows:
# Target: POST request / api/v1/targets
try:
	#data contains the destination URL and type, auth_headers contain APIs_ KEY
   	response = requests.post(targets_api, auth_headers, data, False)
result = response.json()
target_id = result.get('target_id')
   	return target_id
except Exception:
return None
# Scan: POST request / api/v1/scans
try:
    response = requests.post(scan_api, data, auth_headers, False)
    status_code = 200
except Exception:
status_code = 404
return status_code
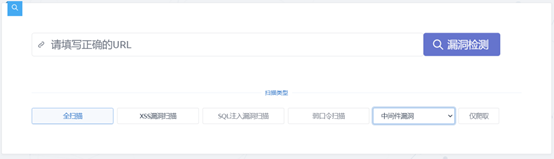
The API interface has been implemented, and the data entered by the user needs to be obtained. Because the system is implemented based on Django, HTML+JavaScript is used to provide user interface and receive and send data to the back end, which is implemented in Python. First in URLs Add access path to PY
path('vuln_scan', views.vuln_scan, name='vuln_scan')
In views Define Vuln in PY_ The scan () function receives user input from the front end and calls the API functions that have been written. The url entered by the user is the target of scanning. The scanning types include SQL injection, XSS vulnerability, weak password and full scanning. Full scanning is to scan all types of vulnerabilities. If the addition is successful, the target will be returned_ If the ID is not None, you can start calling the API to start scanning after adding successfully. After scanning, the status code is returned. If it is 200, you can start scanning and return success. Otherwise, you can return failure. The core code is as follows:
@csrf_exempt
def vuln_scan(request):
    #Obtain the URL and scan type entered by the user through the POST request
    url = request.POST.get('ip')
    scan_type = request.POST.get('scan_type')
    t = Target(API_URL, API_KEY)
    #Add destination URL to scan queue
    target_id = t.add(url)
    #If target_ If the ID is not None, start scanning
    if target_id is not None:
        s = Scan(API_URL, API_KEY)
        status_code = s.add(target_id, scan_type)
        if status_code == 200:
            return success()
    return error()
Finally, JavaScript is used to send the data entered by the user, select the POST method to send the data, and judge the legitimacy of the user's input before sending. The core code is as follows:
function get_scan_info(ip , scan_type) {
# Send user input using POST request
        $.post('/vuln_scan', {
            ip: ip ,
            scan_type: scan_type
        }, function (data) {
            if (data.code !== 200) {
                ......
            } else {
                ......
            }
           ......});
    }
var domain = $('input[name=scan_url]').val();
# Use the loop to determine the scanning type selected by the user
for(var i=0; i<document.getElementsByName("scan_type").length; i++) {
    if (document.getElementsByName("scan_type")[i].checked) {
      var scan_type=document.getElementsByName("scan_type")[i].value;
    }
}
if(domain){
	get_scan_info(domain,scan_type)
}else{
	......
}
Generally speaking, through the above code implementation, the user input is transmitted to the background through JavaScript. After receiving the data, the background will call AWVS API, and then AWVS will start scanning the target URL according to the user input, and save the results in the database after scanning. The results are as follows:
Get scan results
In the previous section, save the target scanning results to the database. We need to GET all the scanning targets, '/ api/v1/scans'. The request method is GET. After the request is successful, the information of all the scanning targets will be returned. Using this API, we can display all the scanning targets. To realize the function of displaying all vulnerabilities of each scanning target, you need to follow the target_id to search all scan targets. AWVS also provides corresponding APIs. The APIs we need to use are: / api/v1/vulnerabilities
? q=severity:{int};criticality:{int};status:{string};cvss_score:{logicexpression};cvss_score:{logicexpression};target_id:{target_id};group_id:{group_id}. The request method is GET. Using target_ ID searches for each scan target. This also solves the URL problem of the vulnerability details page. When using target_ When the ID search scanning target is successful, the vulnerability information of the target will be returned, including the number of vulnerabilities contained in the target, the risk level of each vulnerability, scanning time, scanning type, scanning status and other information.
The specific implementation steps are roughly similar to adding scanning targets. First, use requests to implement API requests. The core code is as follows:
# Get all scan targets
response=requests.get(scan_api, self.auth_headers, False)
scan_response=response.json().get('scans')
for scan in scan_response:
   scan['request_url'] = request_url
   scan_list.append(scan)
return scan_list
# The search status is "open", corresponding to the scanning target of target_id
vuln_search_api=f'{vuln_api}?q=status:{status};target_id:{target_id}'
try:
# Request using get method
    response = requests.get(vuln_search_api, auth_headers, False)
# Returns all vulnerability information for the search result target
    return response.text
except Exception:
    return None
In URLs Add the url accessed by the user to py, which needs to provide a target_ ID to facilitate the implementation of subsequent functions, first obtain the target of all targets_ ID, and then loop all targets_ ID is added to the urlpatterns list. Because in Django, the views function can only use one request parameter, because you need to set target here_ ID is passed into the views function, and the regular matching "(? P < target_id >. *) $" is used to receive the incoming target_ ID, the second parameter name of the corresponding function in views must be consistent with the value in < >. The core code is as follows:
path('vulnscan', views.vulnscan, name="vulnscan"),
for target_id in target_ids:
	  #Use regular matching to get the second parameter: taget_id
urlpatterns.append(url(r'^vuln_result/(?P<target_id>.*)$', views.vuln_result, name='vuln_result/'+target_id))
In views Py defines the function vulnscan(request) to obtain all corresponding target vulnerability information. Use the API to get the returned vulnerability risk level, scanning target URL and Vuln uniquely identified by each vulnerability_ ID, scan type, scan processing time. The scan processing time returned by the API is not in the standard time format. Regular matching is used, Convert it to the format of "% Y -% m -% d% H:% m:% s", then define the function vuln_result(request,target_id), and obtain all vulnerability information in the scanning target according to the target_id, including vulnerability URL, vulnerability type, status, processing time and other information. The core code is as follows:
@login_required
def vuln_result(request, target_id):
    d = Vuln(API_URL, API_KEY)
    data = []
    vuln_details = json.loads(d.search(None,None, "open", target_id=str(target_id)))

    id = 1
    for target in vuln_details['vulnerabilities']:
        item={
            'id': id,
            'severity': target['severity'],
            'target': target['affects_url'],
            'vuln_id':target['vuln_id'],
            'vuln_name': target['vt_name'],
            'time': re.sub(r'T|\..*$', " ", target['last_seen'])
        }
        id += 1
        data.append(item)
    return render(request,'vuln-reslut.html',{'data': data})
In this subfunction, the Bootstrap Table is used for the front-end data display. This template has many practical functions, such as table search function, pagination display function and so on, which increases the user experience. The data of the table is received in HTML using double curly braces in views When the data returned in the PY function is returned to the corresponding HTML page, it will be returned together with the data dictionary. In this way, the key value in the dictionary can be used to obtain the corresponding values value. You can also use if else, for and other statements to classify and display data. The core code is as follows:
{% for item in data %}
...............
# This only shows the scan target column, and other columns are similar
<a href="/vuln_detail/{{ item.vuln_id }}"> {{ item.target }}</a>
...............
{% endfor %}
The final effect is shown in the figure below. There are different displays according to different scanning states. Red, yellow, blue and green are used to classify high-risk, medium risk, low-risk and info level vulnerabilities. Finally, the processing time of scanning is shown.
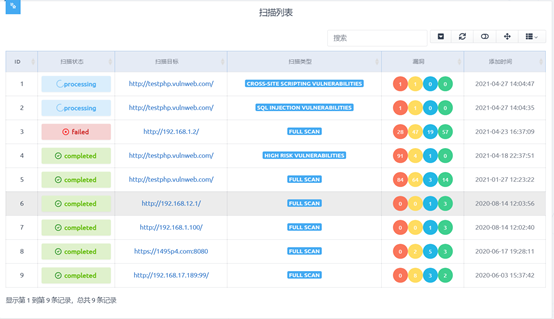
In the scan target column of the table, you can click to view all vulnerability information of the target, as shown in the figure below, showing the risk level, URL and type of each vulnerability of a specific scan target.

Get vulnerability details
After realizing vulnerability scanning and result display, you also need to obtain the details of each vulnerability. Including the request parameters causing the vulnerability, the tested payload, the data request package, brief repair suggestions, and so on. Because each vulnerability also has a unique identification Vuln_ ID, you can query all the information of the specified vulnerability according to this value. The API used is: / api/v1/vulnerabilities/{vuln_id}, and the request method is GET.
Similarly, first use requests to call the API and pass in vuln_id to query all information of the specified vulnerability. The code is as follows:
# Get information about the specified vulnerability
def get(self, vuln_id):
    vuln_get_api = f'{self.vuln_api}/{vuln_id}'
    try:
		#Use GET request to convert Vuln_ The ID is passed to the API, and the result is returned in json format
        response = requests.get(vuln_get_api, auth_headers, False)
        return response.json()
    except Exception:
        return None
In URLs Py, which is similar to all vulnerabilities shown in the previous section, and receives views in the form of regular matching The second parameter of the function in py, but target is not used here_ ID, but vuln_id. The code is as follows:
for vuln_id in vuln_ids:
	urlpatterns.append(url(r'^vuln_detail/(?P<vuln_id>.*)$', views.vuln_detail, name='vuln_detail/' + vuln_id))
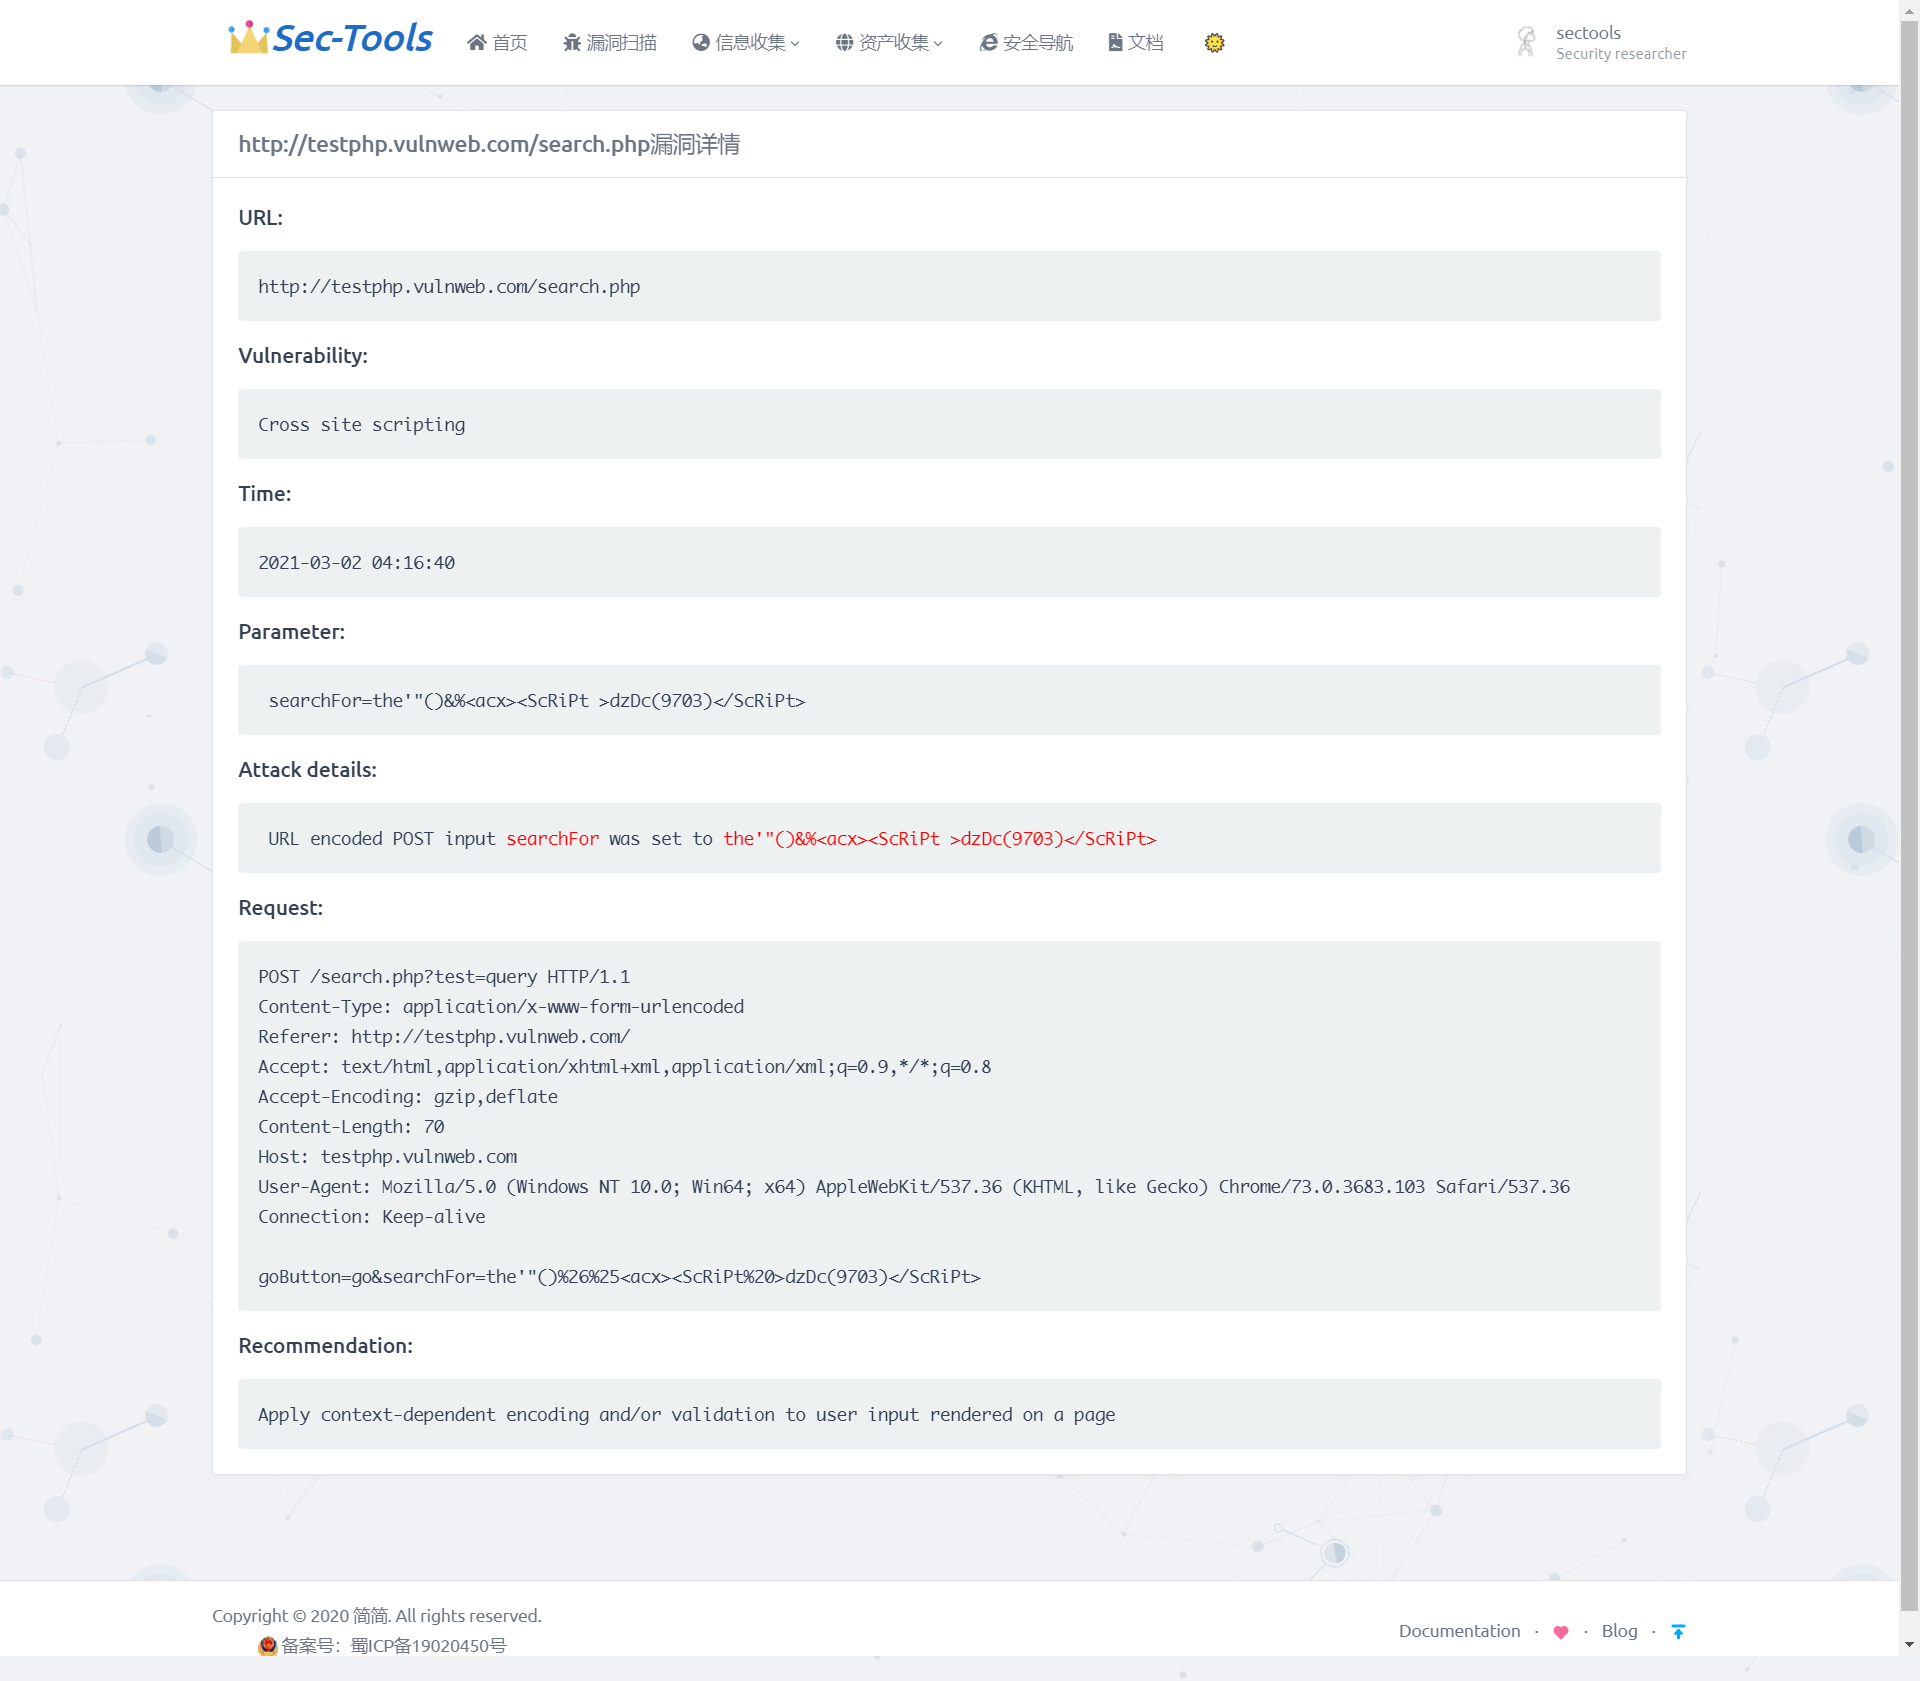
In views Define Vuln in PY_ Details (request, vuln_id) function, according to Vuln_ ID query information about the specified vulnerability. This function extracts the useful information from the value returned by the API into the dictionary data and returns it to Vuln details HTML page, using double curly braces to receive the affected URL, processing time, vulnerability type, vulnerability test parameters, data request package, brief repair suggestions and other information of the vulnerability. The implementation effect is shown in the figure below.
@login_required
def vuln_detail(request,vuln_id):
    d = Vuln(API_URL,API_KEY)
    data = d.get(vuln_id)
    print(data)
    parameter_list = BeautifulSoup(data['details'], features="html.parser").findAll('span')
    request_list = BeautifulSoup(data['details'], features="html.parser").findAll('li')
    data_dict = {
        'affects_url': data['affects_url'],
        'last_seen': re.sub(r'T|\..*$', " ", data['last_seen']),
        'vt_name': data['vt_name'],
        'details': data['details'].replace("  ",'').replace('</p>',''),
        'request': data['request'],
        'recommendation': data['recommendation'].replace('<br/>','\n')
    }
    try:
        data_dict['parameter_name'] = parameter_list[0].contents[0]
        data_dict['parameter_data'] = parameter_list[1].contents[0]
    except:
        pass
    num = 1
    try:
        Str = ''
        for i in range(len(request_list)):
            Str += str(request_list[i].contents[0])+str(request_list[i].contents[1]).replace('<strong>', '').replace('</strong>', '')+'\n'
            num += 1
    except:
        pass
    data_dict['Tests_performed'] = Str
    data_dict['num'] = num
    data_dict['details'] = data_dict['details'].replace('class="bb-dark"','style="color: #ff0000"')
    return render(request, "vuln-detail.html", {'data': data_dict})
Middleware vulnerability scanning based on POC verification
The system uses POC script to scan the vulnerabilities of some middleware [7], including Weblogic, Tomcat, Drupal, JBoss, Nexus, struts 2, etc. According to the characteristics of each vulnerability, different POC scripts are written in Python to verify whether the vulnerability exists in the target.
Firstly, the user interface here is shared with AWVS based vulnerability scanning, and the selection of middleware vulnerability CVE number is added separately. Use JavaScript to send user input data to the back end. The core code is as follows:
# Submit user input using POST request
function get_Middleware_scan(ip , CVE_id) {
    $.post('/Middleware_scan', {
    ip: ip , #Destination URL
    CVE_id: CVE_id  #Selected CVE number
}, function (data) {
# Processing returned results
      .........
      .........});
}
After adding the target to the database, query the database to start scanning, and access start through AJAX_ Middleware_ Scan calls the function to start scanning. Since the scanning time may be very long, you need to set enough timeout to wait for the scanning result to return. The core code is as follows:
$.ajax({
# Send the target URL and CVE number with POST request, and set the timeout to 1 second
    type: "POST",
    url: '/start_Middleware_scan',
    timeout: 10000,
    data: {
    ip: ip,
    CVE_id: CVE_id
    }
});
In URLs Py to add the access path for middleware vulnerability scanning, you need to add two paths: 'middleware'_ scan‘,‘start_Middleware_scan’. The former is the path when the user adds the scanning target, which is used to insert it into the database after receiving the target and CVE number entered by the user. The latter is to start scanning after inserting the target into the database by querying the timestamp, status, target URL and CVE number. When the scan ends, the status of the corresponding scan target in the database is updated. This design can see the scanning status in real time.
The database uses SQLite in models Py to create a database table Middleware_vuln, the fields include ID, target URL, status, result, CVE number and timestamp. This class is defined in Django to represent the database we need to create in modules After creating it in Python, use the command Python manage Py makemigrations to record modules Py, and migrate this change to the migrations file to generate a file, such as the 0001 file. If you need to make changes next, another file may be generated, not necessarily the 0001 file, but this command does not affect the database. Then use the command Python manage Py migrate will create database table and field properties based on the changes just detected. The core code is as follows:
class Middleware_vuln(models.Model):
# The class name is the database table name, the variable name is the field name, and the field properties are defined as follows
	id = models.AutoField(primary_key=True)
	url = models.CharField(max_length=100, null=True)
	status = models.CharField(max_length=20, null=True)
	result = models.CharField(max_length=100, null=True)
	CVE_id = models.CharField(max_length=100, null=True)
	time = models.CharField(max_length=100, null=True, unique=True)
When adding targets and starting detection, we need to insert and query the database. Here, Django's function is used to handle the addition, deletion, query and modification of the database. For Middleware_ The insertion of a vulE uses Middleware_vuln.objects.create(url, status, result, CVE_id, time), update using Middleware_vuln.objects.filter(time).update(status, result). You also need to use try exception to handle exceptions and print error messages.
def insert_Middleware_data(url, CVE_id, Time, result=None, status="runing"):
    try:
        Middleware_vuln.objects.create(url=url, status=status, result=result, CVE_id=CVE_id, time=Time)
        print("insert success")
        return True
    except:
        print("data insert error")
        return False


def update_Middleware_data(url, CVE_id, Time, result):
    try:
        Middleware_vuln.objects.filter(url=url, status='runing', CVE_id=CVE_id, time=Time).update(status="completed", result=result)
        print("update success")
    except:
        print("data updata error")
In views Define Middleware in PY_ Scan() gets the user input and inserts it into the database. The timestamp Time is a global variable, which is used as the condition for querying the database after scanning. Success() is returned when the data is inserted successfully, error() is returned on the no side, and the status code returned when the function is returned here, success() returns 200, error() returns 404, After receiving the above JavaScript T, make a judgment and pop up the corresponding prompt box. The core code is as follows:
Time = 0.0
@csrf_exempt
@login_required
def Middleware_scan(request):
    #Use the POST request to get user input and insert it into the database.
    #Time is inserted into the database as a global variable as a condition for querying target information.
    global Time
    try:
        url= request.POST.get('ip')
        CVE_id = request.POST.get('CVE_id').replace('-',"_")
        Time = time.time()  # time. Strftime ('% Y -% m -% d% H:% m:% s', time. Localtime (T)) timestamp to date format
        if insert_Middleware_data(url, CVE_id, Time):
            return success()
    except:
        return error()
The function start is also defined_ Middleware_ Scan(), which queries the targets in the database with Time stamp and run status, and calls the corresponding POC script according to the CVE number. Finally, update the scanning results and scanning status of the database. Since it may take some Time to insert the data into the database in the previous step, you need to use sleep() to wait for the data to be inserted before querying and scanning, so as to ensure that the scanning target is not missed.
@csrf_exempt
@login_required
def start_Middleware_scan(request):
    try:
        url = request.POST.get('ip')
        ip, port = urlparse(url).netloc.split(':')
        CVE_id = request.POST.get('CVE_id').replace('-', "_")
        time.sleep(5) #Wait until the data is inserted successfully and scan it after query
        msg = Middleware_vuln.objects.filter(url=url, status='runing', CVE_id=CVE_id, time=Time)
        print(msg)
        #There may be more than one scan entry, and you need to use a loop to scan
        for target in msg:
            result = POC_Check(target.url, target.CVE_id)
            #Update scan results and status
            update_Middleware_data(target.url, target.CVE_id, Time, result)
        return success()
    except:
        return error()
Port scan
Port scanning of the system when the user specifies the target IP address, the system will officially work. The IP will be sent to the background to scan the target. After the scanning is completed, the open port and corresponding services will be displayed on the front-end interface. Explain the port division in the two columns of "division by port distribution" and "division by protocol type", so that users can avoid the tedious query. At the same time, the module will also have a built-in common port query table, where you can query and filter the port and its corresponding services and functions. Through this series of functions, users can more clearly understand which services the target host has opened, so as to analyze the services that may have vulnerabilities.
Design ideas
The implementation method of port scanning in this system is to call the library function Socket provided by Python and establish a connection with the port of the target computer through TCP three-time handshake. When a complete handshake is completed three times, it can be inferred that the port and corresponding service are open, otherwise they are not open. In order to improve the efficiency of scanning, the system introduces multi-threaded scanning mechanism.
Realization effect

Detailed implementation
Port scan
Directly define the socket through Python and try to connect with the target port. Socket = socket is used in this program socket(socket.AF_INET,socket.SOCK_STREAM); For TCP connection, call sock connect_ Ex ((IP, port)), to try to connect to the port. If the port is open, it returns 0, otherwise it returns an error code. Use the try statement to catch exceptions. If the socket connection times out, the exception handling information will be returned. The core code is as follows:
def socket_scan(self, hosts):
    '''Port scan core code'''
    global PROBE
    socket.setdefaulttimeout(1)
    ip, port = hosts.split(':')
    try:
        if len(self.port) < 25:
            # Create socket
            sock = socket.socket(socket.AF_INET, socket.SOCK_STREAM)
            # TCP/IP triple handshake to establish connection
            result = sock.connect_ex((ip, int(port)))
# Call socket connect_ Ex ((IP, port)), if the port is open, it returns 0, otherwise it returns an error code
# It implements functions similar to full connection scanning of nmap.
            if result == 0:                     # TCP link successfully established
                self.port.append(port)          # Add port in result set
                for i in PROBE:                 # Through http1 1 spy
                    sock.sendall(i.encode())    # Send complete TCP packet
                    response = sock.recv(256)   # Maximum 256 bytes accepted
                    sock.close()
                    if response:
                        break
                if response:
                    for pattern in SIGNS:
                        pattern = pattern.split(b'|')
                        if re.search(pattern[-1],response, re.IGNORECASE):
# Regular matching banner information and services in dictionary
                            proto = '{}:{}'.format(pattern[1].decode(), port)
                            self.out.append(proto)  # Add to output result
                            break
        else:
            self.num = 1
    except (socket.timeout, ConnectionResetError): # exception handling
        pass
    except:
        pass
If the single thread (serial) is blocked in this way, it will consume a lot of time. Therefore, the scanning speed can be improved by concurrent requests. By comparing and scanning 300 ports, it takes about 30s for a single thread and only about 10s for multiple threads.
In this port scanning function, 64 concurrent threads are used for scanning. Therefore, when defining the run method, the difference between the two port numbers scanned by each thread is 64, and concurrent is used in the program Futures. concurrent. The futures module provides a high-level interface for executing calls asynchronously. Asynchronous execution can be implemented using threads, ThreadPoolExecutor, or independent processes, ProcessPoolExecutor. Both implement the same interface and are defined by the abstract Executor class.
THREADNUM = 64  # Number of threads
def run(self, ip):  #Multithreaded scanning
    hosts = []
    global PORTS, THREADNUM
    for i in PORTS:
        hosts.append('{}:{}'.format(ip, i))
    try:
        with concurrent.futures.ThreadPoolExecutor(
                max_workers=THREADNUM) as executor:
            executor.map(self.socket_scan, hosts)
    except EOFError:
        pass
Port query table
The port query table function establishes a port Query Library by collecting online port information. The port data involved is stored in the database, including port ID, port number, port corresponding service, port corresponding protocol and port status. The port query table structure is shown in the following table.
| Field name | Field type | Allow null | Primary key | remarks |
|---|---|---|---|---|
| id | integer | Not null | True | Port ID |
| num | bigint | Not null | False | Port number |
| service | text | Not null | False | Port corresponding service |
| protocol | Varchar(20) | Not null | False | Port corresponding protocol |
| status | Varchar(10) | Not null | False | Port status |
The port query database is established by Django Model, and the fields include port number, service, protocol, and status. The implementation code is as follows:
class PortList(models.Model):
    '''Port query table'''
    num=models.BigIntegerField(verbose_name='Port number')
    service=models.TextField(max_length=100,verbose_name='service')
    protocol=models.CharField(max_length=20,verbose_name='
agreement',blank=True,default='unknown')
    status=models.CharField(max_length=10,verbose_name='
state',blank=True,default='unknown')
    class Meta:
	# Background header settings
        verbose_name=verbose_name_plural='Port list'
After the database is established, it needs to be registered in the background, so you can enter the background to manage the data. The implementation code is as follows:
@admin.register(PortList)
class PortListAdmin(ImportExportModelAdmin):
    # Set which fields are displayed in the background
    list_display = ('num', 'service', 'protocol', 'status',)
    # Set the num field to enter the editing interface
    list_display_links = ('num',)
    search_fields = ('num', 'service',)
    # Filter, filter by field
    list_filter = ('protocol','status')
    # Set num as the default sort field
    ordering = ('num', )
    list_per_page = 15  #Set the number of data pieces displayed per page
fingerprint identification
The module extracts the fingerprint feature code feature information to identify the Web fingerprint. The system interacts with the Web server by constructing a large number of special HTTP requests, extracts the fingerprint feature information from its response packet information, and then compares it with the fingerprint database to obtain the component information and version information of the Web server and application. Finding and identifying these characteristic information can help us quickly formulate penetration strategies, which is a key step in the penetration process.
Design ideas
The research on Web server and application fingerprint at home and abroad mainly constructs a large number of special HTTP requests to interact with the web server, extracts the fingerprint feature information from its response packet information, and then compares it with the fingerprint database to obtain the component information and version information of the web server and application. In this paper, the method based on keyword feature matching is used to realize the fingerprint identification function. In order to make the detection results more accurate, compared with some mainstream fingerprint databases on the Internet, the database of the system is optimized.
Realization effect
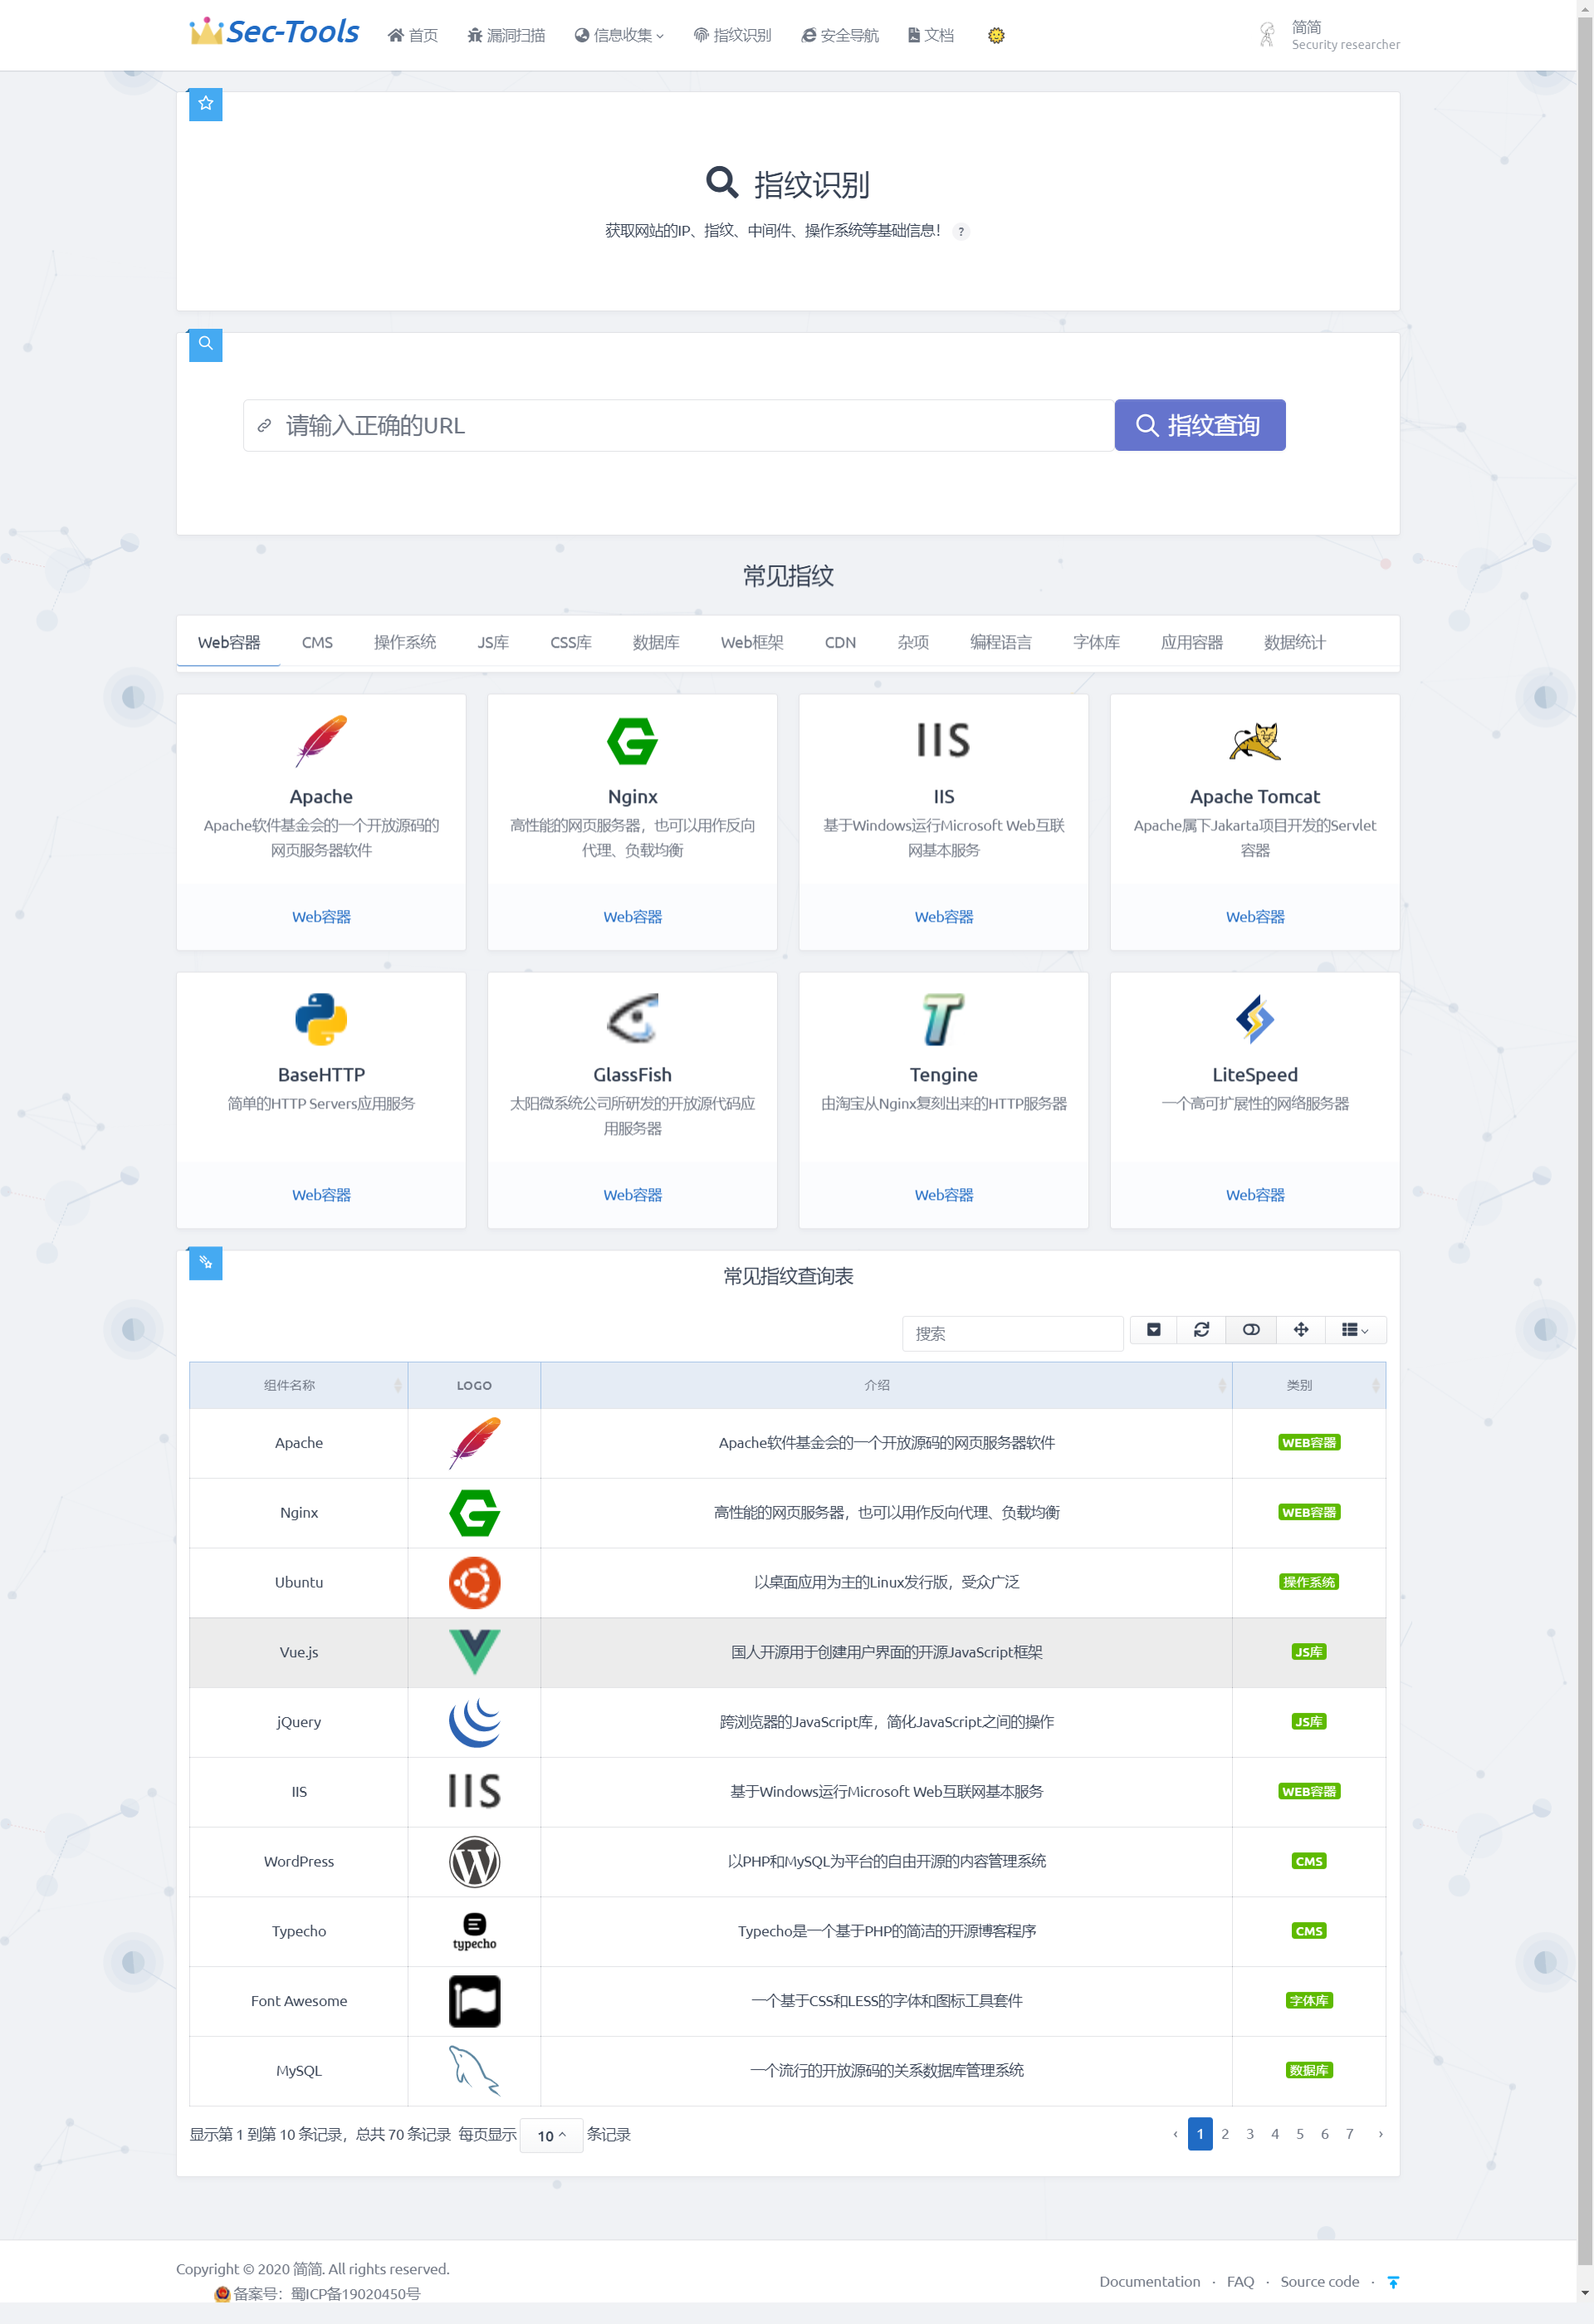
Detailed implementation
The key step in the process of fingerprint identification is to extract fingerprint features. To extract fingerprint features, we first need to determine which data in the response data message should be extracted. Therefore, it is necessary to design a feature extraction algorithm to analyze the response data packet. The response data packet is composed of response line, response header and response body. The response line consists of HTTP version, status code and status code description. The response header is used to indicate how the client handles the response body. The response header contains a lot of component information, which is used to tell the browser the response type, character encoding server type, byte size and other information. The response body is the specific data returned by the server to the client according to the client's request. The response header and response body contain fields that can identify Web fingerprint components. Therefore, the extraction of key fields in the response header and response body is the core of fingerprint identification technology.
Fingerprint identification technology is divided into information collection stage and Web fingerprint identification stage.
(1) Information collection stage: collect the specific field information of the Web application through the URL entered by the user, and return the page keywords or special files and paths. The more key data collected, the more accurate the fingerprint identification results.
(2)Web fingerprint identification stage: this stage includes two parts. One is the establishment of fingerprint database, which is mainly responsible for collecting feature information from known web applications and establishing fingerprint feature database; By analyzing the HTTP response data message, this paper designs the extraction rules of website fingerprint, and constructs a fingerprint component information base by analyzing the response header field and response body content. The information base is stored in JSON format. Fingerprint information is collected and summarized from platforms such as Wappalyzer and FOFA. The other part collects feature information from the web application to be tested and compares it with the data in the fingerprint feature library to identify the web application to be tested.
Directory scan
Directory identification is implemented with reference to dirsearch, including PHP, asp, JSP and other website types for scanning. Recursive scanning and user-defined scanning options are also set. Support custom prefix or subdirectory.
Design ideas
The results of Dirsearch scan are saved in the corresponding path in JSON format, so we can reduce our dependence on the database. The obtained data is divided into URL and TIMR, and the URL is divided into content length, path, redirect and starus. Because the data with different types of brackets in JSON format will be parsed by Django into list, dictionary and other formats, we need to process the obtained JSON data, convert it into data recognized by Django, and make it read at the front end.
To correctly parse data, you need to understand the transformation methods of Python data structure and JSON data. We parse the obtained data based on the current fixed JSON format.
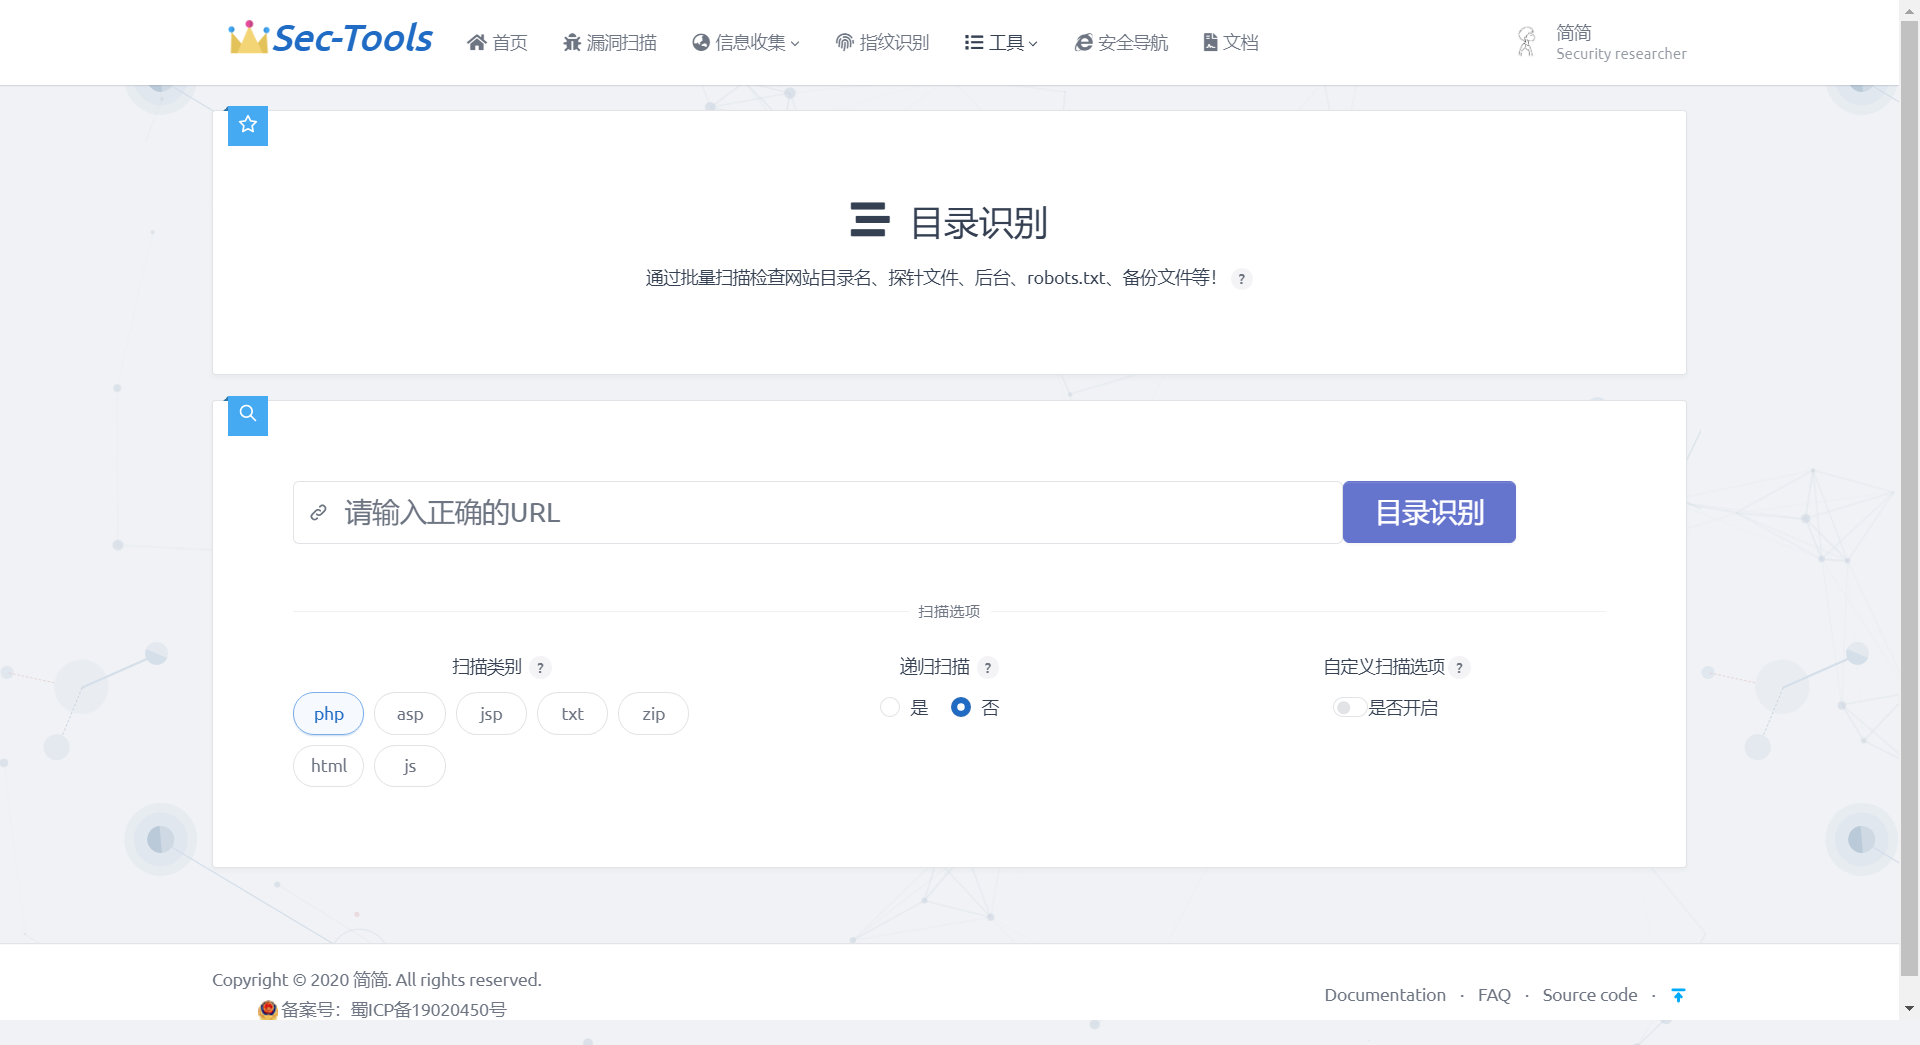
Realization effect
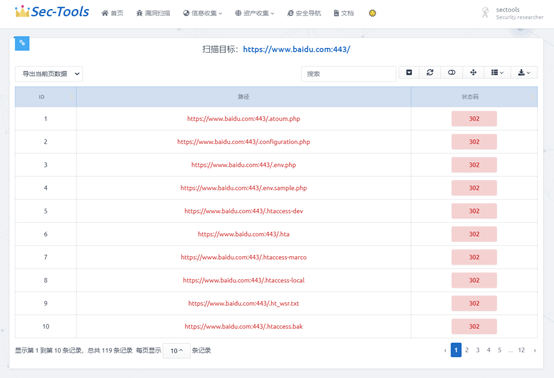
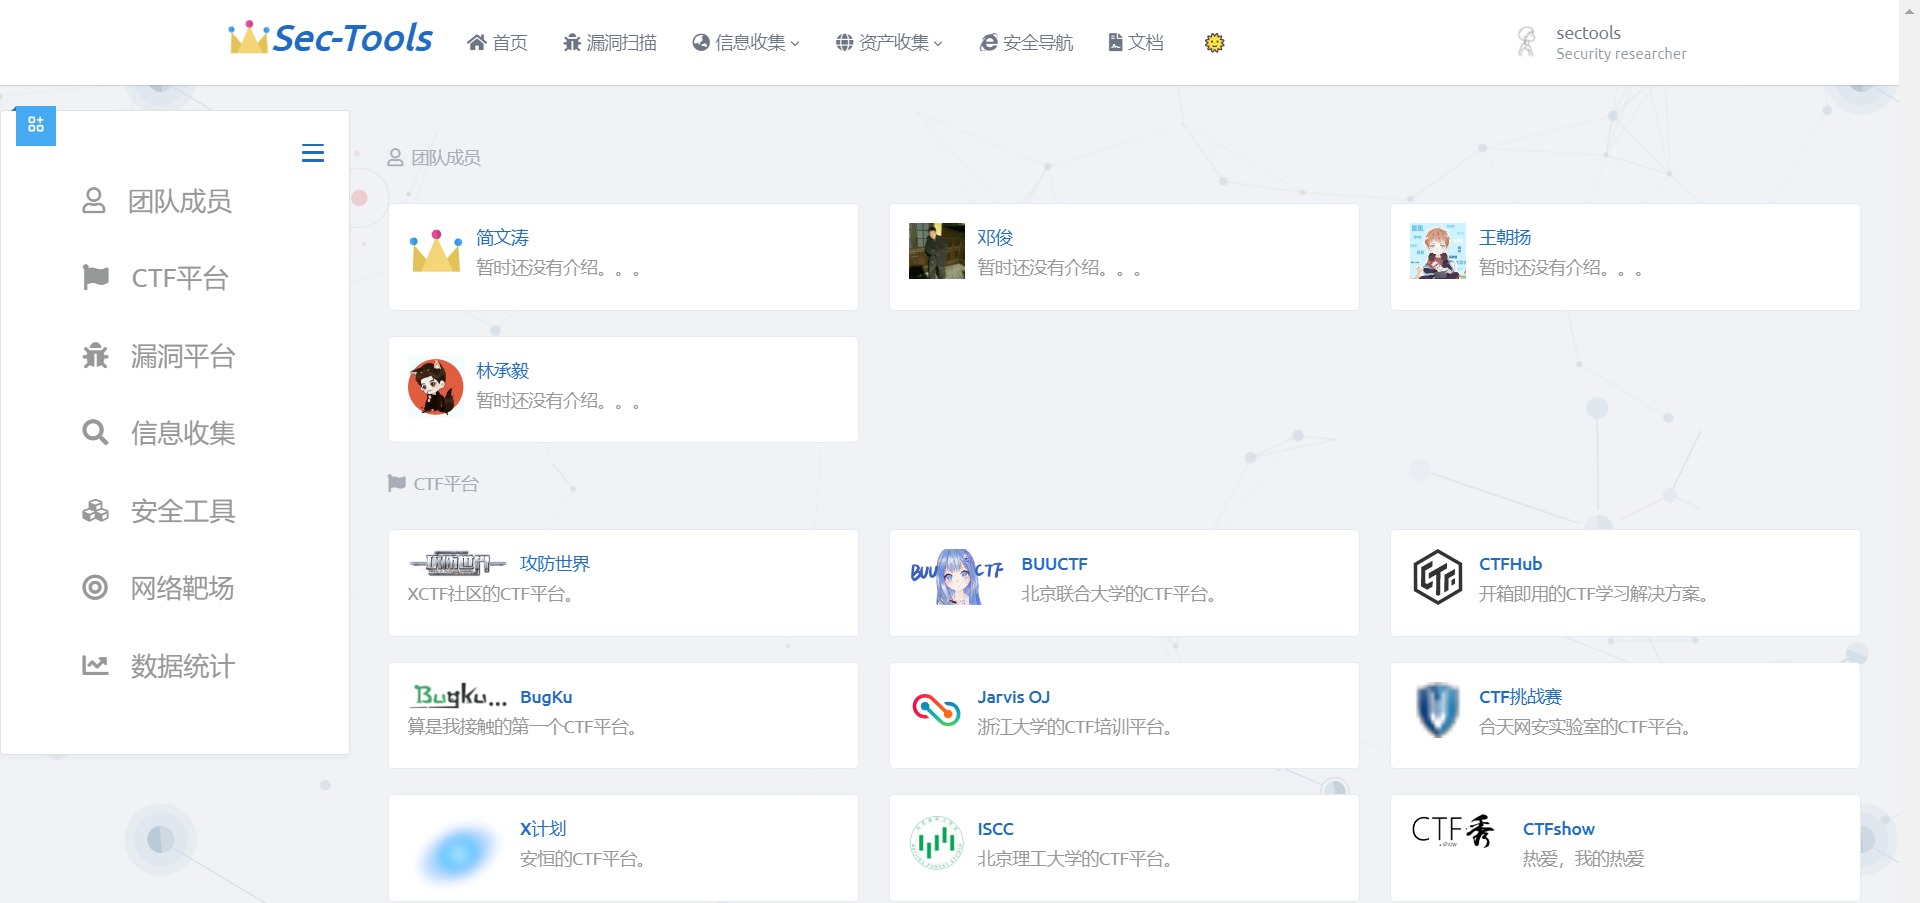
Information disclosure
This module mainly provides users with common information leakage inspection. The front end intuitively displays the possible leaked information such as background address and configuration file. In the result list, users can clearly know the information disclosure problem of a Web service.
Side station detection
This module is mainly used to directly obtain other websites on the server where the current IP is located through the IP address. This module directly calls the API

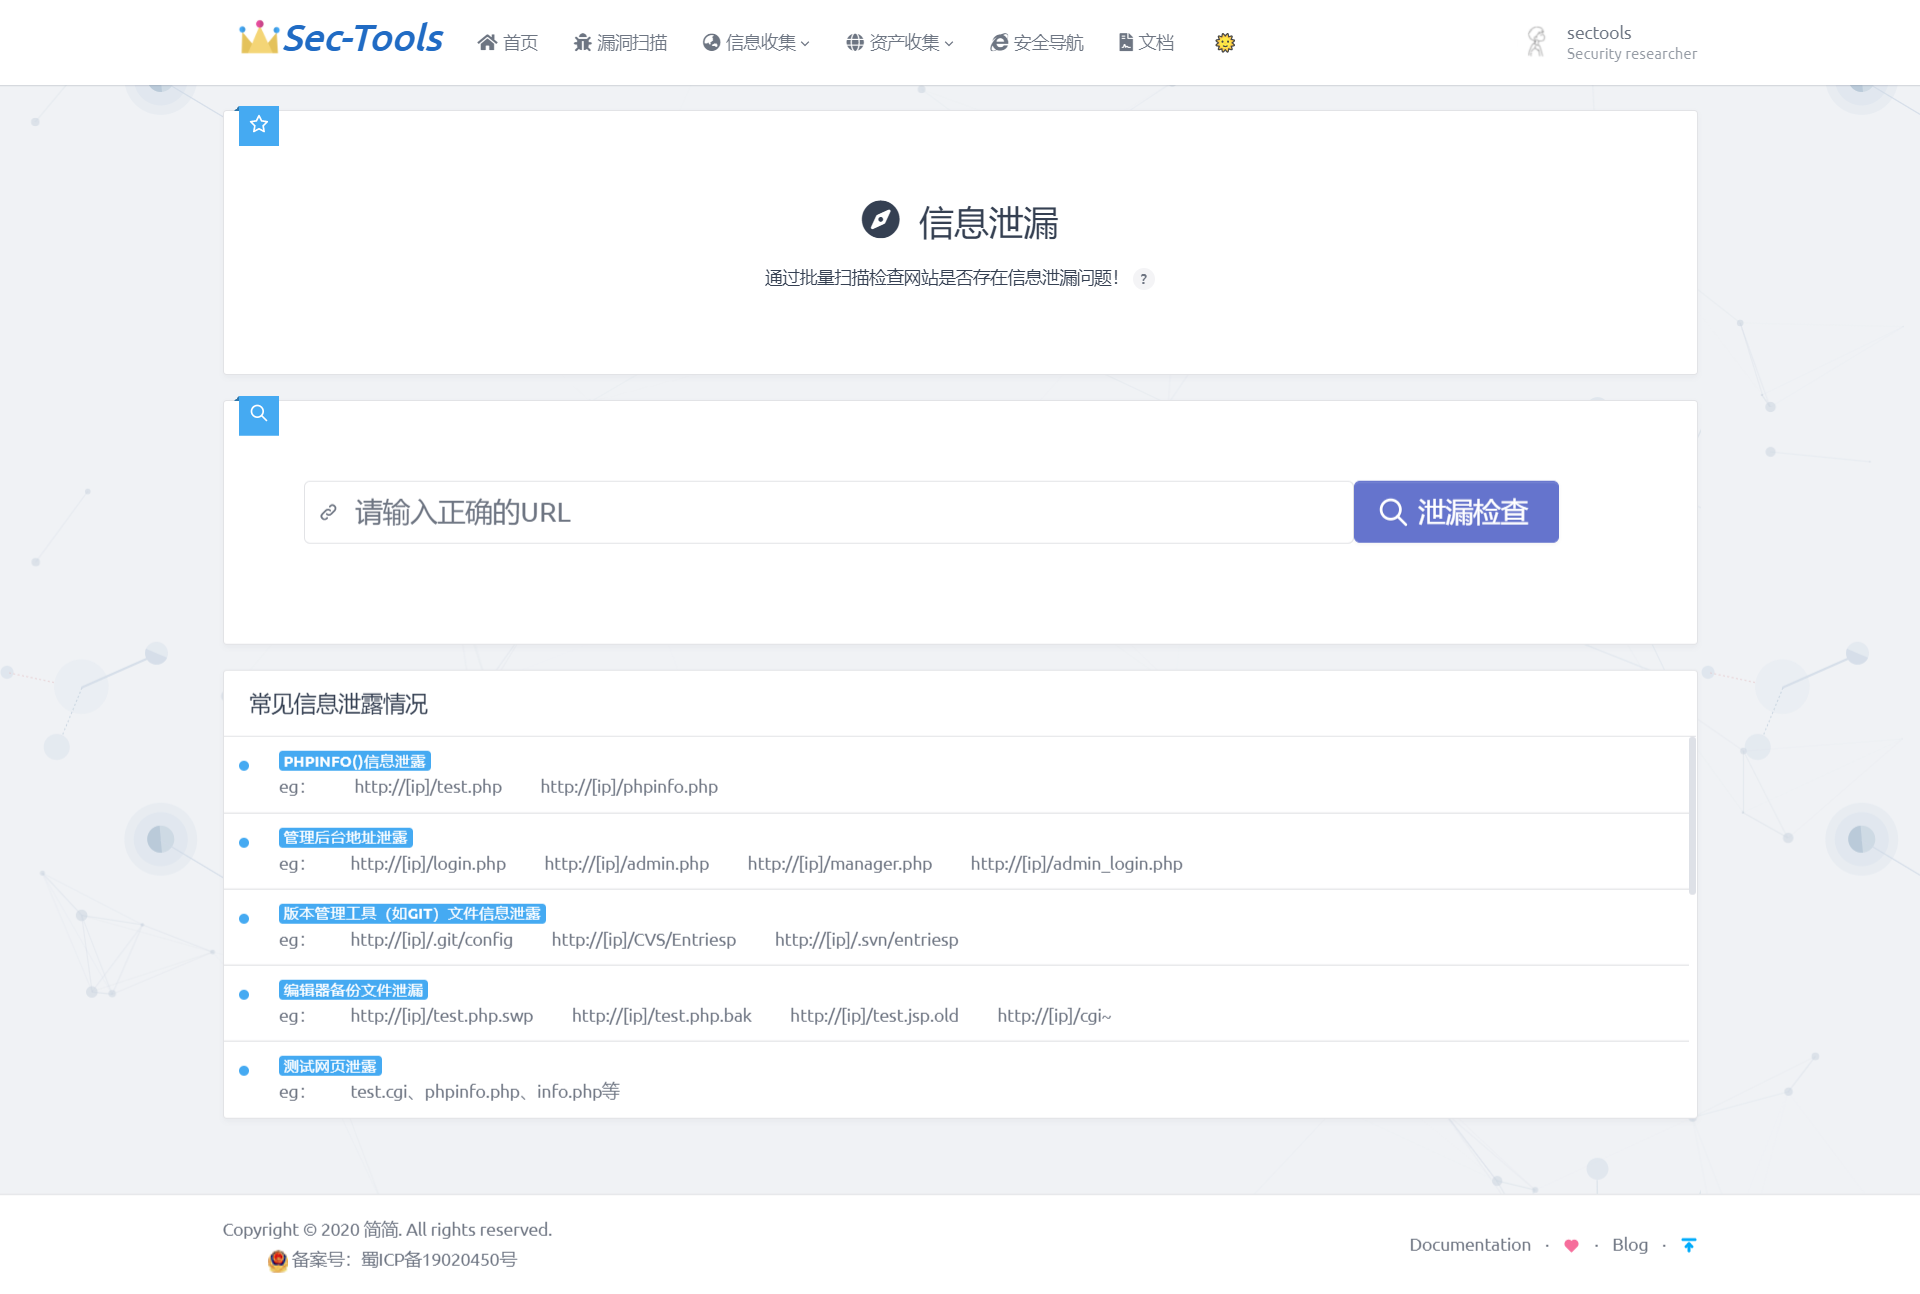
Domain name detection
This module mainly scans the sub domain name of the website by calling API
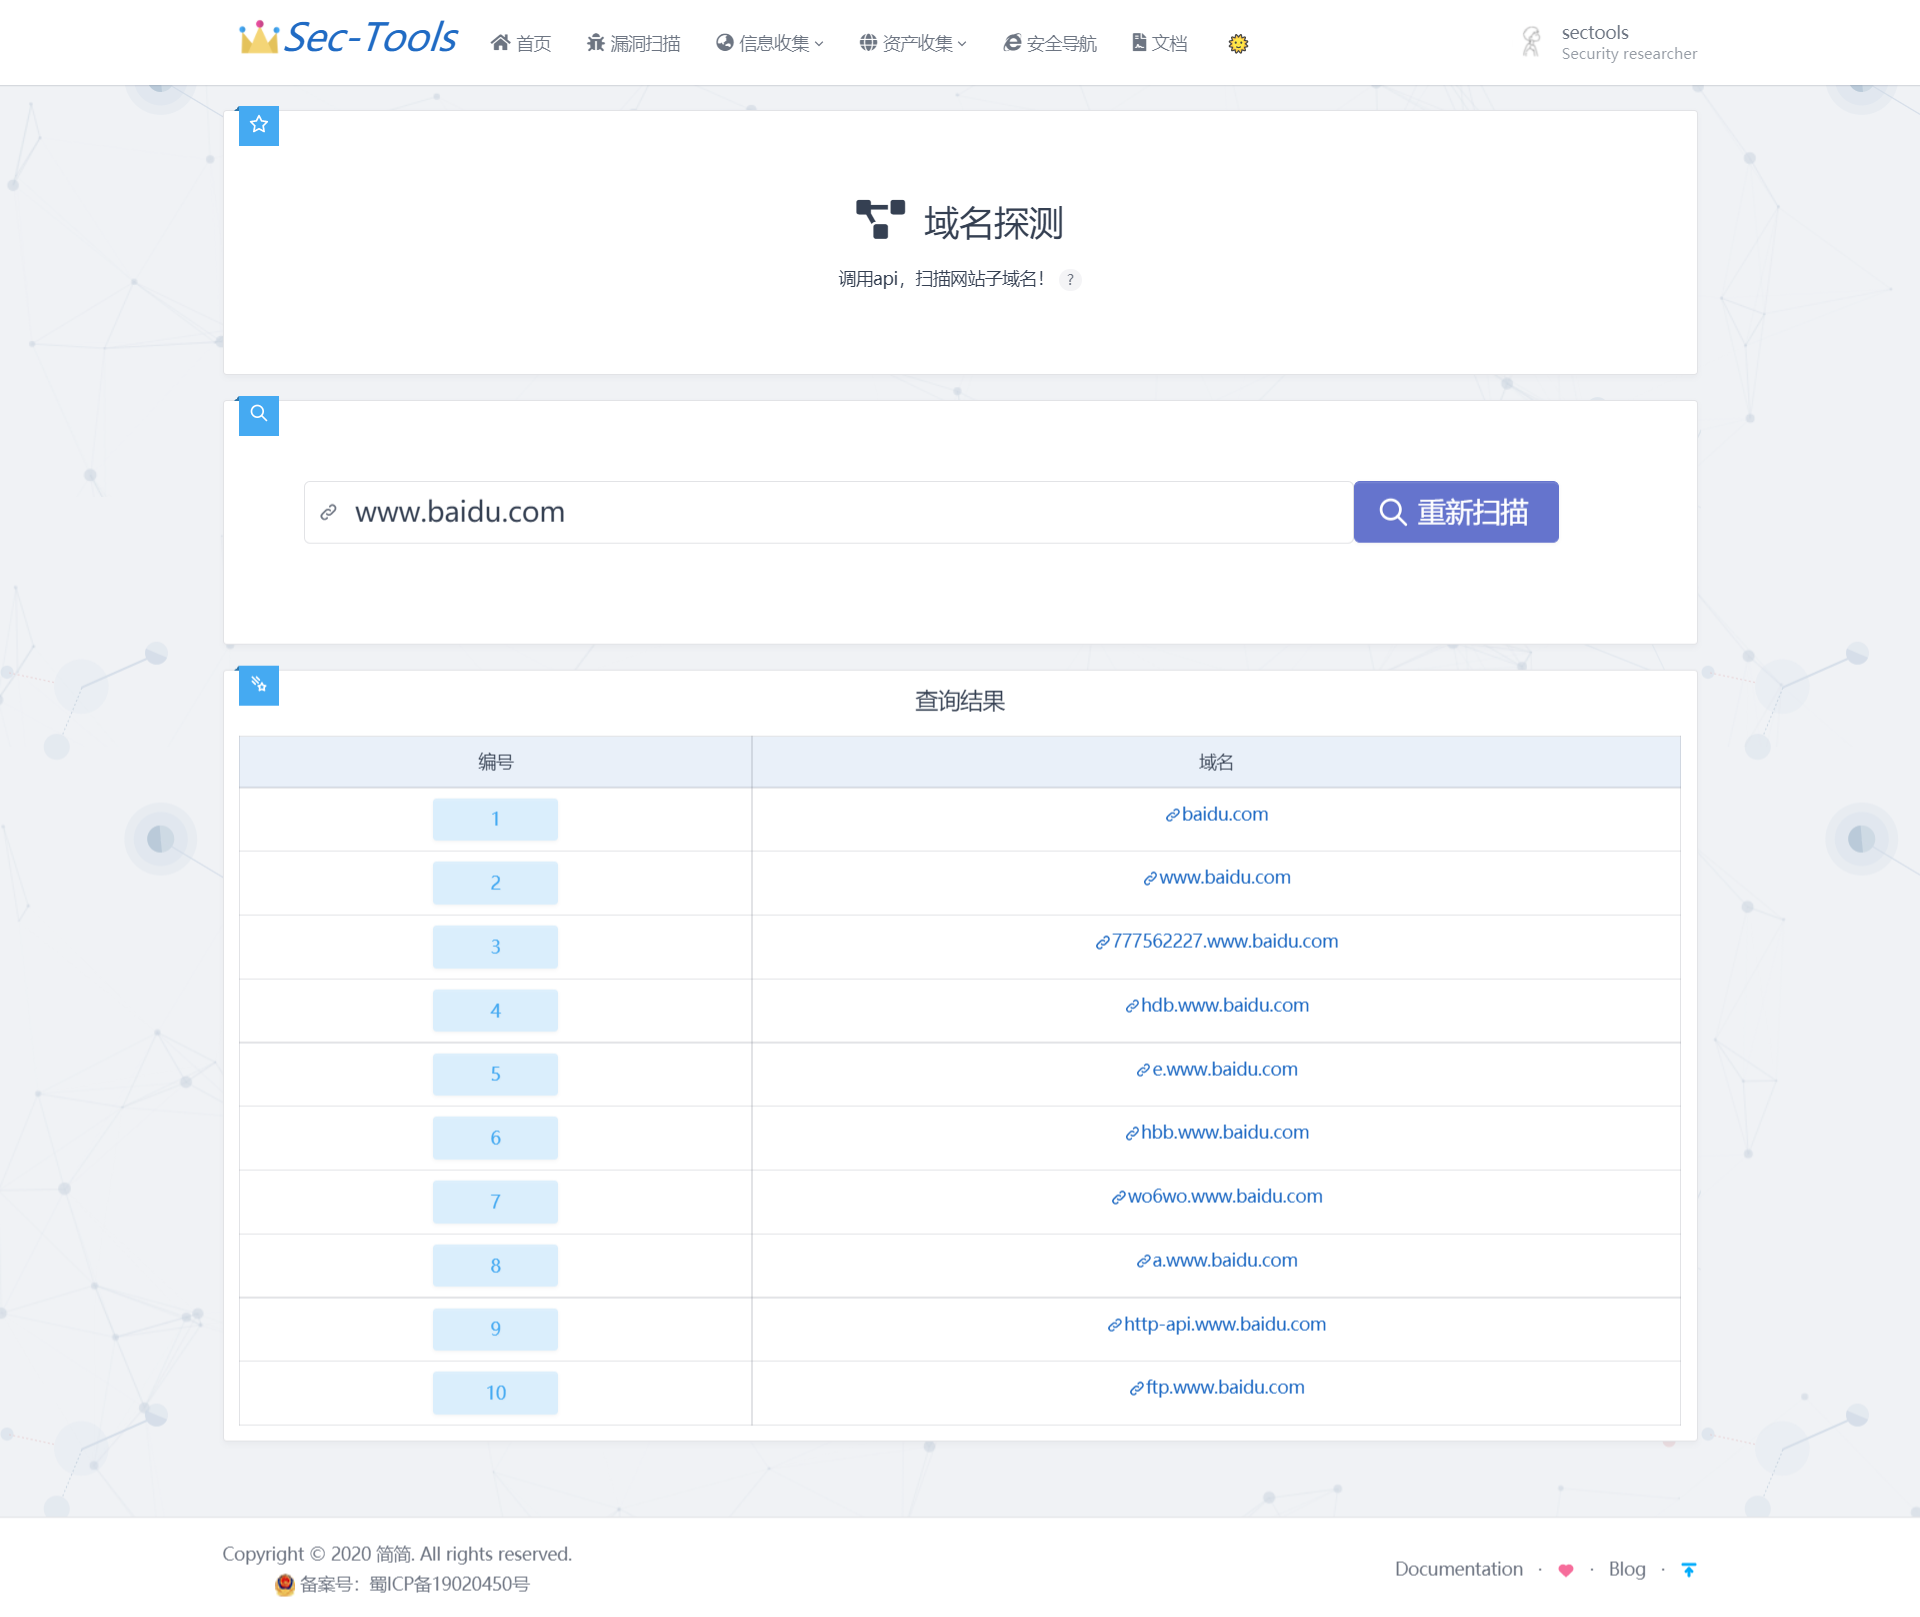
Safe navigation
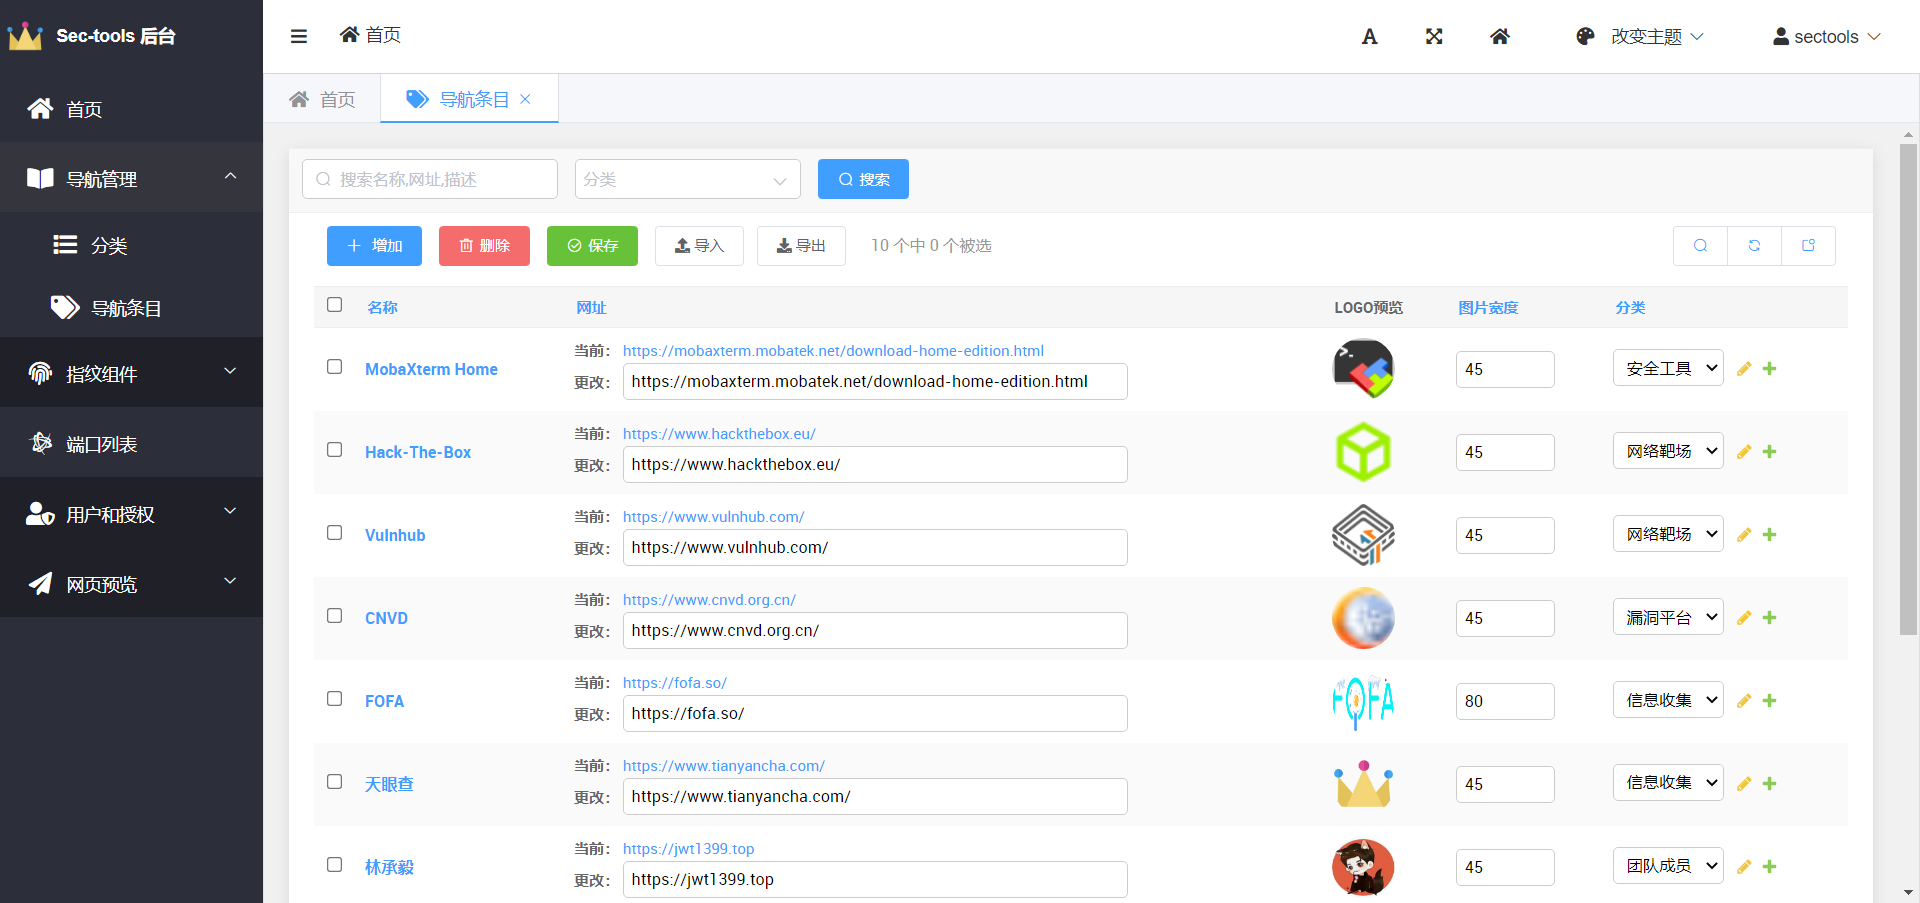
The safety navigation page is inspired by Viggo Developed by the boss Webstack Project, which is a pure front-end page developed based on Bootstrap, so I follow the style of Webstack and integrate the style of Tabler UI, and write background management in Django, which can manage categories and items online.
Front page
Background management page
Database design
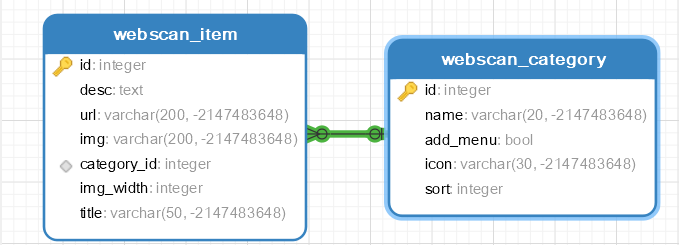
Navigation Item
title Description desc url category picture img picture width img_width
class Item(models.Model):
    '''Navigation entry'''
    title = models.CharField(max_length=50,verbose_name='name')
    desc = models.TextField(max_length=100,verbose_name='describe')
    url = models.URLField(verbose_name='website',blank=True)
    img = models.URLField(default='https://jwt1399.top/favicon.png',verbose_name='logo')
    img_width = models.IntegerField(default=45, verbose_name='image width')
    category = models.ForeignKey(Category, blank=True, null=True, verbose_name='classification', on_delete=models.CASCADE)
    class Meta:
        verbose_name=verbose_name_plural='Navigation entry'
    #Background item picture preview
    def img_admin(self):
        return format_html( '<img src="{}" width="50px" height="50px" style="border-radius: 50%;" />',self.img,)
    img_admin.short_description = 'logo preview'
    def __str__(self):
        return self.title
Item Category
Name name sort add to navigation bar add_menu icon
class Category(models.Model):
    """Item classification"""
    name = models.CharField(max_length=20, verbose_name='name')
    sort = models.IntegerField(default=1, verbose_name='Display order')
    add_menu = models.BooleanField(default=True, verbose_name='Add to navigation bar')
    icon = models.CharField(max_length=30, default='fas fa-home',verbose_name='Icon')
    class Meta:
        verbose_name_plural=verbose_name = 'classification'

    #Count the number of items corresponding to the classification and put them into the background
    def get_items(self):
        return len(self.item_set.all())
    get_items.short_description = 'Number of entries'  # Set background display header
    #Background icon Preview
    def icon_data(self):#Introduction of Font Awesome Free 5.11.1
        return format_html('<h1><i class="{}"></i></h1>',self.icon) #Convert to < I class = "{self. Icon}" > < / I >
    icon_data.short_description = 'Icon Preview'
    def __str__(self):
        return self.name
Document page
Docsify is directly embedded in Django to construct document pages.
compatibility
Phone end
| Vertical screen | Horizontal screen |
|---|---|
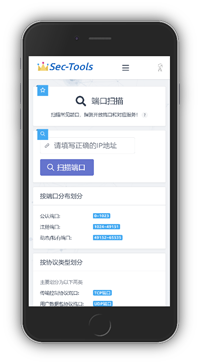 | 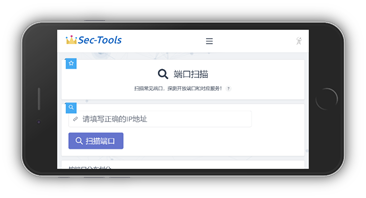 |
Pad end
| Vertical screen | Horizontal screen |
|---|---|
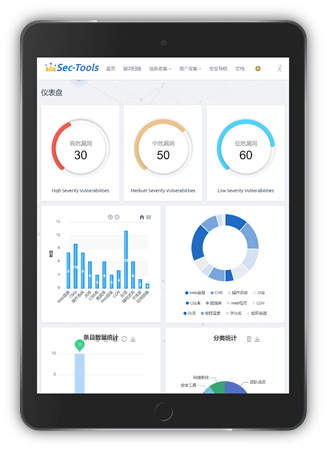 | 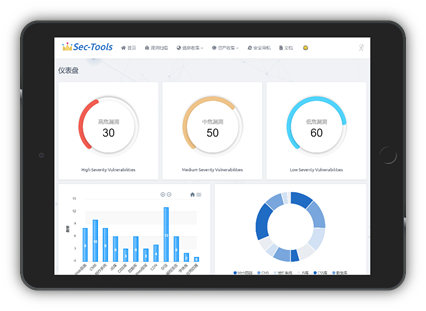 |
Version change record
v2.7(2021-04-18)
- Add domain name detection function;
- New middleware vulnerability scanning;
- Repair the function of forgetting password;
- Optimize the error message when AWVS is not started;
- Optimize user login logic;
- Optimize the UI of missed scanning details page;
- Optimize the navigation bar layout;
- Optimize some small details;
v2.6(2021-03-31)
- New vulnerability scanning details function;
- Add homepage dashboard;
- Safety navigation page navigation bar mobile terminal optimization;
- Security navigation page directory bar zoom optimization;
- Registration & login interface optimization;
- Document page navigation bar optimization;
- Add UI night mode;
- Fix several UI display bugs;
v2.5(2021-03-02)
- Added vulnerability scanning function;
- Add a common port query table on the port scanning page;
- Add a common information disclosure list on the information disclosure page;
- Add data analysis chart on fingerprint identification page;
- Vulnerability scanning page interface optimization;
v2.4(2021-02-22)
- Added directory identification function;
- Rewrite the welcome page;
- Interface adaptation of mobile terminal of safety navigation page;
- Security navigation page UI optimization;
- Directory identification page interface optimization;
- Add common fingerprint display and search on the fingerprint identification page;
- Introduce boost table to realize paging;
- Eliminate Layer UI and use Layer for pop-up;
- Add navigation bar to the document page;
v2.3(2021-02-08)
- New page layout;
- UI adapts to mobile terminal;
- Optimize the layout of navigation pages;
- Optimize a series of UI display problems;
- Optimized the display of mobile phone footer
- The display of navigation bar at the flat end is optimized
- Add back to top button at the bottom of the page
- Button trigger jump page relative position
- Press enter to trigger the query button
- Optimize navigation page footer display
v2.2 (2021-02-03)
- Added information leakage detection function;
- Added side station detection function;
- Added navigation page data analysis function;
- Added Docsify based document page;
- The static file structure is reconstructed
- Optimized the project file structure;
- Beautify the registration page;
- Dynamic particle background effect is introduced;
- Fixed some UI display problems;
v2.1 (2021-01-13)
- New fingerprint identification function;
- New login and registration functions;
- New welcome page;
- Added document page;
- Fixed some UI display problems;
v2.0(2021-01-04)
- New port scanning function;
- Added safety navigation function;
- Connected to SQLite database, and later considered to change to MySQL;
- Fixed some UI display problems;
- Fixed the problem that the small icon in the background header could not be displayed;
- The background data import and export function is added;
v1.0(2020-12-20)
- The front-end page is constructed based on the Tabler framework;
- Use the Django framework based on Python to write the back end;
- SimpleUi is introduced to beautify Django background framework;
- Font awsome5.15.1 icon is introduced;
Project deployment
Local deployment
1. Open the project with pychart and add a new virtual environment in pychart's setting - > project interpreter.
2. In this virtual environment, open pychar's own Terminal and run PIP install - R requirements Txt download the third-party package required for the project.
3. Now the project can run normally, but if you want to use the vulnerability scanning function, you need to install AWVS and set it in the setting Configure API URL and API KEY of AWVS in. PY
4. Forget password function is configured in setting Modify in PY
EMAIL_HOST = 'smtp.163.com'
EMAIL_PORT = 25               # smtp server port for outbox
EMAIL_HOST_USER = 'xxx'       # Your email account
EMAIL_HOST_PASSWORD ="xxx"    # Mailbox authorization code
EMAIL_USE_TLS = True          # This must be True, otherwise the sending will not succeed
EMAIL_FROM = 'xxx'            # Your email account
DEFAULT_FROM_EMAIL = 'xxx'    # Your email account
5. Create the super administrator Python manage py createsuperuser
6. Default account: sectools/password!!
Server deployment
Please refer to: Rapid deployment of Django project using pagoda panel
TO DO
Both development and security have a long way to go. It's a long way to go. I'll look up and down and encourage each other!
- Security Tools page
- Safety book page
- Introducing MySQL database
- Scan algorithm optimization
- Code variables, database structure optimization
- Vulnerability report export function
- Page asynchronous refresh
Statement & thanks
- This project is only for learning, testing and communication, not for illegal purposes.
- Please abide by the network security law of the people's Republic of China and do not use it for unauthorized testing. If it is used for other purposes, the legal liability has nothing to do with the author. Downloading and using it means that the user agrees with the above view.
- This project has referred to many master's ideas / articles / projects. Thank you for your help!!!