Series navigation and source code
demand
In daily development, we need to provide documented API interface definitions for the front end, and even simulate the erection of a fake service to debug interface fields. Or for back-end developers, we can import this interface definition file to Postman or other API clients to save the trouble of manual entry. So this article implements how to use Swagger to manage API interface documentation.
However, in this article, we do not cover the relevant contents of NSwag. Through NSwag, we can even directly generate the interface definitions that can be used by the front end. For the use of NSwag, please refer to: NSwag and ASP Net core getting started And official documents RicoSuter/NSwag.
target
Implement the interface documentation of TodoList project.
Principles and ideas
When you use IDE or cli to generate a new Web API project, swashbuckle is already included in the project template The aspnetcore package is used to generate swagger documents. We need to use this package to implement related functions.
realization
Implement the basic Swagger API documentation
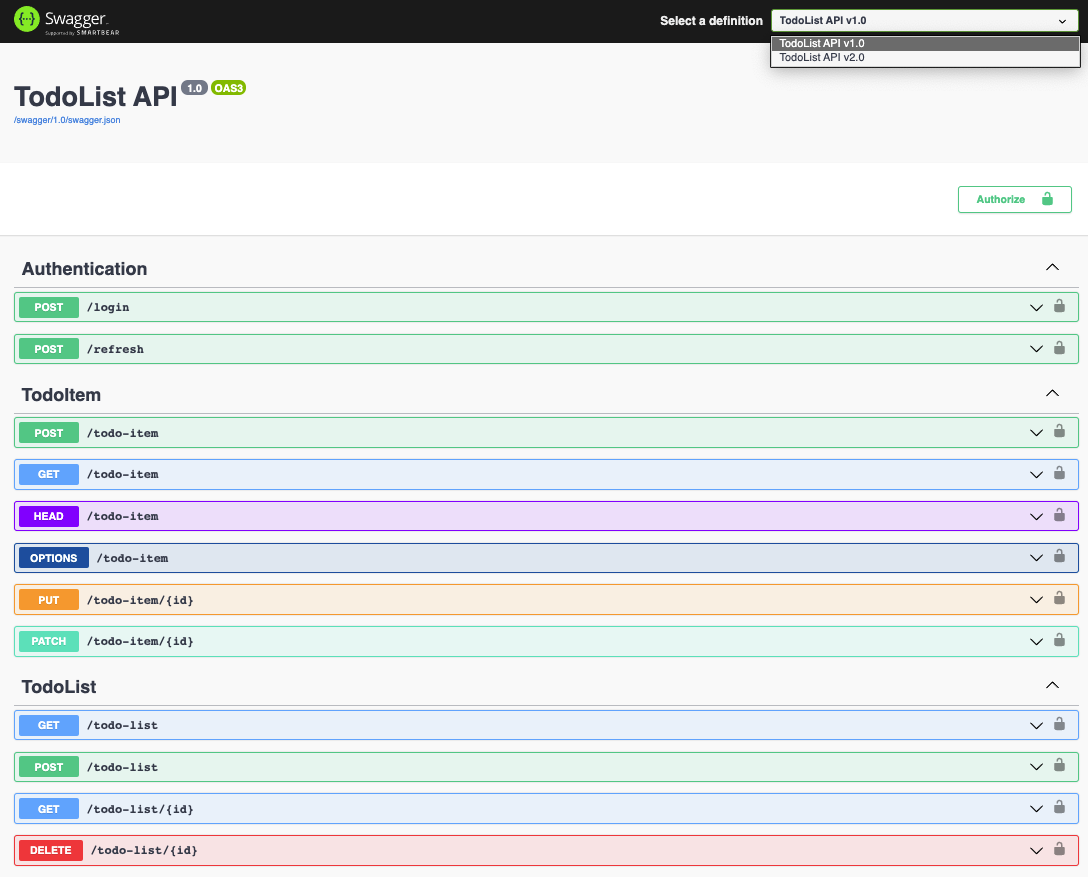
SwaggerGen service is likely to have been added to the Program. We can make a small modification because we have written two versions of TodoItemController before. We hope to reflect the two versions in swagger documents:
// Omit other
builder.Services.AddSwaggerGen(s =>
{
    s.SwaggerDoc("1.0", new OpenApiInfo { Title = "TodoList API", Version = "1.0"});
    s.SwaggerDoc("2.0", new OpenApiInfo { Title = "TodoList API", Version = "2.0"});
});
We can also modify the introduction of middleware:
if (app.Environment.IsDevelopment())
{
    app.UseSwagger();
    app.UseSwaggerUI(s =>
    {
        s.SwaggerEndpoint("/swagger/1.0/swagger.json", "TodoList API v1.0");
        s.SwaggerEndpoint("/swagger/2.0/swagger.json", "TodoList API v2.0");
    });
}
In the chapter of API interface version control, if we do not use multiple versions of the API implemented by changing the URL, we only need to add the following to the Controller of the corresponding version:
- TodoItemController.cs
[Route("/todo-item")]
[ApiExplorerSettings(GroupName = "1.0")]
[ApiController]
public class TodoItemController : ControllerBase
// Omit other
as well as
- TodoItemV2Controller.cs
[Route("/todo-item")]
[ApiExplorerSettings(GroupName = "2.0")]
[ApiController]
public class TodoItemV2Controller : ControllerBase
// Omit other
For documents that use URL paths to implement API s of different versions, you can refer to the implementation of this article: ASP.NET Core 3.1 WebApi Swagger and API version control
Add authentication authorization for Swagger
To add authorization support, we can modify Swagger service options as follows and add authorization configuration:
- Program.cs
// Omit others
s.AddSecurityDefinition("Bearer", new OpenApiSecurityScheme
{
    In = ParameterLocation.Header,
    Description = "Add JWT with Bearer",
    Name = "Authorization",
    Type = SecuritySchemeType.ApiKey,
    Scheme = "Bearer"
});

s.AddSecurityRequirement(new OpenApiSecurityRequirement
{
    {
        new OpenApiSecurityScheme
        {
            Reference = new OpenApiReference
            {
                Type = ReferenceType.SecurityScheme,
                Id = "Bearer"
            },
            Name = "Bearer",
        },
        new List<string>()
    }
});
verification
Start the API project and open the swagger address. You can see that the API version selection and authorization control are displayed on the interface.

I won't post screenshots for specific switching and viewing. You can try it yourself.
A little expansion
Import API client
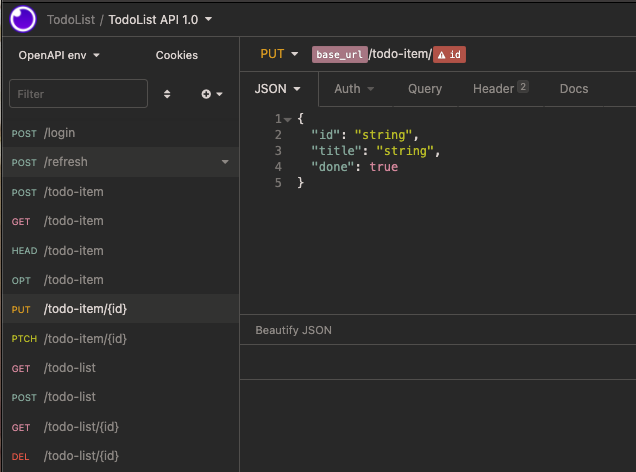
Right click the json file link on the swagger interface, select Save as, and then go to the corresponding API client to import the json file.


What Postman does well in this regard is that it can generate the corresponding folder structure according to the structural relationship of the interface in the json file.
Generate fake server
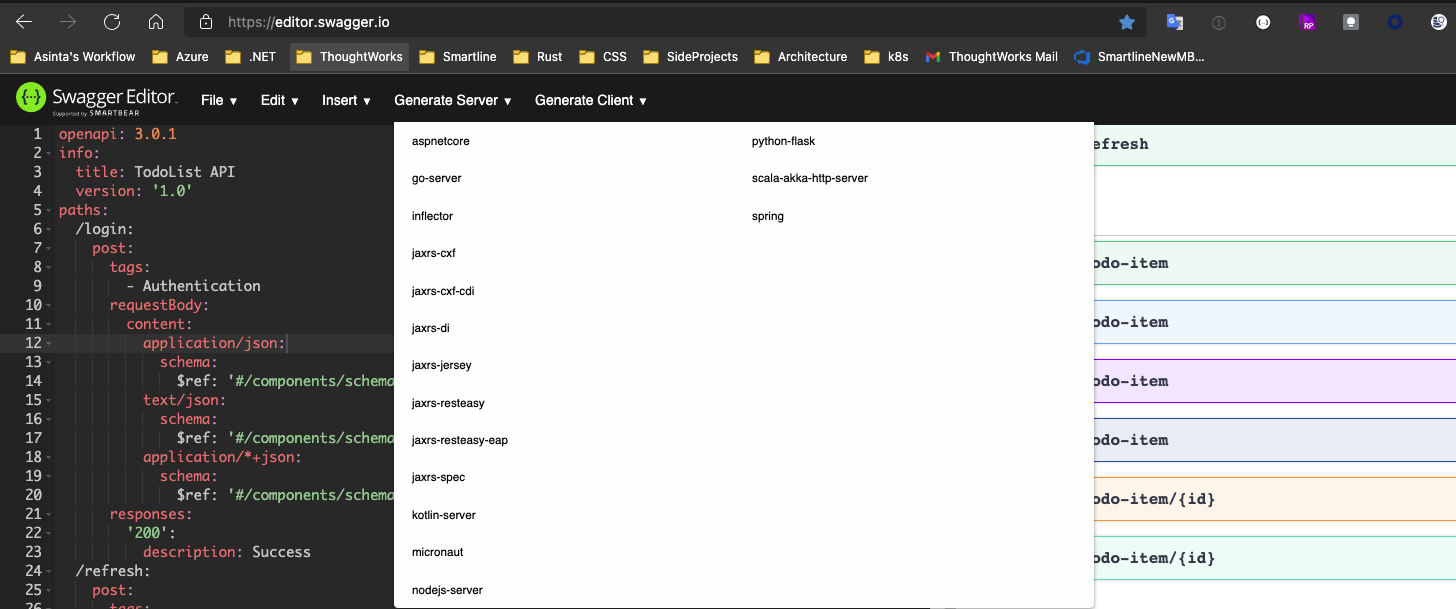
You can go here: Swagger Editor , upload the swagger json file, and select to generate the server or client.

Generate complete data definition and API annotation documents for swagger
The XML annotation function needs to be enabled. Therefore, we also need to prohibit 1591 warning (to avoid issuing a warning without XML annotation documents to all methods, classes and fields). Modify the project settings as follows:
<PropertyGroup Condition="'$(Configuration)|$(Platform)'=='Debug|AnyCPU'">
  <DocumentationFile>TodoList.Api.xml</DocumentationFile>
  <OutputPath></OutputPath>
  <NoWarn>1701;1702;1591</NoWarn>
</PropertyGroup>
<PropertyGroup Condition="'$(Configuration)|$(Platform)'=='Release|AnyCPU'">
  <NoWarn>1701;1702;1591</NoWarn>
</PropertyGroup>
Modify the configuration of SwaggerGen injection:
- TodoList.Api.csproj
var xmlFile = $"{Assembly.GetExecutingAssembly().GetName().Name}.xml";
var xmlPath = Path.Combine(AppContext.BaseDirectory, xmlFile);
s.IncludeXmlComments(xmlPath);
Let's take the CreateTodoList interface as an example to add xml comments,
- TodoListController.cs
/// <summary>
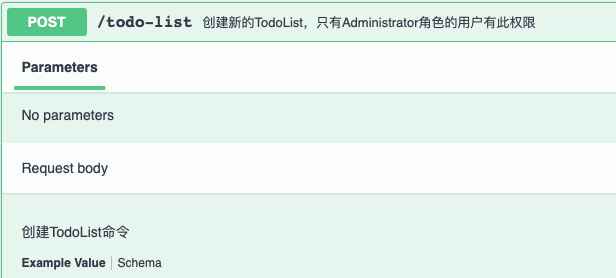
///To create a new TodoList, only users in the Administrator role have this permission
/// </summary>
///< param name = "command" > create TodoList command < / param >
/// <returns></returns>
[HttpPost]
[Authorize(Policy = "OnlyAdmin")]
[ServiceFilter(typeof(LogFilterAttribute))]
public async Task<ApiResponse<Domain.Entities.TodoList>> Create([FromBody] CreateTodoListCommand command)
{
    return ApiResponse<Domain.Entities.TodoList>.Success(await _mediator.Send(command));
}
Open the swagger document again, and you can see that the swagger document now has the interface description:

summary
In this article, we have realized the generation of swagger documents and the role of some configuration options. If you need to use more OpenAPI related features, it is recommended to be familiar with NSwag, which provides more powerful functions.
In the next article, we implement the health check function of the program.