1, Convolution neural network is used to do facial expression recognition such as smiling face and non smiling face
1.1 research background
Facial Expression Recognition
In daily work and life, people's emotional expression mainly includes: language, voice, physical behavior (such as gestures), facial expression and so on. Among these behaviors, facial expressions carry the most abundant information to express human inner emotional activities. According to research, the information of human inner activities carried by human facial expressions accounts for the highest proportion of all the above forms, accounting for about 55%.
Human facial expression changes can convey their inner emotional changes. Expression is a true portrayal of human inner world. In the 1970s, after a large number of experiments, Paul Ackerman, a famous American psychologist, defined human basic expressions as sadness, fear, disgust, happiness, anger and surprise. At the same time, they established the corresponding expression image database according to different facial expression categories. With the deepening of research, neutral expression has also been added to the basic facial expressions by researchers, which constitutes seven basic facial expressions in today's facial expression recognition research.
2. Put the downloaded datasets into the new smile on disk D,

1.2 facial expression recognition framework
Facial expression recognition can usually be divided into four processes. It includes image acquisition, face detection, image preprocessing and expression classification. Among them, face detection, facial feature extraction and facial expression classification are the three key links of facial expression recognition. The basic framework of facial expression recognition is shown in the figure below.
1.3 train the smiling face dataset according to the training method of cat and dog dataset
1. First set the train_ The names of the pictures in the two folders under the folder folder are modified. (change to picture format of cat and dog)
#coding=gbk
import os
import sys
def rename():
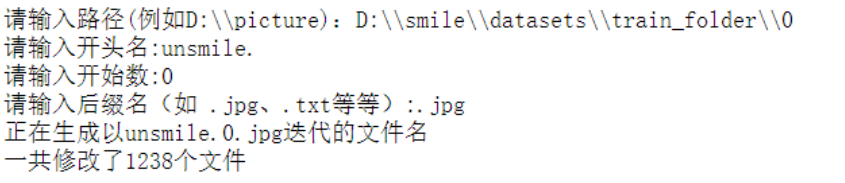
path=input("Please enter a path(for example D:\\\\picture): ")
name=input("Please enter a starting name:")
startNumber=input("Please enter the starting number:")
fileType=input("Please enter a suffix (e.g .jpg,.txt (wait):")
print("Building to"+name+startNumber+fileType+"Iterated file name")
count=0
filelist=os.listdir(path)
for files in filelist:
Olddir=os.path.join(path,files)
if os.path.isdir(Olddir):
continue
Newdir=os.path.join(path,name+str(count+int(startNumber))+fileType)
os.rename(Olddir,Newdir)
count+=1
print("A total of amendments have been made"+str(count)+"Files")
rename()

2) Picture classification
import os, shutil #Copy file
# The path of the original directory
# Data set uncompressed
original_dataset_dir1 = 'D:\\smile\\datasets\\train_folder\\1'  ##smiling face
original_dataset_dir0 = 'D:\\smile\\datasets\\train_folder\\0'  ##Non smiling face
# We will store smaller datasets in the directory
base_dir = 'D:\\smile1'
os.mkdir(base_dir)

# # Directory of training, validation and test data sets
train_dir = os.path.join(base_dir, 'train')
os.mkdir(train_dir)
validation_dir = os.path.join(base_dir, 'validation')
os.mkdir(validation_dir)
test_dir = os.path.join(base_dir, 'test')
os.mkdir(test_dir)

# Cat training picture directory
train_cats_dir = os.path.join(train_dir, 'smile')
os.mkdir(train_cats_dir)

# Directory of dog training pictures
train_dogs_dir = os.path.join(train_dir, 'unsmile')
os.mkdir(train_dogs_dir)

# Cat verification picture directory
validation_cats_dir = os.path.join(validation_dir, 'smile')
os.mkdir(validation_cats_dir)

# Directory where the dog validation dataset is located
validation_dogs_dir = os.path.join(validation_dir, 'unsmile')
os.mkdir(validation_dogs_dir)

# Directory of cat test dataset
test_cats_dir = os.path.join(test_dir, 'smile')
os.mkdir(test_cats_dir)

# Directory of dog test data set
test_dogs_dir = os.path.join(test_dir, 'unsmile')
os.mkdir(test_dogs_dir)

# Copy the first 1000 smiling face images to train_cats_dir
fnames = ['smile.{}.jpg'.format(i) for i in range(1000)]
for fname in fnames:
    src = os.path.join(original_dataset_dir1, fname)
    dst = os.path.join(train_cats_dir, fname)
    shutil.copyfile(src, dst)

# Copy the next 500 smiling face images to validation_cats_dir
fnames = ['smile.{}.jpg'.format(i) for i in range(500)]
for fname in fnames:
    src = os.path.join(original_dataset_dir1, fname)
    dst = os.path.join(validation_cats_dir, fname)
    shutil.copyfile(src, dst)

# Copy the next 500 smiling face images to test_cats_dir
fnames = ['smile.{}.jpg'.format(i) for i in range(500)]
for fname in fnames:
    src = os.path.join(original_dataset_dir1, fname)
    dst = os.path.join(test_cats_dir, fname)
    shutil.copyfile(src, dst)

# Copy the first 1000 non smiling face images to train_dogs_dir
fnames = ['unsmile.{}.jpg'.format(i) for i in range(1000)]
for fname in fnames:
    src = os.path.join(original_dataset_dir0, fname)
    dst = os.path.join(train_dogs_dir, fname)
    shutil.copyfile(src, dst)

# Copy the next 500 non smiling face images to validation_dogs_dir
fnames = ['unsmile.{}.jpg'.format(i) for i in range(500)]
for fname in fnames:
    src = os.path.join(original_dataset_dir0, fname)
    dst = os.path.join(validation_dogs_dir, fname)
    shutil.copyfile(src, dst)

# Copy the next 500 non smiling face images to test_dogs_dir
fnames = ['unsmile.{}.jpg'.format(i) for i in range(500)]
for fname in fnames:
    src = os.path.join(original_dataset_dir0, fname)
    dst = os.path.join(test_dogs_dir, fname)
    shutil.copyfile(src, dst)
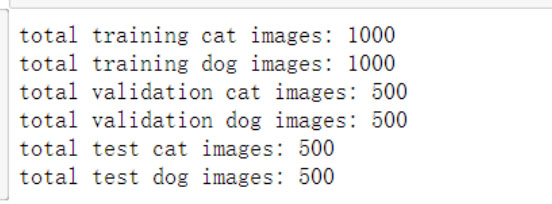
3) As a soundness check, let's calculate how many pictures we have in each training segment (training / verification / test):
print('total training cat images:', len(os.listdir(train_cats_dir)))
print('total training dog images:', len(os.listdir(train_dogs_dir)))
print('total validation cat images:', len(os.listdir(validation_cats_dir)))
print('total validation dog images:', len(os.listdir(validation_dogs_dir)))
print('total test cat images:', len(os.listdir(test_cats_dir)))
print('total test dog images:', len(os.listdir(test_dogs_dir)))
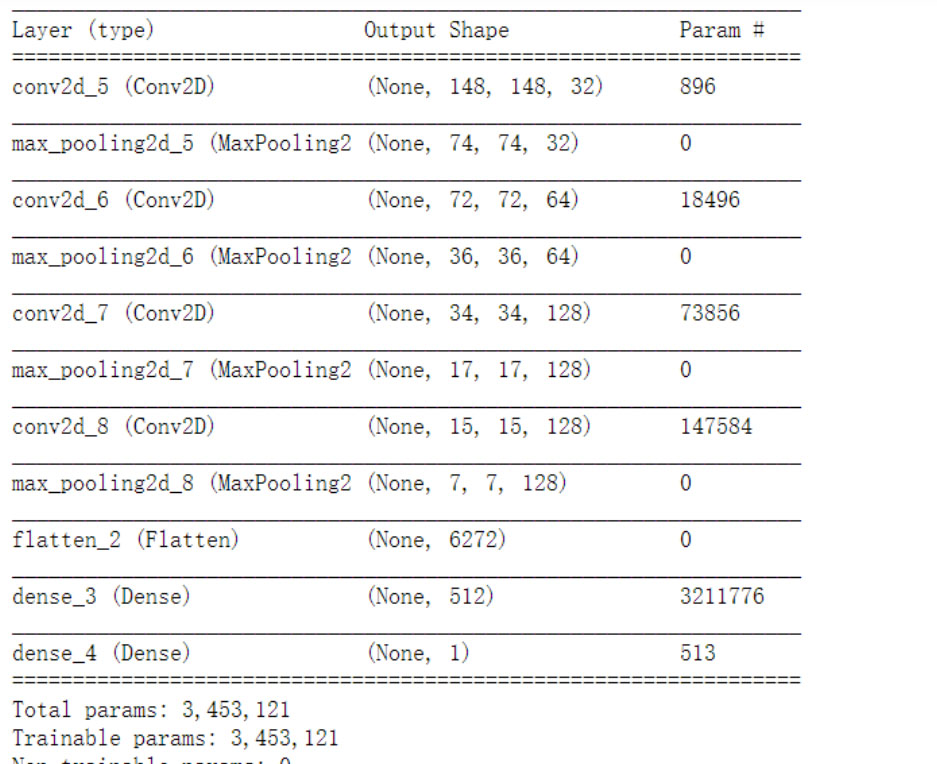
4) Construction of convolution network model
from keras import layers
from keras import models

model = models.Sequential()
model.add(layers.Conv2D(32, (3, 3), activation='relu',
                        input_shape=(150, 150, 3)))
model.add(layers.MaxPooling2D((2, 2)))
model.add(layers.Conv2D(64, (3, 3), activation='relu'))
model.add(layers.MaxPooling2D((2, 2)))
model.add(layers.Conv2D(128, (3, 3), activation='relu'))
model.add(layers.MaxPooling2D((2, 2)))
model.add(layers.Conv2D(128, (3, 3), activation='relu'))
model.add(layers.MaxPooling2D((2, 2)))
model.add(layers.Flatten())
model.add(layers.Dense(512, activation='relu'))
model.add(layers.Dense(1, activation='sigmoid'))
model.summary()
5) The image generator reads the data in the file and preprocesses the data.
from keras import optimizers

model.compile(loss='binary_crossentropy',
              optimizer=optimizers.RMSprop(lr=1e-4),
              metrics=['acc'])
from keras.preprocessing.image import ImageDataGenerator

# All images will be rescaled by 1 / 255
train_datagen = ImageDataGenerator(rescale=1./255)
test_datagen = ImageDataGenerator(rescale=1./255)

train_generator = train_datagen.flow_from_directory(
        # This is the target directory
        train_dir,
        # All images will be adjusted to 150x150
        target_size=(150, 150),
        batch_size=20,
        # Because we use binary cross entropy loss, we need binary labels
        class_mode='binary')

validation_generator = test_datagen.flow_from_directory(
        validation_dir,
        target_size=(150, 150),
        batch_size=20,
        class_mode='binary')

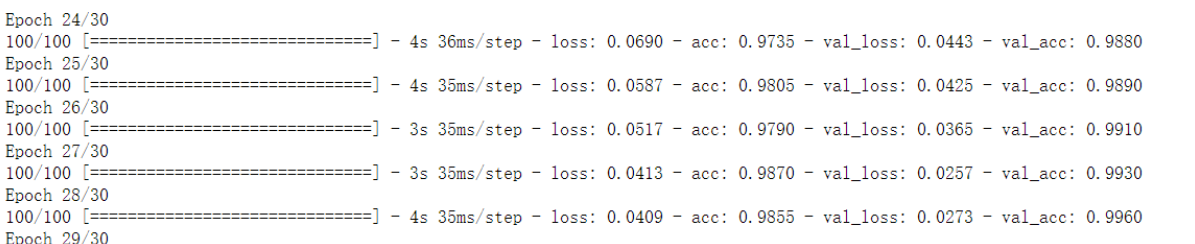
6) Start training
history = model.fit_generator(
      train_generator,
      steps_per_epoch=100,
      epochs=30,
      validation_data=validation_generator,
      validation_steps=50)
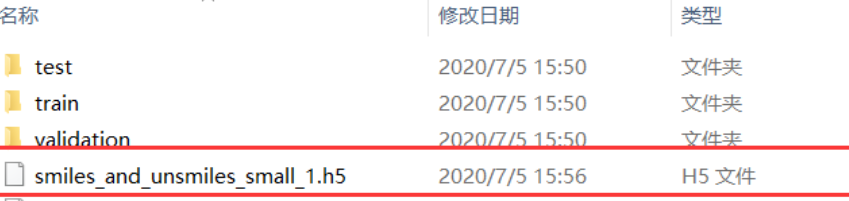
7) Save training model`
model.save('D:\\smile1\\smiles_and_unsmiles_small_1.h5')
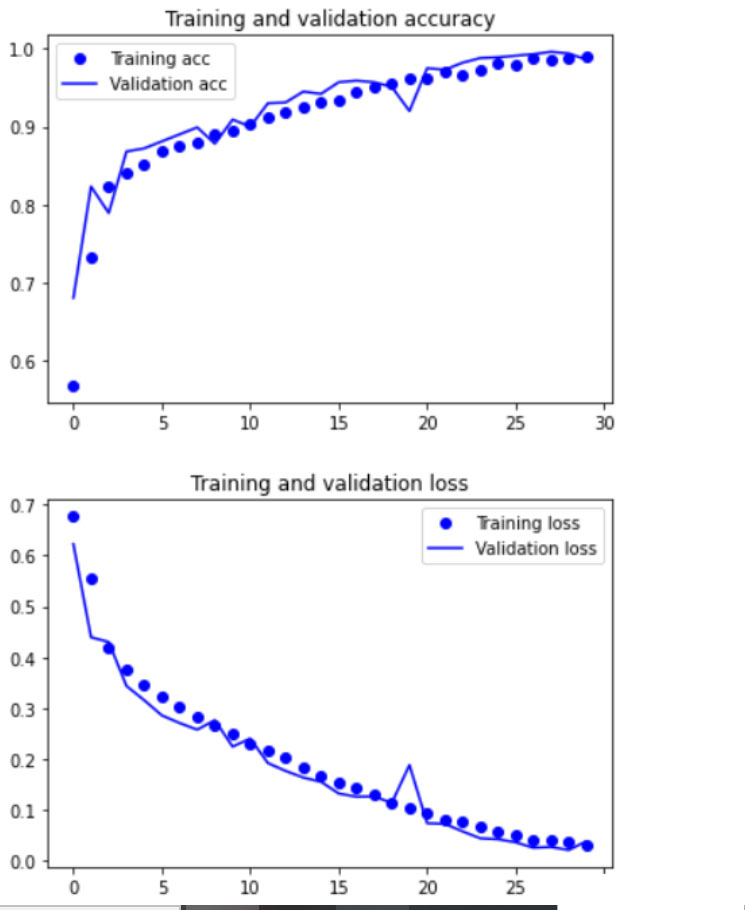
8) Loss and accuracy of models drawn on training and validation data (visual interface)
import matplotlib.pyplot as plt

acc = history.history['acc']
val_acc = history.history['val_acc']
loss = history.history['loss']
val_loss = history.history['val_loss']

epochs = range(len(acc))

plt.plot(epochs, acc, 'bo', label='Training acc')
plt.plot(epochs, val_acc, 'b', label='Validation acc')
plt.title('Training and validation accuracy')
plt.legend()

plt.figure()

plt.plot(epochs, loss, 'bo', label='Training loss')
plt.plot(epochs, val_loss, 'b', label='Validation loss')
plt.title('Training and validation loss')
plt.legend()

plt.show()
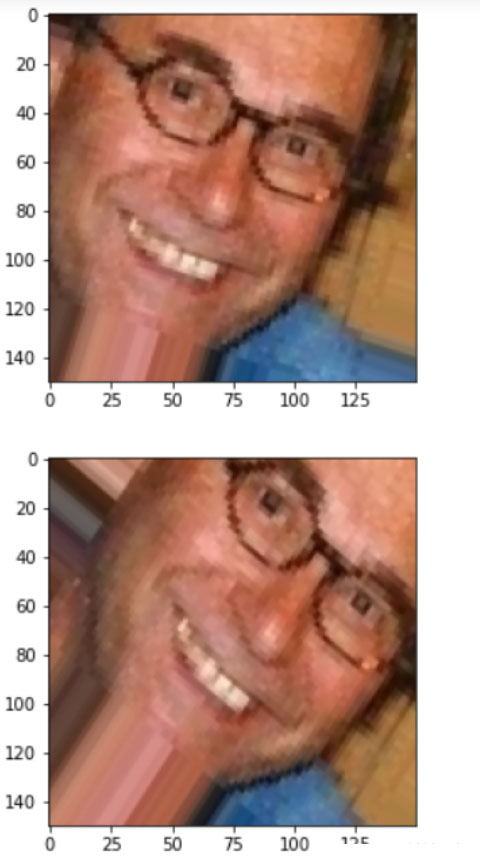
9) Using data expansion
datagen = ImageDataGenerator(
      rotation_range=40,
      width_shift_range=0.2,
      height_shift_range=0.2,
      shear_range=0.2,
      zoom_range=0.2,
      horizontal_flip=True,
      fill_mode='nearest')
# This is a module with an image preprocessing utility
from keras.preprocessing import image

fnames = [os.path.join(train_cats_dir, fname) for fname in os.listdir(train_cats_dir)]

# We select an image to "enhance"
img_path = fnames[3]

# Read and resize the image
img = image.load_img(img_path, target_size=(150, 150))

# Convert it to a Numpy array with shapes (150, 150, 3)
x = image.img_to_array(img)

# Change it to (1150150, 3)
x = x.reshape((1,) + x.shape)

# Below The flow () command generates a batch of randomly transformed images.
# It will cycle indefinitely, so we need to "break" the cycle at some point!
i = 0
for batch in datagen.flow(x, batch_size=1):
    plt.figure(i)
    imgplot = plt.imshow(image.array_to_img(batch[0]))
    i += 1
    if i % 4 == 0:
        break

plt.show()
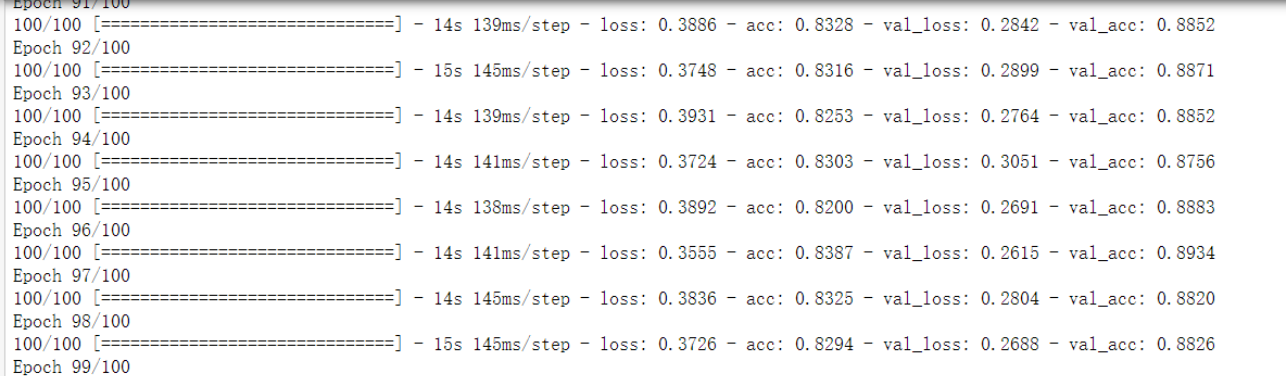
10) Use data expansion and fallback to train our network
train_datagen = ImageDataGenerator(
    rescale=1./255,
    rotation_range=40,
    width_shift_range=0.2,
    height_shift_range=0.2,
    shear_range=0.2,
    zoom_range=0.2,
    horizontal_flip=True,)

# Please note that validation data should not be added!
test_datagen = ImageDataGenerator(rescale=1./255)

train_generator = train_datagen.flow_from_directory(
        # This is the target directory
        train_dir,
        # All images will be adjusted to 150x150
        target_size=(150, 150),
        batch_size=32,
        # Because we use binary cross entropy loss, we need binary labels
        class_mode='binary')

validation_generator = test_datagen.flow_from_directory(
        validation_dir,
        target_size=(150, 150),
        batch_size=32,
        class_mode='binary')

history = model.fit_generator(
      train_generator,
      steps_per_epoch=100,
      epochs=100,
      validation_data=validation_generator,
      validation_steps=50)
11) Save model
model.save('D:\\smile1\\smiles_and_unsmiles_small_2.h5')

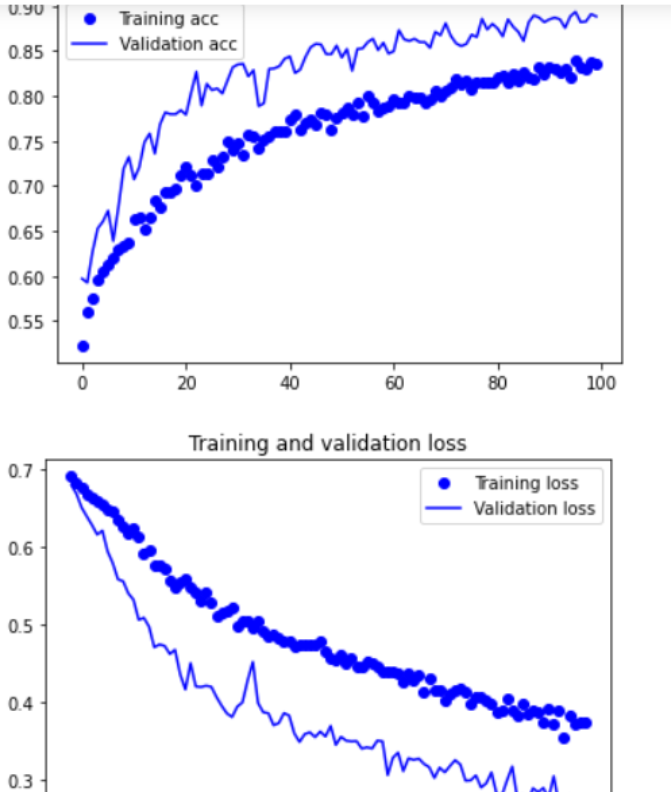
12) Loss and accuracy of models drawn on training and validation data (visual interface)
acc = history.history['acc']
val_acc = history.history['val_acc']
loss = history.history['loss']
val_loss = history.history['val_loss']

epochs = range(len(acc))

plt.plot(epochs, acc, 'bo', label='Training acc')
plt.plot(epochs, val_acc, 'b', label='Validation acc')
plt.title('Training and validation accuracy')
plt.legend()

plt.figure()

plt.plot(epochs, loss, 'bo', label='Training loss')
plt.plot(epochs, val_loss, 'b', label='Validation loss')
plt.title('Training and validation loss')
plt.legend()

plt.show()
2, Complete a program for the camera to collect their own faces and classify and interpret the expressions (smiling and non smiling faces) in real time (output classified text);
1. Smiling face recognition based on above convolution neural network
#Detect face in video or camera
import cv2
from keras.preprocessing import image
from keras.models import load_model
import numpy as np
import dlib
from PIL import Image
model = load_model('D:\\smile1\\smiles_and_unsmiles_small_2.h5')
detector = dlib.get_frontal_face_detector()
video=cv2.VideoCapture(0)
font = cv2.FONT_HERSHEY_SIMPLEX
def rec(img):
    gray=cv2.cvtColor(img,cv2.COLOR_BGR2GRAY)
    dets=detector(gray,1)
    if dets is not None:
        for face in dets:
            left=face.left()
            top=face.top()
            right=face.right()
            bottom=face.bottom()
            cv2.rectangle(img,(left,top),(right,bottom),(0,255,0),2)
            img1=cv2.resize(img[top:bottom,left:right],dsize=(150,150))
            img1=cv2.cvtColor(img1,cv2.COLOR_BGR2RGB)
            img1 = np.array(img1)/255.
            img_tensor = img1.reshape(-1,150,150,3)
            prediction =model.predict(img_tensor)
            if prediction[0][0]>0.5:
                result='unsmile'
            else:
                result='smile'
            cv2.putText(img, result, (left,top), font, 2, (0, 255, 0), 2, cv2.LINE_AA)
        cv2.imshow('Video', img)
while video.isOpened():
    res, img_rd = video.read()
    if not res:
        break
    rec(img_rd)
    if cv2.waitKey(5) & 0xFF == ord('q'):
        break
video.release()
cv2.destroyAllWindows()