1, Overview
This project is a course design of mine. The course design requires a software that can realize the functions of Excel addition, deletion, modification and query and corresponding image addition, deletion, modification and query. Finally, it is required to be packaged into exe. Because of data confidentiality, I deleted the relevant pictures and tables in the code, leaving only two test pictures. As the saying goes, you can't do it in vain. I have never been in serious contact with QtDesigner and python before, and my understanding of Python only stays in functions. Therefore, there are many deficiencies in the design mode of the program, including I think the whole project will be a little messy, and the details are written in readme In MD, many people can't get into GitHub, so the code is placed on the code cloud. I found that there is no unified entry post on the Internet. I stepped on many pits this time and wrote it hard. I feel it is of great significance for reference, including pagination, strengthening robustness, etc. I will write it based on the realization of function points to give you a door. There may be more than one article to talk about. All open sources are for you. The specific function implementation depends on the code more clearly. If you have any suggestions about optimization or error, please contact me!
2, Project description (you can also directly see the README.md file)
2.1 project structure
|-data  data
    |-dist  Excel File output location
        |-new.xls  New after user operation Excel file
    |-dist_images  Store the original data image, and the user operates the image reading and output position
        |-M0  Normal sample image
        |-M1  Abnormal sample image
        |-new Add unclassified image
    |-info.xlsx  Example Excel file
|-detect  Neural network(*It can be replaced and cannot be changed. It should also be changed during replacement detail.py Interface in file)
    |-logs
        |-best.pth  Network weight
    |-model_data
        |-cls_classes.txt  category
    |-nets  Network subject
    |-utils Tool function folder
    |-classification.py  Classification network class
|-icon Icon Folder
	|-cat.ico  program icon Icon
|-img  Example image
|-Clinical_information  Clinical information interface file
|-detail  Image file
|-Image_information Excel  Table image information file
|-information  Main interface layout file
|-new_info  Add patient information file
|-main.py  Program entry file
|-main.spec  Packaged intermediate files
|-requirements.txt  Library version requirements
|-README.md  Project description
|-.gitignore  git Ignored files

# The training network is resnet50
# Reference blogger: https://blog.csdn.net/weixin_44791964/article/details/109160814
2.2 use
After installing the appropriate environment, click Run main Py.
2.3 function introduction
-
Before using all functions, you need to open the Excel file as a table database through "Open Excel", otherwise you will be prompted.
-
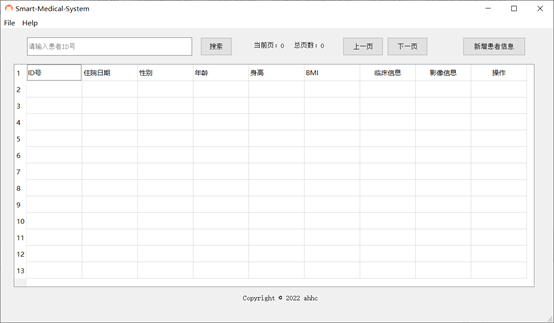
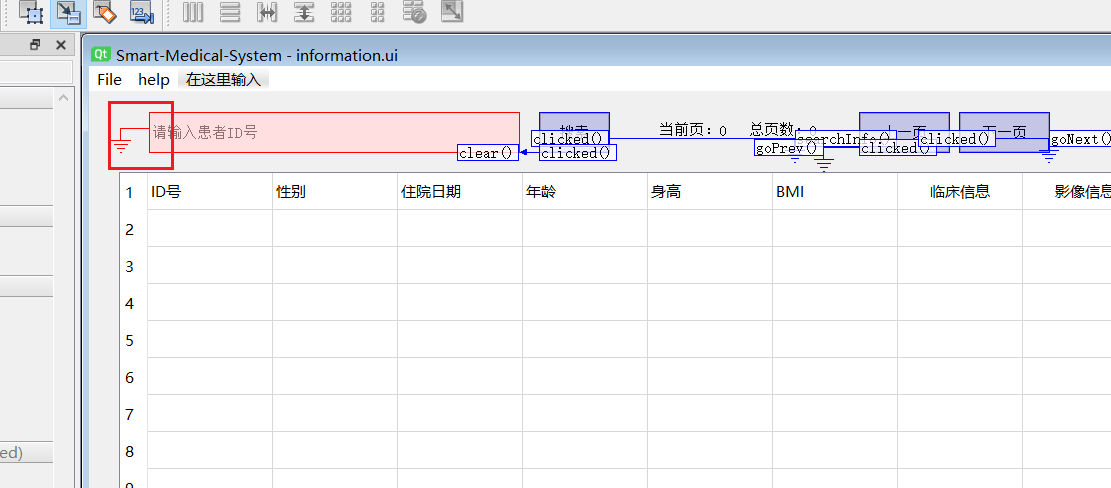
View rendering: when the user selects an Excel file, the table view will be rendered automatically, and the current page and total pages will be calculated automatically. The status bar below will display the current user's operation.
-
When the main interface window is closed, other interfaces will also be closed.
-
Search patient: when the user enters the first few digits of the ID number and clicks the "search" button, the first matching patient information will be automatically found, and the current page and line will be automatically jumped and located.
-
Page switching function: click "previous page" to jump to the previous page, and click "next page" to jump to the next page. When you click "previous page" and "next page" on the first page and the last page respectively, a prompt box will pop up.
-
Click the "view" button to view the clinical information and image information of patients in the current line.
-
Modification function: double click the cell, press Enter after modifying the content, and the modified data will be written to new in dist folder again Xls file, which will not pollute the original data. For clinical information and image information, click the "confirm modification" button after modification.
-
Delete function: click the "delete" button, and the modified data will be written to new in dist folder again Xls file, which will not pollute the original data.
-
Add patient information: click the "add patient information" button. After filling in the information, click the "submit" button. Similarly, the added information will be written to new In the XLS file, the new image will be placed in the images/new folder. After clicking "+ add image" to select the image, the "" before "image information" will disappear. Pay attention to the format when filling in the information. For example, the date format is "YYYY-MM-DD", and the ID number cannot exceed nine digits.
-
View the image information corresponding to the patient: click the "view" button under the "image information" column, and click the "view image" button in the pop-up interface.
-
Click the "add", "modify", "delete" and "AI detection" buttons in the interface in 7 to add, delete, modify and artificial intelligence diagnosis. The diagnosis results will be displayed in the output column below, and the folder will be placed under the M0 and M1 folders corresponding to images.
2.4 precautions
- The py file is not exactly the same as the ui file. The ui file is just used for layout. Some fine-tuning parts are directly modified in the py file with code, and the ui is not completely synchronized.
- The entire application is based on info Xlsx data format to design, and does not have a strong fission ability, if not in strict accordance with info Xlsx rows and columns for typesetting, the maximum probability does not run.
- The image shall be named in strict accordance with the format of "ID number -rk", and the ID number shall not exceed nine digits.
2.5 package into exe program
-
After installing virtualenv, use the command virtualenv env in cmd_ Name creates a virtual environment to isolate it from anaconda's environment and reduce the volume of the package. The project has more than 2GB after packaging, because the torch package accounts for 2GB.
-
Pychart opens Terminal and switches to Env_ Under the name / scripts path, enter activate Bat activation environment.
-
View requirements Txt, use pip install to install all packages until No module error is reported.
-
Run the following command in the active environment:
pyinstaller main.spec
-
Create the following folder in the generated dist folder:
|-data  data
    |-dist
    |-dist_images
        |-M0 Folder named by class alias
        |-M1 Folder named by class alias
        |-new Add unclassified image (it can't be changed at will. If you change it, you need to change the code synchronously)
2.6 deficiencies
- In different computers, the interface display will be different, and there is no adaptation.
- The header should not be written dead. It is better to write it to render with the data.
- The robustness is not very strong. For example, if the format in the table is incorrect, it should be intercepted and prompted, and should not be terminated without reason.
- It is better to let users choose the folder where data can be opened and stored. The user experience is better. There is a problem with the original design mode.
- The modification function needs to be optimized.
3, Getting started with QtDesigner (official start!)
3.1 start
I skipped the environment installation. Please configure QtDesigner and Turn around py tool later (No.
edition: pycharm 2017.3
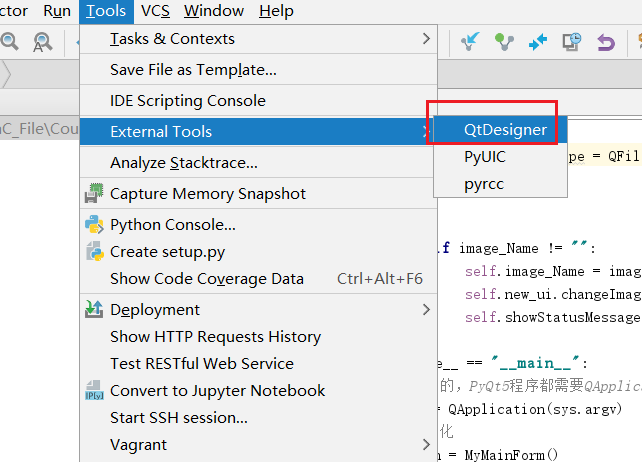
- Click tool - > external tools - > qtdesigner to run
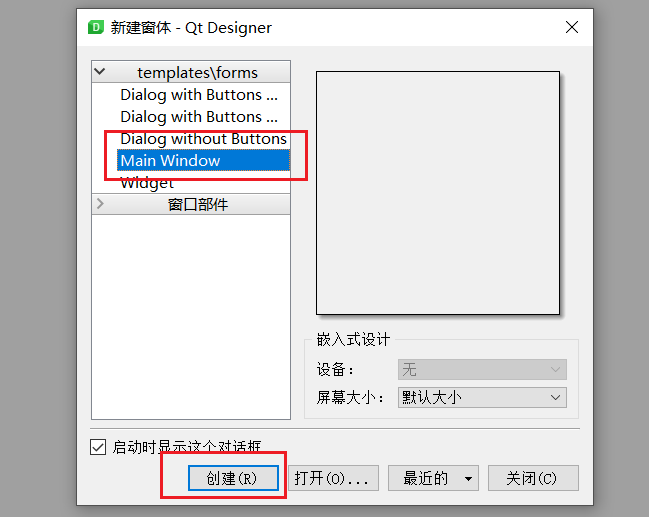
- You can open the existing in the pop-up window ui file, or create a new one ui file, here we select MainWindow and click create. (the difference between MainWindow and Widget is that MainWindow has a menu bar and a status bar at the bottom. You can select Widget if you don't need it.)
- add controls
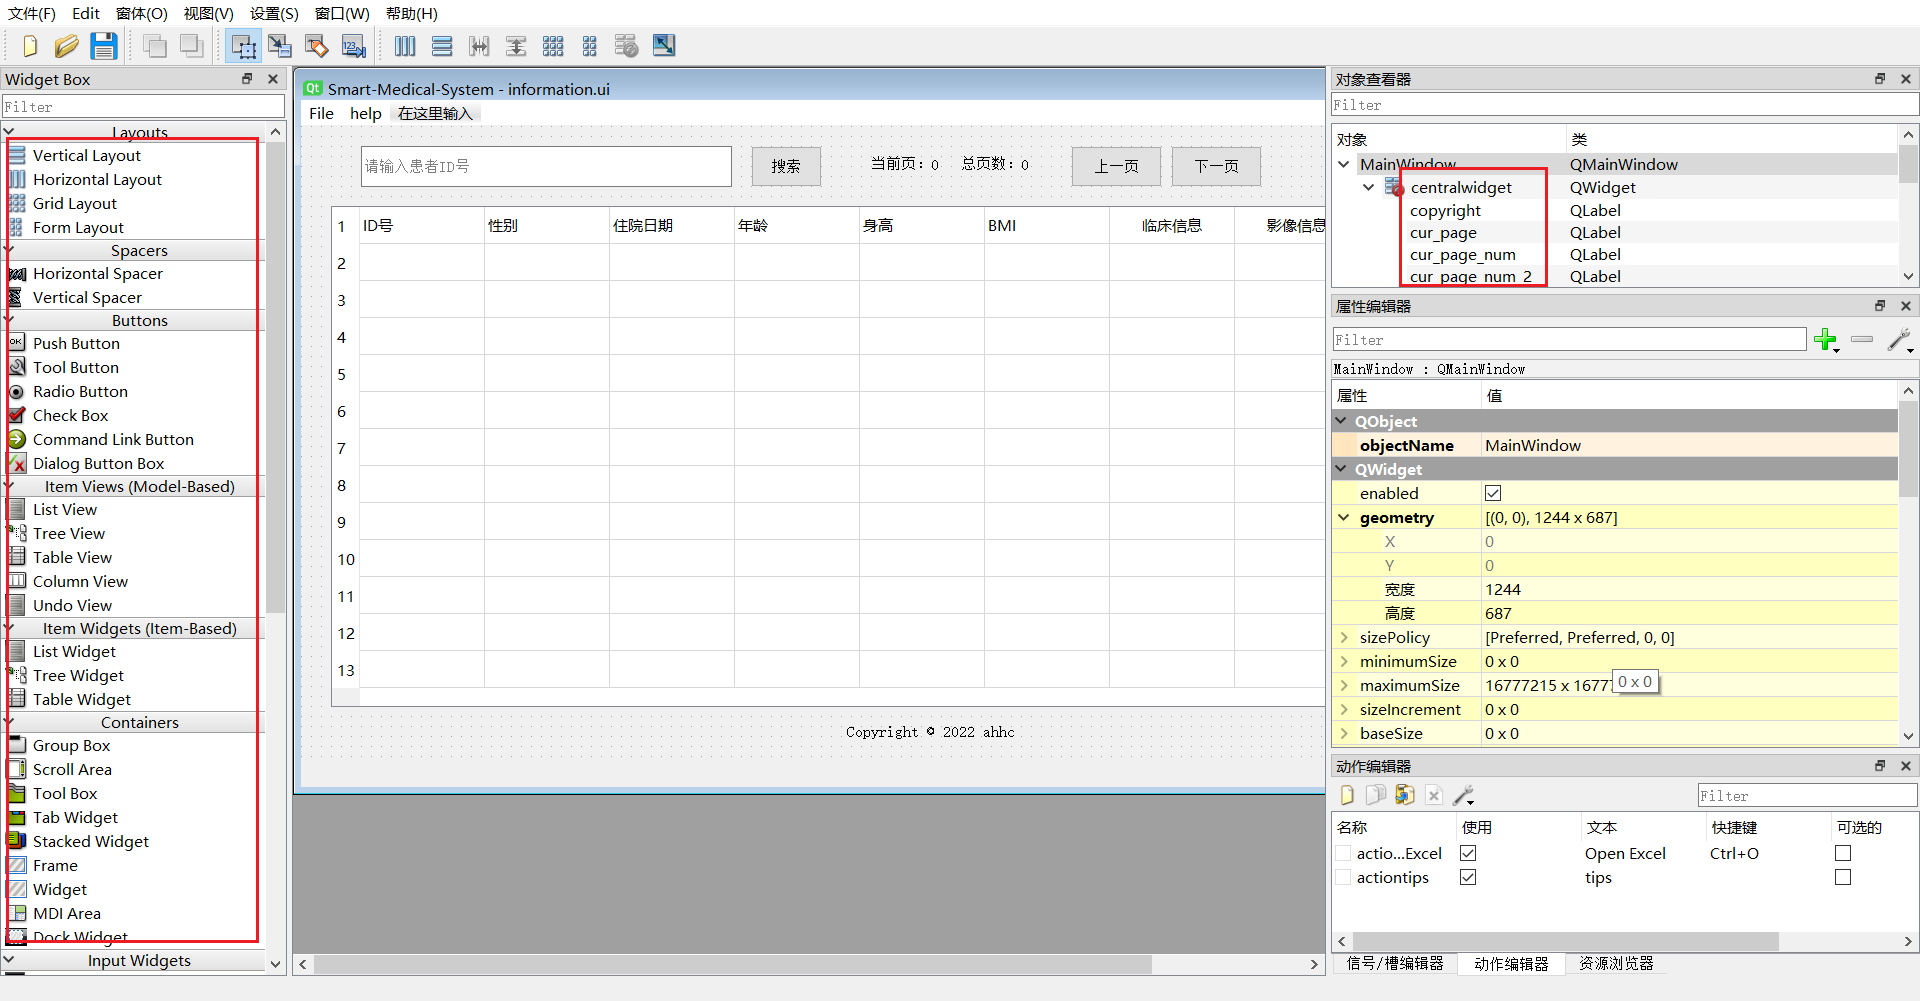
Drag the control in the left column to the canvas and release it to add it. Note that the object name in the "object viewer" in the upper right corner can be modified for better recognition and can not be duplicate.
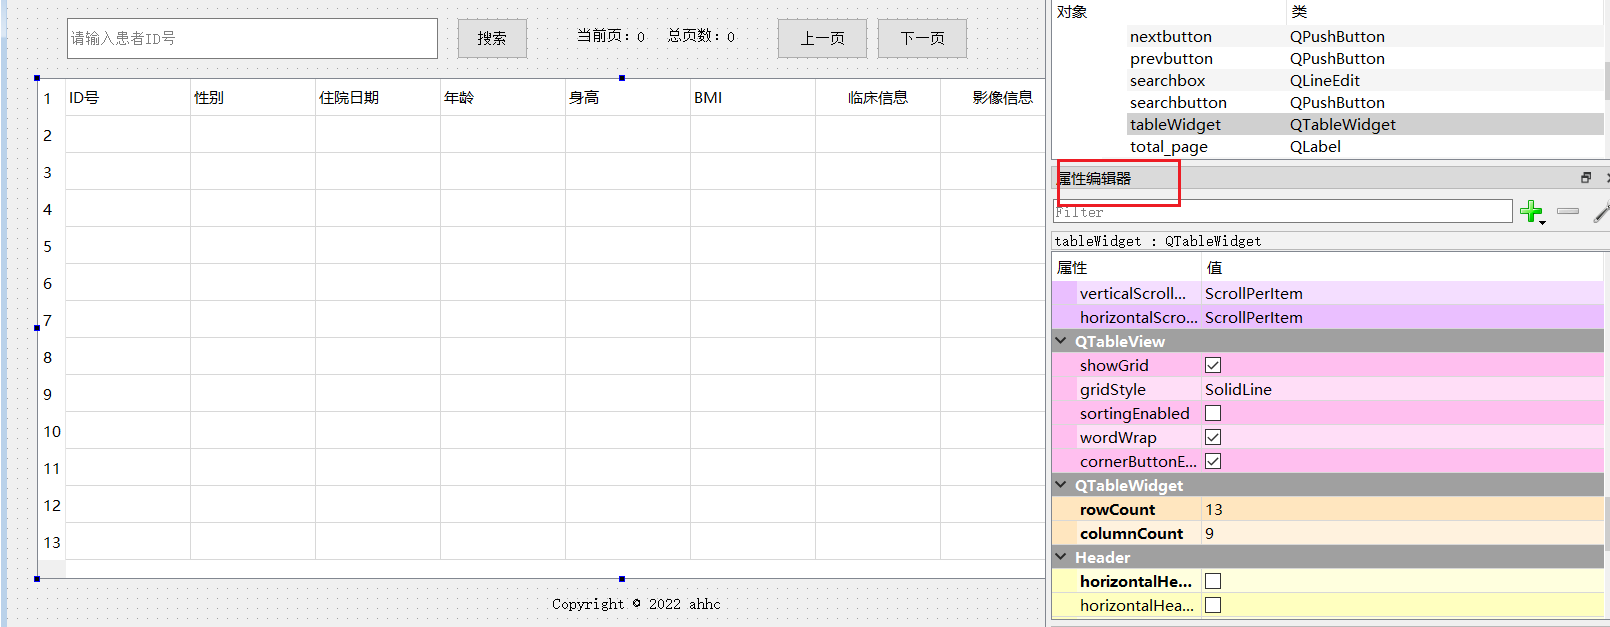
When you click the selected control with the left mouse button, the properties of the currently selected control will be displayed in the "property editor" on the right, listing the property values of this class and all its parent classes. We can modify them through the property editor. For example, QTableWIDget has the properties of rowCount and columnCount. You can modify the number of rows and columns of the table.
- Modify the name of the main program window
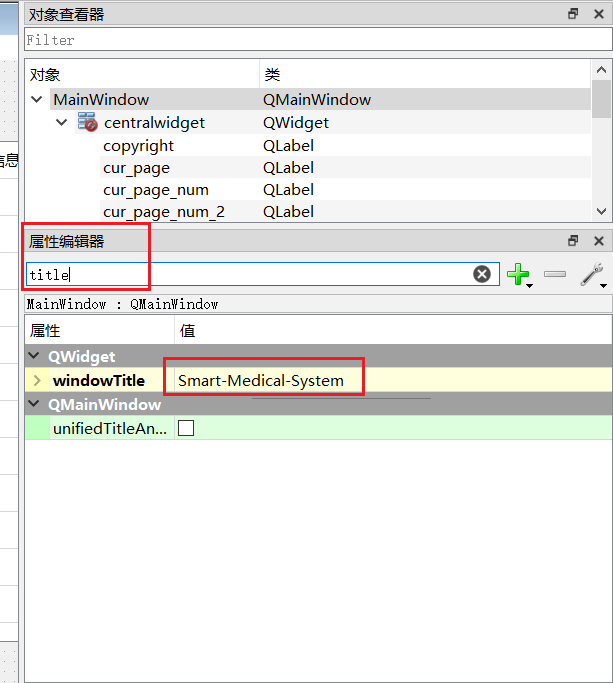
Search for "title" in the Attribute Editor on the right and modify the value of windowTitle.
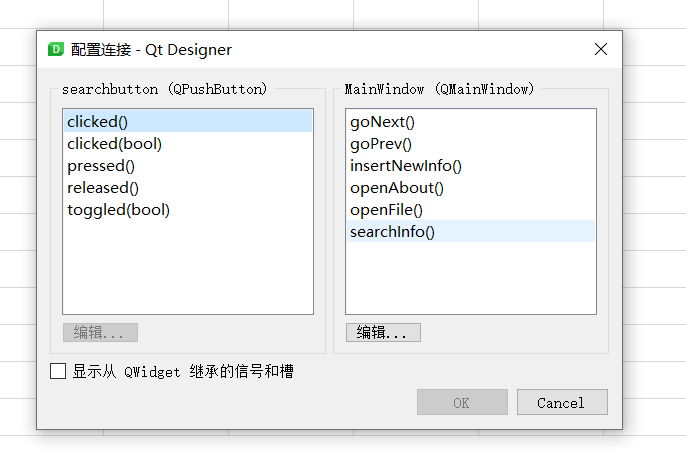
- Signal slot
a. Click "Edit signal / slot" in QtDesigner menu bar;
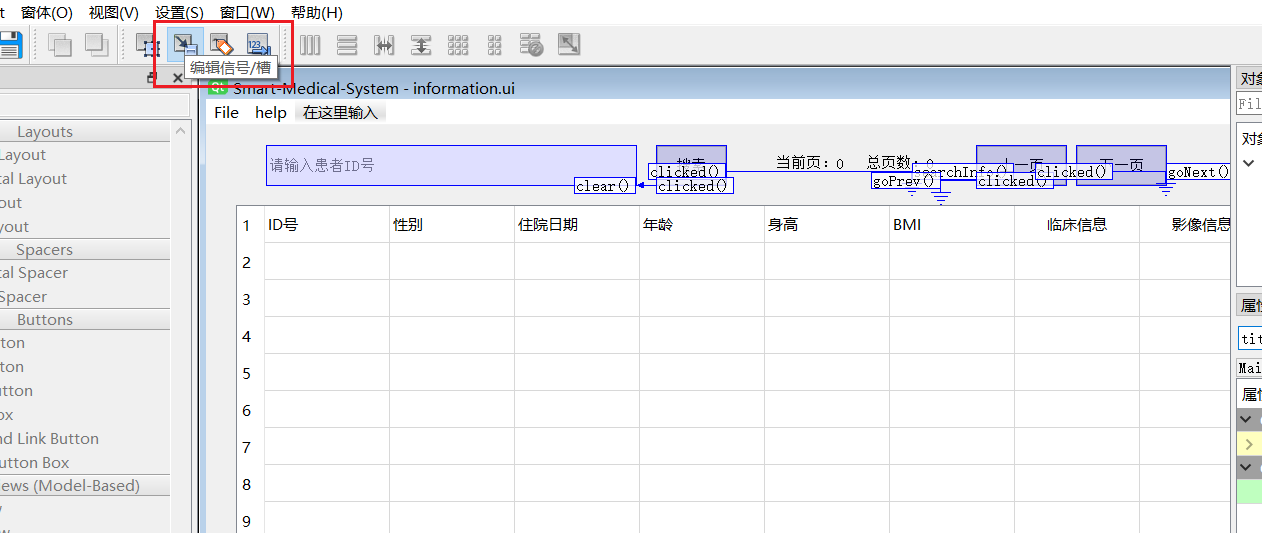
b. Click the control with the left mouse button to pull out a ground wire. When grounded, only the signal of the current control will be triggered, and when connected with other controls, multiple signals will be triggered at the same time;
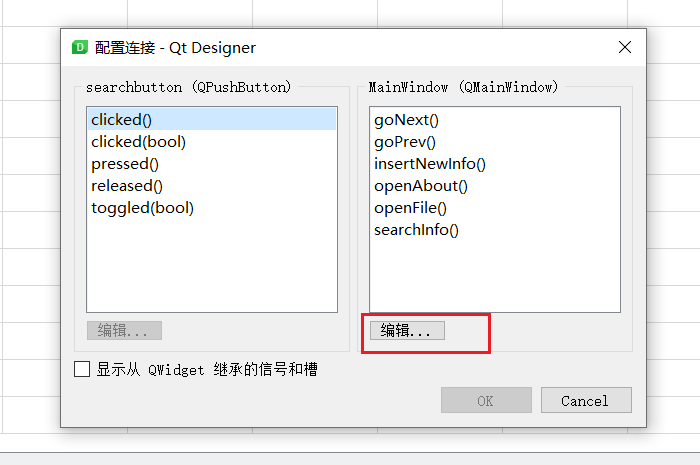
c. In the pop-up window, the left side is the signal that can be triggered by the control, and the right side is the slot function connected with this signal. For example, the clicked signal of the button is connected with the slot function searchInfo. Click to select the signal on the left, then click the slot function on the right, and click OK to associate.
To create a new slot function, click Edit.
Then click "+" and enter the slot function name.
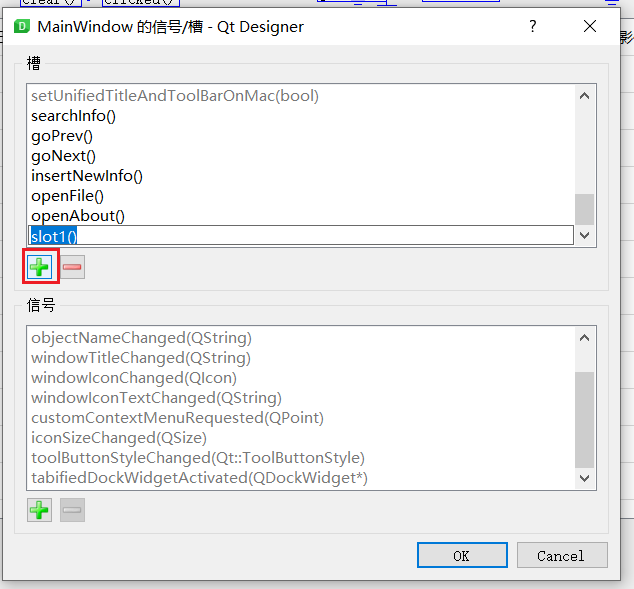
Note: here, the slot function associated with the control must be generated py file, otherwise an error will be reported at runtime. - Menu bar signal slot
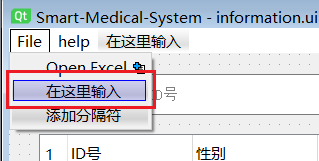
New menu: double click Enter here to Enter the editing mode, Enter the tab name of the menu bar and press Enter to complete the new menu.
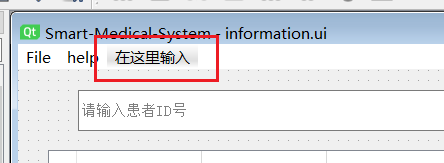
Similarly, double click "Enter here" in the tab and press Enter to create a new sub tab.
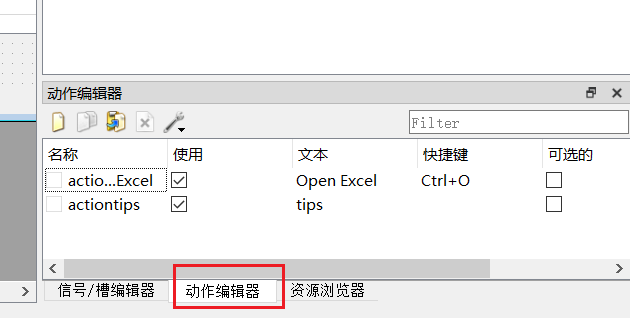
Select the action editor tab in the action editor column at the bottom right.
Right click and select new.
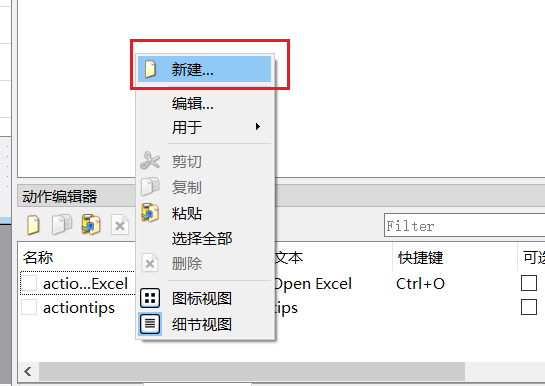
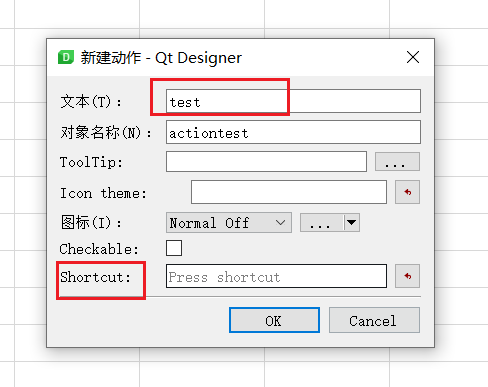
Fill in the name of the tab in the pop-up window, the shortcut key of shortcut, and click "OK".
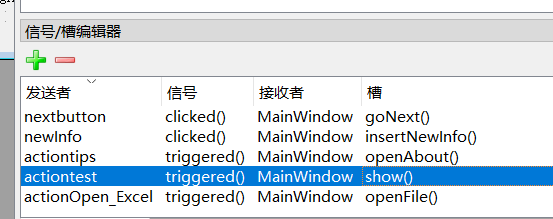
Switch to the signal / slot editor, click the green "+" in the upper left corner to create a new one.
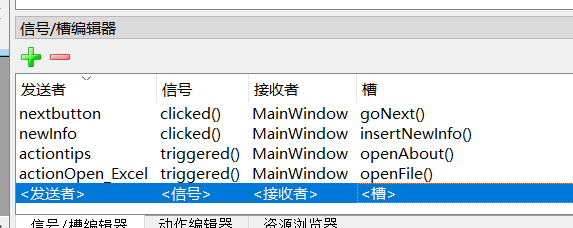
Select the sender as the newly created action, signal, receiver and slot, as follows:
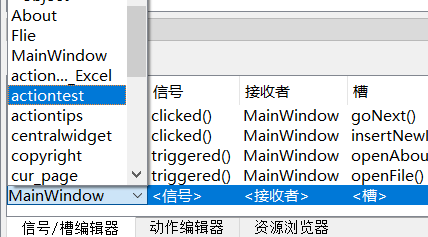
The slot function is user-defined. If you don't know how to create a new slot function, go back to 5 View. - Will The ui file is converted to a file with the same name py file, note: every time it is regenerated py file will overwrite the contents of the original file, that is, if you write new code in it, you should be very careful. It can't run at this time. Let's open a new main py file, copy the following code and run it.
import sys
from information import Ui_MainWindow  # By information Information transferred from UI Py file, Ui_MainWindow is information Py. This step is written according to your own class name.
class MyMainForm(QMainWindow, Ui_MainWindow):
    def __init__(self, parent=None):
        super(MyMainForm, self).__init__(parent)
        self.setupUi(self)
	# Slot function
	def MethodName(self):
		print("test")
if __name__ == "__main__":
    #Fixed, PyQt5 programs need QApplication objects. sys.argv is a list of command-line parameters to ensure that the program can be run by double clicking
    app = QApplication(sys.argv)
    #initialization
    myWin = MyMainForm()
    #Displays the window control on the screen
    myWin.show()
    #Program running, sys The exit method ensures that the program exits completely.
    sys.exit(app.exec())

### If this step does not work, please check main Is there a slot function associated with the control just defined in the PY file.
Summary
At this step, the basic process has been opened up and you can start your own page layout!
3.2 introduce the special function points and compare them. This is the program for processing Excel files
3.2 table data rendering and inserting button controls in cells
When the user opens the excel file, the information in the excel file is rendered to the QTableWidget. It is divided into three steps: use xlrd library to read Excel files, get the information of each line, and render it to QTableWidget by line. See main readExcel, getOnePage and information.py file The generateRow methods in the. Py file. (please import the corresponding package!)
# Read Excel file
    def readExcel(self, fileName):
        workbook = xlrd.open_workbook(fileName)
        # Get sheet_name
        self.sheet_name = workbook.sheet_names()[0]
        # Get sheet content according to sheet index or name
        self.sheet = workbook.sheet_by_index(0)  # Start at index 0

        # Total number of rows obtained
        self.nrows = self.sheet.nrows
        # Get total pages
        self.pageCount = math.ceil((self.nrows - 2) / self.pageSize)
        self.setTotalPage(self.pageCount)
        # Gets the number of rows on the last page
        self.lastPageCount = self.nrows - 2 - self.pageSize * (self.pageCount - 1)

        # Get the contents of the first column
        self.ids = self.sheet.col_values(0)
        for i, v in enumerate(self.ids):
            # Jump over two item s
            if i > 1:
               self.ids[i] = str(int(v))

    # Generate one page line by line
    def getOnePage(self):
        self.isEidt = False # isEdit is used as a valve. Because the cell changed signal of QTableWidget is connected, I don't want to trigger it in the early stage. I want to trigger it when the user modifies it
        self.changePageStatus(self.currentPage + 1)
        for i in range(self.pageSize):
            for j in range(self.infoCols):
                if self.lastPageFlag and i >= self.lastPageCount:
                    val = ''
                else:
                    index = self.currentPage * self.pageSize + i + 2
                    # Get value
                    val = self.sheet.cell_value(index, j)
                    if isinstance(val, float):
                        if j == 0:
                            # Remove the number after the decimal point
                            val = int(val)
                            # TableWidget needs string format to display normally
                            val = str(val)
                        elif j == 1:
                        	# Do date format conversion and display the correct date format
                            data_time = datetime(*xldate_as_tuple(val, 0))
                            val = data_time.strftime('%Y-%m-%d')
                        else:
                            val = str(val)
                # Remove header
                self.generateRow(i + 1, j, val, self.lastPageCount, self.lastPageFlag, index)
        self.isEidt = True

    # Generate a row of the table
    def generateRow(self, row, col, val, lastPageNum, lastPageFlag, trueRow):
        # print('p', row, col, val)
        item = QtWidgets.QTableWidgetItem(val)
        self.tableWidget.setItem(row, col, item)
        if row <= lastPageNum or lastPageFlag == False:
            # Insert view clinical information button
            self.bedButton = QtWidgets.QPushButton('see')
            self.bedButton.setStyleSheet('QPushButton{margin:3px};')
            self.bedButton.setObjectName("bedButton" + str(trueRow))
            self.tableWidget.setCellWidget(row, 6, self.bedButton)
            # Insert view video information button
            self.imageButton = QtWidgets.QPushButton('see')
            self.imageButton.setStyleSheet('QPushButton{margin:3px};')
            self.imageButton.setObjectName("imageButton" + str(trueRow))
            self.tableWidget.setCellWidget(row, 7, self.imageButton)
            # Insert delete information button
            self.deleteButton = QtWidgets.QPushButton('delete')
            self.deleteButton.setStyleSheet('QPushButton{margin:3px};')
            self.deleteButton.setObjectName("deleteButton" + str(trueRow))
            self.tableWidget.setCellWidget(row, 8, self.deleteButton)

            # lambda anonymous functions are used to pass parameters
            self.bedButton.clicked.connect(lambda: self.MainWindow.getBedInfo(trueRow))
            self.imageButton.clicked.connect(lambda: self.MainWindow.getImageInfo(trueRow))
            self.deleteButton.clicked.connect(lambda: self.MainWindow.deleInfo(trueRow))

        else:
            self.tableWidget.removeCellWidget(row, 6)
            self.tableWidget.removeCellWidget(row, 7)
            self.tableWidget.removeCellWidget(row, 8)
3.3 how to transfer parameters to slot functions?
Parameter passing: use the anonymous function lambda. The scenario is: when I click the button, open another Widget. At this time, I need to pass in the ID number.
# lambda anonymous functions are used to pass parameters
self.bedButton.clicked.connect(lambda: self.goToNewWidget(user_id))

def goToNewWidget(self, user_id):
	print(user_id)
3.4 how to click a button to open a new window?
- The tutorial before installation generates a new window Py file, such as new py.
- from new import Ui_new import a new py file and slot the corresponding button.
- The opening function is realized in the slot function.
self.bedButton.clicked.connect(self.goToNewWidget())

def goToNewWidget(self):
	self.new_widget = QWidget()
    self.new_ui = Ui_New_Info()
    self.new_ui.setupUi(self.new_widget, self)
    self.new_widget.setWindowTitle('New Information')
    self.new_widget.show()
3.5 text information displayed in the status bar
self.statusbar.showMessage(message)
3.6 close all other windows when closing the main interface
Override the closeEvent method. See information closeEvent method in py file.
# --------------information.py------------------
	# Override close method
    def closeEvent(self, event):
        if self.MainWindow.clinical_widget:
            # print('close')
            self.MainWindow.clinical_widget.close()
        if self.MainWindow.image_widget:
            # print('close')
            self.MainWindow.image_widget.close()
        if self.MainWindow.new_widget:
            # print('close')
            self.MainWindow.new_widget.close()
        if self.MainWindow.detail_widget:
            # print('close')
            self.MainWindow.detail_widget.close()
        event.accept()

### All widgets here are mounted in main In the QMainWindow object in the QMainWindow. Py file, in order to get the widget in QMainWindow in other functions, I mount QMainWindow as the attribute of the current class, that is, self MainWindow = MainWindow, adding one more layer of if judgment is to prevent some windows from not opening. If this is closed, the program will get stuck.

# ---------------main.py-------------
    def __init__(self, parent=None):
        super(MyMainForm, self).__init__(parent)
        self.setupUi(self)
        self.setWindowIcon(QIcon('icon\cat.ico'))

        # Four windows
        self.clinical_widget = ''
        self.image_widget = ''
        self.new_widget = ''
        self.detail_widget = ''
3.7 Add icon icon of program
self.setWindowIcon(QIcon('icon\cat.ico')
3.8 QTableWidget displays the correct date format
You will find that the date read from the Excel table is a string of numbers. You need to use the datetime library to convert it in order to display it correctly.
from datetime import datetime
from xlrd import xldate_as_tuple
data_time = datetime(*xldate_as_tuple(val, 0))
                            val = data_time.strftime('%Y-%m-%d')

# Write the correct date format in Excel
datetime.strptime(self.getTableWidgetItemContent(row, col), '%Y-%m-%d')
3.9 open file selection box
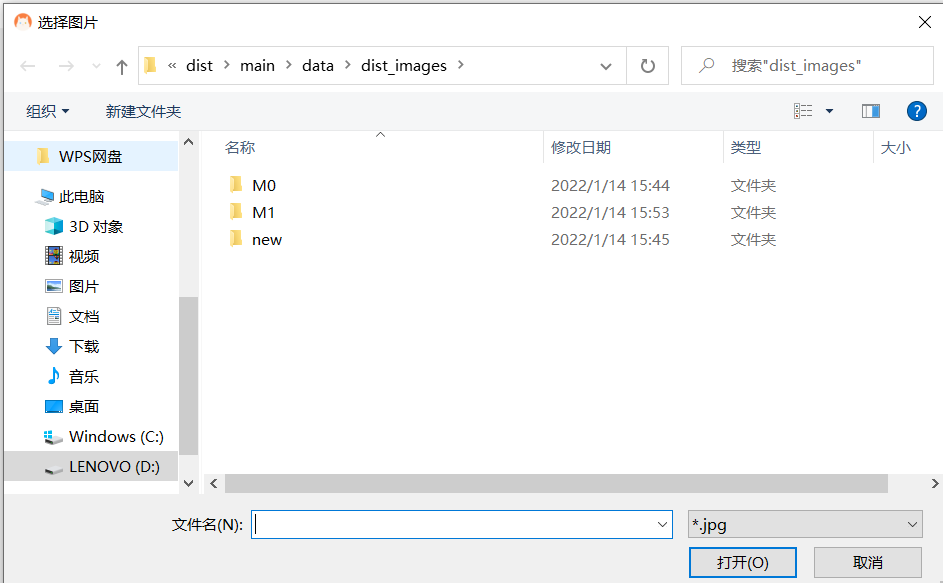
The first parameter is the window parent class of the open file selection box, the second parameter is the name of the pop-up selection box, the third parameter is the specified path to open (optional), and the fourth parameter is the restriction type (Note: the type restriction here is "invalid").
image_Name, imgType = QFileDialog.getOpenFileName(self,
                                                  "Select Picture",
                                                  "",
                                                       "*.jpg;;*.png;;All Files(*)")
3.10 pop up prompt box
from PyQt5.QtWidgets import *
 QMessageBox.information(self, "Tips", "The current page is the last!")
 QMessageBox.warning(self, "warning", "Please open it first Excel File!")
 QMessageBox.error(self, "warning", "Please open it first Excel File!")
 ### The specific pop-up box type depends on the document
3.11 displaying pictures on QLabel
See detail The setPixMap method in the. Py file.
    def setPixMap(self, path):
        # Use qlabel to display pictures, show_image is the object name of qlabel, which is described in the control added from 3.1
        png = QtGui.QPixmap(path).scaled(self.show_image.width(),self.show_image.height())
        self.show_image.setPixmap(png) # setPixmap here is the native method of QLabel
        self.show_image.setScaledContents(True)
4, Specific function realization
4.1 Excel query
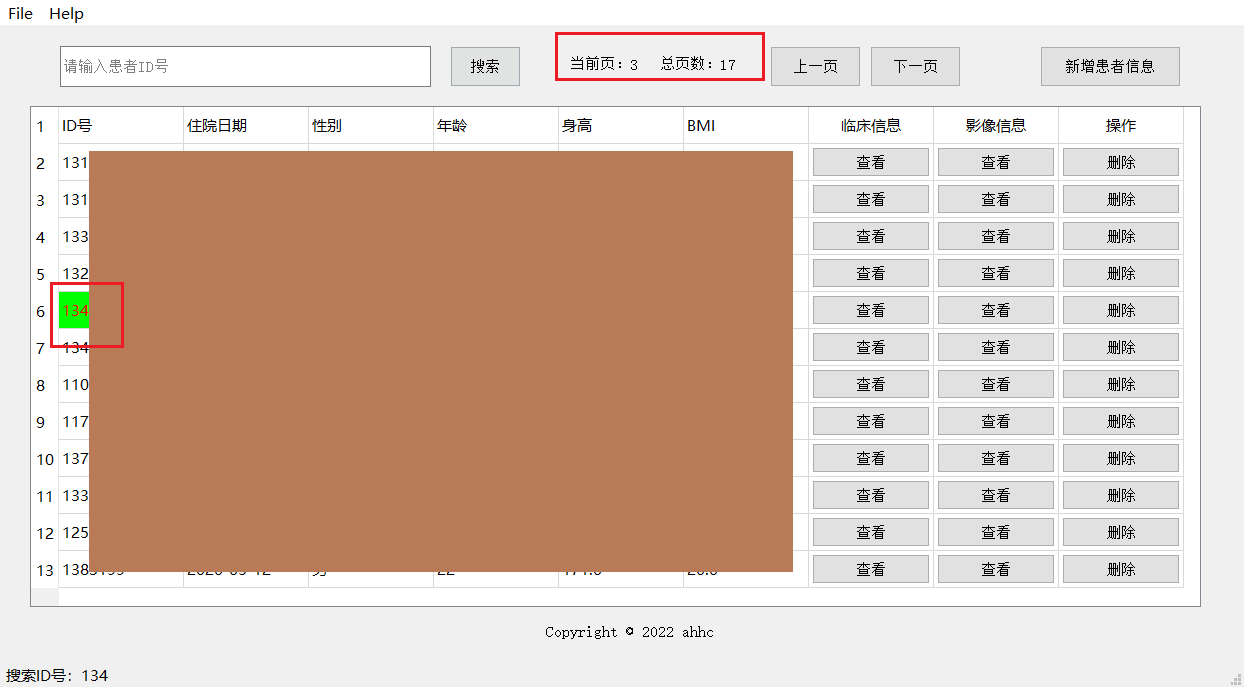
Idea: get all the ID numbers in the Excel table and put them in the list. Because the ID numbers are stored by row, the index of the list is the number of rows of patient information in the Excel file - 1 (the list index starts from zero). When the user enters the ID number in the input box and clicks the search button, the spaces before and after the value in the input box will be intercepted, and the native methods count and index of the list will be used to check whether the current patient exists. If it exists, it will be located to that page and line, and if it does not exist, it will be given corresponding prompts. Users can automatically return the first match without entering the complete ID number. See main The searchInfo method in py.
    # Search for patient information
    def searchInfo(self):
        if self.fileName != '':
            search_id = self.getContent().strip() # String format
            self.showStatusMessage("search ID number:" + search_id)
            # Clear search box contents
            self.clearContect()

            # Use startswitch to return a list
            res = [idx for idx in self.ids if idx.startswith(search_id)]
            if len(res) == 0:
                QMessageBox.information(self, "Tips", "No match found")
            else:
                # The first match, index, is the actual number of rows in the Excel table
                index = self.ids.index(res[0]) - 2
                # Get the number of pages where matches are located
                page = math.floor(index / self.pageSize)
                row = (index % self.pageSize) + 1
                self.currentPage = page
                if self.currentPage == (self.pageCount - 1):
                    self.lastPageFlag = True
                self.getOnePage()
                self.isEidt = False
                self.setLineColor(row)
                self.isEidt = True
        else:
            QMessageBox.warning(self, "warning", "Please open it first Excel File!")
4.2 addition, deletion and modification of Excel
Idea: it's easy to understand that addition, deletion and modification can be understood as two steps: reading and rewriting. Use xlrd library to read Excel files and xlwt library to write Excel files. After adding, deleting and modifying the read information, write back the information after the operation. See main getNewXl method in PY
# Create a new workbook and save it. If there is row, it will be deleted, if there is row and col, it will be modified, if there is none, it will be new, change_val is the specified value. If it is not transmitted, it is the content modified by double clicking the table, and count is the counter to prevent multiple pop-up prompt boxes
    def getNewXl(self, row = -1, col = -1, change_val = '', count_n = 0):
        try:
            # New workbook
            workbook = xlwt.Workbook(encoding='utf-8')
            # New sheet
            sheet_w = workbook.add_sheet(self.sheet_name)

            # loop
            count = 0
            for x in range(self.sheet.nrows):
                if col == -1:
                    # delete
                    if x != row:
                        for y in range(self.sheet.ncols):
                            val = self.sheet.cell_value(x, y)
                            if y == 1:
                                dateFormat = xlwt.XFStyle()
                                dateFormat.num_format_str = 'yyyy/mm/dd'
                                sheet_w.write(count, y, val, dateFormat)
                            else:
                                sheet_w.write(count, y, val)
                        count = count + 1
                else:
                    # modify
                    for y in range(self.sheet.ncols):
                        if x == row and y == col:
                            if change_val == '':
                                val = self.text
                            else:
                                val = change_val
                        else:
                            val = self.sheet.cell_value(x, y)
                        if y == 1:
                            dateFormat = xlwt.XFStyle()
                            dateFormat.num_format_str = 'yyyy/mm/dd'
                            sheet_w.write(x, y, val, dateFormat)
                        else:
                            sheet_w.write(x, y, val)
            if row == -1:
                new_row = self.sheet.nrows
                # newly added
                for i, v in enumerate(self.forms):
                    if i == 1:
                        dateFormat = xlwt.XFStyle()
                        dateFormat.num_format_str = 'yyyy/mm/dd'
                        sheet_w.write(new_row, i, v, dateFormat)
                    else:
                        sheet_w.write(new_row, i, v)

            # Save Workbook
            path = self.dist_root + self.dist_name
            workbook.save(path)
            # Re render the view
            self.readExcel(path)
            self.getOnePage()
        except:
            if row == -1:
                QMessageBox.warning(self, "error", "Failed to add")
            elif col == -1:
                QMessageBox.warning(self, "error", "Deletion failed")
            else:
                if count_n == 0:
                    QMessageBox.warning(self, "error", "Modification failed")
                else:
                    self._count = self._count + 1
                    if self._count == count_n:
                        QMessageBox.warning(self, "error", "Modification failed")
                        self._count = 0
        else:
            if row ==  -1:
                self.showStatusMessage("Successfully added")
            elif col == -1:
                self.showStatusMessage("Delete succeeded")
            else:
                self.showStatusMessage("Modified successfully")
4.3 addition, deletion, modification and query of images in folders
Idea: to add, delete, change and query the pictures in a folder, there must be data. Therefore, we need to use the os library to traverse the files in the folder to obtain each file name and form a list of file names. Then we can find the information entered by the user in the list. The method is the same as that of Excel. Increment is realized by using cv2 this library. Delete is using os Remove method. Change is to add + delete. See detail The logic in the PY file.
# Get folder picture directory tuple
    def getDirectTuple(self):
        self.fileList = []
        for filepath, dirnames, filenames in os.walk(r'data\dist_images'):
            for filename in filenames:
                self.fileList.append(os.path.join(filepath, filename))
        # print(self.fileList)
5, Packing precautions
There are many tutorials on the Internet for packaging a single py file into exe, but for the whole project is very scattered. We use intermediate documents spec to improve the success rate. Note: the steps described here are finally packaged in a folder, not a single exe.
step
- Open the cmd window, enter pip install pyinstaller, and the command line outputs successfully, indicating success.
- Pychart opens Terminal and enters PYI makespec main Py -- > after packaging, a directory will be generated (main.py is the entry file of your program).
- Now a main is generated under the folder Spec file.
- Edit main Spec file, find a = Analysis()
a. The first parameter is to place all py files needed. The format is ['aaa.py', 'bbb.py', 'ccc.py']. Note: under the same level directory, write the file name directly. If it is not under the same file, write the relative path ['aaa.py', 'bbb.py', 'director\ccc.py'].
b. The fourth parameter, data = []. If a non py file needs to be packaged, find the data list and write the path and folder name of the non py file in the tuple. For example, if there are picture files, they can be placed in the images folder. The first item in the tuple is the path of the file before packaging, and the second item is the directory path of the file after packaging. Note: the relative path should be written here, and the first item and the second item should be the same. When there is nothing in the folder, the folder will be ignored. For the robustness of the program, it is best to use relative paths in the program. (if you understand, even if you don't understand)
c. The fifth parameter, hiddenimports = []. If No module name... Appears after packaging, a temporary solution can be adopted to place the missing modules in this list. hiddenimports=[‘PyQt5.sip’]
d. Add program icon. Add Icon = 'icon / cat. Exe ICO ', write the relative path! Here is a picture turn ico file website.
a = Analysis(['main.py', 'Clinical_information.py', 'detail.py', 'Image_information.py', 'information.py', 'new_info.py', 'detect\\classification.py', 'detect\\utils\\utils.py', 'detect\\nets\\__init__.py', 'detect\\nets\\mobilenet.py', 'detect\\nets\\resnet50.py', 'detect\\nets\\vgg16.py', 'detect\\nets\\vit.py'],
             pathex=['D:\\AhhC_File\\CourseDesign\\smodel_mart-medical-system'],
             binaries=[],
             datas=[('detect\\logs','detect\\logs'),('detect\\model_data','detect\\model_data'),('icon','icon')],
             hiddenimports=[],
             hookspath=[],
             runtime_hooks=[],
             excludes=[],
             win_no_prefer_redirects=False,
             win_private_assemblies=False,
             cipher=block_cipher,
             noarchive=False)
pyz = PYZ(a.pure, a.zipped_data,
             cipher=block_cipher)
exe = EXE(pyz,
          a.scripts,
          [],
          exclude_binaries=True,
          name='main',
          debug=False,
          bootloader_ignore_signals=False,
          strip=False,
          upx=True,
          console=True,
          icon='icon/cat.ico')
- Finally, run pyinstaller main Spec, a build and dist folder will be generated when the package is successful
- Reference articles : Although many of them are not applicable, well, thank you.
- Solution to stack overflow error in packaging times
# In the generated main Add to spec file
# -*- mode: python ; coding: utf-8 -*-
import sys
sys.setrecursionlimit(5000)
- Solution to too large folder volume after packaging
If anaconda environment is used, the volume after packaging will be abnormally large, more than 3GB. This can be isolated by using the steps of 2.5 packaging into exe program.
summary
Every day I feel what junk code I write. I can't finish a sentence or two. I still have to look at the code, although I'm not a serious python person, although I'm just a front-end. After writing this program for about four or five days, I did my own testing and optimization, which also taught me some design patterns. It's really one day, write bug. Finally, I found many shortcomings, such as ugly and unable to adapt on my friend's computer after packaging, and some hidden bugs. If you want to learn something, you have to do it yourself!
Criticism and correction are welcome.
Code download
https://gitee.com/Jesy_Hsu/smart-medical-system.git