Harmony OS device development and learning record (VII) -- sensing ambient light through photoresist
Based on hispark wifi suite, harmony os 2.0 full code is adopted
Note: this example shows the adc usage of photoresist, which is the same as that of human infrared sensor.
1, See the schematic diagram to determine the hardware circuit
This example uses the photoresist on the extended version of dazzle lamp
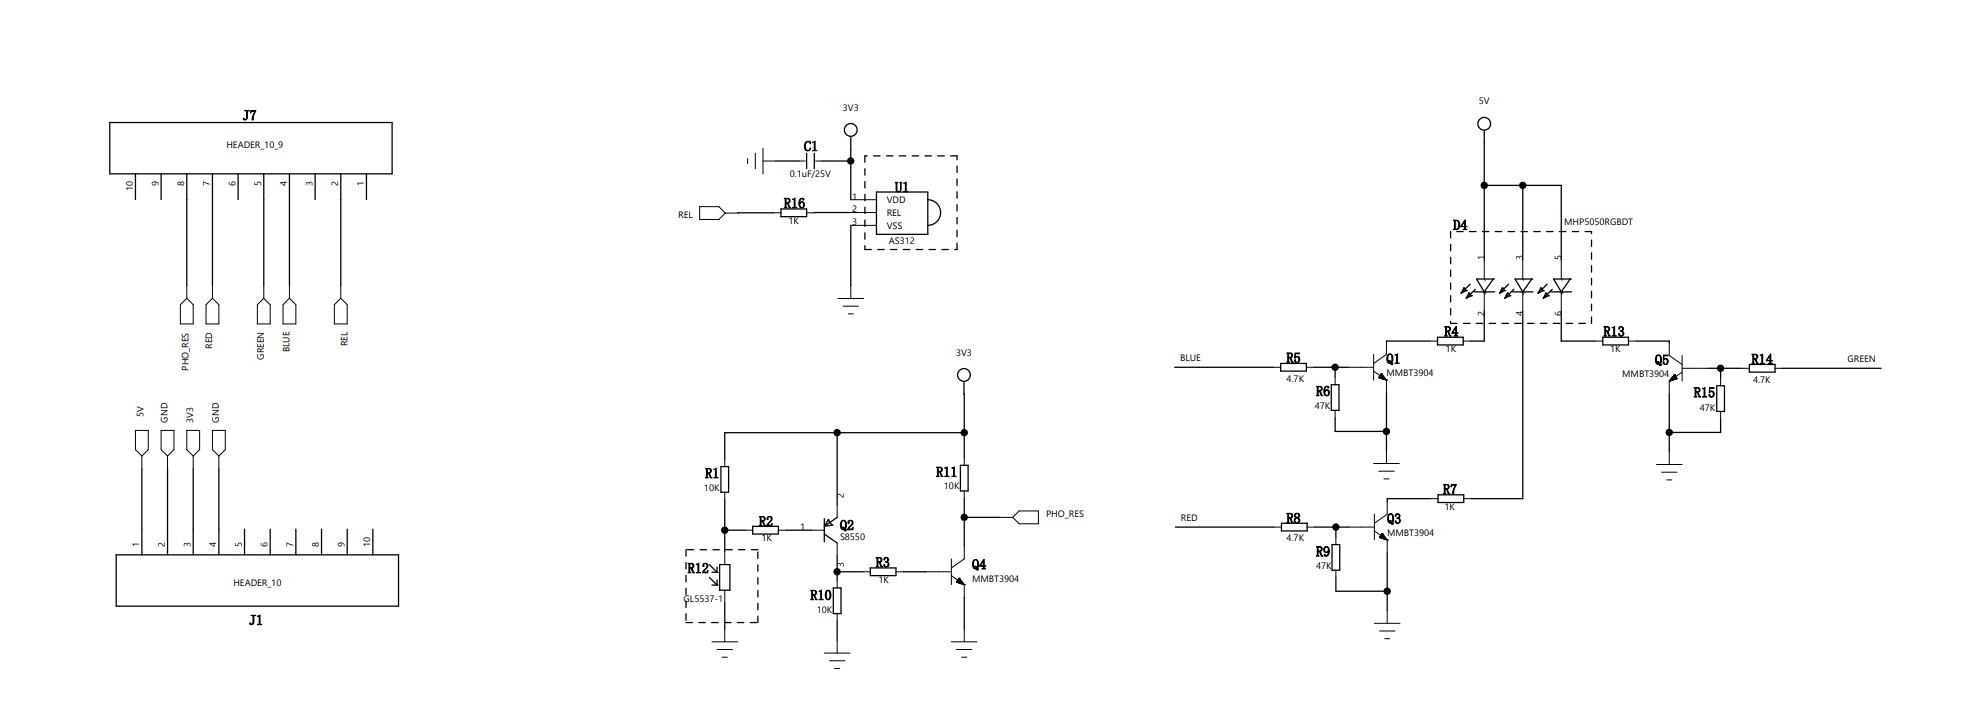
Note: it can be found that since the photoresist is connected to GPIO9 and the led on the core board is also connected to GPIO9, the led on the core board will also change when the photoresist value changes.
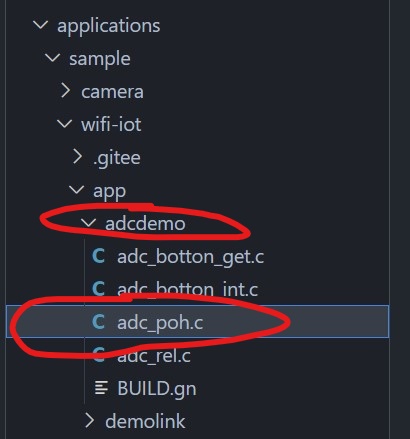
2, Create a demo file in the source code
Create the adcdemo folder under app and create build Gn and adc_poh.c Documents
3, Write code
In adcdemo / ADC_ poh. Write in C
#include <stdio.h>
#include <unistd.h>

#include "ohos_init.h"
#include "cmsis_os2.h"

#include "hi_gpio.h"
#include "hi_io.h"
#include "hi_adc.h"
#include "hi_errno.h"


static void AdcGpioTask(void *arg){
    (void)arg;

    hi_u16 value;
    while (1)
    {
        if(hi_adc_read(HI_ADC_CHANNEL_4, &value, HI_ADC_EQU_MODEL_4, HI_ADC_CUR_BAIS_DEFAULT, 0) != HI_ERR_SUCCESS){
            printf("ADC read error!\n");
        }else{
            printf("ADC_VALUE = %d\n", (unsigned int)value);
            usleep(10000);
        }
    }
}


static void AdcGpioEntry(void){
    printf("ADC Test!\n");
    osThreadAttr_t attr;

    hi_gpio_init();
    hi_io_set_func(HI_GPIO_IDX_9, HI_IO_FUNC_GPIO_9_GPIO);
    hi_gpio_set_dir(HI_GPIO_IDX_9, HI_GPIO_DIR_IN);


    attr.name = "AdcGpioTask";
    attr.attr_bits = 0U;
    attr.cb_mem = NULL;
    attr.cb_size = 0U;
    attr.stack_mem = NULL;
    attr.stack_size = 1024;
    attr.priority = 25;

    if (osThreadNew(AdcGpioTask, NULL, &attr) == NULL) {
        printf("[LedExample] Falied to create LedTask!\n");
    }
}

SYS_RUN(AdcGpioEntry);
Here pwm correlation function usage reference source code
In adcdemo / build Write in GN
static_library("adcdemo") {
    sources = [
        "adc_poh.c"
    ]

    include_dirs = [
        "//utils/native/lite/include",
        "//kernel/liteos_m/components/cmsis/2.0",
        "//base/iot_hardware/peripheral/interfaces/kits",
        "//device/hisilicon/hispark_pegasus/sdk_liteos/include"
    ]
}
In APP / build. In the parent directory Write in GN
import("//build/lite/config/component/lite_component.gni")

lite_component("app") {
    features = [
        "adcdemo",
    ]
}
4, Compiling with hb tool under Linux
root@DESKTOP-QAO2AOK:~/harmonyos/code-2.0-canary# hb set
[OHOS INFO] Input code path: .
OHOS Which product do you need?  wifiiot_hispark_pegasus
root@DESKTOP-QAO2AOK:~/harmonyos/code-2.0-canary# hb build
If hb set has been set, you don't need to set it again. Just do it
root@DESKTOP-QAO2AOK:~/harmonyos/code-2.0-canary# hb build
If you see the word success, the compilation is successful
5, Burn the compiled firmware to the development board
Copy out from the source folder in linux to Windows to replace the original out folder, but delete the original out folder first
Open vscode and open the source folder using DevEco Device Tool
Select the corresponding development board model
hi3861 is selected here
Then, in the project settings, the following settings are made according to the actual port conditions
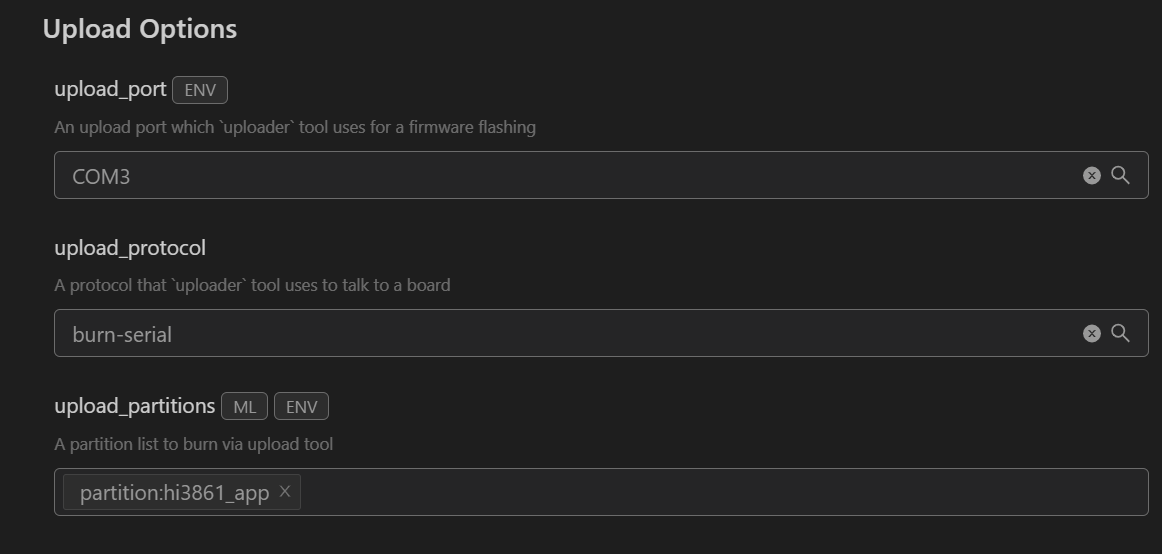
Save the project and open it
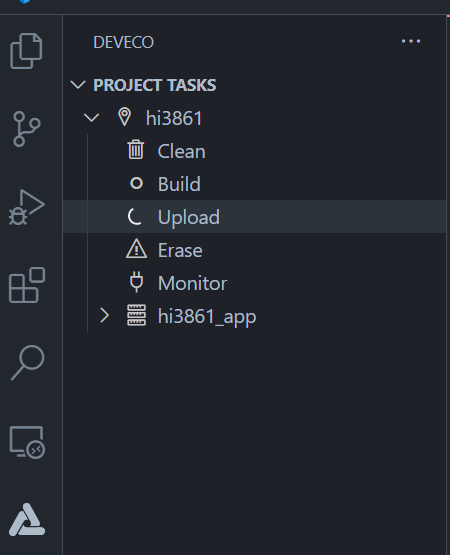
Click upload to burn. When burning, you need to press the rst key on the development board according to the prompt. Wait a moment and see that success represents the success of burning.
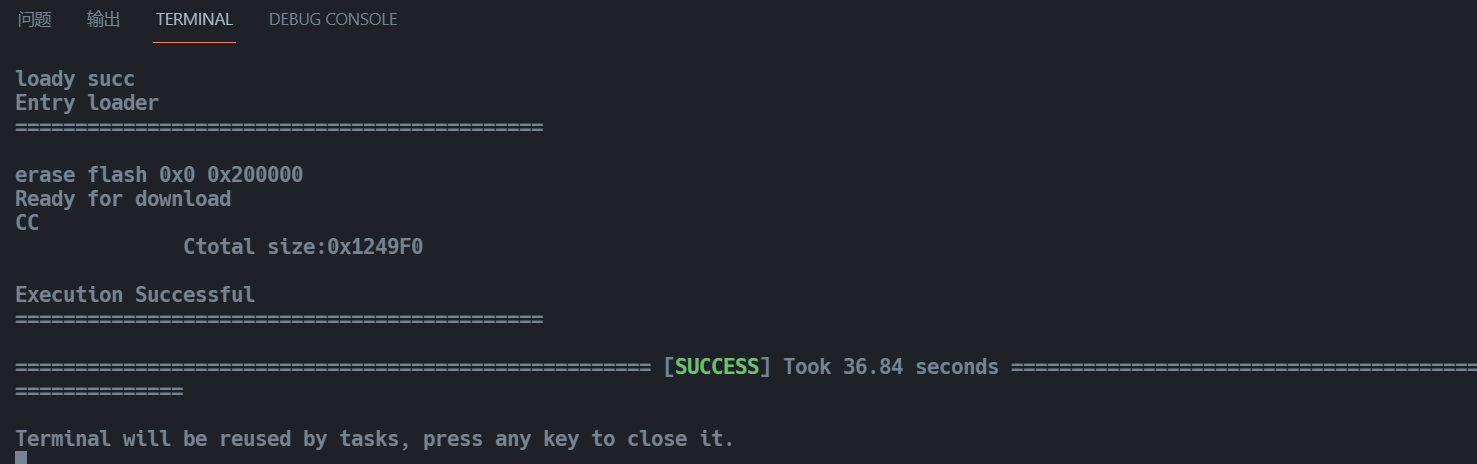
Press rst to restart the development board
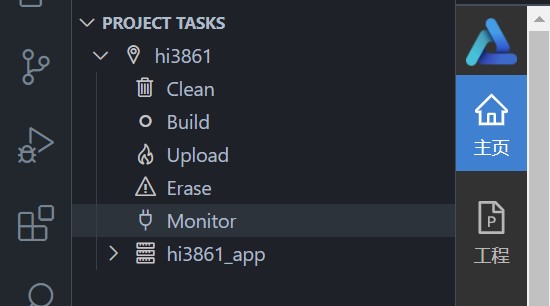
Click Monitor to open the serial debugger. At this time, cover the photoresist with your finger, and you can see the change of adc value, which proves that the experiment is successful.