During school, I mainly studied machine learning and algorithms. I came into contact with big data by chance, and then I started big data. So far, I have also been engaged in the development of big data platform. However, I still cling to AI technology. I usually do some small things related to machine learning, try some demo s, and think that one day I can return to the familiar fields, just like the name of my blog, from big data to artificial intelligence. Since my work is also platform related, this ModelArts experience is not only a product user, but also a product learner for me. Without much to say, let's share with you our experience as a product user.
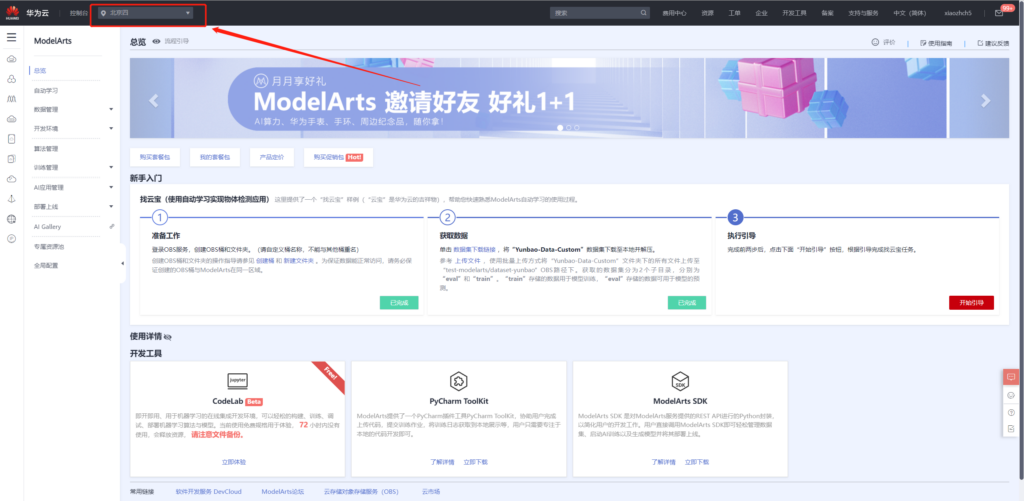
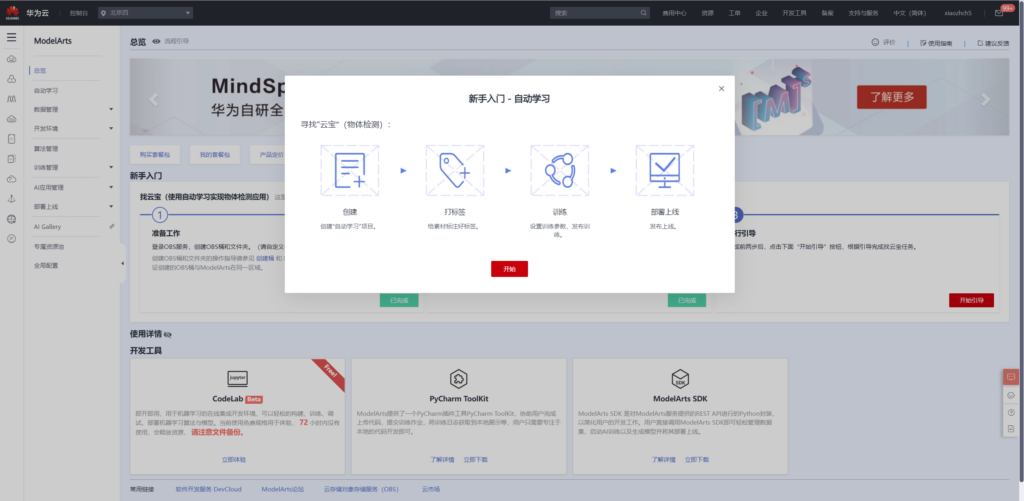
As a one-stop AI development platform, Huawei cloud ModelArts provides full cycle AI workflow management, enabling users to quickly create and deploy models. For beginners, the beginner tutorial guides users to quickly understand ModelArts products.
Beginner's Guide
The novice entry guide is the object detection project in automatic learning. After the "yunbao image data set", the object detection project is created in automatic learning to realize the model training and model deployment of "yunbao detection". Next, share the getting started project guide.
Create OBS object bucket
OBS is an object storage service of Huawei cloud. Since ModelArts has only been launched in some areas, it is necessary to ensure that the purchased OBS resources are in the same area as ModelArts. For example, I choose "Beijing IV" for all.
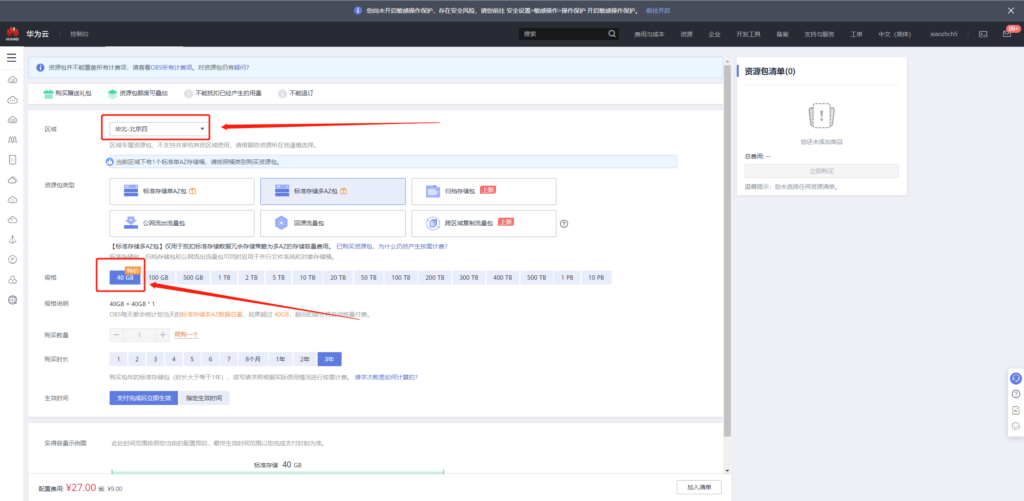
OBS has two modes: on-demand charging and volume charging. New users can experience 40G storage service for one year at 9 yuan. For detailed charging methods and purchase methods, please refer to:
Billing method: https://support.huaweicloud.com/drawer-obs/obs_99_0016.html
Purchase method: https://console.huaweicloud.com/console/?region=cn-north-4&locale=zh-cn#/obs/buy
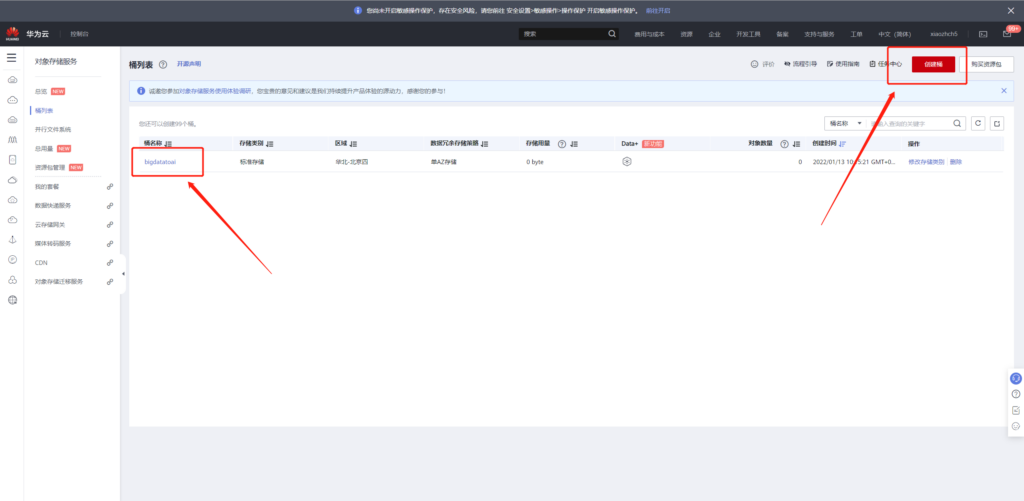
Then create OBS bucket in the above area. For example, I created bigdataoai bucket here
Download data and upload to OBS
Data, upload the data to OBS according to the prompt. There are two ways to upload, one is to upload directly through the web page, and the other is to upload through the OBS desktop tool OBS Browser +. The following describes the way to upload through OBS Browser +.
First, you need to download and install the tool here: https://support.huaweicloud.com/browsertg-obs/obs_03_1003.html . Take windows as an example:
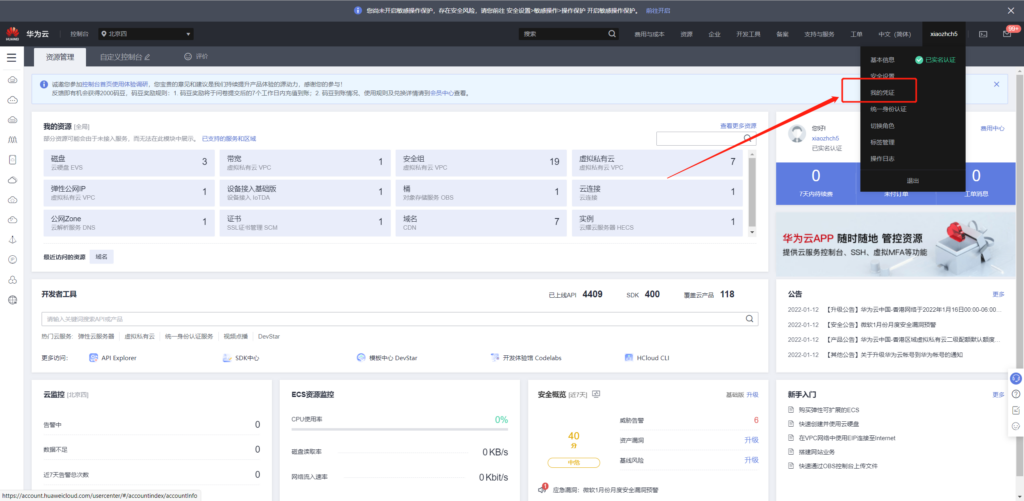
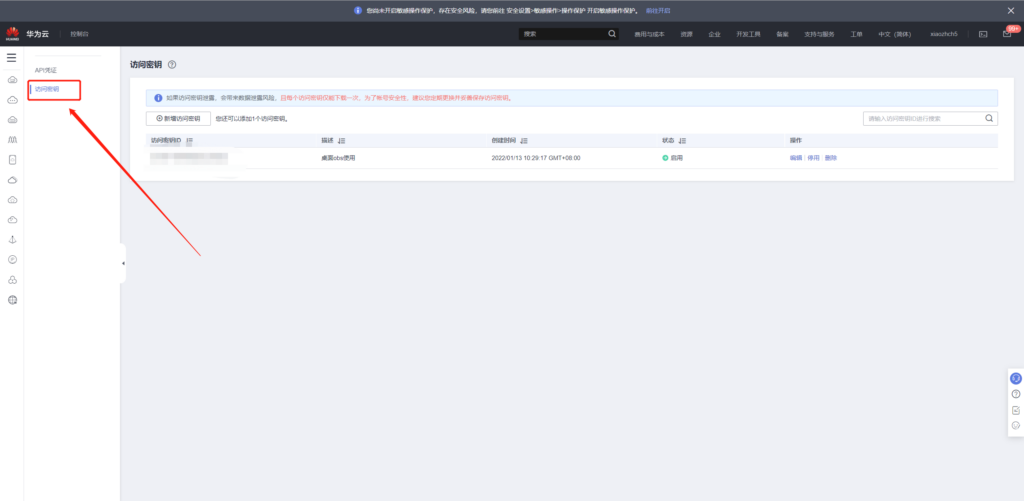
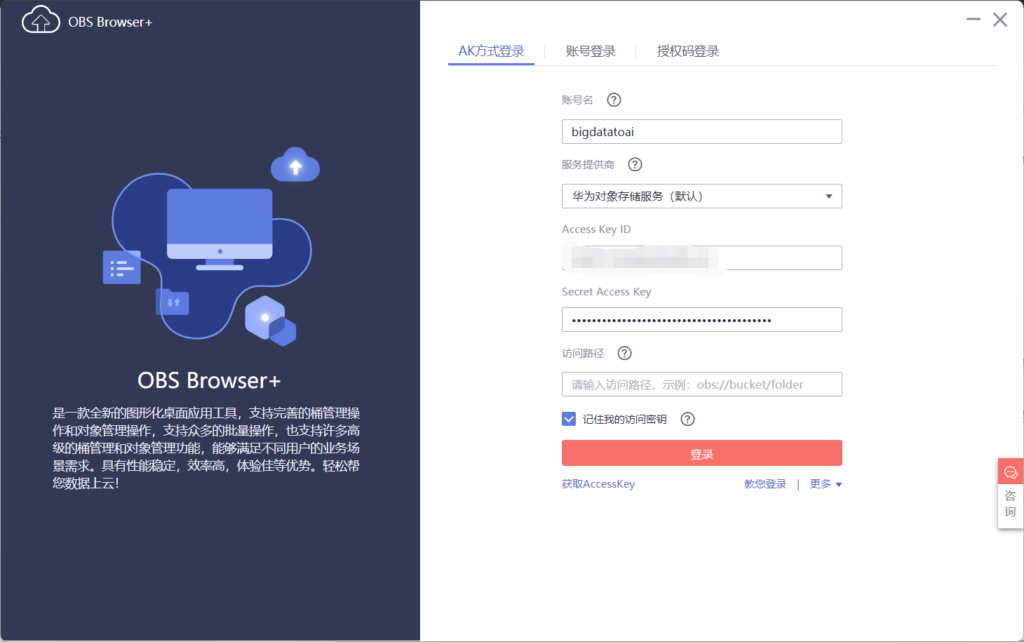
First, apply for the access key. After obtaining the key, fill in the OBS Browser +.
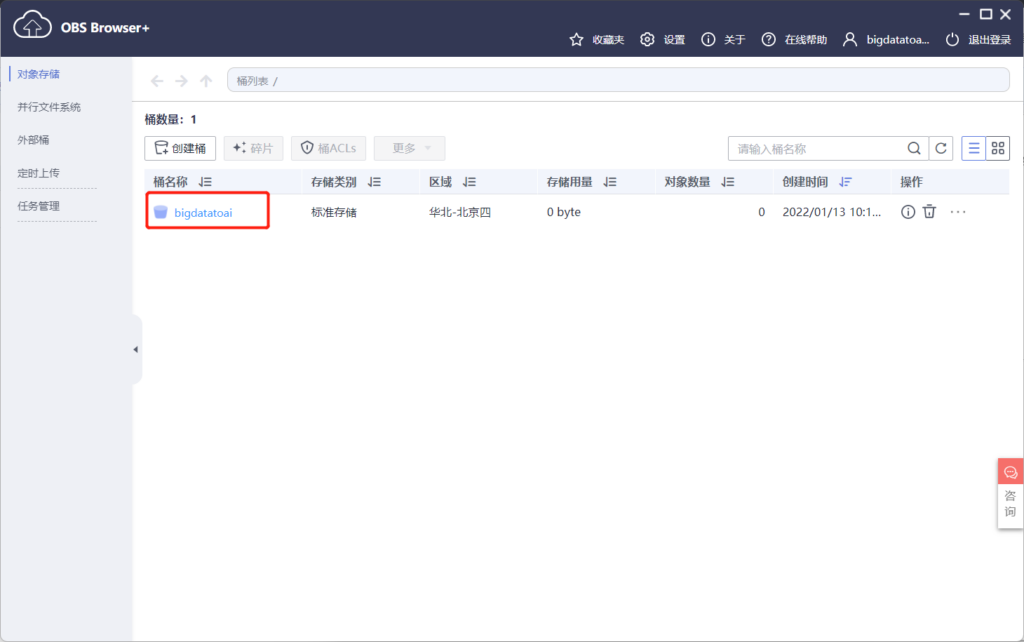
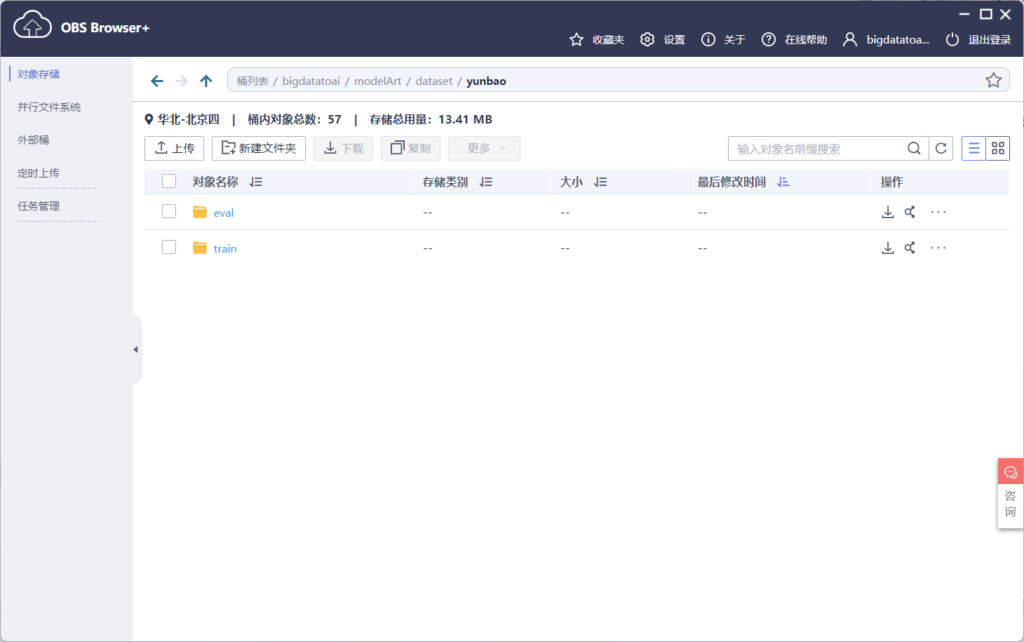
After logging in, you can see the bucket we just created
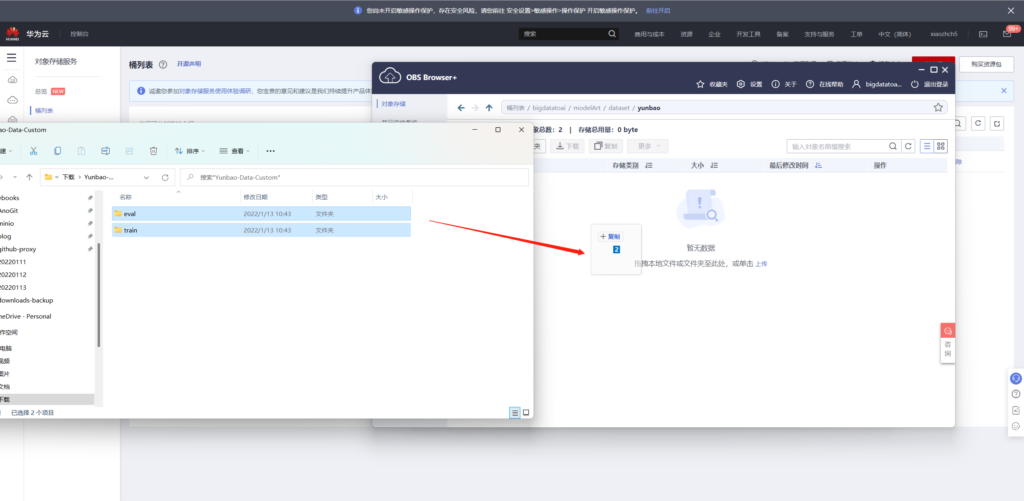
Create a folder modelArt/dataset/yunbao in the bucket and upload the original data to this directory (you can drag and drop it directly)
Introduction to automatic learning
Then you can use the automatic learning function to train the model of the yunbao image just uploaded.
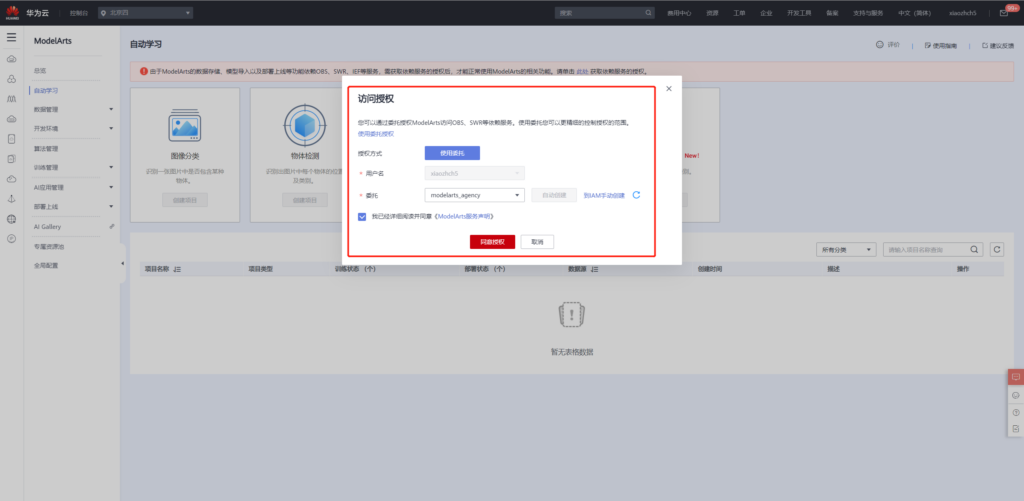
However, you need to authorize delegates before using them. This article takes the automatic creation of delegates as an example.
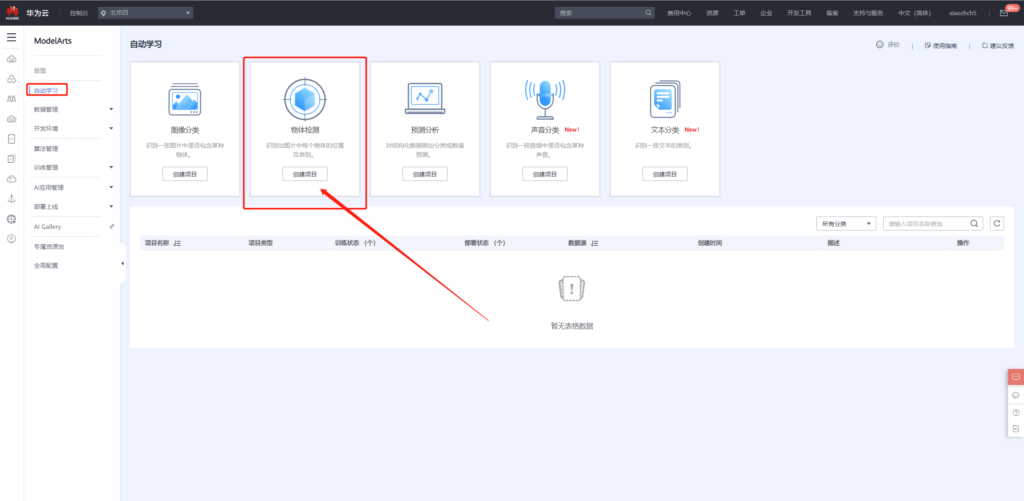
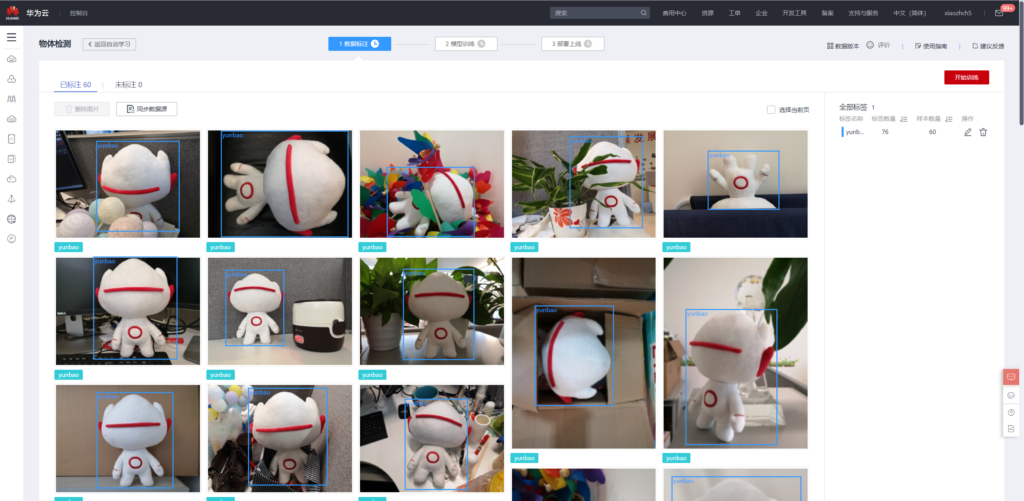
Click target detection in automatic learning to create a project using the data we just uploaded
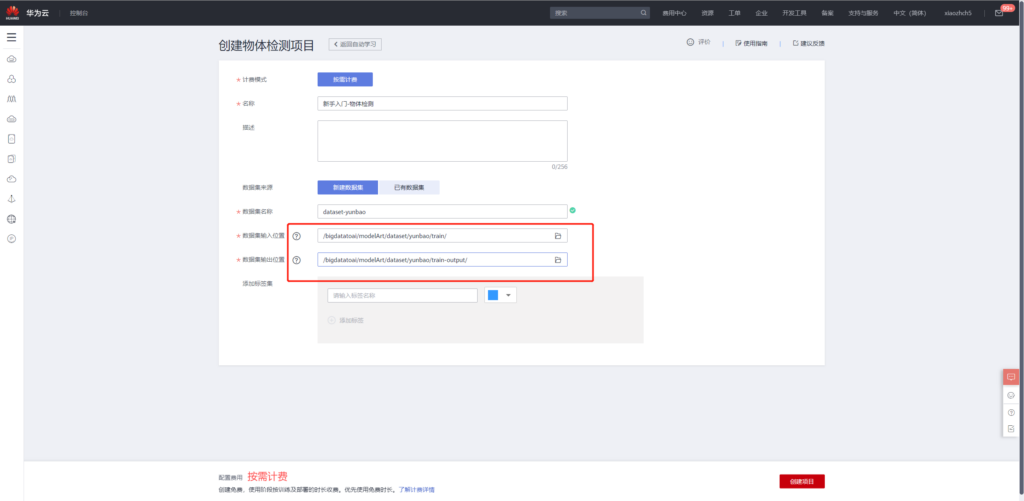
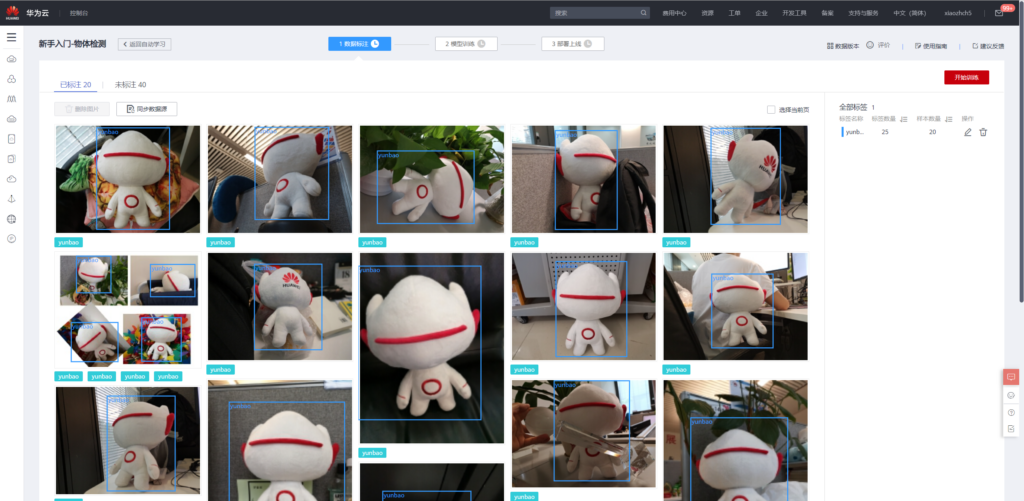
After the project is created, you can use the labeled data for training. There are 20 labeled data in the original data, and the other 40 data are not labeled. In the subsequent steps, you can use manual labeling before model training.
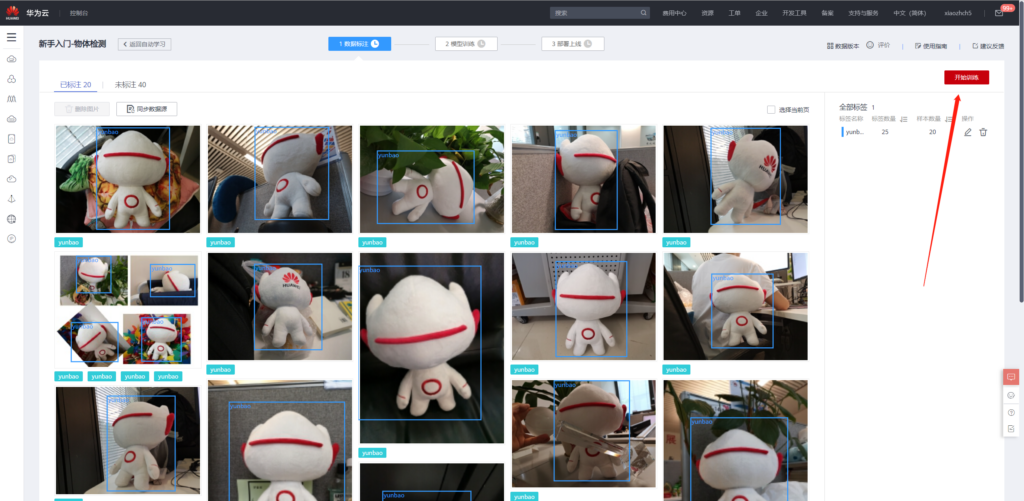
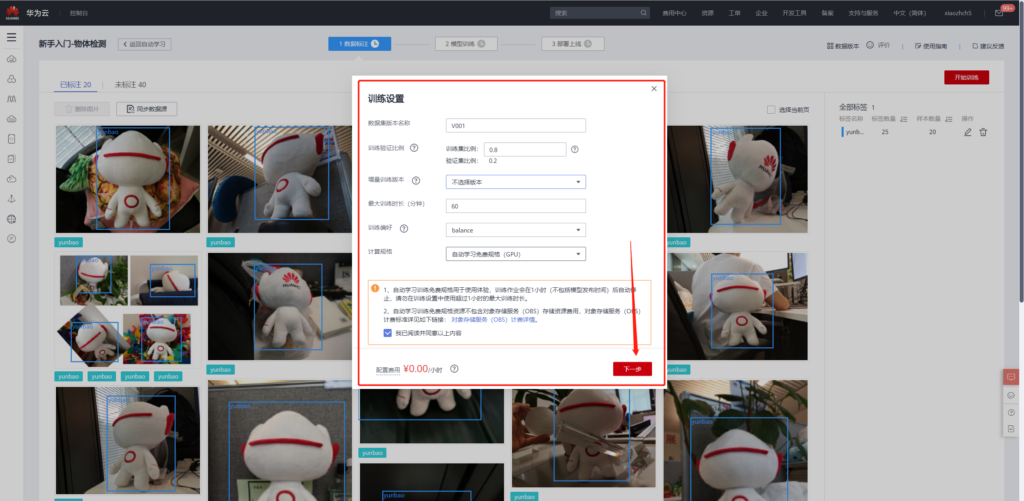
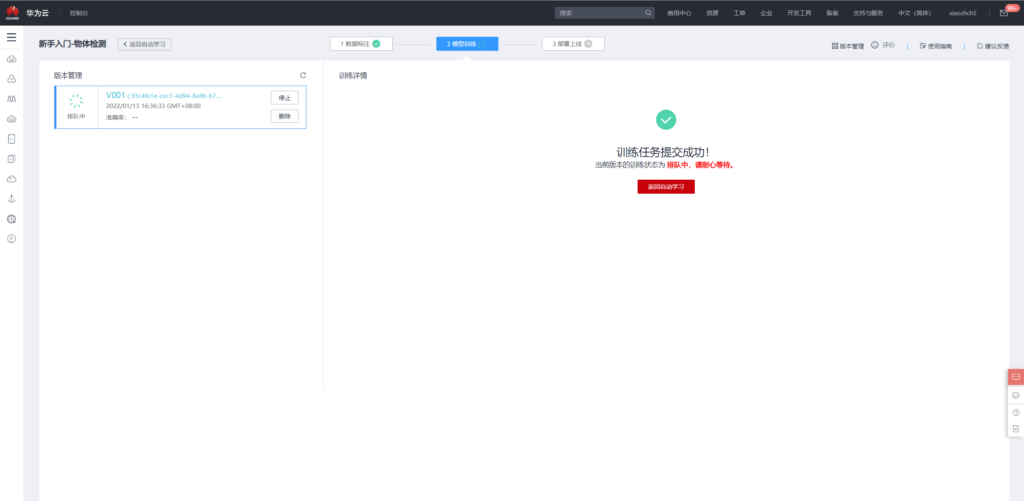
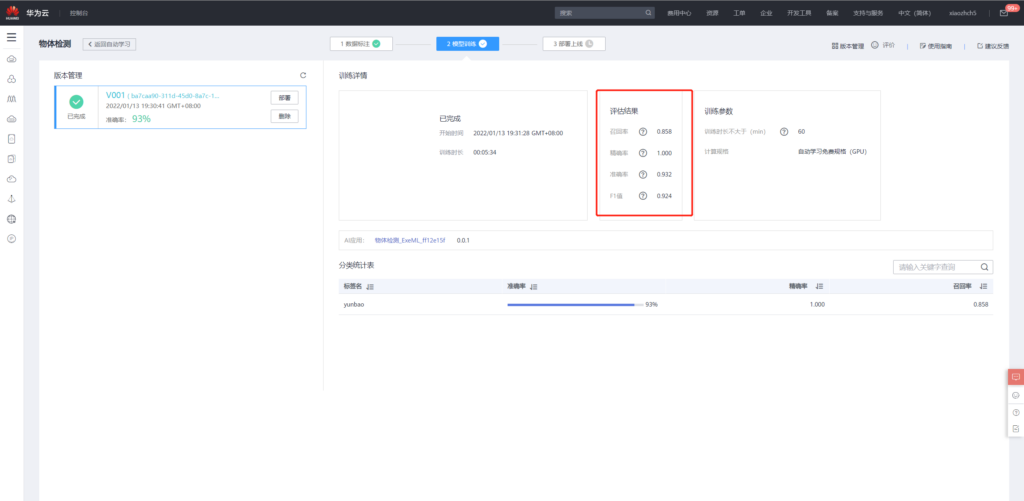
model training
After the training, the following evaluation results are obtained,
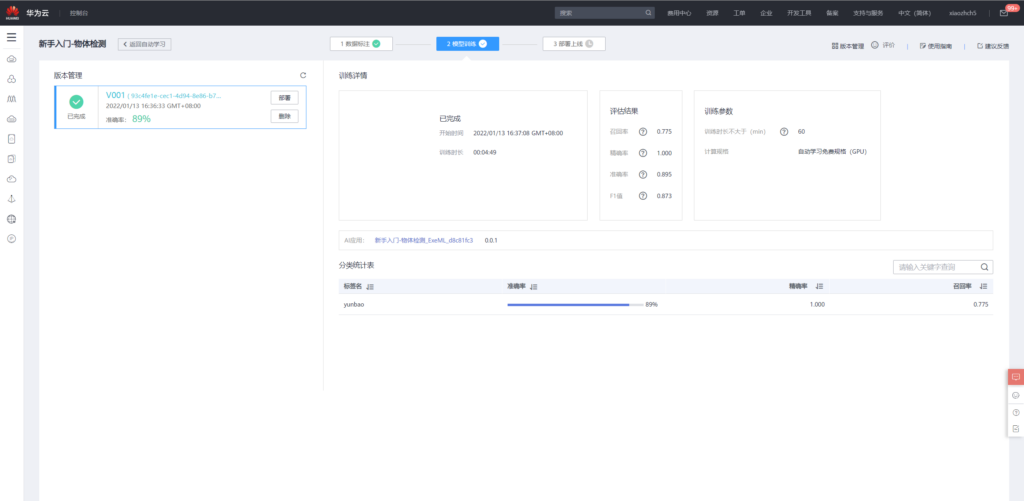
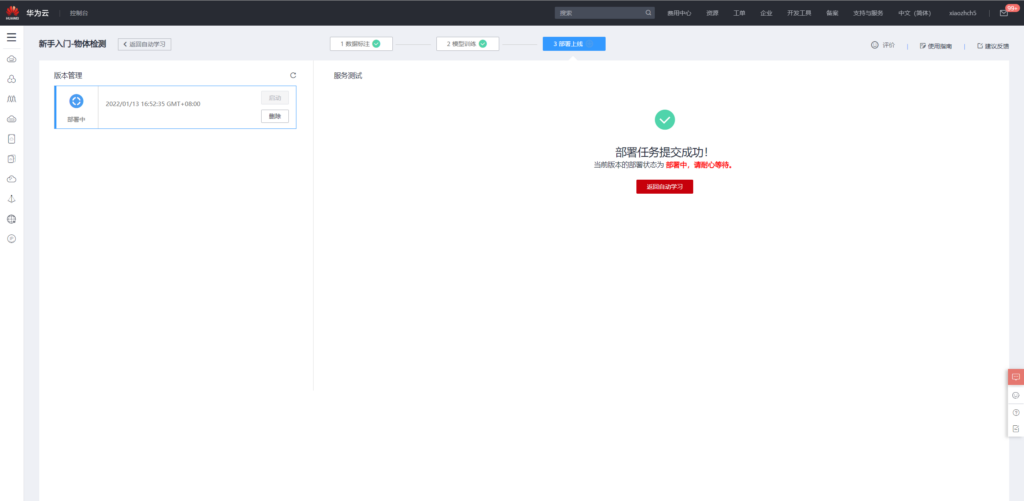
The model can then be deployed online
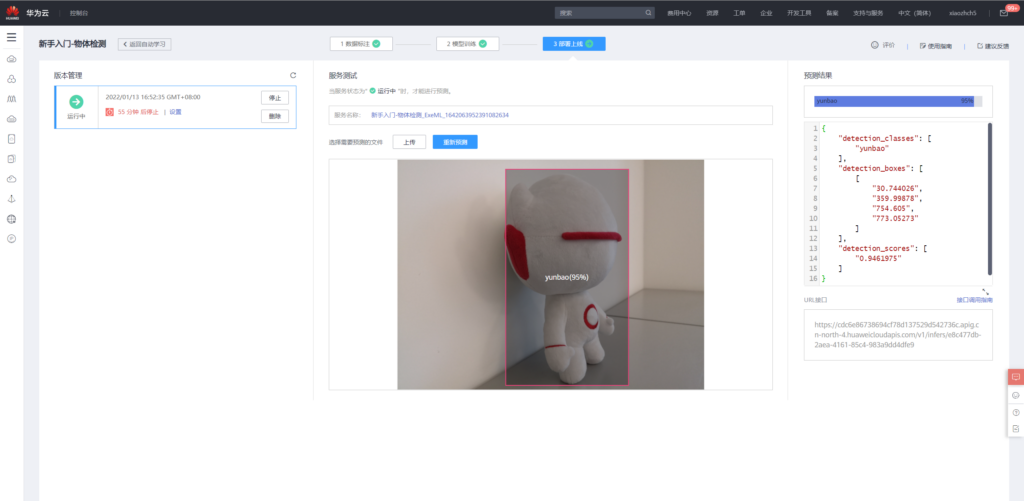
Model use
Use the known and just trained model for prediction, and upload the image in eval through the page

Of course, images can also be detected by api calls.
according to https://support.huaweicloud.com/engineers-modelarts/modelarts_23_0063.html As described above, use postman to obtain X-Auth-Token
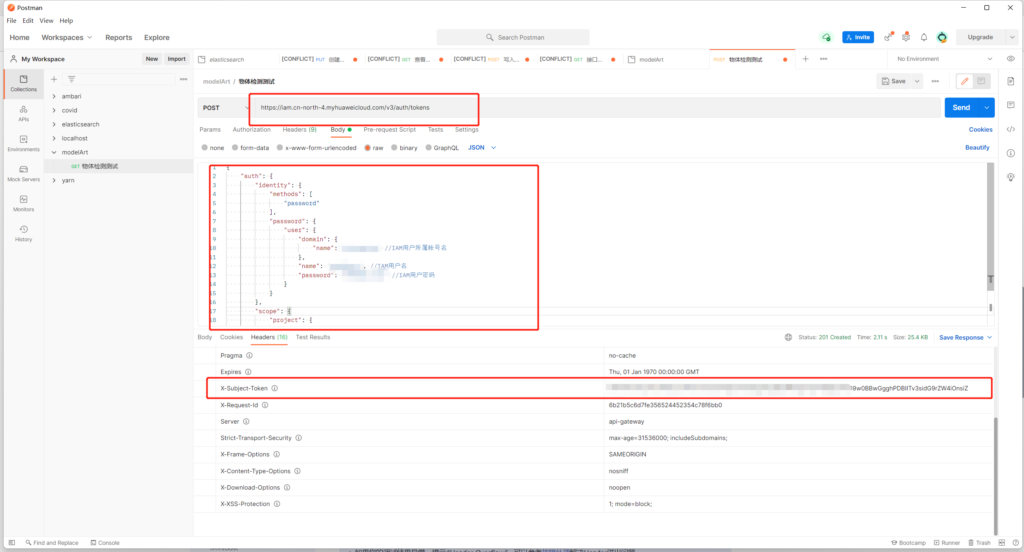
Then use the api of the model page to detect the image

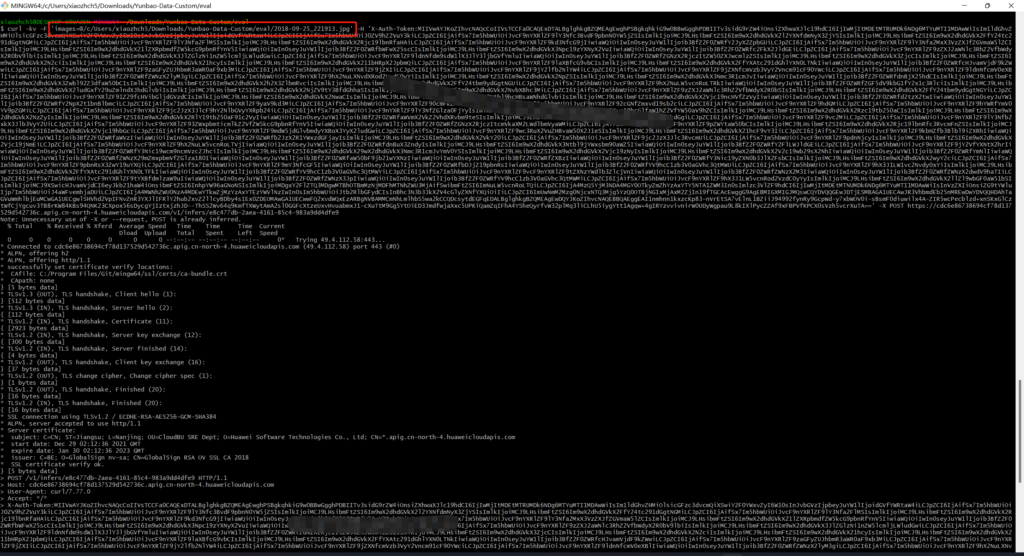
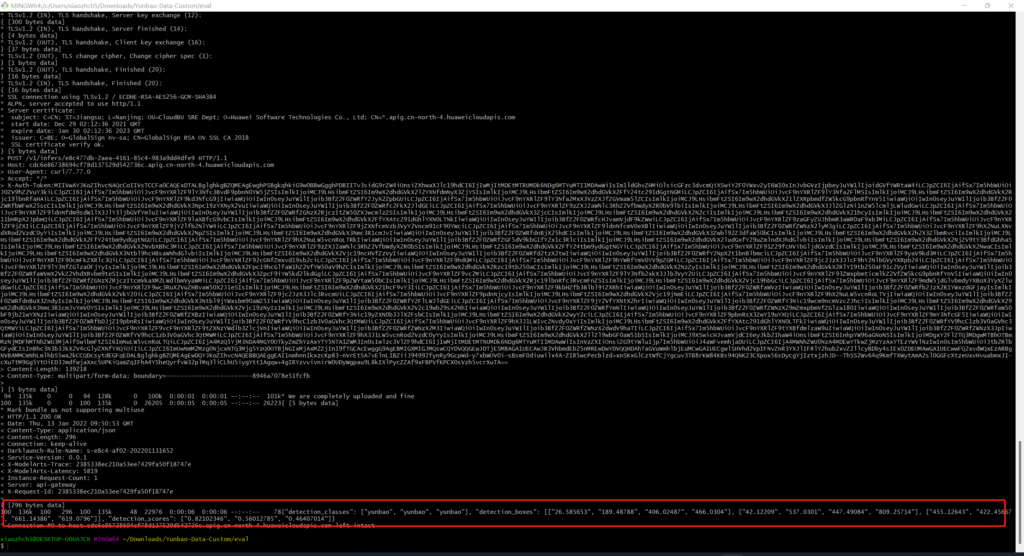
This article uses curl to send pictures, (using postman to always return 400) to get the following results
Manually mark data retraining
Just now we used 20 labeled data to train the model. Now we manually label the remaining 40 images.
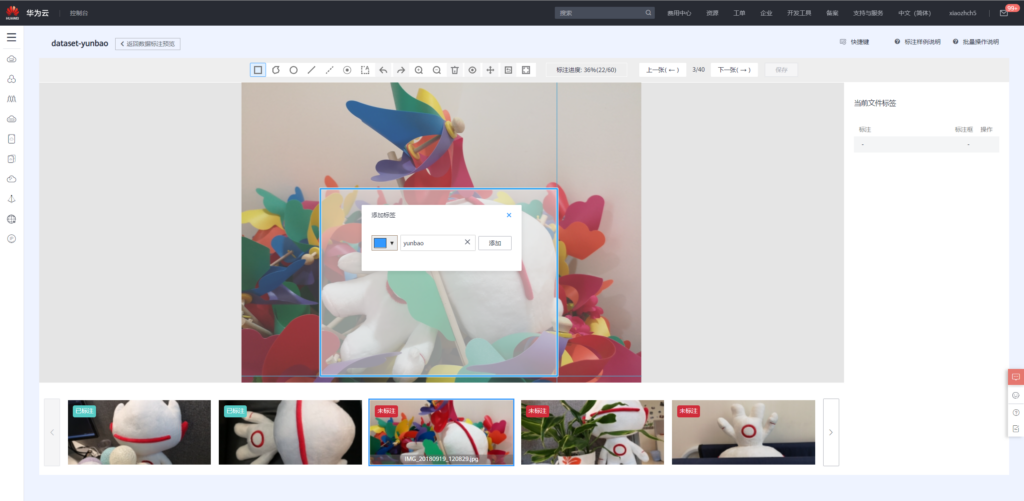
Retraining with the marked 60 pictures:
The results of retraining are as follows
It can be seen that its performance is improved compared with the training of 20 pictures.
CodeLab - out of the box online NoteBook development environment
Overview
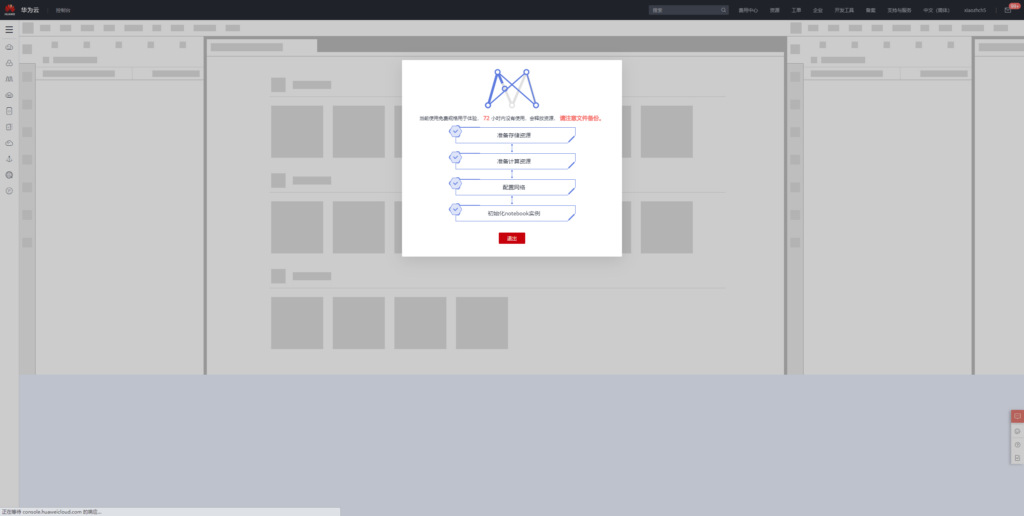
A great advantage of platform is to use it out of the box. I like CodeLab very much. Next, let's experience how to develop using CodeLab.
First, click use now to enter the NoteBook development environment.

CodeLab currently directly supports the following types of machine learning frameworks. If you are not satisfied, you can also use conda to install them freely in the terminal.

Training fully connected networks with mnist data
Reference address: https://mxnet.apache.org/versions/1.5.0/tutorials/gluon/mnist.html
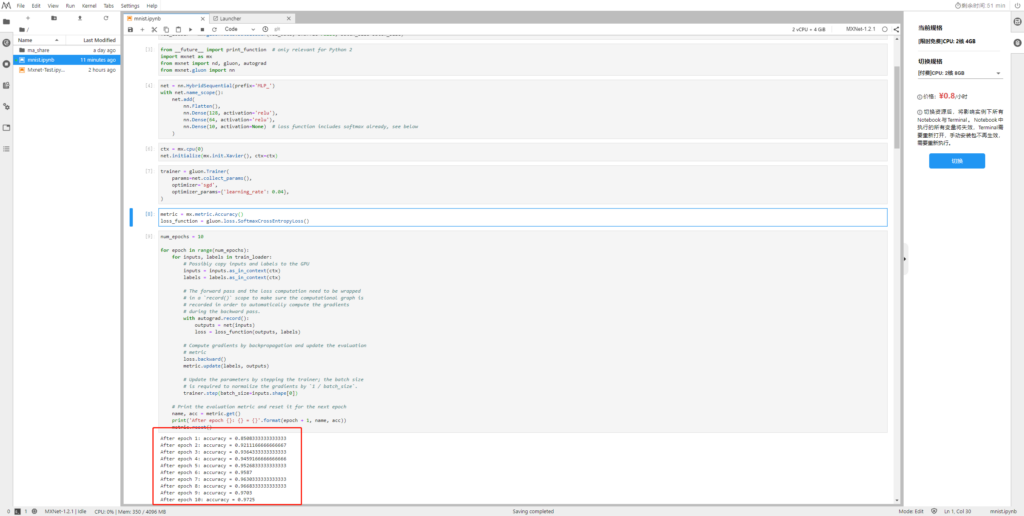
Let me take mxnet framework as an example to try to run the classic handwritten numeral recognition example.
First download training and test data
import mxnet as mx

# Select a fixed random seed for reproducibility
mx.random.seed(42)

def data_xform(data):
    """Move channel axis to the beginning, cast to float32, and normalize to [0, 1]."""
    return nd.moveaxis(data, 2, 0).astype('float32') / 255

train_data = mx.gluon.data.vision.MNIST(train=True).transform_first(data_xform)
val_data = mx.gluon.data.vision.MNIST(train=False).transform_first(data_xform)
Load data
batch_size = 100
train_loader = mx.gluon.data.DataLoader(train_data, shuffle=True, batch_size=batch_size)
val_loader = mx.gluon.data.DataLoader(val_data, shuffle=False, batch_size=batch_size)
Import necessary packages
from __future__ import print_function  # only relevant for Python 2
import mxnet as mx
from mxnet import nd, gluon, autograd
from mxnet.gluon import nn
Building a fully connected network
net = nn.HybridSequential(prefix='MLP_')
with net.name_scope():
    net.add(
        nn.Flatten(),
        nn.Dense(128, activation='relu'),
        nn.Dense(64, activation='relu'),
        nn.Dense(10, activation=None)  # loss function includes softmax already, see below
    )
Network initialization, training with cpu
ctx = mx.cpu(0)
net.initialize(mx.init.Xavier(), ctx=ctx)
Define how to train the fully connected network built above
trainer = gluon.Trainer(
    params=net.collect_params(),
    optimizer='sgd',
    optimizer_params={'learning_rate': 0.04},
)
Define loss function
metric = mx.metric.Accuracy()
loss_function = gluon.loss.SoftmaxCrossEntropyLoss()
Repeat 10 times
num_epochs = 10

for epoch in range(num_epochs):
    for inputs, labels in train_loader:
        # Possibly copy inputs and labels to the GPU
        inputs = inputs.as_in_context(ctx)
        labels = labels.as_in_context(ctx)

        # The forward pass and the loss computation need to be wrapped
        # in a `record()` scope to make sure the computational graph is
        # recorded in order to automatically compute the gradients
        # during the backward pass.
        with autograd.record():
            outputs = net(inputs)
            loss = loss_function(outputs, labels)

        # Compute gradients by backpropagation and update the evaluation
        # metric
        loss.backward()
        metric.update(labels, outputs)

        # Update the parameters by stepping the trainer; the batch size
        # is required to normalize the gradients by `1 / batch_size`.
        trainer.step(batch_size=inputs.shape[0])

    # Print the evaluation metric and reset it for the next epoch
    name, acc = metric.get()
    print('After epoch {}: {} = {}'.format(epoch + 1, name, acc))
    metric.reset()
The training accuracy after 10 times is 0.9725
Next, we use the test set to verify the effect
metric = mx.metric.Accuracy()
for inputs, labels in val_loader:
    # Possibly copy inputs and labels to the GPU
    inputs = inputs.as_in_context(ctx)
    labels = labels.as_in_context(ctx)
    metric.update(labels, net(inputs))
print('Validaton: {} = {}'.format(*metric.get()))
assert metric.get()[1] > 0.96
The test accuracy is 0.9679

Training lenet network with mnist data
Next, we use the above data to train lenet and test the accuracy of the model
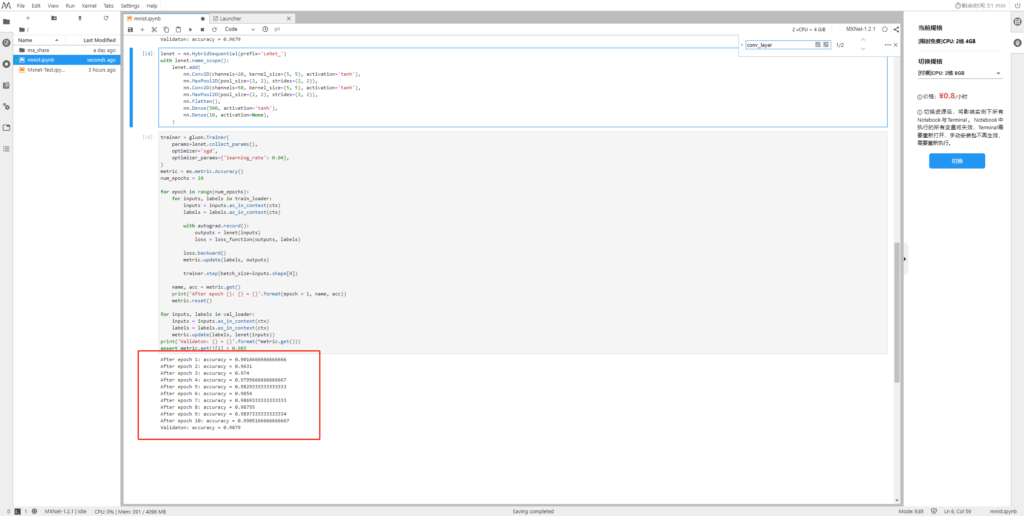
Define lenet
lenet = nn.HybridSequential(prefix='LeNet_')
with lenet.name_scope():
    lenet.add(
        nn.Conv2D(channels=20, kernel_size=(5, 5), activation='tanh'),
        nn.MaxPool2D(pool_size=(2, 2), strides=(2, 2)),
        nn.Conv2D(channels=50, kernel_size=(5, 5), activation='tanh'),
        nn.MaxPool2D(pool_size=(2, 2), strides=(2, 2)),
        nn.Flatten(),
        nn.Dense(500, activation='tanh'),
        nn.Dense(10, activation=None),
    )
Training lenet network
trainer = gluon.Trainer(
    params=lenet.collect_params(),
    optimizer='sgd',
    optimizer_params={'learning_rate': 0.04},
)
metric = mx.metric.Accuracy()
num_epochs = 10

for epoch in range(num_epochs):
    for inputs, labels in train_loader:
        inputs = inputs.as_in_context(ctx)
        labels = labels.as_in_context(ctx)

        with autograd.record():
            outputs = lenet(inputs)
            loss = loss_function(outputs, labels)

        loss.backward()
        metric.update(labels, outputs)

        trainer.step(batch_size=inputs.shape[0])

    name, acc = metric.get()
    print('After epoch {}: {} = {}'.format(epoch + 1, name, acc))
    metric.reset()

for inputs, labels in val_loader:
    inputs = inputs.as_in_context(ctx)
    labels = labels.as_in_context(ctx)
    metric.update(labels, lenet(inputs))
print('Validaton: {} = {}'.format(*metric.get()))
assert metric.get()[1] > 0.985
As can be seen from the figure below, the training and testing accuracy of lenet has reached 0.9905 and 0.9879
lenet model export
Next, we export the trained lenet network to the local.
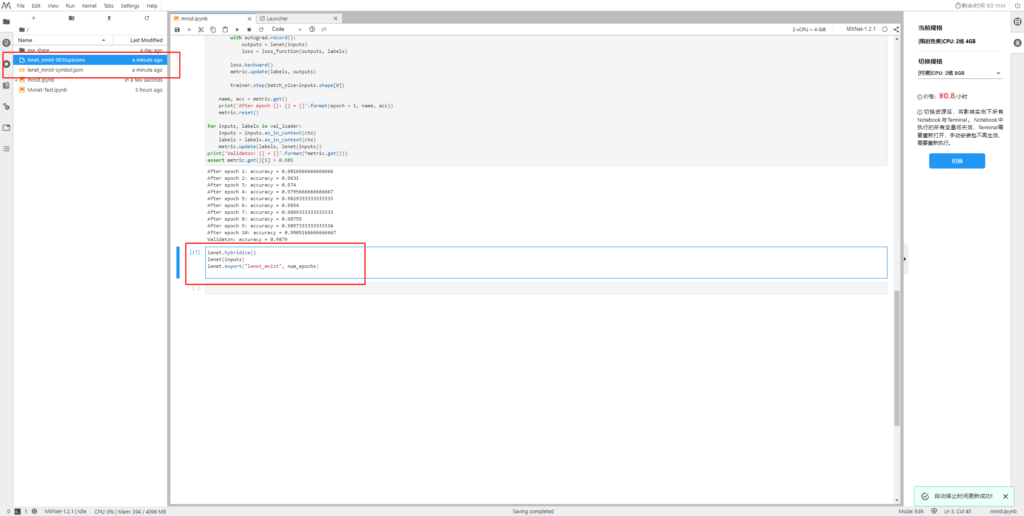
Download the above two files locally and then upload them to OBS.
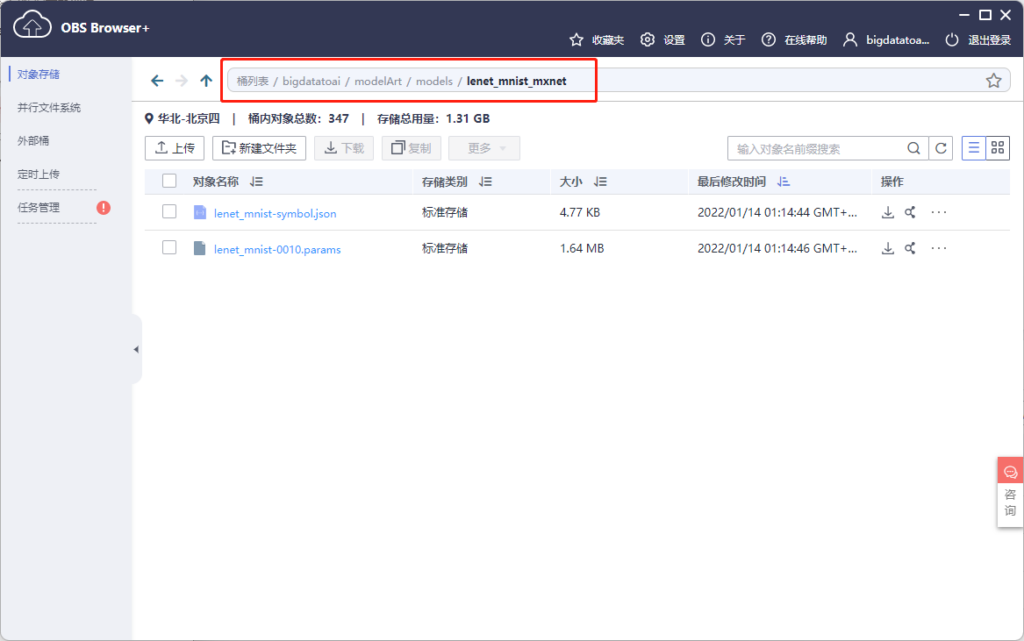
Creating AI applications using lenet model
After the above steps, we import the lenet model into the following directory of OBS.
In addition, we also need two files to implement model deployment, one is reasoning code and the other is configuration file. The official has provided the reasoning code for handwritten numeral recognition. We can use it directly. The code content is:
customize_service.py
import mxnet as mx
import requests
import zipfile
import json
import shutil
import os
import numpy as np

from mxnet.io import DataBatch
from mms.log import get_logger
from mms.model_service.mxnet_model_service import MXNetBaseService
from mms.utils.mxnet import image, ndarray


logger = get_logger()


def check_input_shape(inputs, signature):
    '''Check input data shape consistency with signature.

    Parameters
    ----------
    inputs : List of NDArray
        Input data in NDArray format.
    signature : dict
        Dictionary containing model signature.
    '''
    assert isinstance(inputs, list), 'Input data must be a list.'
    assert len(inputs) == len(signature['inputs']), 'Input number mismatches with ' \
         'signature. %d expected but got %d.' \
                                           % (len(signature['inputs']), len(inputs))
    for input, sig_input in zip(inputs, signature['inputs']):
        assert isinstance(input, mx.nd.NDArray), 'Each input must be NDArray.'
        assert len(input.shape) == \
               len(sig_input['data_shape']), 'Shape dimension of input %s mismatches with ' \
                                'signature. %d expected but got %d.' \
                                % (sig_input['data_name'], len(sig_input['data_shape']),
                                   len(input.shape))
        for idx in range(len(input.shape)):
            if idx != 0 and sig_input['data_shape'][idx] != 0:
                assert sig_input['data_shape'][idx] == \
                       input.shape[idx], 'Input %s has different shape with ' \
                                         'signature. %s expected but got %s.' \
                                         % (sig_input['data_name'], sig_input['data_shape'],
                                            input.shape)

class DLSMXNetBaseService(MXNetBaseService):
    '''MXNetBaseService defines the fundamental loading model and inference
       operations when serving MXNet model. This is a base class and needs to be
       inherited.
    '''
    def __init__(self, model_name, model_dir, manifest, gpu=None):
        print ("-------------------- init classification servive -------------")
        self.model_name = model_name
        self.ctx = mx.gpu(int(gpu)) if gpu is not None else mx.cpu()
        self._signature = manifest['Model']['Signature']
        data_names = []
        data_shapes = []
        for input in self._signature['inputs']:
            data_names.append(input['data_name'])
            # Replace 0 entry in data shape with 1 for binding executor.
            # Set batch size as 1
            data_shape = input['data_shape']
            data_shape[0] = 1
            for idx in range(len(data_shape)):
                if data_shape[idx] == 0:
                    data_shape[idx] = 1
            data_shapes.append(('data', tuple(data_shape)))

        # Load MXNet module
        epoch = 0
        try:
            param_filename = manifest['Model']['Parameters']
            epoch = int(param_filename[len(model_name) + 1: -len('.params')])
        except Exception as e:
            logger.warning('Failed to parse epoch from param file, setting epoch to 0')

        sym, arg_params, aux_params = mx.model.load_checkpoint('%s/%s' % (model_dir, manifest['Model']['Symbol'][:-12]), epoch)
        self.mx_model = mx.mod.Module(symbol=sym, context=self.ctx,
                                      data_names=['data'], label_names=None)
        self.mx_model.bind(for_training=False, data_shapes=data_shapes)
        self.mx_model.set_params(arg_params, aux_params, allow_missing=True)

    def _preprocess(self, data):
        img_list = []
        for idx, img in enumerate(data):
            input_shape = self.signature['inputs'][idx]['data_shape']
            # We are assuming input shape is NCHW
            [h, w] = input_shape[2:]
            if input_shape[1] == 1:
                img_arr = image.read(img, 0)
            else:
                img_arr = image.read(img)
            img_arr = image.resize(img_arr, w, h)
            img_arr = image.transform_shape(img_arr)
            img_list.append(img_arr)
        return img_list

    def _postprocess(self, data):
        dim = len(data[0].shape)
        if dim > 2:
            data = mx.nd.array(np.squeeze(data.asnumpy(), axis=tuple(range(dim)[2:])))
        sorted_prob = mx.nd.argsort(data[0], is_ascend=False)
        top_prob = map(lambda x: int(x.asscalar()), sorted_prob[0:5])
        return [{'probability': float(data[0, i].asscalar()), 'class': i}
                for i in top_prob]

    def _inference(self, data):
        '''Internal inference methods for MXNet. Run forward computation and
        return output.

        Parameters
        ----------
        data : list of NDArray
            Preprocessed inputs in NDArray format.

        Returns
        -------
        list of NDArray
            Inference output.
        '''
        # Check input shape
        check_input_shape(data, self.signature)
        data = [item.as_in_context(self.ctx) for item in data]
        self.mx_model.forward(DataBatch(data))
        return self.mx_model.get_outputs()[0]

    def ping(self):
        '''Ping to get system's health.

        Returns
        -------
        String
            MXNet version to show system is healthy.
        '''
        return mx.__version__

    @property
    def signature(self):
        '''Signiture for model service.

        Returns
        -------
        Dict
            Model service signiture.
        '''
        return self._signature
The next step is the configuration file. Its content is that we can modify the content in metrics according to the accuracy of our own model
config.json
{"model_type": "MXNet", "metrics": {"f1": 0.39542, "accuracy": 0.987426, "precision": 0.395875, "recall": 0.394966}, "dependencies": [], "model_algorithm": "image_classification", "apis": [{"procotol": "http", "url": "/", "request": {"Content-type": "multipart/form-data", "data": {"type": "object", "properties": {"images": {"type": "file"}}}}, "method": "post", "response": {"Content-type": "multipart/form-data", "data": {"required": ["predicted_label", "scores"], "type": "object", "properties": {"scores": {"items": {"minItems": 2, "items": [{"type": "string"}, {"type": "number"}], "type": "array", "maxItems": 2}, "type": "array"}}}}}]}
Copy the above two files to OBS

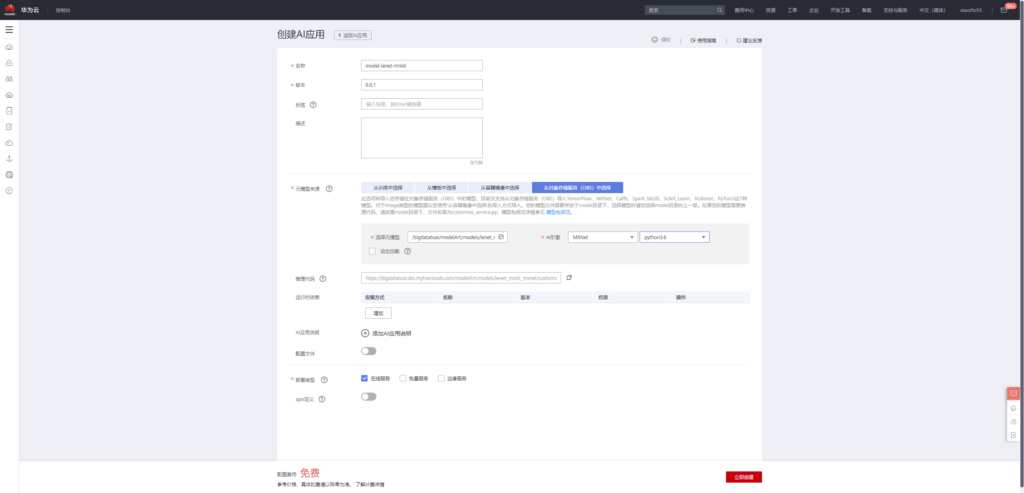
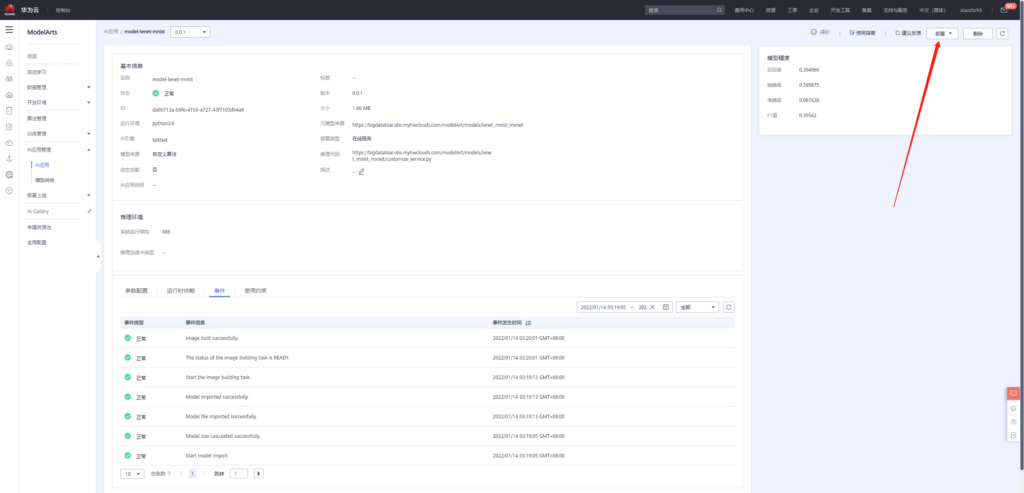
Next, we can build AI applications based on the above model.
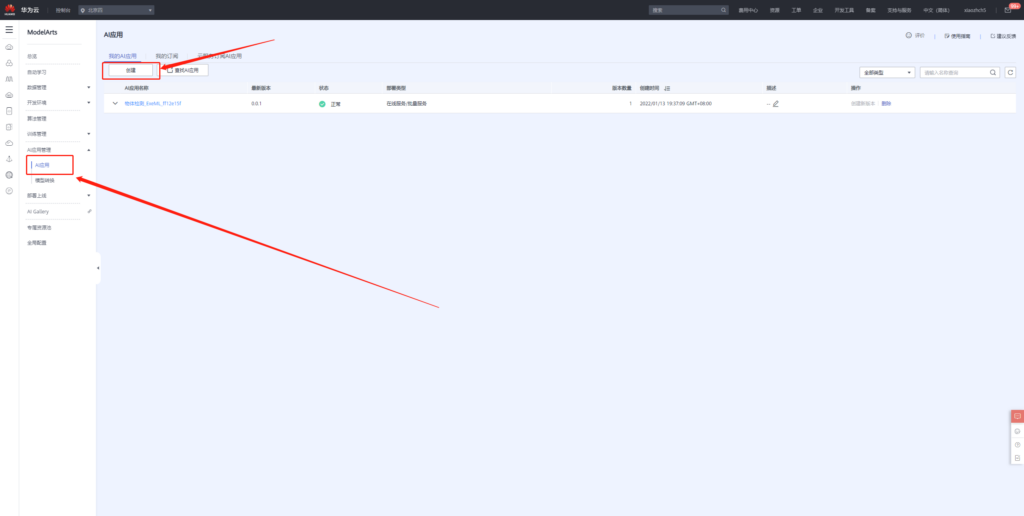
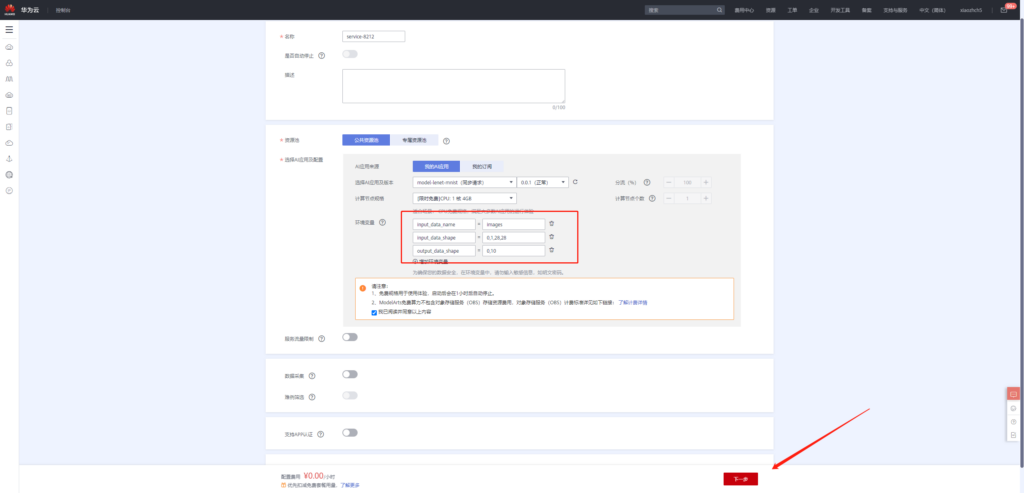
After the application is created, the application can then be deployed online.
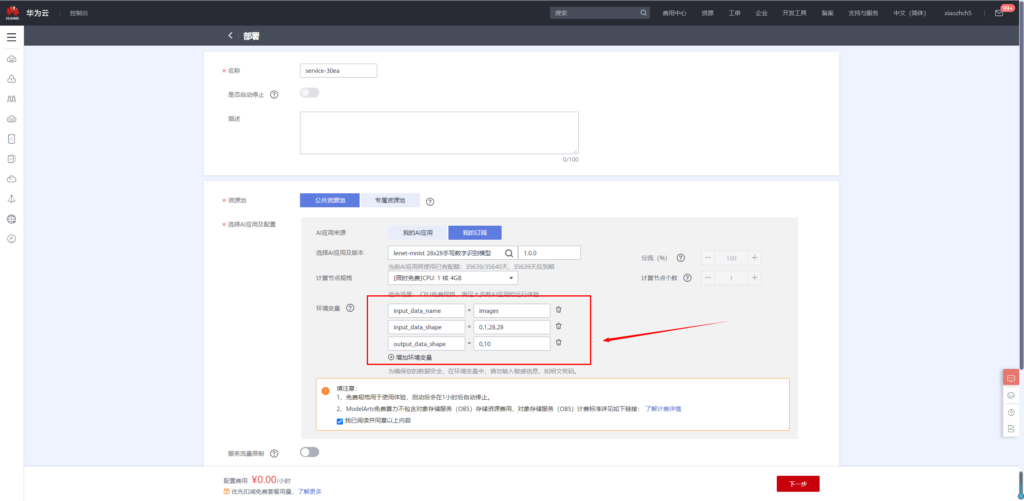
Add environment variable
input_data_name: images
input_data_shape: 0,1,28,28
output_data_shape: 0,10
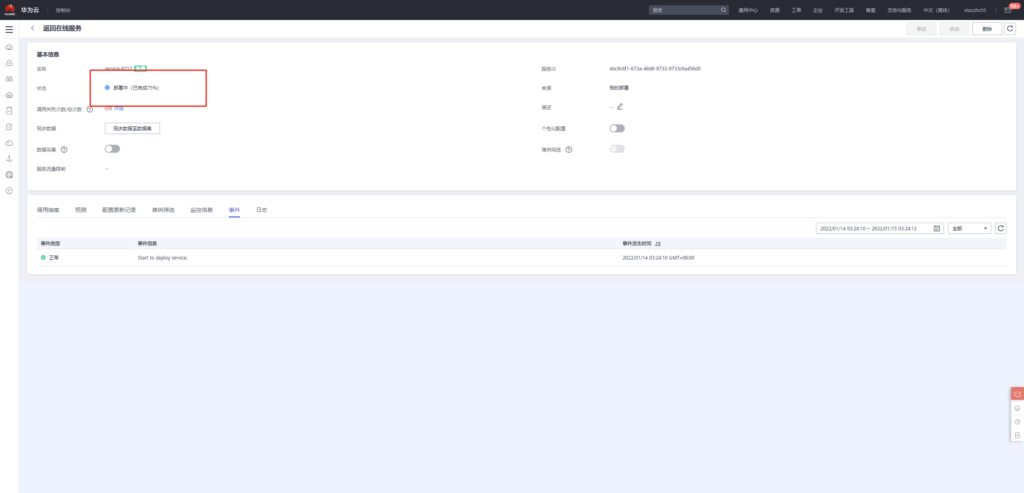
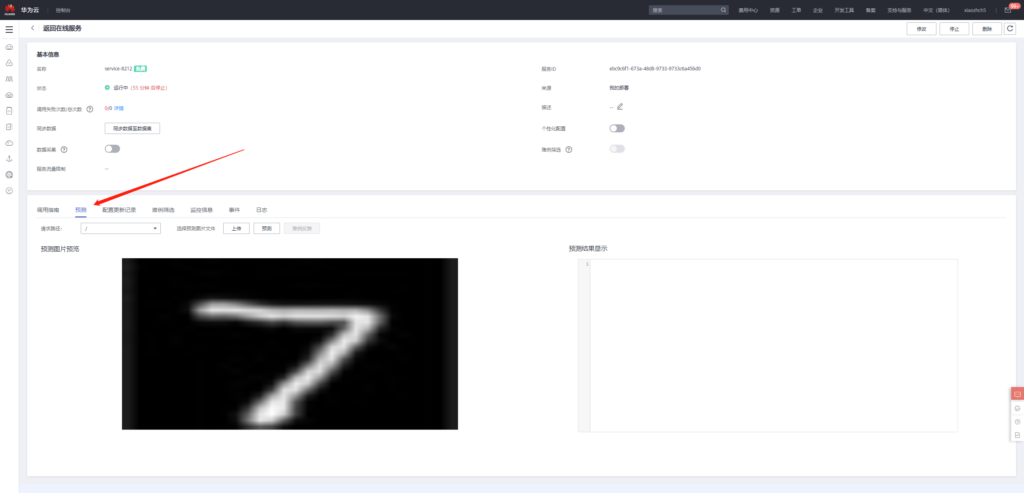
Wait for the deployment to complete before performing the prediction operation. Since we define the image size as 28x28 in the model, the image we input is a 28x28 black-and-white digital image.
The image can be obtained by the following methods:
Get mnist pictures through search engine search, and then take screenshots:
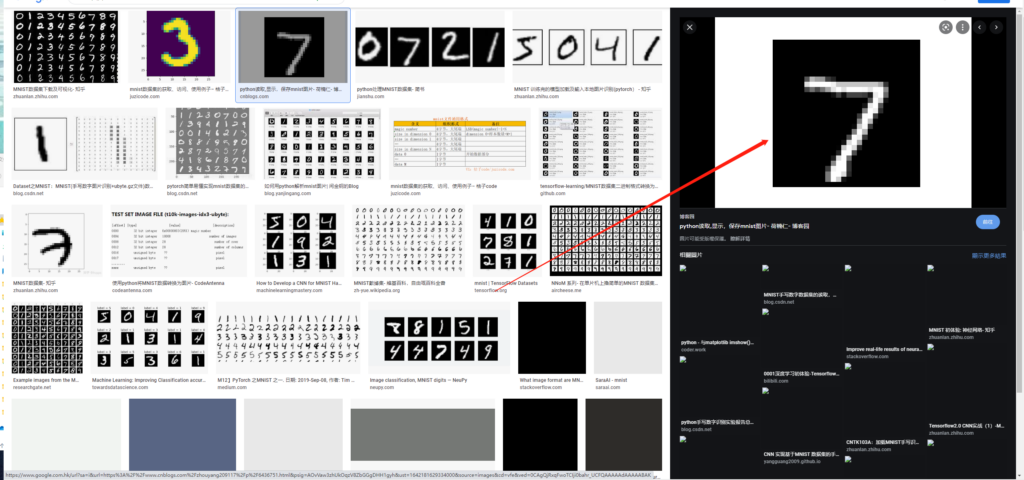
Then use the online picture resizing tool to adjust the picture to 28x28,
Online picture adjustment tool website: https://www.iloveimg.com/zh-cn/resize-image#resize-options,pixels
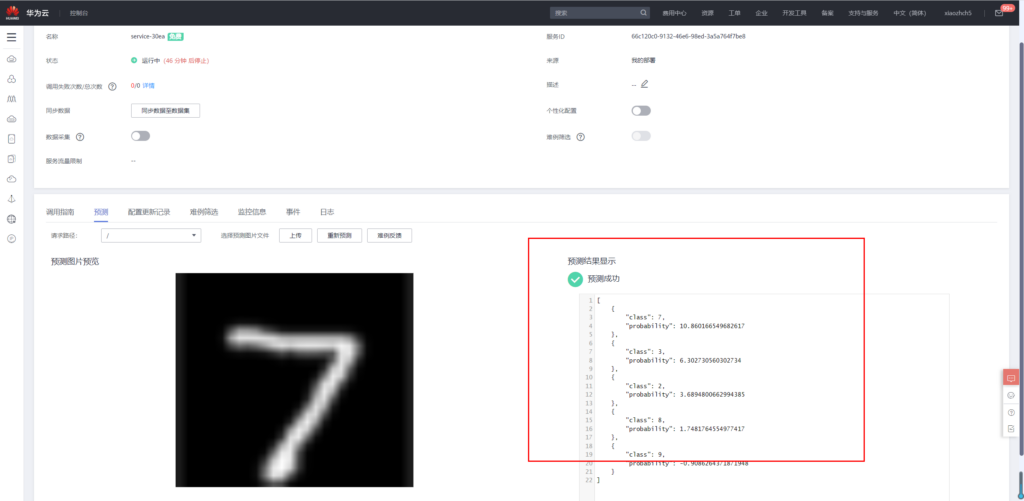
Then, after the above operations, we get a 28x28 black-and-white handwritten 7 image
Upload this image in forecast

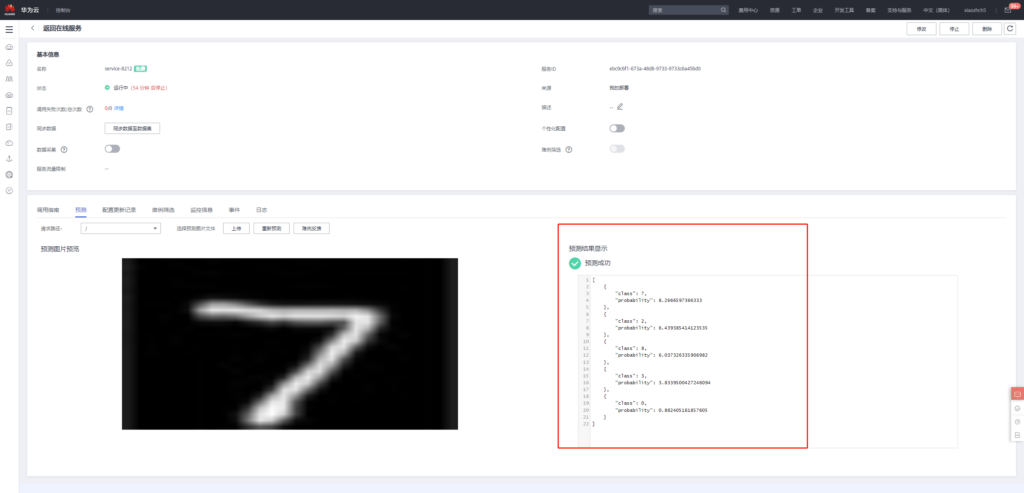
Then click forecast to get the following forecast results
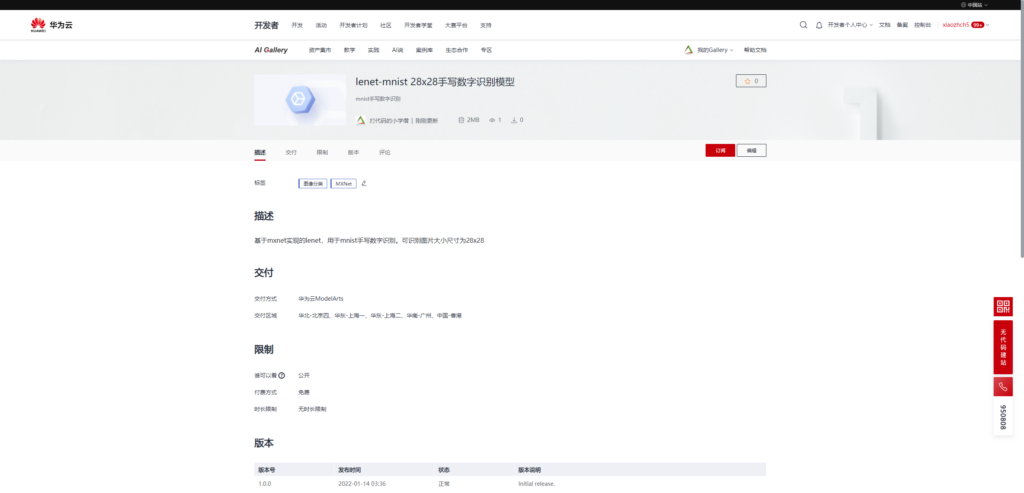
Lenet MNIST 28x28 handwritten numeral recognition model release
Click the following link to enter the model publishing page
https://developer.huaweicloud.com/develop/aigallery/model/list
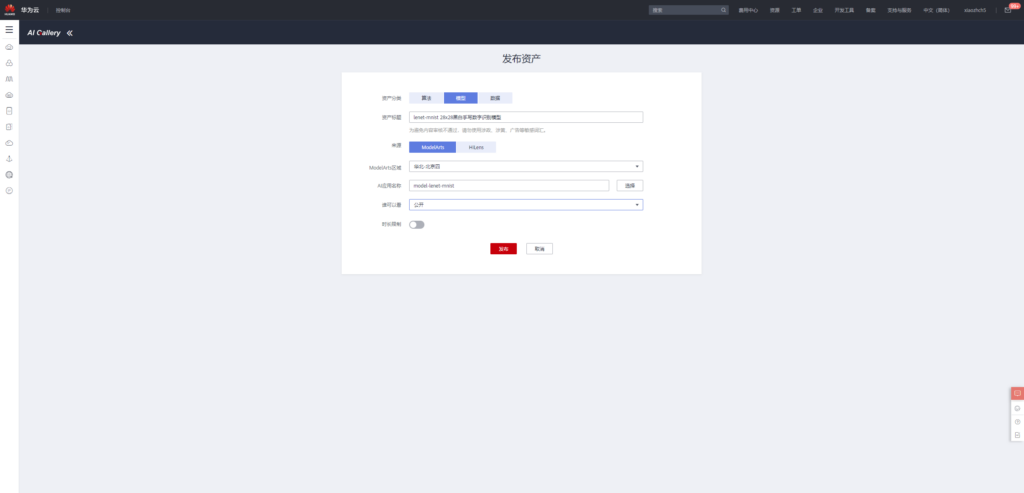
Final release page
Subscribe model from AI Gallery
AI gallery is an AI application market based on ModelArts. This function greatly reduces the development threshold of AI model. In the AI model market based on AI Gallery, users can directly use the model even if they do not understand AI knowledge and subscribe to model services. I think with the progress of technology and the development of society, AI will certainly tend to be civilian, and the function of AI gallery is a great pioneer in this direction.
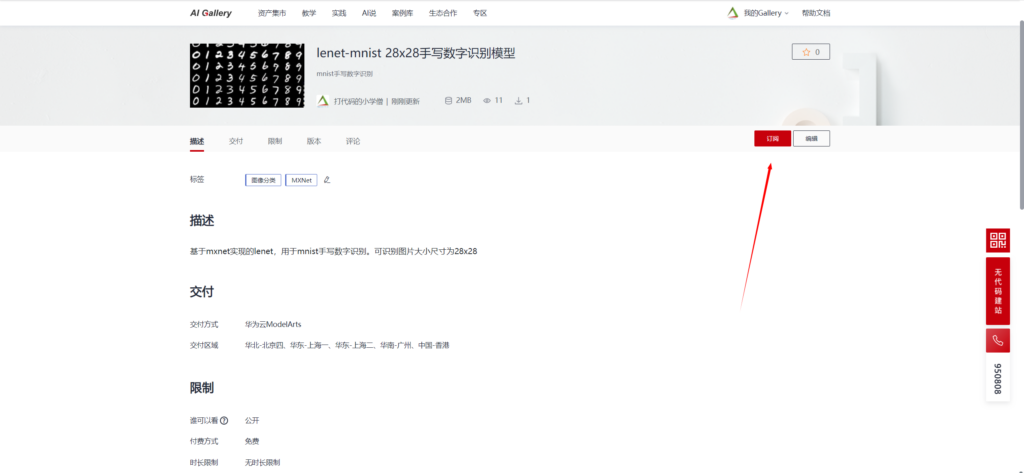
Next, let's share with you how to subscribe to the model I just released and then deploy it quickly.
First, enter the model subscription page and click subscribe: https://developer.huaweicloud.com/develop/aigallery/model/detail?id=d6fcb13b-adc8-448e-a523-5d7f5d44b7a2
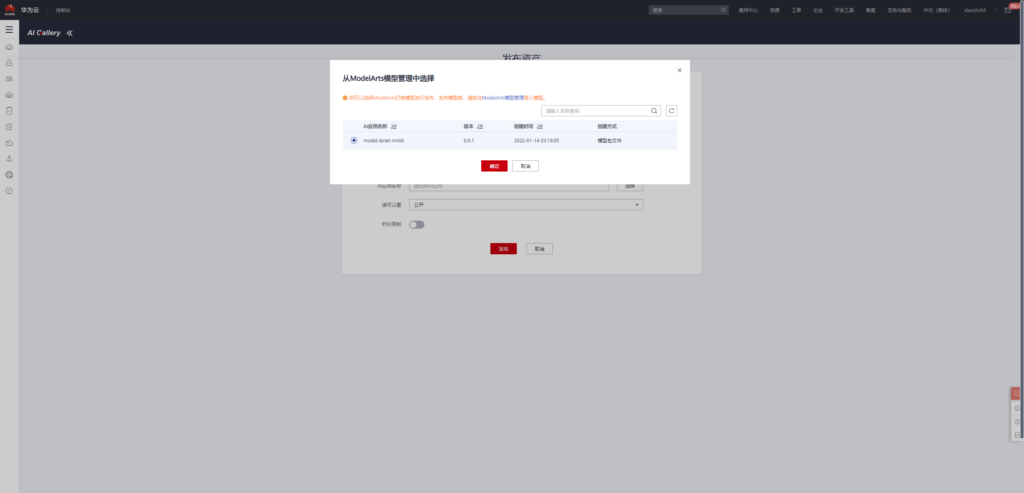
After the subscription is completed, go to the console and select the cloud service area where ModelArts is located. I still choose Beijing 4. After entering the console, you can directly deploy the model online

Similarly, when deploying the model, add the following environment variables
input_data_name: images
input_data_shape: 0,1,28,28
output_data_shape: 0,10
After the model is successfully deployed, handwritten numeral recognition can be carried out
summary
Huawei cloud modelArts and AI Gallery pave a very broad path for AI popularization, and people at all levels can walk on it. Competent AI developers can focus more on model and algorithm development without paying attention to the details of the underlying hardware; Ordinary users can use the automatic learning module for model development and deployment; For students without any AI prior knowledge, with AI Gallery, AI applications can be easily deployed in just a few steps.
From the perspective of the platform, I like this product very much. Advanced functions, easy to start, and tall capabilities are directly popularized through the platform, which may also be the direction of platform development in our work.