1, About XXL-JOB
1. Introduction to xxl-job
XXL-JOB is a distributed task scheduling platform developed by Xu Xueli's team. Its core design goal is to develop quickly, learn easily, lightweight and easy to expand. Its main function is to beautify and manage a large number of scheduled scheduling tasks in our system, and provide a visual management platform for these scheduling tasks (such as manual trigger, parameter transfer trigger, scheduled trigger, etc.). The scheduling platform solution is applicable to a variety of application scenarios, such as: in the field of e-commerce, timed scheduling tasks such as zero point issuing coupons and membership interests; As well as the demand for regular collection and transmission of data in the big data platform.
2. XXL-JOB Download
The XXL-JOB version used here is the latest [2.3.0 official version] code cloud address
2, XXL-JOB framework construction
1. Module introduction
When we open the project in the IDEA, we will see the following modules, which will be introduced one by one below.
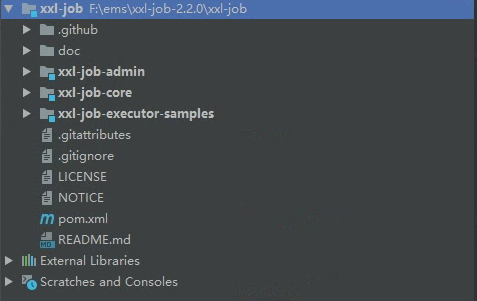
1. doc
This directory mainly stores the static resources of XXL job and db data structure and data
2. xxl-job-admin
This module is the source code of the XXL job scheduling task platform. After startup, you can enter the XXL job background management system interface for task configuration.
3. xxl-job-core
This module is the core dependency package of XXL job
4. xxl-job-executor-samples
Several small demo cases of XXL job executor (client) are stored under this module for us to imitate and refer to how to connect our system with XXL job scheduling platform.
2. Start the XXL job scheduling task platform
- First of all, we need the doc directory. The database table structure and table data under the db directory we just mentioned are imported into the database. Since the official XXL job uses the mysql database, it only supports the mysql database without modification (for other data sources, I will add it after I have time to see how to modify and debug)
- After importing the db file into the database, you need to modify the following configuration file
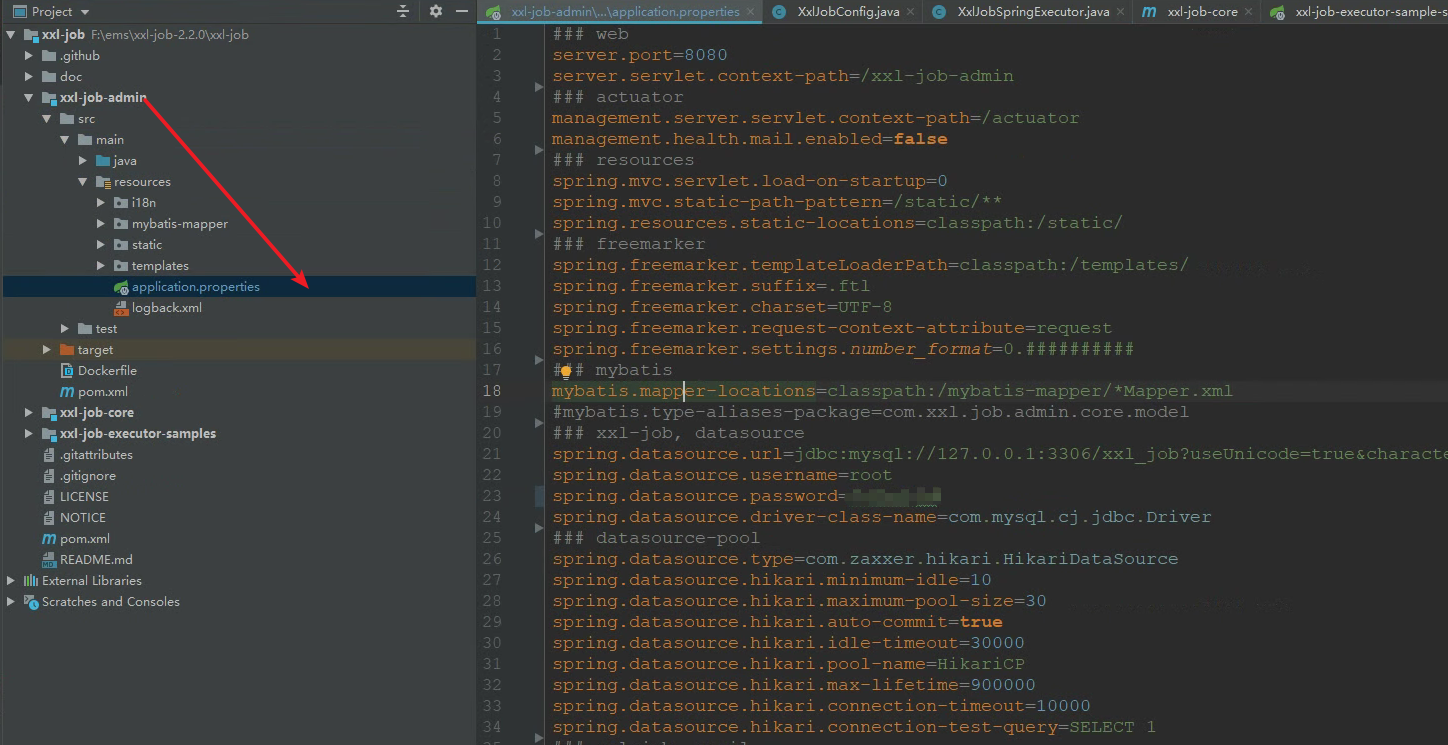
Modify database connection related parameters:

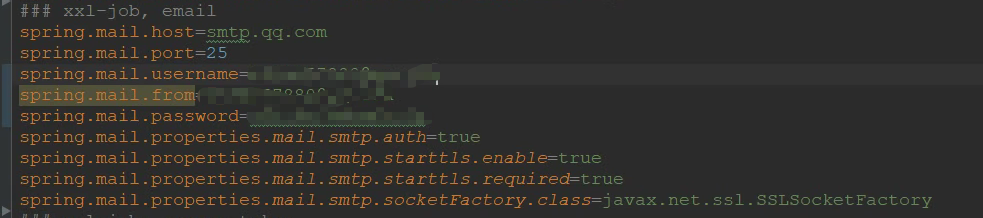
Configure the mailbox information of the alarm due to abnormal scheduling tasks (optional), and fill in the relevant information of your mailbox. If you are not clear, please refer to the elder brother's SpringBoot integrated mail service
3. After modifying the configuration, you can start the service. After the service is started, enter it in the browser http://127.0.0.1:8080/xxl -Job admin / tologin, initial account password: admin:123456
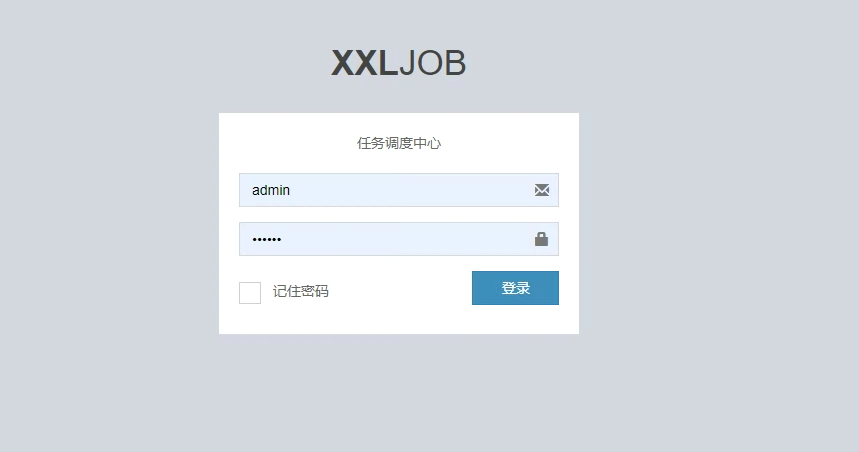
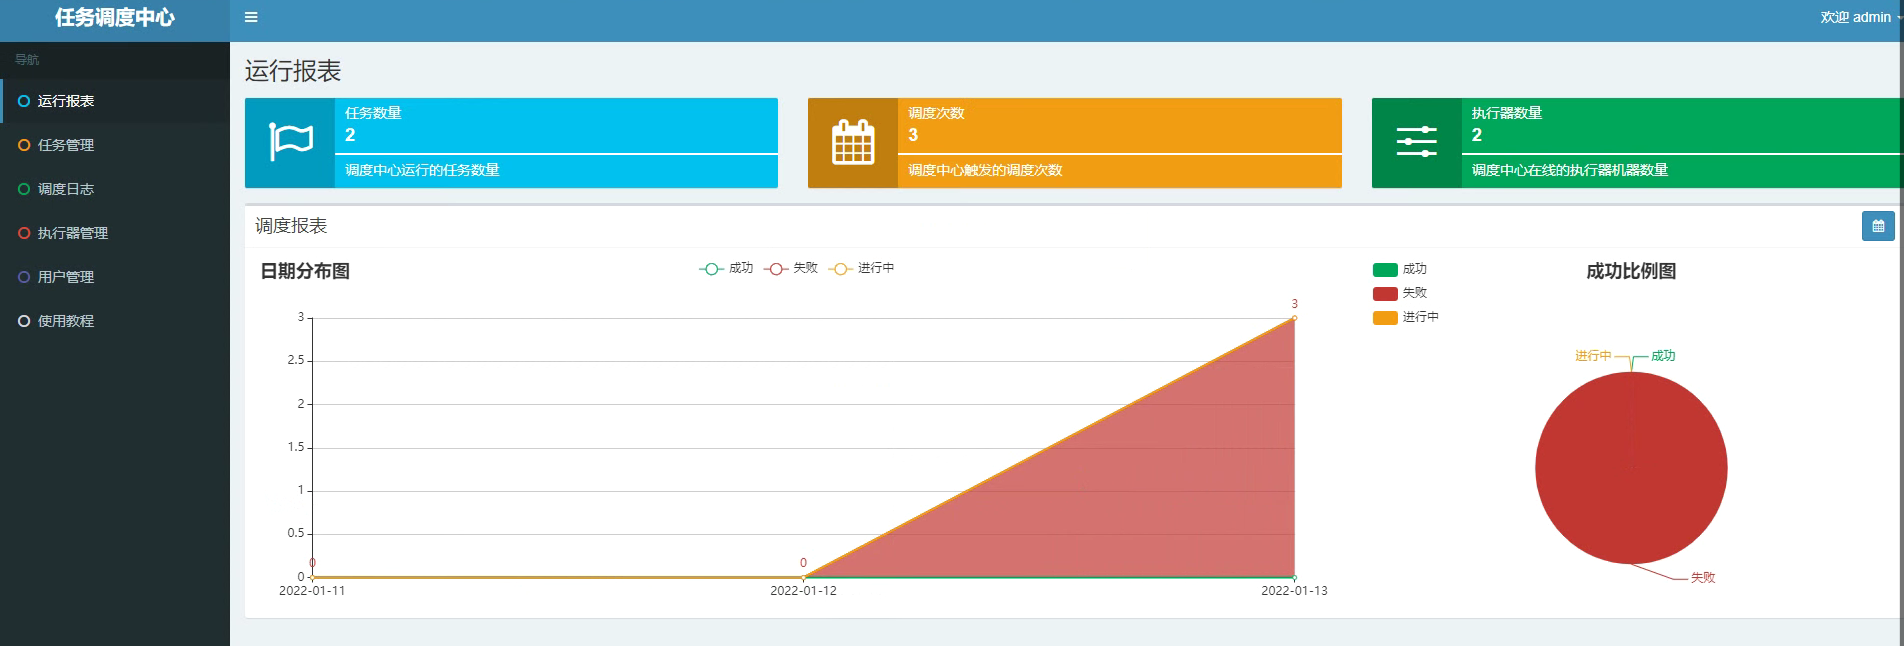
When we can see such an interface, it means that the construction of the XXL job scheduling platform has been successful, and then the construction of the actuator (which can be understood as the scheduling task in our system) has been completed.
3. XXL-JOB actuator construction
In fact, the execution principle of XXL job can be understood as that after we write a scheduled task in our own project, we hand over the Schedule annotation that triggered the scheduled task before to the XXL job scheduling platform for management, while within the XXL job scheduling platform, rpc remotely calls our configured actuator information and task Association to find the task in the corresponding actuator, To start and receive the results returned after the task runs;
Therefore, for the construction of the XXL job actuator, the first step is to introduce the corresponding XXL job core package;
<dependency>
            <groupId>com.xuxueli</groupId>
            <artifactId>xxl-job-core</artifactId>
            <version>2.3.0</version>
 </dependency>
After the package is imported, the required parameters are configured in the project configuration file
# xxl-job
xxl:
  job:
    admin:
      # Dispatching center deployment root address [optional]: if there are multiple addresses in the dispatching center cluster deployment, they are separated by commas. The actuator will use this address for "actuator heartbeat registration" and "task result callback"; If it is blank, automatic registration will be closed; For the XXL job scheduling platform we just built, IP:PROT
      addresses: http://IP:PORT/xxl-job-admin
    executor:
      # Actuator AppName [optional]: grouping basis for actuator heartbeat registration; If it is blank, automatic registration will be turned off. Although it is optional here, it is better to fill it in to facilitate the management of the actuator and enable the automatic registration function. The filled values are defined by yourself
      appname: jsxmall-admin
      # Actuator IP [optional]: it is blank by default, indicating that the IP is automatically obtained. When there are multiple network cards, the specified IP can be manually set. The IP will not bind the Host, but is only used for communication; The address information is used for "actuator registration" and "dispatching center requests and triggers tasks";
      ip:
      # Actuator registration [optional]: this configuration is preferred as the registration address. When it is empty, the embedded service "IP:PORT" is used as the registration address, so as to more flexibly support the dynamic IP and dynamic mapping port problems of container type actuators.
      address:
      # Actuator port number [optional]: automatically obtained if it is less than or equal to 0; The default port is 9999. When deploying multiple actuators on a single machine, pay attention to configuring different actuator ports;
      port: 0
      # Storage disk path of actuator operation log file [optional]: you need to have read-write permission on this path; If blank, the default path is used
      logpath: logs/jobhandler
      # Days to save the actuator log file [optional]: the expired log will be automatically cleaned up, and the limit value will take effect when it is greater than or equal to 3; Otherwise, if - 1, turn off the automatic cleaning function;
      logretentiondays: 30
    # Actuator communication TOKEN [optional]: enabled when not empty; (if the XXL job platform is configured, the configuration here is consistent with the platform.)
    accessToken:
After configuring the information, you need to register the executor with the XXL job platform
import com.xxl.job.core.executor.impl.XxlJobSpringExecutor;
import org.slf4j.Logger;
import org.slf4j.LoggerFactory;
import org.springframework.beans.factory.annotation.Value;
import org.springframework.context.annotation.Bean;
import org.springframework.context.annotation.Configuration;

/**
 * xxl-job Actuator configuration information
 *
 * @author: tuxusheng
 * @create-time 2021-12-29 11:44
 **/
@Configuration
public class XxlJobConfig {

    private Logger logger = LoggerFactory.getLogger(XxlJobConfig.class);

    @Value("${xxl.job.admin.addresses}")
    private String adminAddresses;

    @Value("${xxl.job.accessToken}")
    private String accessToken;

    @Value("${xxl.job.executor.appname}")
    private String appname;

    @Value("${xxl.job.executor.address}")
    private String address;

    @Value("${xxl.job.executor.ip}")
    private String ip;

    @Value("${xxl.job.executor.port}")
    private int port;

    @Value("${xxl.job.executor.logpath}")
    private String logPath;

    @Value("${xxl.job.executor.logretentiondays}")
    private int logRetentionDays;

    @Bean
    public XxlJobSpringExecutor xxlJobExecutor() {
        logger.info(">>>>>>>>>>> xxl-job config init.");
        XxlJobSpringExecutor xxlJobSpringExecutor = new XxlJobSpringExecutor();
        xxlJobSpringExecutor.setAdminAddresses(adminAddresses);
        xxlJobSpringExecutor.setAppname(appname);
        xxlJobSpringExecutor.setAddress(address);
        xxlJobSpringExecutor.setIp(ip);
        xxlJobSpringExecutor.setPort(port);
        xxlJobSpringExecutor.setAccessToken(accessToken);
        xxlJobSpringExecutor.setLogPath(logPath);
        xxlJobSpringExecutor.setLogRetentionDays(logRetentionDays);
        return xxlJobSpringExecutor;
    }

}
Next, write the scheduling task (business logic)
import com.xxl.job.core.biz.model.ReturnT;
import com.xxl.job.core.handler.annotation.XxlJob;
import lombok.extern.slf4j.Slf4j;
import org.springframework.stereotype.Component;

/**
 * Voice robot XXL Job timed task Bean mode. One method is one task. 1. In the Spring Bean instance, develop the Job method in the format of "public"
 * ReturnT<String> execute(String param)" 2,Add annotation "@ XxlJob(value =" custom jobhandler name ") for Job method,
 * init = "JobHandler Initialization method ", destroy=
 * "JobHandler Destroy method ")", and the annotation value corresponds to the value of JobHandler property of the new task created by the dispatching center. 3. Execution log: you need to pass "XxlJobLogger.log"
 * Print the execution log;
 *
 * @author: tuxusheng
 * @create-time 2021-12-29 12:17
 **/
@Component
@Slf4j
public class VoiceRobotHandler {

    /**
     * Timed outbound interface (note here that the incoming parameters only support String type). Note the value of this xxlJob annotation. Later, you need to register the task with the scheduling platform.
     * @param phone
     * @return Success, failure
     */
    @XxlJob("calloutInterfaceHandle")
    public ReturnT<String> calloutInterfaceHandle(String phone) {
        log.info("[xxl-job] Outbound call request scheduling task start, parameters={}", phone);
        // Business logic
        log.info("[xxl-job] Outbound call request scheduling task ends, parameter={}", phone);

       return ReturnT.SUCCESS;
    }

}
After we have completed the construction of the above actuator, start the application of the project where the actuator is located.
4. Configure the executor and scheduling task on the XXL job scheduling platform interface
4.1 actuator configuration
Log in to XXL job scheduling platform

AppName: fill in the value of the configured appName attribute in the executor configuration file we just configured
Name: the name of the configuration actuator to facilitate management on the platform
Sorting: default write 1
Registration method
Manual entry: fill in the IP:PROT of the project where the actuator is located
Automatic entry: XXL job will match the actuator registered on the platform according to the name configured by AppName, and automatically obtain its IP:PROT
4.2 task configuration

Actuator: select the actuator we just configured on the platform
cron: represents the scheduling cycle
Running mode: since our executor runs in Bean mode, Bean mode is selected here
JobHandle: is the filled value in the @ XxlJob (value) annotation in our actuator project
You can configure other information by yourself. Then click save. Here, our scheduling task is configured successfully.
4.3 operation scheduling task
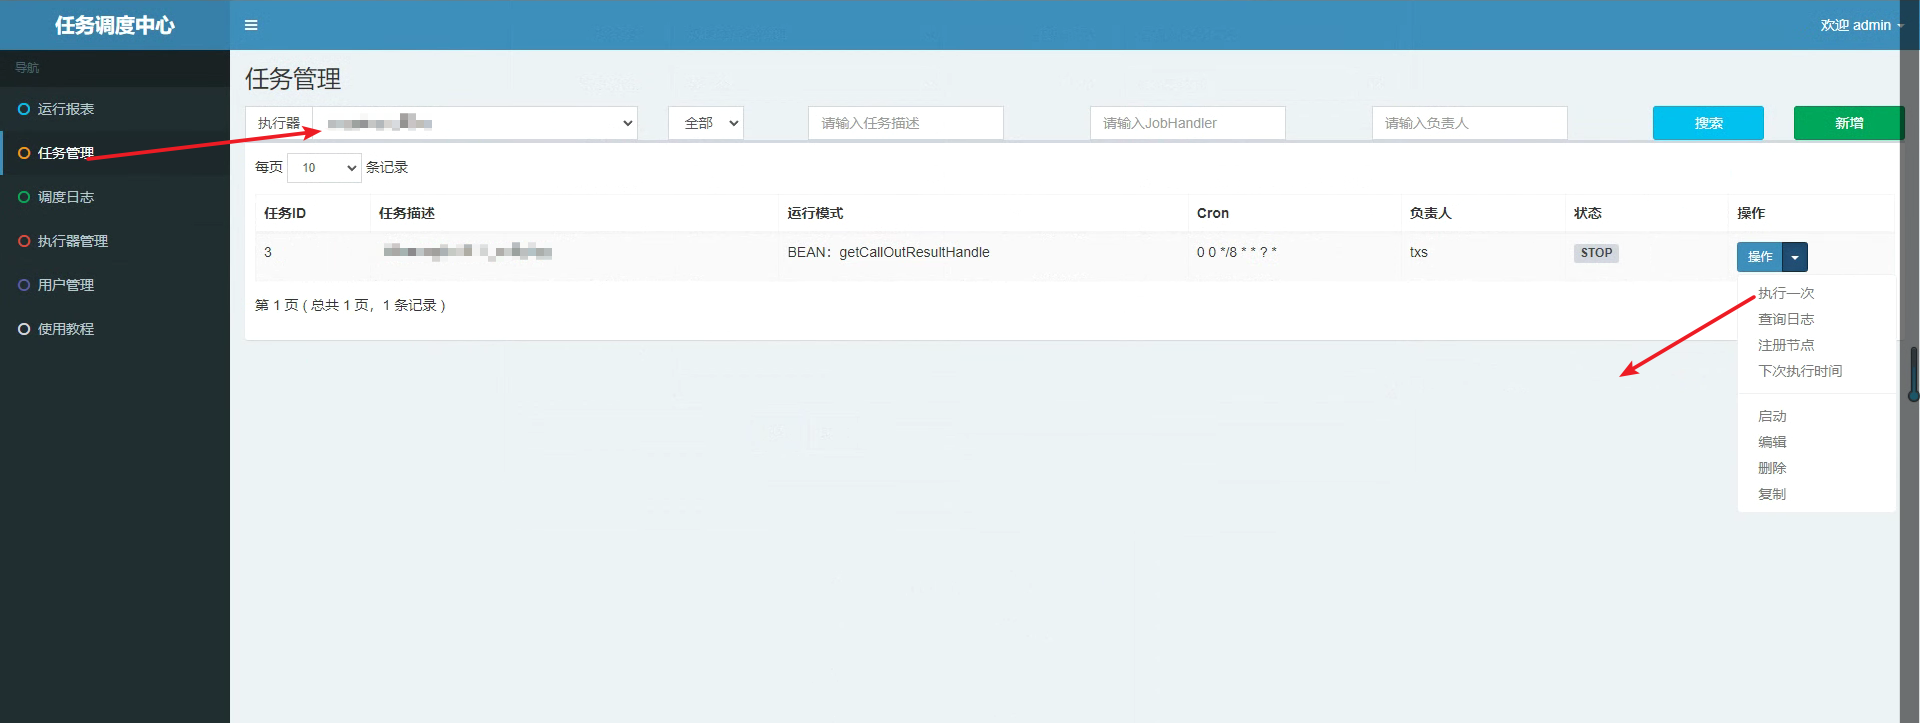
It should be noted here that we need to select the corresponding actuator (very important), because the system has given a demo actuator. If it is selected incorrectly, the task scheduling will not succeed. After selecting the actuator, we can select the operation behind the task to execute the task.
III Common problem solving
1. Version problem
It should be noted that there are many versions of XXL job in the process of development iteration, and the version of the server should be consistent with the version of the XXL job core package in the executor as far as possible (the difference between packages of different versions will be very large), which will lead to various rpc remote call problems in the scheduling and execution of tasks. If this problem occurs, it is caused by the wrong version.
2. Table structure of XXL job scheduling platform
When upgrading the scheduling platform, we need to consider whether the table structure in the upgraded version is the same as the existing table structure. If it is different, we need to upgrade together with the table structure and migrate the old data, otherwise the task scheduling will be abnormal.
IV summary
This is my first comprehensive technical flow article (I tried to make my own typesetting for the first time). In fact, I am not particularly familiar with XXL job, but the requirements written in this project just need the business logic of regular task processing. Therefore, at the suggestion of the development team leader, I investigated, understood and built this framework to introduce the project, I also encountered a lot of problems on the way. The version problem has bothered me the most for a long time, so I tried to form this record into a document, hoping to help students in need. If there are problems (what I wrote and what I didn't write), I also hope everyone can point out or put forward, learn and make progress together. Later, I may further study the XXL job framework and understand its implementation principle. If I have time, I will organize it into documents and share it. Questions are welcome!