Welcome to my GitHub
https://github.com/zq2599/blog_demos
Content: classification and summary of all original articles and supporting source code, involving Java, Docker, Kubernetes, DevOPS, etc;
Overview of this article
- This is a note recording the whole process of compiling, installing and using OpenCV4 on the pure Ubuntu 16 desktop computer. In general, it is divided into the following parts:
- Install the necessary software, such as cmake
- Download opencv source code, including opencv and opencv_contrib, and decompress and position it
- Run cmake GUI to configure compilation items on the graphical page
- Compilation and installation
- Configuration environment
- verification
environment
- The environmental information is as follows:
- Operating system: Ubuntu 16 04 desktop version
- OpenCV: 4.1.1
- Note: This article uses a non root account throughout the operation
- Cut the crap and start directly in the newly installed Ubuntu 16 desktop version
Source change
- In order to quickly install dependent software, first change the source to domestic. I use Alibaba cloud here
- Backup source configuration first:
sudo cp /etc/apt/sources.list /etc/apt/sources.list.bk
-Modify / etc / apt / sources List is the following:
deb http://mirrors.aliyun.com/ubuntu/ xenial main restricted universe multiverse

deb http://mirrors.aliyun.com/ubuntu/ xenial-security main restricted universe multiverse

deb http://mirrors.aliyun.com/ubuntu/ xenial-updates main restricted universe multiverse

deb http://mirrors.aliyun.com/ubuntu/ xenial-proposed main restricted universe multiverse

deb http://mirrors.aliyun.com/ubuntu/ xenial-backports main restricted universe multiverse

deb-src http://mirrors.aliyun.com/ubuntu/ xenial main restricted universe multiverse

deb-src http://mirrors.aliyun.com/ubuntu/ xenial-security main restricted universe multiverse

deb-src http://mirrors.aliyun.com/ubuntu/ xenial-updates main restricted universe multiverse

deb-src http://mirrors.aliyun.com/ubuntu/ xenial-proposed main restricted universe multiverse

deb-src http://mirrors.aliyun.com/ubuntu/ xenial-backports main restricted universe multiverse
- If alicloud's source update is too slow, you can try this:
deb http://mirrors.tuna.tsinghua.edu.cn/ubuntu/ xenial main restricted
deb http://mirrors.tuna.tsinghua.edu.cn/ubuntu/ xenial-updates main restricted
deb http://mirrors.tuna.tsinghua.edu.cn/ubuntu/ xenial universe
deb http://mirrors.tuna.tsinghua.edu.cn/ubuntu/ xenial-updates universe
deb http://mirrors.tuna.tsinghua.edu.cn/ubuntu/ xenial multiverse
deb http://mirrors.tuna.tsinghua.edu.cn/ubuntu/ xenial-updates multiverse
deb http://mirrors.tuna.tsinghua.edu.cn/ubuntu/ xenial-backports main restricted universe multiverse
deb http://mirrors.tuna.tsinghua.edu.cn/ubuntu/ xenial-security main restricted
deb http://mirrors.tuna.tsinghua.edu.cn/ubuntu/ xenial-security universe
deb http://mirrors.tuna.tsinghua.edu.cn/ubuntu/ xenial-security multiverse
- to update:
sudo apt-get update
Install application
- Execute the following command to install all applications. If individual prompts fail, you can try several more times:
sudo apt-get install -y unzip build-essential curl cmake cmake-gui git libgtk2.0-dev pkg-config libavcodec-dev libavformat-dev libswscale-dev python-dev python-numpy libtbb2 libtbb-dev libjpeg-dev libpng-dev libtiff-dev libjasper-dev libdc1394-22-dev
Download source code
- Execute the following command to download all the source code, decompress it, and place it in an appropriate location:
curl -fL -o opencv-4.1.1.zip https://codeload.github.com/opencv/opencv/zip/4.1.1; \
unzip opencv-4.1.1.zip; \
rm -rf opencv-4.1.1.zip; \
curl -fL -o opencv_contrib-4.1.1.zip https://codeload.github.com/opencv/opencv_contrib/zip/refs/tags/4.1.1; \
unzip opencv_contrib-4.1.1.zip; \
rm -rf opencv_contrib-4.1.1.zip; \
mv opencv_contrib-4.1.1 opencv_contrib; \
mv opencv_contrib opencv-4.1.1/; \
mkdir opencv-4.1.1/build
Configuring with cmake GUI
-
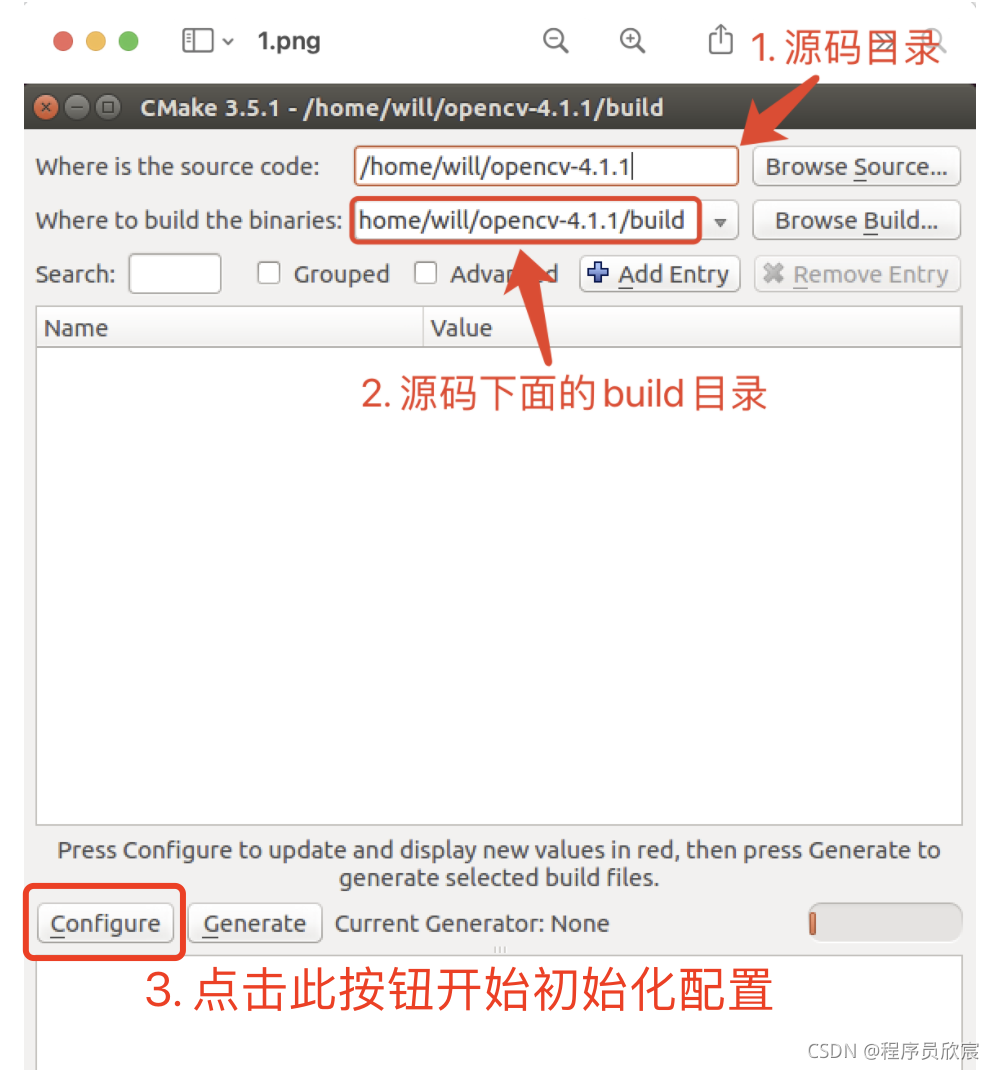
Execute cmake GUI in opencv-4.1.1 directory You can start the cmake GUI page and start the graphical configuration
-
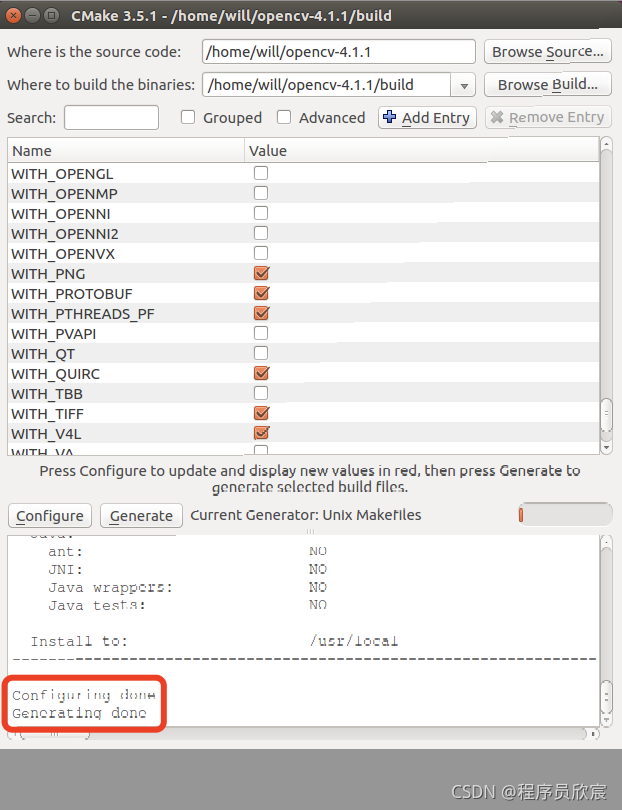
The absolute path of the opencv-4.1.1 folder here is / home/will/opencv-4.1.1, so in the following figure, red box 1 is the absolute path of the source code, and red box 2 is the build subdirectory in the source code folder. After configuration, click red box 3 to initialize the configuration:
-
Click the button in red box 3 in the figure above, select Unix Makefiles in the pop-up page, and then start configuration:
-
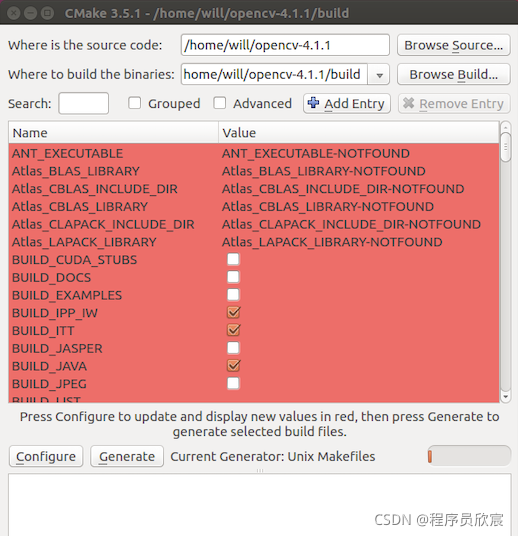
At this time, configuration items that can be edited appear. Next, start configuration:
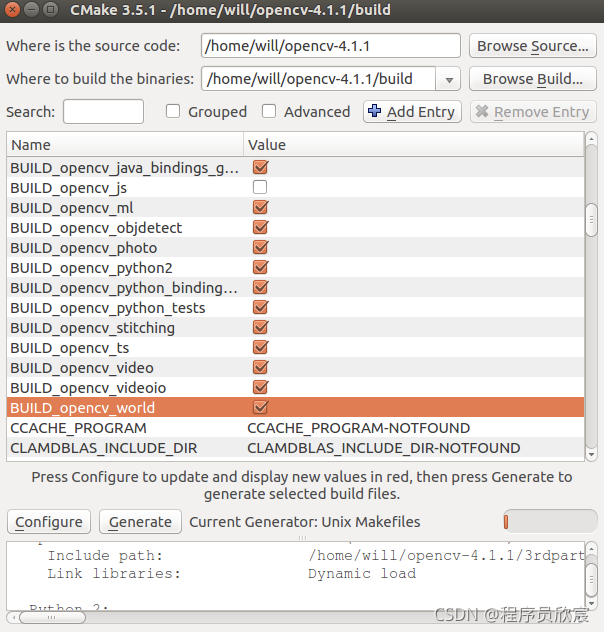
- First, select BUILD_opencv_world:
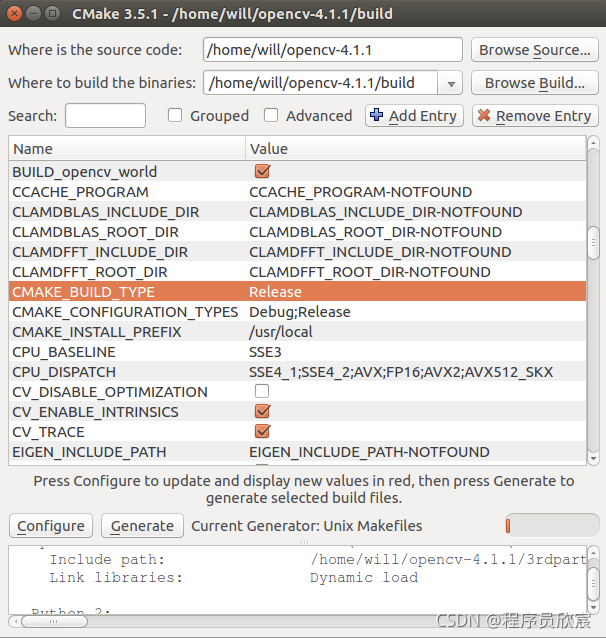
- Second, CMAKE_BUILD_TYPE is set to Release
- Third, OPENCV_EXTRA_MODULES_PATH is a file path. Select / home / will / opencv-4.1.1/opencv here_ contrib/modules
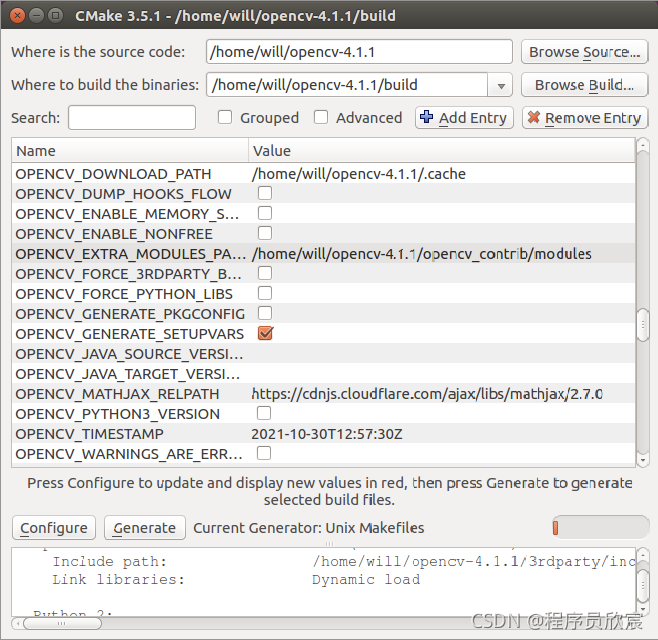
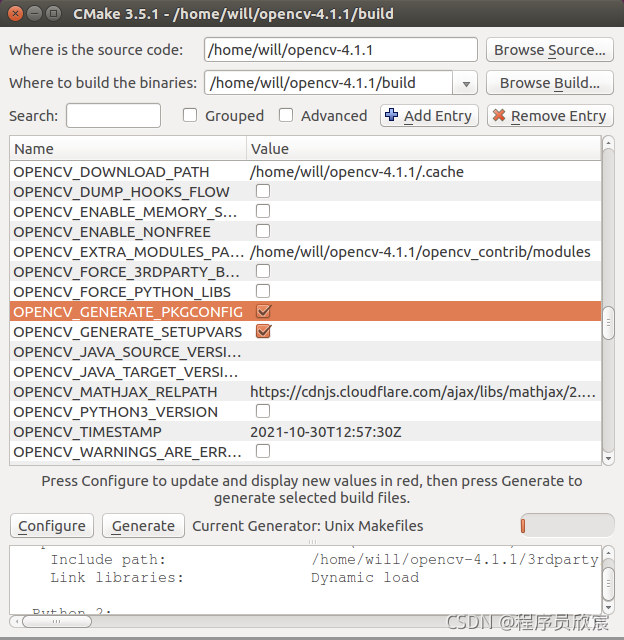
- Fourth, select OPENCV_GENERATE_PKGCONFIG
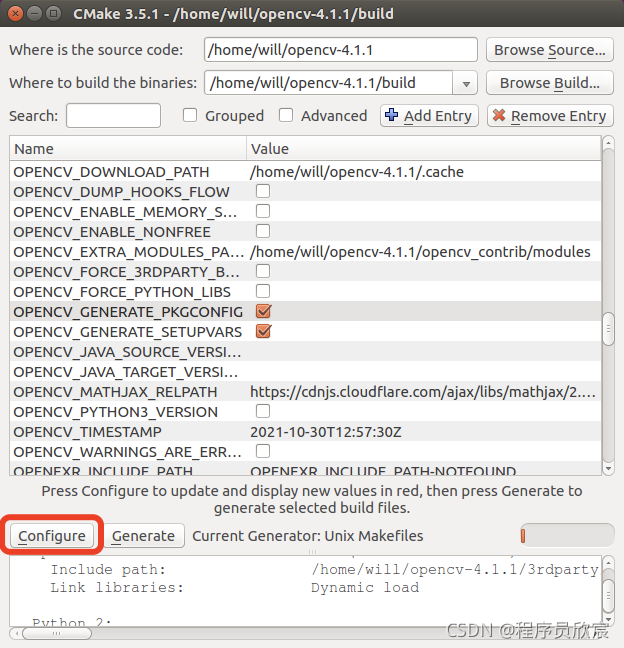
- Click the Configure button in the red box below again to start configuration:
- After the configuration is completed, click the Generate button in the red box below to start generating configuration items:
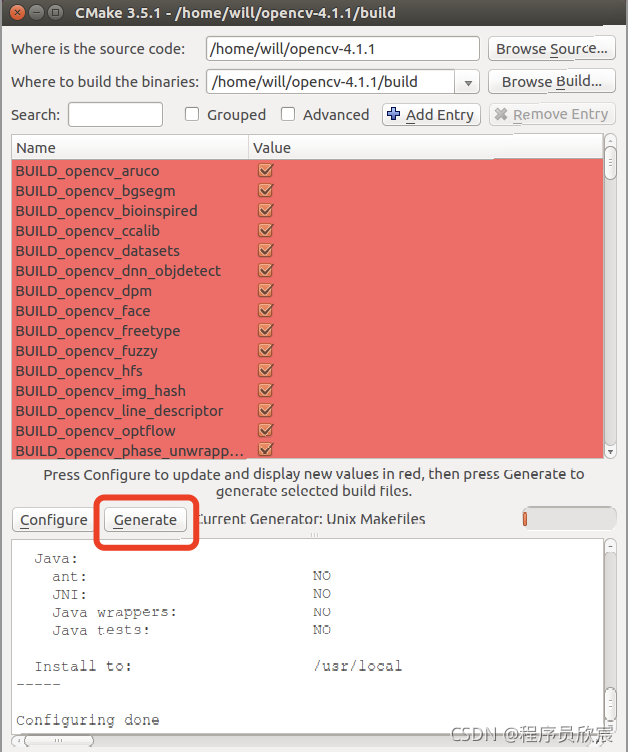
- Wait until the prompt in the red box in the figure below shows that the configuration is completed and the configuration item has been generated:
- So far, all configurations have been completed. Please close cmake GUI and start compiling
compile
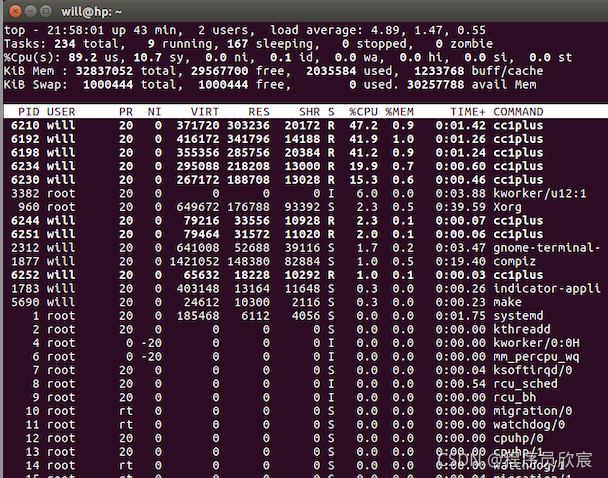
- Enter the directory opencv-4.1.1/build and execute the following command to start compilation:
make -j8
- When I saw the CPU, I went up:
-
Execute sudo make install to install into the current system (Please add sudo)
-
At this point, the installation is complete and the system configuration begins
system configuration
- Execute the following command to edit the file (if not, create it):
sudo vi /etc/ld.so.conf.d/opencv.conf
- In the open OpenCV Add the following content at the end of conf file:
/usr/local/lib
- Execute configuration:
sudo ldconfig
- Execute the following command to edit the file (if not, create it):
sudo vi /etc/bash.bashrc
- In the open bash Add the following content at the end of bashrc file:
PKG_CONFIG_PATH=$PKG_CONFIG_PATH:/usr/local/lib/pkgconfig
export PKG_CONFIG_PATH
- Now that the configuration is complete, exit the console, reopen one, and execute the command PKG config -- modversion opencv4. Note that opencv4 can see the version number of OpenCV:
will@hp:~$ pkg-config --modversion opencv4
4.1.1
verification
-
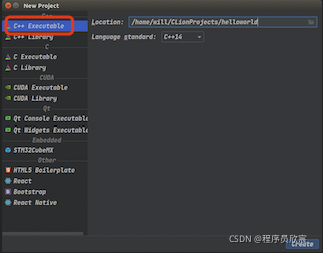
Next, write a helloworld project to verify that opencv is available
-
I use CLion to create C + + projects:
- CMakeLists.txt is as follows, which depends on OpenCV resources:
cmake_minimum_required(VERSION 3.20)
project(helloworld)

set(CMAKE_CXX_STANDARD 14)

find_package(OpenCV)
include_directories(${OpenCV_INCLUDE_DIRS})

add_executable(helloworld main.cpp)
target_link_libraries(helloworld ${OpenCV_LIBS})
- main.cpp is as follows. Its function is to read the local picture and create a window to display the picture:
#include <iostream>
#include <opencv2/opencv.hpp>

using namespace std;
using namespace cv;

int main() {
    Mat mat = imread("/home/will/temp/202110/30/111.png");

    if(!mat.data) {
        cout<<"Image not exists!";
        return -1;
    }

    namedWindow("src", WINDOW_AUTOSIZE);
    imshow("[src]", mat);

    waitKey(0);
    return 0;
}
- Compile and run, as shown in the following figure. The local picture is displayed successfully:
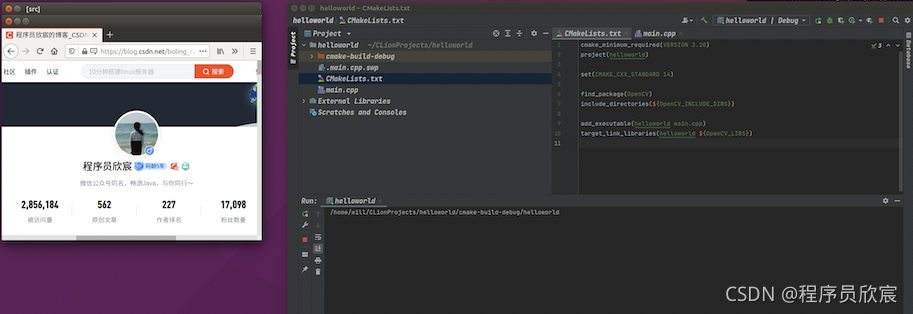
- So far, the actual combat of compiling, installing, setting and verifying OpenCV4 in Ubuntu 16 desktop version has been completed;
You're not alone. Xinchen's original accompanies you all the way
- Java series
- Spring collection
- Docker series
- kubernetes series
- Database + middleware series
- DevOps series
Welcome to the official account: programmer Xin Chen
Wechat search "programmer Xinchen", I'm Xinchen, looking forward to traveling with you in the Java World
https://github.com/zq2599/blog_demos