to configure
1. Add WebSecurityConfigurerAdapter configuration
A password parser is added, a user is added in memory, and other configurations will be added later.
@Configuration
@EnableWebSecurity(debug = true)
@EnableGlobalMethodSecurity(prePostEnabled = true, securedEnabled = true, jsr250Enabled = true)
public class MyWebSecurityConfiguration extends WebSecurityConfigurerAdapter {
    @Override
    public void configure(WebSecurity web) throws Exception {
        super.configure(web);
    }

    @Override
    protected void configure(HttpSecurity http) throws Exception {
        super.configure(http);
    }

    @Override
    protected void configure(AuthenticationManagerBuilder auth) throws Exception {
        auth.inMemoryAuthentication()
                // Create a user in memory and encrypt the password
                .withUser("user").password(passwordEncoder().encode("123456")).roles("USER");
    }

    // Cipher parser
    @Bean
    public BCryptPasswordEncoder passwordEncoder() {
        return new BCryptPasswordEncoder();
    }

}
2. Add the AuthorizationServerConfigurerAdapter configuration
AuthorizationServerConfigurerAdapter is the configuration class of the authorization server. Here, an Oauth2 client is configured in memory, and the database storage will be integrated later.
@Configuration
@EnableAuthorizationServer
public class MyAuthorizationServerConfiguration extends AuthorizationServerConfigurerAdapter {


    @Autowired
    private PasswordEncoder passwordEncoder;

    @Override
    public void configure(ClientDetailsServiceConfigurer clients) throws Exception {
        // Configure client
        clients
                // Use memory settings
                .inMemory()
                // client_id
                .withClient("client")
                // client_secret
                .secret(passwordEncoder.encode("secret"))
                // Authorization type: authorization code, refresh token
                .authorizedGrantTypes("authorization_code","refresh_token")
                // Scope of authorization
                .scopes("app")
                // Register callback address
                .redirectUris("http://localhost:20000/code");
    }
}
Default endpoint URL
The default endpoint URL (access interface) is provided, which we need to use when performing Oauth2 authentication.
- /oauth/authorize: authorize the endpoint.
- /oauth/token: token endpoint.
- /oauth/confirm_access: the user confirms the authorization submission endpoint.
- /oauth/error: authorization service error information endpoint.
- /oauth/check_token: token resolution endpoint for resource service access.
- /oauth/token_key: the endpoint that provides the public key, if you use the JWT token.
Four authorization modes
Authorization code mode
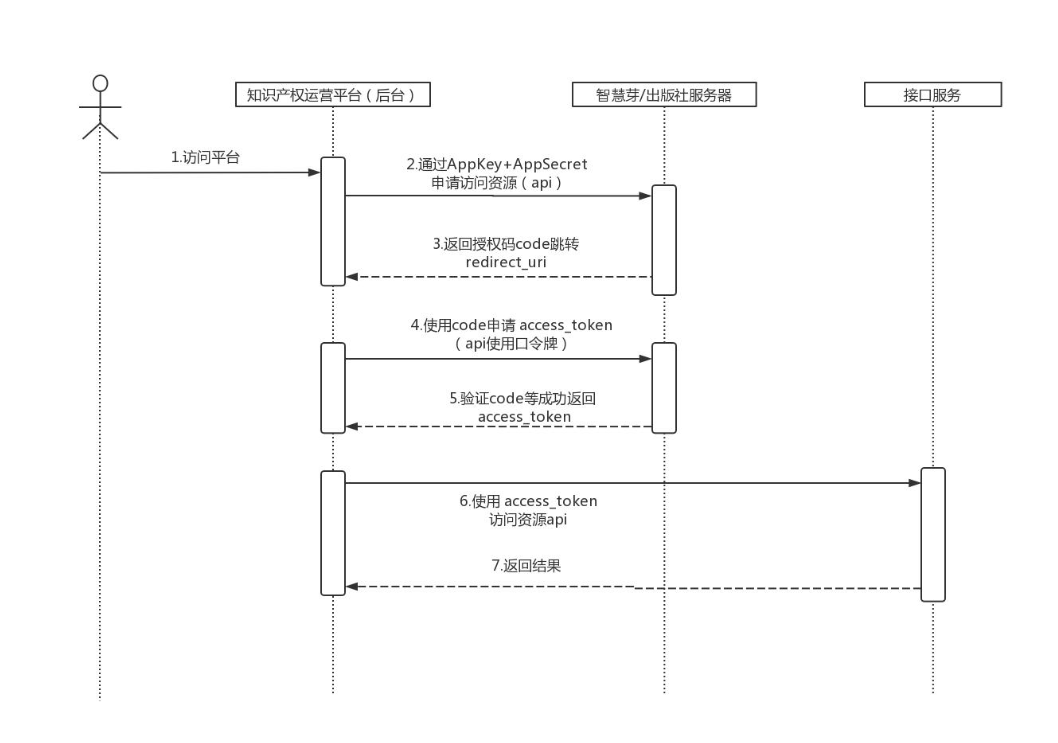
First, review the authorization code mode flow. As can be seen from the figure, the following steps are required to obtain a token:
- The Oauth Client obtains the code through the client's account and password
- Get token using code
- Carrying tokens to access resources

1. Obtain authorization code
Access the endpoint that gets the authorization code
http://localhost:20000/oauth/authorize?client_id=client&client_secret=secret&response_type=code
Parameter Description:
| parameter | explain | Required |
|---|---|---|
| client_id | Id used to identify the customer | YES |
| client_secret | (requires a trusted client) client password | YES |
| response_type | The authorization code mode is fixed to code | YES |
| redirect_uri | Jump to uri. When the authorization code application is successful, it will jump to this address with the code parameter (authorization code) in the back | NO |
| scope | It is used to limit the access range of the client. If it is empty (default), the client has all the access ranges | NO |
| state | Random values can be taken to prevent CORS attacks | NO |
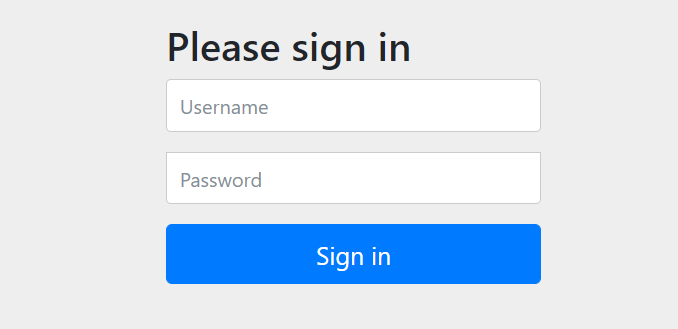
Then it will be transferred to the login interface and enter the user name and password

2. Obtain authorization code
After successful login, jump to the authorization page, whether to allow this client to access your resources, select Approve, and click agree to authorize.

After that, the browser will redirect to the configured callback address and carry the authorization code, so the callback address should be the address of the added client server itself.

3. Get token
A Post request is required to access the token endpoint to obtain a token. postman is used here.
Post request access endpoint:
http://localhost:20000/oauth/token
First, the ID and password of the client need to be passed in. The httpBasic authentication method is adopted, and it is spliced into the format of "user name: password", with a colon in the middle, and then base64 is encoded into xxx, and then Authorization:Basic xxx is appended to the request header. Here, you can use postman to select Basic Auth, and then enter the client ID and password.

Add parameters:

Parameter Description:
| parameter | explain |
|---|---|
| code | The authorization code is the authorization code just obtained. Note: the authorization code is invalid only once and needs to be applied again |
| grant_type | Authorization type, fill in authorization_code, indicating authorization code mode |
| redirect_uri | The jump url when applying for authorization code must be the same as the redirect used when applying for authorization code_ Uri consistent. |
Access, get the access and refresh token.
{
    "access_token": "0ce36dcf-79c0-490e-873b-d3e295028b73",
    "token_type": "bearer",
    "refresh_token": "7b67b4b3-87a9-4b40-970d-44598f9cb355",
    "expires_in": 42723,
    "scope": "app"
}
When you click again, an error will be reported, indicating that the code can only be used once.

Password mode
The password mode directly uses the user name and password to obtain the token, which is generally used for home applications.
1. Add authentication manager
As mentioned earlier, spring security uses the authentication manager for login authentication. In Oauth2, you need to configure an endpoint authentication manager to use the user name and password for authentication.
Inject an authentication manager into MyWebSecurityConfiguration:
    // Configure authentication manager
    @Override
    @Bean
    public AuthenticationManager authenticationManagerBean() throws Exception {
        return super.authenticationManagerBean();
    }
In the myauthorization server configuration configuration configuration authentication manager, add Oauth2 client password mode support.
@Configuration
@EnableAuthorizationServer
public class MyAuthorizationServerConfiguration extends AuthorizationServerConfigurerAdapter {


    @Autowired
    private PasswordEncoder passwordEncoder;
    @Autowired
     private AuthenticationManager authenticationManager;

    @Override
    public void configure(ClientDetailsServiceConfigurer clients) throws Exception {
        // Configure client
        clients
                // Use memory settings
                .inMemory()
                // client_id
                .withClient("client")
                // client_secret
                .secret(passwordEncoder.encode("secret"))
                // Authorization type: authorization code, refresh token, password, client
                .authorizedGrantTypes("authorization_code","refresh_token","password","client_credentials")
                // Scope of authorization
                .scopes("app")
                // Register callback address
                .redirectUris("http://localhost:20000/code");
    }
    // Endpoint Configuration
    @Override
    public void configure(AuthorizationServerEndpointsConfigurer endpoints) throws Exception {
        // Configure the request mode allowed by the endpoint
        endpoints.allowedTokenEndpointRequestMethods(HttpMethod.GET, HttpMethod.POST);
        // Configure authentication manager
        endpoints.authenticationManager(authenticationManager);
    }
}
2. Get token
Post request access request endpoint:
http://localhost:20000/oauth/token
Add parameters:

Parameter Description:
| parameter | explain |
|---|---|
| grant_type | Authorization code type, fixed as password |
| username | User's account |
| password | User's password |
Like the authorization code mode, add the authentication message header:

Get the token, click it many times and find that the token we got is the same, but expires_in is changing.

Client mode
In client mode, tokens can be returned directly through the interface.
Access endpoint, grant_type is client_credentials:
http://localhost:20000/oauth/token?grant_type=client_credentials
Add Httpbasic authentication to the message header:

Access return token:

Simplified mode
Implicit mode is also translated into implicit mode or compact mode. Simplification is aimed at simplifying the authorization code mode, and obtaining a token without an authorization code.
The simplified mode can be through the client name and a redirect_uri to access the authentication server. After authentication, the authentication server will directly return a token, which will be returned in redirect_ Use # connections behind URIs.
Client add simplified mode support:
// Authorization type: authorization code, refresh token, password, client, simplified mode
.authorizedGrantTypes("authorization_code","refresh_token","password","client_credentials","implicit")
Access endpoint, mainly response_type is token
http://localhost:20000/oauth/authorize?client_id=client&client_secret=secret&response_type=token
Then log in and authorize, which is consistent with the authorization code mode.

After clicking authorization, the token and expiration time are returned directly through the callback address.
