1, Introduction to Saltstack
1. Introduction
- saltstack is a configuration management system that can maintain remote nodes in predefined states.
- saltstack is a distributed remote execution system, which is used to execute commands and query data on remote nodes.
- saltstack is a powerful tool for operation and maintenance personnel to improve work efficiency and standardize business configuration and operation.
- Salt's core functions
- Make the command sent to the remote system parallel rather than serial
- Protocol using secure encryption
- Use the smallest and fastest network load
- Provide simple programming interface
- Salt also introduces a more detailed domain control system for remote execution, which makes the system a target not only through the host name, but also through the system attributes.
2.Saltstack communication mechanism
- SaltStack adopts the C/S mode, and the ZeroMQ message queue is used between minion and master
Column communication, listening to port 4505 by default. - The second network service run by the Salt Master is the ZeroMQ REP system, which listens by default
4506 port.
2, Installation
1. Server server1
[root@server1 ~]# vim /etc/yum.repos.d/westos.repo 	#Configure network warehouse
[root@server1 ~]# cat /etc/yum.repos.d/westos.repo
[wan]
name="wan"
baseurl=http://172.25.15.250/rhel7
gpgcheck=0

[salt]
name="salt"
baseurl=ftp://172.25.15.250/pub/docs/saltstack/rhel7/3000/
gpgcheck=0
[root@server1 ~]# yum repolist 	#Scan warehouse package

[root@server1 ~]# yum list salt-*
Loaded plugins: product-id, search-disabled-repos, subscription-manager
This system is not registered with an entitlement server. You can use subscription-manager to register.
Available Packages
salt.noarch                              3000.3-1.el7                       salt
salt-api.noarch                          3000.3-1.el7                       salt
salt-master.noarch                       3000.3-1.el7                       salt
salt-minion.noarch                       3000.3-1.el7                       salt
salt-ssh.noarch                          3000.3-1.el7                       salt
salt-syndic.noarch                       3000.3-1.el7                       salt
[root@server1 ~]# yum install -y salt-master.noarch
[root@server1 ~]# scp /etc/yum.repos.d/westos.repo server2:/etc/yum.repos.d/
[root@server1 ~]# scp /etc/yum.repos.d/westos.repo server3:/etc/yum.repos.d/
[root@server1 ~]# systemctl enable --now salt-master.service
Created symlink from /etc/systemd/system/multi-user.target.wants/salt-master.service to /usr/lib/systemd/system/salt-master.service.
(1) Configure network warehouse
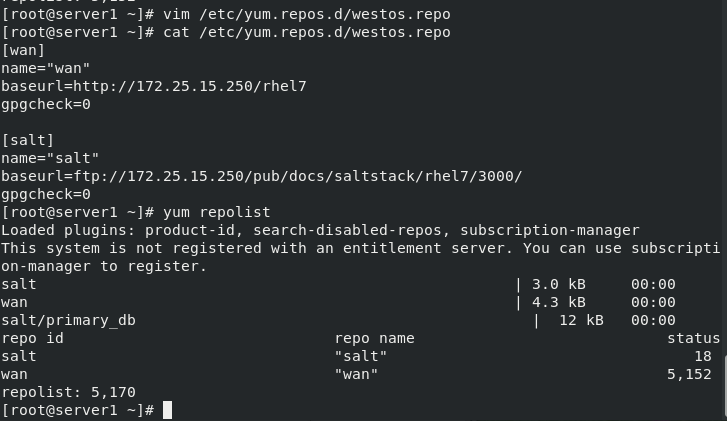
(2) Install saltstack master

(3) Pass the warehouse configuration to the client server2 and server3 to be configured

(4) Start the master server

2. Client server2 and server3
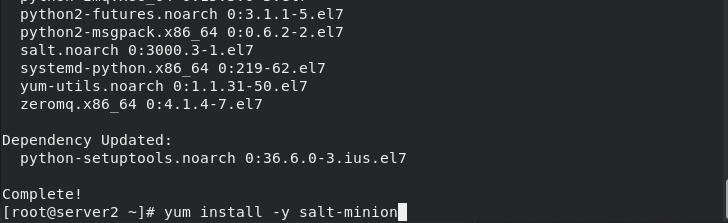
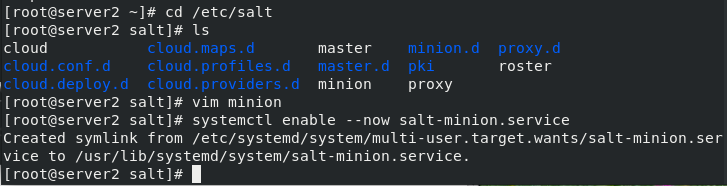
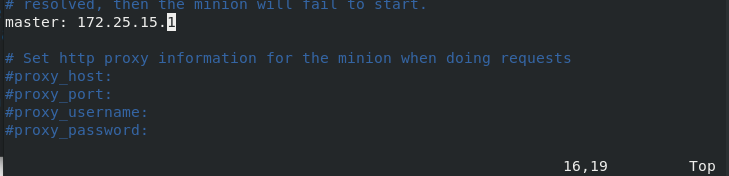
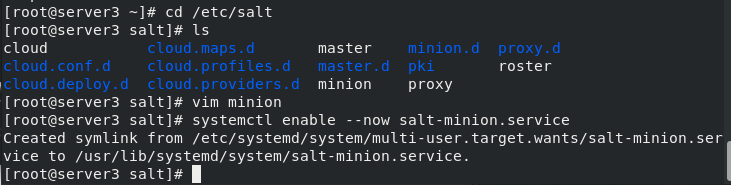
[root@server2 ~]# yum install -y salt-minion
[root@server2 ~]# cd /etc/salt
[root@server2 salt]# ls
cloud           cloud.maps.d       master    minion.d  proxy.d
cloud.conf.d    cloud.profiles.d   master.d  pki       roster
cloud.deploy.d  cloud.providers.d  minion    proxy
[root@server2 salt]# vim minion
16 master: 172.25.15.1

[root@server2 salt]# systemctl enable --now salt-minion.service
Created symlink from /etc/systemd/system/multi-user.target.wants/salt-minion.service to /usr/lib/systemd/system/salt-minion.service.
[root@server2 salt]#

[root@server3 ~]# yum install -y salt-minion
[root@server3 ~]# cd /etc/salt
[root@server3 salt]# ls
cloud           cloud.maps.d       master    minion.d  proxy.d
cloud.conf.d    cloud.profiles.d   master.d  pki       roster
cloud.deploy.d  cloud.providers.d  minion    proxy
[root@server3 salt]# vim minion
16 master: 172.25.15.1

[root@server3 salt]# systemctl enable --now salt-minion.service
Created symlink from /etc/systemd/system/multi-user.target.wants/salt-minion.service to /usr/lib/systemd/system/salt-minion.service.
[root@server3 salt]#
(1) Install the saltstack minion server2 and server3 (similarly)
(2) Configure client
3. Connection between saltstack server (master) and client (minion)
server1 Open service
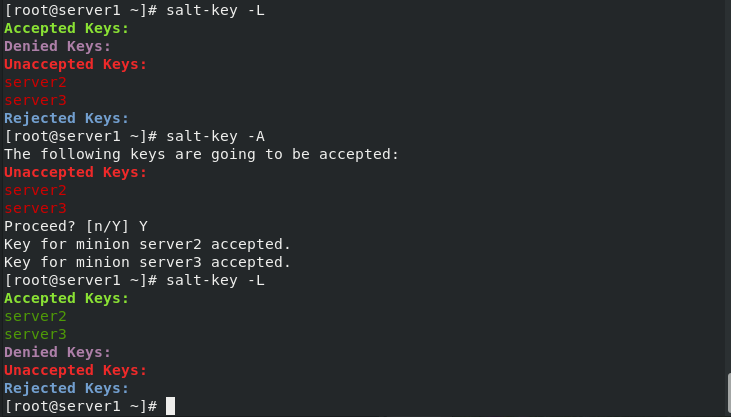
[root@server1 ~]# salt-key -L #List clients for saltstack
Accepted Keys:
Denied Keys:
Unaccepted Keys:
server2
server3
Rejected Keys:
[root@server1 ~]# salt-key -A #Connect all unconnected clients
The following keys are going to be accepted:
Unaccepted Keys:
server2
server3
Proceed? [n/Y] Y
Key for minion server2 accepted.
Key for minion server3 accepted.
[root@server1 ~]# salt-key -L
Accepted Keys:
server2
server3
Denied Keys:
Unaccepted Keys:
Rejected Keys:
[root@server1 ~]# salt '*' test.ping #View test connection succeeded
server2:
True
server3:
True
[root@server1 ~]#
[root@server1 ~]# lsof -i :4505 #4505 port
COMMAND PID USER FD TYPE DEVICE SIZE/OFF NODE NAME
salt-mast 23577 root 15u IPv4 56595 0t0 TCP *:4505 (LISTEN)
salt-mast 23577 root 17u IPv4 59059 0t0 TCP server1:4505->server2:34542 (ESTABLISHED)
salt-mast 23577 root 18u IPv4 59060 0t0 TCP server1:4505->server3:36104 (ESTABLISHED)
[root@server1 ~]# lsof -i :4506
COMMAND PID USER FD TYPE DEVICE SIZE/OFF NODE NAME
salt-mast 23583 root 23u IPv4 55871 0t0 TCP *:4506 (LISTEN)
[root@server1 ~]#
(1) View test connection succeeded

(2) Port status
- 4505 send to the client (master)
- 4506 feedback to minion

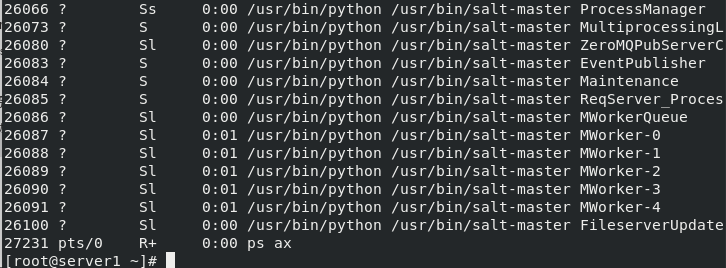
[root@server1 ~]# yum install -y python-setproctitle.x86_64
[root@server1 ~]# systemctl restart salt-master.service
[root@server1 ~]# ps ax


(3) View process role
- minion_id: after minion is started, a host name file will be generated. After the host name is changed, the file will be deleted. Each time the minion is started, the original generated file id will be used to connect to the master. If the file is not deleted, the file will be read. After the host name is changed, it will not take effect. After deletion and restart, a new file will be automatically generated with the current host name.
3, saltstack remote execution
1. Imperative
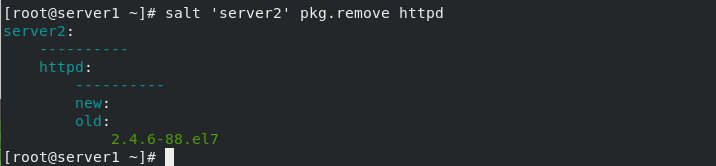
salt The command consists of three main parts: salt'<target>'<funcation>[arguments]
target:  Specify which minion, The default rule is to use glob matching minion id.
# salt '*' test.ping
Targets Regular expressions can also be used:
# salt -E 'server[1-3]' test.ping
Targets You can also specify a list:
# salt -L 'server2,server3' test.ping

funcation yes module Functions provided,Salt Built in a large number of effective functions.
# salt '*' cmd.run 'uname -a'

arguments Parameters are defined by spaces.
# salt 'server2' sys.doc pkg			#View pkg module documentation
# salt 'server2' sys.doc pkg | grep pkg.install	#Filter view remote installation
# salt 'server2' pkg.install httpd		#Install http service for server2
#salt 'server2' service.start httpd	#Remote start http service
# salt 'server2' pkg.remove httpd	#Remote delete http service

salt List of built-in execution modules:
http://docs.saltstack.cn/ref/modules/all/index.html


2. Modular remote execution
(1) Create module
- To do modular execution
- First create a directory
[root@server1 ~]# mkdir /srv/salt/_modules -p
[root@server1 ~]# cd /srv/salt/_modules/
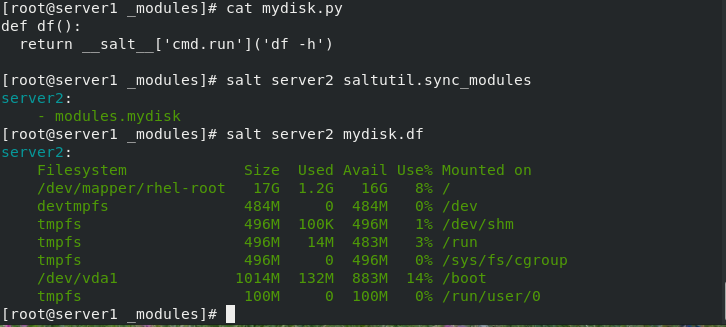
[root@server1 _modules]# vim mydisk.py
[root@server1 _modules]# cat mydisk.py
def df():
return __salt__['cmd.run']('df -h')
[root@server1 _modules]# salt server2 saltutil.sync_modules
server2:
- modules.mydisk
[root@server1 _modules]# salt server2 mydisk.df #Execute the module to check the memory of server2
server2:
Filesystem Size Used Avail Use% Mounted on
/dev/mapper/rhel-root 17G 1.2G 16G 8% /
devtmpfs 484M 0 484M 0% /dev
tmpfs 496M 100K 496M 1% /dev/shm
tmpfs 496M 14M 483M 3% /run
tmpfs 496M 0 496M 0% /sys/fs/cgroup
/dev/vda1 1014M 132M 883M 14% /boot
tmpfs 100M 0 100M 0% /run/user/0
[root@server1 _modules]#

init.sls In a subdirectory, it represents the boot file, that is, the subdirectory itself, so``apache/init.sls`` That means``apache``.
If both exist apache.sls and apache/init.sls,be apache/init.sls Ignored, apache.sls Will be used to represent apache.
(2) Configuration management
Salt The core of state system is SLS,Or call SaLt State File.
•SLS It indicates what kind of state the system will be, and contains these data in a very simple format, which is often called configuration management.
•sls File name:
•sls File with.sls"The suffix ends, but you don't need to write this suffix when calling.
•Using subdirectories for organization is a good choice.
• init.sls In a subdirectory, it represents the boot file, that is, the subdirectory itself, so``apache/init.sls`` That means``apache``.
•If both exist apache.sls and apache/init.sls,be apache/init.sls Ignored, apache.sls Will be used to represent apache.

Create a sls file:
# vim /srv/salt/apache.sls
httpd:                 	# ID declaration
  pkg:                  	# Status statement
    - installed           	# Function declaration
 Specify host execution:
# salt server2 state.sls apache

prepare Top file:
# vim /srv/salt/top.sls
base:
  '*':
    - apache
 Batch execution:
# salt '*' state.highstate
3. Write the remote execution module: deploy apache in server2
(1) Writing method I
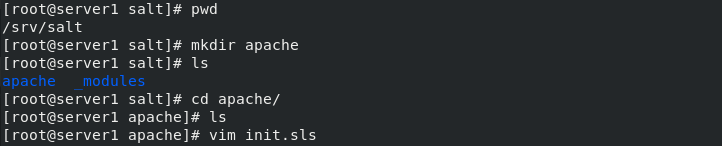
[root@server1 salt]# pwd
/srv/salt
[root@server1 salt]# mkdir apache
[root@server1 apache]# vim install.sls	#Write module
apache:
  pkg.installed:
    - pkgs:
      - httpd				#Install http, php services
      - php

  service.running:
    - name: httpd			#Open http service
    - enable: true		#Set startup and self startup
    - reload: ture			#Refresh service
    - watch:
      - file: /etc/httpd/conf/httpd.conf		#Conditions: monitor the configuration file, change, start the execution service, start automatically, and refresh

##Uniqueness statement
/etc/httpd/conf/httpd.conf:		#Modify the content settings of the configuration file, and declare the modified file path
  file.managed:
    - source: salt://apache/httpd.conf 	# Replace this file with a new configuration file

[root@server1 apache]# cp /etc/httpd/conf/httpd.conf .		#Copy a profile
[root@server1 apache]# ls
httpd.conf  init.sls
[root@server1 apache]# vim httpd.conf 	#Modify profile
 Listen 8080	#Port changed to 8080

[root@server1 apache]# salt server2 state.sls apache  ##All file paths are determined based on / srv/salt. Call the install file in the apache directory
Module writing
Write the modified configuration file and execute the module
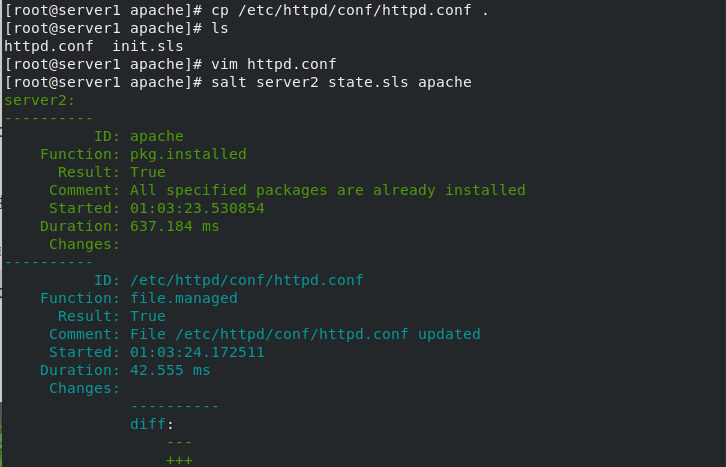
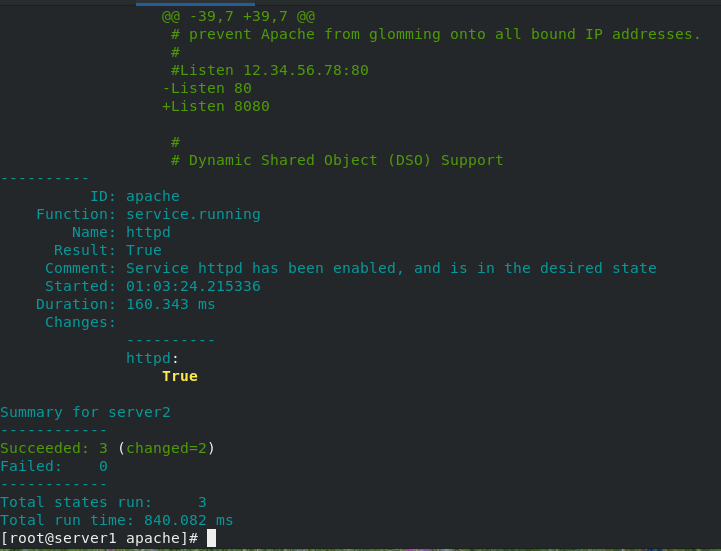
We can see that the server2 port has been changed to 8080
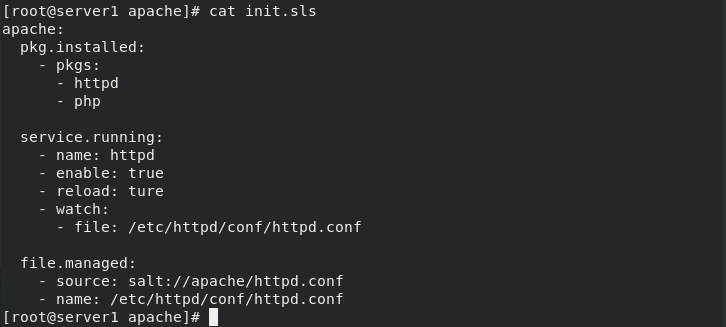
(2) Module writing method 2
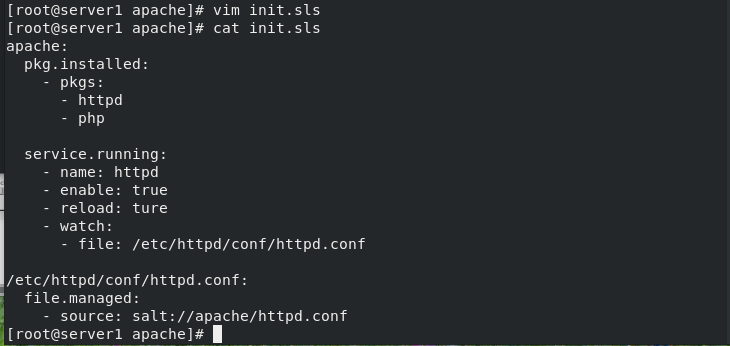
[root@server1 apache]# vim init.sls
[root@server1 apache]# cat init.sls
apache:
  pkg.installed:
    - pkgs:
      - httpd
      - php

  service.running:
    - name: httpd
    - enable: true
    - reload: ture
    - watch:
      - file: /etc/httpd/conf/httpd.conf

  file.managed:
    - source: salt://apache/httpd.conf
    - name: /etc/httpd/conf/httpd.conf	#Preparation and modification of documents
[root@server1 apache]# salt server2 state.sls apache
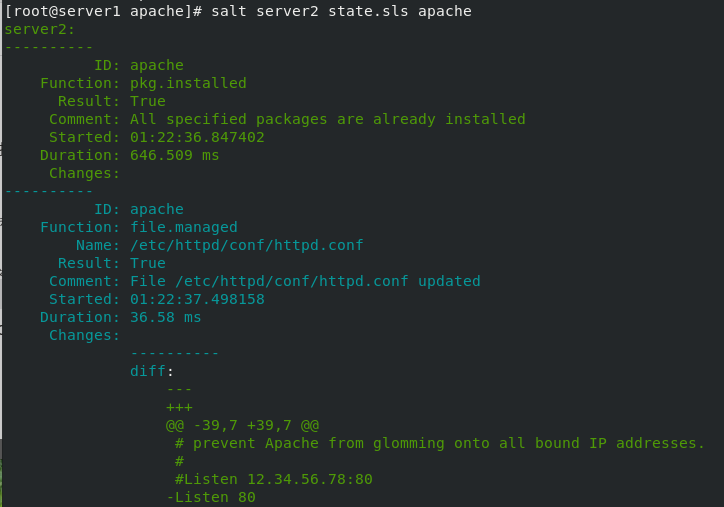
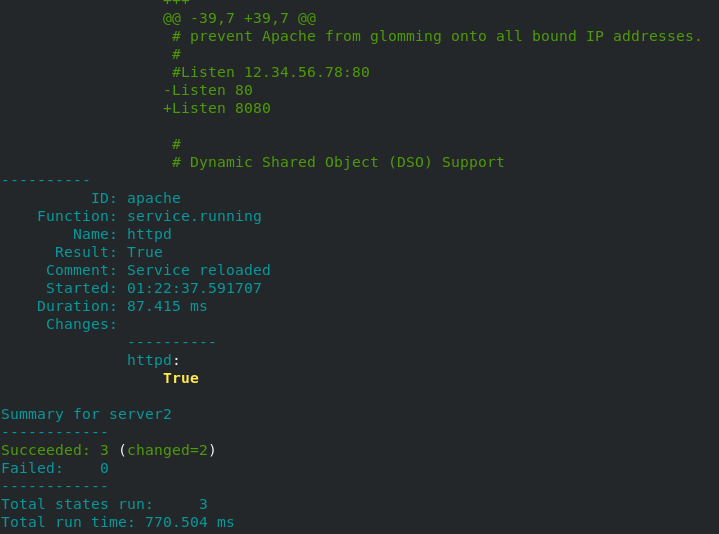
You can see that the results are consistent

4.grains matching application: deploy nginx on server3
(1) Installing nginx
[root@server1 salt]# mkdir nginx
[root@server1 salt]# ls
apache  _modules  nginx
[root@server1 salt]# cd nginx/

## Download installation package
lftp 172.25.15.250:/pub/docs/lamp> get nginx-1.20.1.tar.gz
1061461 bytes transferred
lftp 172.25.15.250:/pub/docs/lamp> exit
[root@server1 nginx]# ls
init.sls  nginx-1.20.1.tar.gz	#Download the installation package

[root@server1 nginx]# vim init.sls	#Writing and installing nginx module
[root@server1 nginx]# cat init.sls
nginx-install:
  pkg.installed:
    - pkgs:		#Installing nginx dependencies
      - gcc
      - pcre-devel
      - openssl-devel

  file.managed:
    - source: salt://nginx/nginx-1.20.1.tar.gz 	# Location of the installation package on the execution machine
    - name: /mnt/nginx-1.20.1.tar.gz	#Specify the path to store the installation package

  cmd.run:				#Command execution module
    - name: cd /mnt && tar zxf nginx-1.20.1.tar.gz && cd nginx-1.20.1 && sed -i 's/CFLAGS="$CFLAGS -g"/#CFLAGS="$CFLAGS -g"/g' auto/cc/gcc && ./configure --prefix=/usr/local/nginx --with-http_ssl_module --with-threads --with-file-aio &> /dev/null && make &> /dev/null && make install &> /dev/null
    - creates: /usr/local/nginx			#Detect if it already exists


[root@server1 nginx]# salt server3 state.sls nginx		#Remote deployment nginx installation


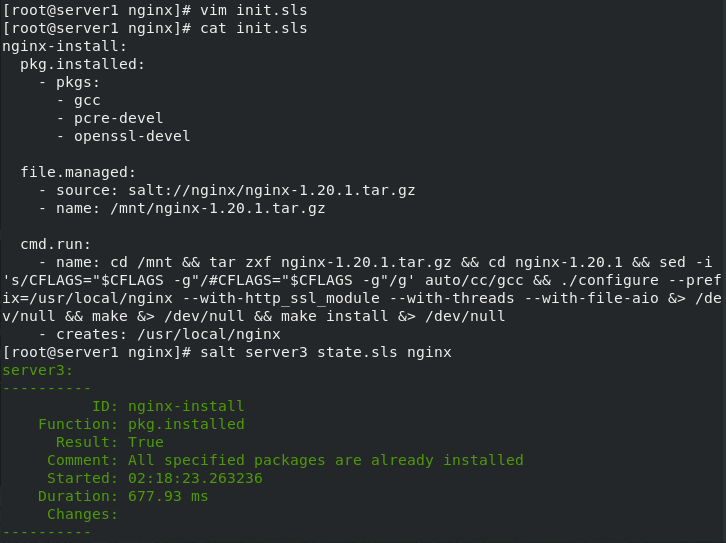
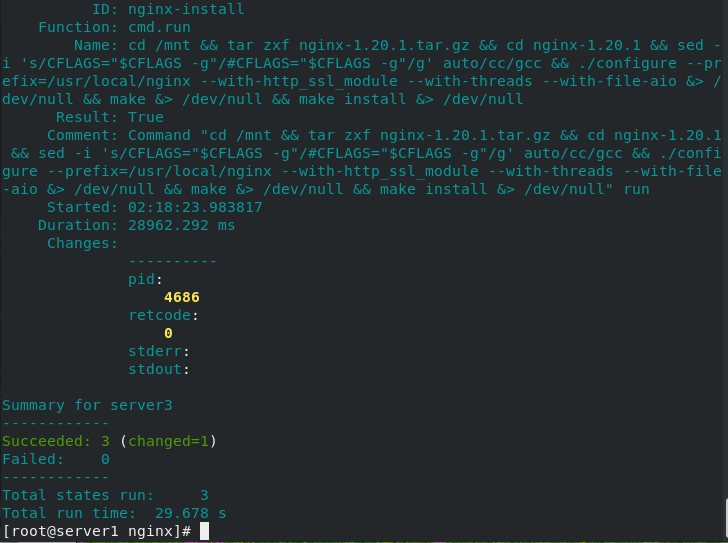
nginx remote installation succeeded
(2) Configure and start nginx
## Copy the configuration file to servr1
[root@server3 mnt]# cd /usr/local/nginx/conf/
[root@server3 conf]# scp nginx.conf server1:/srv/salt/nginx
##Download nginx startup script
[root@server1 nginx]# ls
init.sls nginx-1.20.1.tar.gz
[root@server1 nginx]# lftp 172.25.15.250
lftp 172.25.15.250:~> cd /pub/docs/lamp/
lftp 172.25.15.250:/pub/docs/lamp> get nginx.service
414 bytes transferred
lftp 172.25.15.250:/pub/docs/lamp> exit
[root@server1 nginx]# ls
init.sls nginx-1.20.1.tar.gz nginx.conf nginx.service
[root@server1 nginx]#
## Write startup module
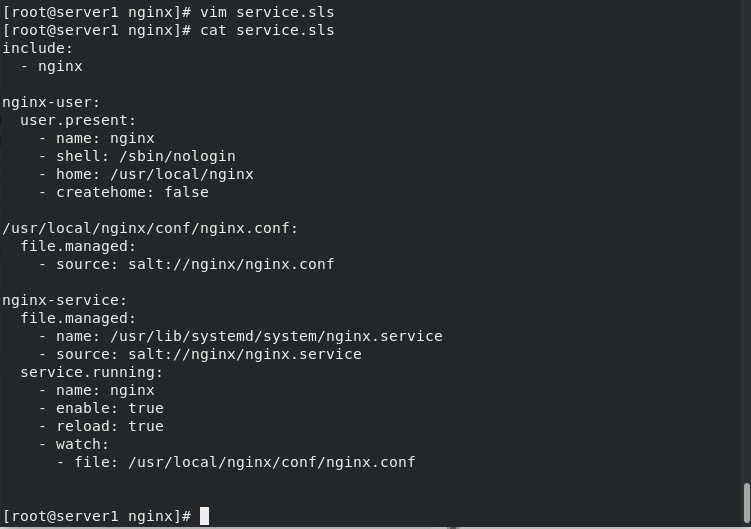
[root@server1 nginx]# vim service.sls
[root@server1 nginx]# cat service.sls
include:
- nginx
nginx-user:
user.present:
- name: nginx #Create user
- shell: /sbin/nologin #No login
- home: /usr/local/nginx
- createhome: false
/usr/local/nginx/conf/nginx.conf:
file.managed:
- source: salt://nginx/nginx.conf
nginx-service:
file.managed:
- name: /usr/lib/systemd/system/nginx.service
- source: salt://nginx/nginx.service
service.running:
- name: nginx
- enable: true
- reload: true
- watch:
- file: /usr/local/nginx/conf/nginx.conf #Monitoring profile
[root@server1 nginx]# salt server3 state.sls nginx.service #

(3) Write module
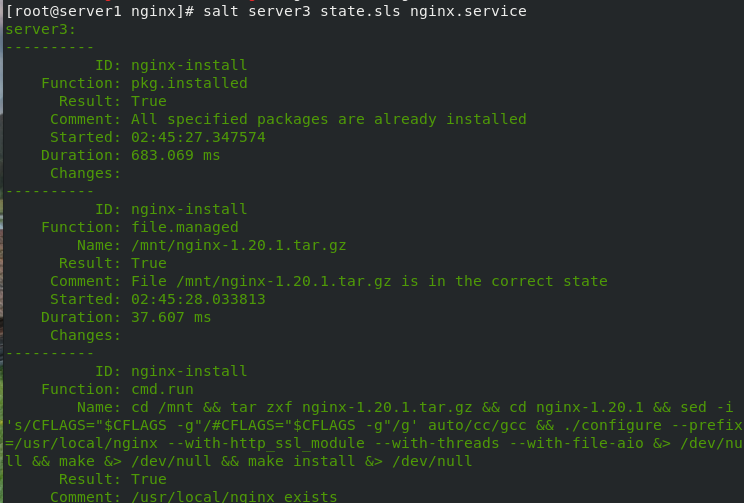
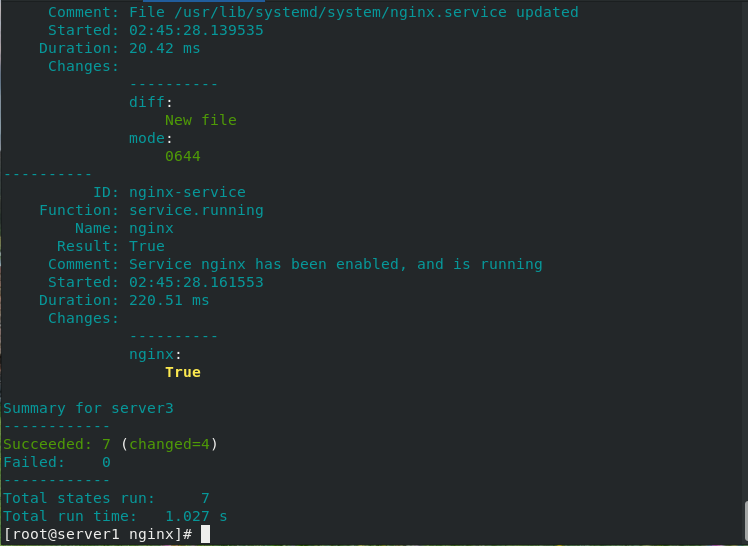
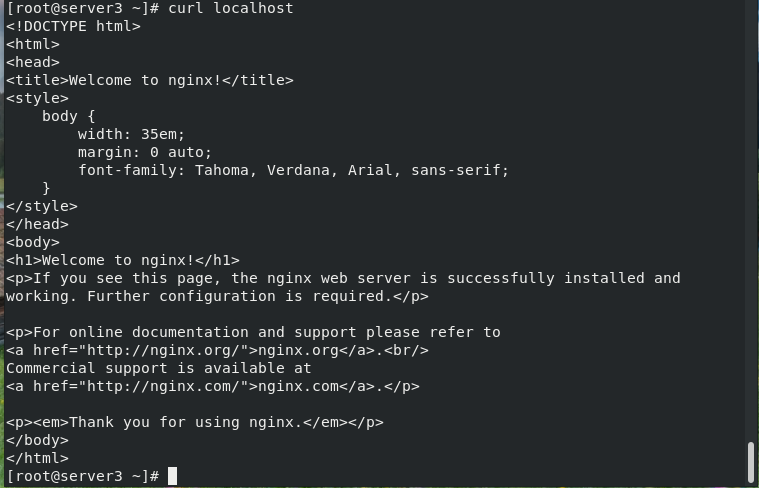
(4) server3 checks whether nginx is started successfully
[root@server3 ~]# curl localhost #Access local default web pages
4, grains
1. Introduction
- Grains is a component of SaltStack and is stored at the minion end of SaltStack.
- When salt minion is started, the collected data will be statically stored in Grains. The data will be updated only when minion is restarted.
- Since grains is static data, it is not recommended to modify it often.
- Application scenario:
Information query, which can be used as CMDB.
Use in target to match minion.
In the state system, configure the management module.
2. Information query
It is used to query the IP, FQDN and other information of the minion end.
Available grains by default:
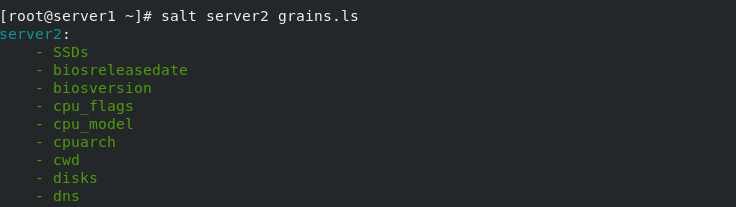
[root@server1 ~]# salt server2 grains.item ipv4
[root@server1 ~]# salt server2 grains.items
[root@server1 ~]# salt server2 grains.ls
List all key s
 List all key s and values
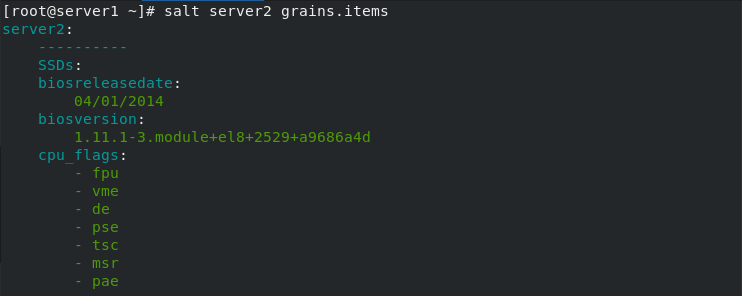
Specifies the value of the key
(1) Custom grains item
server2: defined in / etc/salt/minion
## Modify the / etc/salt/minion file in server2
[root@server2 files]# cd /etc/salt
[root@server2 salt]# ls
cloud           cloud.maps.d       master    minion.d   proxy
cloud.conf.d    cloud.profiles.d   master.d  minion_id  proxy.d
cloud.deploy.d  cloud.providers.d  minion    pki        roster
[root@server2 salt]# vim minion	###129 line add
grains:
  roles:
    - apache

[root@server2 salt]# systemctl restart salt-minion.service 	#Restart client
[root@server2 salt]#
## server1
[root@server1 salt]# salt server2 test.ping
[root@server1 salt]# salt server2 grains.item ipv4 ## Specify ip
[root@server1 salt]# salt server2 grains.item roles ##Specify role


(2) Detection

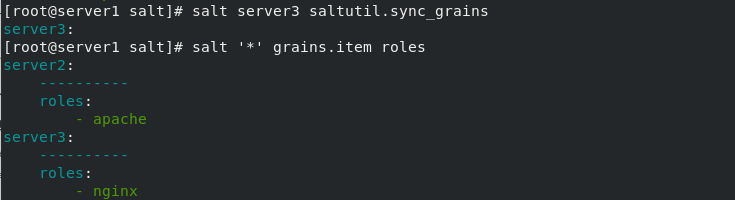
server3: defined in / etc/salt/grains
[root@server3 ~]# cd /etc/salt
[root@server3 salt]# ls
cloud           cloud.maps.d       master    minion.d   proxy
cloud.conf.d    cloud.profiles.d   master.d  minion_id  proxy.d
cloud.deploy.d  cloud.providers.d  minion    pki        roster
[root@server3 salt]# vim grains
roles:
  - nginx
[root@server1 _modules]# salt server3 saltutil.sync_grains ##Synchronous data
[root@server1 _modules]# salt '*' grains.item roles

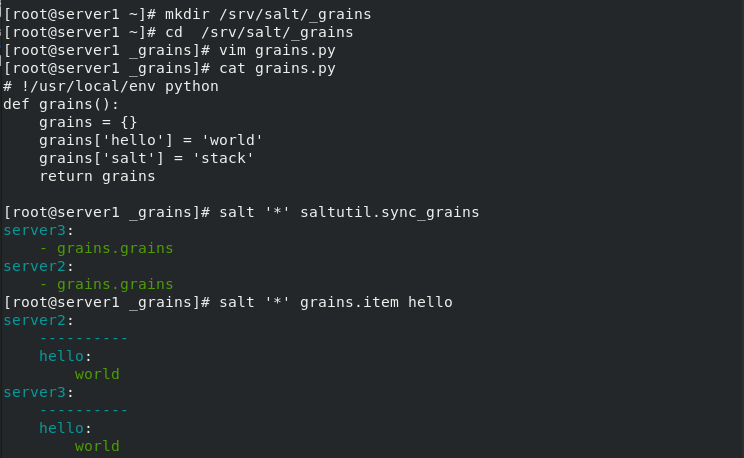
3. Create at the salt master side_ grains directory
[root@server1 salt]# mkdir _grains
[root@server1 salt]# cd _grains/
[root@server1 _grains]# vim grains.py
[root@server1 _grains]# cat grains.py
def my_grain():
    grains = {}
    grains['hello'] = 'world'
    grains['salt'] = 'stack'
    return grains
[root@server1 _grains]# salt '*' saltutil.sync_grains  ##Synchronize grains to minion
[root@server1 _grains]# salt '*' grains.item hello
[root@server1 _grains]# salt '*' grains.item salt

4.pillar introduction
- Like grains, pillar is also a data system, but the application scenarios are different.
- pillar dynamically stores information on the master side. It mainly stores private and sensitive information (such as user name, password, etc.), and you can specify a minion to see the corresponding information.
- pillar is more suitable for configuration management.
5. User defined pillar item
[root@server1 srv]# mkdir pillar
[root@server1 srv]# cd pillar/
[root@server1 pillar]# vim top.sls
[root@server1 pillar]# cat top.sls
base:
  '*':
    - pkgs
[root@server1 pillar]# vim pkgs.sls
[root@server1 pillar]# cat  pkgs.sls
{% if grains['fqdn'] == 'server2' %}
package: httpd
{% elif grains['fqdn'] == 'server3' %}
package: nginx
{% endif %}


[root@server1 pillar]# salt '*' saltutil.refresh_pillar
server3:
    True
server2:
    True
[root@server1 pillar]# salt '*' pillar.items
server3:
    ----------
    package:
        nginx
server2:
    ----------
    package:
        httpd
[root@server1 pillar]#

6.pillar data matching
[root@server1 apache]# vim init.sls
[root@server1 apache]# cat init.sls
apache:
  pkg.installed:
    - pkgs:
      - {{ pillar['package'] }}

  service.running:
    - name: httpd
    - enable: true
    - reload: ture
    - watch:
      - file: /etc/httpd/conf/httpd.conf

  file.managed:
    - source: salt://apache/httpd.conf
    - name: /etc/httpd/conf/httpd.conf
[root@server1 apache]# salt server2 state.sls apache


5, Jinja template
1. Introduction
Jinja Is based on python Template engine for,stay SLS The file can be used directly jinja Template to do some operations.
adopt jinja Templates can define their own variables for different servers.
Two separators: {% ... %} and {{ ... }},The former is used to perform tasks such as for Cycle or
 Assignment statement,The latter prints the result of the expression on the template.
2. Usage of Jinja template
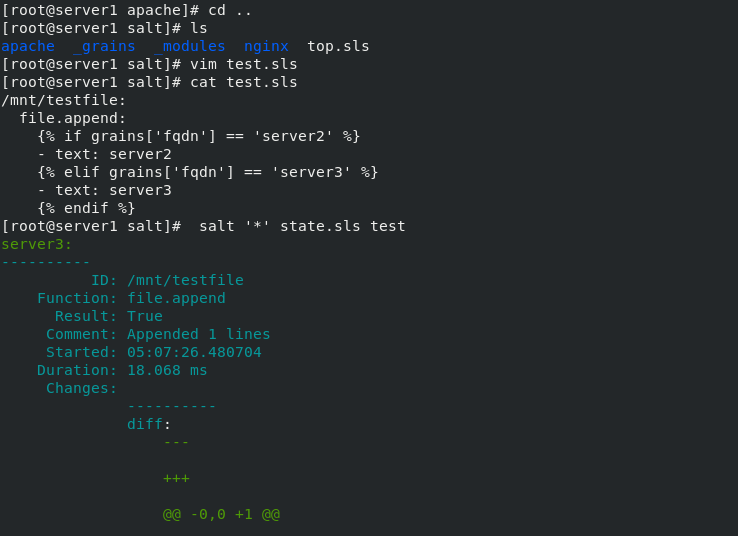
[root@server1 salt]# ls
apache _grains _modules nginx top.sls
[root@server1 salt]# vim test.sls
[root@server1 salt]# cat test.sls
/mnt/testfile:
file.append:
{% if grains['fqdn'] == 'server2' %}
- text: server2
{% elif grains['fqdn'] == 'server3' %}
- text: server3
{% endif %}
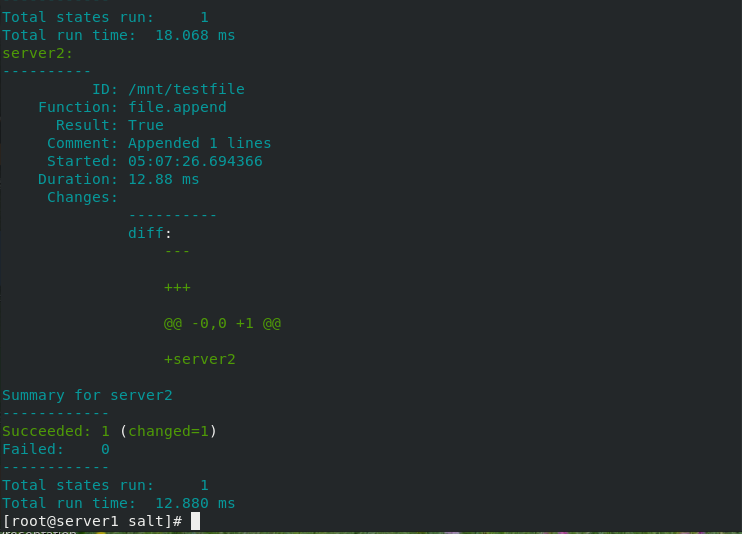
[root@server1 salt]# salt '*' state.sls test
3. Usage of Jinja template
## Configure pillar
[root@server1 salt]# cd ..
[root@server1 srv]# cd pillar/
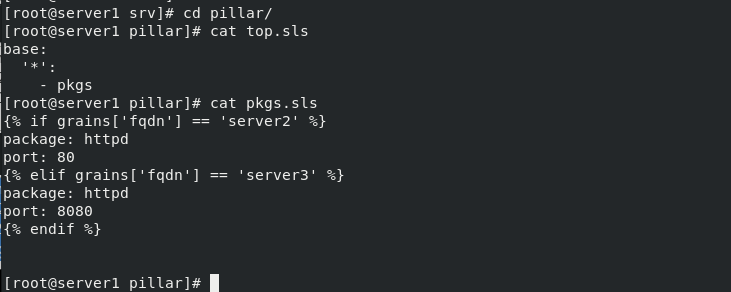
[root@server1 pillar]# cat top.sls
base:
'*':
- pkgs
[root@server1 pillar]# cat pkgs.sls
{% if grains['fqdn'] == 'server2' %}
package: httpd
port: 80
{% elif grains['fqdn'] == 'server3' %}
package: httpd
port: 8080
{% endif %}
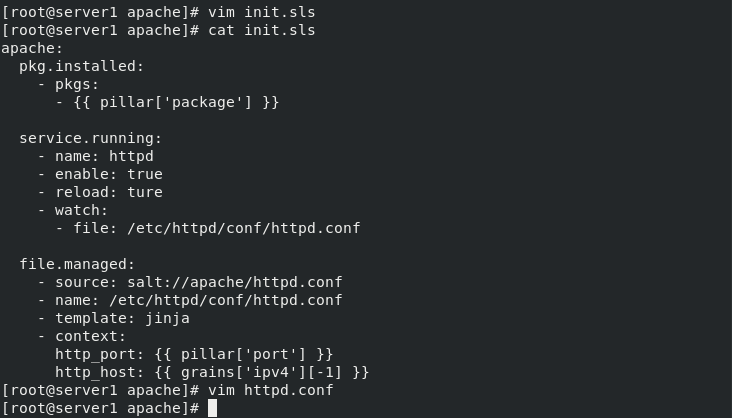
[root@server1 apache]# vim init.sls
[root@server1 apache]# cat init.sls
apache:
pkg.installed:
- pkgs:
- {{ pillar['package'] }}
service.running:
- name: httpd
- enable: true
- reload: ture
- watch:
- file: /etc/httpd/conf/httpd.conf
file.managed:
- source: salt://apache/httpd.conf
- name: /etc/httpd/conf/httpd.conf
- template: jinja
- context:
http_port: {{ pillar['port'] }}
http_port: {{ grains['ipv4'][-1] }}
[root@server1 apache]# vim httpd.conf
Listen {{ http_host }}:{{ http_port }} ## Direct reference to grains variables
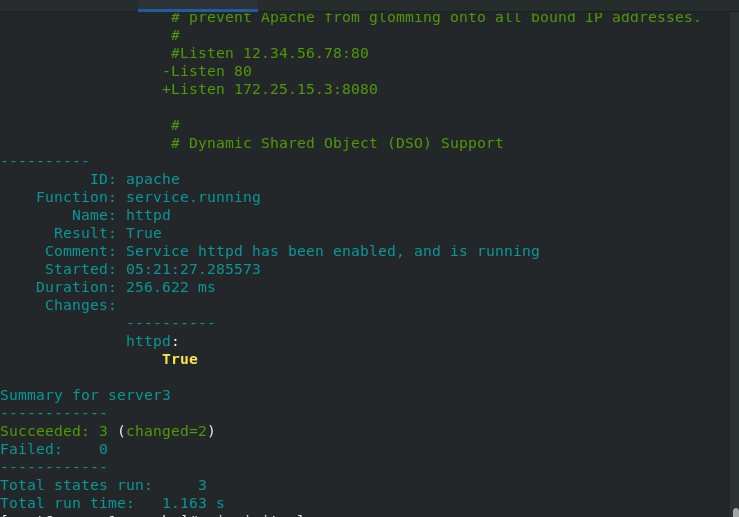
[root@server1 pillar]# salt '*' state.sls apache #Execute complete port change

server2
[root@server2 salt]# vim /etc/httpd/conf/httpd.conf

server3
[root@server3 salt]# vim /etc/httpd/conf/httpd.conf
