1, Effect display
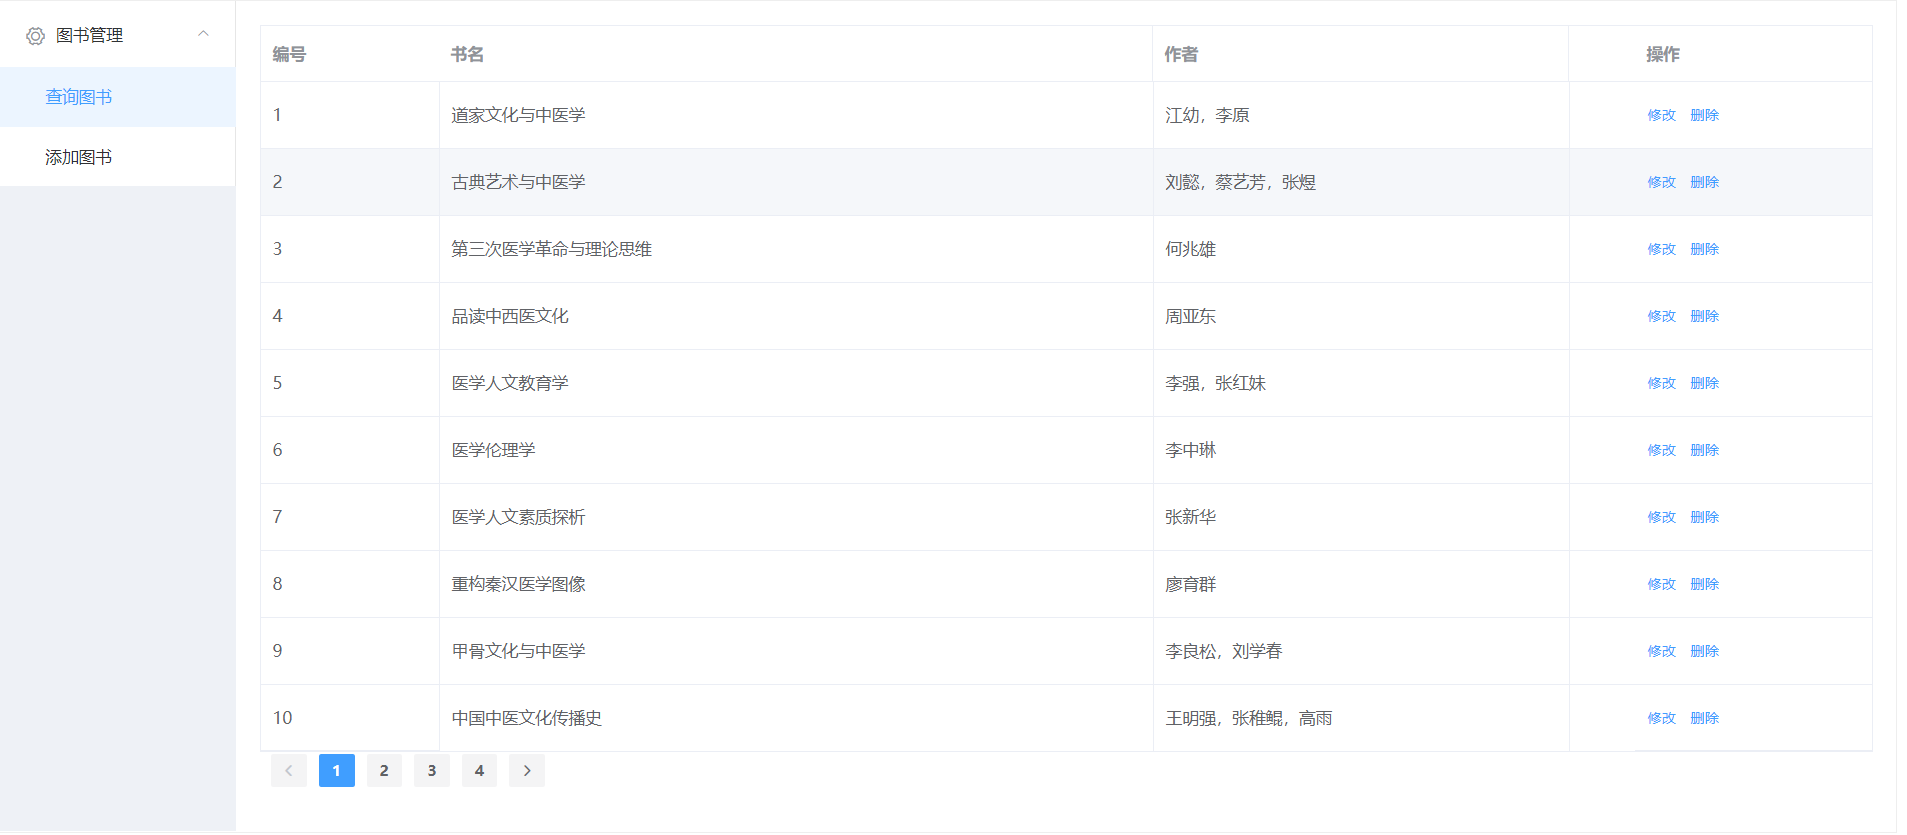
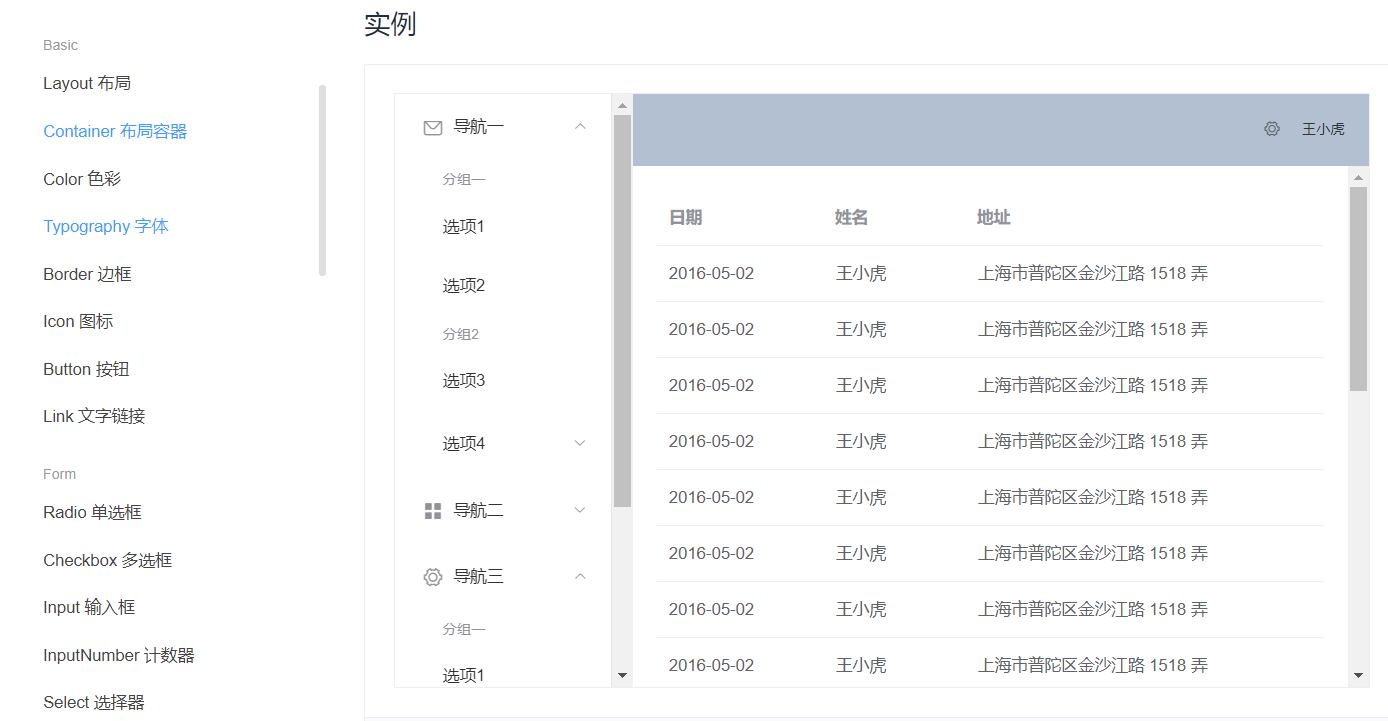
main interface:
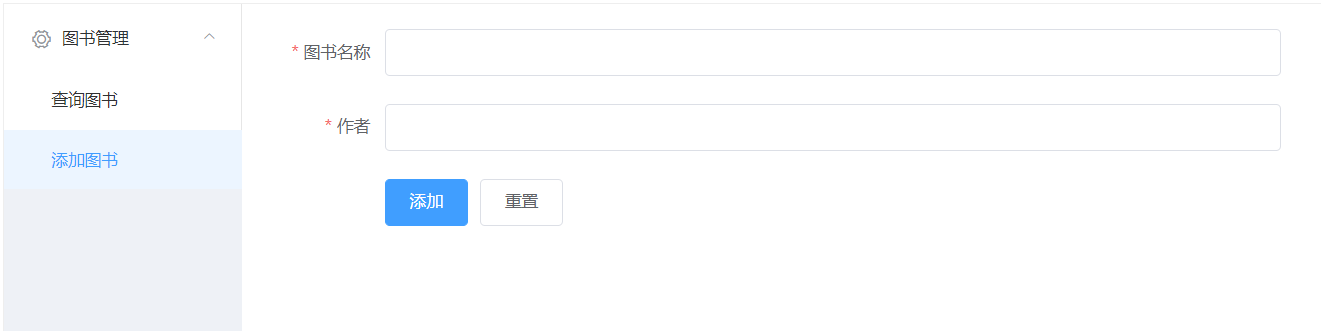
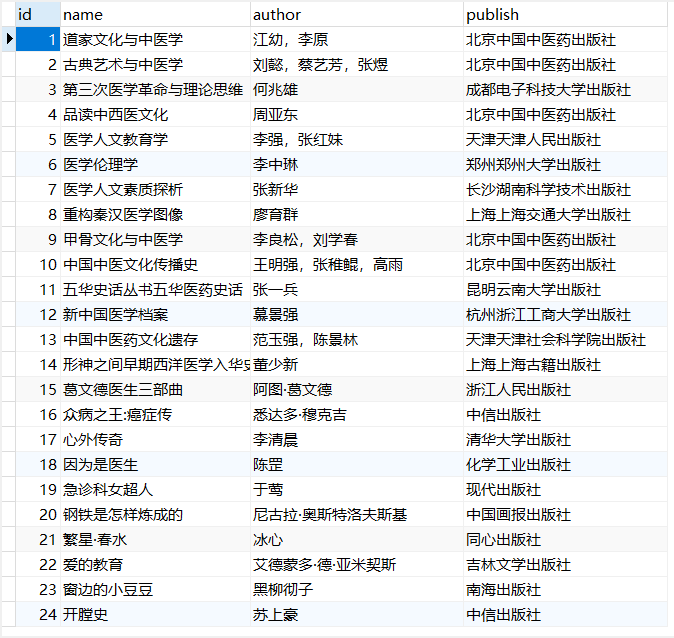
Add books:
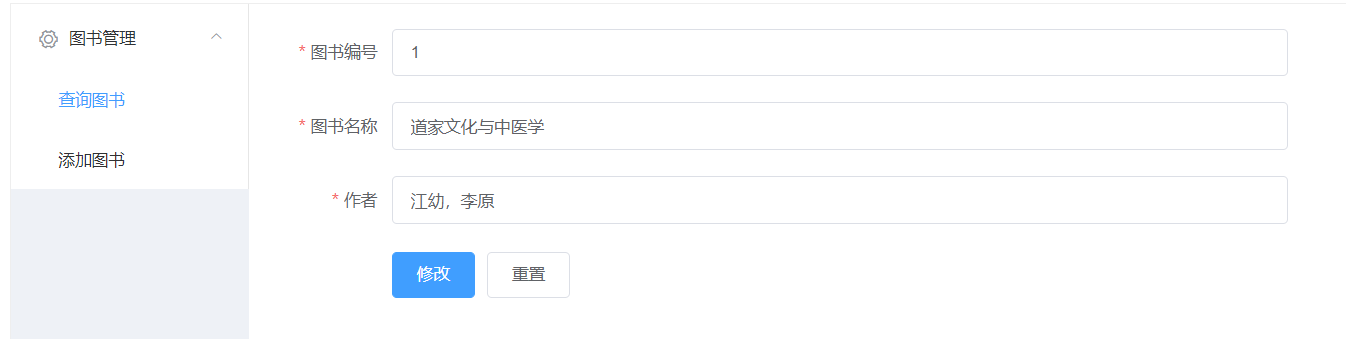
Modify interface:
2, Front end implementation
1,Vue.cli build project
Enter vue ui on the command line (UI interface with vue version above 3.0)
vue ui
Manually create the project and select the following configuration to use:
Wait until the project is created, because the backend needs to be written, I open it with idea (idea needs to download the Vue.js extension)
It can be input at the terminal
npm run serve
Run the official initial project, and the project creation is completed
2. vue+elementUI to quickly build front-end pages
(1) Install elementUI
Open the elementUI official website
https://element.eleme.cn/#/zh-CN/component/installation
It is recommended to install with npm, which can be better used with webpack packaging tool.
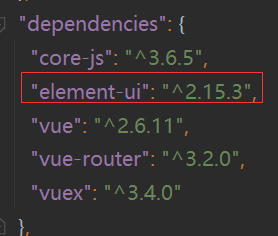
npm i element-ui -S
In main JS to write the following:
import Vue from 'vue';
import ElementUI from 'element-ui';
import 'element-ui/lib/theme-chalk/index.css';
import App from './App.vue';

Vue.use(ElementUI);

new Vue({
  el: '#app',
  render: h => h(App)
});
Check the package. In the directory JSON file. If there is already an elementUI version number, the installation is successful
(2) Using elementUI
Open the elementUI official website
https://element.eleme.cn/#/zh-CN/component/installation
Find the corresponding component code and select it as needed.
If the project selects the official example in the layout container, it will be modified
Change the static page combined with Vue into dynamic page, and the main code is as follows: index vue:
  <el-container style="height: 700px; border: 1px solid #eee">
    <el-aside width="200px" style="background-color: rgb(238, 241, 246)">
      <el-menu router :default-openeds="['0','1']">
        <el-submenu v-for="(item,index) in $router.options.routes" :index="index+''">
          <template slot="title"><i class="el-icon-setting"></i>{{ item.name }} </template>
          <el-menu-item v-for="item2 in item.children" :index="item2.path"
                                      :class="$route.path==item2.path?'is-active':''"   v-if="item2.show">{{item2.name}}</el-menu-item>
        </el-submenu>
      </el-menu>
    </el-aside>
    <el-container>
      <el-main>
        <router-view></router-view>
      </el-main>
    </el-container>
  </el-container>
The router attribute in < El menu Router: default openeds = "['0 ','1'] > is the mapped route corresponding to the index attribute of its subcomponent, and: default openeds is opened by default, which is also based on the index attribute.
The routing management code is as follows: router / index js:
const routes = [
  {
    path:'/',
    name:'Library management',
    component:Index,
    redirect:'/BookManage',
    children:[
      {
        path:'/BookManage',
        name:'Query books',
        show:true,
        component:BookManage
      },
      {
        path:'/AddBook',
        name:'Add books',
        show:true,
        component:AddBook
      },
      {
        path:'/update',
        show:false,
        component: BookUpdate
      }
    ]
  },
]
Book management interface BookManage vue:
 <el-table
      :data="tableData"
      border
      style="width: 100%">
    <el-table-column
        fixed
        prop="id"
        label="number"
        width="150">
    </el-table-column>
    <el-table-column
        prop="name"
        label="title"
        width="600">
    </el-table-column>
    <el-table-column
        prop="author"
        label="author"
        width="350">
    </el-table-column>
    <el-table-column
        fixed="right"
        label="operation"
        width="200">
      <template slot-scope="scope">
        <el-button @click="handleClick(scope.row)" type="text" size="small">modify</el-button>
        <el-button @click="deleteBook(scope.row)" type="text" size="small">delete</el-button>
      </template>
    </el-table-column>
  </el-table>

    <el-pagination
        background
        layout="prev, pager, next"
        page-size="10"
        :total="this.total"
        @current-change="page">
    </el-pagination>
< El pagination is the component of page number. Page size = "10" how many pages are there on each page: total="this.total" total pages
Add book interface addbook vue:
<el-form :model="ruleForm" :rules="rules" ref="ruleForm" label-width="100px" class="demo-ruleForm">
    <el-form-item label="Book name" prop="name">
      <el-input v-model="ruleForm.name" style="width: 60%"></el-input>
    </el-form-item>

    <el-form-item label="author" prop="author">
      <el-input v-model="ruleForm.author" style="width: 60%"></el-input>
    </el-form-item>

    <el-form-item>
      <el-button type="primary" @click="submitForm('ruleForm')">add to</el-button>
      <el-button @click="resetForm('ruleForm')">Reset</el-button>
    </el-form-item>
  </el-form>
Modify book interface bookupdate vue:
  <el-form :model="ruleForm" :rules="rules" ref="ruleForm" label-width="100px" class="demo-ruleForm">

    <el-form-item label="Book number" prop="name">
      <el-input v-model="ruleForm.id" readonly style="width: 60%"></el-input>
    </el-form-item>

    <el-form-item label="Book name" prop="name">
      <el-input v-model="ruleForm.name" style="width: 60%"></el-input>
    </el-form-item>

    <el-form-item label="author" prop="author">
      <el-input v-model="ruleForm.author" style="width: 60%"></el-input>
    </el-form-item>

    <el-form-item>
      <el-button type="primary" @click="submitForm('ruleForm')">modify</el-button>
      <el-button @click="resetForm('ruleForm')">Reset</el-button>
    </el-form-item>
  </el-form>
(3) Front end test
The front-end page is not a dynamic page at the beginning. When there is no back-end data interface, you can first test the front-end with false data and static pages, build the page, wait for the implementation of the back-end interface, obtain the back-end data with Ajax, and then dynamically set the page.
2, Backend implementation
1. Quickly create a spring boot project with spring initializer in idea
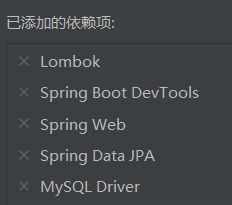
Select the above dependencies. There are many convenient annotations in Lombok, such as @ Data. DevTools realizes hot deployment. This project uses JPA to link MySQL.
2. Write configuration file
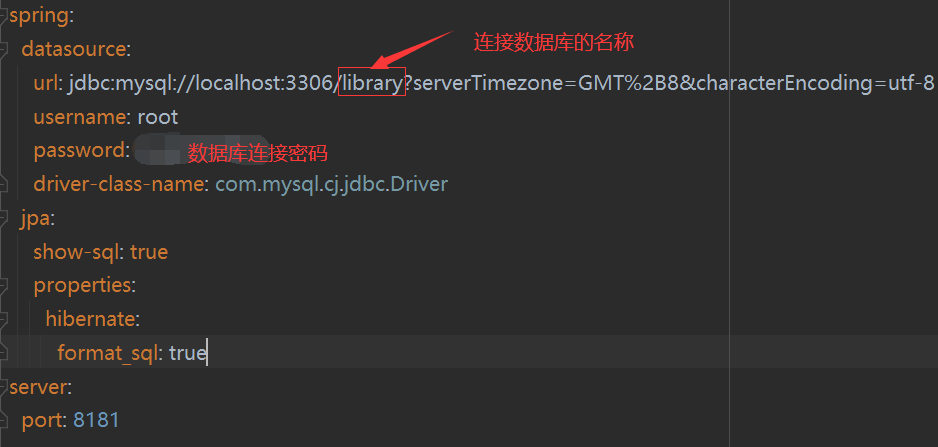
To change the port, because the default port of the front-end service is also 8080
3. Prepare the database
4. Writing entity classes
@Entity
@Data
public class Book {
    @Id
    @GeneratedValue(strategy = GenerationType.IDENTITY)
    private Integer id;
    private String name;
    private String author;
}
Where id is set as the primary key and self incrementing.
5. Dao layer
public interface BookRepository extends JpaRepository<Book,Integer> {
}
This interface only needs to inherit the jparepository interface. JpaRepository
It encapsulates the basic data operation methods, including basic addition, deletion, modification, query, paging, sorting, etc.
6. Testing
@SpringBootTest
class BookRepositoryTest {

    @Autowired
    private BookRepository bookRepository;

    @Test
    void findAll(){
        System.out.println(bookRepository.findAll());
    }

    @Test
    void save(){
        Book book =new Book();
        book.setName("springboot");
        book.setAuthor("Zhang San");
        Book book1=bookRepository.save(book);
        System.out.println(book1);
    }

    @Test
     void findById(){
        Book book=bookRepository.findById(1).get();
        System.out.println(book);
     }

     @Test
     void update(){
        Book book=new Book();
        book.setId(18);
        book.setName("test");
        Book book1=bookRepository.save(book);
         System.out.println(book1);
     }

     @Test
     void delete(){
        bookRepository.deleteById(18);
     }
}
Test the crud function respectively to determine the available interfaces.
7. Write Controller
Simplify the operation and omit the service layer
@RestController
@RequestMapping("/book")
public class BookController {
    @Autowired
    private BookRepository bookRepository;

    @GetMapping("/findAll/{page}/{size}")
    public Page<Book> findAll(@PathVariable("page") Integer page,@PathVariable("size") Integer size){
        Pageable pageable= PageRequest.of(page-1,size);
        return bookRepository.findAll(pageable);
    }

    @PostMapping("/save")
    public String save(@RequestBody Book book){
        Book result=bookRepository.save(book);
        if (result!=null){
            return "success";
        }else {
            return "error";
        }
    }

    @GetMapping("/findById/{id}")
    public Book findById(@PathVariable("id") Integer id){
        return bookRepository.findById(id).get();
    }

    @PutMapping("/update")
    public String update(@RequestBody Book book){
        Book result=bookRepository.save(book);
        if (result!=null){
            return "success";
        }else {
            return "error";
        }
    }

    @DeleteMapping("/deleteById/{id}")
    public void deleteById(@PathVariable("id") Integer id){
        bookRepository.deleteById(id);
    }
}
The implementation of CRUD function conforms to RESTful style
8. Solve cross domain problems
Since the front end 8080 accesses the back end 8181, which constitutes a cross domain problem, the cross domain problem is solved at the back end. The configuration class is written as follows:
@Configuration
public class CrosConfig implements WebMvcConfigurer {
    @Override
    public void addCorsMappings(CorsRegistry registry) {
        registry.addMapping("/**")
                .allowedOrigins("*")
                .allowedMethods("GET","HEAD","POST","PUT","DELETE","OPTIONS")
                                .allowCredentials(false)
                                .maxAge(3600)
                                .allowedHeaders("*");
    }
}
3, Front and rear end data connection
1. Front mounted axios
First, add axios. The command is as follows:
vue add axios
There are too many project directories
2. Front end connection back end interface
Get backend database data and paging operation:
    page(currentPage){
      this.$axios.get('http://localhost:8181/book/findAll/'+currentPage+'/10').then(resp => {
        this.tableData = resp.data.content;
        this.total=resp.data.totalElements
      })
    }
  },
  created(){
    this.$axios.get('http://localhost:8181/book/findAll/1/10').then(resp => {
      this.tableData = resp.data.content;
      this.total=resp.data.totalElements
    })
  },
Delete operation:
    deleteBook(row){
      this.$axios.delete('http://localhost:8181/book/deleteById/'+row.id).then(resp => {
        this.$message('Delete succeeded!');
        window.location.reload();
      })
    }
Add action:
 submitForm(formName) {
        this.$refs[formName].validate((valid) => {
          if (valid) {
            this.$axios.post('http://localhost:8181/book/save',this.ruleForm).then(resp => {
                 if(resp.data =='success'){
                   this.$message('Successfully added!');
                   this.$router.push('/BookManage')
                 }
            })
          } else {
            return false;
          }
        });
      }
Modification:
submitForm(formName) {
      this.$refs[formName].validate((valid) => {
        if (valid) {
          this.$axios.put('http://localhost:8181/book/update',this.ruleForm).then(resp => {
            if(resp.data =='success'){
              this.$message('Modification succeeded!');
              this.$router.push('/BookManage')
            }
          })
        } else {
          return false;
        }
      });
    }
The above are all part of the code