2.5.1 implementation of listview item multi layout
Introduction to this section:
This section is the last section of the ListView section, which brings you the implementation of ListView multi layout items. What is ListView Item multi layout? For example, QQ chat list:
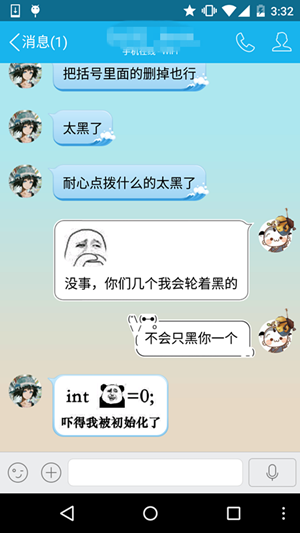
If it is made with a ListView, there are two different items on a ListView! One left and one right, hey hey, this section will teach you how to realize the multi layout of ListView!
1. Key points:
Override the category of View corresponding to getItemViewType() method and the total number of categories returned by getViewTypeCount() method iew! Then call getItemViewType from getView to get the corresponding category, and then load the corresponding View!
2. Code implementation:
Here, you can directly use the two layouts in the previous section, and then write another Adapter to rewrite several places in the key points:
MutiLayoutAdapter.java:
/**
 * Created by Jay on 2015/9/23 0023.
 */
public class MutiLayoutAdapter extends BaseAdapter{

    //Define two category flags
    private static final int TYPE_BOOK = 0;
    private static final int TYPE_APP = 1;
    private Context mContext;
    private ArrayList<Object> mData = null;


    public MutiLayoutAdapter(Context mContext,ArrayList<Object> mData) {
        this.mContext = mContext;
        this.mData = mData;
    }

    @Override
    public int getCount() {
        return mData.size();
    }

    @Override
    public Object getItem(int position) {
        return mData.get(position);
    }

    @Override
    public long getItemId(int position) {
        return position;
    }

    //Multi layout is the core of this judgment category
    @Override
    public int getItemViewType(int position) {
        if (mData.get(position) instanceof App) {
            return TYPE_APP;
        } else if (mData.get(position) instanceof Book) {
            return TYPE_BOOK;
        } else {
            return super.getItemViewType(position);
        }
    }

    //Number of categories
    @Override
    public int getViewTypeCount() {
        return 2;
    }


    @Override
    public View getView(int position, View convertView, ViewGroup parent) {
        int type = getItemViewType(position);
        ViewHolder1 holder1 = null;
        ViewHolder2 holder2 = null;
        if(convertView == null){
           switch (type){
               case TYPE_APP:
                   holder1 = new ViewHolder1();
                   convertView = LayoutInflater.from(mContext).inflate(R.layout.item_one, parent, false);
                   holder1.img_icon = (ImageView) convertView.findViewById(R.id.img_icon);
                   holder1.txt_aname = (TextView) convertView.findViewById(R.id.txt_aname);
                   convertView.setTag(R.id.Tag_APP,holder1);
                   break;
               case TYPE_BOOK:
                   holder2 = new ViewHolder2();
                   convertView = LayoutInflater.from(mContext).inflate(R.layout.item_two, parent, false);
                   holder2.txt_bname = (TextView) convertView.findViewById(R.id.txt_bname);
                   holder2.txt_bauthor = (TextView) convertView.findViewById(R.id.txt_bauthor);
                   convertView.setTag(R.id.Tag_Book,holder2);
                   break;
           }
        }else{
            switch (type){
                case TYPE_APP:
                    holder1 = (ViewHolder1) convertView.getTag(R.id.Tag_APP);
                    break;
                case TYPE_BOOK:
                    holder2 = (ViewHolder2) convertView.getTag(R.id.Tag_Book);
                    break;
            }
        }

        Object obj = mData.get(position);
        //Sets the value of the lower control
        switch (type){
            case TYPE_APP:
                App app = (App) obj;
                if(app != null){
                    holder1.img_icon.setImageResource(app.getaIcon());
                    holder1.txt_aname.setText(app.getaName());
                }
                break;
            case TYPE_BOOK:
                Book book = (Book) obj;
                if(book != null){
                    holder2.txt_bname.setText(book.getbName());
                    holder2.txt_bauthor.setText(book.getbAuthor());
                }
                break;
        }
        return convertView;
    }


    //Two different viewholders
    private static class ViewHolder1{
        ImageView img_icon;
        TextView txt_aname;
    }

    private static class ViewHolder2{
        TextView txt_bname;
        TextView txt_bauthor;
    }
}
Here's a place to pay attention to, convertview setTag(R.id.Tag_APP,holder1); We usually directly setTag(Object). This is the overloaded method of settag. The parameter is a unique key and a subsequent object! only!!! I started with type_ Take book as the first parameter, and then report the following error:

The key must be an application specific resource ID should be unique. Defining an int variable of final type and hard coding a value are not feasible. Here, it is directly in strings Add to XML:
<item name="Tag_APP" type="id"></item>
<item name="Tag_Book" type="id"></item>
Of course, you can also create another IDS under res/values / XML file, paste the above code! In addition to this, there is another thing to note, that is, the category distinguishing flag should start from 0, otherwise the following errors will be reported:

MainActivity.java:
public class MainActivity extends AppCompatActivity {

    private static final int TYPE_BOOK = 0;
    private static final int TYPE_APP = 1;
    private ListView list_content;
    private ArrayList<Object> mData = null;
    private MutiLayoutAdapter myAdapter = null;

    @Override
    protected void onCreate(Bundle savedInstanceState) {
        super.onCreate(savedInstanceState);
        setContentView(R.layout.activity_main);

        //Data preparation:
        mData = new ArrayList<Object>();
        for(int i = 0;i < 20;i++){
            switch ((int)(Math.random() * 2)){
                case TYPE_BOOK:
                    mData.add(new Book("<First line code","Guo Lin"));
                    break;
                case TYPE_APP:
                    mData.add(new App(R.mipmap.iv_icon_baidu,"Baidu"));
                    break;
            }
        }

        list_content = (ListView) findViewById(R.id.list_content);
        myAdapter = new MutiLayoutAdapter(MainActivity.this,mData);
        list_content.setAdapter(myAdapter);
    }
}
The above randomly generates 0 and 1. 0 adds a Book object to the collection, and 1 adds an App object!
3. Code download:
Summary of this section:
OK, this section explains the implementation of ListView Item multi layout, that is, the rewriting of two methods, and then getView() makes a judgment and sets different layouts ~ the code is very simple~
Let's finish with the knowledge of ListView. Of course, the knowledge of ListView is more than that, asynchronous loading, optimization, etc. we will learn these in the advanced part ~ that's all. Thank you~