✨✨✨
Thank you for opening Xiaobai's article
"I hope you have made a little progress today and come closer to a better life!" 🌈
catalogue
🍋 Installation of Pilot Library
🌻 Image module built-in functions and properties
🌻 Small example 1 blur the picture
🌻 Common custom filter functions in ImageFilter
🌻 Application - use ImageEnhance to achieve image color balance
🌻 Apply - use ImageEnhance to achieve image brightness
🚀 Previous review
| Basic image processing (I) | (1 message) basic image processing (I)_ am_student blog - CSDN blog |
| Basic image processing (2) | (1 message) basic processing of pictures (II)_ am_student blog - CSDN blog |
| Basic image processing (3) | (1 message) basic image processing (III)_ am_student blog - CSDN blog |
🍉 Foreword
Pilot is the abbreviation of Python Imaging Library. It is the most commonly used image processing library in Python language. The pilot library provides support for Python 3 and provides image processing functions for the python 3 interpreter. By using the pilot library, you can easily use Python programs to process pictures, such as common size, format, color, rotation and so on.
The pilot library is the most common image processing library for Python developers. It provides a wide range of file format support and powerful image processing capabilities, mainly including image storage, image display, format conversion and basic image processing operations.
🍋 Installation of Pilot Library
pip installs pilot and executes the following command:
pip install pillow
🌟 Filter for image processing
In the Image module of the pilot library, you can use the filter() function to use the filter effect on the specified Image, and the filters that can be used in the pilot library are saved in the ImageFilter module. The syntax format of using the function filter() is as follows:
Image.filter(filter)
Through the function filter(), you can filter the specified image with the given filter, and the parameter "filter" represents the filter core.
🌻 Image module built-in functions and properties
1. Image.format: source image format
2. Image.mode: image mode string
3. Image.size: image size
4. Image.getbands(): get the name list of each channel of the image. For example, RGB image returns ['R', 'G', 'B'].
5. Image. Getextreme(): get the maximum and minimum pixel values of the image.
6. Image.getpixel(xy): get pixel value.
7. Image. Histogram (mask = none, extreme = none): get the image histogram and return the list of pixel counts.
8. Image.point(function): use the function to modify each pixel of the image.
9. Image.putalpha(alpha): adds or replaces the alpha layer of the image.
10. Image.verify(): verify whether the file is damaged.
11. Image.close(): close the file
12. Image.save(fp,format=None,**params): save the picture.
13. Image.show(title=None,command=None): displays a picture.
14. Image.transform(size,method,data=None,resample=0,fill=1): transform the image.
🌻 ImageFilter module
The built-in module ImageFilter implements the filter function, which can be used to create image effects or use this effect as a medium for further processing. In the module ImageFilter, some predefined filters and custom filter functions are provided. The most commonly used predefined filters are as follows:
BLUE: fuzzy
CONTOUR: CONTOUR
DETAIL: Details
EDGE_ENHANCE: edge enhancement
EDGE_ENHANCE_MORE: edge enhancement
EMBOSS
FIND_EDGES: finding edges
SHARPEN: sharpening
SMOOTH: SMOOTH
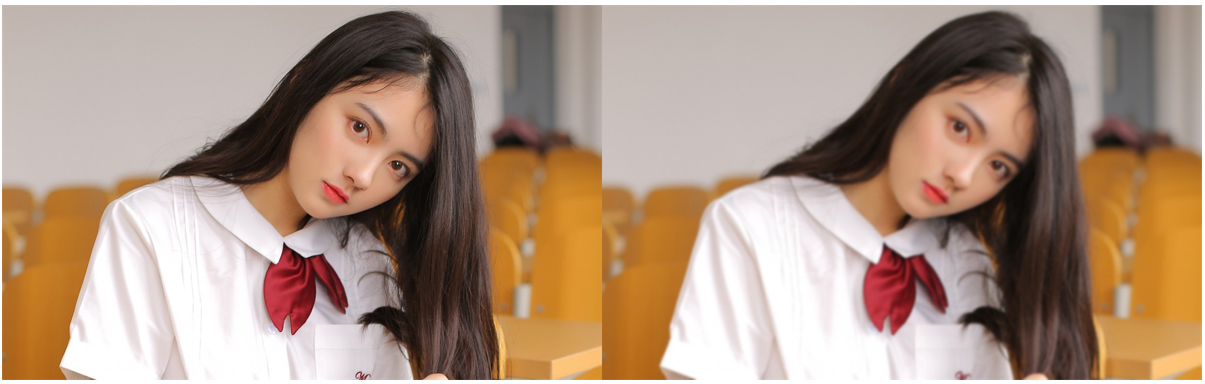
🌻 Small example 1 blur the picture
from PIL import Image,ImageFilter
img=Image.open('p2.jpg')
w,h=img.size
#Create an image
img_output=Image.new('RGB',(2*w,h))
img_output.paste(img,(0,0))
img_filter=img.filter(ImageFilter.GaussianBlur)
img_output.paste(img_filter,(w,0))
img_output.show()
Comparison and display of results:
🌻 Common custom filter functions in ImageFilter
ImageFilter. Gaussian blur (radius = 2) Gaussian blur
ImageFilter.UnsharpMask (radius = 2, percent = 150, threshold = 3) unsharp mask filter imagefilter Minfilter (size = 3) minimum filter
ImageFilter.MedianFilter (size = 3) median filter
ImageFilter.ModeFilter (size = 3)
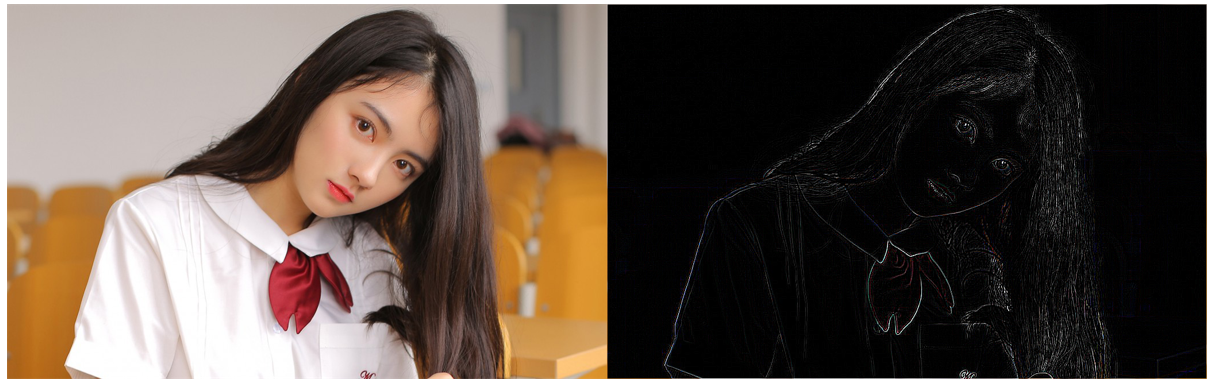
🌻 Small example 2
from PIL import Image,ImageFilter
img=Image.open('p2.jpg')
w,h=img.size
#Create an image
img_output=Image.new('RGB',(2*w,h))
img_output.paste(img,(0,0))

filters=[]
img_filter1=img.filter(ImageFilter.GaussianBlur) #Gaussian Blur
img_filter2=img.filter(ImageFilter.EDGE_ENHANCE) #Edge enhancement filter
img_filter3=img.filter(ImageFilter.FIND_EDGES) #Find edge filter
filters.append(img_filter1)
filters.append(img_filter2)
filters.append(img_filter3)

for img_filter in filters:
    img_output.paste(img_filter,(w,0))
    img_output.show()
Comparative display of results

Edge enhancement filter:
 Looking for edge filters:
🍉 ImageChops module
The built-in module ImageChops of the pilot library contains several functions for image synthesis.
These synthesis functions are realized by calculating the pixel values in the channel.
It is mainly used for making special effects, synthesizing pictures and other operations. Common built-in functions are as follows:
(1) The addition function add() performs arithmetic addition on two pictures. The syntax is as follows:
ImageChops.add(image1,image2,scale = 1.0,offset = 0 )
Each pixel value in the synthesized image is calculated according to the following formula.
out = ((image1 + image2) / scale
(2) the subtraction function subtract() performs arithmetic subtraction on two pictures. The syntax is as follows:
ImageChops.subtract(image1,image2,scale = 1.0,offset = 0 )
Each pixel value in the synthesized image is the corresponding pixel value of the two images according to the following formula.
out = ((image1 - image2) / scale + offset
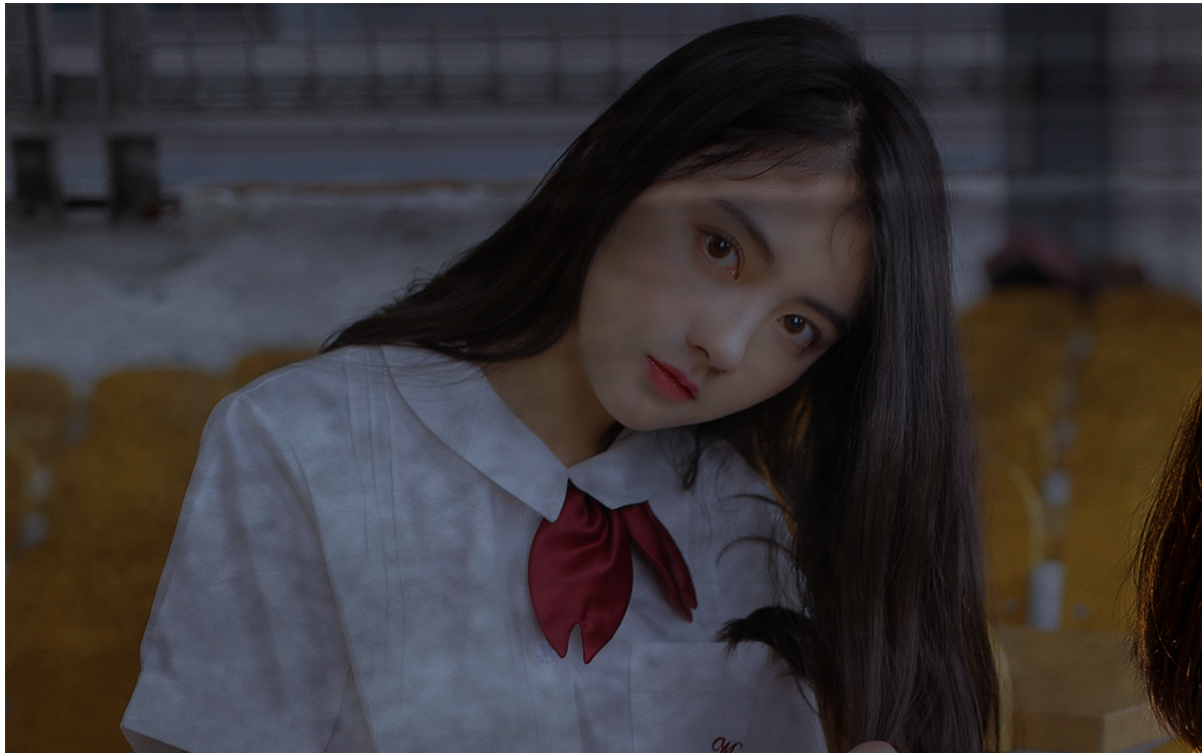
🌻 Example application I
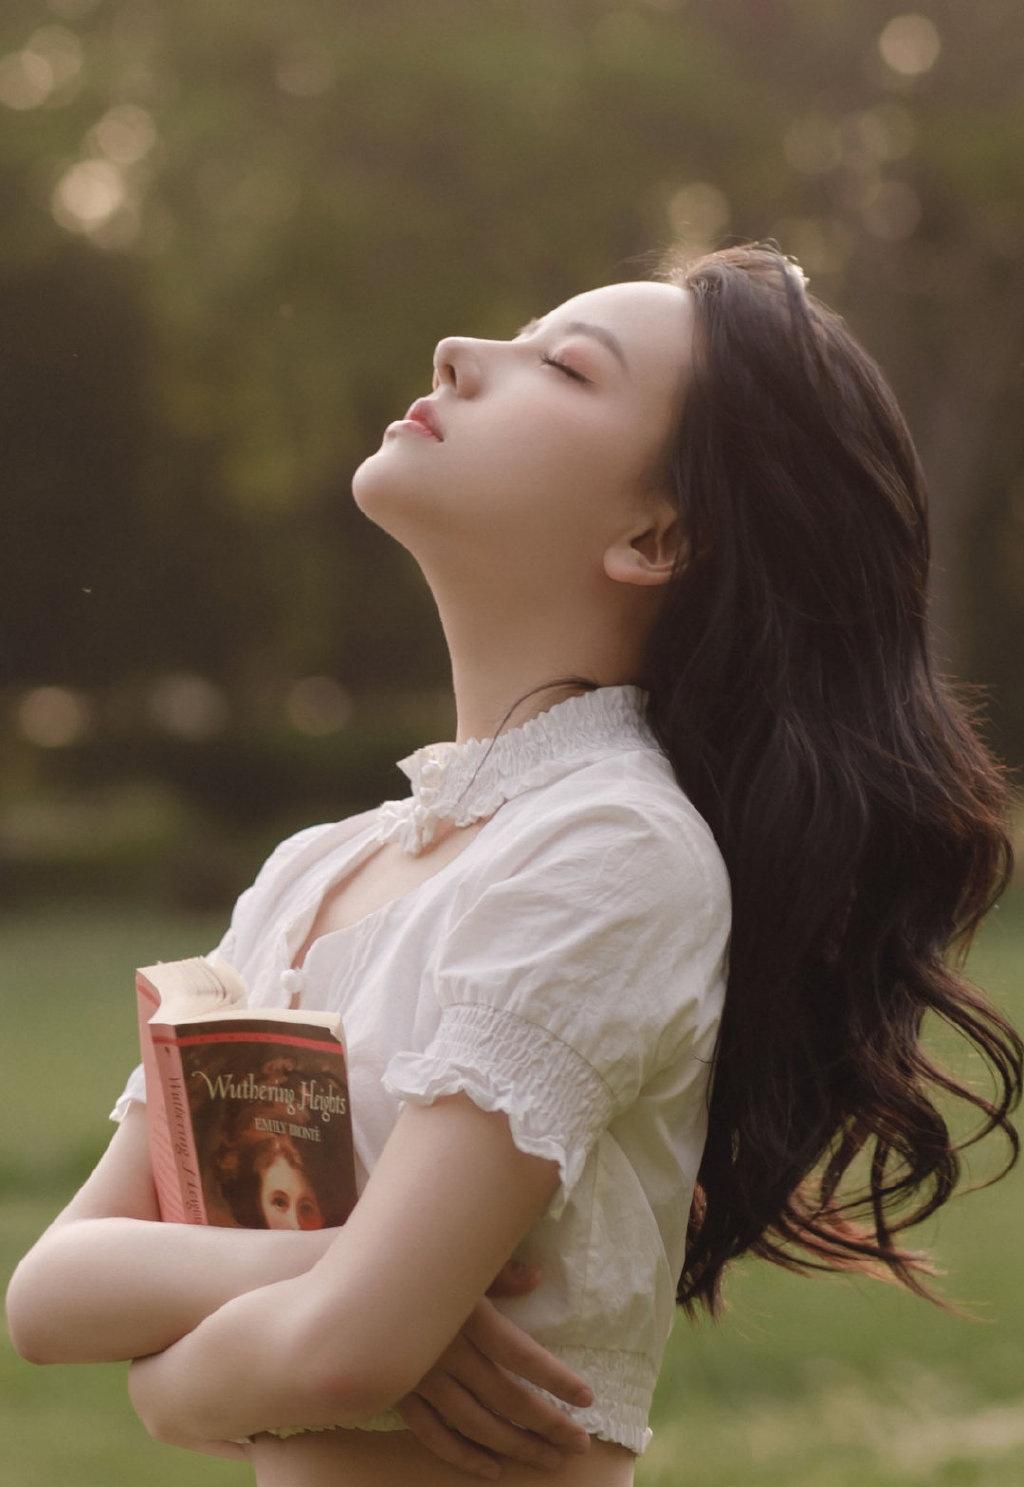
Let's look at the original picture first. The picture must be selected, otherwise the repaired picture can't bear to look directly at it.
from PIL import Image,ImageChops
#Open picture
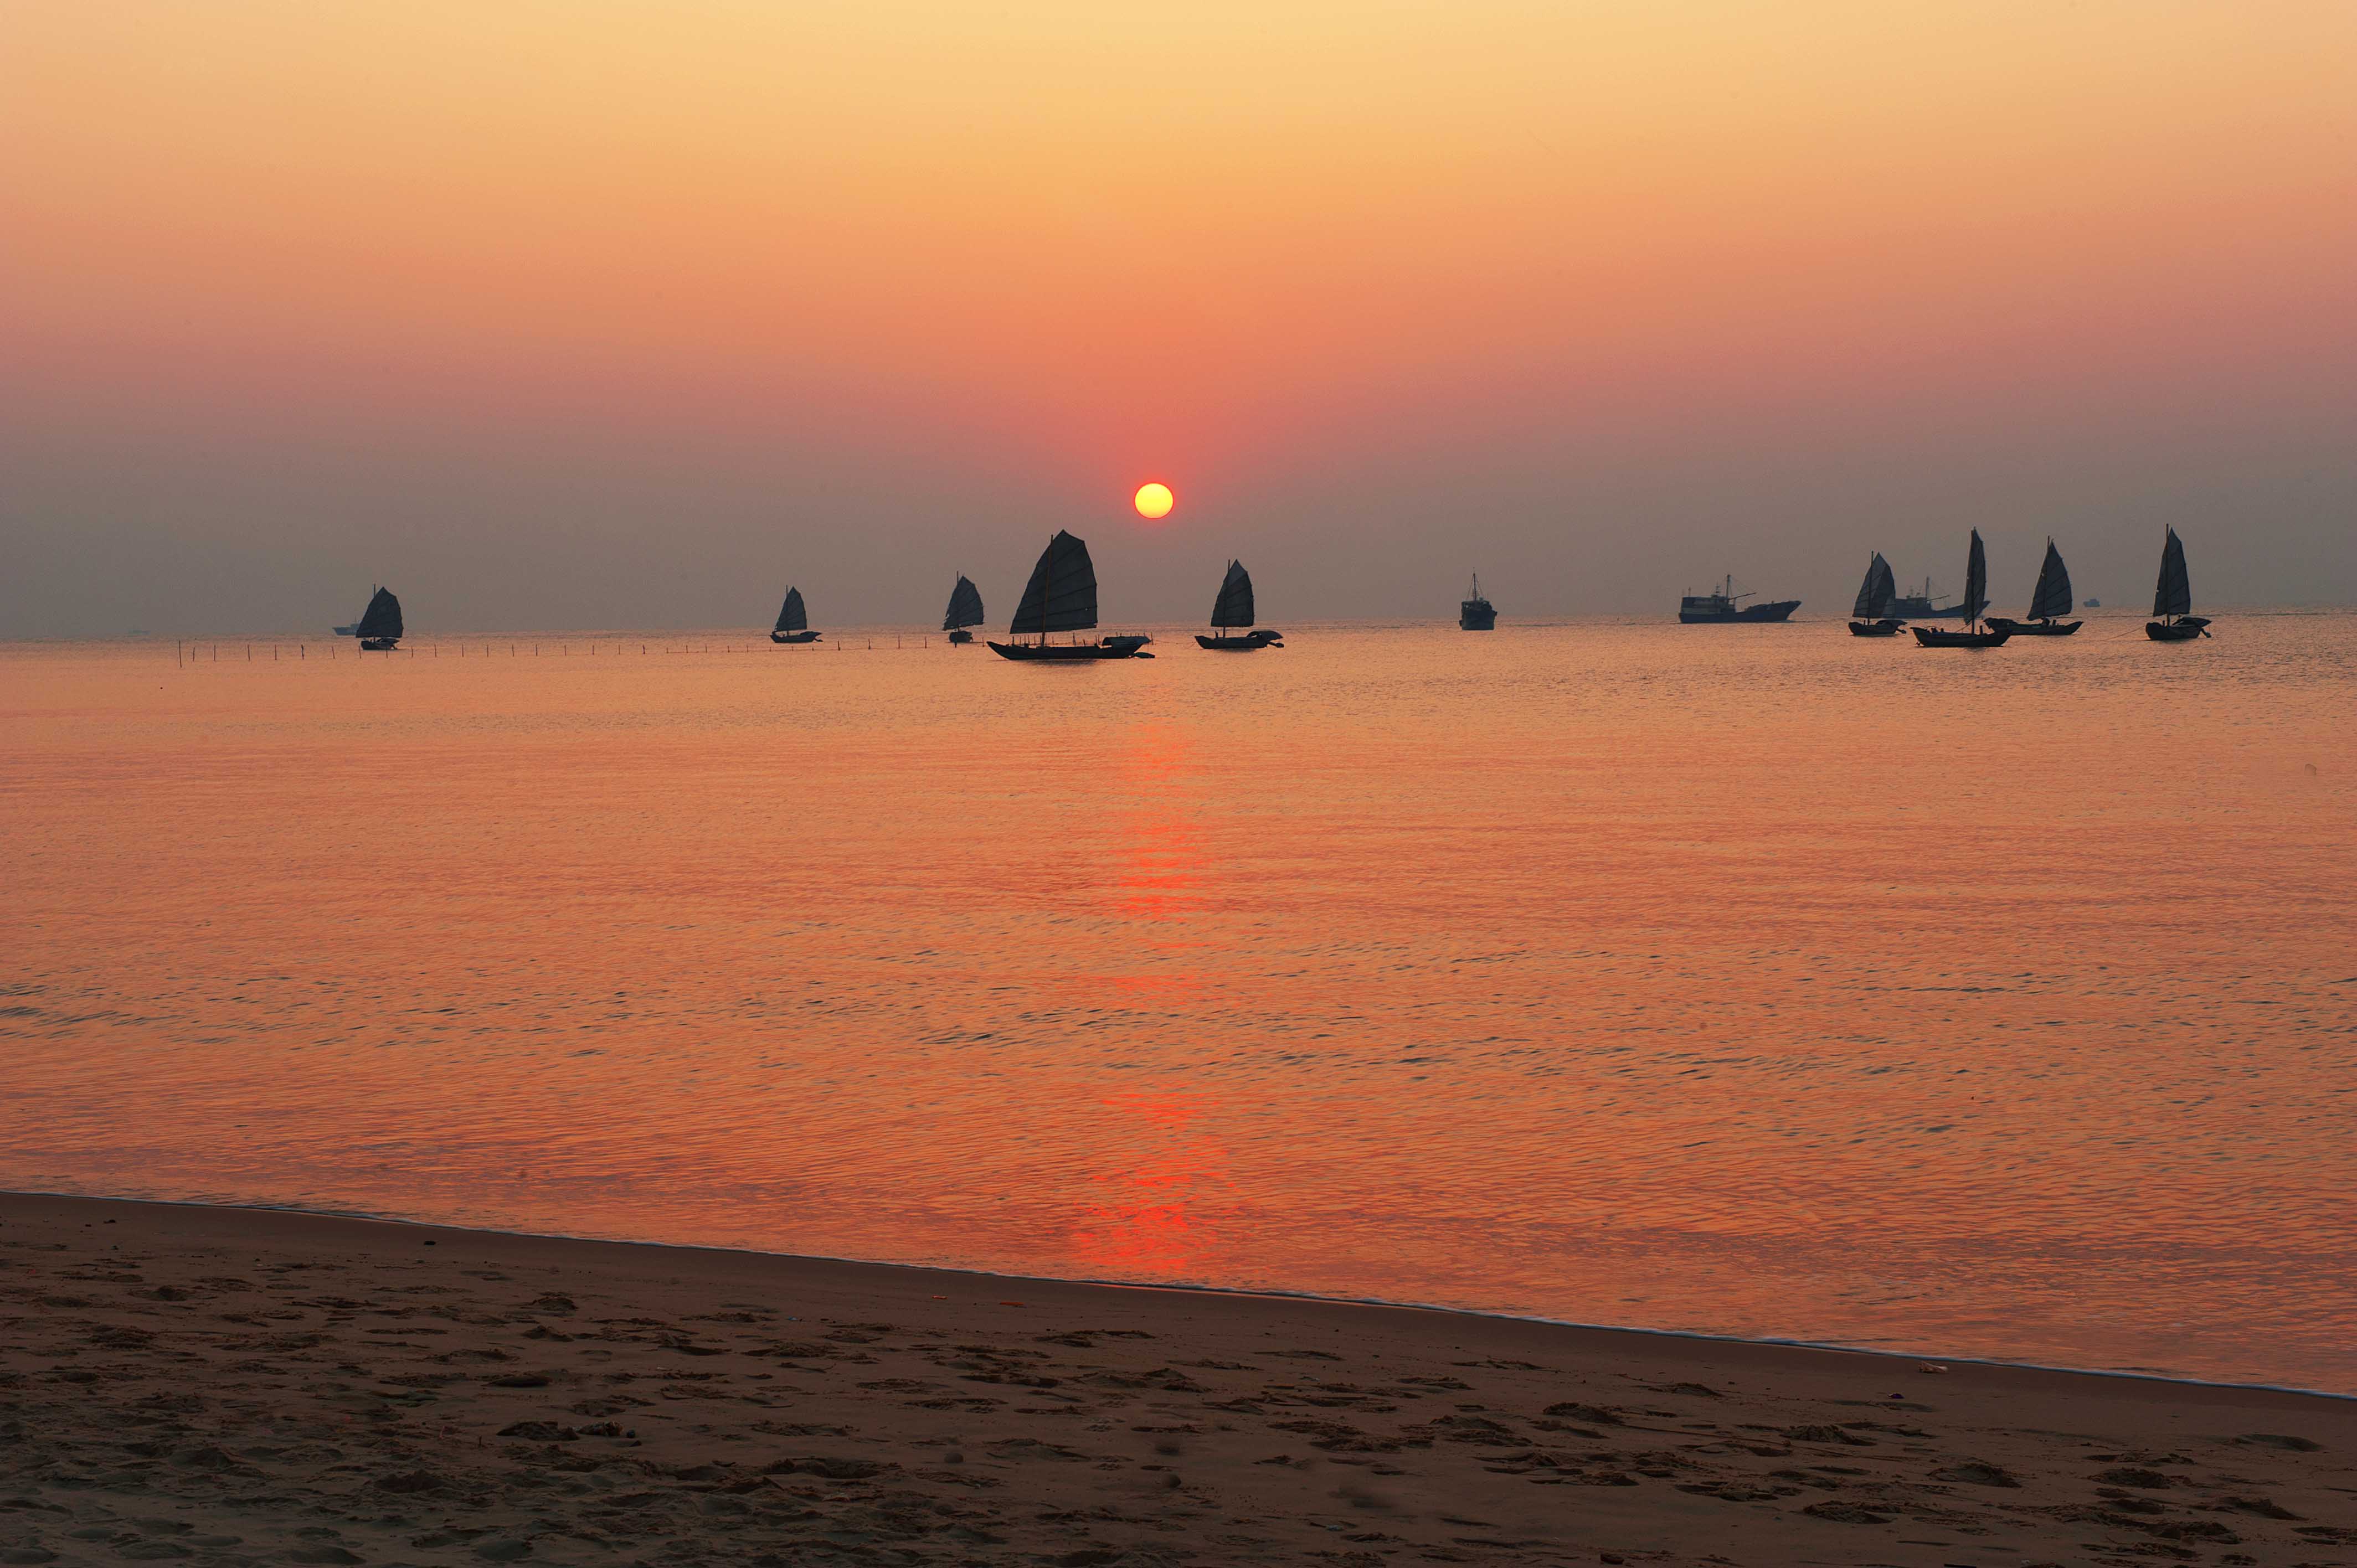
img1=Image.open('p2.jpg')
img2=Image.open('p3.jpg')
#Arithmetic addition of two pictures
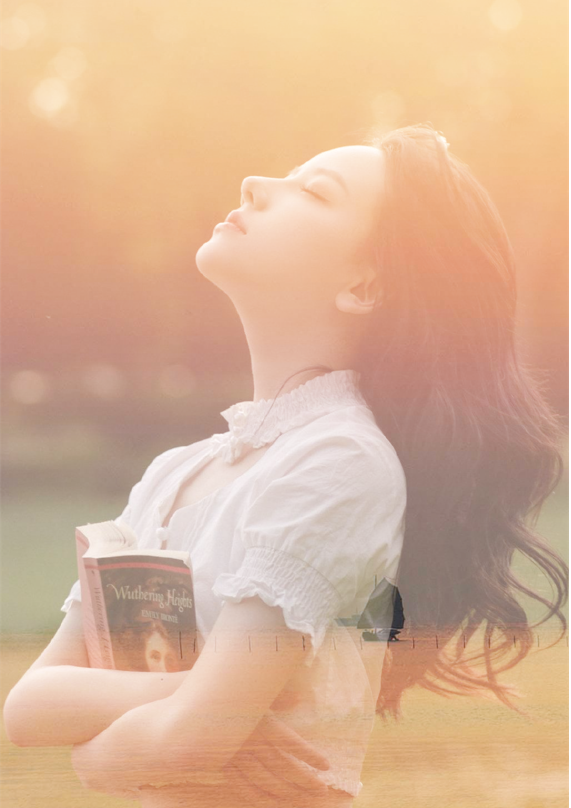
ImageChops.add(img1,img2).show()
#Arithmetic subtraction of two pictures
ImageChops.subtract(img1,img2).show()Result display:
Addition operation: it feels a little retro
Subtraction: a little cinematic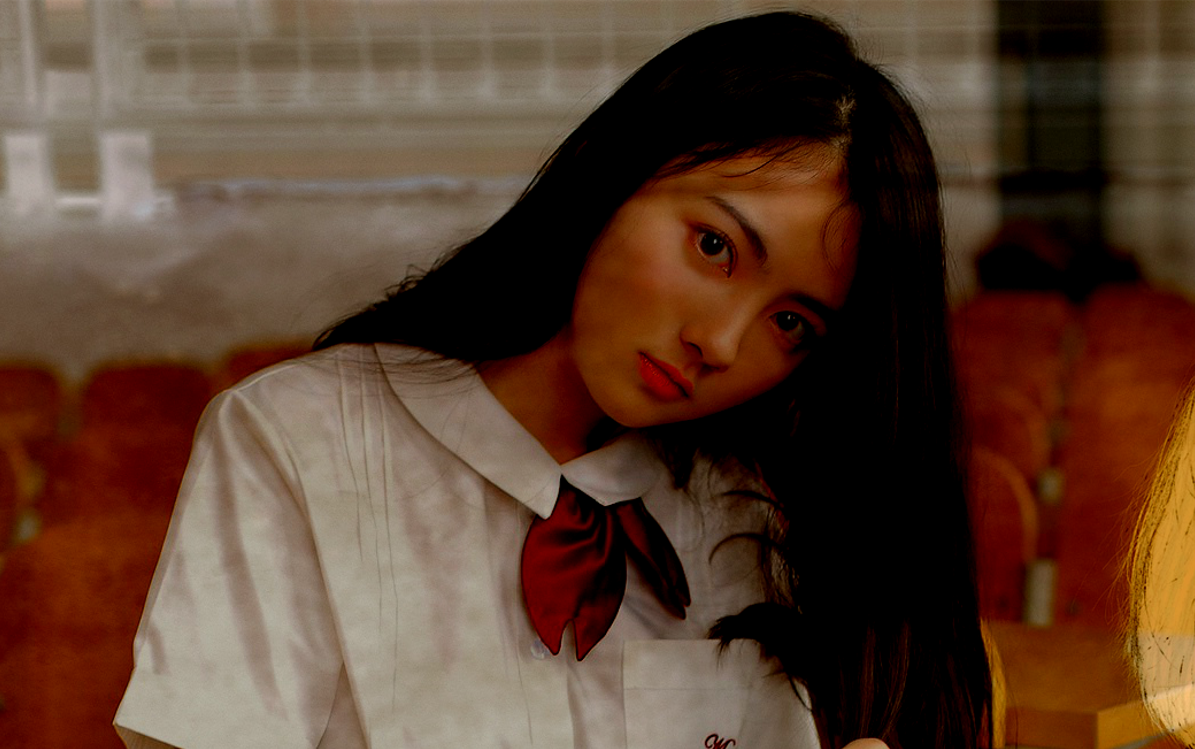
🌻 Other functions
(3) The darkening function dark () is used to compare the pixels of two pictures and take the smaller value of the corresponding pixels in the two pictures. Therefore, during synthesis, the dark part of the corresponding position in the two images is retained and the bright part is removed.
The specific syntax is as follows:
ImageChops.darker(image1,image2 )
The calculation formula of pixels is as follows:
out = min(image1, image2)
Application 1:
from PIL import Image,ImageChops
#Open picture
img1=Image.open('p2.jpg')
img2=Image.open('p3.jpg')
#Using the marker() function
ImageChops.darker(img1,img2).show()
(4) the brightening function lighter() is opposite to the darkening function darker(). Its function is to compare two pictures (pixel by pixel) and return a new picture. This new picture is obtained by superimposing the brighter parts of the two pictures. In other words, at a certain point, whichever of the two figures has a large (bright) value is taken. The specific syntax is as follows:
ImageChops.lighter(image1,image2 )
The function lighter() is opposite to the function dark (). The calculated image is the bright part of the corresponding position of the two images. The calculation formula of pixels is as follows:
out = max(image1,image2)
Application 2:
from PIL import Image,ImageChops
#Open picture
img1=Image.open('p2.jpg')
img2=Image.open('p3.jpg')
#Brightener() function
ImageChops.lighter(img1,img2).show()
This effect is very good.

(5) The overlay function multiply() is used to overlay two pictures on each other.
If you overlay a picture with pure black, you will get a pure black picture.
If pure white is superimposed with the picture, the picture is not affected. Concrete grammar
ImageChops.multiply(image1,image2 )
The effect of the composite image is similar to that of two pictures stacked together on transparent tracing paper. The calculation formula of corresponding pixels is as follows:
out = image1 * image2 / MAX
Application III:
from PIL import Image,ImageChops
#Open picture
img1=Image.open('p3.jpg')
img2=Image.open('p2.jpg')
#multiply two pictures superimposed on each other
ImageChops.multiply(img1,img2).show()
Results:
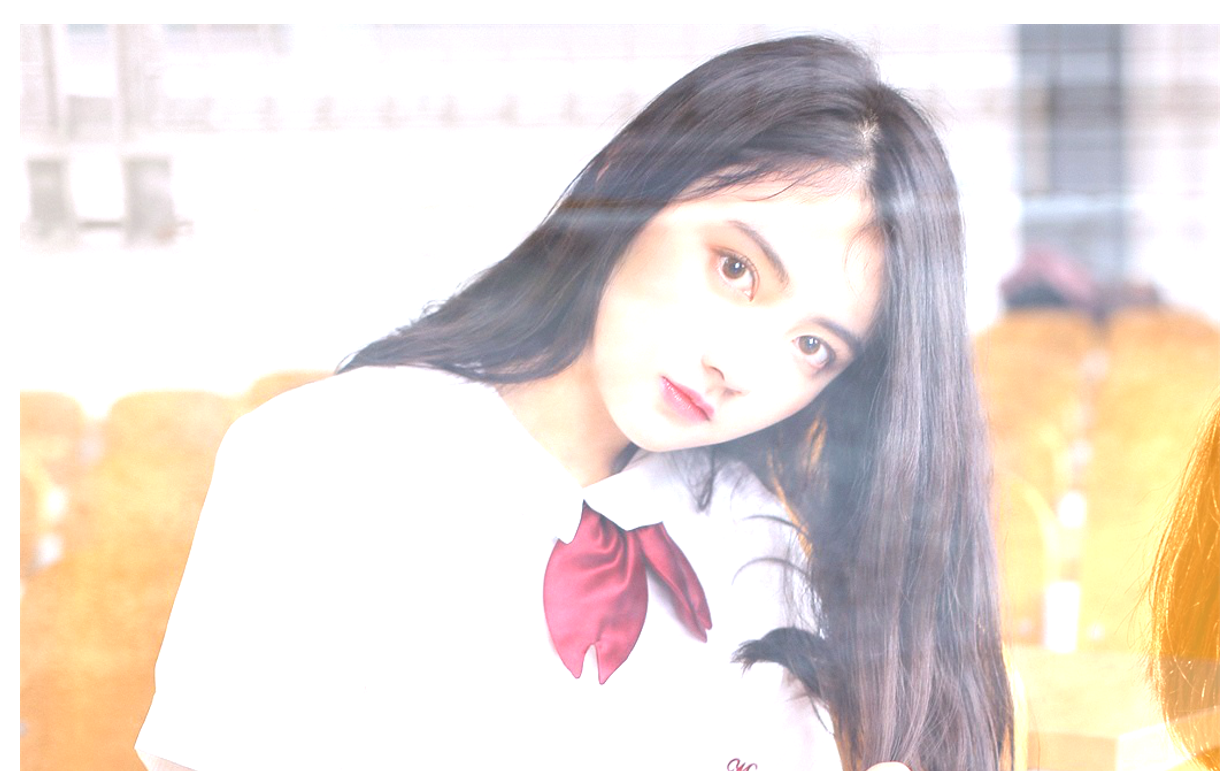
 (6) the screen function screen() is to reverse the color first and then overlay to realize the effect of synthetic image, just like the effect of projecting two slides onto one screen with two projectors at the same time. The specific syntax is as follows:
ImageChops.screen(image1,image2 )
The calculation formula of corresponding pixels is as follows:
out = MAX - ((MAX - image1) * (MAX - image2) / MAX
Visual fatigue, change the picture!
from PIL import Image
from PIL import ImageChops
#Open picture
imga=Image.open('p1.jpg')
imgb=Image.open('p4.jpg')
#Stack after reverse color
ImageChops.screen(imga,imgb).show()
Operation result: the artistic conception is coming up.
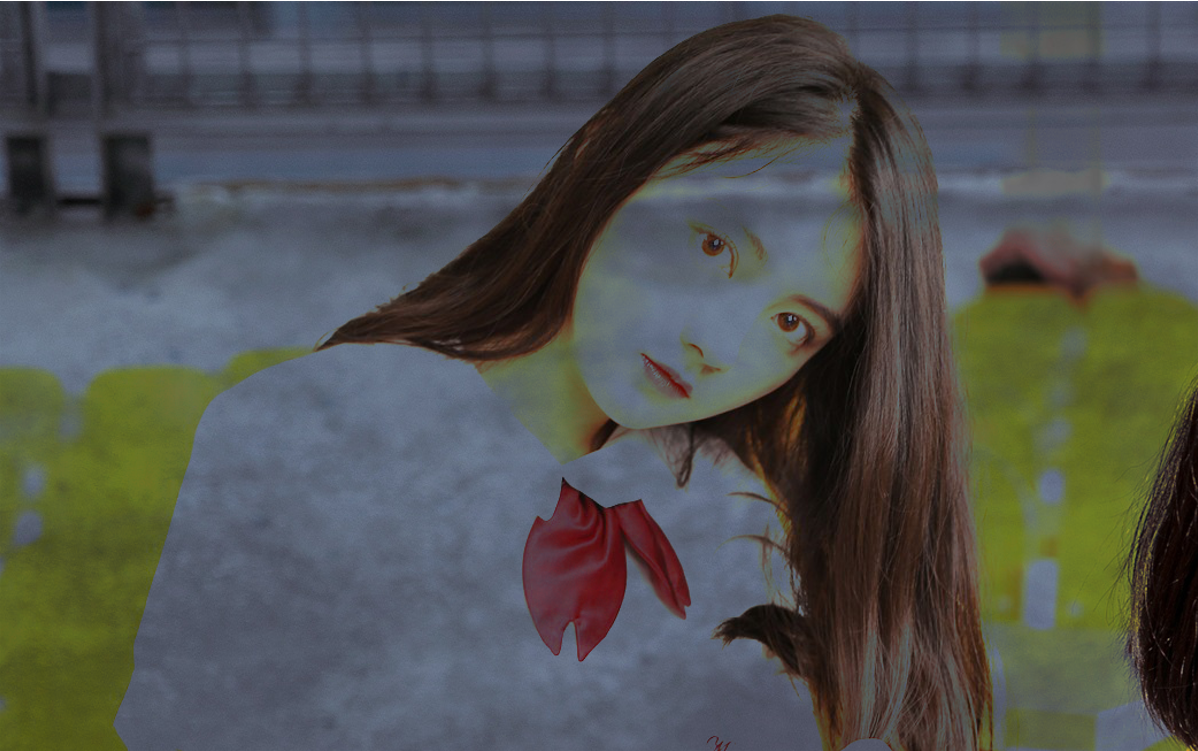
(7) The inverse function invert() is similar to the complement set in the set operation. The maximum value is Max. subtract each pixel to get the inverse color. When inverting, each pixel value of an image will be subtracted with 255 to obtain the inverse of the original image. In other words, it is an image of "negative" nature. The specific syntax is as follows:
ImageChops.invert(image)
The calculation formula of corresponding pixels is as follows:
out = MAX - image
🌻 Using 4 is not recommended unless you want to see your girlfriend's bones
from PIL import Image,ImageChops
#Open picture
img1=Image.open('p3.jpg')
img2=Image.open('p2.jpg')

#invert()
ImageChops.invert(img1).show()
Display of operation results;

(8) the comparison function difference() can perform subtraction operation pixel by pixel to calculate the absolute value. The function difference() can the image after subtracting the corresponding pixel values of two images. If the corresponding pixel values are the same, it is black. The function difference () is usually used to find the difference between images. The specific syntax is as follows:
ImageChops.difference(image1,image2 )
The calculation formula of corresponding pixels is as follows:
out = abs(image1 - image2)
🌻 Application 5
from PIL import Image,ImageChops
#Open picture
img1=Image.open('p1.jpg')
img2=Image.open('p2.jpg')

#Comparison function difference()
ImageChops.difference(img2,img2).show()
🍉 ImageEnhance module usage
The built-in ImageEnhance module contains several functions to enhance the image effect, which are mainly used to adjust the color, contrast, brightness and clarity of the image. It feels the same as adjusting the display parameters of the TV.
In the module ImageEnhance, all image enhancement objects implement a common interface.
This interface contains only one of the following methods. The method enhance() will return an enhanced Image object. The parameter factor is a floating-point number greater than 0, and 1 means to return the original Image.
When using the module ImageEnhance to enhance the image effect in the Python program, it is necessary to create the corresponding enhancement adjuster first, then call the adjuster output function, according to the specified enhancement coefficient (less than 1 indicates that the attenuation is greater than 1, which means that the enhancement is equal to 1 indicates that the original image remains unchanged) adjusts and outputs the adjusted image finally. In the module imageenhance, the commonly used built-in functions are as follows:
(1)ImageEnhance.Color (image): the function is to adjust the image color balance, which is equivalent to the color adjustment on page 14 of color TV, and realizes the enhance ment method of the interface mentioned above.
(2)ImageEnhance.Contrast (image): the function is to adjust the image contrast, which is equivalent to the contrast adjustment of color TV.
(3)ImageEnhance.Brightness (image): the function is to adjust the brightness of the image.
(4)ImageEnhance.Sharpness (image): the function is to adjust the sharpness of the image, which is used to sharpen / passivate the image. The factor of sharpening operation is a floating-point number between 0 and 2. When factor=0, a fuzzy picture object is returned; When factor=2, a sharpened picture object is returned; When factor=1, the original picture object is returned.
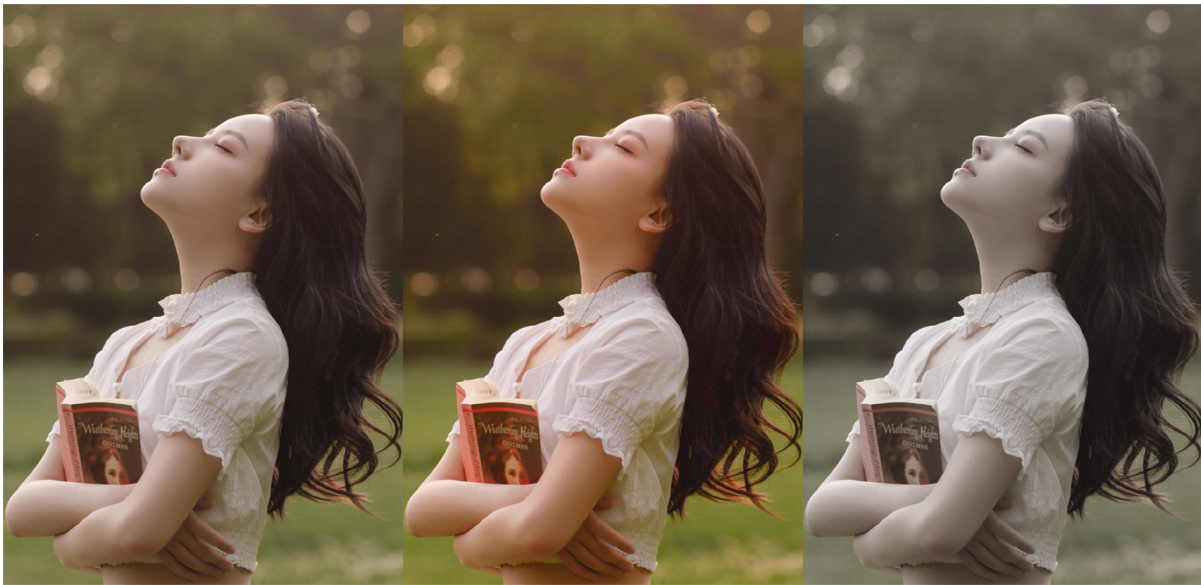
🌻 Application - use ImageEnhance to achieve image color balance
from PIL import Image,ImageEnhance
#Open image
img=Image.open('p1.jpg')
w,h=img.size
img_output=Image.new('RGB',(3*w,h))
#Copy original to (0,0)
img_output.paste(img,(0,0))
#Get color adjuster
img_color=ImageEnhance.Color(img)
imgb=img_color.enhance(1.5)
img_output.paste(imgb,(w,0))
#Fade color
imgc=img_color.enhance(0.5)
img_output.paste(imgc,(2*w,0))
img_output.show()
Comparison and display of results:
🌻 Apply - use ImageEnhance to achieve image brightness
from PIL import Image,ImageEnhance
#Open image
img=Image.open('p2.jpg')
w,h=img.size
img_output=Image.new('RGB',(3*w,h))
#Copy original to (0,0)
img_output.paste(img,(0,0))
#Get brightness adjuster
img_bright=ImageEnhance.Brightness(img)
imgb=img_bright.enhance(1.5)
img_output.paste(imgb,(w,0))
#Reduce brightness
imgc=img_bright.enhance(0.5)
img_output.paste(imgc,(2*w,0))
img_output.show() 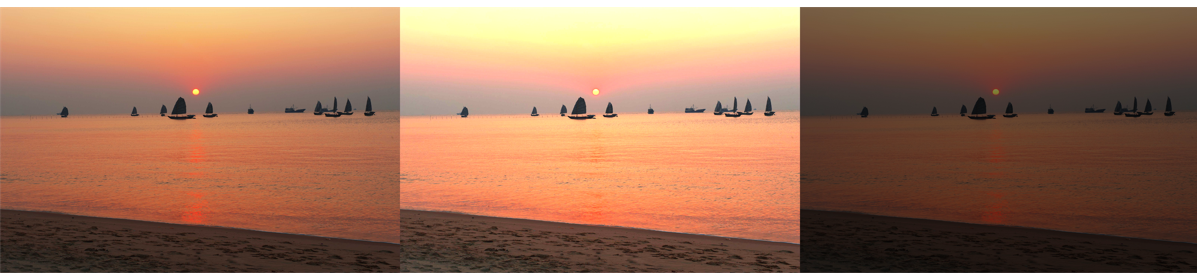
Finally
I've seen it all. Don't you backhand for three times? Take it to your girlfriend to fix the picture. Maybe Hey, hey, hey
Code can also be obtained through official account.