prepare
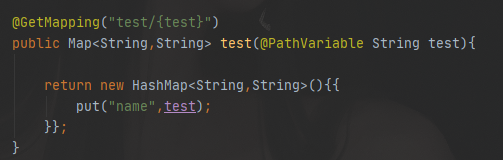
First, prepare the simplest demo and a rest interface. Our goal is to deploy this demo to the k8s cluster and access it. The port exposed here is 8080
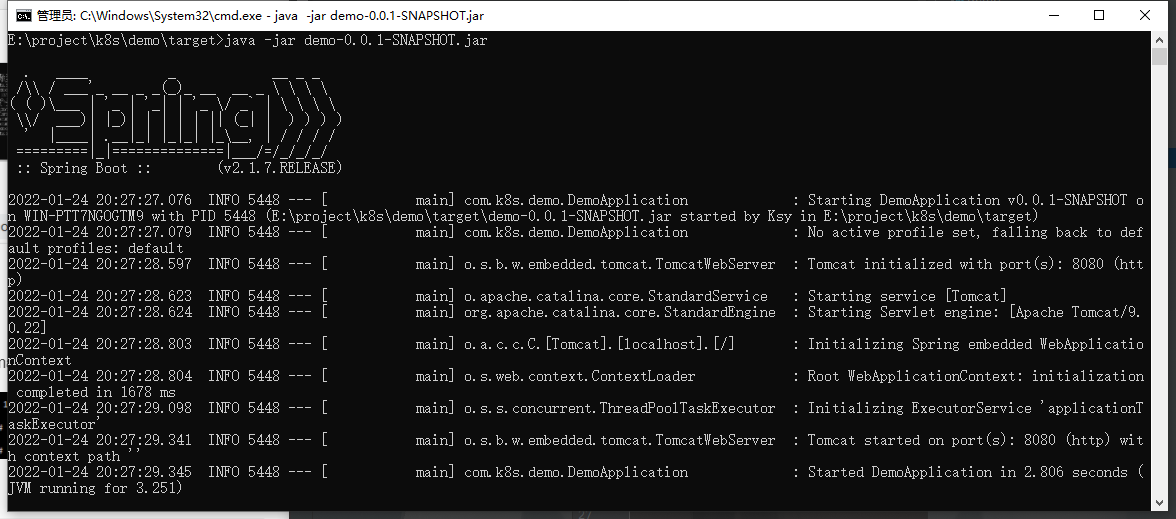
Run the jar package locally
Local access
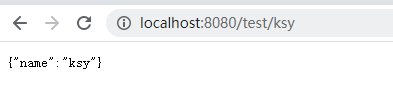
Image packaging
-
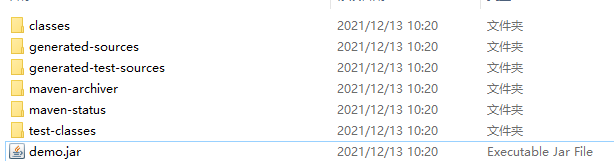
First upload the jar package to a folder on the master

-
Write Dockerfile
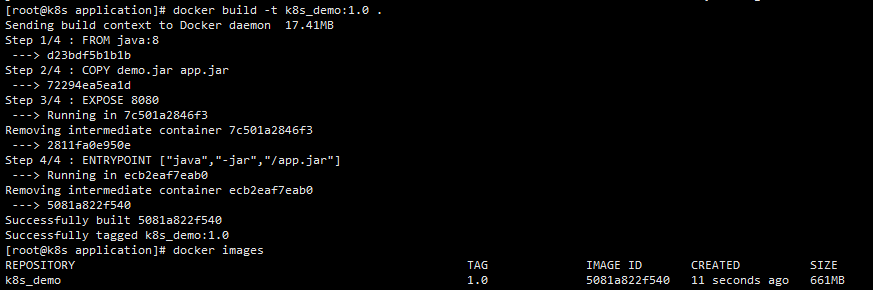
 #create a file
 vim Dockerfile
 ##content
 FROM java:8
 COPY demo.jar app.jar
 EXPOSE 8080
 ENTRYPOINT ["java","-jar","/app.jar"]
-
Build the image (note the last point)
docker build -t k8s_demo:1.0 .
You can see a file named k8s_demo: the 1.0 image has now been built
-
Deploy image warehouse (choose one of two warehouses, generally harbor)
1.Docker Registry
 docker run -d -v /etc/images/registry:/var/lib/registry -p 5000:5000 --restart=always --name my-registry registry

 docker ps

 #View local warehouse image
 #Via ip
 curl http://192.168.101.100:5000/v2/_catalog
 #Through domain name
 curl http://k8s.master:5000/v2/_catalog

It can be found that it is empty. That's right. We haven't uploaded our image yet2.Harbor
Install docker compose
 #Download the specified version of docker compose
 curl -L https://github.com/docker/compose/releases/download/1.24.1/docker-compose-`uname -s`-`uname -m` > /usr/local/bin/docker-compose
 #Assign executable permissions to binary files
 chmod +x /usr/local/bin/docker-compose
 #Verify whether the docker compose installation is successful
 docker-compose --version
Download the harbor installation package
GitHub address of each release of harbor: https://github.com/goharbor/harbor/releases , you can download various versions of harbor by yourself, and finally upload them to your server, or pull them directly from the server. I use v2 4.1 the harbor version and warehouse version are not important, as long as they can be used

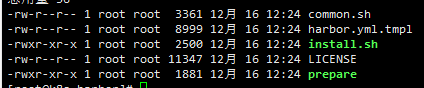
tar -zxvf harbor-online-installer-v2.4.1.tgz
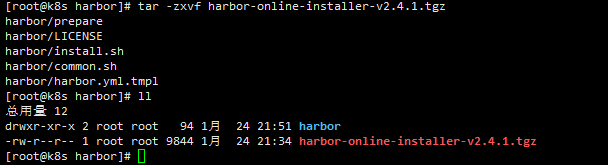
cd harbor
There are two steps to do here. copy a yml for installation and modify it
cp harbor.yml.tmpl harbor.yml
vim harbor.yml
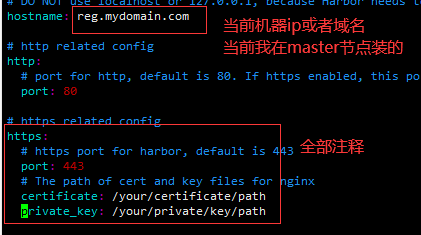
After modification

Run install sh
./install.sh
Many related images will be pulled for the first time, which needs to wait for a while.
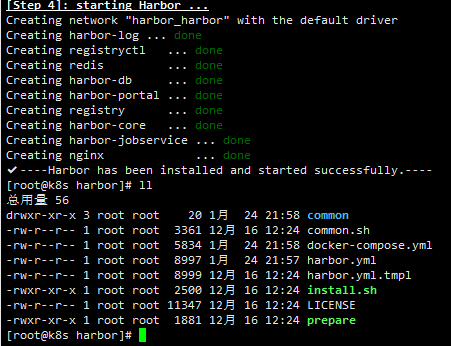
So far, harbor has been installed and run successfully, and there will be one more docker composition YML file, directly execute the following command to start the next time
docker-compose -f docker-compose.yml up -d
You need to stop harbor and enter your yaml directory to execute:
docker-compose -f docker-compose.yml down
- Upload image
In order to enable the client server to quickly access the image warehouse just built on the server (HTTPS certificate needs to be configured by default), simply configure the trusted settings of the private warehouse on the client, so that we can access it directly through HTTP: # VIM / etc / docker / daemon JSON, the following operations are configured according to the warehouse you installed
Docker Registry configuration
The following operations need to be run on each node, and each node must be able to access the image warehouse
   vim /etc/docker/daemon.json
   # Add the following
   "insecure-registries": ["192.168.101.100:5000"]
   #Or use a domain name
   #"insecure-registries": ["http://k8s.master"]
   #Restart docker
   systemctl restart docker
Harbor configuration
The following operations need to be run on each node, and each node must be able to access the image warehouse
vim /etc/docker/daemon.json
# Add the following
"insecure-registries": ["192.168.101.100"]
#Or use a domain name
#"insecure-registries": ["http://k8s.master"]
#Restart docker
systemctl restart docker
You can find your own harbor account configuration
It depends on the ip address of your master, and you must turn off your firewall (you can play by yourself). After modifying the configuration file, you must restart docker
Upload the image to the private warehouse. This only describes the use of harbor warehouse:
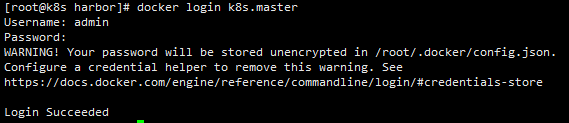
Log in to harbor warehouse
The browser can enter the host ip of harbor (port 80 by default). The default password of admin is Harbor12345. If you want to modify admin or add a harbor user, you can configure it yourself. I won't talk about this problem here.
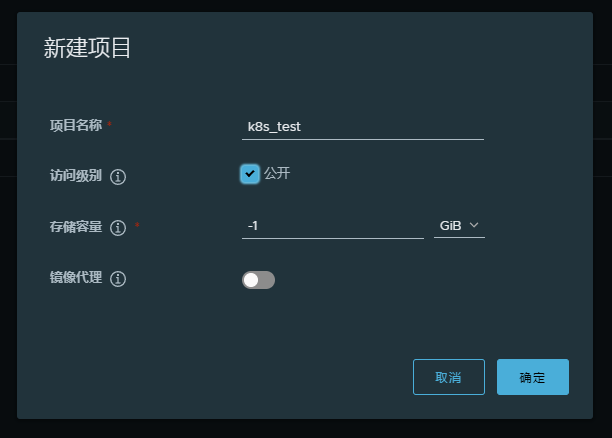
Create project
Modify the image name to warehouse address / warehouse name / image name: TAG
Note that the warehouse address marked with tag here should be consistent with the warehouse address configured in secure registers at that time. The configured ip should be written as IP and the configured domain name should be written as domain name
When push ing, it is reported as unauthorized. If you don't have permission, you need to log in first (the user name and password are the same as logging in to the harbor client)
#Image tagging (docker tag Image Name: tag warehouse address / image name: tag)
docker tag k8s_demo:1.0 192.168.101.100/k8s_test/k8s_demo:1.0
#If the trustworthiness setting is configured with a domain name, the warehouse address needs to be a domain name
#docker tag k8s_demo:1.0 k8s.master/k8s_test/k8s_demo:1.0
#docker push image warehouse address / image name: label (version)
docker push 192.168.101.100/k8s_test/k8s_demo:1.0
#docker push k8s.master/k8s_test/k8s_demo:1.0
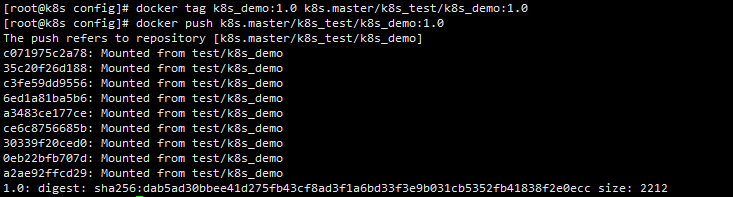
The trusted configuration here is the domain name of my configuration. It depends on their own configuration to modify the image name
After pushing, you can see the image you pushed up on the warehouse
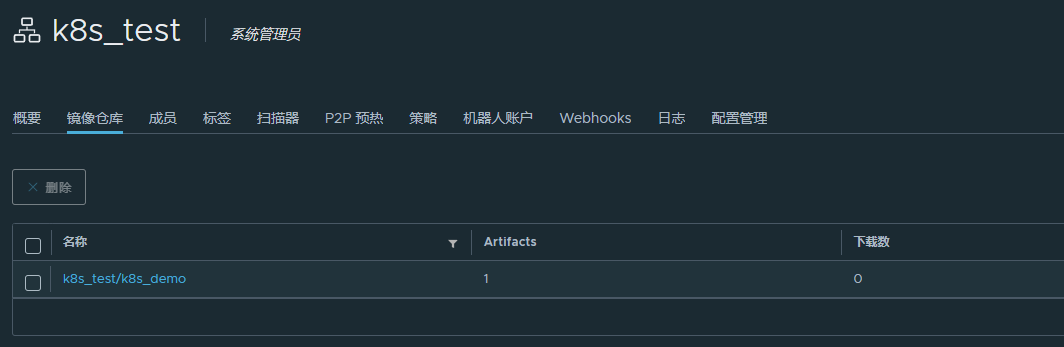
So far, the image production is completed
deploy
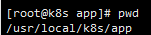
Here, I perform the operation of creating a pod in another folder
-
Create the deployment layout file of the demo application (the deployment maintains the basic running unit of pod and k8s container)
 vim demo_deploy.yaml

 apiVersion: apps/v1
 kind: Deployment
 metadata:
   name: k8s-demo
   labels:
     app: k8s-demo
 spec:
   replicas: 2
   selector:
     matchLabels:
       app: k8s-demo
   template:
     metadata:
       labels:
         app: k8s-demo
     spec:
       containers:
       - name: k8s-demo
         image: k8s.master/k8s_test/k8s_demo:1.0
         imagePullPolicy: IfNotPresent
         ports:
         - containerPort: 8080
be careful
The warehouse address of the image is the address of its own image
The values of name and labels in the layout file cannot be underlined, otherwise an error will be reported
-
Run deployment
 kubectl apply -f demo_deploy.yaml
 #View run
 kubectl get deploy
 kubectl get pod -o wide
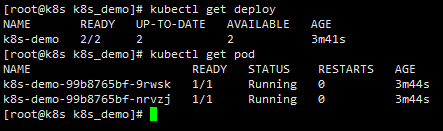
This is the deploy application we just created. The application of a k8s-demo has two copies. Check the operation of each pod in turn
kubectl describe pod k8s-demo-99b8765bf-9rwsk
kubectl describe pod k8s-demo-99b8765bf-nrvzj
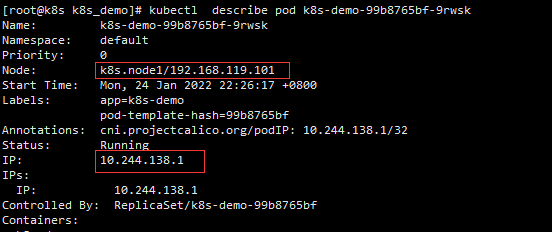
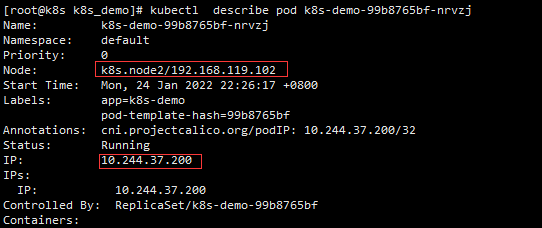
It is found that the two replicas are running on node1 and node2 nodes respectively (here, the cluster node changes ip because of the subsequent network problems).
Go to the two nodes to see the operation of docker. You can find that the two nodes are running a docker container, which is our k8s_demo


However, we found that ports is not exposed, because the access policy of k8s is clusterIp by default. In this mode, it can only be accessed inside the cluster, not exposed to the outside, as follows:

curl each other's test interfaces on node1 and node2 respectively


Direct requests within the ClusterIP cluster can be made, but not through the host
In the next chapter, deploy the Service to access the application through NodePort