Environmental preparation
- OS: MacOS
- JDK: java version "1.8.0_231"
- idea: 2019.3.4
- Gradle: 5.6.4
1. Download Spring source code
1.1 method 1-Github official
https://github.com/spring-projects/spring-framework
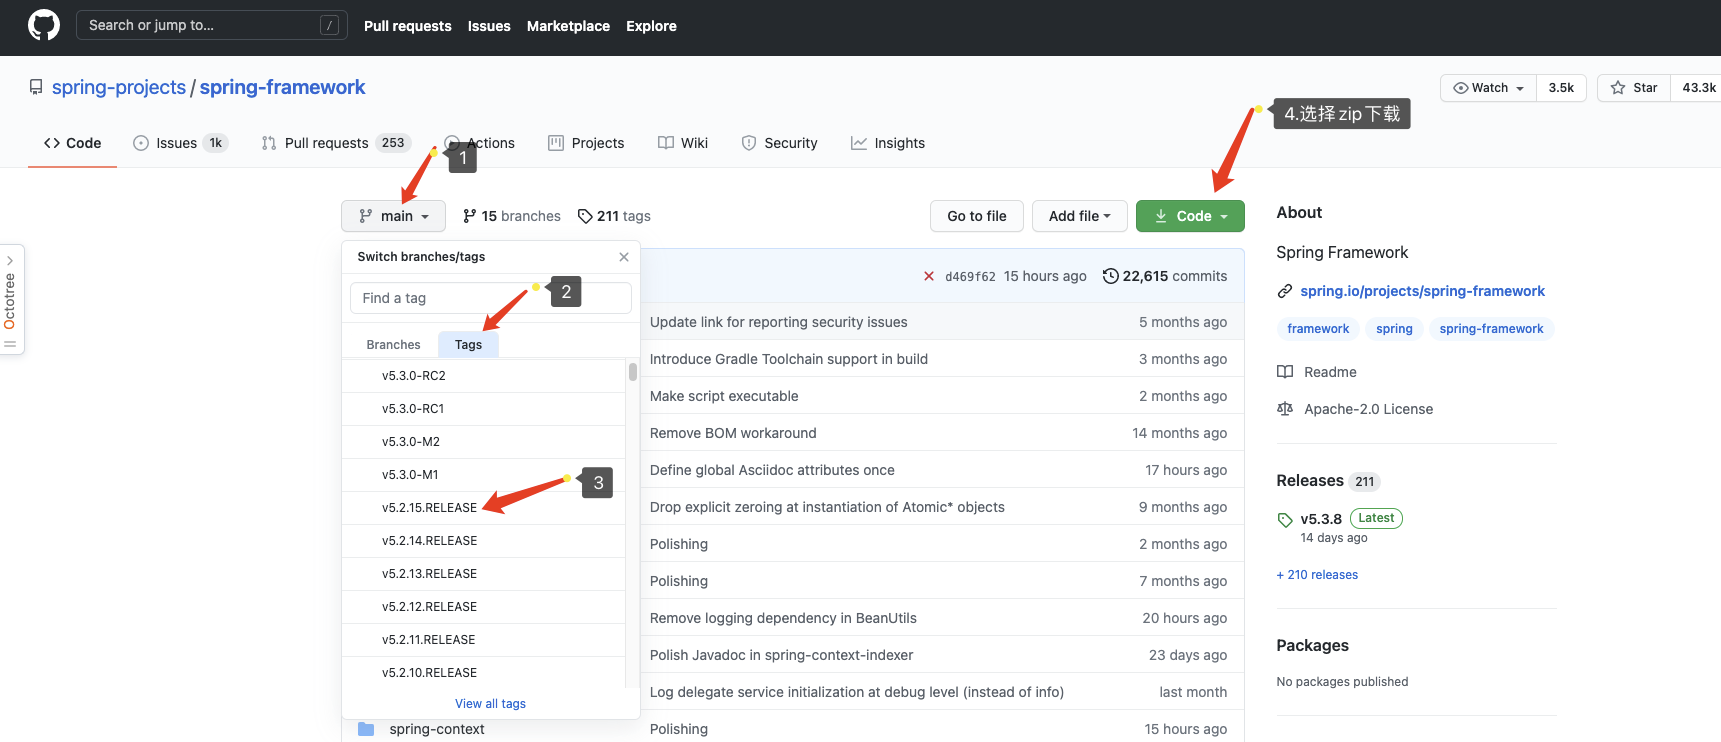
Recommendations:
- Select the release version to download
- The network speed is too slow. Select mode 2
1.2 mode 2-Gitee
Code cloud accelerated download address
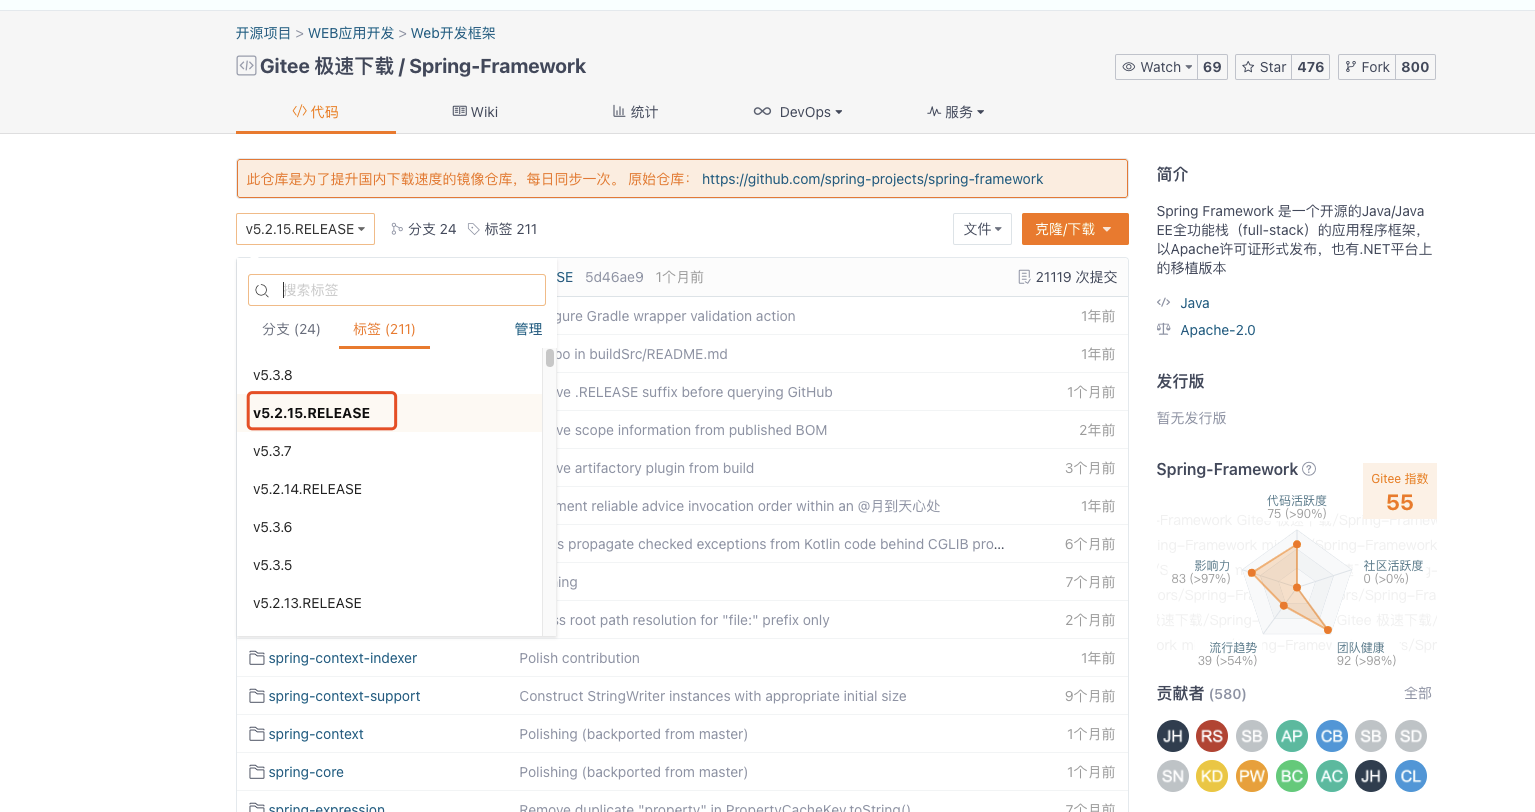
After downloading, unzip it and put it in a directory without Chinese
2. Modify the configuration file
In the extracted directory, there will be several configuration files that we need to modify in advance
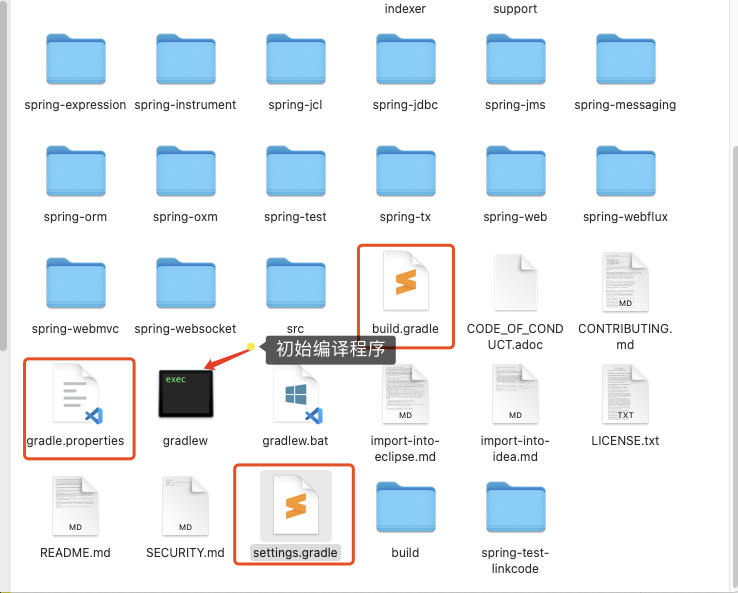
2.1 build.gradle
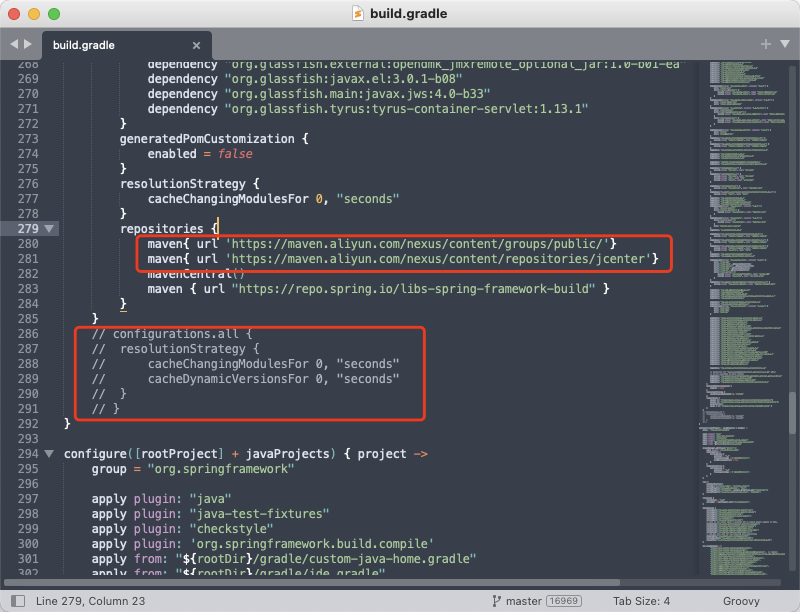
Step 1: search repositories and add Alibaba cloud maven image warehouse
repositories {
	maven{ url 'https://maven.aliyun.com/nexus/content/groups/public/'}
    maven{ url 'https://maven.aliyun.com/nexus/content/repositories/jcenter'}
	mavenCentral()
	maven { url "https://repo.spring.io/libs-spring-framework-build" }
}
Note: you'd better not delete the latter two, otherwise you may not find the corresponding version of the jar package in alicloud during later construction, and an error will be reported. Best to keep
Step 2: search for configurations
Comment it out
// configurations.all {
// 	resolutionStrategy {
// 		cacheChangingModulesFor 0, "seconds"
// 		cacheDynamicVersionsFor 0, "seconds"
// 	}
// }
If you don't do this, use gradlew (gradle wrapper command) to compile oxm:compileTest Java first, which may cause the progress bar to be stuck for 0% a long time, and the compilation process is quite slow! (you can compile with gradlew first to see the effect. If it passes soon, there is no need to modify it here)
The final revision of this document is as follows:
2.2 gradle.properties
version=5.2.15.RELEASE
org.gradle.daemon=true
org.gradle.jvmargs=-Xmx4096m -XX:MaxPermSize=512m -XX:+HeapDumpOnOutOfMemoryError -Dfile.encoding=UTF-8
org.gradle.caching=true
org.gradle.parallel=true
Adjust the memory according to your own needs in order to speed up the progress of compiling the source code. The personal test of 4G is still very fast~
Note: org gradle. Daemon = true is new
2.3 settings.gradle
In the first line, add the repository address of Alibaba cloud, and don't move the other two. As follows:
pluginManagement {
	repositories {
		maven { url "https://maven.aliyun.com/repository/public" }
		gradlePluginPortal()
		maven { url 'https://repo.spring.io/plugins-release' }
	}
}
2.4 gradle-wrapper. Properties (optional)
If you find that the speed of downloading gradle is slow later, you can download it locally first. Then specify it in this file, and you don't need to download it again.
Location of this file: spring framework / gradle / wrapper / gradle wrapper properties
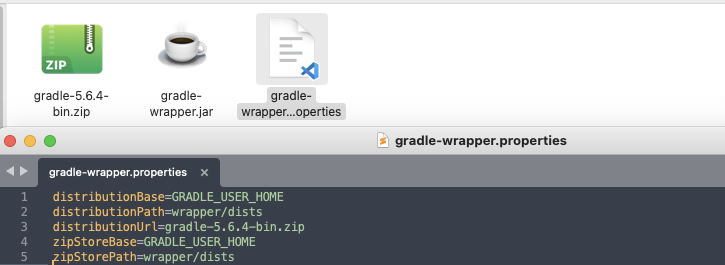
Original configuration:
distributionUrl=https://services.gradle.org/distributions/gradle-5.6.4-bin.zip
If you download gradle yourself, you'd better be consistent with the version here. Of course, you can also download it directly with this link and save it locally.
Note here: if you use a local gradle, the address here may be a little pit. As can be seen from the figure above, I put the downloaded gradle compressed package into the directory at the same level as the configuration file. I tried to directly specify / user/my/download under the mac (starting from the root directory of the mac). When it finally found: [current directory src]/user/my/download, it will report an exception that the file cannot be found.
The reason is that distributionbase = grade configured above_ USER_ Home, this address seems to be the directory of the configuration file.
distributionBase=GRADLE_USER_HOME
distributionPath=wrapper/dists
distributionUrl=https\://services.gradle.org/distributions/gradle-5.6.4-bin.zip
zipStoreBase=GRADLE_USER_HOME
zipStorePath=wrapper/dists
2.5 install your own gradle
Although there is gradle in the idea after the project is imported into the idea. But just like maven, we download gradle ourselves and use our own gradle in the idea.
Under the mac environment, the gradle downloaded in the previous step After zip decompression:
vim ~/.bash_profile
 Modify profile
export GRADLE=/Users/Develop/develop-tools/gradle-5.6.4(Yours gradle Path of);
export PATH="$MAVEN_HOME/bin:$PATH";
Save exit, refresh configuration file
source ~/.bash_profile
The same is true for windows
At this point, our preparations are finished, and let's start the initial compilation!
3. Compile spring oxm: compiletestjava
In the spring source directory, there are the following two files. windows uses gradlew Bat and mac can directly execute the one on the left.
Of course, you can also run commands in cmd or bash
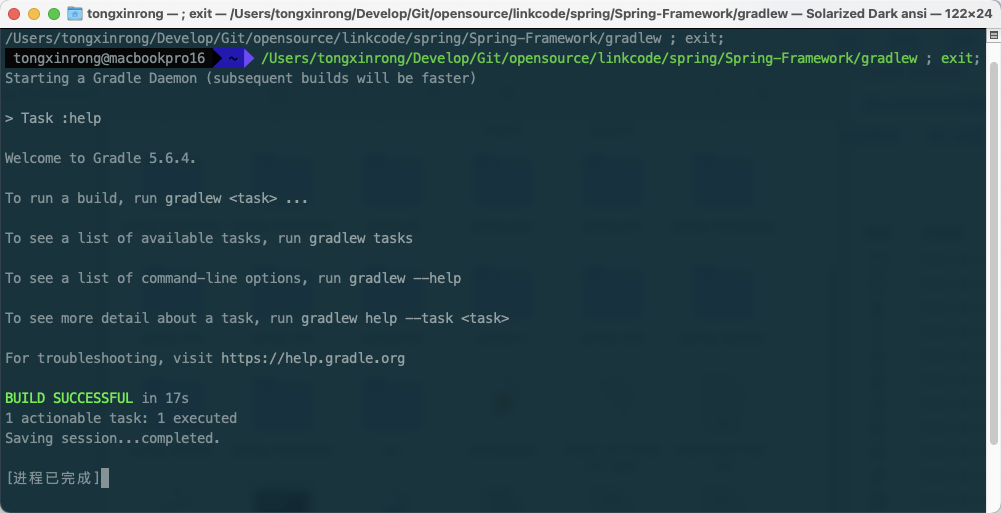
gradlew :spring-oxm:compileTestJava
The compilation screenshot is as follows. If the configuration is correct, it will be fast. However, if the card is stuck at 0% for a long time, it may be that there is no configuration on it. Check it again.
4. Import idea
New a new project

Once created, configure the gradle address.
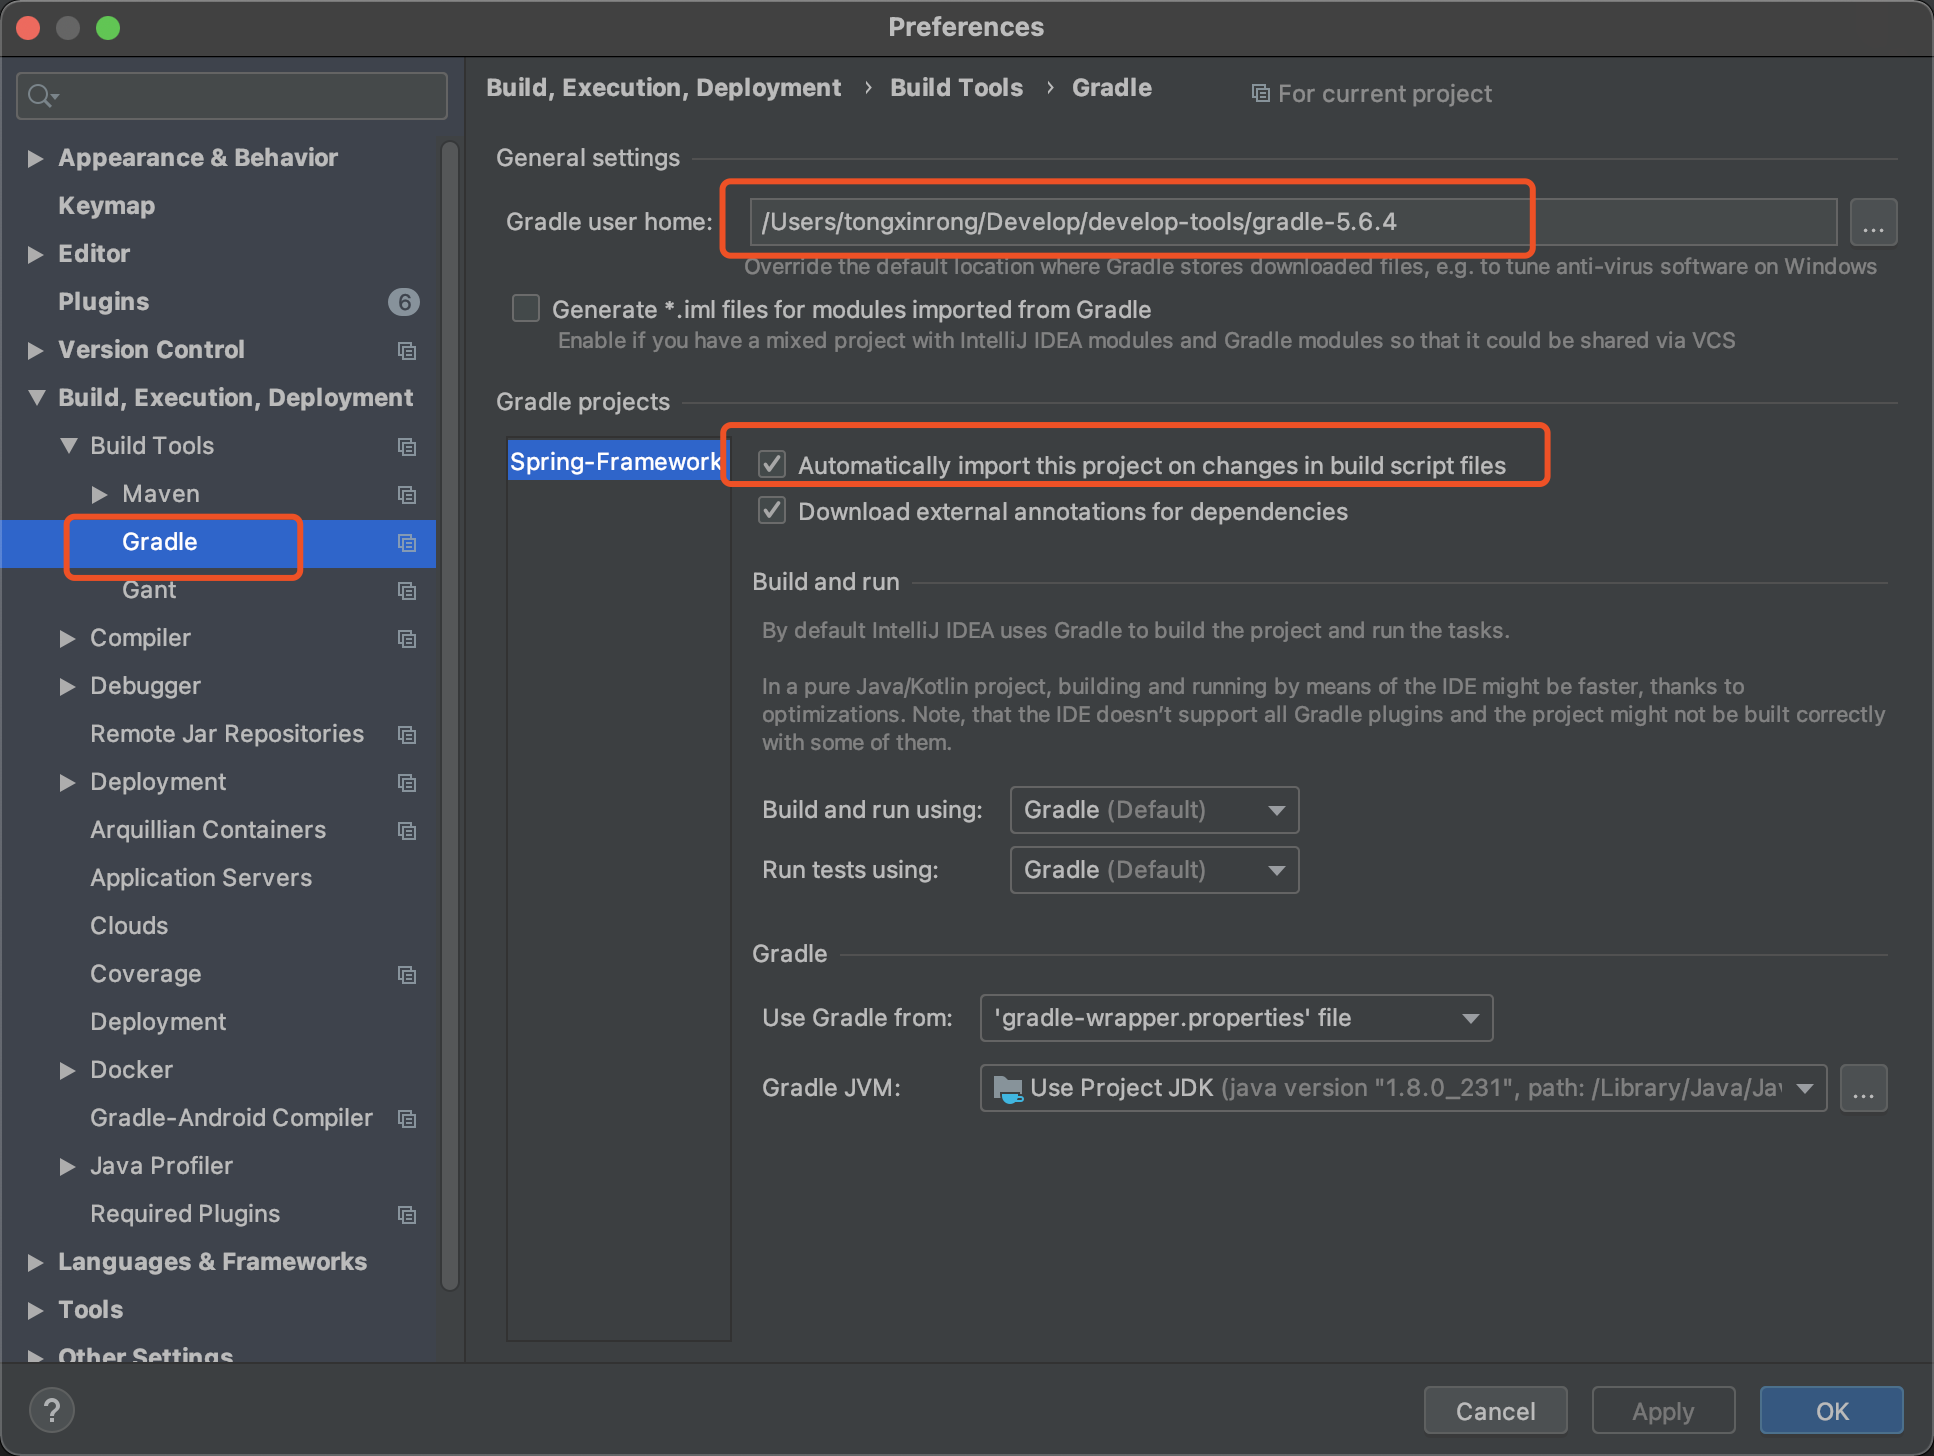
At this point, you can restart idea. After restarting, you will find that idea has compiled the Spring source code very quickly.
5. Test
Let's test whether the compiled spring works well.
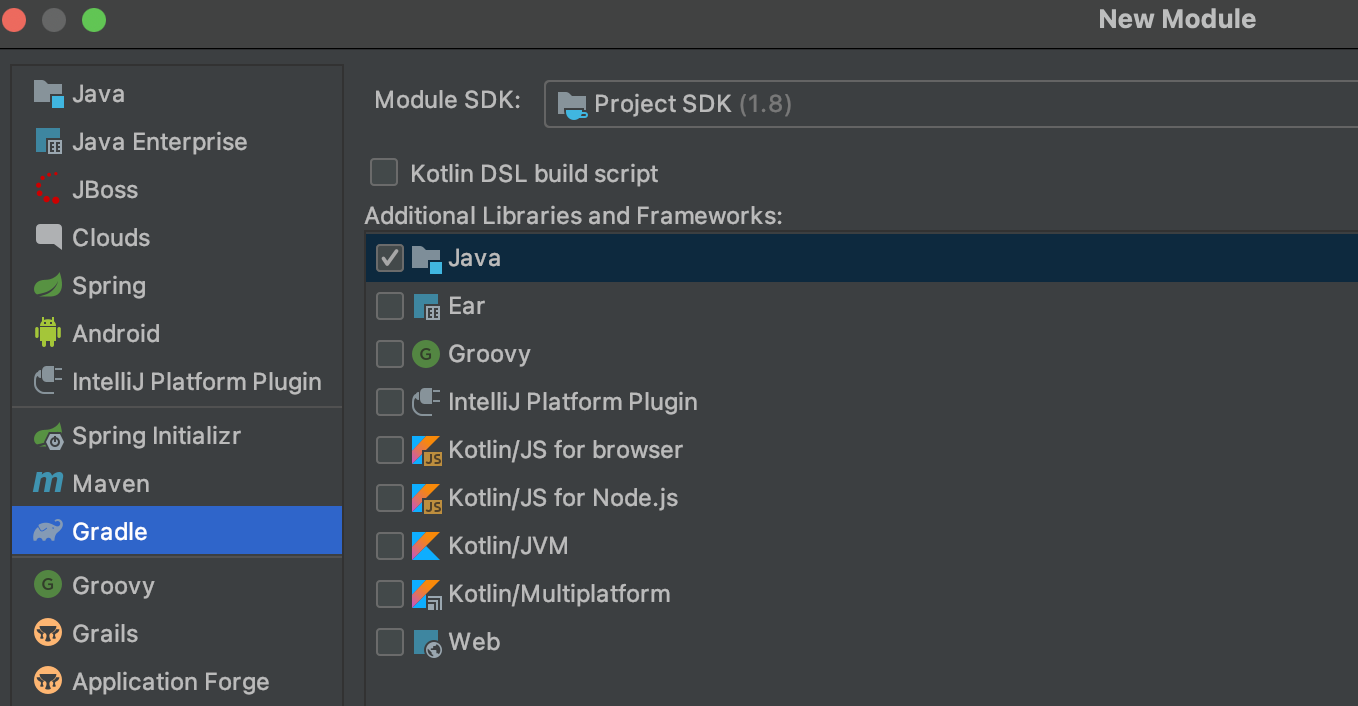
First, create a gradle module
Then create your own Bean
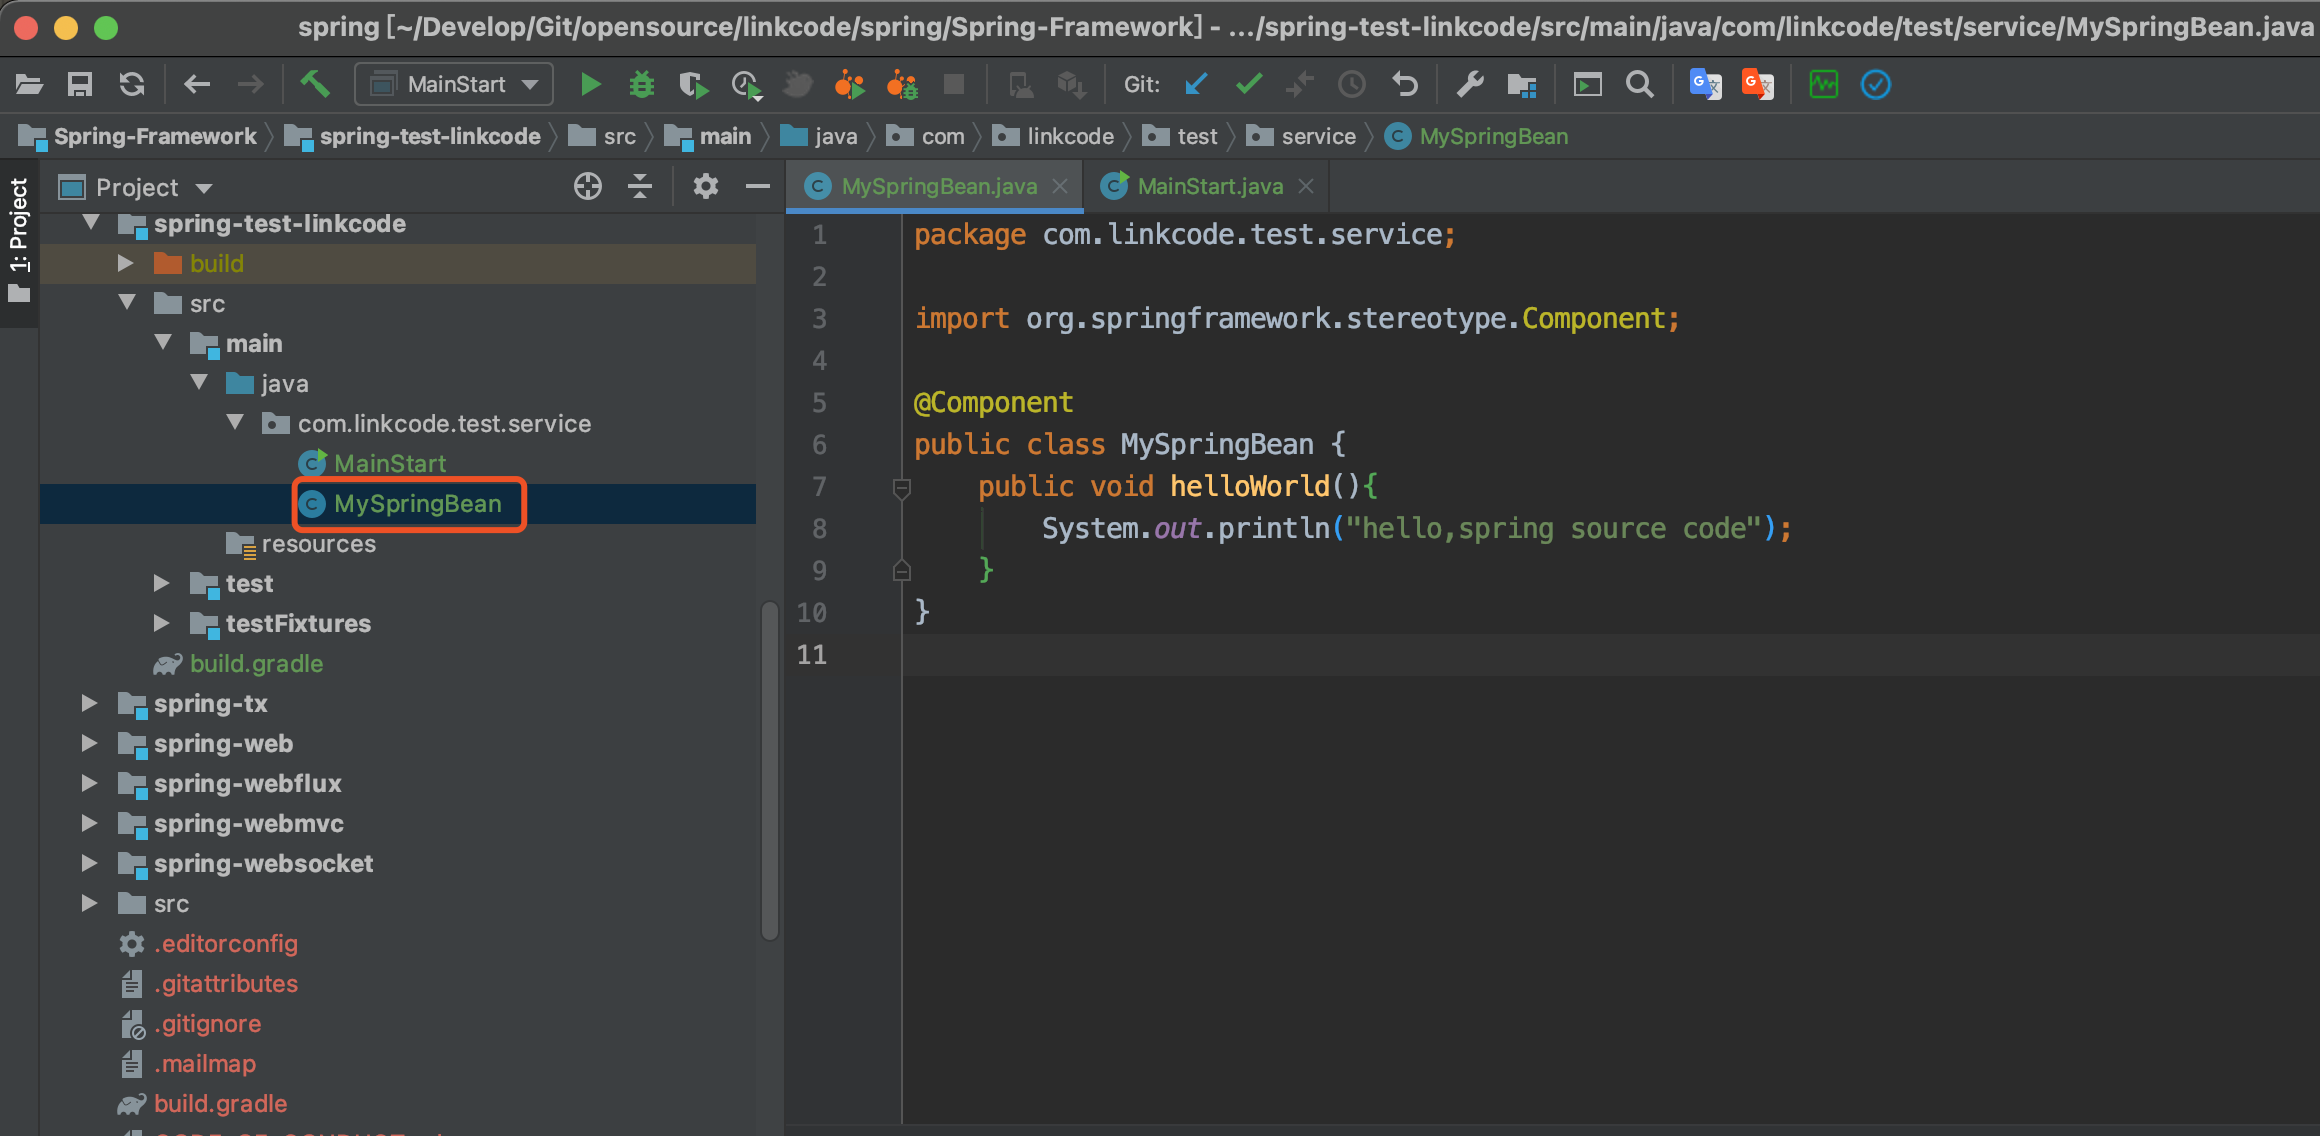
@Component
public class MySpringBean {
	public void helloWorld(){
		System.out.println("hello,spring source code");
	}
}
@Configuration
@ComponentScan("com.linkcode.test.service")
public class MainStart {
	public static void main(String[] args) {
		ApplicationContext context = new AnnotationConfigApplicationContext(MainStart.class);
		MySpringBean bean = context.getBean(MySpringBean.class);
		bean.helloWorld();
	}
}
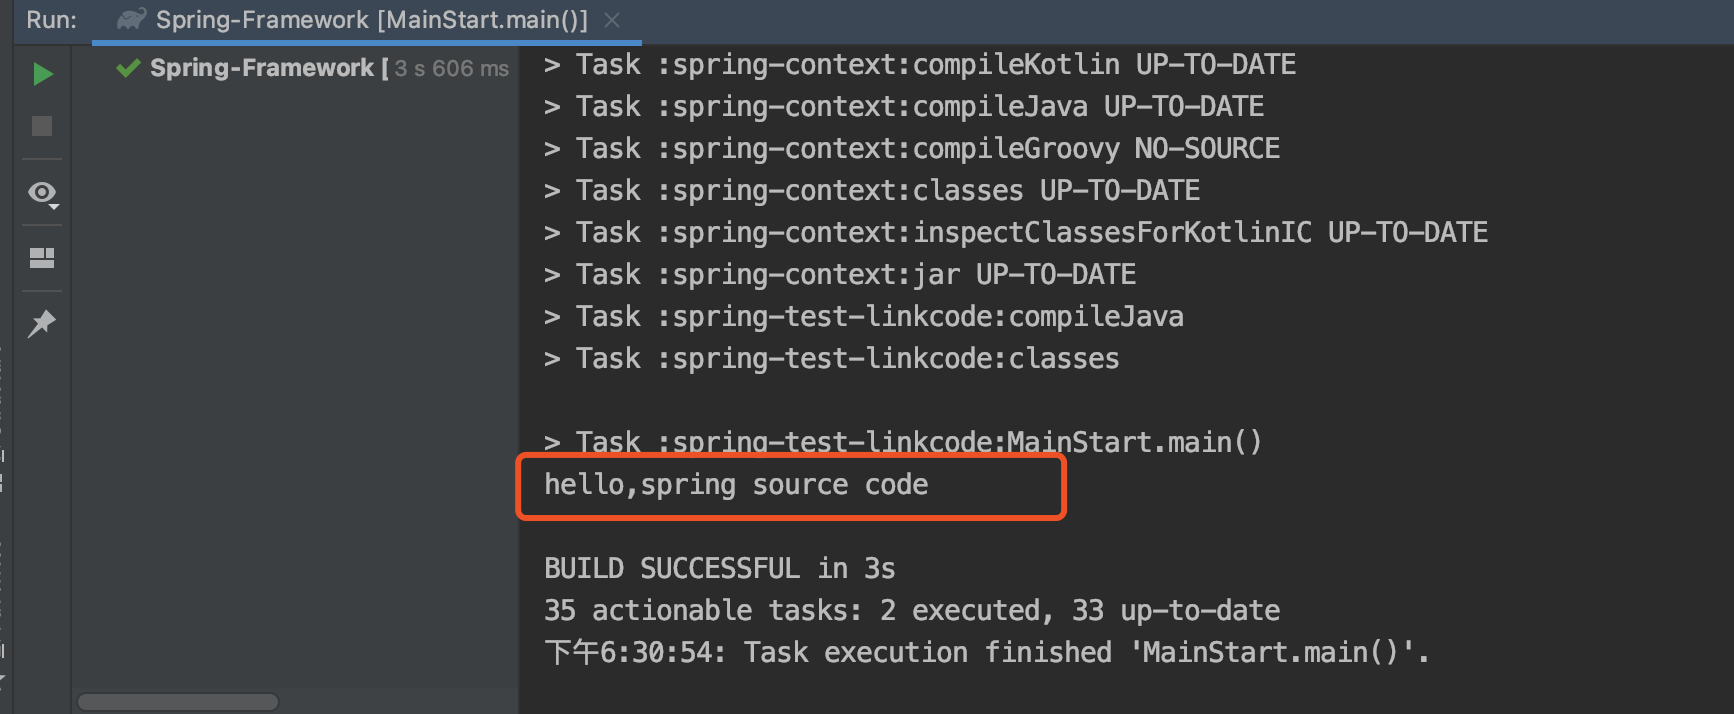
Execution succeeded. So far, you can add comments to the spin source code, debug yourself, modify the source code and debug it~
6. Write at the end
Thanks to Mr Wu 1997 for this blog https://blog.csdn.net/AARON0797/article/details/104424462
Write very well, I refer to his blog to solve the problem of slow compilation. And what he wrote is windows, which can be referred to by my friends.